


We are thrilled to introduce an exciting enhancement to our Clone to Staging feature. Now, you can securely store server credentials for your staging sites that don’t have a paid Jetpack VaultPress Backup plan. This means you can enjoy a seamless cloning experience without the need to repeatedly enter your credentials every time you clone. Let’s dive into the details of this exciting update.
Remember Credentials: Your Ticket to Convenience
Tired of the hassle of entering server credentials every time you clone to a staging site that doesn’t have a paid Jetpack VaultPress Backup plan? Say hello to the “Remember credentials” feature! Here’s what you need to know:
Storing Your Credentials
- Start the Cloning Process: Begin by visiting Jetpack Cloud and selecting Backup on the left menu.
- Click “Copy this site”: Once you’re in the Backup section, select the “Copy this site” button.
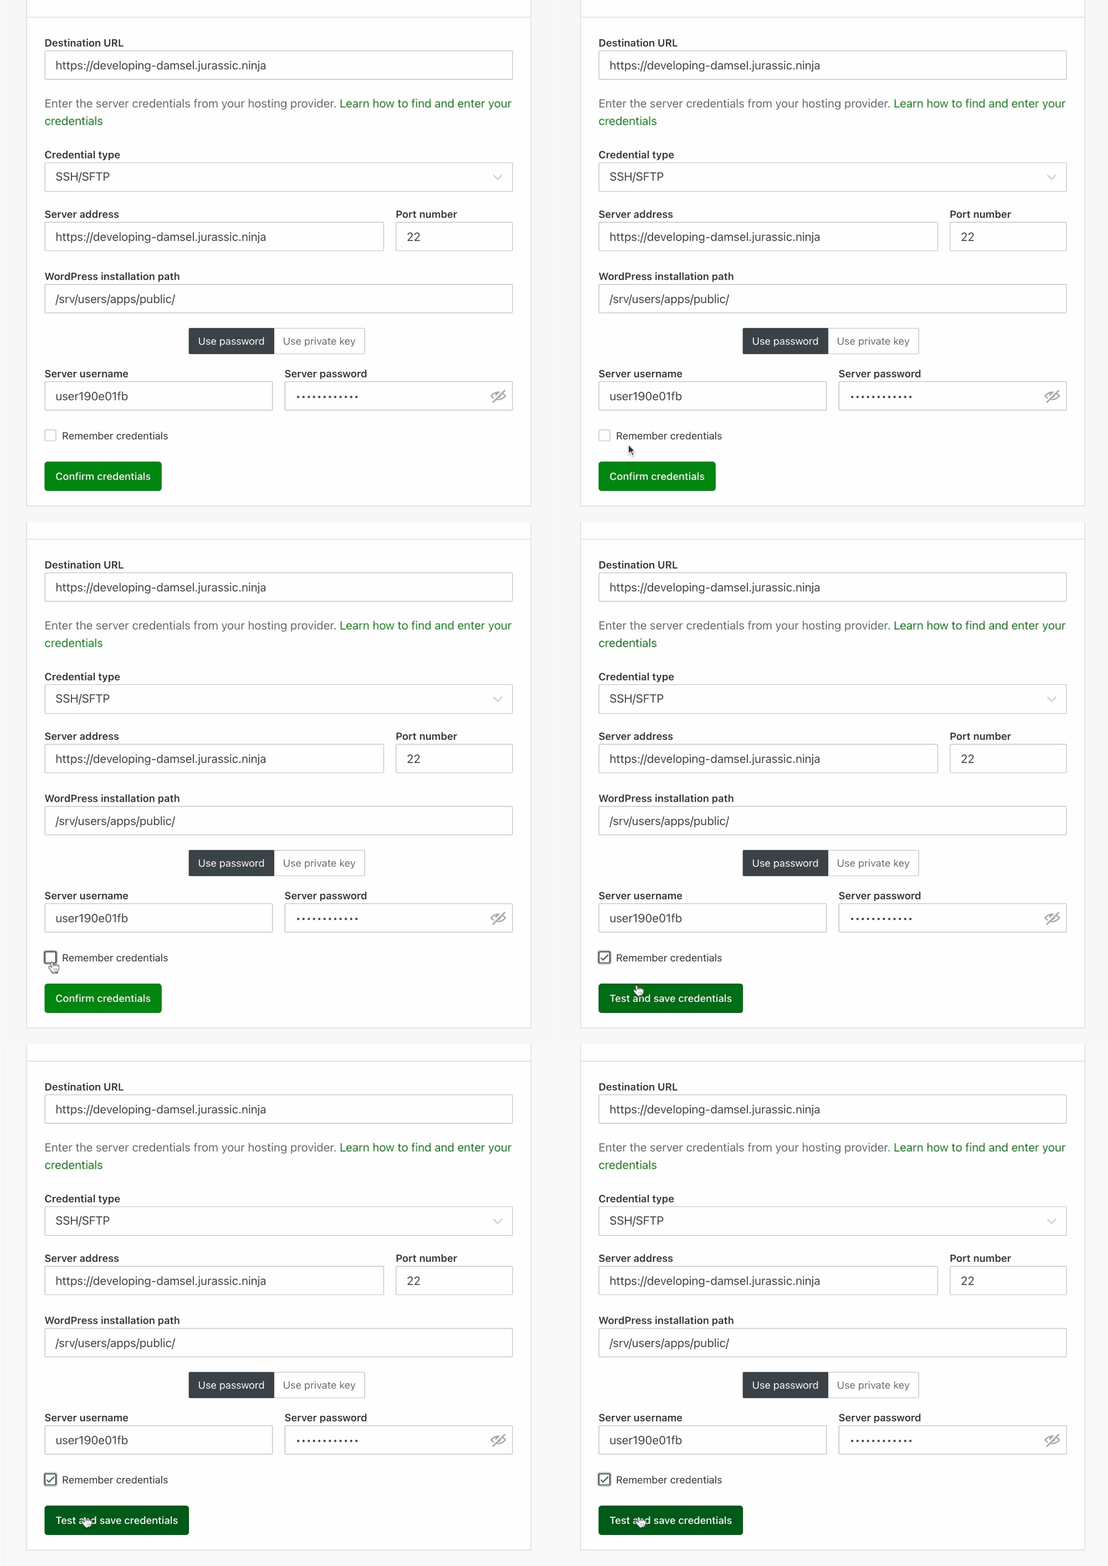
- Entering Credentials: If your staging site doesn’t have a paid Jetpack VaultPress Backup plan, enter the required SSH/SFTP/FTP credentials. You can check out this guide for more information and troubleshooting suggestions for entering your server credentials.
- Remember Credentials: Before submitting your credentials, simply check the “Remember credentials” checkbox at the bottom of the form.
- Test and Save: Click the “Test and save credentials” button to securely store your credentials.
- Complete the Cloning Process: Follow the remaining steps from our comprehensive guide, starting from step 8, to successfully complete the cloning process.
Reusing Stored Credentials
Once your credentials are saved, you’ll appreciate the incredible ease of reuse. No more manual entry is required!
- Cloning Again?: When you’re ready to clone again, click “Copy this site” as usual.
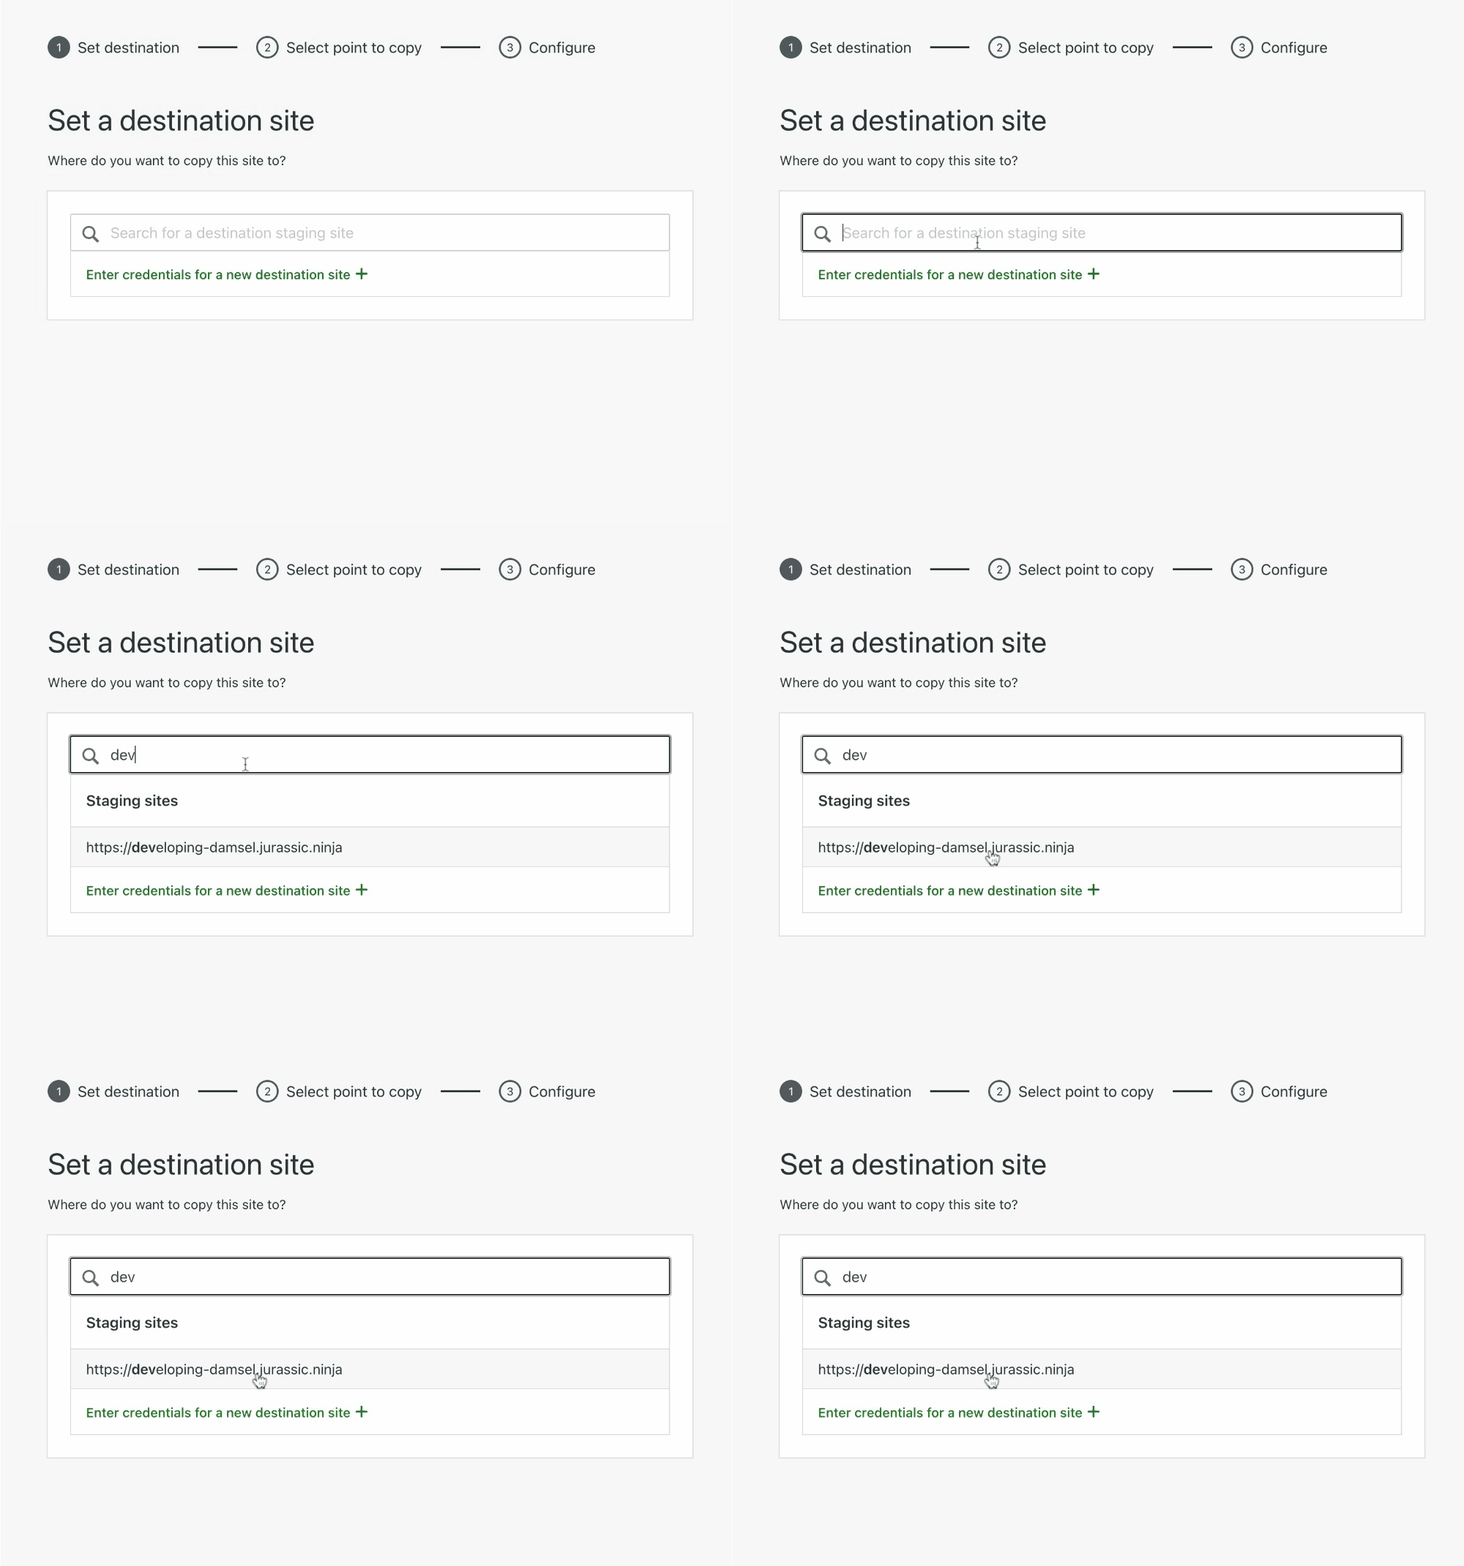
- Destination Selection: While you are on the destination selection screen, start typing the destination URL you specified while saving the staging credentials in the “Search for a destination staging site” box.
- Select Your Staging Site: Once your staging site appears, click on it, and you can proceed directly to step 8 in our guide.
With this enhancement, our core goal remains unwavering: making your experience with Jetpack VaultPress Backup as smooth and convenient as possible while saving you valuable time.
Should you ever need assistance, our dedicated support team is here to help. Feel free to contact us directly, and we’ll be delighted to assist you.
If you haven’t yet experienced the power of Jetpack VaultPress Backup, now is the perfect time to discover the depth of our backup capabilities. Get started here.