


Let’s kick off 2016 with a new series: welcome to the first installment of Hook of the Month!
Hooks are places in WordPress code where you can add your own code or change the default behavior of WordPress. Jetpack includes many of those hooks — 430 at the time of writing. In this series, I’ll introduce you to a new hook every month.
Today, let’s look at hooks help you customize one of our most popular widgets, the Top Posts & Pages widget.
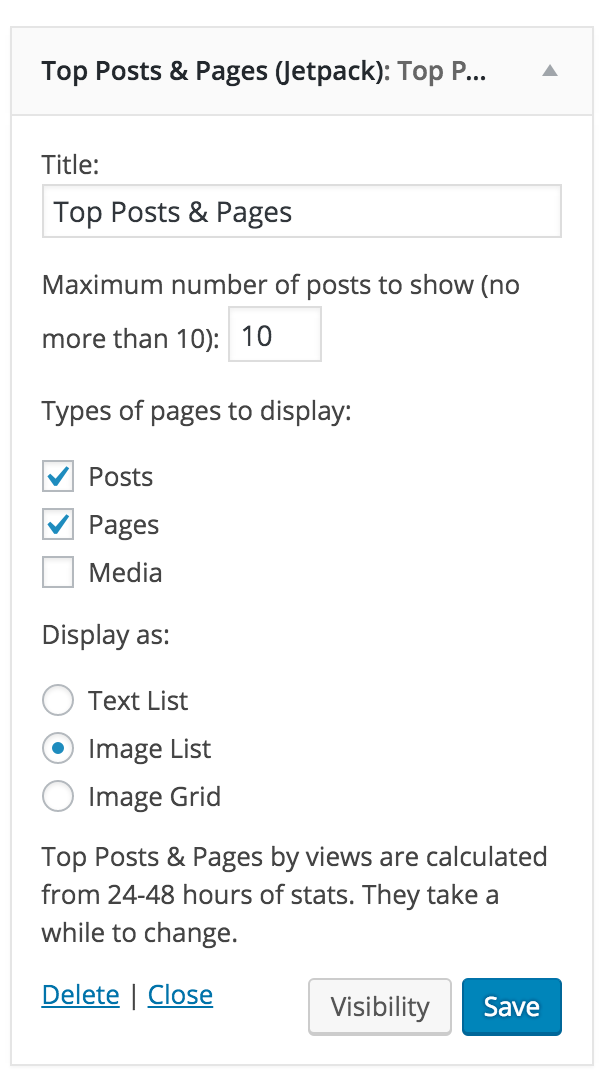
Jetpack’s Top Posts & Pages widget displays a list of the most popular posts and pages on your site. Here are its default customizing options:
The widget’s settings offer quite a few customization options, but we’ve also added filters and actions to the code — these are the hooks. The hooks allow you to customize things further to build a widget fits your specific needs. In this post, we’ll explore one filter and two actions.
Filter the number of days used to calculate Top Posts
By default, the widget calculates the most popular posts in the past two days. This short timeframe is often more relevant, especially if you post a lot. However, if you post a bit less or have yet to build a large audience, you might want to include more days’ or weeks’ worth of data.
With a filter, you can change this. Let’s update the widget to display a list of the most popular posts in the past month.
To do so, we’ll use the jetpack_top_posts_days filter. To get started, add the following code snippet to a functionality plugin:
function jetpackme_top_posts_timeframe() {
    return '30';
}
add_filter( 'jetpack_top_posts_days', 'jetpackme_top_posts_timeframe' );
We’ve entered “30” as the number of days worth of data to return, but you can enter any number of days. “-1” means unlimited.
Add data before or after each post in the widget
The Top Posts & Pages widget includes two actions:
jetpack_widget_top_posts_before_post
jetpack_widget_top_posts_after_post
These actions will allow you to insert data before or after each post appearing in the widget.
In the example below, I’ve used the jetpack_widget_top_posts_after_post action to insert the post date below each post:
/**
 * Top Posts Widget: add post date below each post.
 */
function jetpackme_add_date_top_posts( $post_id ) {
        $post_date = get_post_time(
                get_option( 'date_format' ),
                true,
                $post_id,
                true
        );
        printf( '<div class="top_posts_date">%s</div>', $post_date );
}
add_action( 'jetpack_widget_top_posts_after_post', 'jetpackme_add_date_top_posts' );
The widget includes six other filters, and five other actions. Do you want to learn more? Check the code here.
Is there a specific filter or module you’d like us to cover in our next Hook of the Month article? Let us know in the comments!