
When you’re trying to access a website, the last thing you want is to experience technical difficulties. Unfortunately though, you’re likely to encounter a few, like the DNS_PROBE_FINISHED_NXDOMAIN error, at some point while managing a site.
The good news is that there are plenty of steps you can take to resolve the issue relatively quickly. The key is understanding what the error message means and following some simple troubleshooting steps to fix it. Regardless of which device or operating system (OS) you’re using, you should be able to get your browsing experience back on track with minimal effort.
In this guide, we’ll explain what the DNS_PROBE_FINISHED_NXDOMAIN error means and some common things that cause it. Then, we’ll walk you through the steps you can take to fix it on Windows, Mac, iOS, and Android.
Table of contents:
- Try this first (2 minutes)
- What does it mean?
- Common causes
- Fix on desktop (Windows & macOS)
- Fix on mobile (Android & iOS)
- If it’s your domain
- Frequently asked questions
Try this first (2 minutes)
- Restart your device and router.
- In Chrome: Settings → Privacy and security → Security → Use secure DNS → set to With and choose Google or your provider.
- Safari (macOS): Safari → Settings (or Preferences) → Privacy → Manage Website Data… → Remove All → then History → Clear History…
- If mobile (Android 9+): Settings → Network & Internet → Private DNS → Private DNS provider hostname → dns.google.
- Mobile (iOS): Settings → Safari → Clear History and Website Data → Clear. (Optional: Settings → Wi-Fi → (i) → Configure DNS → Manual → add
1.1.1.1and/or8.8.8.8→ Save.) - Clear browser cache/history, then reload the page.
If the error persists, follow the step-by-step diagnostics below.
If it’s your domain (NXDOMAIN while accessing your own site)
- Confirm DNS records exist (apex and www): ensure A/AAAA or CNAME records are present and correct; add missing www or subdomain records.
- Nameservers: verify your registrar points to the intended nameservers and that recent changes have propagated (TTL).
- Expired domain / WHOIS: ensure the domain is active and not expired.
- Validate with public resolvers:
Windows/macOS/Linux:
nslookup yourdomain.com 1.1.1.1
nslookup www.yourdomain.com 8.8.8.8
dig +short yourdomain.com @1.1.1.1
dig +trace www.yourdomain.com
If only www is NXDOMAIN, CNAME www to the root; if both are NXDOMAIN, add root A/AAAA or fix nameservers.
What does DNS_PROBE_FINISHED_NXDOMAIN mean?
There are a wide variety of WordPress error messages you might encounter when trying to access your website. Some have to do with WordPress directly while others, like the DNS_PROBE_FINISHED_NXDOMAIN error, arise from other sources.
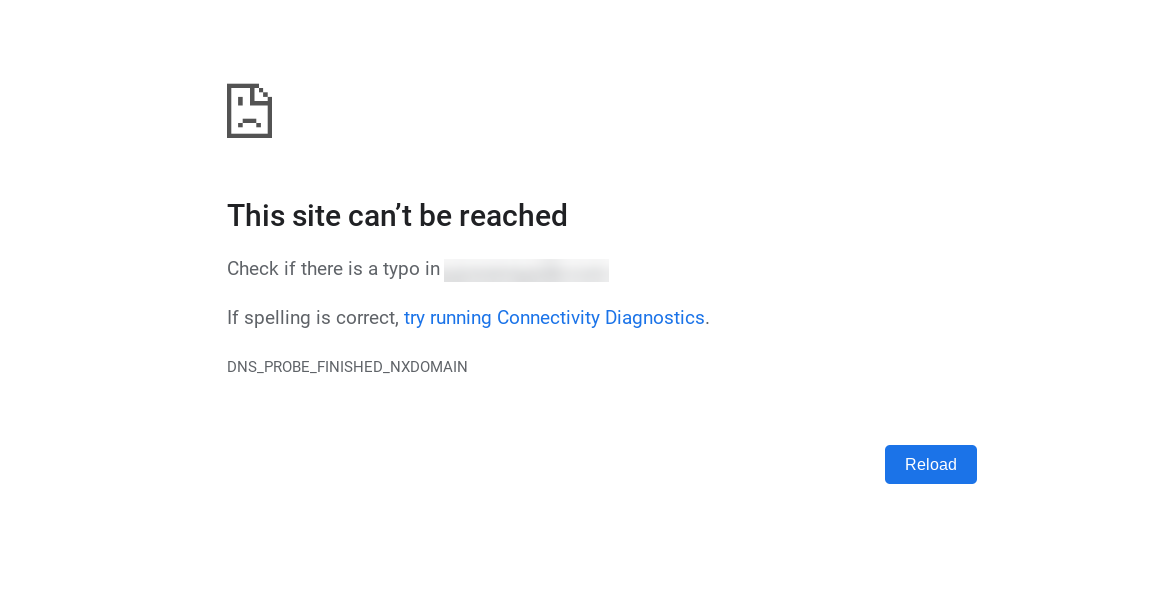
The above error message is what you’ll see using Google Chrome. But, you may also encounter it on other devices, browsers, and operating systems. If you’re not using Chrome, the exact wording of the error message may vary.
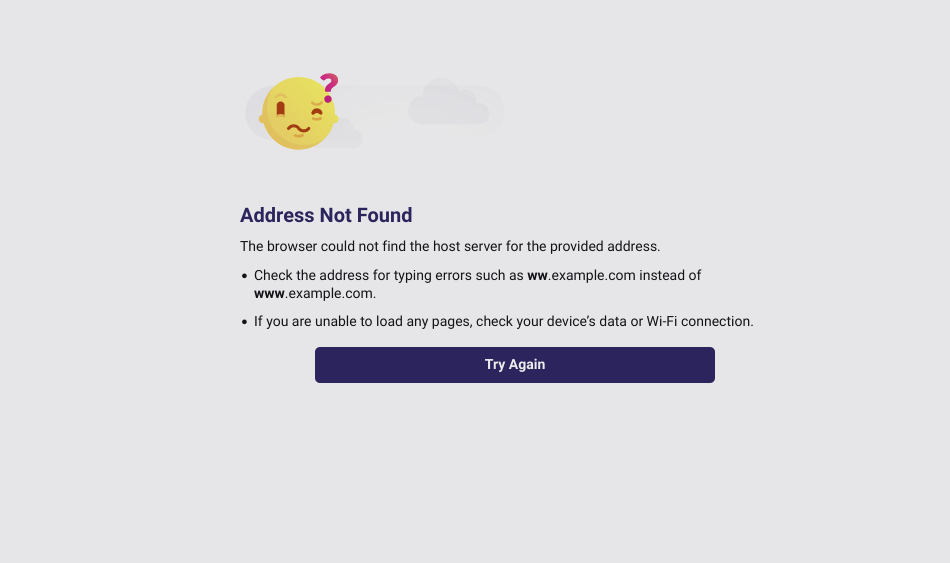
For instance, in Mozilla Firefox, it might look something like this instead:
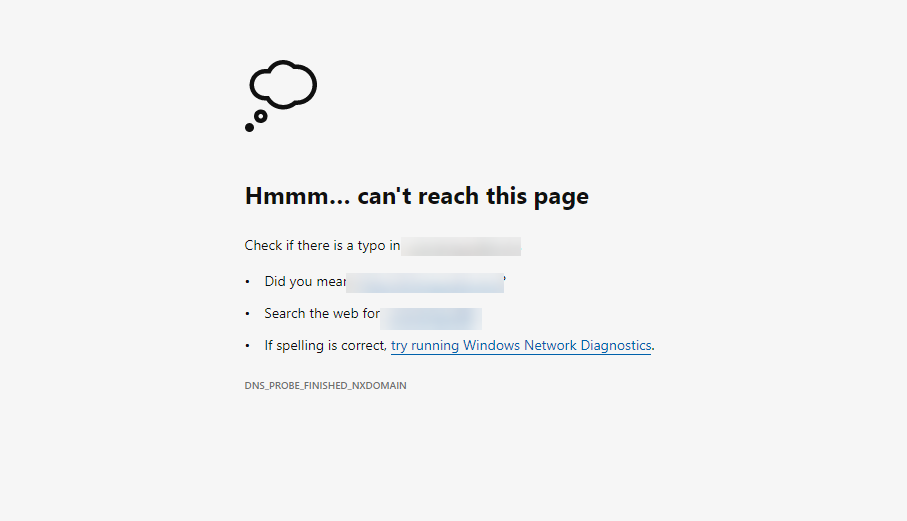
In Microsoft Edge, it usually appears similar to the following:
Meanwhile, Safari displays a message like this:

The DNS_PROBE FINISHED NXDOMAIN error is returned if the nameserver cannot find the requested domain. This may happen due to a number of reasons. It’s often seen when trying to connect to a website using a web browser. Typically, it indicates an issue with your network or “DNS.”
Before we get into what might be causing this error message, it’s helpful to understand what each element of the response code means. DNS stands for domain name system. A DNS server is responsible for translating human-friendly domain names (like jetpack.com) into internet protocol (IP) addresses (like 192.168.0.1).
Your web browser does this automatically when you type in a URL (Uniform Resource Locator) into the address bar. To put it simply, when you type a URL in your browser, you’re asking the DNS server to translate the name into an IP address.
This process of requesting your computer to find the IP address of a website is referred to as a DNS probe. If the DNS server does not have a record for the requested name, then it returns an NXDOMAIN (Non-Existent Domain) error.
Common causes of the DNS_PROBE_FINISHED_NXDOMAIN error
There are many reasons why you may be seeing the DNS_PROBE_FINISHED_NXDOMAIN error message. Some of the most common causes include:
- A typo in the URL or an incorrect IP address: Sometimes it can be as simple as mistyping the URL of the website you’re trying to visit.
- Antivirus or firewalls blocking access to the name server: It’s not uncommon for antivirus or firewall software to block access to certain websites, resulting in the DNS_PROBE_FINISHED_NXDOMAIN error.
- Misconfigured server settings or DNS configuration: Your computer may be configured to use the wrong DNS server or your internet service provider’s (ISP) DNS server may be unavailable.
- Mismatched hostname: The hosts file on your computer may be blocking access to the website you’re trying to visit. You can check and edit your hosts file to see if that’s the case.
- A DNS lookup timeout: The DNS lookup process can time out if it’s taking longer than expected.
- Browser cache and cookies: Another common cause of this error is an outdated or corrupt cache and cookies in your browser.
It’s also possible that you’re seeing this error message simply because the server is down. If that’s the case, you’ll want to check back again in a few minutes.
Keep in mind that you might not be able to identify the source of this error message until you begin troubleshooting. You may have to attempt a handful of potential solutions before you uncover the problem and, in turn, take the necessary steps to remedy it.
How to fix DNS_PROBE_FINISHED_NXDOMAIN on desktop (Windows & Mac)
Now that we understand a bit more about what the DNS_PROBE_FINISHED_NXDOMAIN error is and what might be causing the problem, it’s time to get into how you can go about resolving it. The exact steps you should take will depend on the device that you’re using. To start, we’ll show you how to fix it on desktops, including both Windows and Mac.
1. Restart your device and router/modem
It’s possible that you’re seeing this error message because of your internet connection. So, after you’ve confirmed that you’ve entered the correct URL, it’s a good idea to check your internet connection, to make sure it’s working properly.
If everything seems to be operating as it should, the next step is to restart your device, as well as your router (or modem). You’ll need to power down your computer, then unplug your router or modem and wait a minute or so.
After that, you can plug it back in. Once you’re connected to the internet again, turn your computer back on and try revisiting the website. This may seem obvious, but it’s a tactic you won’t want to skip.
2. Clear your browser cache and cookies
If you’re experiencing issues with a particular website, one thing you can try is clearing your browser cookies and cache. Browser cookies and cache are two web technologies that are used to store data in order to improve the web browsing experience.
In a nutshell, browser cookies are small files that are stored on a user’s computer by the websites they visit. They’re used to store data such as login information, preferences, and other details that can help improve the user experience (UX) on a site.
Cache is a type of storage that is used by web browsers and servers in order to save frequently accessed data so that it can be quickly retrieved when needed. Both browser cookies and caching can help improve the speed and performance of web browsing. However, if not managed properly, they can also lead to privacy and security issues.
Clearing your browser cookies and cache will remove any temporary data that could be causing the problem.
2.1 Windows
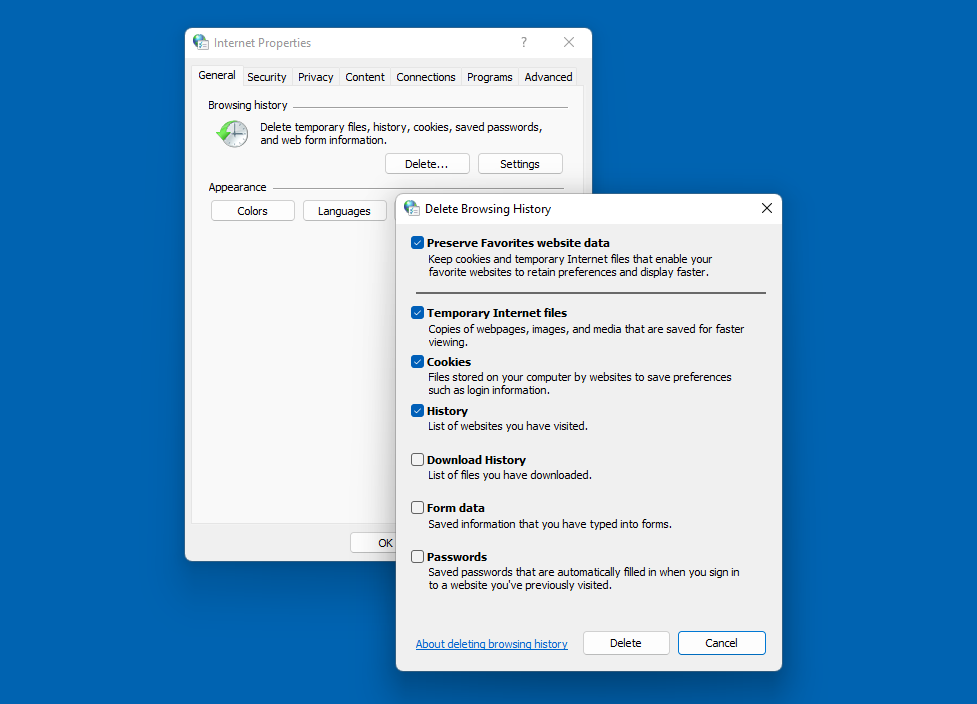
To do this in Windows, go to the Start menu and type “Internet Options” into the search bar. Then, click on the Internet Options icon when it appears in the results.

In the Internet Options (or Internet Properties) window, go to the General tab and click on Delete in the Browsing history section. Make sure to check both the cookies and website data and the Temporary Internet files and website files options. Then, click on Delete.
Alternatively, you can clear your browser cookies and cache within the browser you’re using.
For instance, if you’re navigating with Google Chrome, you can click on the three vertical dots in the upper right-hand corner followed by More tools → Clear browsing data. In the window that appears, make sure the three items are selected, then click on the Clear Data button.
2.2 Mac
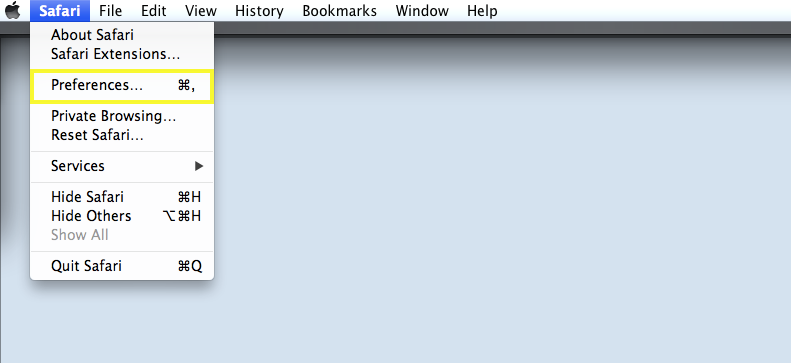
On a Mac, you’ll have to clear your cache in Safari. To do this, open Safari and click on Safari → Preferences in the top menu bar.
In the Preferences window, go to the Privacy tab and click on Remove All Website Data.

This will remove all cookies and cached data for all websites. Select Remove Now to confirm. Then, restart your browser and try loading the website again.
3. Refresh your DNS cache
Similar to a browser cache, a DNS cache is a type of storage that is used by DNS servers in order to save frequently accessed data. DNS servers use this in order to save time when resolving IP addresses.
If the DNS server has recently resolved an IP address for a certain website, it will be able to quickly retrieve the IP address from its DNS cache rather than having to look up the address again. This can help improve the speed of web browsing. But if it becomes outdated or corrupt, it can also lead to a wide range of issues, including the DNS_PROBE_FINISHED_NXDOMAIN error.
3.1 Windows
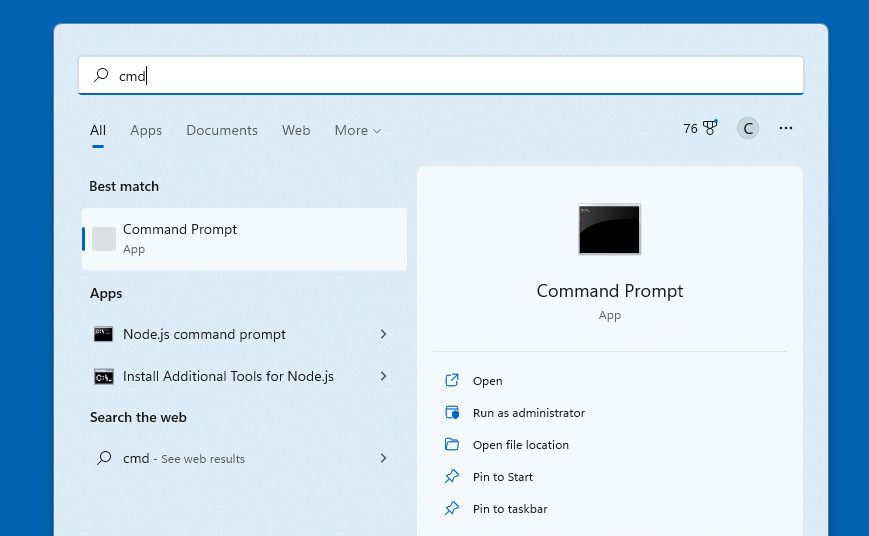
To flush your DNS cache in Windows, go to the Start menu and type “cmd” into the search bar. Click on the Command Prompt icon.
In the Command Prompt window, type “ipconfig /flushdns” and press Enter.
3.2 Mac
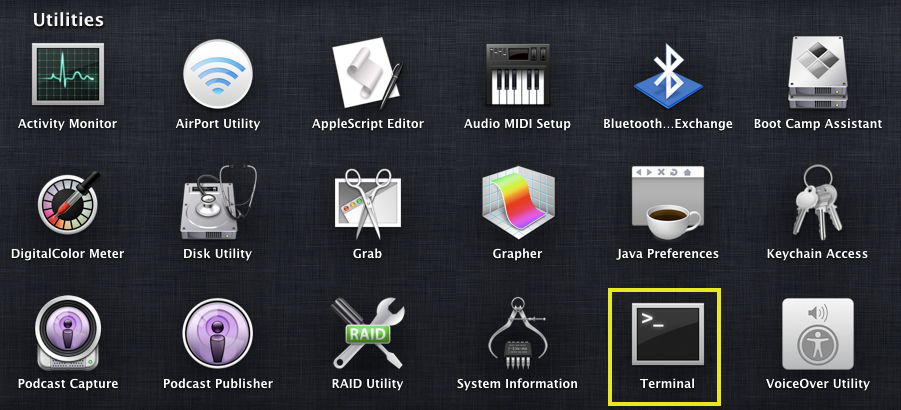
To flush your DNS cache on Mac, open the Terminal application. You can do this by going to the Applications → Utilities folder or by searching for it in Spotlight.
In the Terminal window, type “dscacheutil -flushcache” and press Return. This will clear your DNS cache.
4. Release and renew your IP address
If you’re still seeing the error message, the next step is to release and renew your IP address. This allows your computer to communicate with the network more effectively, which can improve your internet speeds and reduce any connectivity issues you may be experiencing.
4.1 Windows
To do this in Windows, you’ll want to return to the Command Prompt window. This time, type the following commands, pressing your Enter key after each:
ipconfig /release
ipconfig /renew
4.2 Mac
If you’re using macOS, you can navigate to your Terminal application. Then enter the following:
sudo killall –HUP mDNSResponder
After that, hit your Return key. Note that it may ask you to enter your device admin password to proceed.
5. Change your DNS servers
If you’re still having trouble accessing a website, you can try selecting a different DNS server. While there are a handful of alternatives you can use, a popular choice is the standard Google Public DNS. Google Public DNS is a free, global DNS resolution service.
It can make your internet browsing both faster and more secure. The service uses modern Anycast technology to spread traffic across multiple servers around the world. It also leverages DNSSEC to validate responses.
5.1 Windows
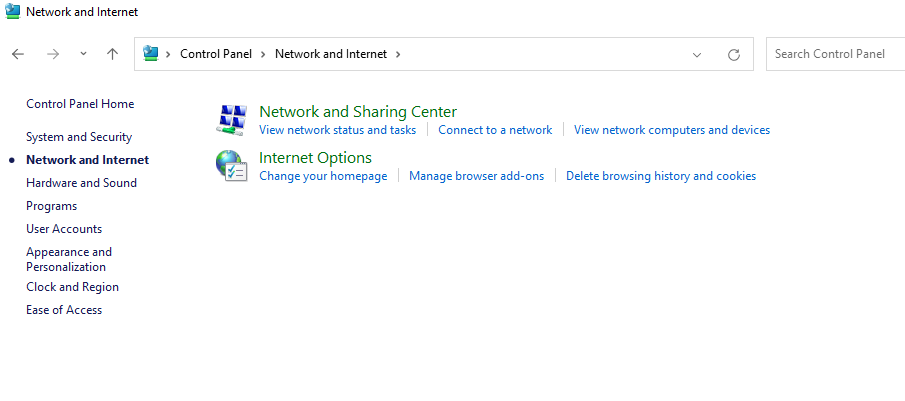
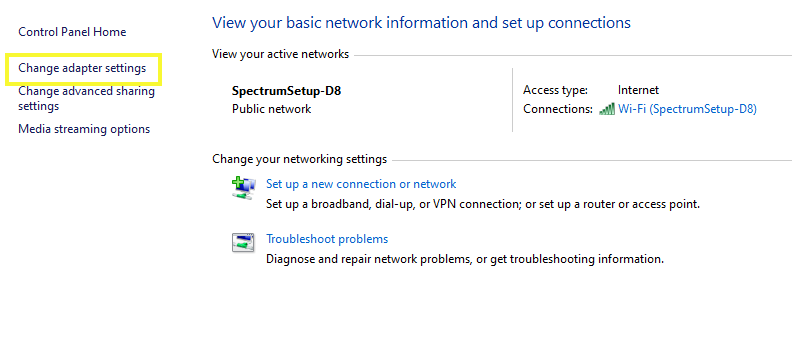
To change your DNS servers in Windows, go to Control Panel → Network and Internet. Then, select the Network and Sharing Center option.
Once there, click on the Change adapter settings in the left sidebar.
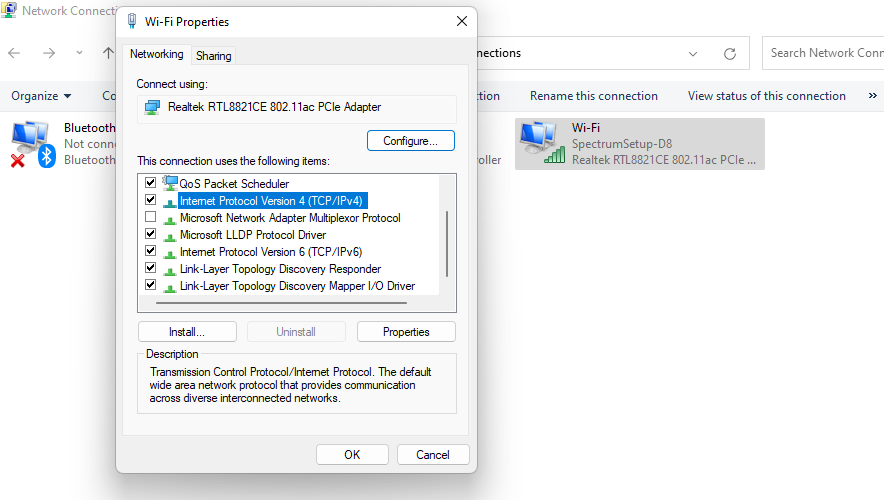
This will open the Network Connections window. Right-click on your active network connection and select Properties from the drop-down menu.
In the Properties window, go to the Networking tab and select Internet Protocol Version 4 (TCP/IPv4) from the list of options, followed by the Properties button.
In the IPv4 Properties window, select the Use the following DNS server addresses radio button.
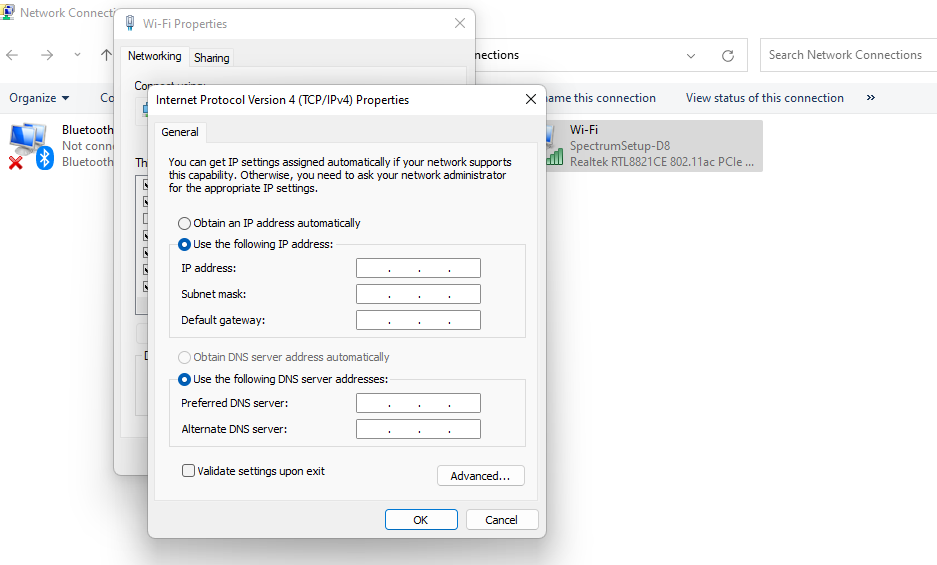
Next, you can enter “8.8.8.8” for the Preferred DNS server and “8.8.4.4” for the Alternate DNS server. Click on OK to save your changes and close the window.
5.2 Mac
You can use these same addresses for Mac. But, to get there, you’ll need to open the System Preferences application by clicking on the Apple icon in the top menu bar. Then select System Preferences from the drop-down menu.
In the System Preferences window, go to Network and choose the network interface you want to configure in the left sidebar. Next, click on the Advanced button.

In the window that opens, go to the DNS tab and select the + icon.
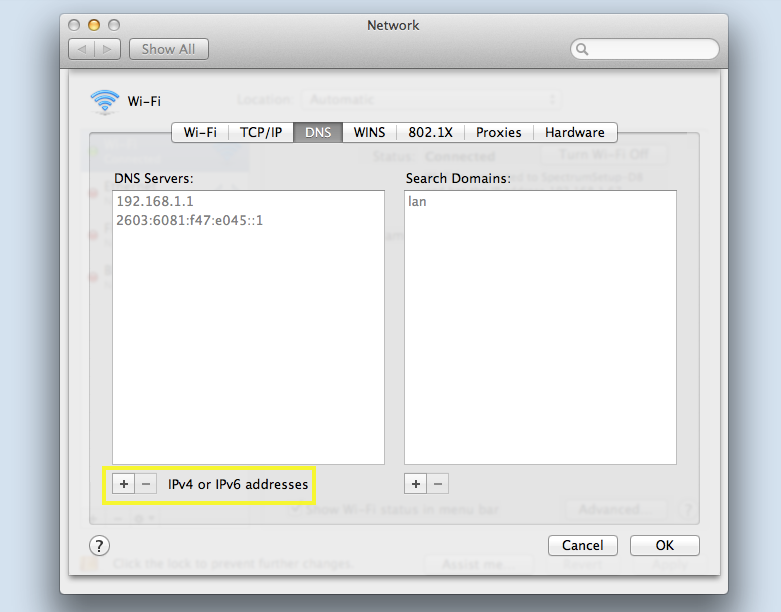
This will allow you to enter a custom DNS server. When you’re done, you can click on the OK button.
6. Temporarily disable your antivirus or firewall
6.1 Windows
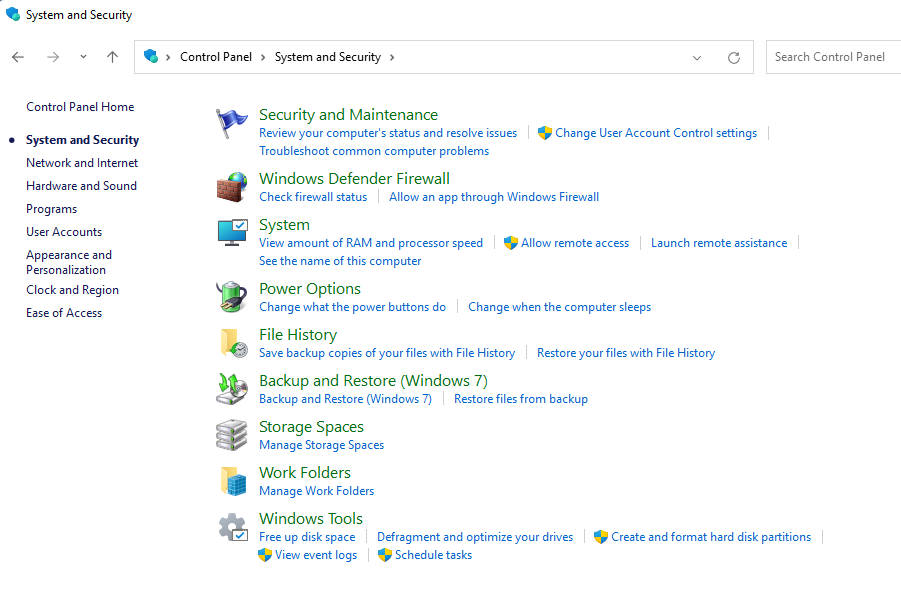
To disable your antivirus and firewall in Windows, navigate to your Control Panel then go to the System and Security section and click on the Windows Firewall option.
In the Windows Firewall screen, click on the Turn Windows Defender Firewall on or off option in the left sidebar.
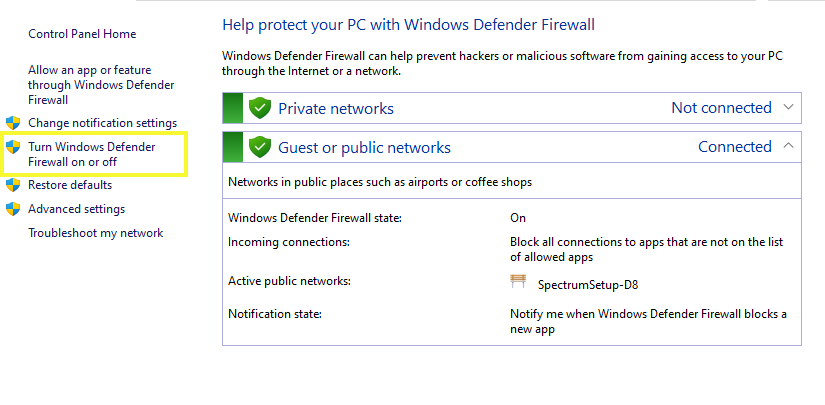
After that, click on the Off (not recommended) radio button for both the Private network settings and Public network settings options. Select OK to save your changes and close the screen.
6.2 Mac
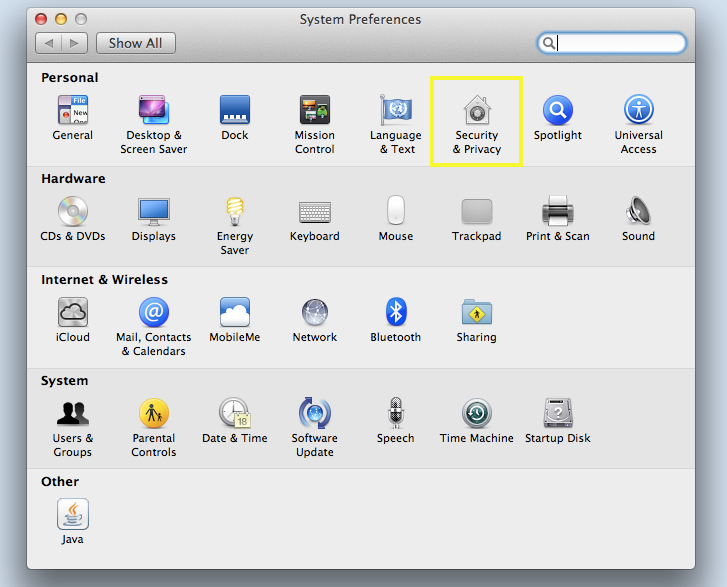
To disable your antivirus and firewall on Mac, open the System Preferences application, then go to the Security & Privacy application.
Select the Firewall tab. Next, click on the Turn Off Firewall button.

You will be prompted to confirm your decision. Simply click on the Turn Off Firewall button again to confirm.
7. Check your hosts file
A hosts file is a text file that maps hostnames to IP addresses without using a DNS server.
When a computer visits a website, it first checks the hosts file to see if it can resolve the hostname to an IP address. If it can, then it will connect to the website using the IP address. Otherwise, it will use DNS to resolve the hostname.
7.1 Windows
To check your hosts file in Windows, go to the Start menu and type “Notepad” into the search bar and select the Notepad application.

Click on the File menu and select Open from the drop-down menu. In the Open window, navigate to C:\Windows\System32\drivers\etc and select the hosts file.

Make sure that All Files is selected in the drop-down menu next to the File name field. Click on the Open button to open the hosts file in Notepad.
Within this file, check whether the website that you’re trying to access that’s throwing the DNS_PROBE_FINISHED_NXDOMAIN error is listed. If it is, delete it, save the file, then try refreshing your browser.
Also, you don’t necessarily need to use the Notepad application to do this. You can use any text editor in Windows that lets you access and modify your files.
7.2 Mac
To check the hosts file in Mac, open the Terminal application. In the command prompt, type “sudo nano /etc/hosts” and press Enter. This will open the hosts file in a text editor.
Again, look for the site that you’re trying to access and delete it if you find it listed. When you’re done, press on your Ctrl+X keys to exit the Nano text editor and save your changes.
That’s it! After completing the above steps, you should no longer see the NDS_PROBE_FINISHED_NXDOMAIN error message on the WordPress website you’re trying to access from your computer.
How to fix DNS_PROBE_FINISHED_NXDOMAIN on Mobile (iOS & Android)
As we mentioned, you can also come across this error message when you’re browsing on your mobile device, not just a desktop computer. The process for resolving this issue is slightly different than if you were using a PC. Below is how you can fix the DNS_PROBE_FINISHED_NXDOMAIN error on mobile for both Android and iOS.
1. Check for any app or system updates
To get started, first try restarting your mobile device. This may help resolve any minor connection issues you’re experiencing that may be leading to the error.
If this doesn’t work, the next step is to check to see whether your system or browser app requires any updates.
1.1 Android
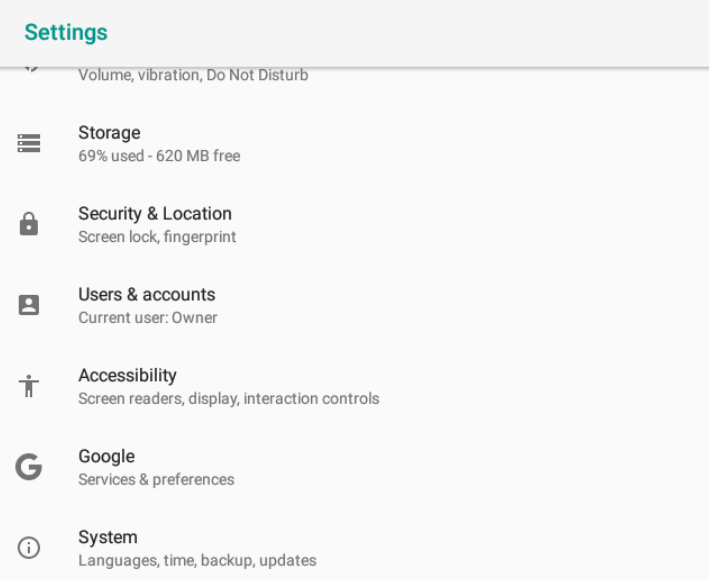
On Android devices, you can do this by browsing to Settings → System.
Navigate to System update. If there is a new version available, it will tell you. In that case, simply update it, then try visiting the site once more.
To check for any updates on your Chrome app, you can open the Play Store, then search for “Chrome.” If one is available, you can click on the Update button next to it.
1.2 Apple iOS
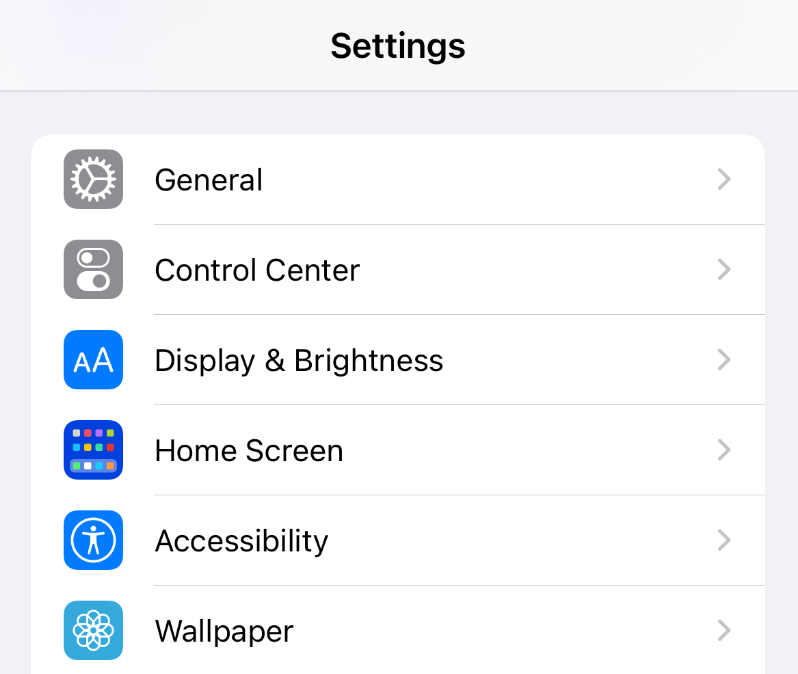
If you’re using Apple iOS, you can check for system updates by selecting the Settings application (the gear icon), followed by General.
Next, click on Software Update.
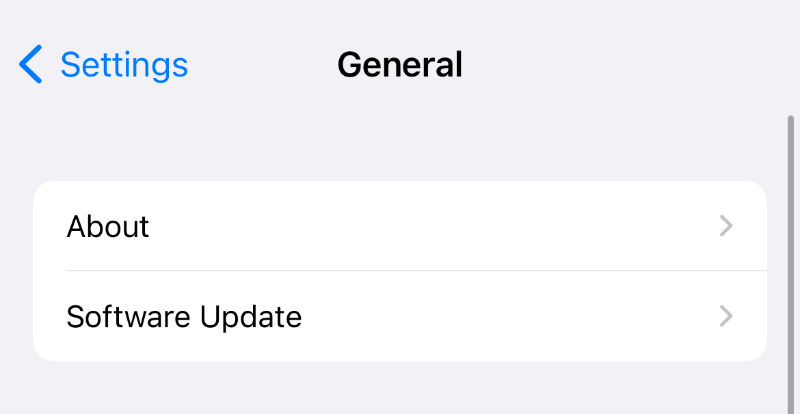
If one is available, it will inform you on the screen. You can select Update Now to proceed.
To update any browser apps you use, you can navigate to the Apps Store from your home screen. Select the icon in the top right-hand corner of the screen. Here, you can find all the applications on your device that currently have an updated version available.
Scroll through the list and update any browser apps that you use. When you’re done, restart your device and try accessing the website again.
2. Clear your browser cookies and cache
As with desktop devices, you might be able to resolve this error message by clearing your browser cookies and cache.
2.1 Android
If you’re using Android, you can open your Chrome app and then select the three vertical dots.
Next, navigate to Settings → Storage → Apps → Chrome.
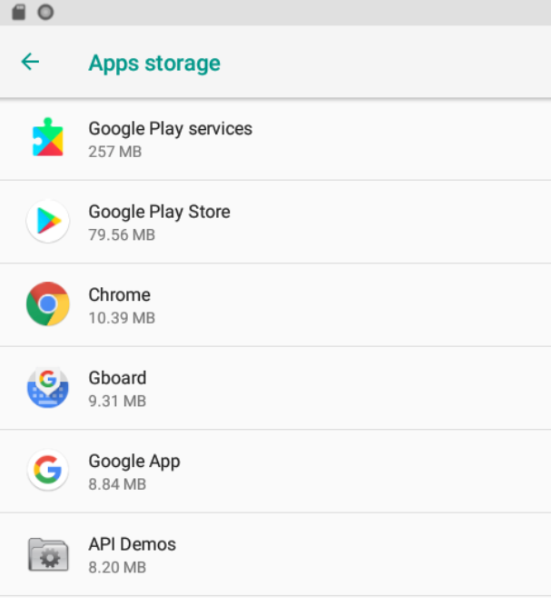
After you select Free up storage space, you’ll be prompted to do so. This will clear any unnecessary files or data.
2.2 Apple iOS
In Apple iOS, you can open your Settings application then scroll down to Safari.
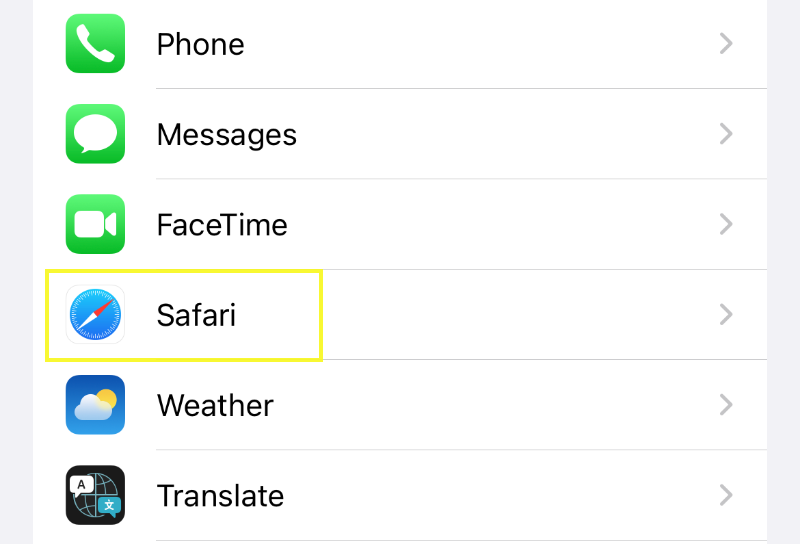
On the next screen, scroll to the bottom to locate the Privacy & Security section.
Next, select Clear History and Website Data.

In the popup that appears, click on Clear History and Data. This will remove your history, cookies, and other browsing data.
3. Change your DNS settings
As with a desktop, the DNS settings of your mobile device may be to blame when you’re seeing this pesky error message. So, the next step is to try changing your network settings.
3.1 Android
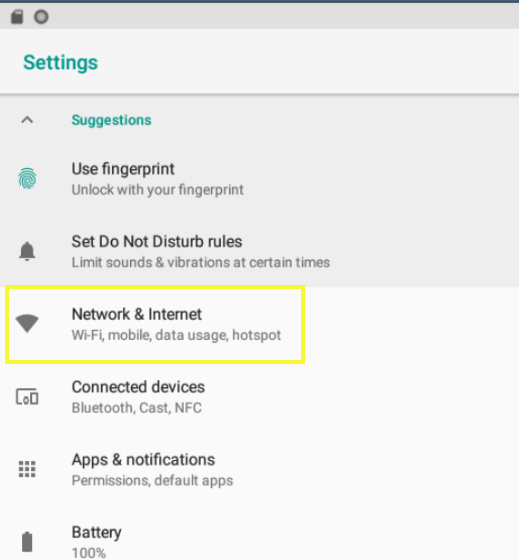
If you’re an Android user, you can do this by opening your Settings app, then navigating to Network & Internet.
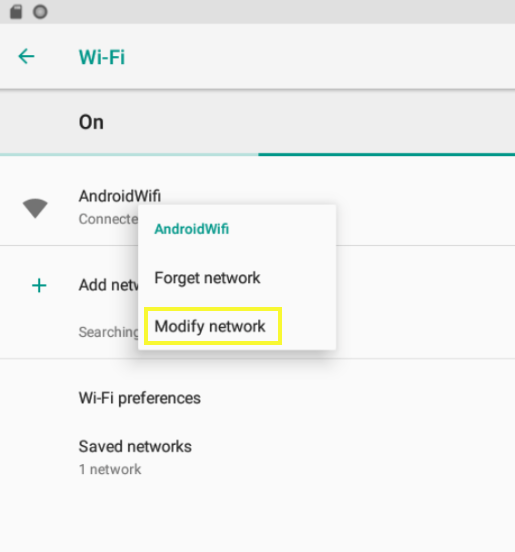
Next, tap and hold the Wi-Fi network connection, then click on Modify network.
In the Advanced options section, select Static then scroll to the bottom to locate the DNS server addresses fields.
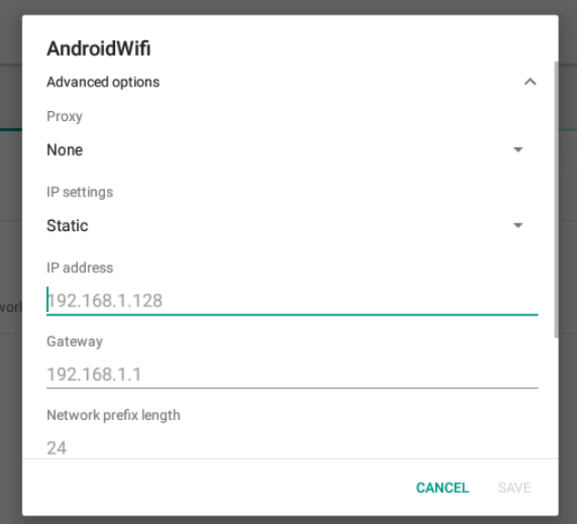
For the preferred DNS value, you can enter “8.8.8.8” for DNS 1 and “8.8.4.4” for DNS 2. Save your changes then refresh your browser.
3.2 Apple iOS
For iOS, open your Settings application then select your Wi-Fi connection and select it again on the next screen. Scroll down to the DNS section and click on Configure DNS.

On the next screen, select Manual followed by Add Server.

You can then enter the same values as above into the fields. When you’re done, click on the Save button in the top right-hand corner of the screen.
For site owners: Is your website causing the NXDOMAIN error?
If you own the website that is showing this error, the problem may be with your domain’s configuration. Here’s how to check:
Check Your DNS Records: Log into your domain registrar (like GoDaddy, Namecheap, etc) and ensure your ‘A’ records are pointing to the correct IP address provided by your web host.
Verify DNS Propagation: If you recently changed hosts or DNS settings, the changes may not have fully propagated. Use a free tool like whatsmydns.net to check if your domain’s DNS is resolving correctly across the globe.
Confirm Your Domain Has Not Expired: A simple but common cause. Log into your registrar and confirm that your domain registration is active. An expired domain will fail DNS lookups, causing the NXDOMAIN error.
Why backups are a WordPress site’s best friend
At this point, hopefully, you’ve learned how you can resolve the DNS_PROBE_FINISHED_NXDOMAIN error in WordPress.
To help minimize the potential damage that may occur as a result of website or browser errors, it’s essential to consistently create backups of your website. When it comes to WordPress site maintenance and management, the importance of backups can’t be stressed enough.
One of the reasons they should be a priority is that they help ensure your website’s content will always be available, even if something happens to your original files. Backups also make it easy to restore your website if it is ever hacked or damaged.
Plus, having a backup can save you a lot of time and money if you ever need to rebuild your site from scratch. The more frequently you back up your website, the more likely you are to have an updated version of it to restore in an emergency.
How often should you back up your WordPress website? It depends on how often you make changes to it. If you only update your site occasionally, then backing it up once a month or so should be sufficient. However, if you are constantly tweaking your site, then you may want to consider a solution that saves every change.
Real-time backups mean that your website’s content is constantly being saved as you make modifications. They also make it easy to restore your website to a previous state in a matter of minutes.
For WordPress users, Jetpack Backup is a trusted option for those looking to protect their work.
It offers a complete solution for handling website backups. It’s intuitive, easy to use, and lets you restore your site from anywhere, even if it’s offline.
Frequently asked questions
What is the meaning of DNS_PROBE_FINISHED_NXDOMAIN?
The error means your device’s DNS (Domain Name System) probe, which tries to find the IP address associated with a domain name, has failed. The NXDOMAIN part specifically signifies that the domain does not exist at the address your system tried to look up. In simple terms, your browser asked for directions to a website, and the internet’s address book said it couldn’t find it.
Does this error mean the website is down for everyone?
Not necessarily. The DNS_PROBE_FINISHED_NXDOMAIN error can be a client-side issue (a problem with your computer, browser, or network) or a server-side issue (a problem with the website itself). Before trying complex fixes, it’s wise to use a service like “Down for Everyone or Just Me” to see if others can access the site.
What is the most common and quickest fix for the NXDOMAIN error?
For end-users, the most common and effective solution is to flush your local DNS cache and renew your IP address. This action forces your computer to discard old, possibly incorrect address information and request a fresh lookup from the DNS server. It resolves the majority of local configuration issues causing the error.
How is this error different from “This site can’t be reached”?
“This site can’t be reached” is the general error message Google Chrome displays for a wide range of connection failures. DNS_PROBE_FINISHED_NXDOMAIN is one of the specific, technical reasons why that site can’t be reached. It tells you the root cause is a DNS lookup failure, not a different problem like a firewall block or a server timeout.
As a website owner, could my site’s configuration be causing this error?
Absolutely. If visitors are reporting this error, you should immediately check two things:
Domain Expiration: Ensure your domain registration has not expired.
DNS Records: Log into your domain registrar and verify that your domain’s ‘A’ records are pointing to the correct IP address provided by your web host. An incorrect IP address is a primary server-side cause of the NXDOMAIN error.
Can using a VPN cause the DNS_PROBE_FINISHED_NXDOMAIN error?
Yes, a VPN can sometimes interfere with or override your system’s default DNS settings, leading to lookup failures. If you are connected to a VPN, try temporarily disconnecting from it and attempting to access the site again. If the error disappears, the issue lies with your VPN’s network configuration.
Final words on the DNS_PROBE_FINISHED_NXDOMAIN error
If you see the DNS_PROBE_FINISHED_NXDOMAIN error when you’re trying to connect to a website, it likely means that the DNS can’t find the address of the page you’re trying to reach. This can happen for a number of reasons. Luckily, there are a few simple steps you can take to resolve it.
As we discussed in this guide, you can often fix this error by simply checking and refreshing your DNS and network settings. In addition to configuring proper DNS and browser settings, it’s also important to make sure you’re creating regular backups of your website so you can quickly resolve other site or browser-related errors in the future.
