
You’ve put a lot of work into creating the pages and blog posts on your WordPress site. You carefully wrote each word of content, tweaked the design until it was perfect, and added beautiful images.
But then, something happens and you accidentally delete your work. What do you do? You certainly don’t want to start from scratch!
Don’t worry — this is a pretty common issue, and one that’s completely solvable. So let’s take a step back and look at how WordPress handles deleted posts and pages. Then we’ll walk through several ways to restore your valuable content.
How WordPress handles page and post deletion
It’s somewhat easy to accidentally delete a page or blog post on WordPress. Perhaps you were trying to make a quick change and clicked Add to trash instead. Or maybe you thought you didn’t need that page and realized later that it was important for your site.
But what happens after you send a post or page to the trash?
Well, thankfully, it’s not actually gone for good right away. After you click Add to trash, posts, pages, and products are sent to the Trash folder. That means that they’re still saved on your site and can be easily recovered.
However, the Trash folder does have the option to permanently delete individual posts and pages, or empty the entire folder at once. WordPress also automatically empties the trash every 30 days. If this happens, the deleted content cannot be restored without using an outside method, like a backup.
Now that you know how WordPress handles deleted content, let’s look at how to restore it.
How to restore a deleted WordPress page or post from the trash
If you sent your page or post to the trash, restoring it is as easy as clicking a few buttons. First, navigate to your list of content. For posts, you’ll go to Posts → All Posts in your WordPress dashboard. For pages, you’ll go to Pages → All Pages.
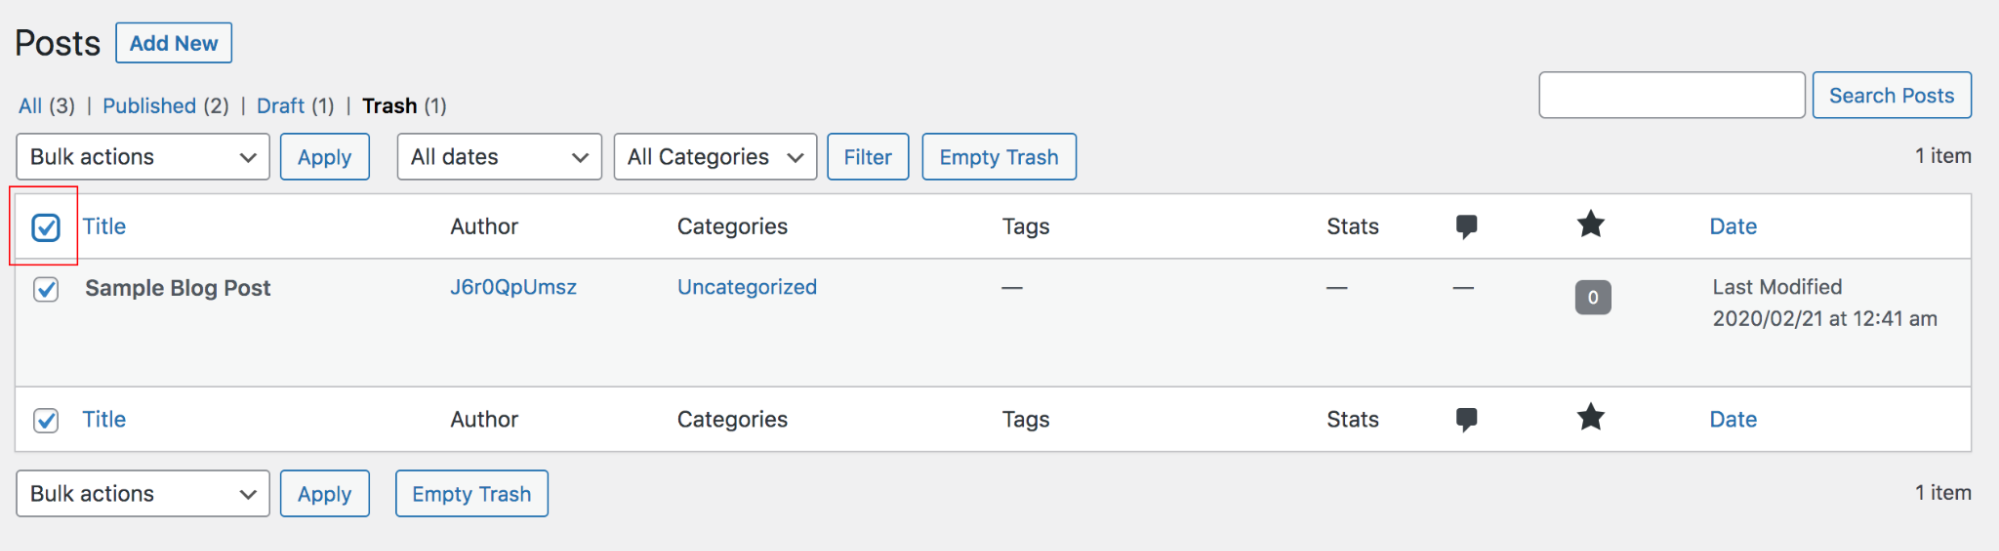
There, you’ll see an entire list of the posts and pages that are on your site, divided up into pages of 20 items at a time by default. Above that list, you’ll see four folders: All, Published, Drafts, and Trash. Click on the Trash folder.

You’re going to find a list of all the posts or pages that were sent to the trash, along with information about each one — like the author and last date modified.
If you want to restore a single page or post, hover over it and click the Restore option that appears. But be careful! The Restore button is right next to an option to delete the post permanently.

To restore more than one post or page at once, click the checkbox next to each one you want to recover. Then, under the Bulk actions dropdown, select Restore and click the Apply button.
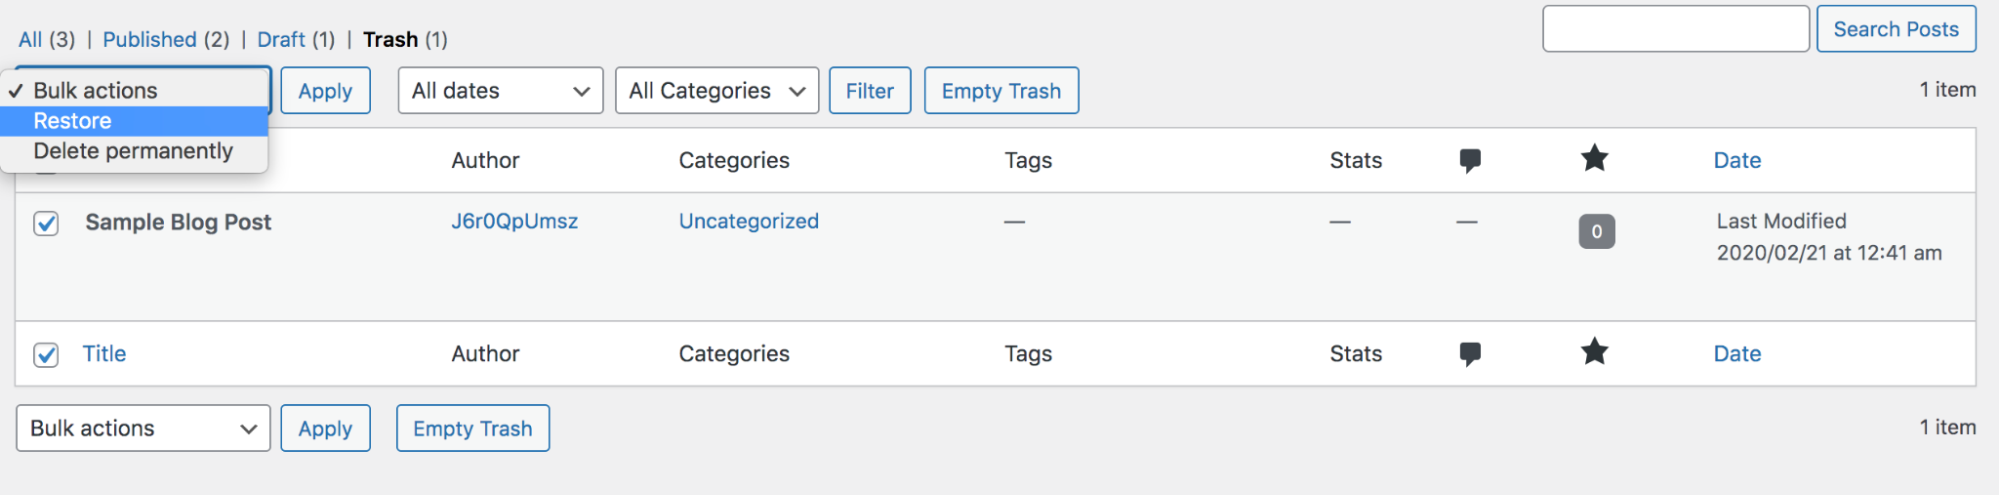
To select and restore all of the posts and pages shown on your screen, click the blank checkbox next to the word Title. Then, under the Bulk actions dropdown, select Restore and click the Apply button.
And that’s it! You’ll now see your post or page on the frontend of your site and will be able to edit it in the backend as normal.
How to restore a deleted WordPress page or post using a backup plugin
But what if you accidentally deleted your page or post permanently? Well, unfortunately, there’s no way to restore it directly through WordPress. But if you have a recent backup of your site, you can use that to recover your content.
Backups should always be part of your site processes because they’re helpful if your site is hacked, you want to move to a new hosting provider, or you make a mistake. And while there are several WordPress backup plugins that you can choose from, Jetpack VaultPress Backup is the perfect solution for cases like this.
Why? Because it saves a copy of your site each time you make a change, so you can always restore the latest version of your post or page (rather than the one from yesterday, or last week).
Here’s how to restore a deleted page or post with VaultPress Backup:
1. Log into your WordPress.com account and choose the site you’re working on.
2. Navigate to Jetpack → Activity Log.
3. Find the instance where you deleted your page or post. You can either scroll down through all your activities until you find it, or filter based on Posts and Pages. You can easily identify the deleted post or page by the bright red icon and the text “Post Trashed” under the page name.

4. Click the Restore button to the right of the activity. Then, you’ll need to choose what to restore. You can restore an entire backup of your site, but in this case, you’ll really just need to select the WP-Content Directory and Site Database. By limiting the files that you restore, you speed up the entire process. Click Confirm Restore.

5. Now, a progress bar is going to appear, which will let you track the status of your backup restoration. You’ll also receive an email once the restore is completed. The exact amount of time will vary based on the size of your site and the files you’re recovering.
And it’s that simple! Your deleted page or post will be right back where it belongs.
How to restore a deleted page or post using the cPanel backup wizard
If you’re not using a WordPress backup plugin to save your site regularly, hope isn’t lost — your hosting provider may take backups on your behalf. Note that this does vary based on the host you use and the plan you’ve purchased.
If your hosting provider uses cPanel, you can restore a backup by following these steps:
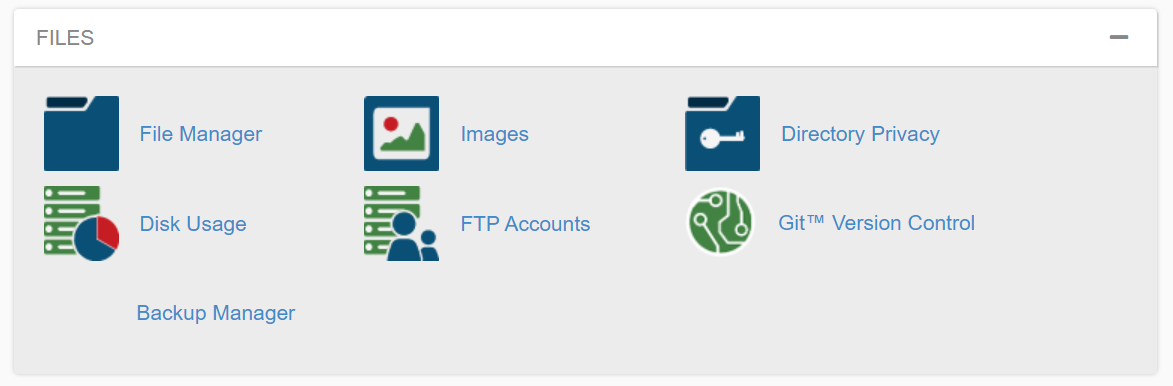
1. Log into your cPanel using the credentials you set up with your host. There, you’ll see a variety of options you can click, along with icons for each one. These options are divided into categories based on the functionality they provide.
2. Find the Files section and click Backup Manager.
3. There, you’ll see three options: cPanel Backups, File Restoration, and cPanel Backup Wizard. In this case, click Backup Wizard — this tool will simply the restoration process for you.

4. In the box that opens up, click Restore.

5. Then, you can choose the types of files you want to restore. In this case, you’ll need to select Home Directory and MySQL Databases.
6. Click Choose File and select the backup file you want to restore. Click Upload to restore your site in full.
Remember, though, that this will restore your site to the exact point it was at the time of the backup. So, if your last backup was taken three days ago, you’ll lose all of the changes you made between that date and today.
How to recover a deleted page or post using Google’s cache
While it’s definitely easiest to restore a permanently deleted page or post with a backup, it’s possible that you’re reading this without having a saved copy of your site on hand. Thankfully, you do have a couple more options you can try.
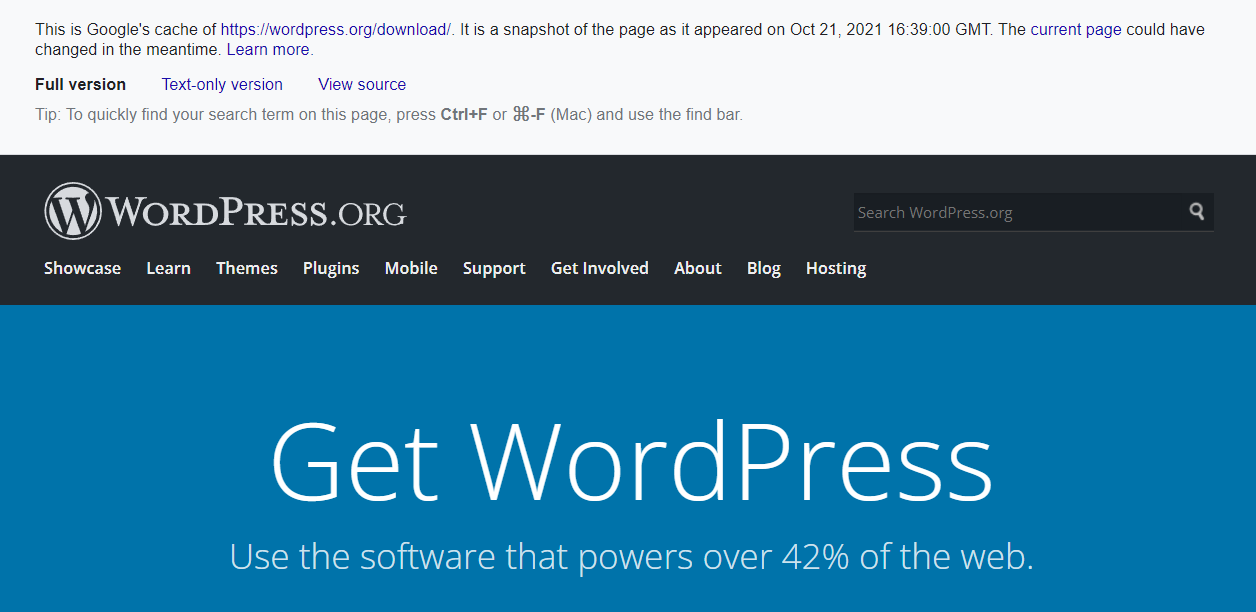
One of those options is to find a cached version of your page or post with Google’s cache. You see, Google takes a snapshot of many of the pages that it indexes and shows in search results, so it can still display content if that page isn’t available for some reason.
To restore a deleted page or post with Google’s cache, take these actions:
1. Find the post or page in Google search results. Note that this method does depend on your URL being indexed, so if it was created recently, it may not show up.
2. Next to the page URL, click on the three dots that appear, then click Cached.
3. Now you’ll see a cached version of that page, along with information like the date and time the snapshot was taken.
Alternatively, if you know the URL of the page you want to restore, you can type “cache:” before the page in Google (e.g. “cache:https://jetpack.com”).
Now, you can use the text and images on the page to recreate it with the WordPress editor on your site. While this doesn’t automatically restore the entire page, at least you can access the content.
How to recover deleted page content using Archive.org
If your page or post wasn’t cached by Google, you do have one more option to restore it: Archive.org.
The Internet Archive is a nonprofit database full of snapshots of websites and other types of content. You may be able to find a copy of your page or post using this database. Here’s how:
1. Navigate to https://archive.org/ and type the page or post URL into the search box.
2. There, you’ll see a calendar with circles marking the dates that snapshots were taken of that URL. Choose the one you want to view.

3. When you click on the date, you may even see time options. If you do, choose the time you want to view.
4. Then, you’ll see exactly how the page or post looked on that date and time. You can use the content and images here to recreate the page in WordPress.
Remember: all is not lost
If you accidentally deleted a page or post, don’t panic! You can usually undo the changes and recover it in full. If the page is in your WordPress trash, just click a few buttons to restore it.
If you did permanently delete your post or page, restoring a backup is your best bet. You can do this using any backup you have on hand, whether that’s through a backup plugin or your hosting provider. This is definitely the best option because there’s no additional work required on your end.
If you don’t have a backup available, however, you may be able to recover the content of that page or post using Google Cache or an archive like Archive.org. But remember, you’ll need to recreate the page in its entirety.
This is a great example of why real-time backups are so valuable! With a WordPress backup plugin like Jetpack VaultPress, you can restore a copy of your site in just a few clicks, to the exact state it was in just before you deleted the page. Your website is always saved.
Ready to protect your site? Get started with VaultPress Backup.
WordPress deletion FAQs
If you have additional questions, check out the following answers below or read the WordPress documentation on the Trash folder.
The best real‑time WordPress backup plugin
Save every change and get back online quickly with one‑click restores from VaultPress Backup.
Get VaultPress BackupHow can I delete WordPress posts and pages?
There are several ways you can delete posts and pages, whether intentionally or accidentally. The first is through the WordPress editor, when you’re creating or changing your page. Simply click on the gear icon at the top right of the page to view all options, then click the Move to Trash button in the Status & visibility section.

The second way is to navigate to either Pages → All Pages or Posts → All Posts in the WordPress dashboard. Hover over the post you want to delete and click the Trash option that appears. Or, select multiple posts or pages and choose Move to Trash from the Bulk Options dropdown at the top of the page.

Are WordPress pages and posts permanently deleted?
It depends. When you move a post or page to the trash, it’s still stored on your site for 30 days or until you permanently empty the trash folder. This means that you can easily recover that page with the click of a button as long as you make it within that 30 day period.
But if you permanently delete a page or post from the trash folder, it cannot be recovered without restoring a backup or recreating the content.
How can I restore deleted user content?
When you delete a user account from your WordPress site, you have the option to either attribute all of their content to a different user or delete it entirely. Unfortunately, if you choose to delete the content that the user created, it is permanently deleted, not sent to the trash folder.
To restore deleted user content, you’ll need to restore a backup or recreate each page manually.
How are deleted media files handled in WordPress?
If you delete an upload from your Media Library, it’s permanently deleted, not sent to the trash folder. Your best bet at this point is to restore a backup of your WordPress website. But if you don’t have a backup on hand, hope is not lost! Try using the Google Cache or Archive.org methods listed above to find a page that the media file was on and save it from there.
How do I restore deleted WooCommerce products?
When it comes to deletions, WordPress handles products the same way as posts and pages. First, it’s sent to the trash folder, where it will stay for 30 days or until you permanently empty the trash. To restore a deleted product, follow the same steps in the How to restore a deleted WordPress page or post from the trash section above, but start by navigating to Products → All Products instead.
How do I restore deleted comments in WordPress?
Comments work similarly to pages and posts when it comes to deletions. If you click Trash on a comment, it goes to the trash folder, where it lives for 30 days or until you permanently delete it. To restore a deleted comment, follow the same steps in the How to restore a deleted WordPress page or post from the trash section above, but start by navigating to Comments in the WordPress dashboard instead.
How can I remove a page from my WordPress site without deleting it?
If you want to remove a page from public view without deleting it, you have several options.
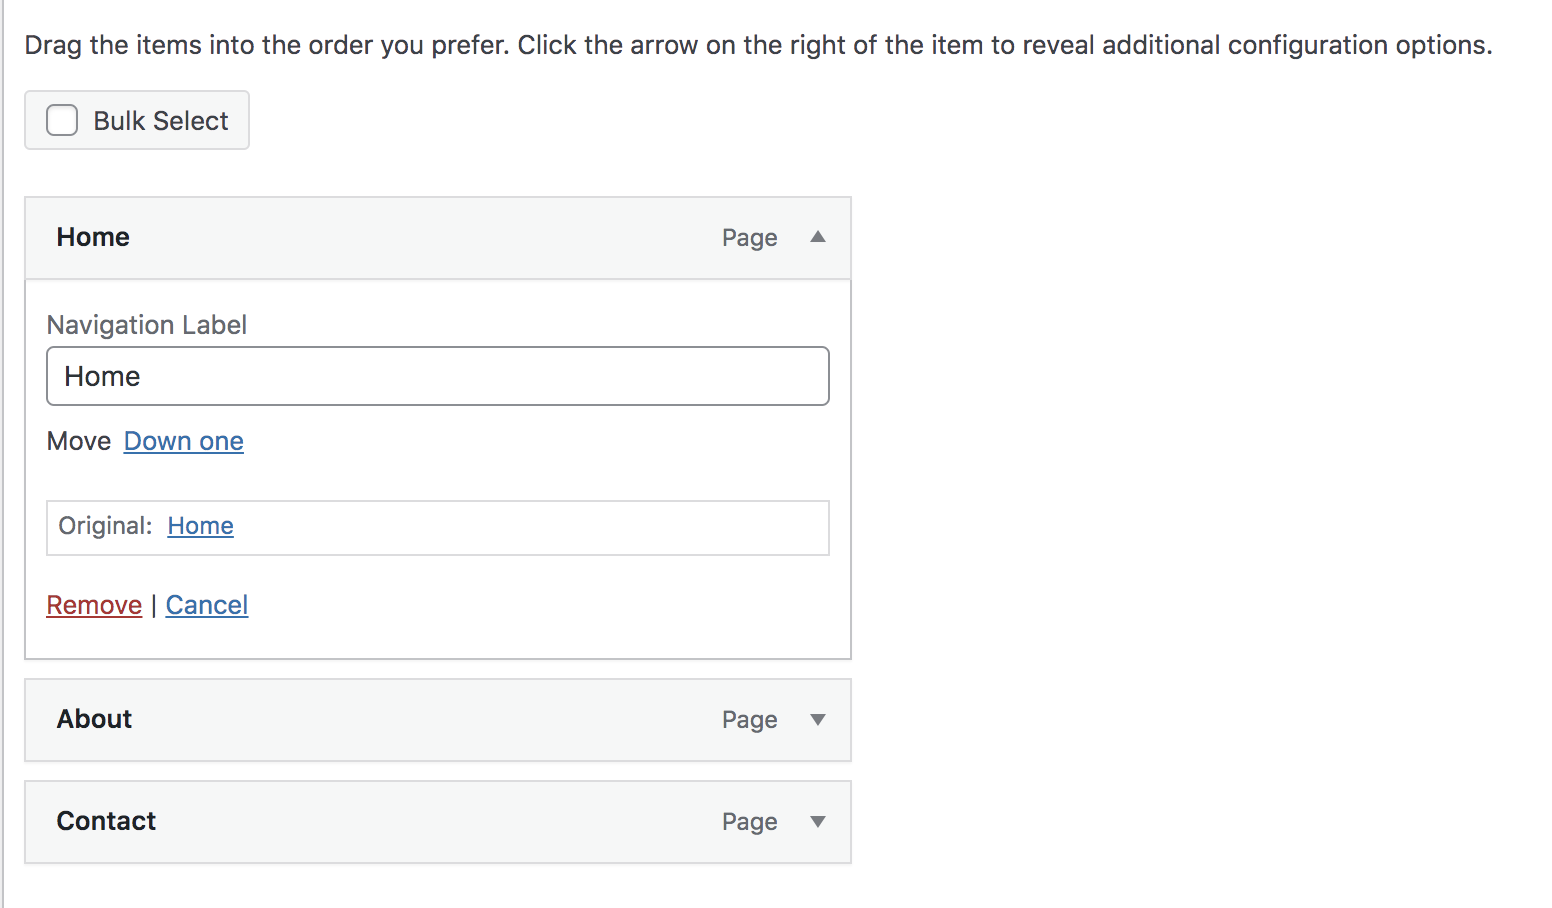
1. Simply remove it from your main navigation menu. While people will still be able to find it in search results or by going to its URL, it will be much harder to find. You can do this by going to Appearance → Menus in your WordPress dashboard and selecting the menu you want to edit. Then, find and expand the page you want to remove and click the Remove button. Finally, save your menu.
2. Return the post or page to a draft. To do so, navigate to your page and, at the top, click the Switch to draft button.

3. Set the page or post to be private or password protected. If the post is private, it can only be accessed by Editors or Administrators on your site. If the post is password protected, it’s visible only to people who know the password. To do this, navigate to the page or post and click the gear icon in the top right. Under Visibility, select either Private or Password Protected. Then update the page.

What’s the difference between a real-time backup and daily backup?
A daily backup saves a copy of your website once per day. That means that if you want to recover a page or post using this method, there may only be a backup available from, say, 12 hours ago. Restoring this backup will cause any content you created within the last 12 hours to be lost.
Real-time backups, however, save your site every single time a change is made — a page is published, a post is edited, or a plugin is updated, for example. So a copy of your site will be available from the exact moment you deleted the page or post and you won’t lose a single bit of your work when restoring.
The best real‑time WordPress backup plugin
Save every change and get back online quickly with one‑click restores from VaultPress Backup.
Get VaultPress Backup