
There are many reasons you may want to upload a video in WordPress. Whether you’re a professional videographer or a food blogger with an amateur cooking show, you’ll need a simple way to post audiovisual content on your site.
There are a couple of different ways you can add a video to a WordPress page or post. You could embed one from a video hosting service like Jetpack VideoPress or upload and add it directly from your site’s hosting server. Each method has its pros and cons, which we’ll cover in more detail in our tutorial.
In this guide, we’ll go over the various ways you can upload a video to your WordPress Media Library. Then we’ll walk you through adding a video to a post or page. Finally, we’ll discuss some frequently asked questions related to videos on WordPress.
Adding videos to WordPress: The basics
Before you learn how to add videos to WordPress, it’s helpful to have a basic understanding of what that process means. First off, there’s an important distinction between ‘uploading’ and ‘embedding’ a video into your WordPress site.
When you add a video directly to WordPress, the video file will be stored on your host’s server. This is called uploading.

When you add a video to a post or page in WordPress using a third-party site like YouTube or a video hosting platform like Jetpack VideoPress, this is called embedding.

As you can see in the example above, when you embed a video in WordPress, you’ll likely get advanced player features. These will be unique to each platform. Sometimes, they’ll include built-in social sharing options to enhance audience engagement.
Additionally, when you use a third-party host, the video doesn’t actually ‘live’ on your website’s server. Therefore, it won’t have a significant impact on your page loading times.
Comparison of common ways to add videos to WordPress
| Feature | Jetpack VideoPress | Self-Hosting (Media Library) | YouTube/Vimeo Embed |
| Site Speed Impact | None (Served via CDN) | High (Slows down your site) | Low |
| Video Player | Ad-free, customizable player | Basic browser player | Branded player with ads |
| Ease of Use | Easy (Integrated) | Easy | Easy |
| Cost | Freemium/Paid | Free (uses hosting resources) | Free (with ads) |
| Analytics | Views & engagement stats | None | Detailed |
| Best For | Professional, ad-free branding | Short, non-critical clips | Public content, community building |
Why should I add a video to WordPress?
Before we continue, it’s worth discussing some of the many benefits of learning how to upload videos to WordPress. For starters, visual media is on the rise in nearly every virtual space, from ecommerce to social media. As a result, online users have come to expect more video content.
No matter what type of site you run, videos can help engage your audience and keep them on your site longer. Often, videos are useful to explain complicated concepts or humanize a company or subject. Using videos can also help you meet a wide array of audience preferences and learning styles.
Tons of creative websites incorporate high-quality video content into their posts and pages. From product videos and promotional content to independent films and lifestyle reels, there are video opportunities for any type of site.
Can uploading a video slow down your WordPress site?
When you upload a video directly to your Media Library, it’s saved on the back end of your site and, thus, takes up space on your server. And video files aren’t usually small — adding even just the occasional video can weigh things down and negatively impact performance.
This means slower loading times and worse Core Web Vitals scores. This could not only cause your search engine rankings to suffer, but result in frustration for both new and regular site visitors. In other words, if performance tanks as a result of adding a bunch of videos, it could counteract the benefits the videos were supposed to bring in the first place.
Luckily, you can avoid all of these adverse effects by simply using a third-party video hosting provider to upload your videos. This way, the clips will use external server resources while still looking great on the front end.
In this tutorial, we’ll show you how to use various upload methods, so you can ultimately decide which approach is best for your needs.
How to upload a video to the WordPress Media Library
Now that you know the basics of adding videos to WordPress, we’re going to go over three methods of doing so.
Method 1: Using the video hosting plugin Jetpack VideoPress
With WordPress, the simplest way to upload a video is using a plugin. A video hosting plugin can function similarly to popular options like YouTube and Vimeo.
But, unlike the alternatives, Jetpack VideoPress is designed specifically for WordPress.

Using Jetpack VideoPress is highly straightforward because it fully integrates with your WordPress dashboard. It’s also affordable, offering your first video for free and a generous 50 percent discount for your first year.
Plus, you’ll never have to worry about advertisements interrupting your videos. You’ll even be able to apply your branding to your video player.
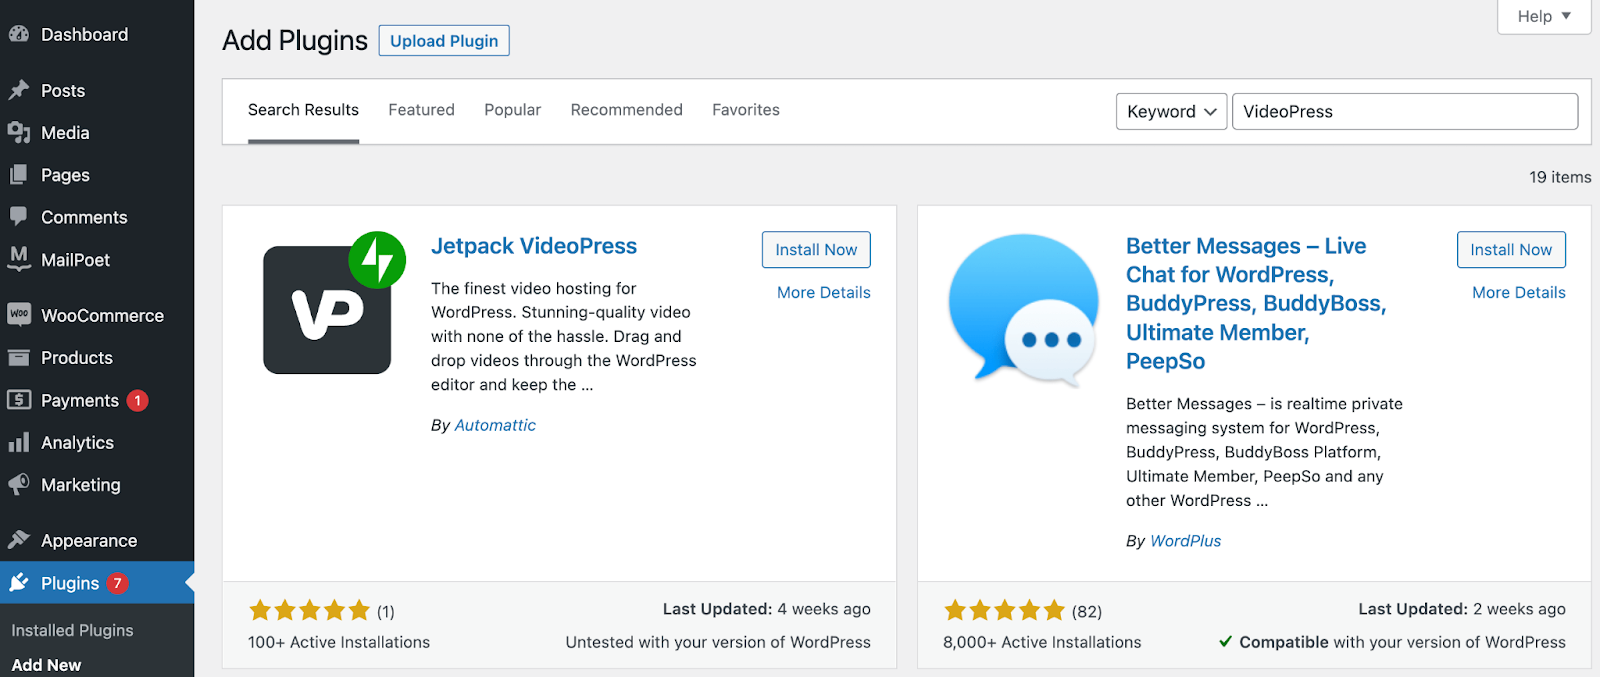
To get started, navigate to your WordPress dashboard. Go to Plugins → Add New. Use the search function to find the Jetpack VideoPress plugin.
After you’ve installed and activated Jetpack VideoPress, you should see the following screen:

If you like, you can sign up for the premium version of Jetpack VideoPress here. Otherwise, click on Start for free to explore the tool before making a decision.
After that, you’ll be prompted to connect Jetpack to your site. Click on Approve.
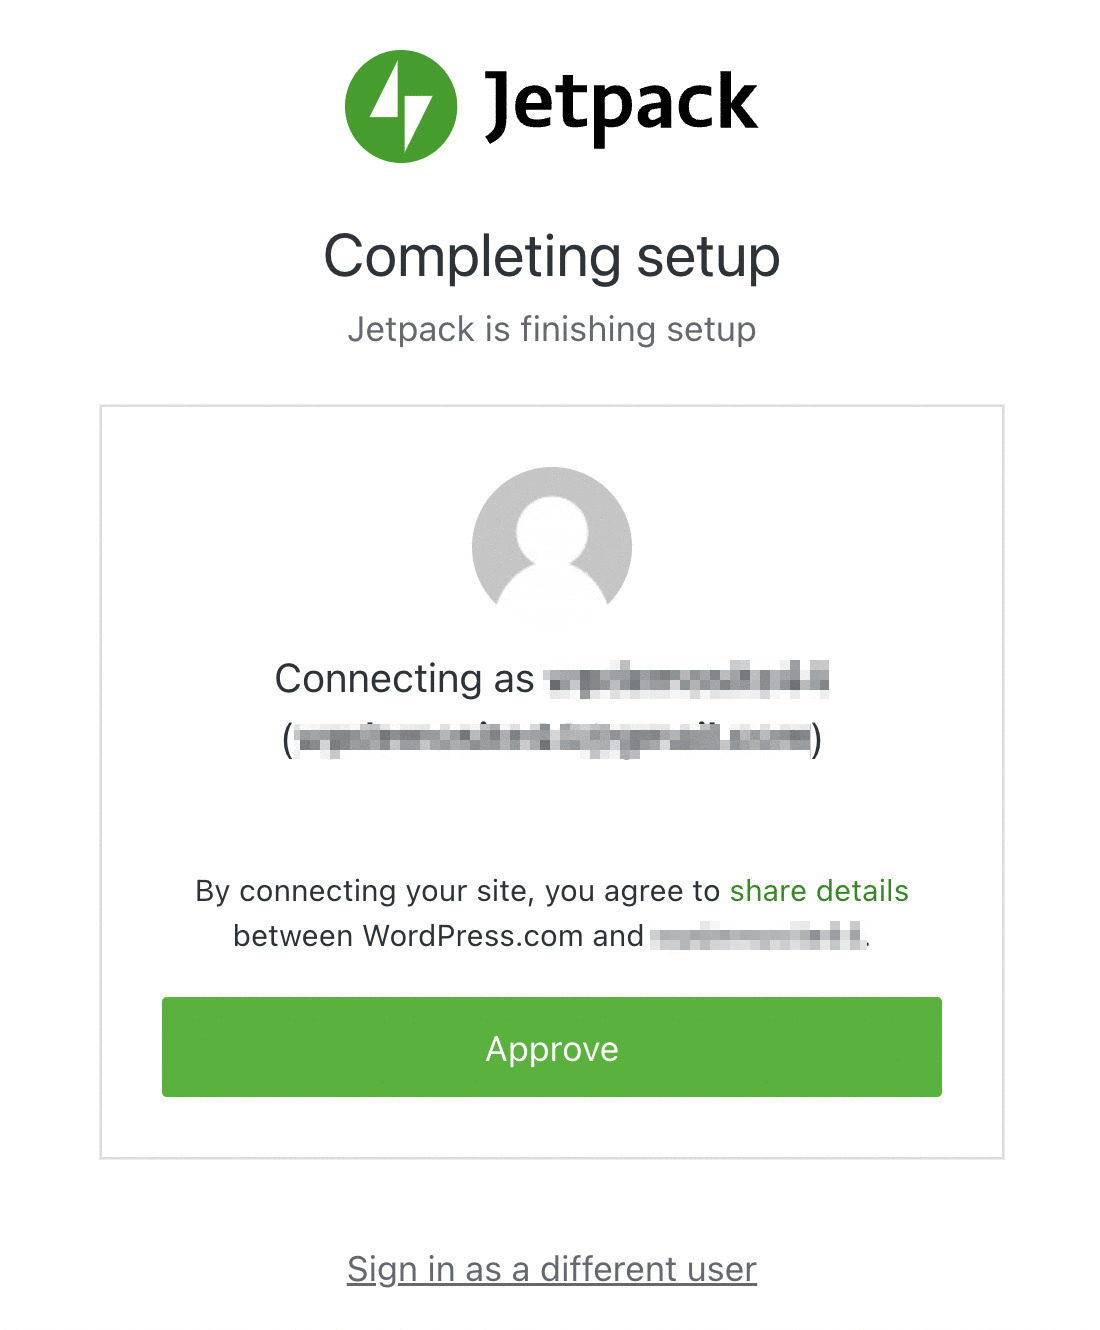
Keep in mind that you won’t need to complete this step if you’ve already connected your website to Jetpack for one of its other tools.
The connection process should take a few seconds. Then, you’ll be able to add your first video to WordPress.

On the above page, you can either select Add your first video or Select file to upload. Alternatively, simply drag and drop a video onto the page.

The video will now be added to your Jetpack VideoPress library and your WordPress Media Library. That’s it! Later on, we’ll show you how to insert this video into your posts and pages.
Method 2: Using your site’s hosting server (not recommended)
The next way to upload a video in WordPress is by using your site’s hosting server. This method is not recommended because it can slow down your website by consuming a substantial amount of precious server resources. Depending on your hosting provider, they may also have limits on the maximum file size you can upload.
It’s also not usually the best choice because your playback speed won’t be optimal, and the player will have limited features. In any case, knowing how to carry out this approach can still be useful for certain situations.
To begin, simply head to your WordPress dashboard. Go to Media → Add New. Then go ahead and drag your video file into the box or click on Select Files.

Once the video has finished uploading, your screen will update automatically. It should now have a banner below the Upload New Media section showing your video’s thumbnail.

To confirm that your video was uploaded correctly, navigate to Media → Library.
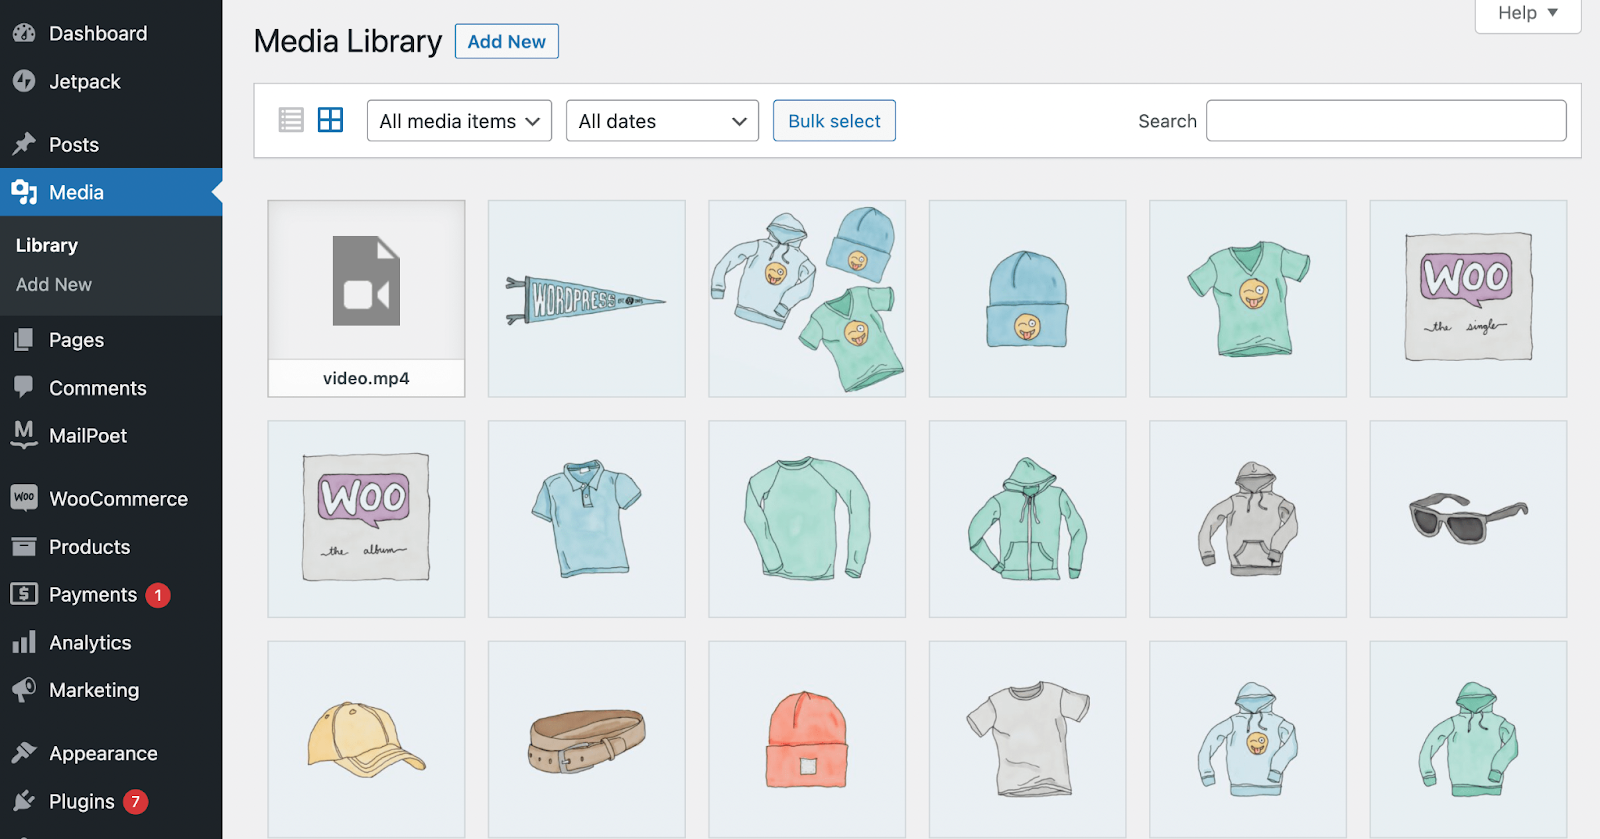
You should be able to see your video’s thumbnail in the upper left corner of the screen.
At this point, you might notice that your video is mixed with all of your images and other media files. That’s because there isn’t a separation of videos and photos in the WordPress Media Library.
Method 3: Using an external hosting server
The final way you can add a video to WordPress is by using an external hosting server like Amazon S3. While this platform offers the power and security needed for large sites, it’s a fairly complicated and expensive option.
To use Amazon S3, you must set up and manage your own server — requiring a good degree of development experience or the help of a professional. Furthermore, AWS S3 isn’t natively designed to integrate with WordPress and doesn’t come with a video player feature.
For all these reasons, WordPress-specific video hosting options like Jetpack VideoPress often make more sense. They integrate seamlessly with the WordPress Media Library and are usually more affordable.
Learn more about Amazon S3 and video streaming here.
How to add a video to a WordPress post or page (2 ways)
Now that you know how to upload a video to WordPress, we’ll show you how to insert one into a page or post. We’ll review two ways you can do this using the Block Editor so that you can easily share videos with your audience.
Method 1: Using the VideoPress block
Firstly, let’s see how you can easily use the VideoPress block to add a video to a WordPress page or post.
The Finest Video Hosting for WordPress
Stunning-quality video with none of the hassle. Drag and drop videos through the WordPress editor and keep the focus on your content, not the ads.
Get VideoPressStep 1: Add the VideoPress block
To begin, you’ll need to create the page or post where you’d like to insert your video. Alternatively, you can navigate to a pre-existing page or post and modify it. Once you’re in the Block Editor, simply click on the plus symbol to Add block.

Next, use the search tool to look for the VideoPress block.

When it appears, click on it, and the block will be added to your page.

Another handy way to add any block to a page or post is by using keyboard shortcuts. For instance, you can type in “/videopress” and access the block that way.

You can either select the block when it appears or simply hit the enter key to add it to the editing interface.
Step 2: Add your video and customize its settings
Once your VideoPress block is on the screen, add your video by selecting Upload, Media Library, or Insert from URL.
We’re going to go with the Media Library for our example since we already uploaded the video earlier in the tutorial. However, you can also drag and drop your video here to add it to VideoPress. Remember, your videos will be stored separately from your server to improve speed, but will still be visible in the WordPress Media Library.
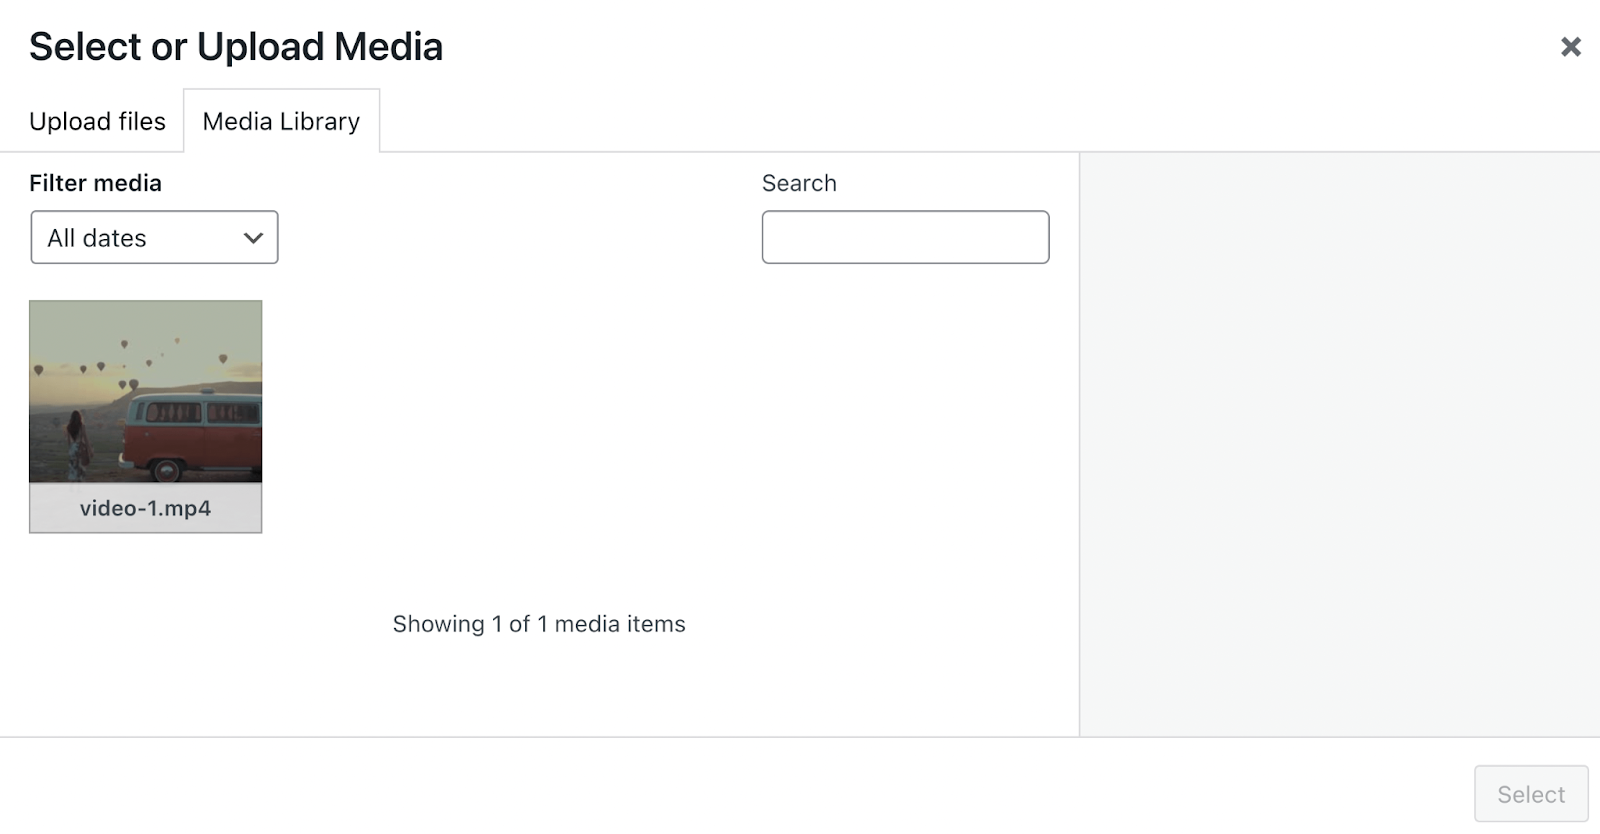
Since the VideoPress block deals with videos, you’ll only see that type of media in your library. When you’ve located the clip you want to use, simply click on it and hit Select.

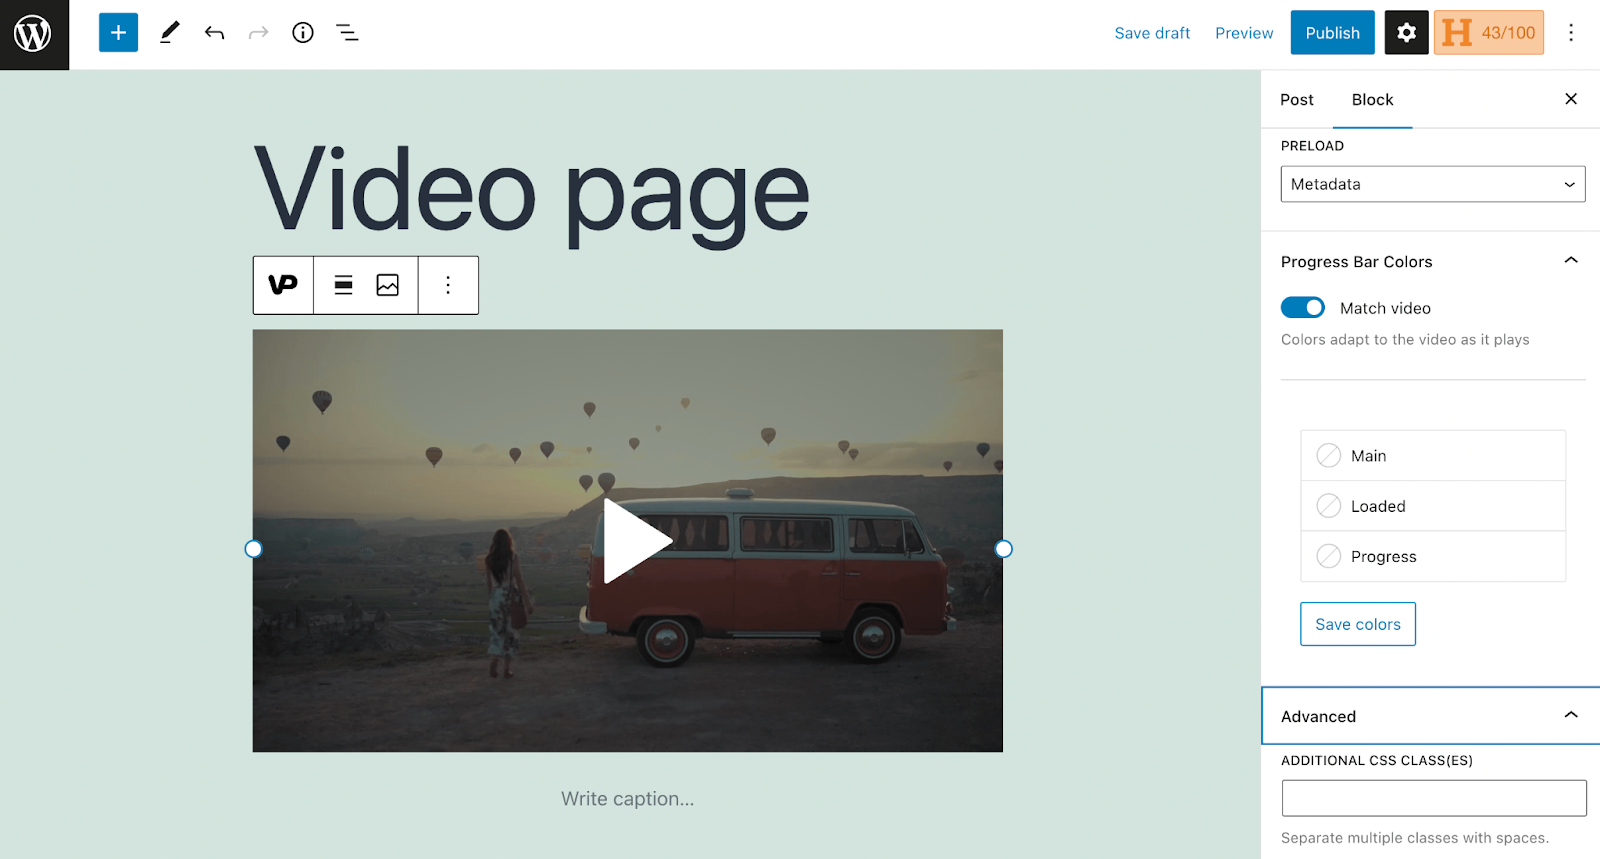
After that, your video will appear on your page. As you can see, the VideoPress block gives you access to a variety of settings. You can enable or disable playback controls, turn on and off autoplay, choose to loop the video, and mute it if you’d like.
You can also select the dropdown menu next to Progress Bar Colors to change the way that the video’s progress bar appears. There are some other options as well, so feel free to play around until you get the look and functionality that you’re going for.
Step 3: Publish and preview your video
When you’ve finished making your changes, click on Publish in the upper-right corner of your page. Now let’s preview what your video will look like on the front end.

In this example, we left the progress bar colors setting to Match video. This makes the progress bar blend in, while still remaining functional.
Your viewers can make additional adjustments to video speed and quality. Plus, they’ll be able to change to full-screen viewing or create a pop-out window to watch while they scroll.
Method 2: Using the Video block
Now, let’s explore how to add a video to a post or page using the default Video block that comes with WordPress. Remember, this will store videos on your server and could cause your site to load more slowly.
To get started, open up the Block Editor and add the Video block. You can locate the block by clicking on the plus symbol or using keyboard shortcuts.

Then, choose your preferred method for adding a video to the block. Again, we’ll insert our clip from the Media Library by hitting Select. The video will now be added to the page.
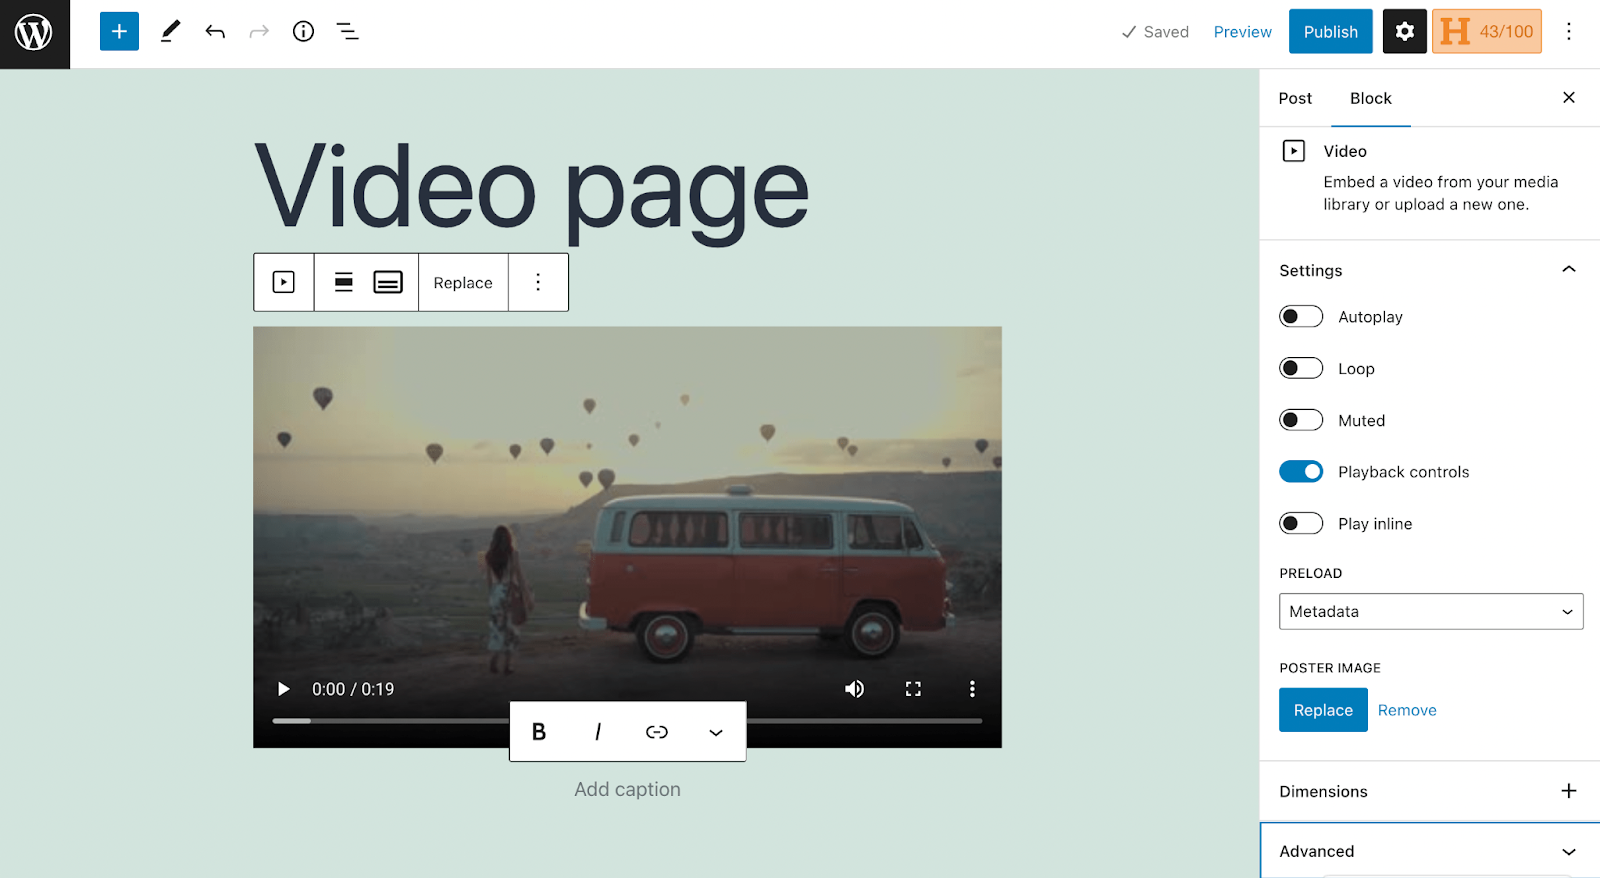
You should notice that the Video block has some of the same settings as the VideoPress block, though it does provide fewer customization options.
Once you’ve modified your video block’s settings, click on Publish. Now let’s preview it on the front end:

As you can see, the progress bar and settings are a bit less discreet, and the video is showing at a lower quality.
Frequently asked questions
Hopefully, you’re now comfortable with the basics of uploading videos in WordPress. Just in case, though, we’ll cover some frequently asked questions!
Can self-hosting my video slow down my WordPress site?
When you upload large video files to your Media Library without using a tool like Jetpack VideoPress, they’ll occupy space on your website’s server. So, this video hosting option can slow down your website, hindering the overall user experience.
But this won’t be an issue if you use a video hosting tool like Jetpack VideoPress. This is because the heavy files will be hosted on a separate, more robust server.
What is the best option to upload a video to WordPress?
Using Jetpack VideoPress is hands down the best option to upload a video to WordPress.
The plugin provides the best experience for viewers because it can handle and maintain the highest-quality video content. Plus, with Jetpack VideoPress, you’ll never have to worry about ads interrupting your content.
Additionally, Jetpack VideoPress is very practical for WordPress creators because it fully integrates with the dashboard and the Block Editor. Lastly, with Jetpack VideoPress, there’s minimal impact on site since your content is served using Jetpack’s global Content Delivery Network (CDN).
Can I use an uploaded video to build a video header?
Yes, there are a few ways to use an uploaded video as your WordPress header. You can create this effect using the Cover block or a video plugin.
For complete instructions on how to do this, check out the complete tutorial on adding a video background to a WordPress page!
Where can I learn more about Jetpack VideoPress?
You can learn more about Jetpack VideoPress on the Jetpack website! Check out the complete list of Jetpack VideoPress features.
Streamline video uploads in WordPress using Jetpack VideoPress
Whether you’re an aspiring filmmaker, a talented blogger, or a business owner who understands the value of video, knowing how to add a video in WordPress is key. If you’re not careful, though, your clips can look unprofessional and even slow down your website.
Fortunately, you can use a video hosting service like Jetpack VideoPress to easily upload videos in WordPress. With Jetpack VideoPress, you can add clips to the Media Library without damaging your site’s performance. Then, you can use the Jetpack VideoPress block to insert your videos into any page or post, with plenty of customization options to improve the viewing experience.
Are you looking for additional ways to improve your website’s performance? Why not check out Jetpack Complete? This plan offers top-tier performance and security tools for WordPress sites. Plus, it includes Jetpack VideoPress at no additional charge!
The Finest Video Hosting for WordPress
Stunning-quality video with none of the hassle. Drag and drop videos through the WordPress editor and keep the focus on your content, not the ads.
Get VideoPress