
One of the hallmarks of a user-friendly website is that it doesn’t keep visitors waiting too long while loading. Caching static assets is a critical step to improving site performance, but it doesn’t help much to simply set this up and move on. Without an efficient WordPress caching policy, you might struggle to provide fast loading times.
Fortunately, learning how to leverage browser caching on WordPress is easier than you might think. You can configure browser caching manually, and the Content Management System (CMS) also enables you to use tools that do it for you.
In this article, we’ll explain how browser caching works and discuss its benefits. We’ll also show you how to check if caching is enabled on your site and look at different ways to turn it on.
What is browser caching?
Browser caching is a process that saves copies of a website’s elements on your computer. When you visit a website, your browser downloads different pieces of content, like images and text. Instead of downloading this content every time you visit the site, your browser “caches” or stores some of it in case you need it later.
The next time you visit the site, your browser will check what elements are stored locally. It will then load these elements from the cache instead of requesting them from the site’s server. This can make the page load significantly faster, depending on the number of assets that are stored in the cache.
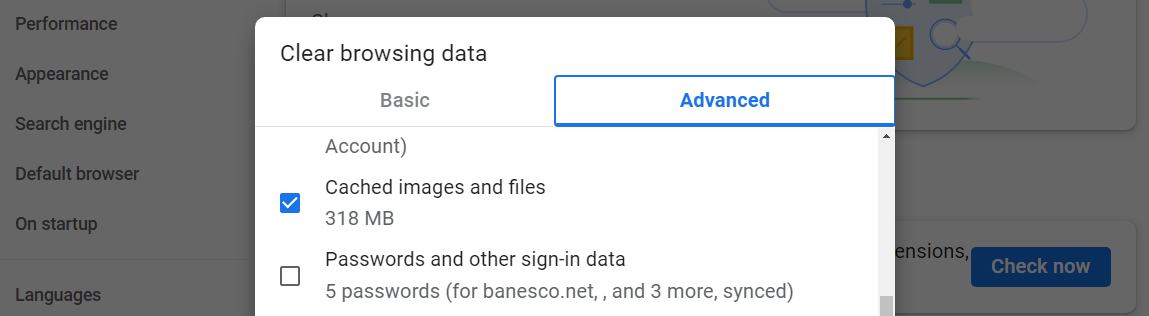
If you had to check your browser’s cache right now, you’ll likely find a few hundred megabytes of files inside it. Most modern browsers enable you to see an overview of cached files if you go into the privacy settings.
The thing about caching is that a browser can’t decide to do it on its own. To leverage browser caching in WordPress, you’ll need to configure your website or server to do so. This means that your site controls which assets the browser caches and for how long.
What are the benefits of caching static assets?
The primary benefit of browser caching is that it can help visitors load pages faster upon returning to your site. We talk about “static assets” because it’s not possible to cache every element on a website.
Dynamic assets are elements that change every time you load a page. For example, if you log into an app that shows you a post feed in real time, like Twitter or Instagram, those assets are dynamic.
Since dynamic assets can change frequently, caching them might not serve any purpose. After all, the next time you log into Twitter or Instagram, you’ll see entirely new posts.
Caching provides the best possible results when it’s limited to static assets. Learning how to serve static assets with an efficient cache policy in WordPress can have several benefits:
- Reducing bandwidth usage. Since cached assets are loaded from local storage, there’s less data being transferred between the server and the visitor’s device. This helps visitors with limited internet plans save on data usage.
- Decreasing the load on your server. When browsers use cached assets, the server receives fewer requests for those files. This reduces the server’s workload and can help prevent server overloads during periods of high traffic.
- Enabling partial offline browsing. In some cases, caching static assets can enable visitors to access certain parts of a website even when they’re offline. If the browser has previously cached the necessary files, it can display the content without needing an active internet connection.
Caching static assets enables you to make better use of server resources and improve the experience for visitors. All of this works by instructing your server on what assets it should tell browsers to cache.
How to check if browser caching is enabled on your site
The easiest way to check if a website leverages caching is to use browser developer tools, like the ones you find in Firefox and Google Chrome. This approach requires you to look at some code, but you don’t need to be a developer to understand it.
To do this in Google Chrome, visit the website you want to check, right-click anywhere on the page, and select the Inspect option. This will open the developer tools tab within the browser, which should look like this:
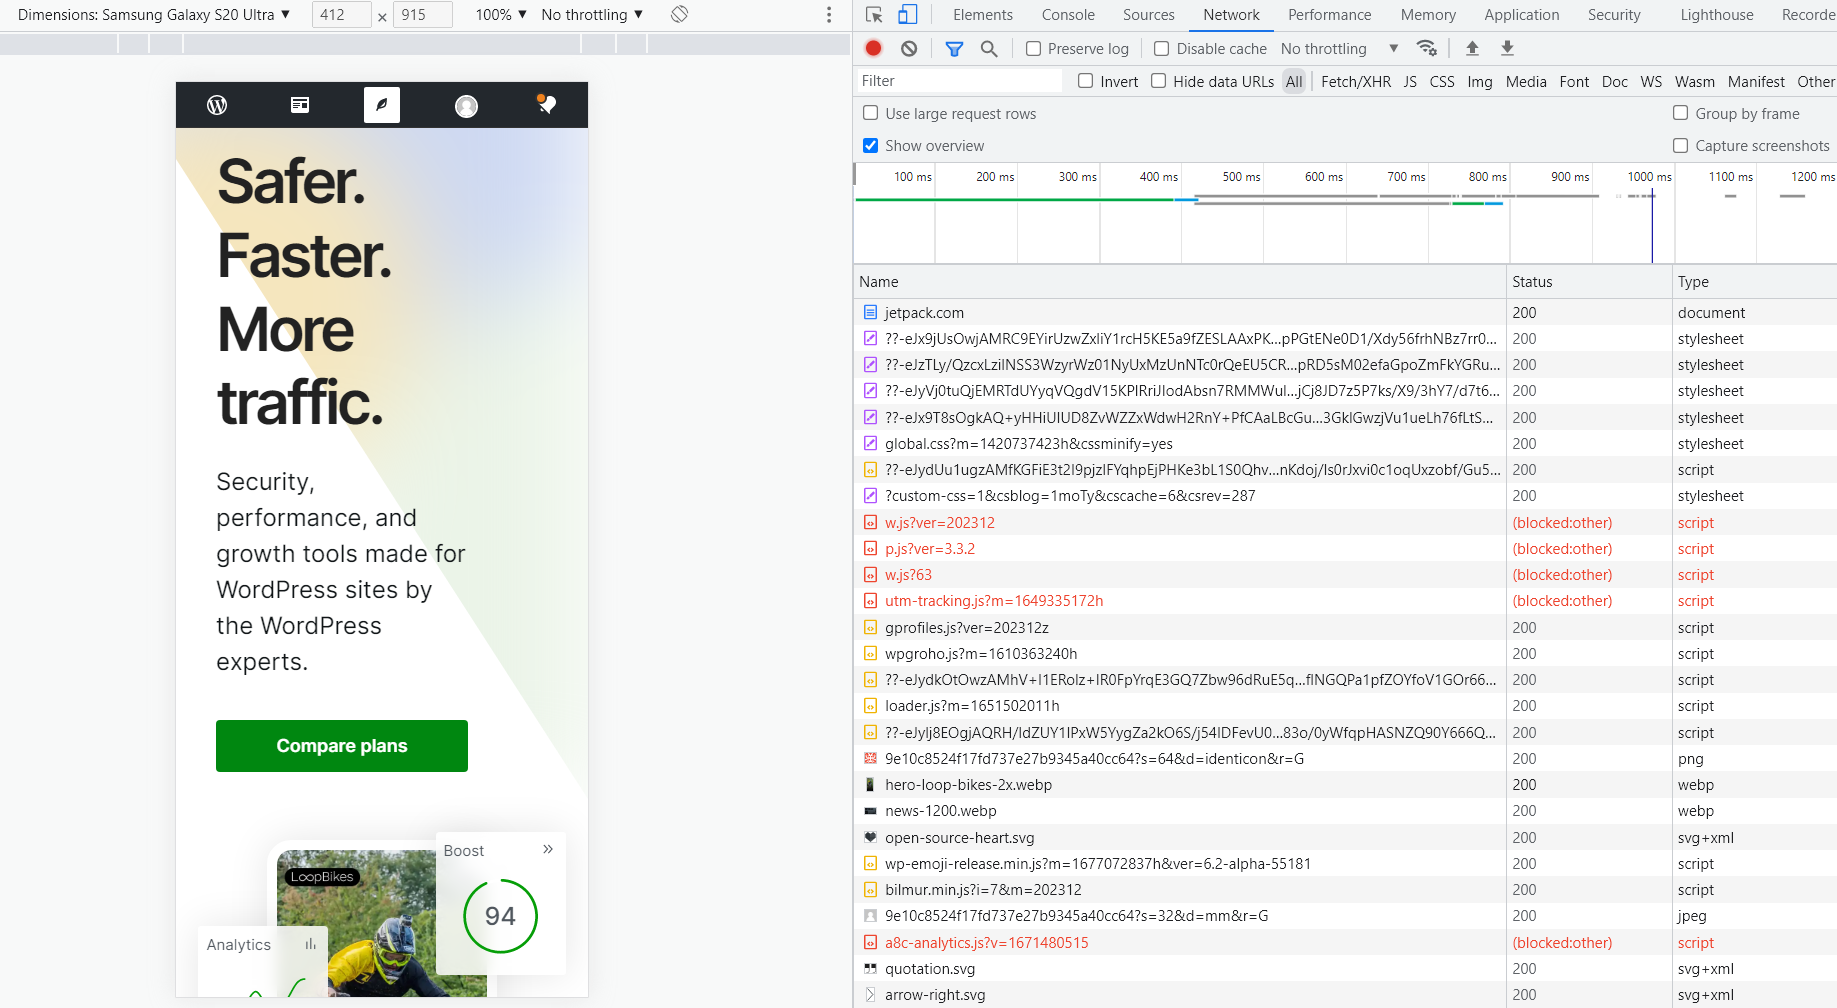
Click on the Network tab. If you see an empty list, you’ll need to reload the page with the developer tools tab open. The Network tab will display all the requests and assets the browser loads while accessing the page.
The element we’re interested in should be the first on the list. In our case, it’s Jetpack.com, and it contains the page’s headers. Select that file, and it will open a new tab to the right, jumping straight into the Headers section.
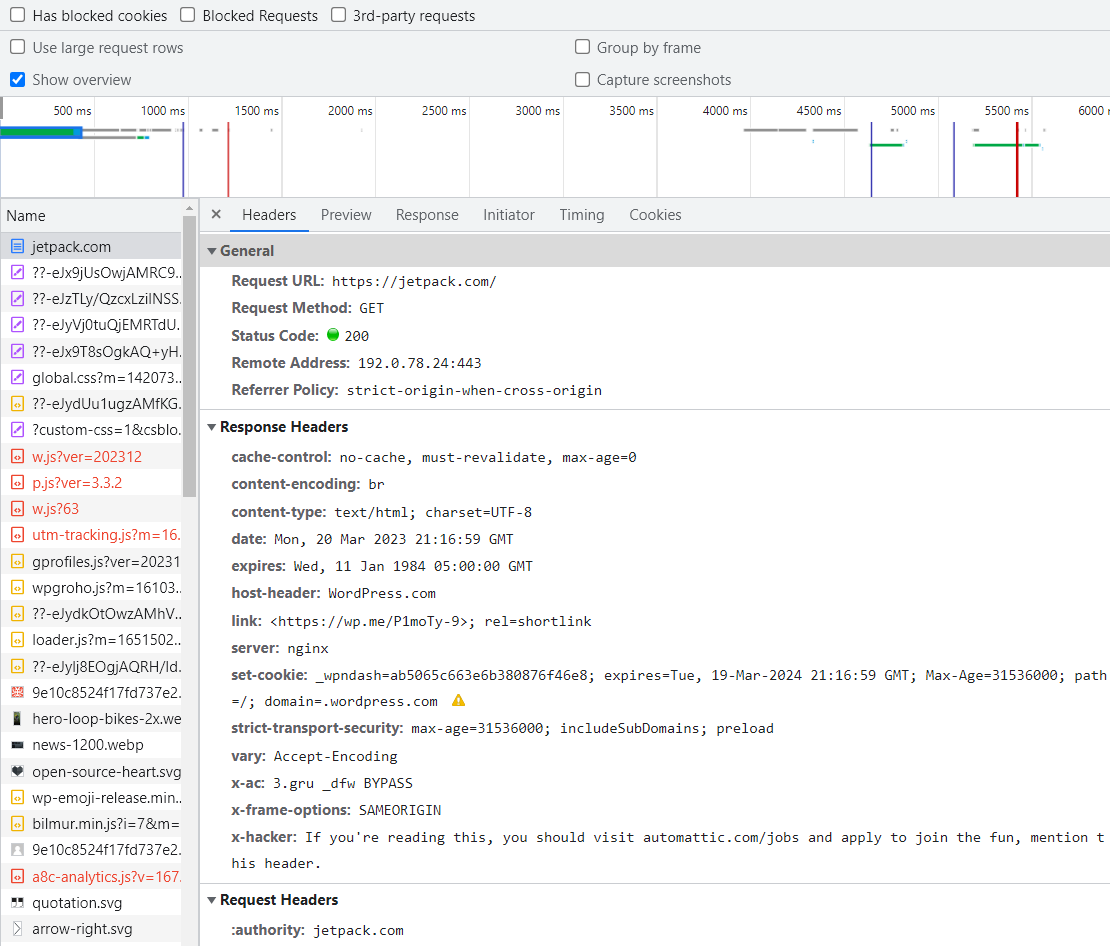
Some headers will tell us whether the site uses caching and how it’s implemented. These are:
- Cache-Control. This header specifies caching directives, like max-age (the maximum time a resource is considered fresh) or no-cache (forces caches to submit the request to the origin server for validation before releasing a cached copy).
- Expires. This header provides an expiration date and time for the resource. After this, the resource is considered stale, and the browser will revalidate it.
- ETag. This header is an identifier for a specific version of a resource. When the resource changes, the ETag changes as well, allowing browsers to determine if a cached resource is still valid.
- Last-Modified. This header indicates the last modification date of the resource. Browsers can use this information to validate if their cached version is still up-to-date.
If you can find these headers in the file, then the website uses caching. Keep in mind that specific caching configurations can vary from site to site. Some sites might tell browsers to store static files for a day, whereas others will tell them to store files for months or longer periods.
How to leverage browser caching with a plugin
The easiest way to leverage browser caching on a WordPress site is by using a plugin. There are a lot of caching plugins you can use. One of the best caching plugins for WordPress is WP Super Cache.
Once you’ve installed and activated WP Super Cache on your site, you can implement caching using several approaches. The simplest way is to go to Settings → WP Super Cache and select the Caching On option next to Caching.
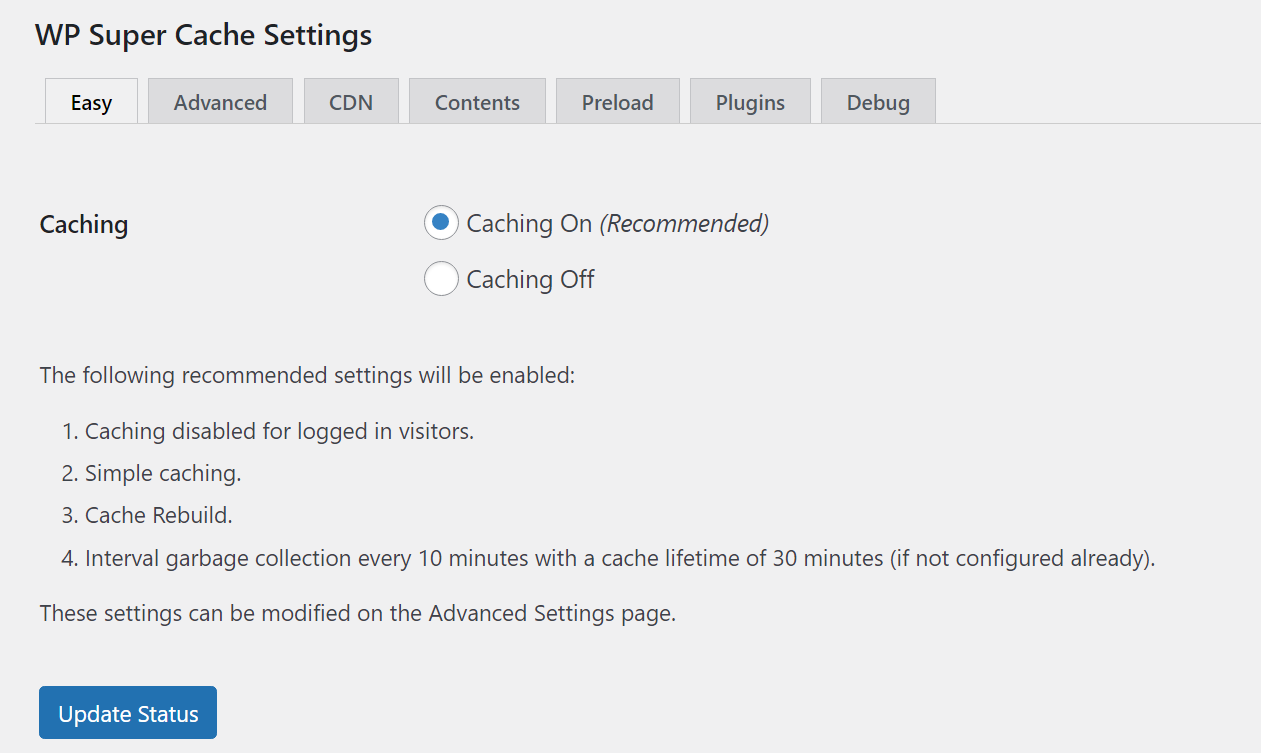
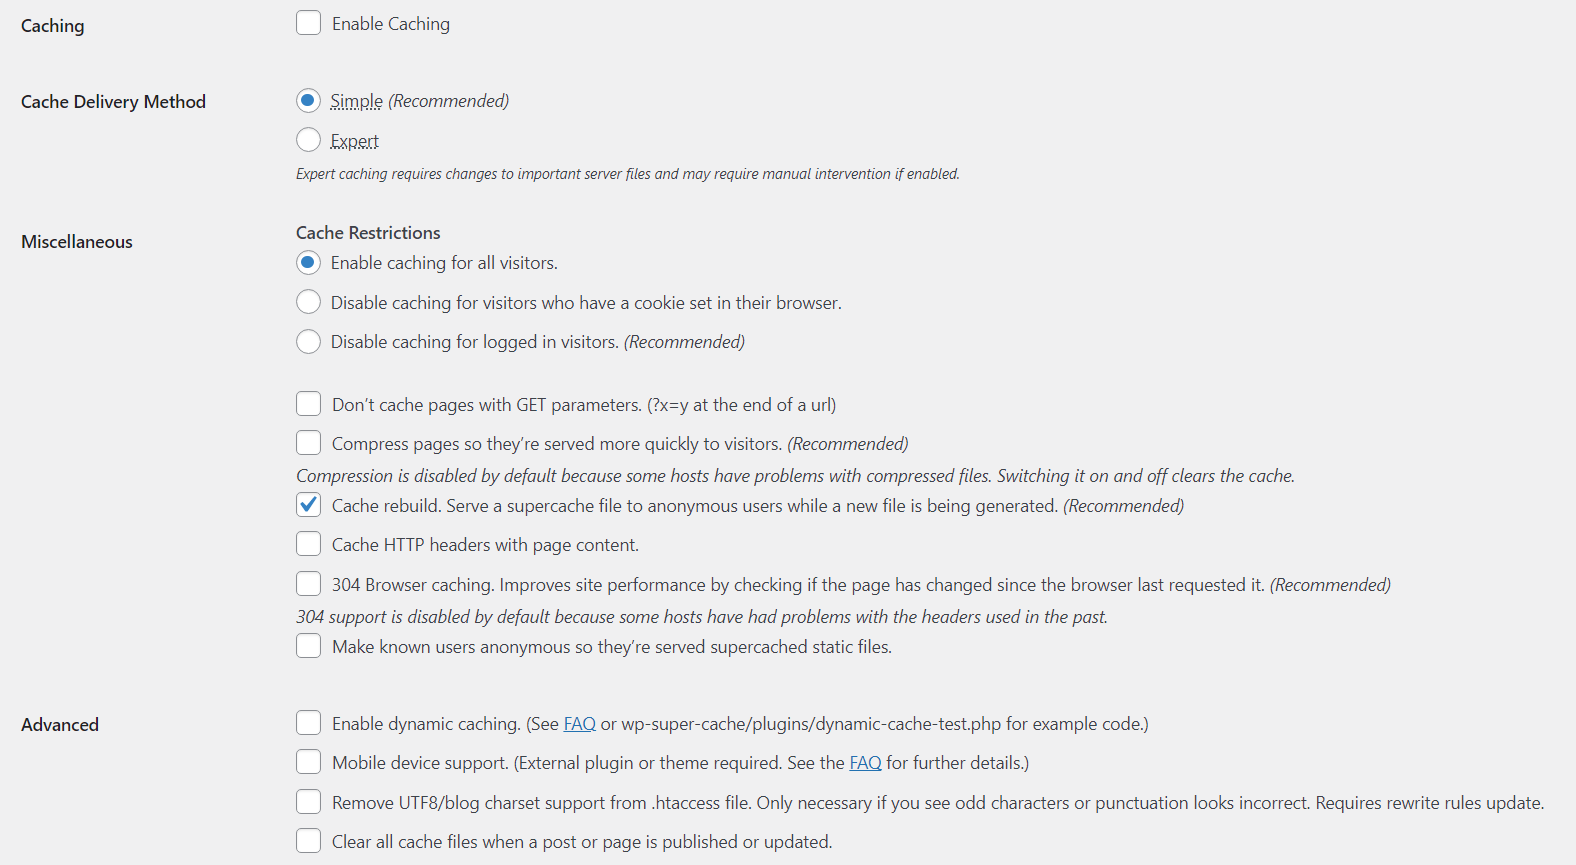
The plugin’s default settings enable caching for logged-out visitors and set a lifetime of 30 minutes for stored assets. If you want to change these settings, you’ll need to go into the Advanced tab.
Here, you can decide which visitors to enable caching for, whether to enable dynamic caching, if the plugin should clear the cache when you update pages, and more. The plugin helps you out by recommending the most effective options.
If you don’t have a firm grasp of caching, you might want to stick with the default settings. Configuring caching settings without fully understanding how they work can lead to problems with your website.
How to leverage browser caching without a plugin
If you don’t want to use a plugin, you can enable browser caching on your website manually. This process might involve dealing with code at the server or at the site level, depending on the implementation method that you choose.
1. Add “Cache-Control” and “Expires” Headers in NGINX
To add “Cache-Control” and “Expires” headers in NGINX, you’ll need to modify the server configuration file. This file is usually called nginx.conf, and it’s located in the main nginx directory.
The easiest way to connect to your site’s server is to use a File Transfer Protocol (FTP) client. Then, you’ll need to locate the nginx.conf file, which should be in either
/etc/nginx/nginx.conf or /etc/nginx/sites-available/default.
Open the file using a text editor and look for the server block of code within nginx.conf. Here, we’re going to add the following new block of code, which specifies what files the server should tell browsers to cache and how long that cache should last before it expires:
location ~* \.(jpg|jpeg|png|gif)$ {

    expires 30d;

    add_header Cache-Control "public, no-transform";

}
This code includes both the “Cache-Control” and “Expires” headers. You can modify both the expiration time range and the file types that browsers should cache.
If you can’t decide what types of files to cache, take a look at what’s in your WordPress media folder. Any static files that visitors access regularly should be cached. As for the expiration header, 30 days is generally a good timeframe for most websites.
Once you add the code, save the changes to the file and exit the editor. You’ll need to restart NGINX to apply the changes.
2. Add “Cache-Control” and “Expires” Headers in Apache
Using “Cache-Control” and “Expires” headers in Apache requires you to enable their corresponding modules. You can enable these modules by opening the terminal and running the following commands:
sudo a2enmod expires

sudo a2enmod headers

sudo systemctl restart apache2
The final command will restart Apache with both modules active. Next, you’ll need to modify the Apache configuration file, which is usually called either httpd.conf or apache2.conf.
You can find this file in either /etc/httpd/conf/httpd.conf, /etc/apache2/apache2.conf, or
/etc/apache2/sites-available/000-default.conf, depending on the server configuration.
Then, look for the <Directory> block within the Apache configuration file and add the following code inside it:
<IfModule mod_expires.c>

    ExpiresActive On

    ExpiresDefault "access plus 1 month"

    ExpiresByType image/jpg "access plus 1 month"

    ExpiresByType image/jpeg "access plus 1 month"

    ExpiresByType image/gif "access plus 1 month"

    ExpiresByType image/png "access plus 1 month"

</IfModule>

<IfModule mod_headers.c>

    <FilesMatch "\.(jpg|jpeg|png|gif)$">

        Header set Cache-Control "public, no-transform"

    </FilesMatch>

</IfModule>
The first part of that code governs the expiration settings for cached files. The second part indicates what file types browsers should cache. As with NGINX, you can modify these settings depending on the files you want browsers to store.
When you’re done, save the changes to the Apache configuration file and close it. You’ll need to restart Apache for the changes to take effect.
The easiest speed optimization plugin for WordPress
Jetpack Boost gives your site the same performance advantages as the world’s leading websites, no developer required.
Boost your site for free3. Use a Content Delivery Network (CDN)
A Content Delivery Network (CDN) is a network of servers that you can use to store cached copies of your website in key regions. CDNs tend to be paid services, and they help by serving cached copies of your site from the server that’s geographically closest to the visitor.
This approach lessens the load on your own servers. Moreover, CDNs tend to be optimized for top-of-the-line performance and are typically distributed across the globe, so they can serve websites from the best possible location for each visitor.
Jetpack CDN is an option that integrates seamlessly with WordPress, is easy to use, and highly effective.
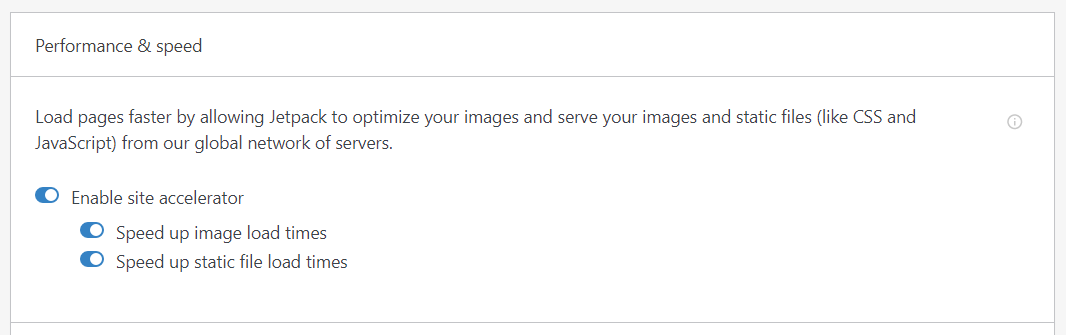
Best of all, it’s a free CDN that stores images and other types of static assets from your website. Once you install and activate it, you can enable the CDN by going into Jetpack → Settings in the WordPress dashboard.
Then, locate the Performance & Speed settings and toggle the Enable site accelerator option.
4. Host third-party scripts and assets locally (whenever possible)
Third-party scripts are elements like code from external sites, tracking pixels, fonts, and other assets that require loading to work. The more scripts and assets you load from third-party sources, the longer the process will take, which can slow down your site.
Ideally, you should look to eliminate any third-party scripts and assets you don’t use. Alternatively, you can host code and assets on your local server to reduce loading times.
You can identify third-party scripts, as well as unused JavaScript, using PageSpeed Insights. This tool highlights opportunities for improving site performance, including lists of unused code and third-party scripts that can be removed from your pages.

You can safely delete any unused third-party scripts on your website. For important scripts, you may want to consider the option of hosting them locally.
Final step: Install a free plugin to improve Core Web Vitals
Learning how to leverage browser caching in WordPress is a key step to improving site performance. Fortunately, it’s not the only thing you can do to make the user experience better.
Google measures the quality of a site’s user experience with a set of metrics called Core Web Vitals. Key performance metrics include:
- Largest Contentful Paint (LCP). This metric measures how long it takes to load the largest asset on a page. Typically, it’s a good indicator of a page’s overall loading time.
- First Input Delay (FID). There is a delay between loading a page and it becoming interactive. You might think a page is done loading, but if it doesn’t enable you to interact with elements like forms or links, it might have a high FID.
- Cumulative Layout Shift (CLS). While a page is loading, its layout can shift, moving elements around on the browser. The more elements there are moving around, the higher the CLS score is. Ideally, this should be zero.
There are a lot of ways to improve Core Web Vitals in WordPress. The easiest approach is to use a plugin that optimizes all the variables behind these metrics.
Jetpack Boost can help you implement several strategies to improve Core Web Vitals. You can optimize CSS delivery, defer non-essential JavaScript, and enable lazy loading.
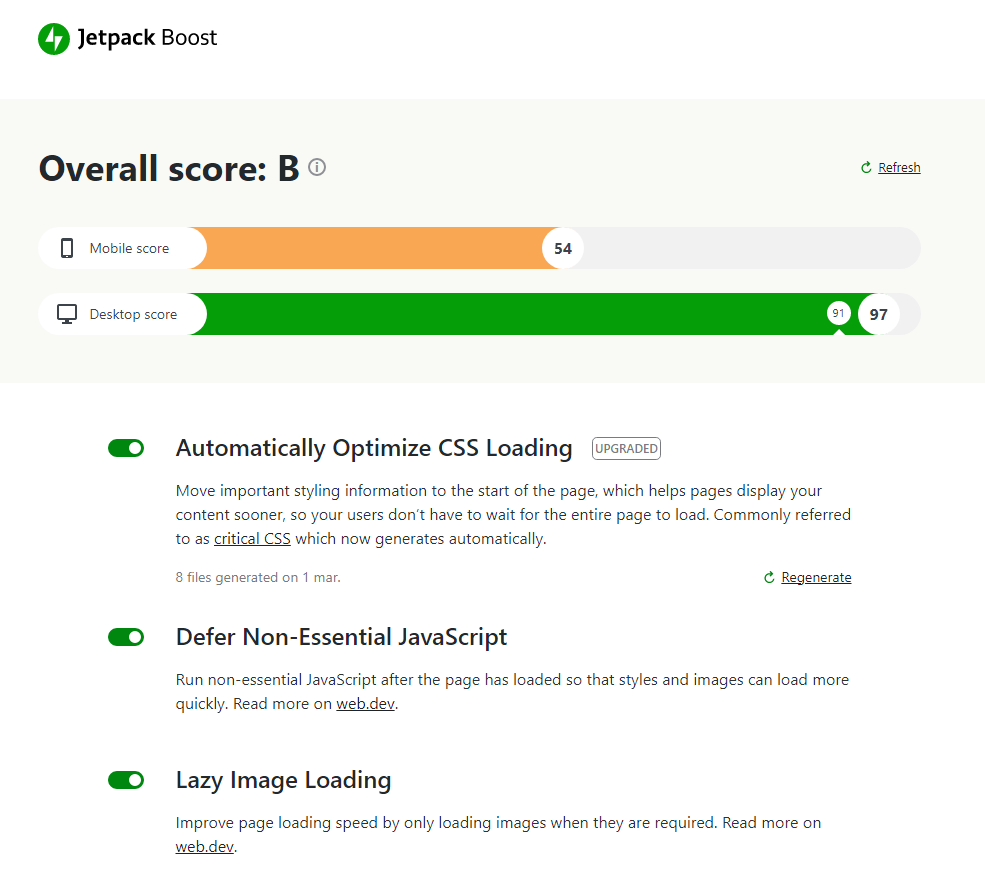
Typically, you would need to use multiple plugins to implement these configurations or do so manually, making Jetpack Boost an essential plugin for all WordPress sites. After you install and activate Jetpack Boost, you can simply enable every setting by navigating to Jetpack → Boost and toggling the corresponding options.
Frequently asked questions about WordPress browser caching
While we’ve covered the essentials of browser caching in WordPress, you may still have some questions about the process. Let’s look at some of the most common ones.
Is browser caching secure?
Browser caching is very secure. Most of the websites you visit probably use some type of caching policy to improve performance for visitors. As a visitor, you won’t even notice it unless you go digging into the website’s headers, or you need to clear the cache.
The only way in which browser caching might not be secure is through bad implementation. If it’s not configured properly, browsers won’t be able to store assets the right way, or a page might fail to load (although this is very rare).
Browser caching vs. server caching: How do they differ?
Browser and server caching work very similarly. The only difference is that one method stores files locally, whereas the other does it on the server side.
The best example of server caching in action is a CDN. With CDNs, you can store cached copies of your site on a third-party server (or a cluster of them). When visitors try to access the website, the CDN intercepts that connection and serves the stored copy of the site.
In that scenario, visitors can still cache static content through their browsers. The experience for end users shouldn’t change in any way, except that CDNs often deliver much better loading times than traditional servers.
What else can I do to improve my site’s performance?
There are a lot of things you can do to improve your site’s performance (beyond leveraging browser caching). Some other changes you can make include eliminating render-blocking resources, minifying CSS, using a CDN, making fewer HTTP requests, and reducing TTFB and server response times.
When it comes to site performance, some changes are more effective than others. Improvements in loading times can have a significant impact on the user experience, which can lead to a higher conversion rate for your business.
Start serving static assets on your WordPress site
Leveraging browser caching in WordPress is one of the most effective ways to improve loading times. An efficient strategy will focus on static files and configure them to reload periodically. This way, visitors aren’t stuck with outdated elements.
The easiest way to implement browser caching in WordPress is by using a plugin like WP Super Cache. This plugin enables you to leverage browser caching using a set of default configurations or control every setting manually. Plus, it’s free to use.
Additionally, when you install Jetpack Boost, you can further improve your site’s performance. Check out the plugin to learn more!
The easiest speed optimization plugin for WordPress
Jetpack Boost gives your site the same performance advantages as the world’s leading websites, no developer required.
Boost your site for free