Adding social media icons used to require heavy plugins or custom code. Today, the native WordPress Social Icons Block is the fastest, most performance-friendly method. It uses lightweight SVGs that won’t hurt your Core Web Vitals. Here is how to add them to your header, footer, or sidebar in minutes.
What are the benefits of having social media icons on your WordPress site?
Adding social media icons to your WordPress site opens the door to a whole new world of promotional possibilities. Let’s explore some of the benefits.
- Increased engagement. You have the opportunity to reach your site visitors in other places that they spend time, increasing their opportunity to connect with you.
- Broader audience reach. When you gain social media followers, you have the opportunity to reach more people as they share and engage with your content.
- Social proof. When people see others sharing and engaging with your content, they’re more likely to trust your brand and join the party. People have lots of options for spending their time, energy, and money than ever, and they’re more skeptical than ever before. A social media recommendation from their friends instantly transfers credibility to your organization.
- A streamlined user experience. Many website visitors simply expect to find social media icons on your site, hoping to connect with you on more than one platform. By providing them with an easy way to do so — rather than forcing them to click through page after page to find your social accounts — you provide a much better user experience.
What is the Social Icons block on WordPress?
If you want to add social icons to your WordPress site, you can quickly do so using the Social Icons block. This simple-but-powerful tool allows your visitors to quickly recognize your presence on certain social media platforms and visit your corresponding profiles. There, they can engage with your brand, ask questions, follow you, and keep up-to-date with your latest posts.
Which icons are available on the Social Icons block for WordPress?
There are seemingly endless choices for where to spend your social media efforts. Choosing the best social media platforms for your business is important because you want to go where an interested audience is most likely to engage. Spread yourself too thin, and you’re less likely to find success on any one platform.
A tool like Jetpack Social can help, though. It allows you to spend more time creating great content and less time on the logistics.
Once you’ve decided where to focus your time, there are more than 40 icons available to represent any custom link you want to insert. They are:
- Amazon
- BandCamp
- Behance
- CodePen
- DeviantArt
- Dribble
- Dropbox
- Etsy
- RSS Feed
- Flickr
- Foursquare
- Goodreads
- GitHub
- Last.FM
- Mastodon
- Meetup
- Medium
- Patreon
- Skype
- Snapchat
- SoundCloud
- Spotify
- Telegram
- TikTok
- Tumblr
- Twitch
- Twitter / X
- Vimeo
- VK
- WhatsApp?
- WordPress
- Yelp
- YouTube
How to add the Social Icons block to your WordPress site
Here are several areas you can add the Social Icons block:
- Content like pages and posts, using the Block Editor
- Global site elements, like your header and footer, using the Site Editor (for block themes)
- Widgetized areas, like your sidebar (for classic themes)
Let’s take a closer look at all three of these.
Adding the Social Icons block to pages and posts
There are a lot of reasons you might want to add social media icons to a page or blog post. Perhaps you want to add a call to action to a blog post, encouraging readers to follow you on social media. Or maybe you want to include social icons on your Contact page, so visitors have another way to connect with you.
Your first step is to open up the page or post you’re working on and decide where you want to add your social media icons. Then, click the blue + icon at the top right to open the Block Inserter. Search for “Social Icons,” then drag and drop the block into your page.
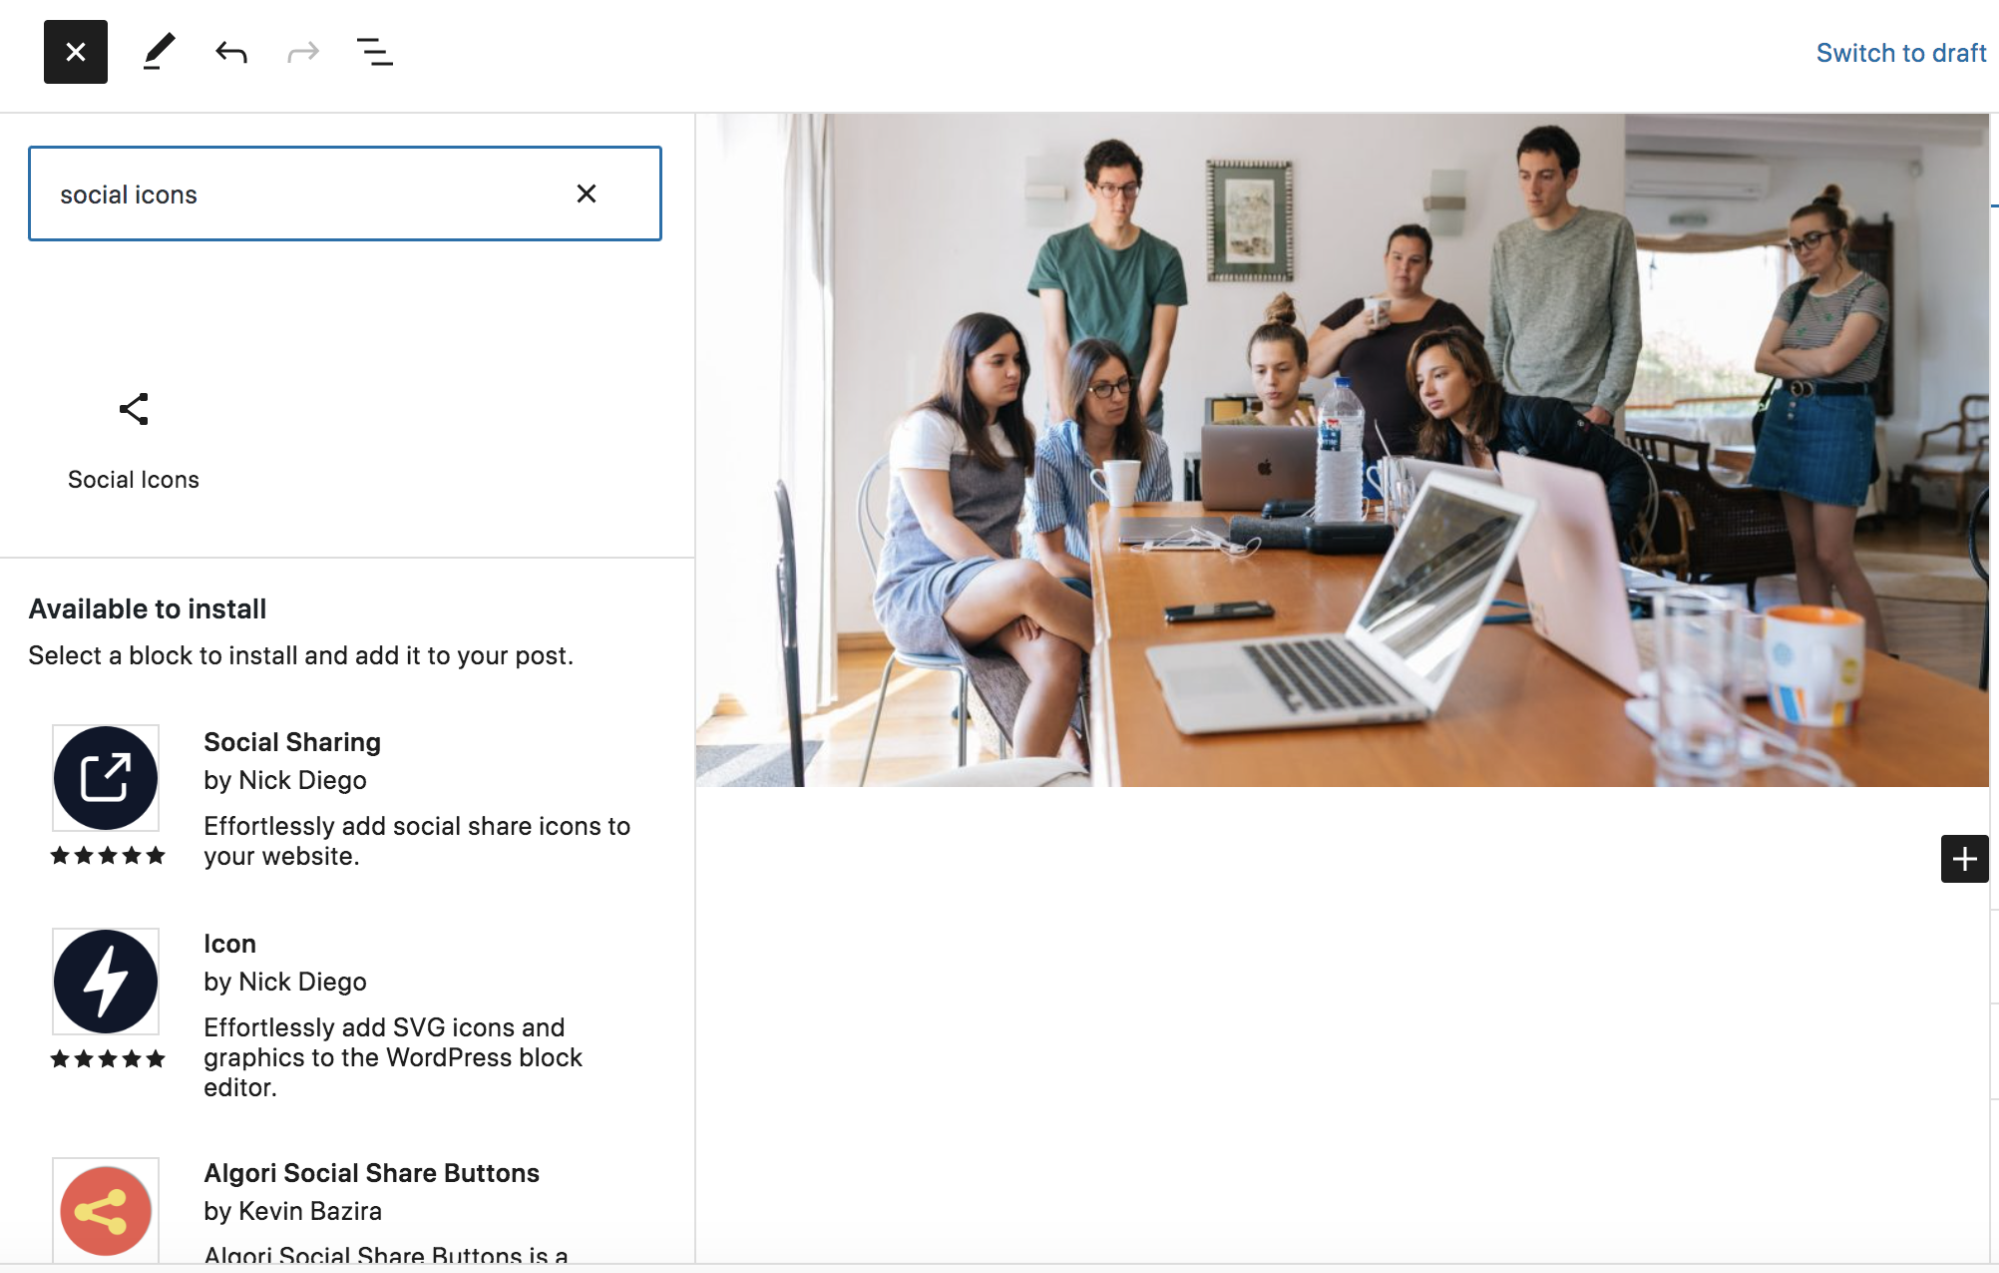
The block will be blank initially, and simply say, “Click plus to add.” Click the + icon at the right of the Social Icons block.

This will open up a new window that has several social media platforms listed, along with a search bar. You can add your social platforms here, or click the button that says Browse All to see a full list of options.

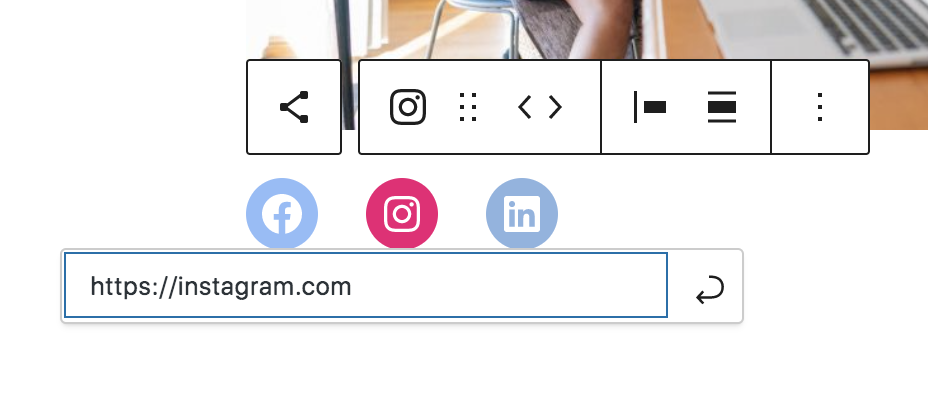
Add any platforms that you’d like, simply by clicking on their name. They’ll appear horizontally across the Social Icons block.

Select one of the individual icons to add a link to your social media account. You can also use the toolbar above the block to move icons left or right, change their alignment, and more.
For even more options, click the Social Icons block and open the Settings panel on the right. Here, you can adjust the icon colors, display their labels, change their shape, and more.

Once you’re happy with the way your social icons look, simply save your page or post. And that’s it!
Adding the Social Icons block to global site elements
Including your social media icons in global site areas like the header, sidebar, or footer of your WordPress website can be extremely beneficial. It means that visitors can easily find your accounts, and they’ll show up on the majority (or all) of your website pages.
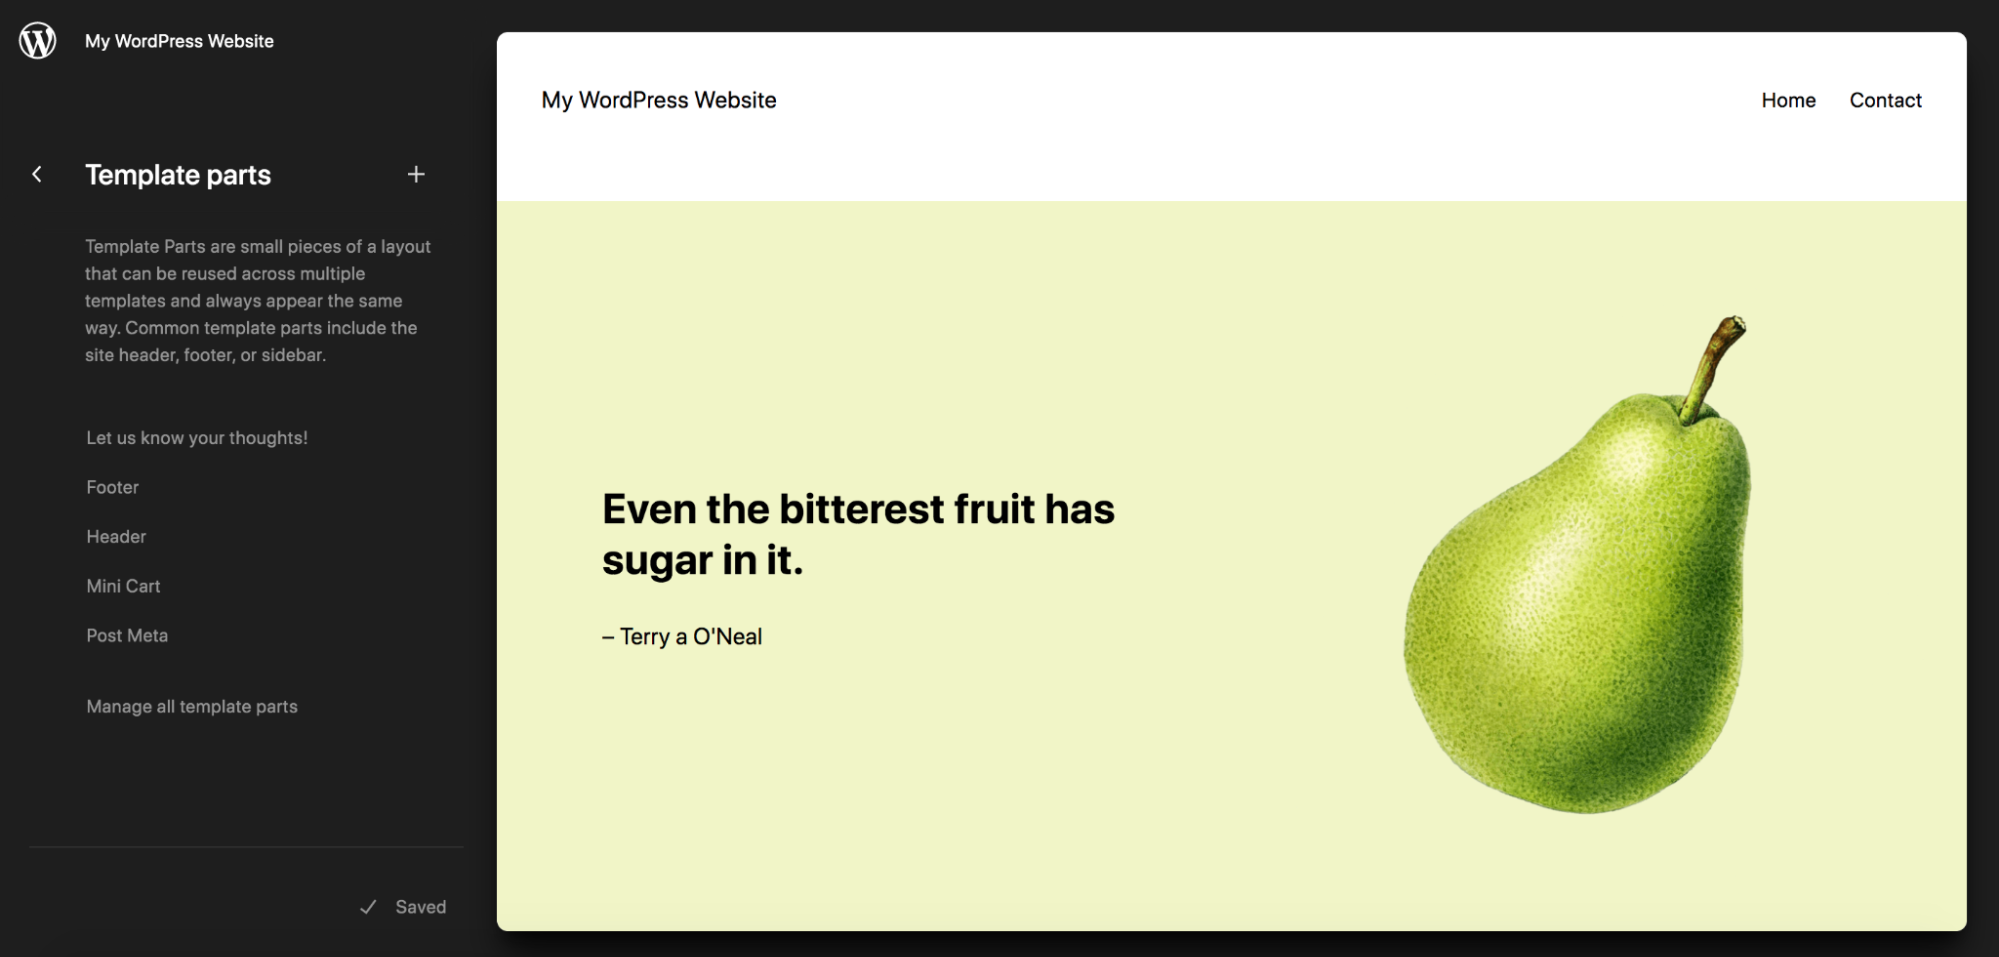
If you’re using a block theme, you can easily add the Social Icons block to global site areas (called “template parts”) using the Site Editor. In your WordPress dashboard, go to Appearance → Editor. Open Template Parts, and you’ll see a list of elements that you can edit. Choose the one you want to work with (in this example, the header).
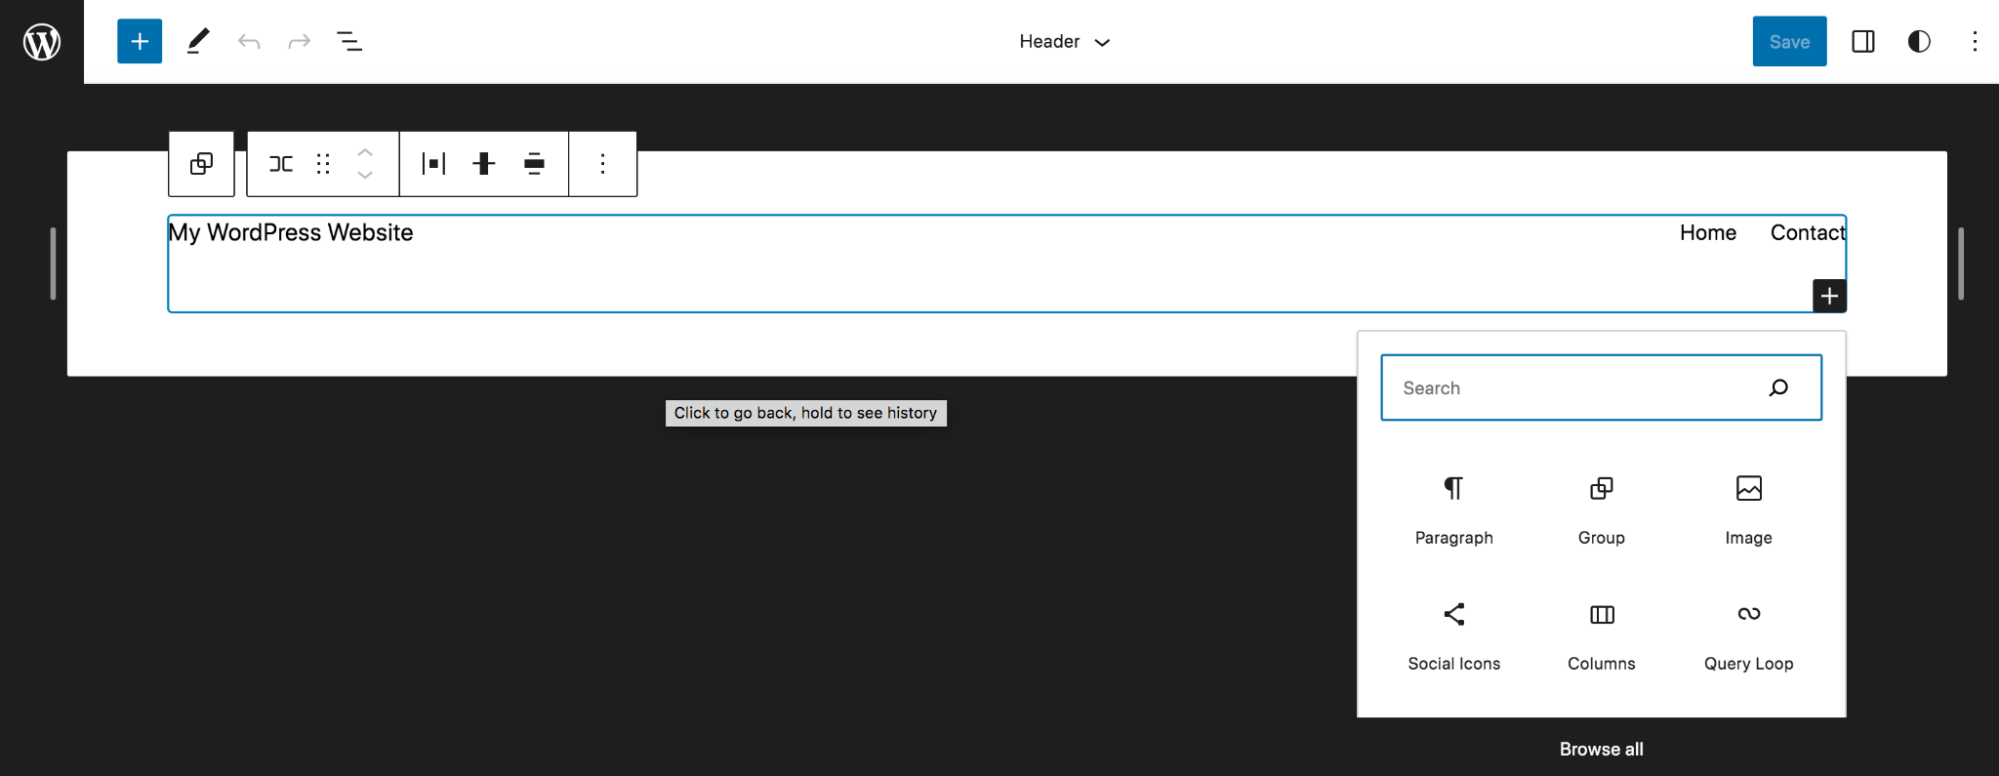
Here, you can make any changes you’d like to your header using blocks, and those changes will be reflected across your entire site. When you click on the header, you’ll see a black + icon at the bottom right, which will open a list of blocks, along with a search bar. Here, choose the Social Icons block.
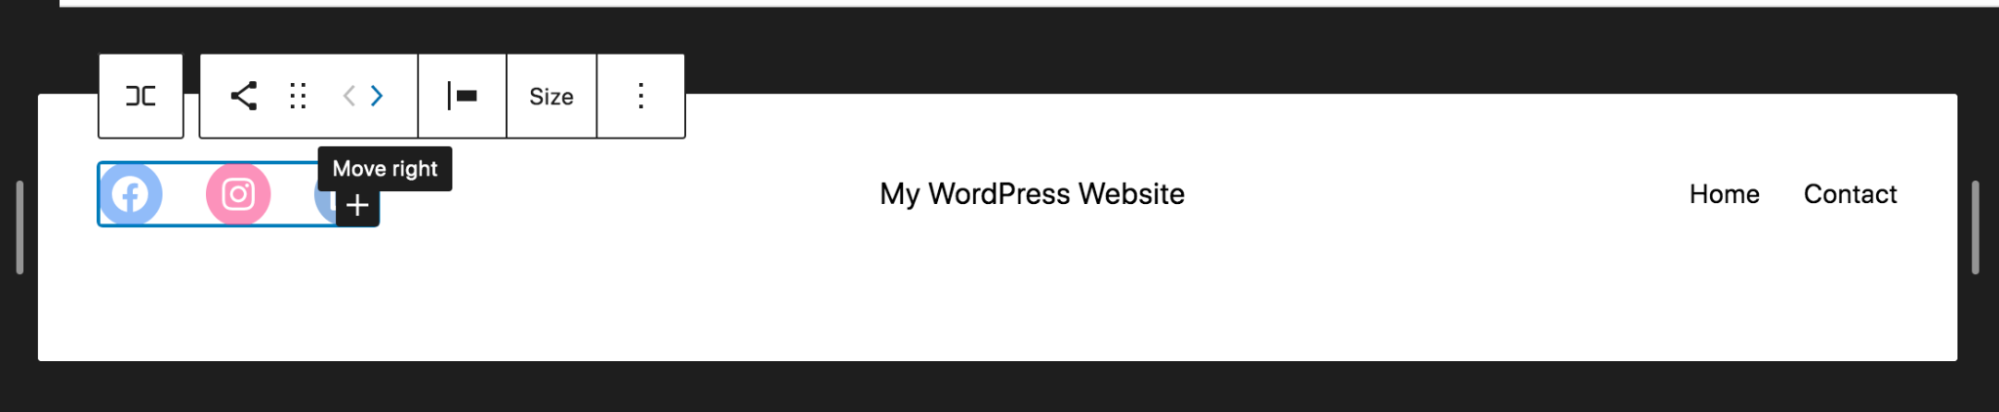
This will add the Social Icons block to the right of your header. Now, you can click the + icon to add your social media accounts to the list. Click on each individual icon to add the link to your profile, then use the block settings to customize the look and functionality of your icons, just as you did in the section above.

If you want to move the icons somewhere else in your header, simply click on the Social Icons block and use the left and right arrows that appear in the toolbar to change their position.
Once you’re happy with how things look, click the blue Save button at the top right of the Site Editor. And you’re done!
Adding the Social Icons block to widgetized areas
If you’re using a classic theme rather than a block theme, you can add the Social Icons block to any widgetized area on your website. These will vary based on the theme you’re using, but typically include global site areas like the sidebar.
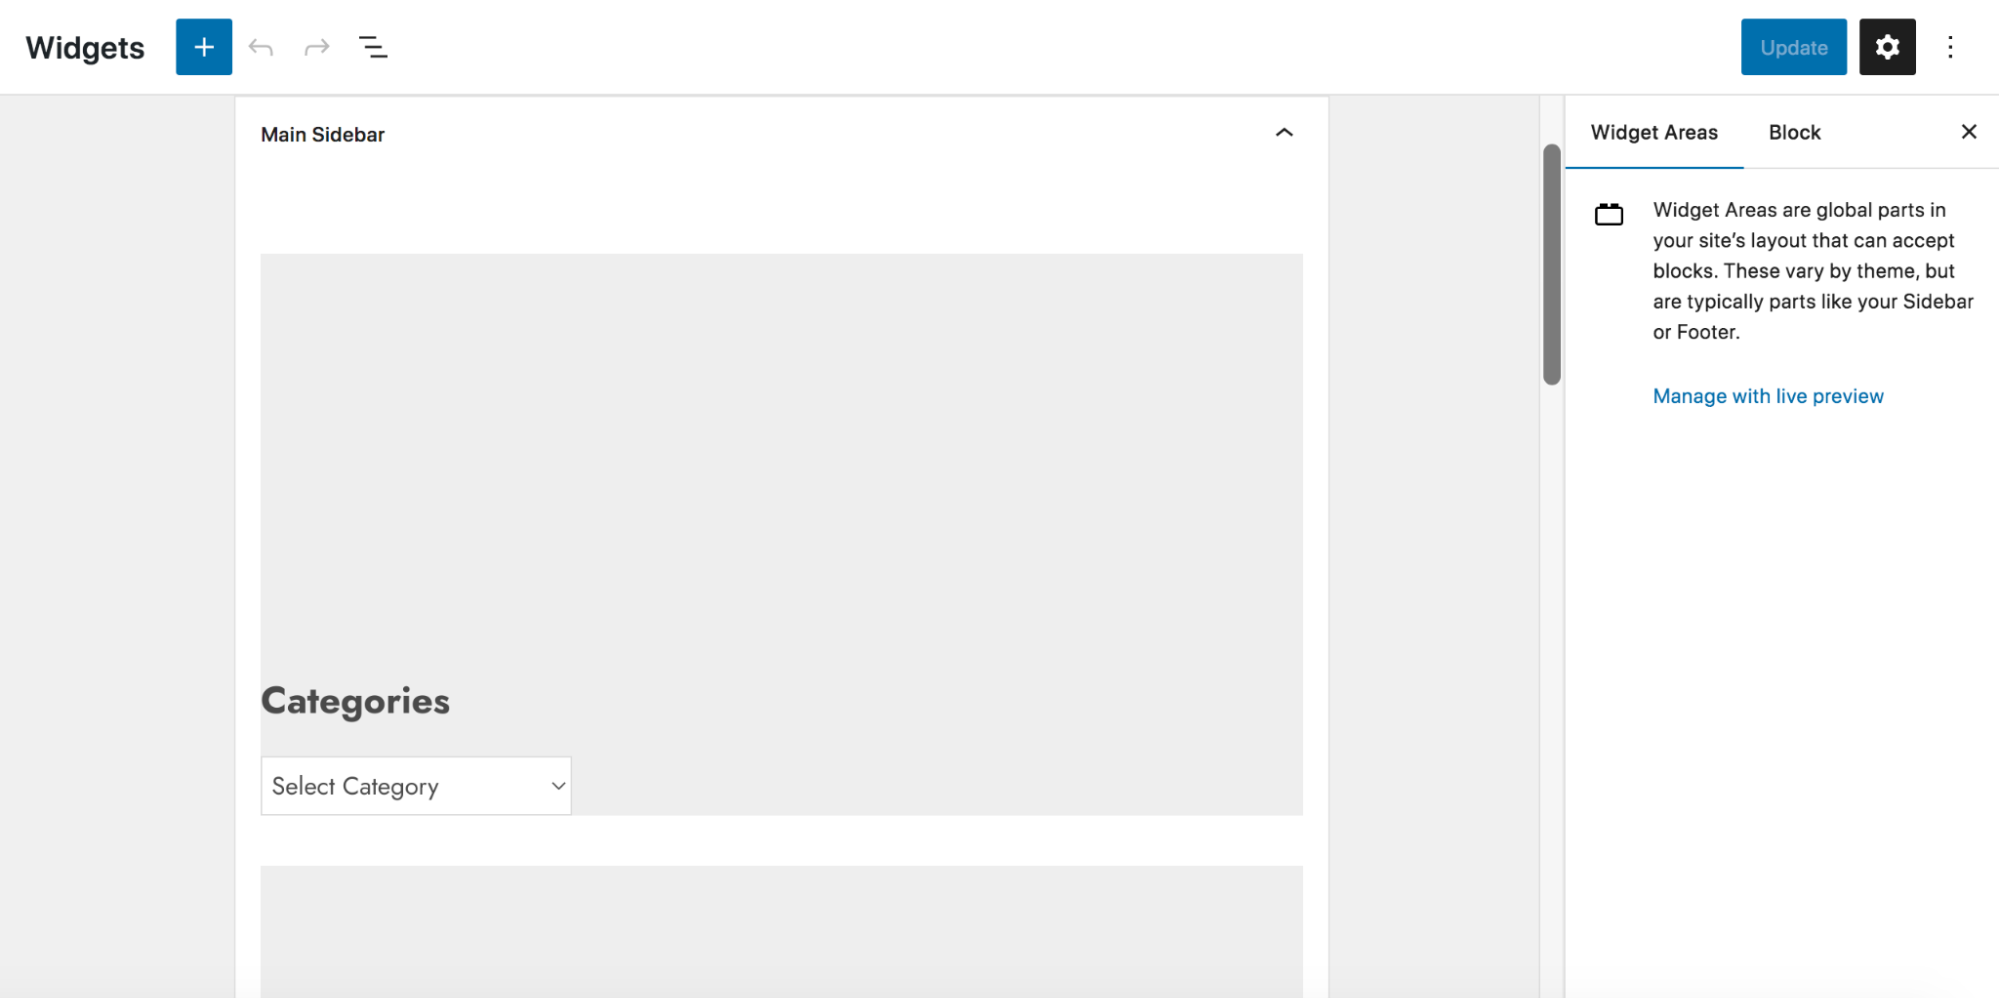
In your WordPress dashboard, go to Appearance → Widgets. Here, you’ll see a list of widgetized areas on your website, and you can expand the one you want to edit. In this example, we’ll be editing the Main Sidebar.
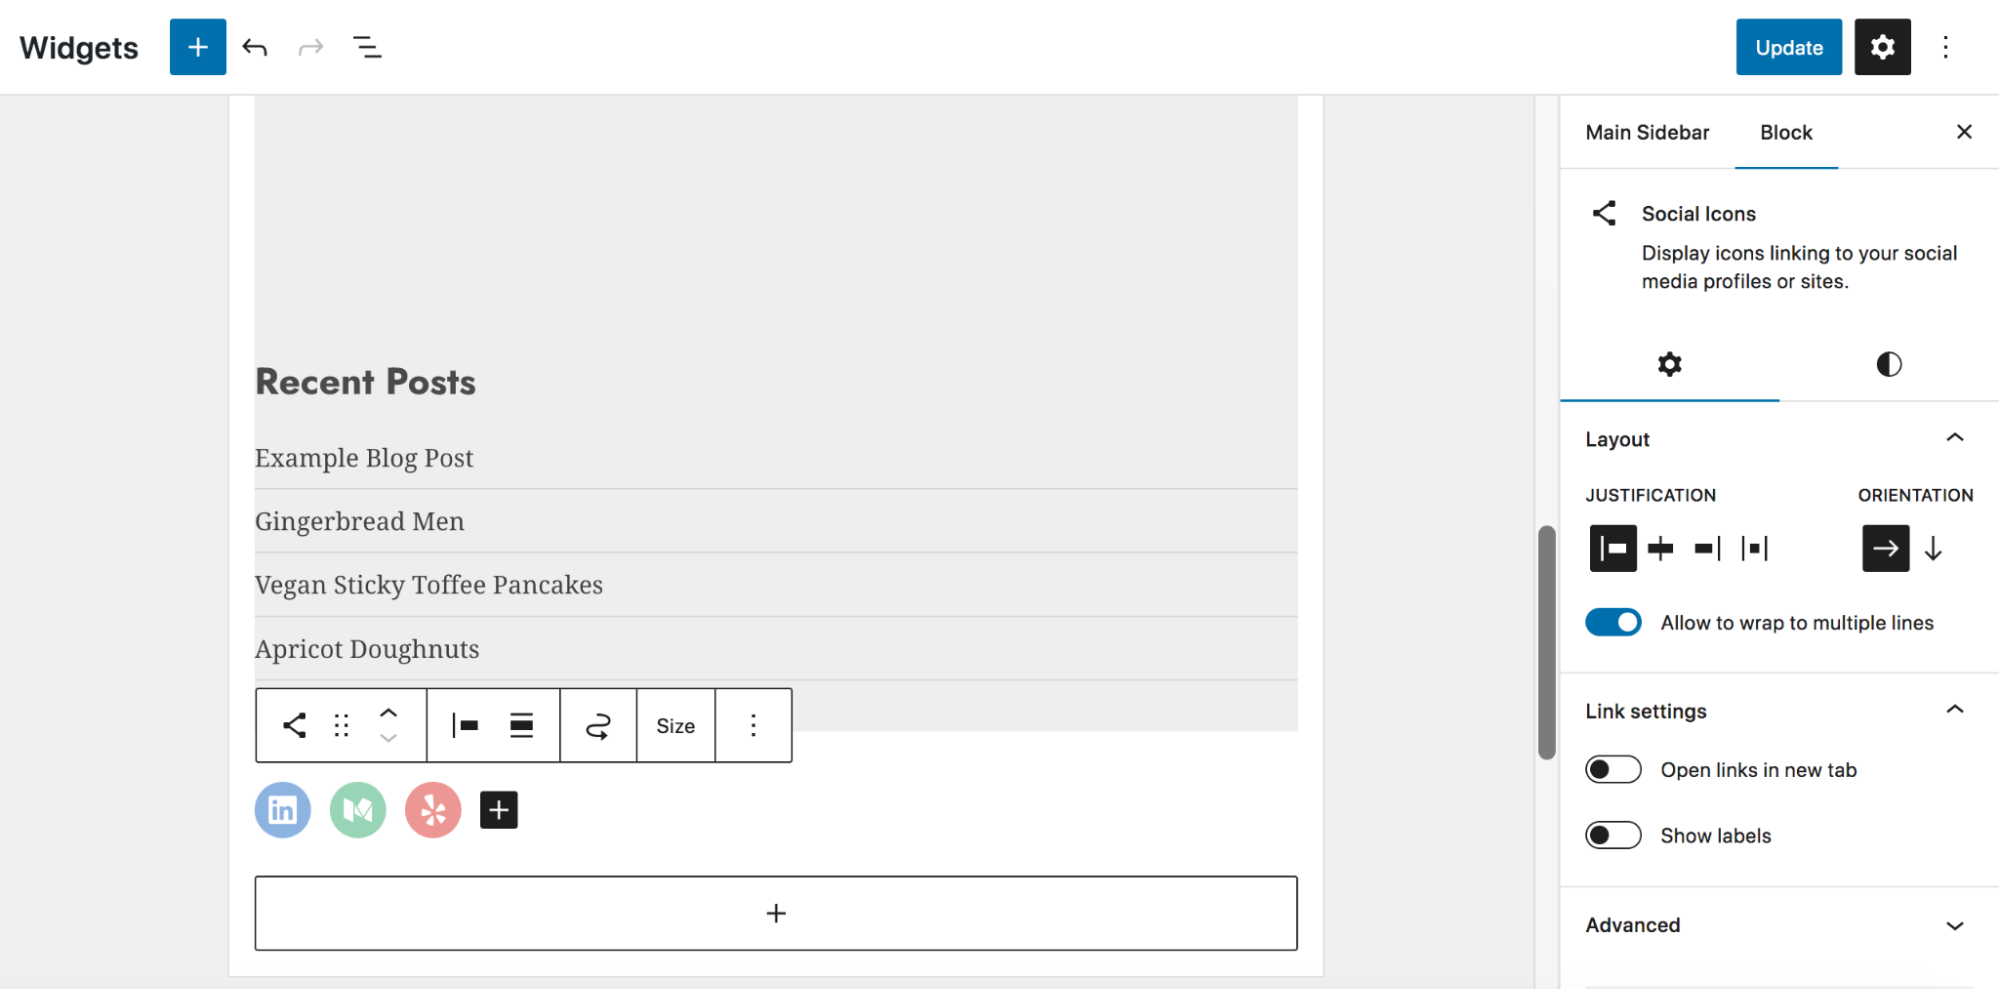
Click the + icon at the bottom of the widgetized area to see a list of blocks, along with a search bar that will allow you to search for more. Click the Social Icons block. Now, you can add your social media icons, include your profile links, and style the Social Icons block just as you would in the previous two sections of this post. If you want to move the icons to another part of the sidebar, simply drag and drop the block.
When you’re done, click the blue Update button at the top right to save your changes.
Need more social media features?
If you’re ready to level up your social media game on WordPress, and gain access to even more fantastic features, Jetpack Social is the answer.
It’s like upgrading from economy to first class on your favorite airline. Jetpack Social is a powerful plugin that offers a comprehensive social media sharing solution for WordPress. It’s developed by the same team behind WordPress.com and the multi-faceted, popular WordPress plugin — Jetpack. They’ve designed a suite of tools for WordPress security, performance, and growth.
Here’s what you can expect from Jetpack Social:
- Automatic sharing. Save time and effort by automatically sharing new posts to your social media profiles.
- Social media scheduling. Plan and schedule your social media posts in advance for better organization and consistency.
- Video sharing, engagement optimization, and more. Get more from each post by maximizing engagement and sharing craveable video content with your followers.
Jetpack Social offers a variety of plans, including a free option to help you get started.
Spread the word while you sleep
Adding social media icons to your WordPress site is a must for anyone who wants to grow their online presence.
Sometimes, finding success involves working longer hours or making temporary sacrifices for long-term gain. But other times? It’s just a matter of finding the right tools. With the Social Icons block and Jetpack Social, you have everything you need to supercharge your social media strategy and take your website to new heights.
Learn more about Jetpack Social here: https://jetpack.com/social/
Publish once. Share everywhere.
Automatically share your website content to your favorite social media platforms, from one place.
Get Jetpack Social for freeFrequently asked questions
Why are my WordPress social icons not showing up after I add the block?
The most common reason social icons remain invisible is that they do not have a link assigned to them yet. When you first add the Social Icons block to your page or footer, the icons appear faded or transparent in the editor.
They will not appear on the live site until you click on each individual icon and paste the full URL to your social media profile. Make sure you include the full “https://” part of the web address. Once you save your changes, the icons will become visible to your visitors.
What is the difference between social profile icons and social sharing buttons?
These two features serve completely different purposes on your website. Social profile icons are simple links that take visitors away from your site to view your company pages on platforms like Instagram or LinkedIn. Social sharing buttons are tools that let visitors share your specific blog post or page with their own friends and followers.
If you want to grow your following, use profile icons. If you want to increase traffic to your articles, use sharing buttons at the bottom of your posts.
Can I use custom colors for my social media icons in WordPress?
Yes. You can change the colors of the native Social Icons block without writing any code. After you click on the block, look at the settings sidebar on the right side of your screen. You will see options for “Icon Color” and “Icon Background.”
You can choose from your theme’s default palette or use the color picker to select a custom hex code that matches your brand. Just be careful to choose colors that have enough contrast so that all users can see them clearly.
How do I make social media icons open in a new tab?
By default, clicking an icon will open the link in the same browser tab. This takes the visitor away from your website. To fix this, click on the individual icon you want to edit. A small toolbar will appear above it.
Click the “link” symbol (it looks like a chain), and then click the “Edit” pencil or the settings toggle. Switch on the option that says “Open in new tab.” Repeat this step for every icon in your list to ensure your visitors stay on your site.
Is it better to use a plugin or the native WordPress block for social icons?
Using the native WordPress block is almost always the better choice for site speed and performance. The native block uses lightweight SVG images that load instantly and do not hurt your Core Web Vitals scores. Unless you need very specific animations or tracking features that only a plugin can provide, stick to the built-in block to keep your site fast.
How do I add social icons to the WordPress menu or header?
If you are using a modern Block Theme, you can add icons to your header by going to Appearance and then Editor. Click on the header template part and insert the Social Icons block right next to your navigation menu.
If you are using a Classic Theme that does not support blocks in the header, you might need to install a plugin like “Menu Image” or use a widget area if your theme provides one in the header. Check your theme documentation to see if it supports header widgets.
Do social media icons affect my website’s SEO rankings?
Social media icons do not directly improve your SEO rankings, but they help indirectly. Google looks for signals that a business is legitimate and trustworthy.
Linking to active, real social media profiles helps search engines verify your brand’s identity. This is part of what SEO experts call E-E-A-T (Experience, Expertise, Authoritativeness, and Trustworthiness). Additionally, if users engage with your brand on social media and then search for your brand name later, that branded traffic is a strong positive signal to search engines.
What should I do if the social network I use is not in the block list?
The WordPress block library covers most major platforms, but sometimes a specific niche network is missing. If you cannot find the icon you need, you have two options.
First, you can use the generic “Link” icon available in the block options and label it clearly. Second, you can install a plugin like “Font Awesome” that offers a much larger library of icons. However, remember that installing a plugin just for one icon might add unnecessary code to your site, so only do this if that specific network is critical for your business.
How many social media icons should I display on my website?
You should only display icons for the platforms where you are actively posting and engaging with users. A common mistake is adding every possible icon, including ones for dormant or empty accounts.
If a user clicks an Instagram icon and sees you have not posted since 2019, it makes your business look neglected or closed. Limit your list to the top two or three platforms where you actually want people to contact you. This keeps your design clean and directs users to your best content.
Publish once. Share everywhere.
Automatically share your website content to your favorite social media platforms, from one place.
Get Jetpack Social for free