
If you currently run a WordPress website or are considering building one, you’ve probably heard of the block editor. This powerful tool is built into WordPress core, giving website owners and developers the ability to build their entire site from the ground up without needing to use code.
But there’s a lot more to uncover about the block editor! Let’s take a look at what it is, the pros and cons, and how to use it.
What is the WordPress block editor?
The block editor is a revolutionary website editor that was released as part of WordPress Version 5.0, replacing the Classic Editor. It enables beginners and advanced users alike to build pages, templates, and entire websites by dragging and dropping elements into place — no code required!

Each element is called a block, and can be anything from paragraphs or images to columns, pricing tables, social media feeds, and more. To design a page, post, or other website section, a user simply has to drag and drop blocks into place, then style each one using a straightforward settings panel.
It’s more than just a standard page editor. Website owners and developers can use blocks to customize headers, footers, sidebars, archive pages, checkout and cart pages, and more. It truly makes website design accessible to everyone.
Before we dive in, let’s define a few terms:
- Blocks. Individual elements that can be added to content. E.g. images, paragraphs, headings, videos, columns, and more.
- Block patterns. Groups of pre-selected blocks that you can use to build entire sections of content. E.g. banners, post designs, column layouts, and more.
- Templates. Essentially, frameworks that define the design and layout of specific types of content. Posts, products, and category pages are all examples of content that have their own templates.
- Template parts. A part of your site that appears on most or all of your pages. E.g. headers, footers, and comments.
- Site Editor. A tool that brings block functionality to additional areas of your site, including templates and template parts. You must have a WordPress block theme installed to use the Site Editor.
Pros and cons of the block editor
Like with everything, the block editor has advantages and disadvantages. Let’s take a look.
Pros of the block editor
1. It helps you be faster and more efficient
The block editor is incredibly powerful, and has lots of built-in features specifically designed to improve your workflow. Here are some features of the block editor that make designing, publishing, and editing much faster:
- Reusable blocks. You can save a block and use it over and over on your website. Then, when you edit that block, it will update across all instances. For example, you might create a call to action that you can insert on all of your landing pages as you build them. And if you need to change the button link, it will be updated across all pages.
- Block patterns. Block patterns are predefined groups of blocks that are available by default in WordPress or through third-party plugins. They allow you to quickly insert entire sections of pages at once, like headers and multi-column layouts. You can just add these into a page, customize the colors, and you’re good to go!
- Keyboard shortcuts. These allow you to keep your hands on the keyboard the entire time you’re adding and editing content on your site. Navigate through different blocks, save changes, insert blocks, style text, and more.
- Easy blog post creation. You can drag and drop content directly into the block editor, and it will automatically convert it to appropriate blocks. This can save you a tremendous amount of time! For example, if you write a post in Google Docs, you can paste it into WordPress in its entirety, and it will keep headers, images, links, and more. There’s no need to individually add graphics and other elements!
- Set styles globally. Set colors, fonts, spacing, and other design specifications that apply to blocks throughout your site (if using a block theme). This keeps you from having to individually edit each page and makes things easier on team members or clients who add content to your site.
2. It enables beginners to create complex, beautiful sites without writing code
The block-based interface of the block editor makes it accessible for any type of user, including complete beginners. Like with anything, there’s a small learning curve, but you can take advantage of helpful WordPress block editor official documentation, tutorials, and community resources to get the hang of things.
Then you can use the block editor to drag elements into place, making design choices like color and spacing with a simple settings panel. There’s no need to edit code or even use shortcodes that can quickly get complicated.
And you can take things even further, applying that same concept to your header, footer, sidebar, and page templates. This means that even beginners can fully customize all aspects of their site — checkout pages, search pages, archive pages, and more.
Block patterns are another great feature for beginners. These are set groups of blocks that you can quickly add to build entire sections of a page, like pricing tables, hero sections, and image galleries.
3. It allows for true full-site customization
Unlike many other solutions, the WordPress block editor truly lets you customize every aspect of your site using its features. Go beyond page and post designs! Here are just a few site elements that you can build with blocks:
- Headers
- Footers
- Search results pages
- Archives (like post and product categories)
- 404 pages
- Blog post templates
- Product templates
- Comment sections
This is a huge opportunity to build a website that truly stands out with design and functionality that meets your specific needs. For example, you could modify the product template to include a video of your product in action, a size chart, or an allergen notice that appears across all items in your store. Or you could add a call to action that is automatically added to the bottom of all of your blog posts. The possibilities are endless!
4. It improves website performance
Using the block editor can improve the speed and performance of your site as well. Not only does it enable you to skip heavy page builders, it also reduces the number of plugins you need to install to access certain functionality. For instance, instead of installing a plugin for image galleries, you can simply insert a Gallery block into your page and style it however you see fit.
Plus, the code output from the block editor is lighter and cleaner than that of page builder plugins. That means that when the same page design is made with the block editor instead of a page builder, the page should load faster by default.
5. There are lots of integrations with third-party plugins
Because the block editor is included with WordPress by default, it works with popular themes and plugins. This also means that third-party developers typically adapt their solutions to work with the block editor.
There are lots of great plugins that add blocks and block patterns to your library. For example, Jetpack includes blocks for forms, payments, social media feeds, email captures, and more.
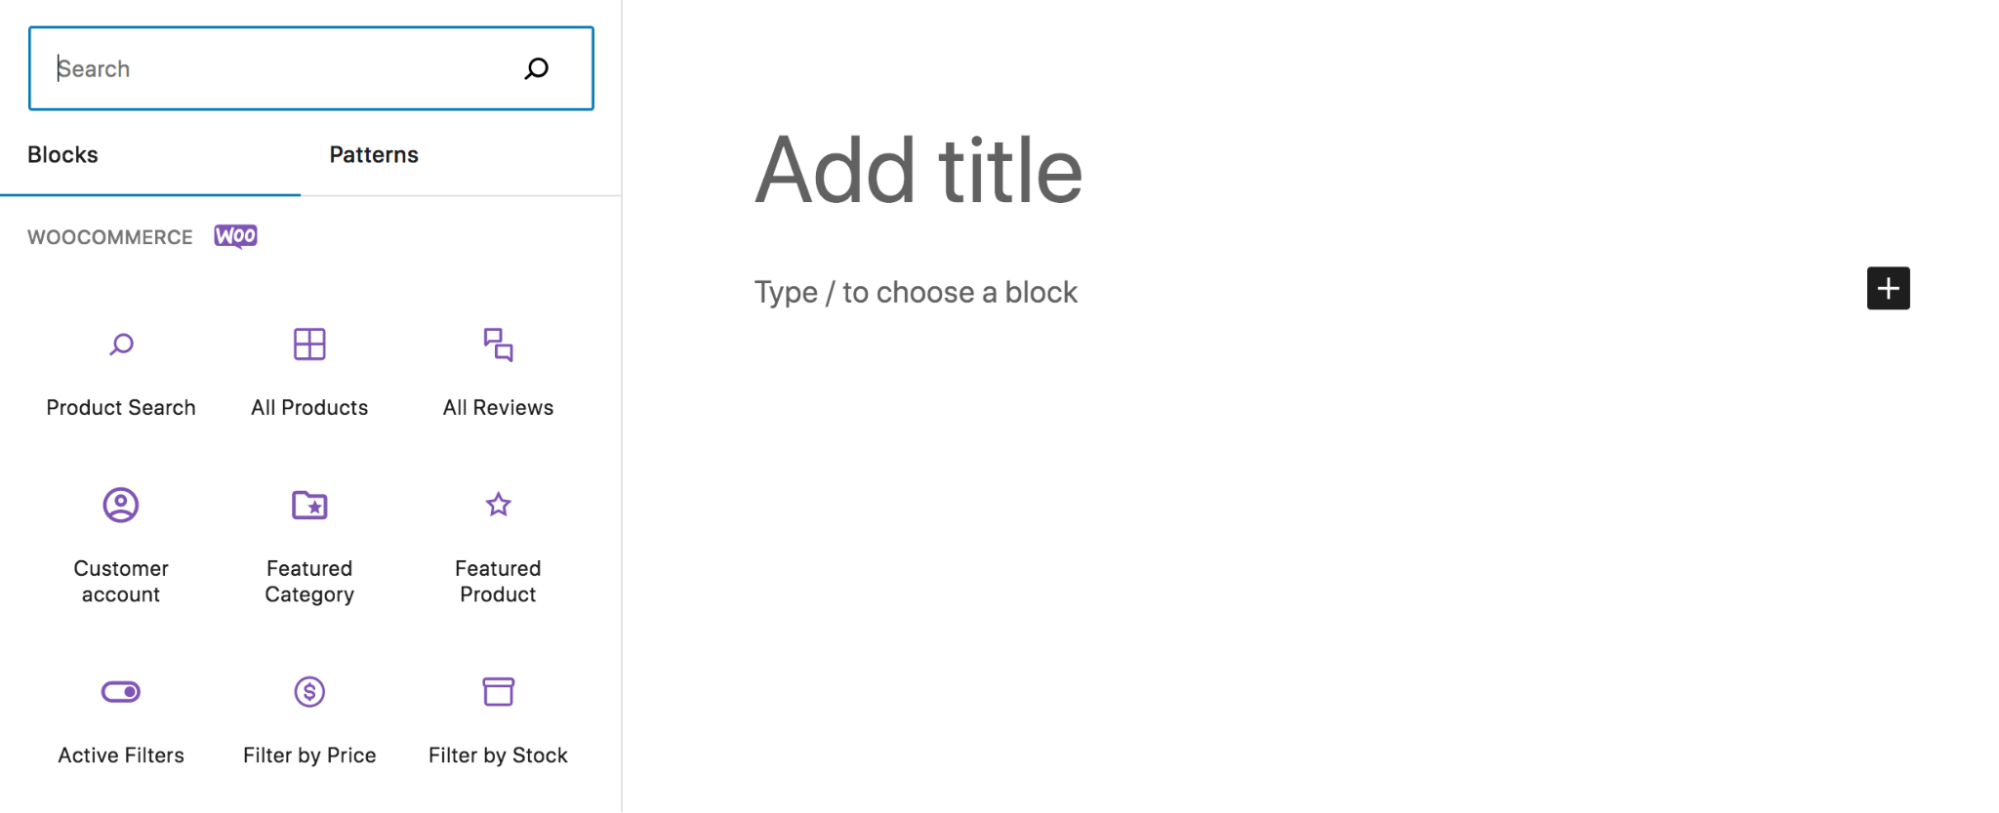
WooCommerce adds blocks for displaying products, reviews, filters, and just about anything you could need to create an effective ecommerce store.
6. It’s constantly improving
The best is yet to come! There’s a team of developers and volunteers who constantly work to release new features and improvements, also ensuring that WordPress is secure and accessible.
Stay up to date on the latest here.
Cons of the block editor
Of course, the block editor may not be the right solution for every single website. Here are a few downsides:
1. You may need to switch themes or rebuild portions of your existing site
Many page builders and themes support the block editor and make it simple for you to switch to the block editor. However, that’s not always the case. It’s possible that you’ll need to rebuild portions of your site to move to a fully block-based system.
If you want to take advantage of the Site Editor, you’ll also need to use a block theme. That means that, if you’re not using a block theme currently, you’ll need to switch to a new theme. Depending on your situation, this can require quite a bit of work. However, in the majority of cases, it’s well worth it!
2. There may be a learning curve
Any new technology comes with a bit of a learning curve, no matter your experience level. So if you intend to build a new site with the block editor or convert your existing site to blocks, you’ll want to schedule time to learn the system.
Thankfully, there are lots of great resources available to help, including:
- Learn WordPress: Chock full of tutorials and courses that walk you through all the details of the block editor
- The block editor documentation: A support guide with instructions and images
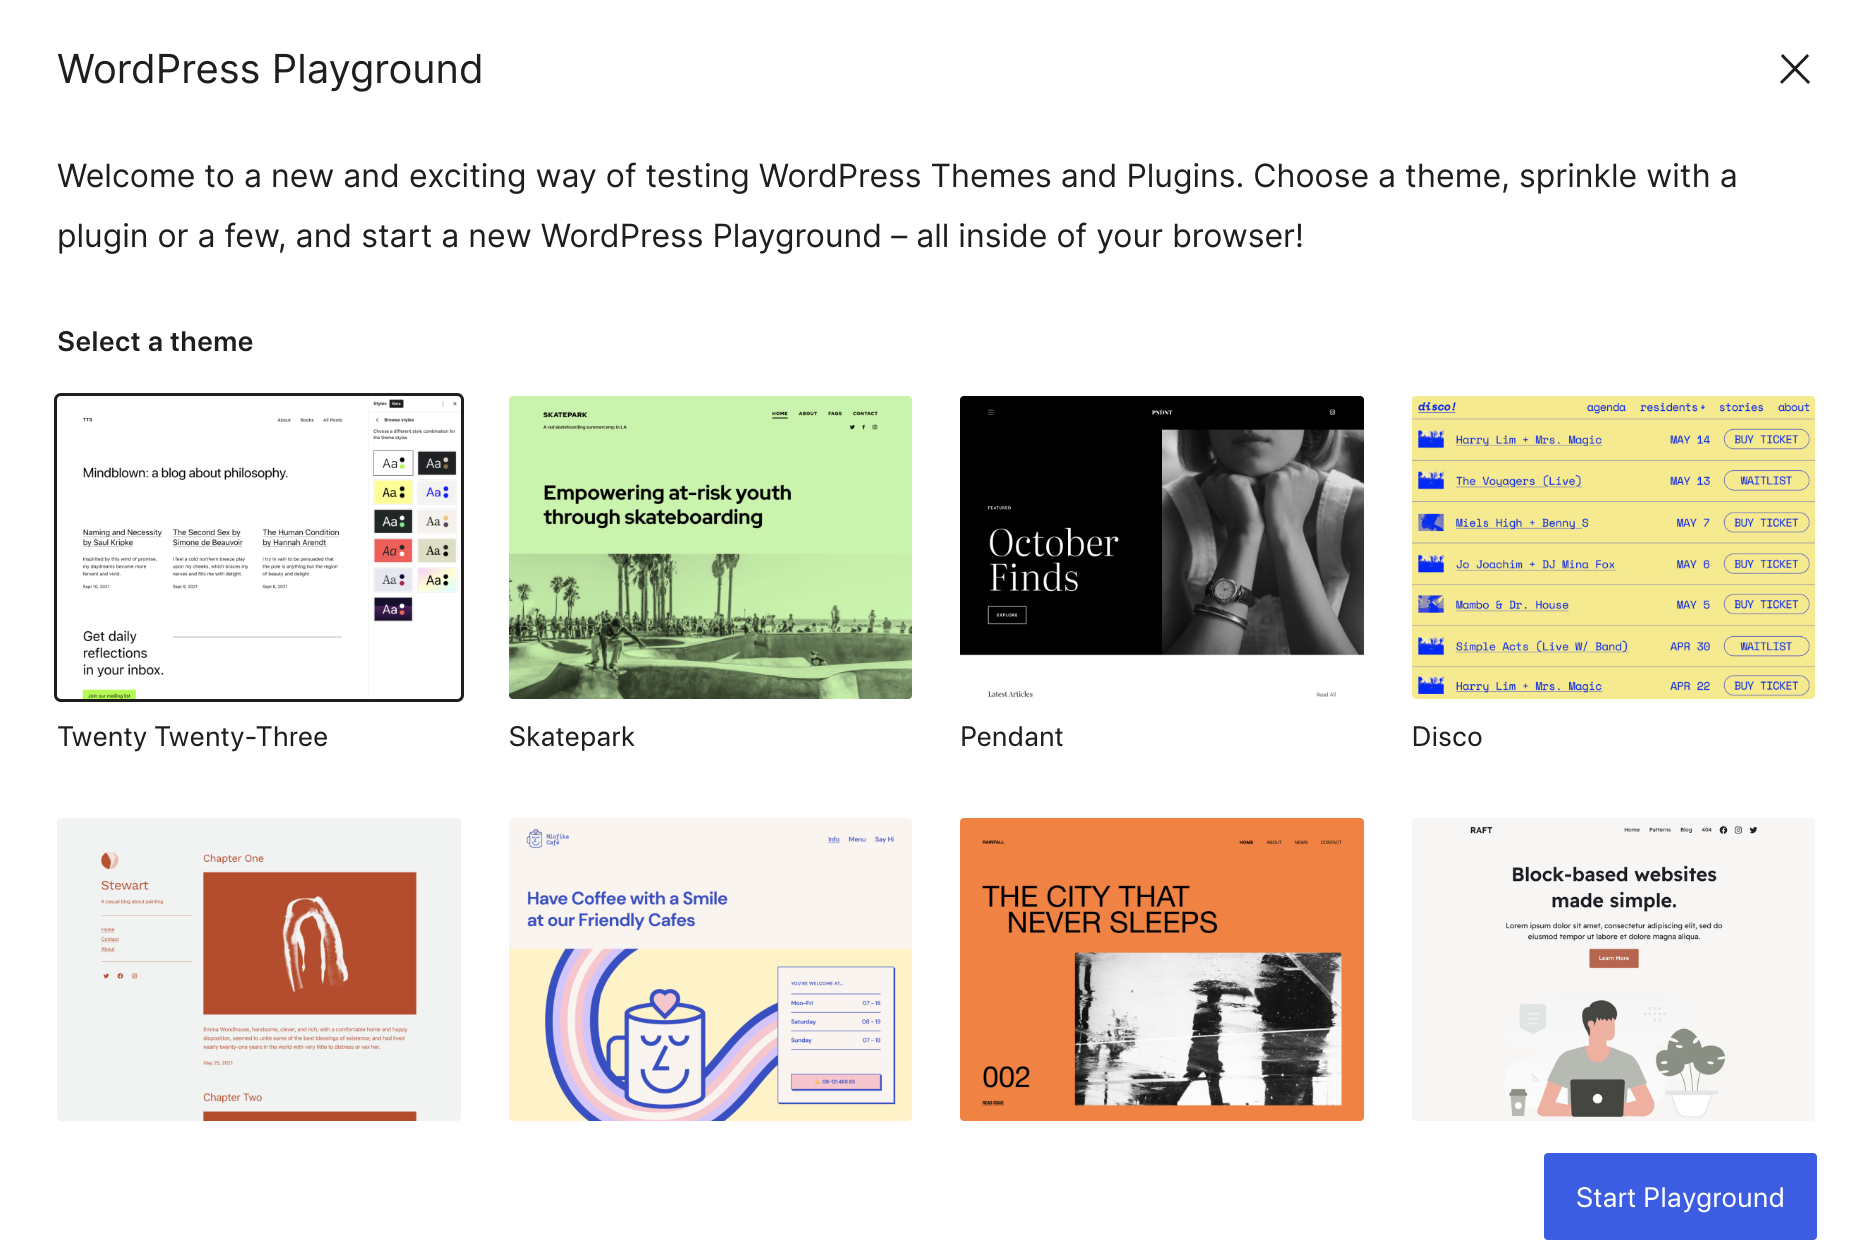
- WordPress playground: A free, blank site where you can play around with the block editor and get the hang of things before making major changes to your live site
How to access and use the block editor
Now that you understand a little more about the block editor, it’s time to jump in and learn how to use it.
The block editor interface
Let’s start by introducing the components of the block editor. This is what you’ll see when you build a page, post, or other site element. We’ve identified some major components in the following image, which we’ll discuss shortly:

Here’s a breakdown of these elements:
- Block Inserter: This is where you’ll select and add blocks. You can see a list of available blocks and patterns, organized by block type, and drag them directly from this panel. Open and close the Block Inserter using the button at the top left.
- Blocks: This tab shows all available blocks.
- Patterns: This tab shows all available block patterns.
- Block search bar: Use this to search for a specific block or pattern.
- Tools: This button provides different interactions for selecting, navigating, and editing blocks.
- Undo/Redo: Undo an action taken in the block editor, or redo that same action.
- Details: This provides information about the page or post, like number of words and characters, time to read, and number of paragraphs, headings, and blocks.
- List View: A tool that helps you navigate blocks and content. View all the blocks on the page, move them around, and switch back and forth quickly and easily.
- Settings panel: Access settings for the page/post or each individual block. This is where you’ll make changes to design elements like spacing, colors, and more.
- Additional options: Change your view type, switch to the code editor to edit in HTML, and customize other aspects of your block editor experience.
- Add new block: Click this icon to add a new block based on the icon’s location on the page.
Using blocks
Now that you know a bit about where important elements lie in the block editor, we’ll show you how to add and edit blocks. In this tutorial, we’ll be creating a blog post. The concepts will be similar whether you’re working on a post, page, or other elements of your site.
In this case, you’ll go to Posts → Add New in your WordPress dashboard. This will automatically open up the block editor for a new post. Start by adding a title at the top of the post.
Then, click the blue + icon in the top-left corner to open the Block Inserter. Here, you’ll see a list of available blocks. These are categorized by type, but you can also use the search bar to look for a specific one. If you hover over a block, it will provide more information and show a preview of what that block will look like in action.
Let’s start by adding a Paragraph block. You can either find it in the Block Inserter and drag it into the main content area on the right or just start typing where it says, “Type / to choose a block.”

When you place your cursor inside your text, a new menu will appear above it with styling options. From left to right, these are:
- Paragraph: Click on this to convert the block into a different block type. For example, you could transform it into a heading.
- Drag: Move the block wherever you’d like in relation to the other blocks on the page.
- Move up/down: Move the block up or down one space on the page.
- Align: Left, center, or right align the text.
- Bold: Bold any text you select within the paragraph.
- Italic: Italicize any text you select within the paragraph.
- Link: Turn any text you select into a link.
- More: See additional options to highlight or strike-through text, turn a number into subscript, and more.
- Options: Access additional capabilities, like making the block reusable, duplicating it, locking it, and more.

Make whatever adjustments you’d like to the text within the paragraph. Then, select anywhere within the block and click on the icon at the top right. This will open the Settings panel.

You’ll see tabs for both Post and Block at the top of this panel. For now, let’s focus on the Block tab. This panel shows options that are specific to the block you’ve selected — in this case, the Paragraph block.
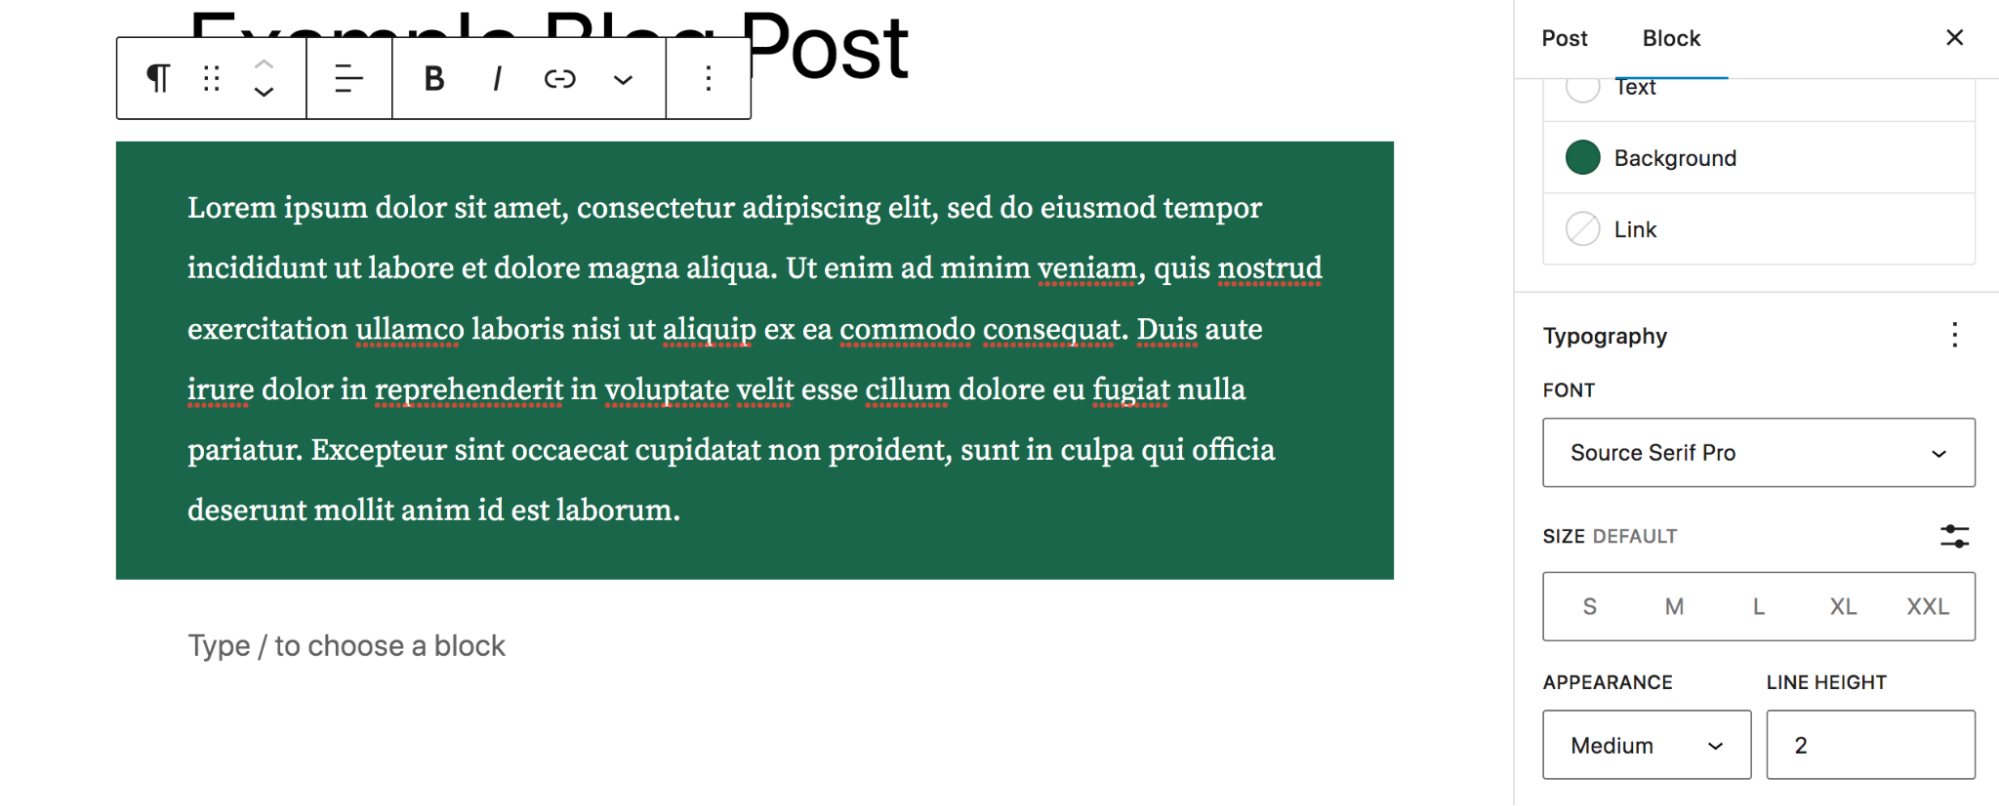
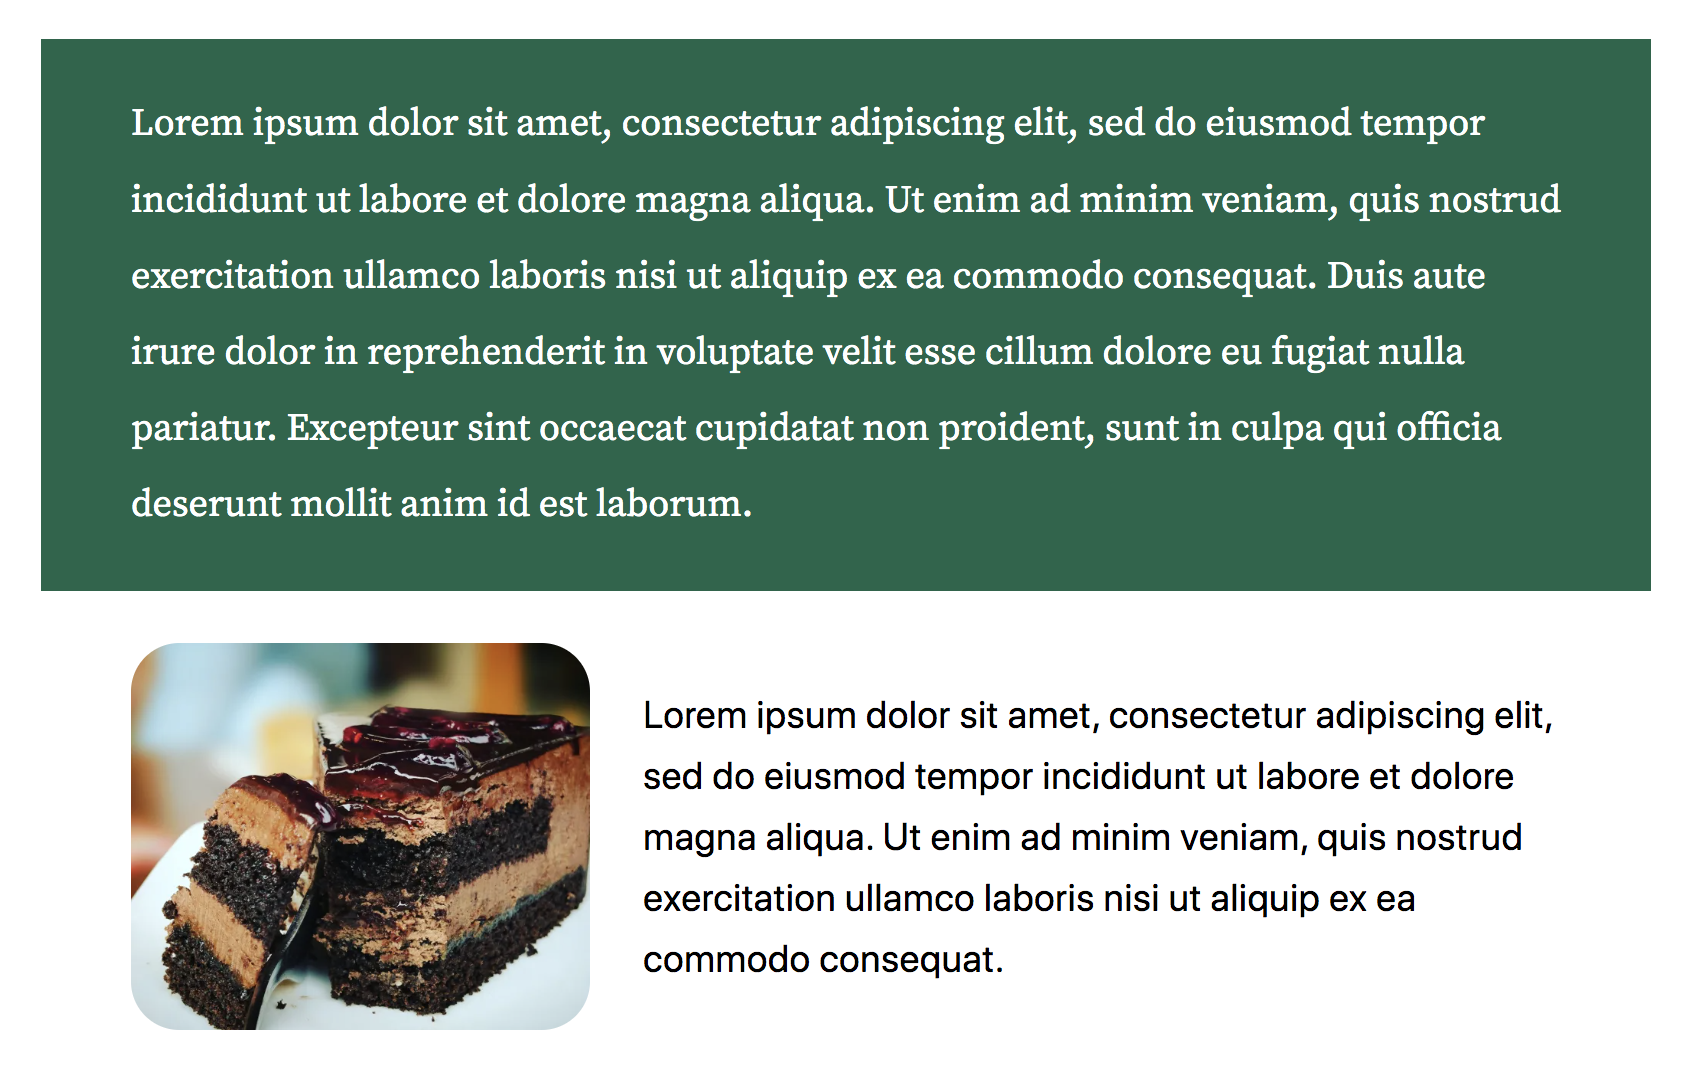
In the Color section, you can set a color for your text, background, and links, just for that paragraph. You can even create your own gradient if you’d like. For example, you might make a paragraph stand out from the rest of the post by using a deep green background and white text.
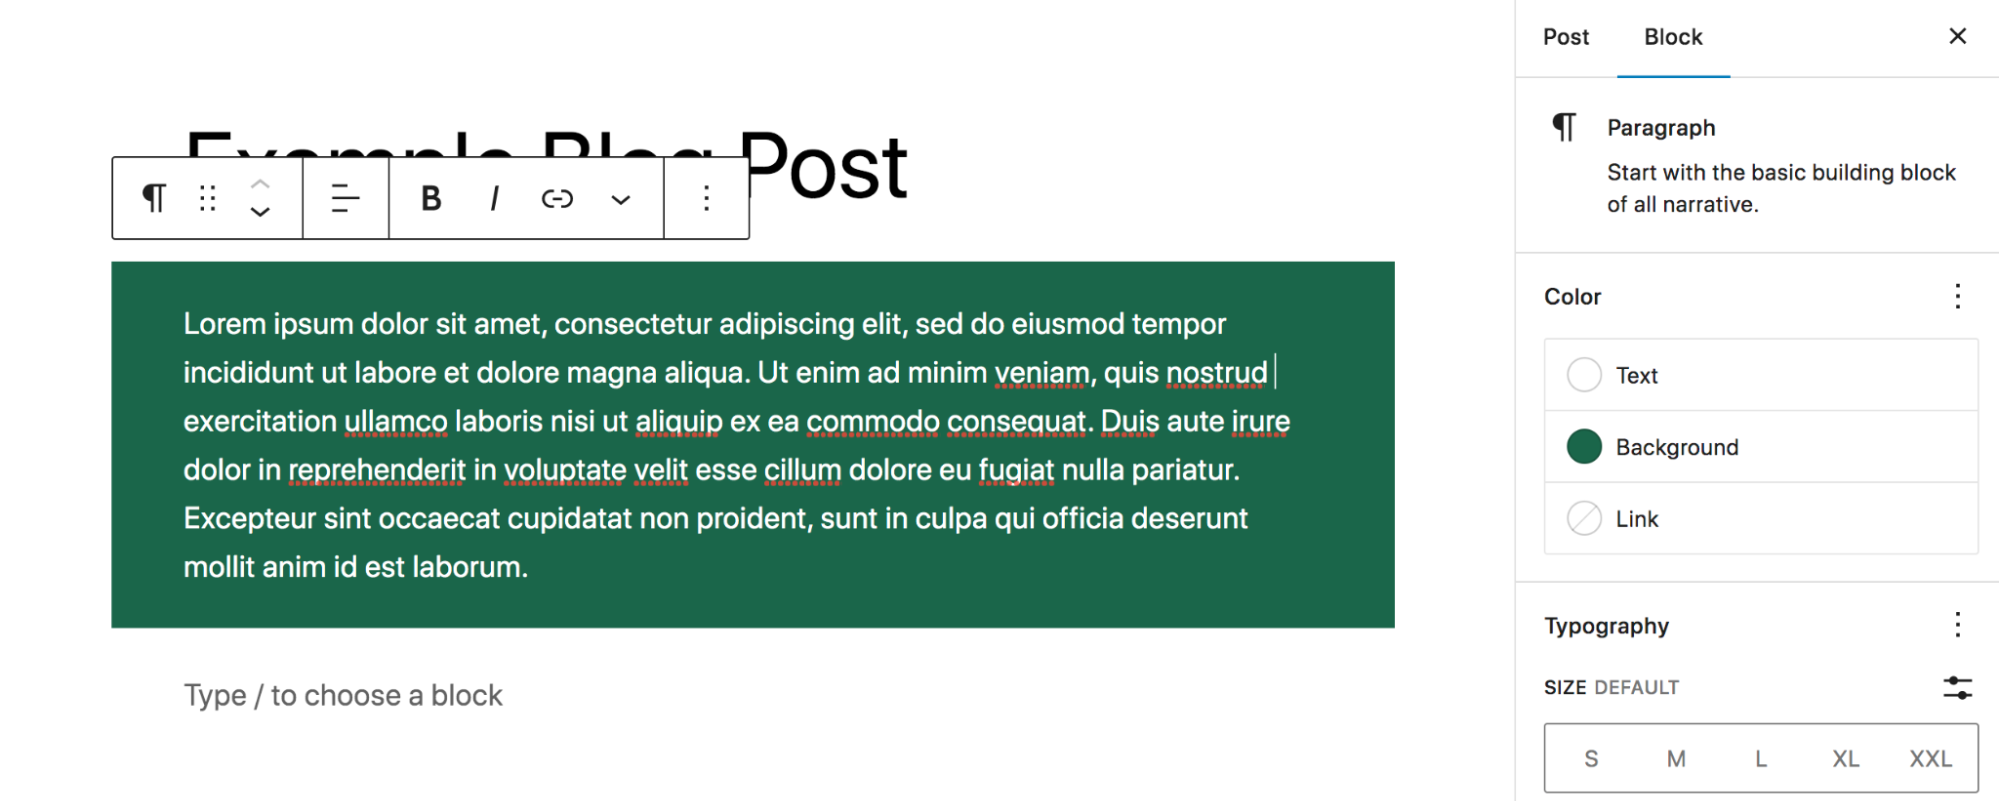
In the Typography section, you can set font options. While size appears by default, you can click the three vertical dots to unlock more choices, like font family and letter spacing. In this example, we decided to change the text to a serif font and add more space between the lines of text (called line height).
Under Dimensions, you can adjust the padding and margins around the text, adding or reducing the space as needed.

And under Advanced, you can add an HTML anchor, so you can link to the section at another point in the post, or set a CSS class for styling purposes.
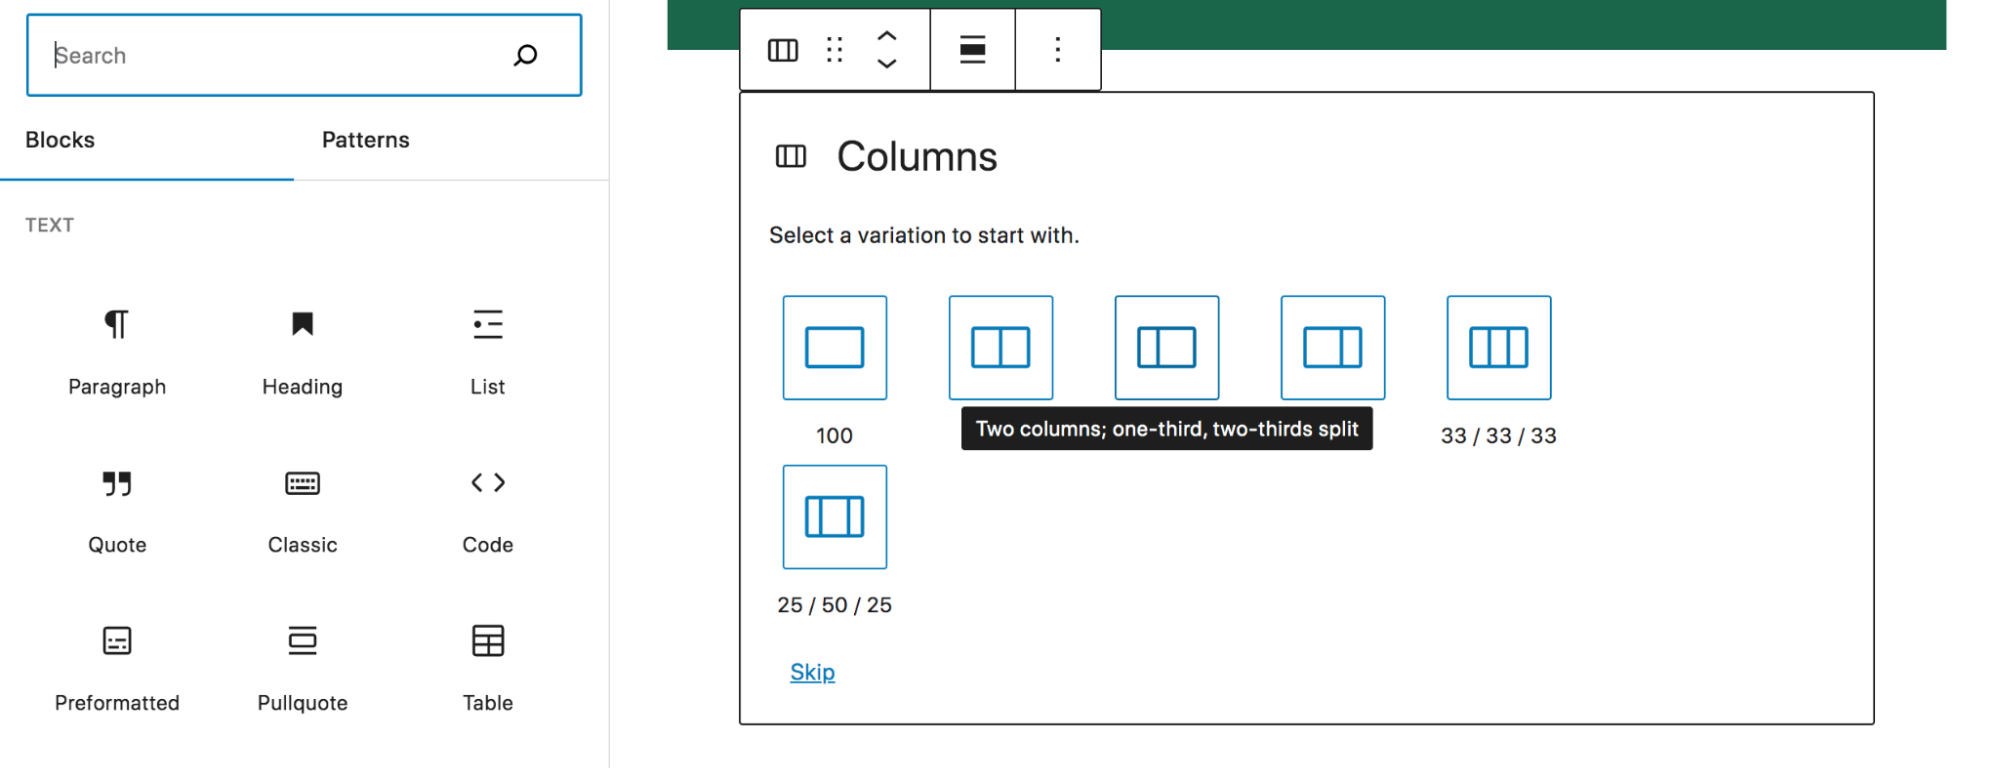
Now that our paragraph block looks how we’d like, let’s add two columns to our post — one with an image and another with a second paragraph. Add a Columns block to your page, then select the column layout that you’d like. We’ll go with 33/66 this time, which is a ⅓, ⅔ split.
You’ll see that you can select each column individually to style it and add blocks.

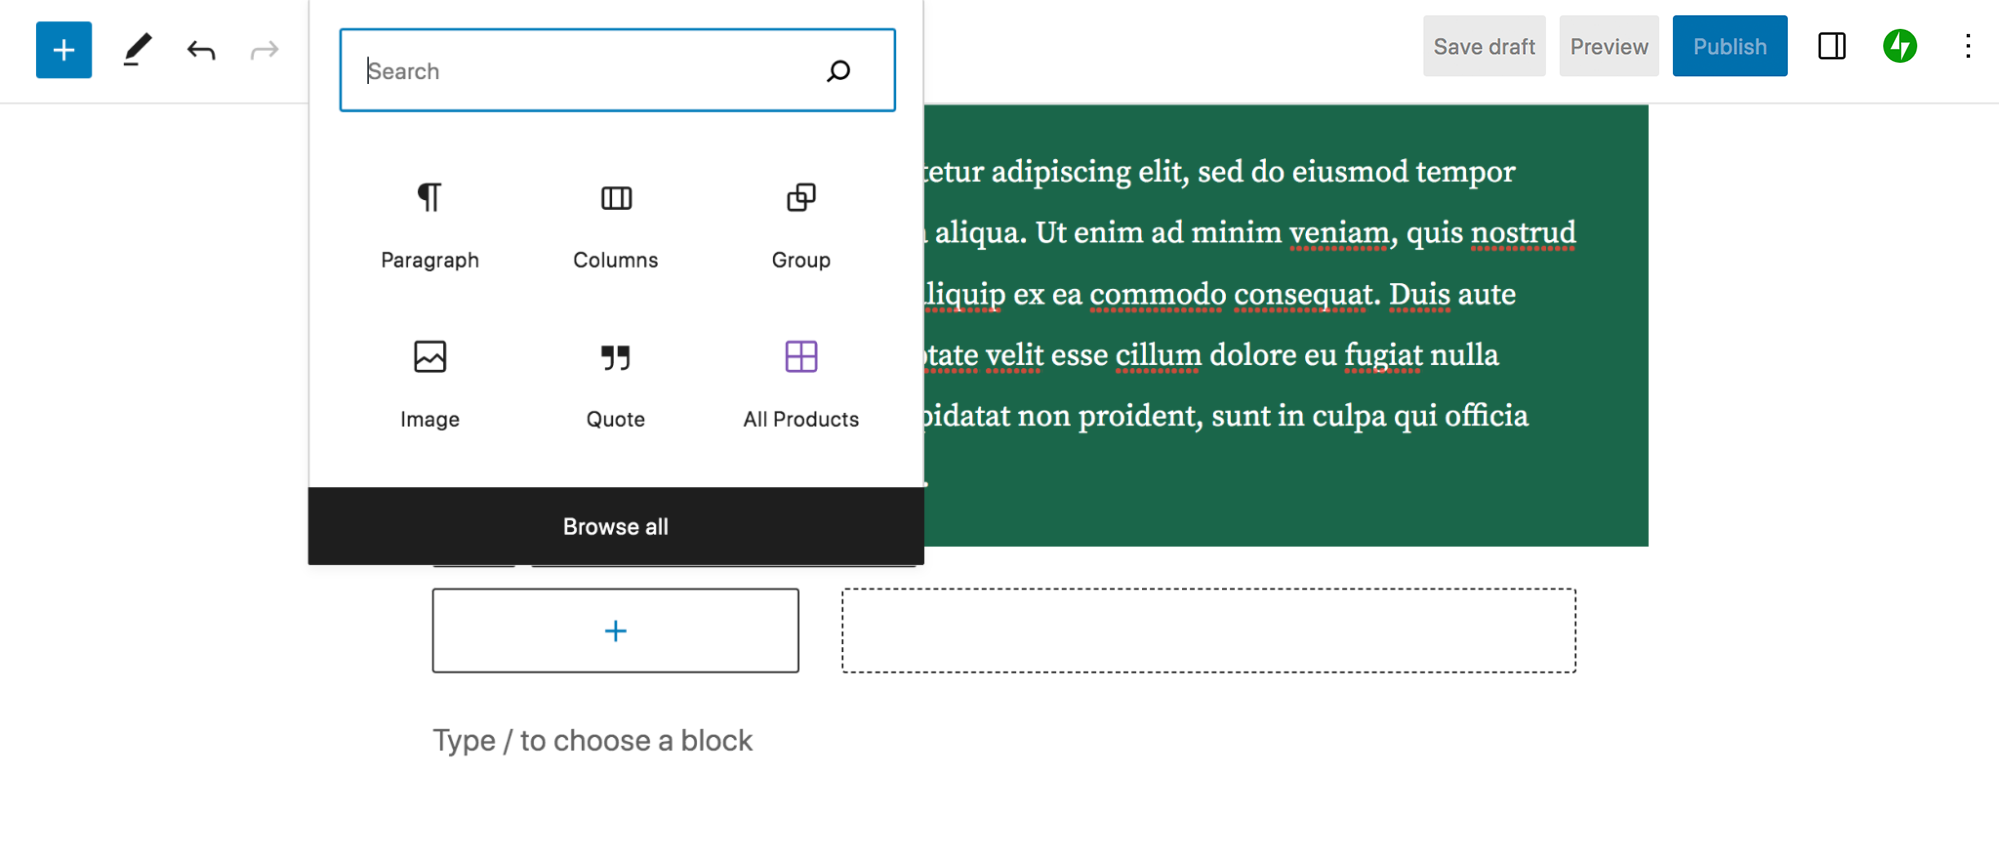
To the left column, click the + icon and select an Image block.
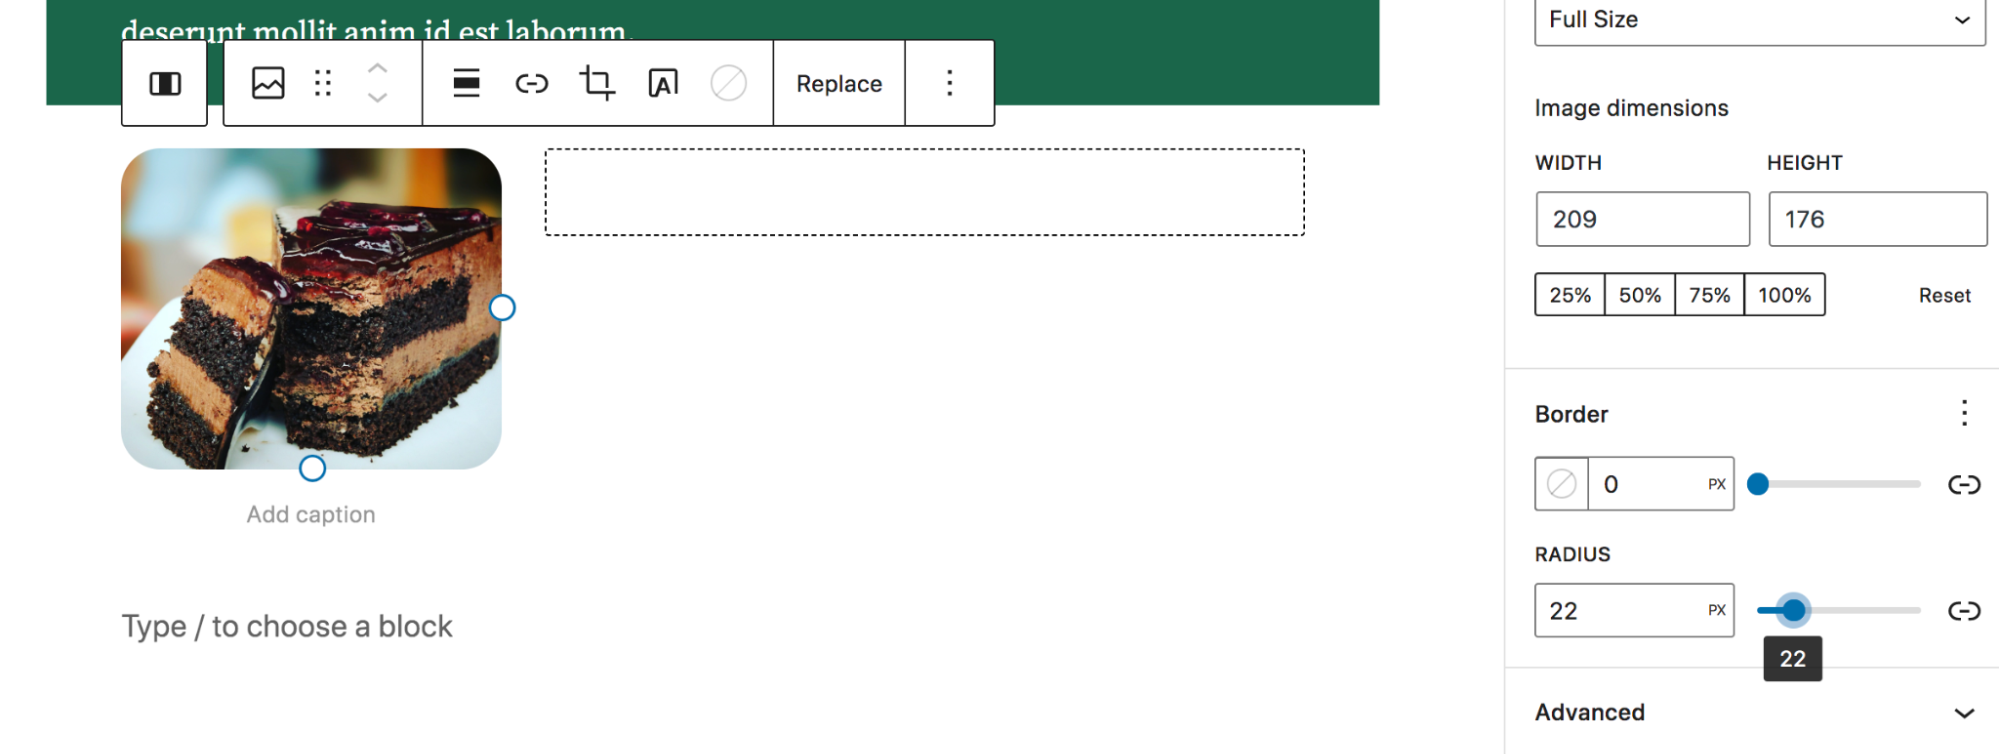
Here, you can upload an image from your device, select an existing one from the Media Library, or insert one from a URL. We decided to add a picture of a black forest cake from the Media Library. When you click on the Image block, you’ll see a new Settings bar appear, just like with the Paragraph block, but with slightly different options. For example, you’ll get choices to crop the image, add text on top of it, apply a filter, and more.
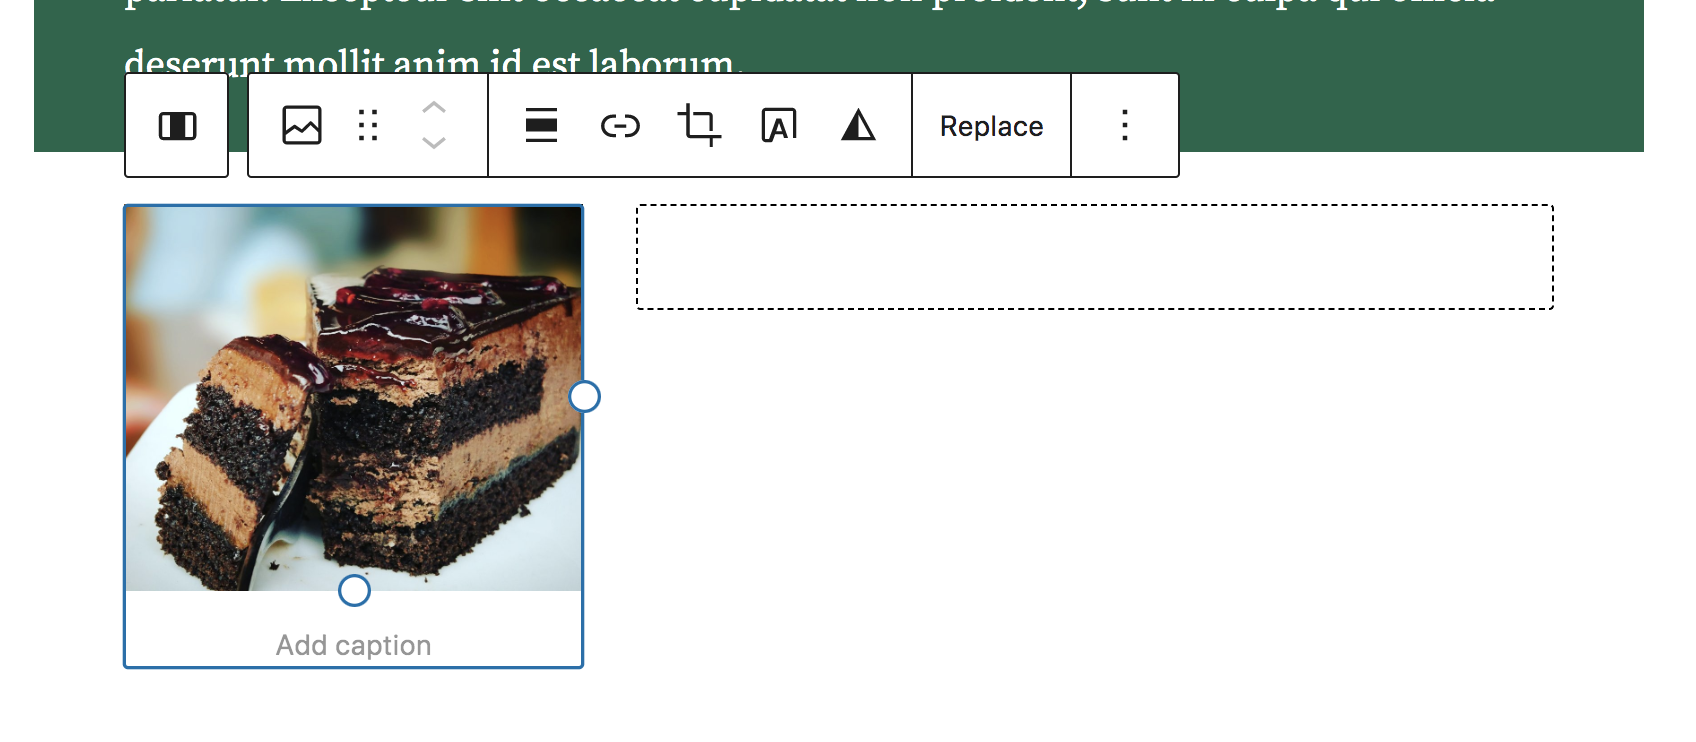
If you click the icon at the top right, you’ll see the settings panel for the Image block. There, you can add alt text, create rounded corners, change the image size, add a border, and more. Here, we’ve rounded the image corners with a radius of 22 px.
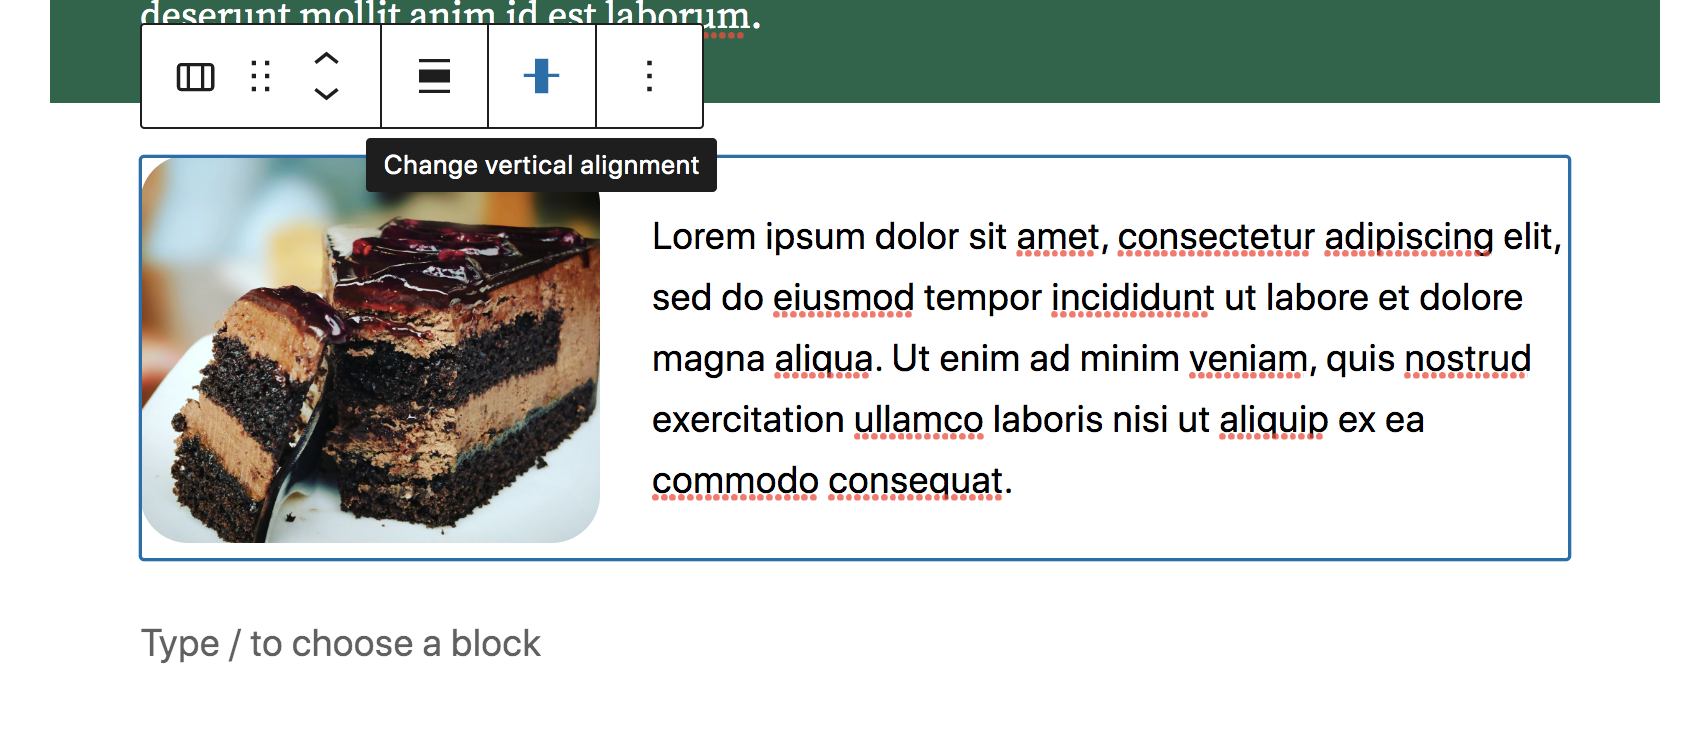
We then added another Paragraph block to the right, ⅔ column. Notice that you can select either each individual column to edit or the entire two-column block. When both columns are selected, they’ll be outlined in blue.
This enables you to make decisions for both columns at once using the toolbar that appears. Here, we set the vertical alignment to “Align middle” so the text and image are lined up.
And that’s it! You can keep building out the post as much as you’d like, choosing from a wide array of available blocks. Each one will come with its own settings and options — feel free to play around with these until you get the exact look you’re going for.
Before you publish the post, you probably want to preview it to see how it looks on the front-end of your site. Click the Preview button at the top right, followed by Preview in a new tab. This will give you an even more accurate idea of how the post looks when you publish it.
If you’re ready, you can now click Publish to make the post live!
Using block patterns
As a reminder, patterns are pre-built page segments that make building a post or page quick and easy. Let’s go back to the post we built in the previous section and explore how to add a pattern.
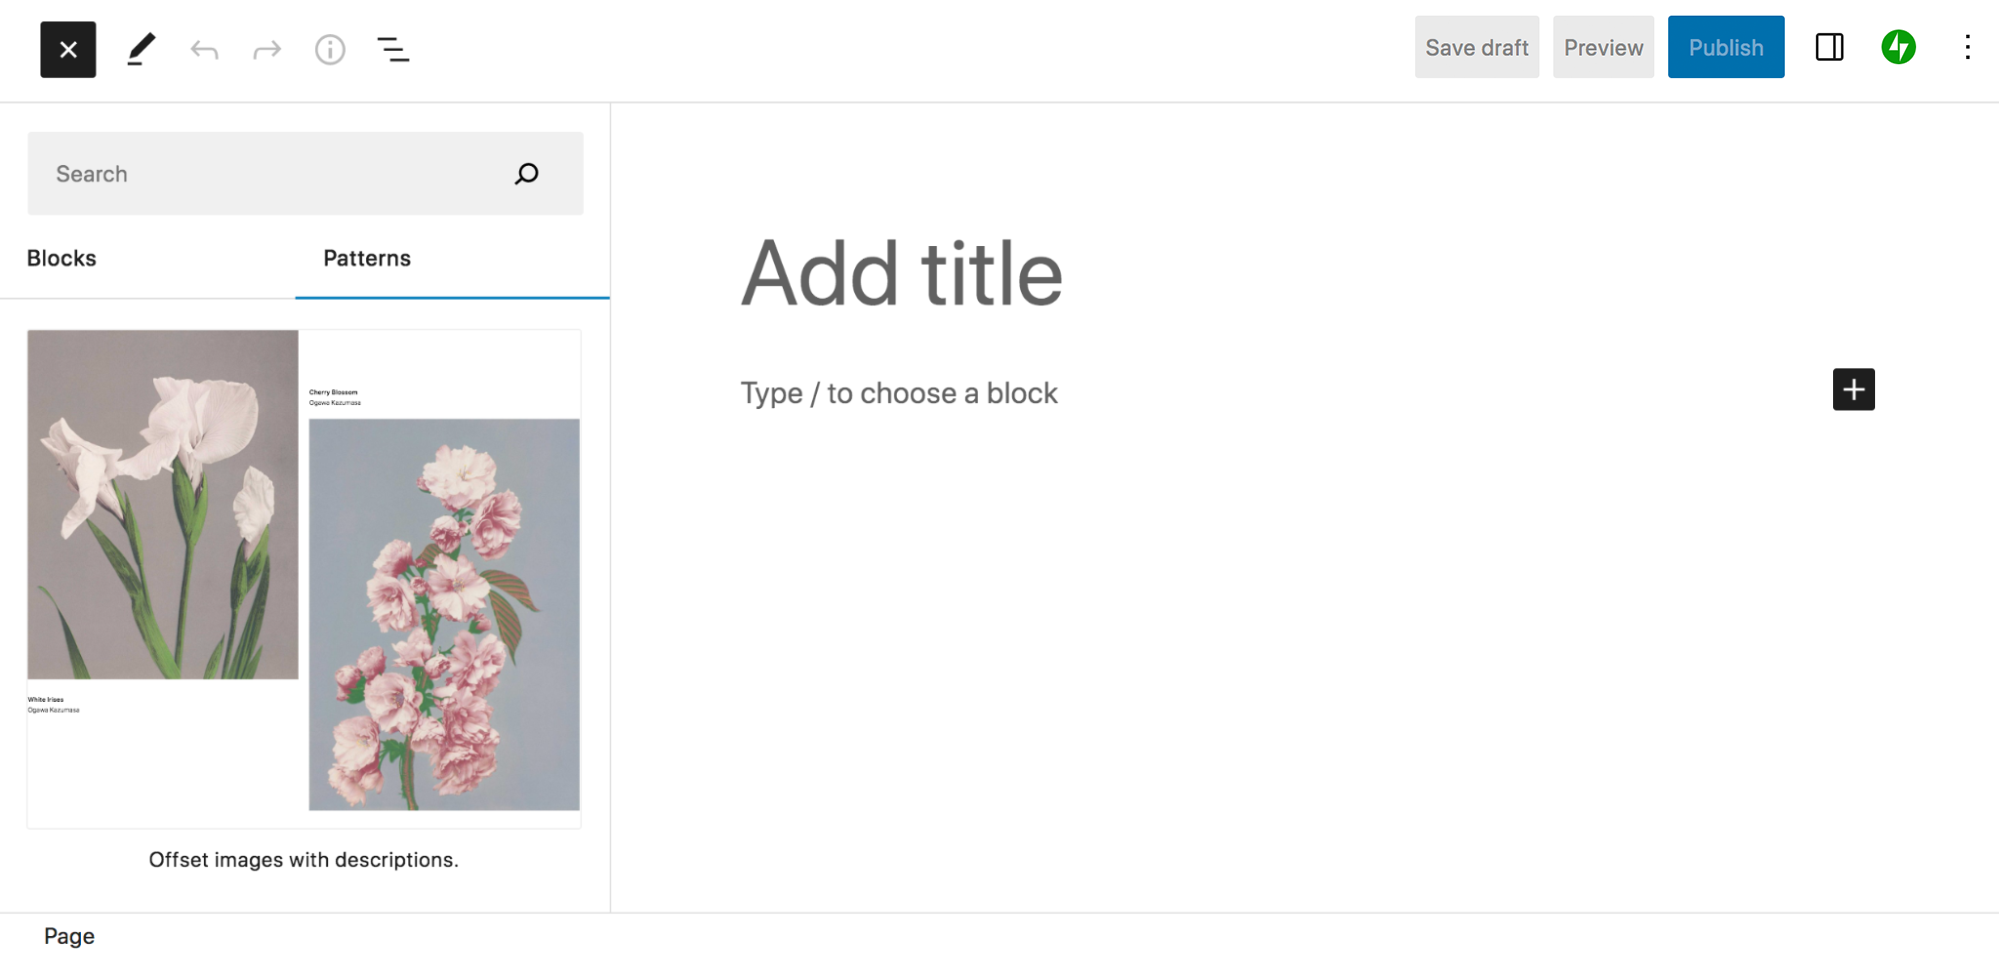
You’re going to click the blue + icon at the top left again to open the Block Inserter. But this time, click on the Patterns tab. By default, this will open a list of featured patterns.
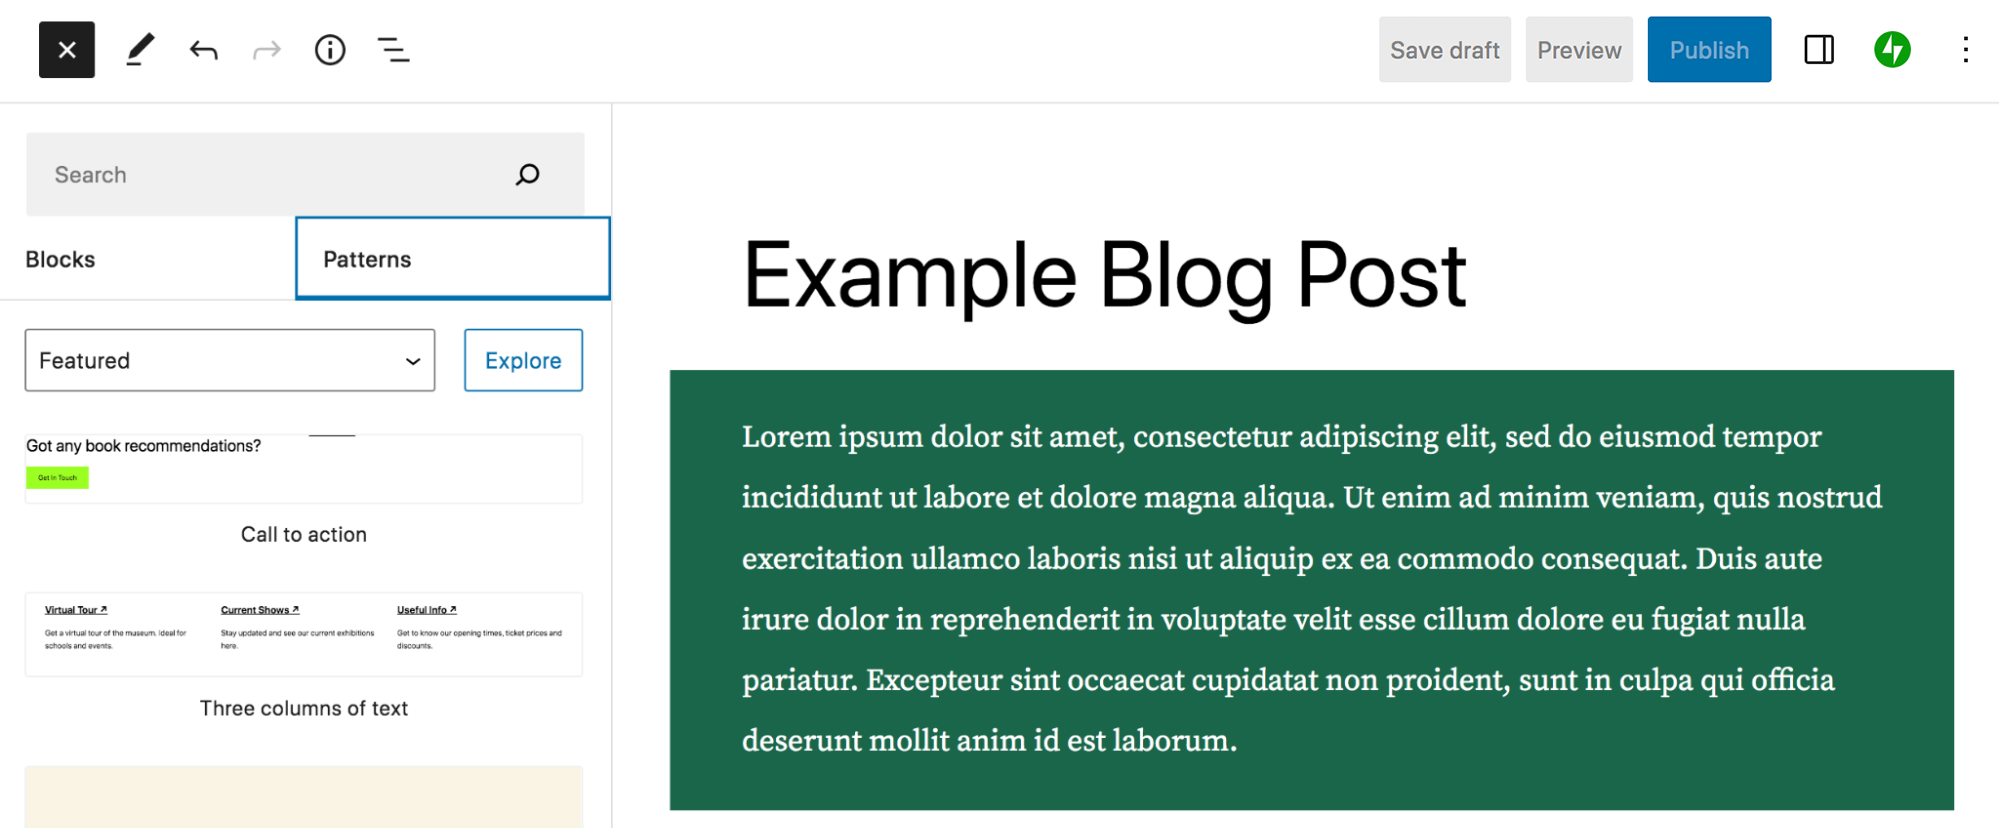
You can use the dropdown that is currently set to Featured, and choose other pattern categories, like Buttons, Columns, and WooCommerce. Or you can use the Search bar at the top to look for a specific pattern.
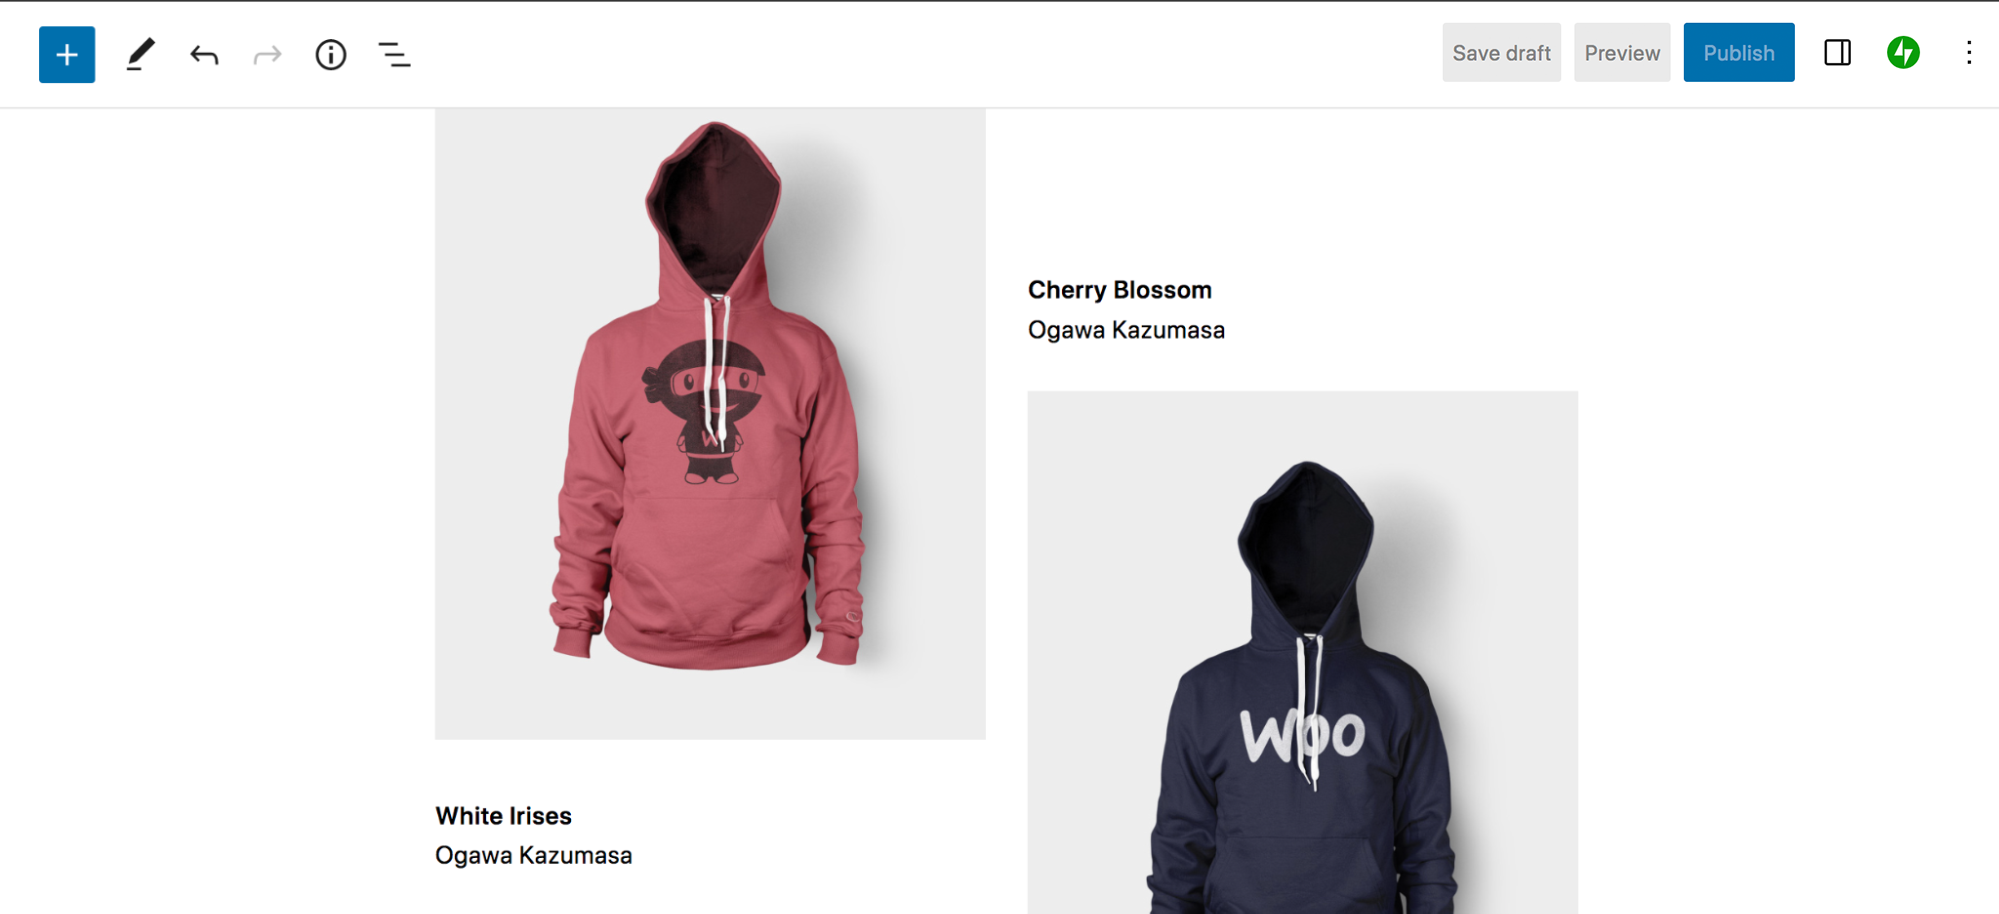
In this case, let’s select Gallery and drag the pattern titled Offset images with descriptions into our post. This will add a neat image feature to the content.

You’ll see that the pattern is composed of several blocks: two Image blocks, two Paragraph blocks, and a Spacer block. Just as we did earlier, you can edit each block individually or edit the pattern as a whole. You can either edit all the pattern details to truly make it your own, or you can just switch out the images and text with your own content.
Start by selecting one of the images. Then click Replace. Here, you can choose between uploading an image or picking from the Media Library. Once you’ve added your image, do the same with the other placeholder.
Then, click on one of the Paragraph blocks and replace the text with your own. You can make changes as you’d like, just as you did with the Paragraph block earlier.

And that’s it! You now have a beautiful page section that only took you a few minutes to create.
Using templates and template parts
Again, templates are frameworks that define the layout and design for types of content like posts, product pages, and archives. Template parts are reusable, global elements like headers and footers. You can edit both of these using the Site Editor.
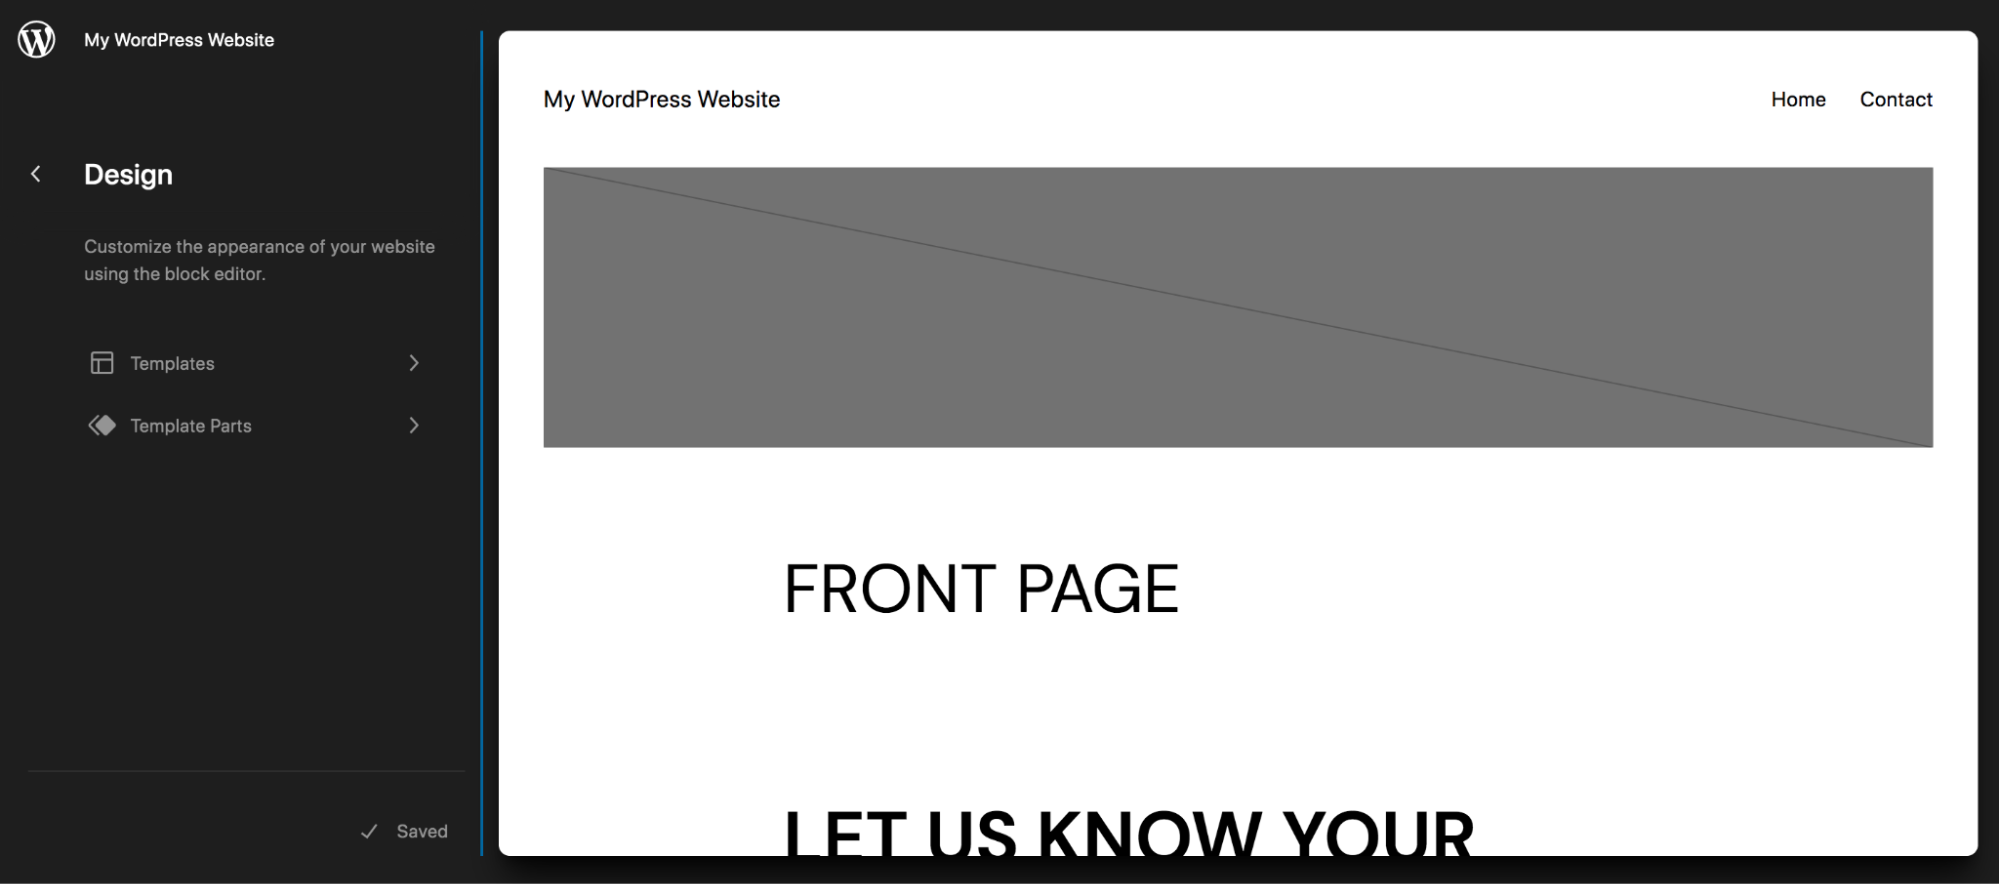
To use the Site Editor, you must have a block theme active on your site. In your WordPress dashboard, go to Appearance → Editor. This will open up the Site Editor. On the left-hand side, you’ll see a sidebar with options for Templates and Template Parts. Click on Templates. Here, you’ll see a list of all the templates on your site, which will vary based on the specific theme you’re using.
In this example, we’ve selected the Single template, which is the template for individual blog posts. You’ll see that a few blocks already exist on this page, including:
- Featured image
- Post title
- Post content
- Post meta
- Comments

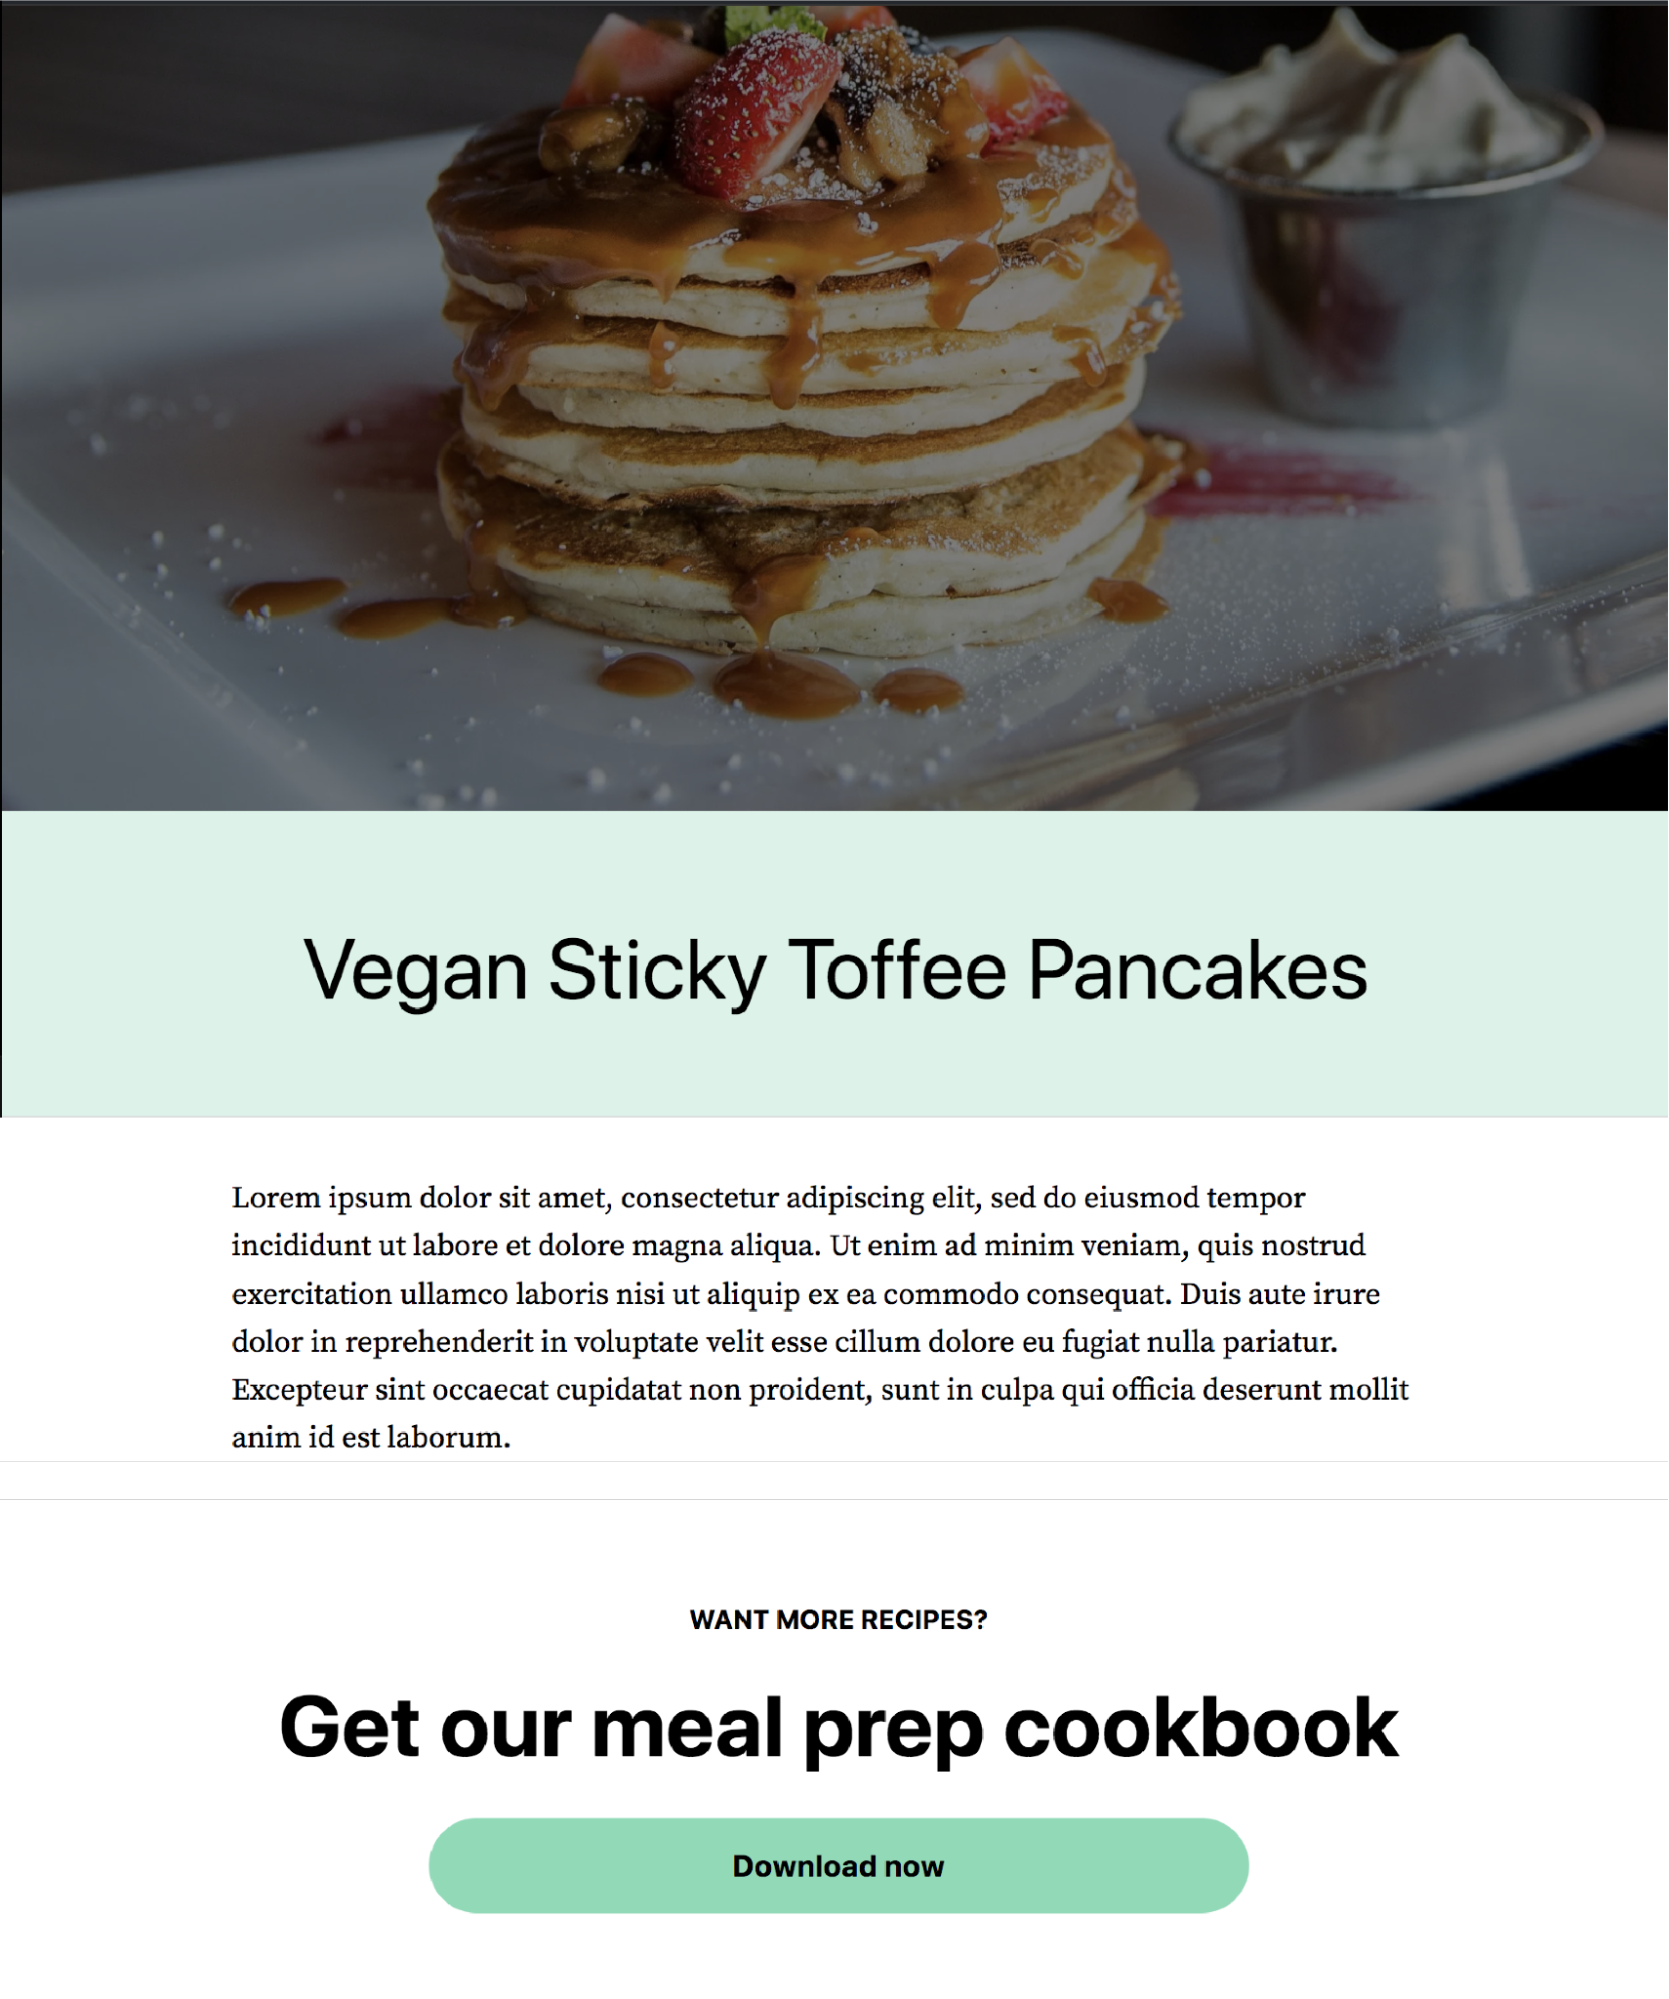
You can make changes to these existing blocks however you see fit. We added a light green background behind the post title, made the title full width, changed the font of the post content, and removed the margin between the featured image and title. You can see what a post will look like with these changes made:

You can also add new blocks to your templates. Since we’re working with the Single template, let’s add a call to action that will automatically appear at the bottom of all of our blog posts. This will end up saving a lot of time because you won’t have to add the CTA to every single post individually.
Let’s add the “Simple call to action” block pattern to our template.
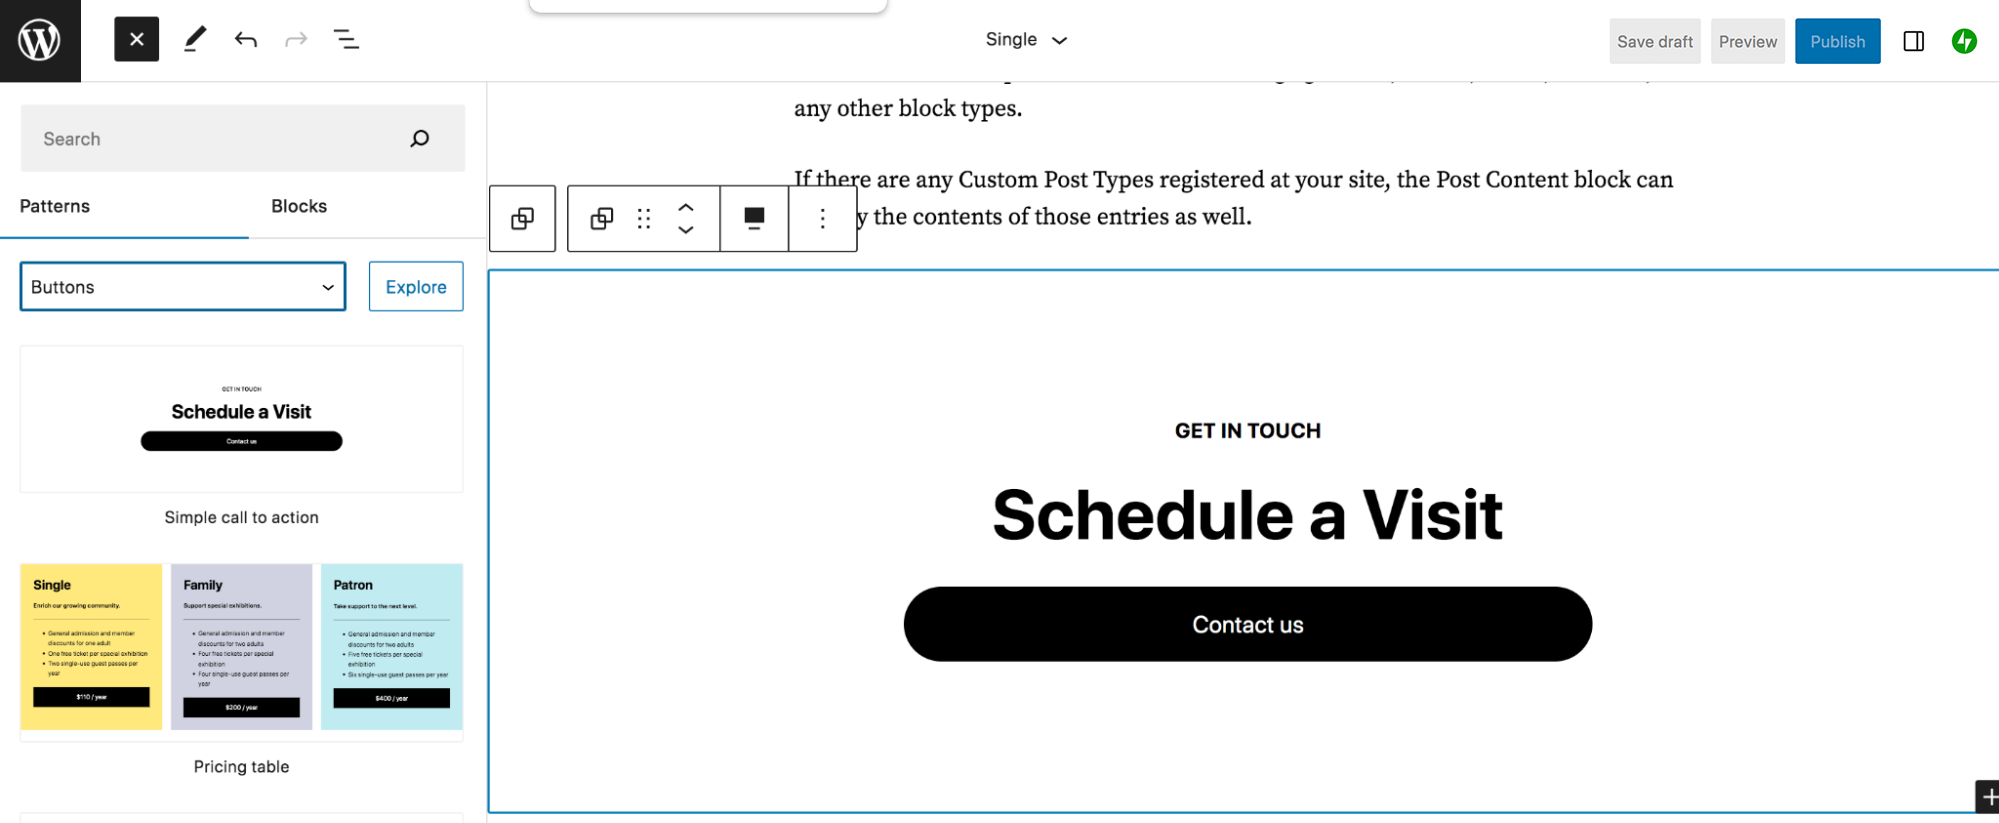
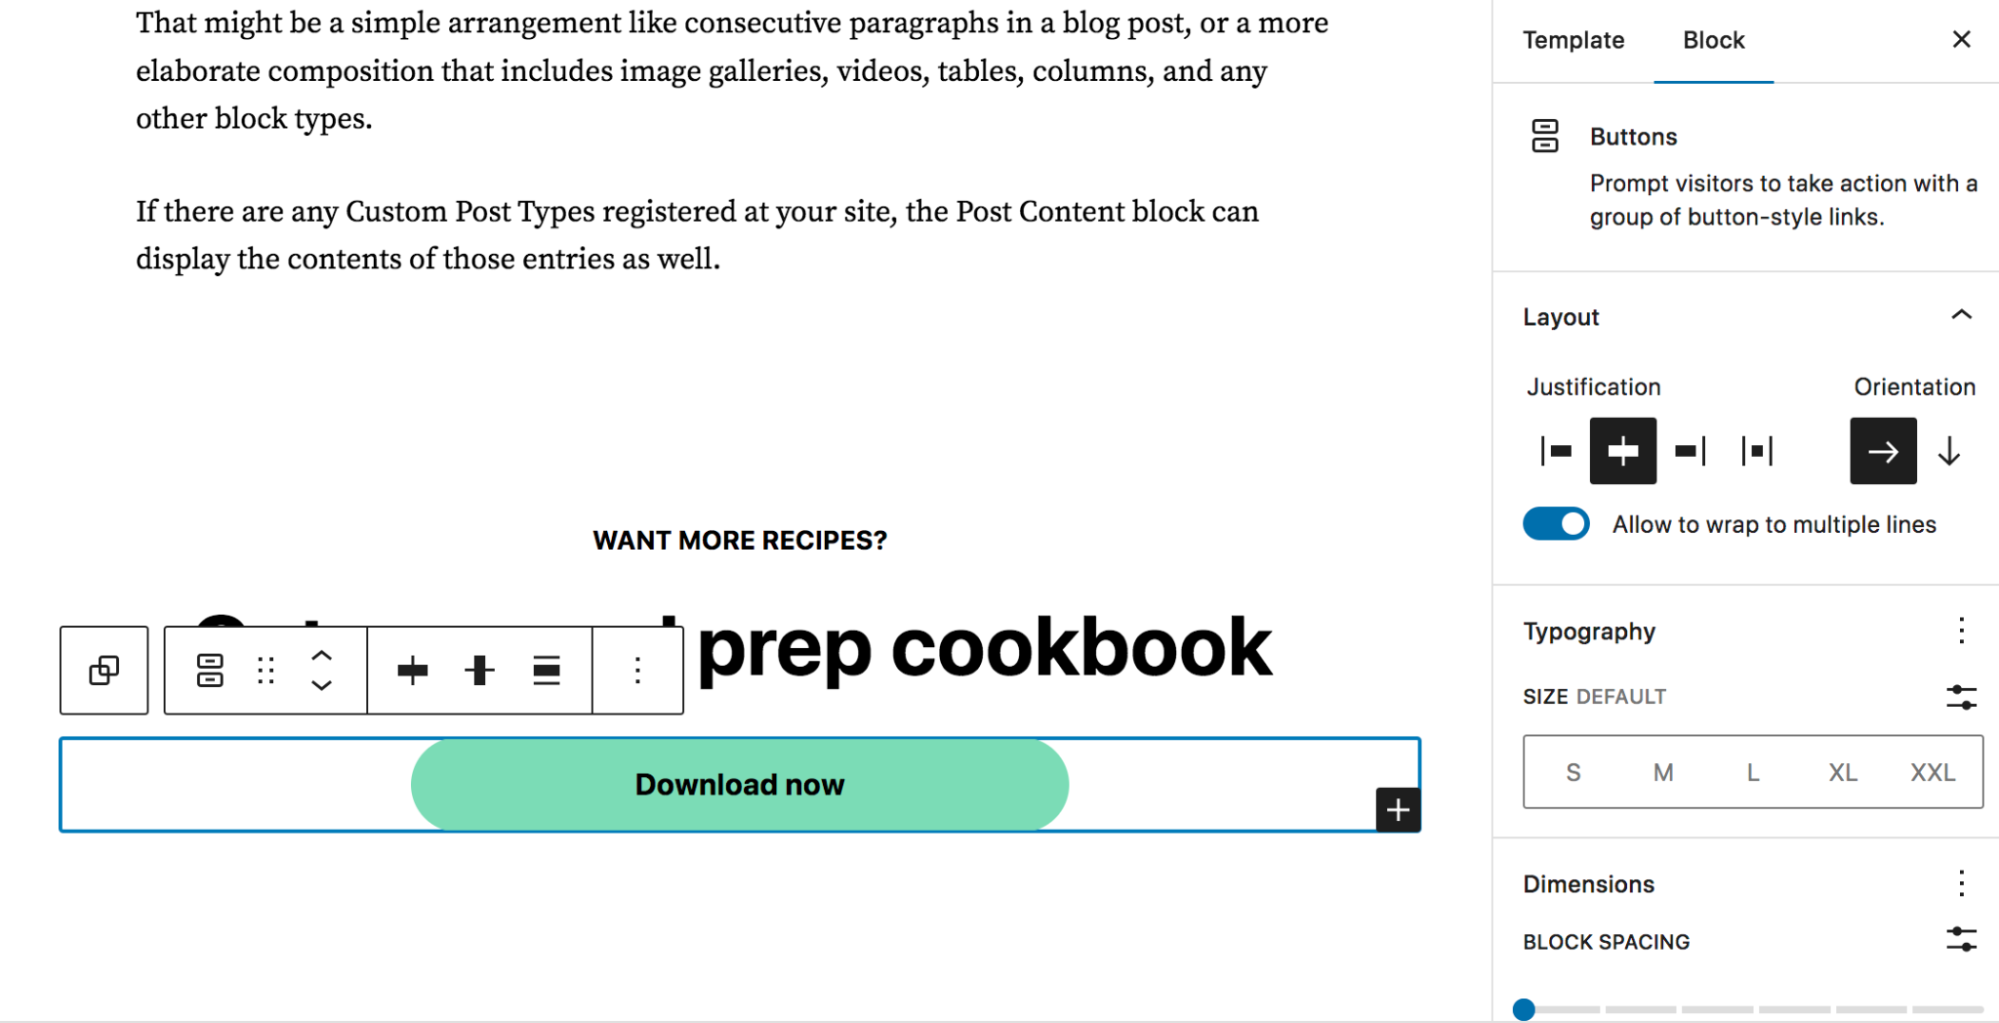
Now, we’ll just customize the CTA text so that it fits our needs. We’ll also update the design of the button, which you can do by clicking on the Button block, followed by the gear icon at the top right. There, you can edit settings like color, typography, padding, and more. You can change the button text and link by clicking directly on the button text and using the toolbar that appears.
Take a look at the changes we made:
Click Save at the top right to update your template. Now, you’ll see that the CTA is at the bottom of each of your blog posts.
Now, let’s go back to the Site Editor and look at editing Template Parts. Go to Appearance → Editor and choose Template Parts.
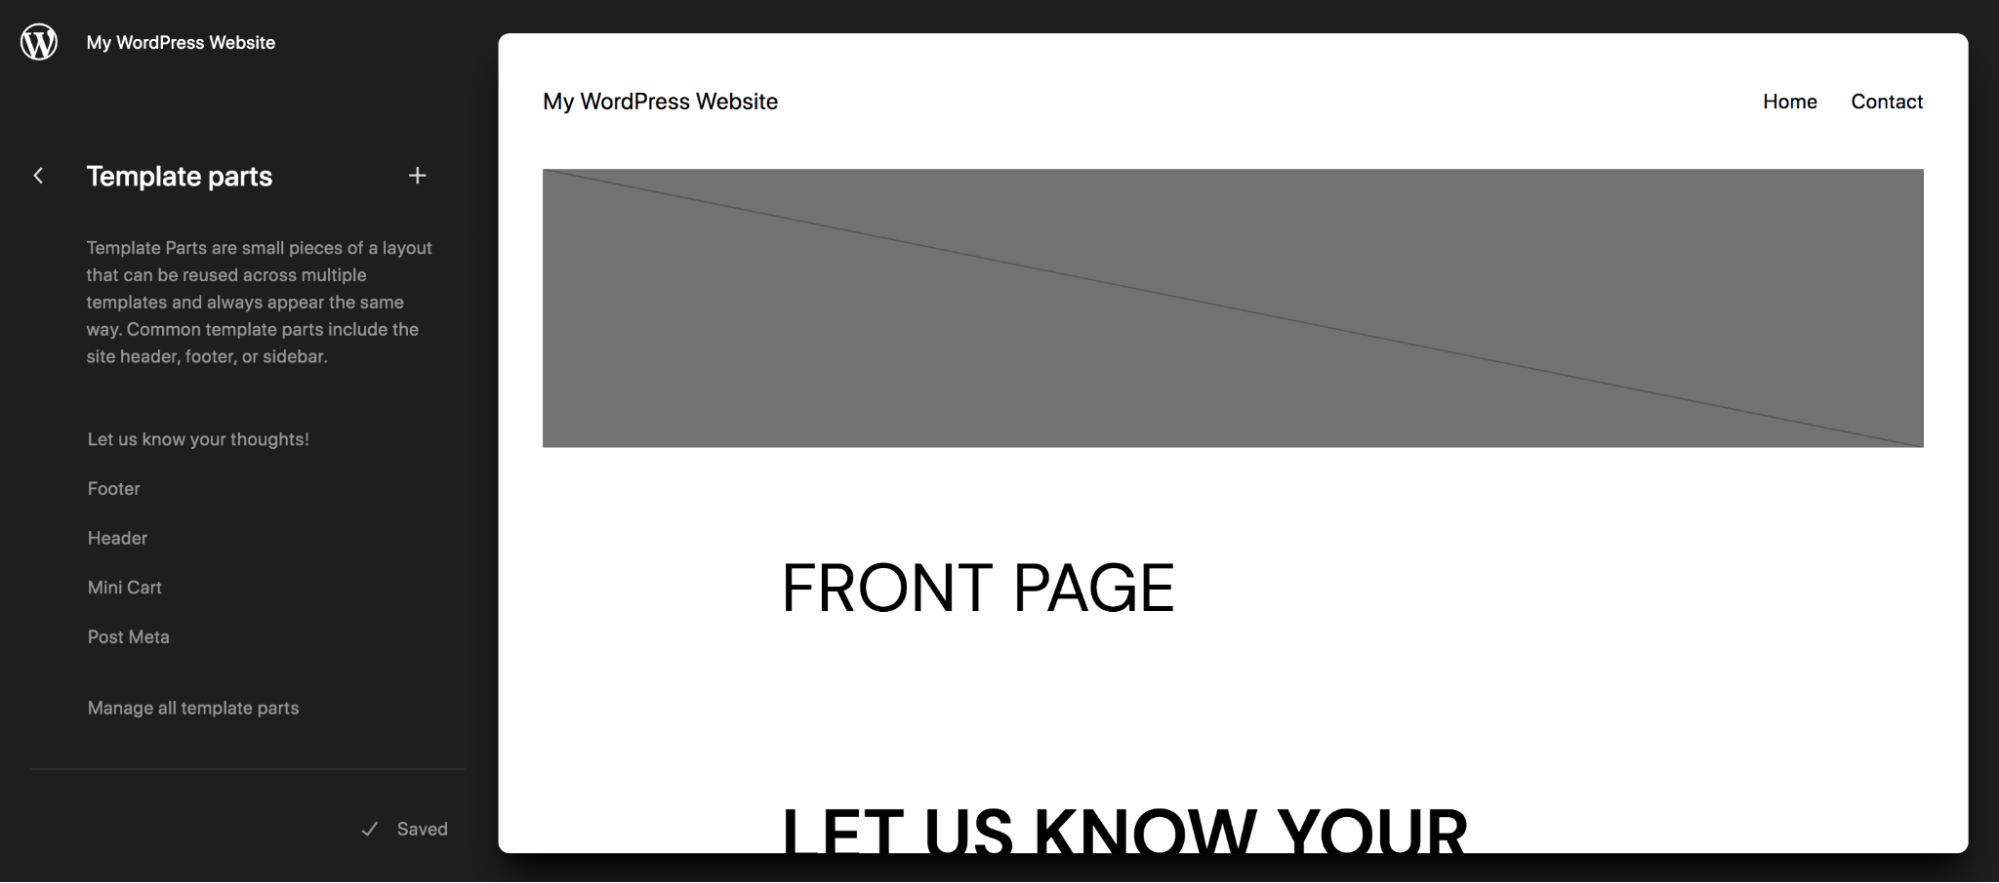
Here, you’ll see a list of template parts that you can edit. Remember, these are global elements and any changes that you make will be reflected across your whole site. Let’s click on Header to edit that template part.
You’ll see the header, and the current blocks that live there. In this case, there’s the Site Title block and the Navigation block.

You can make changes to the existing blocks just as you did with the block editor earlier in this article. Simply click on one to edit it, using either the menu that appears above the block or the Settings panel on the right-hand side.
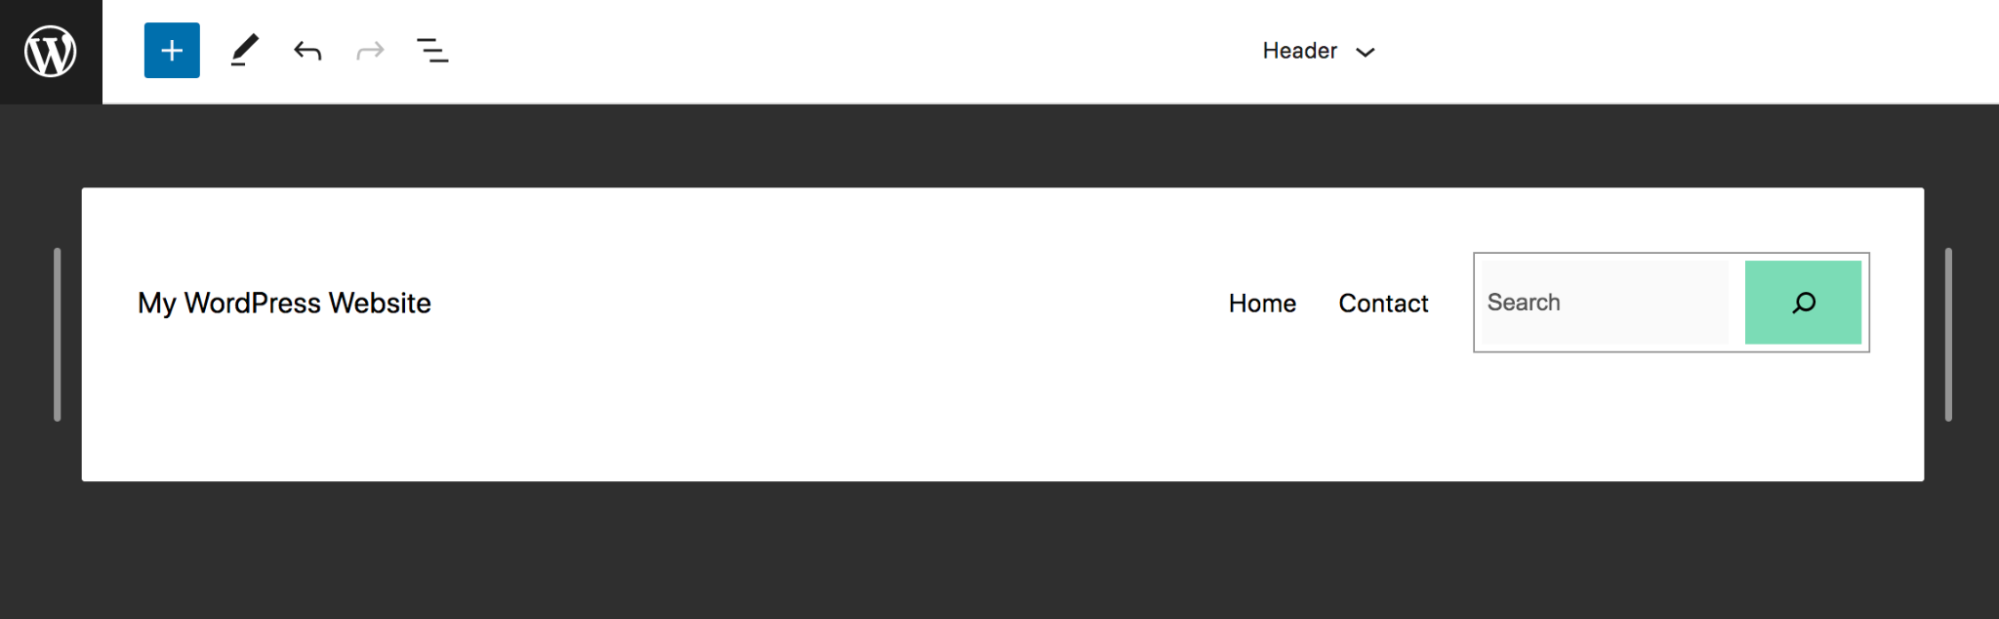
Let’s add a search bar to the main menu. If you click on the Navigation block, the same toolbar will appear that you’ve seen throughout this article. But you’ll also see a black + icon to the right of the last menu item. Click that to add a new link or block to your menu. We added the Search block, but you could also include a custom button, a new link, social media icons — whatever fits your needs.
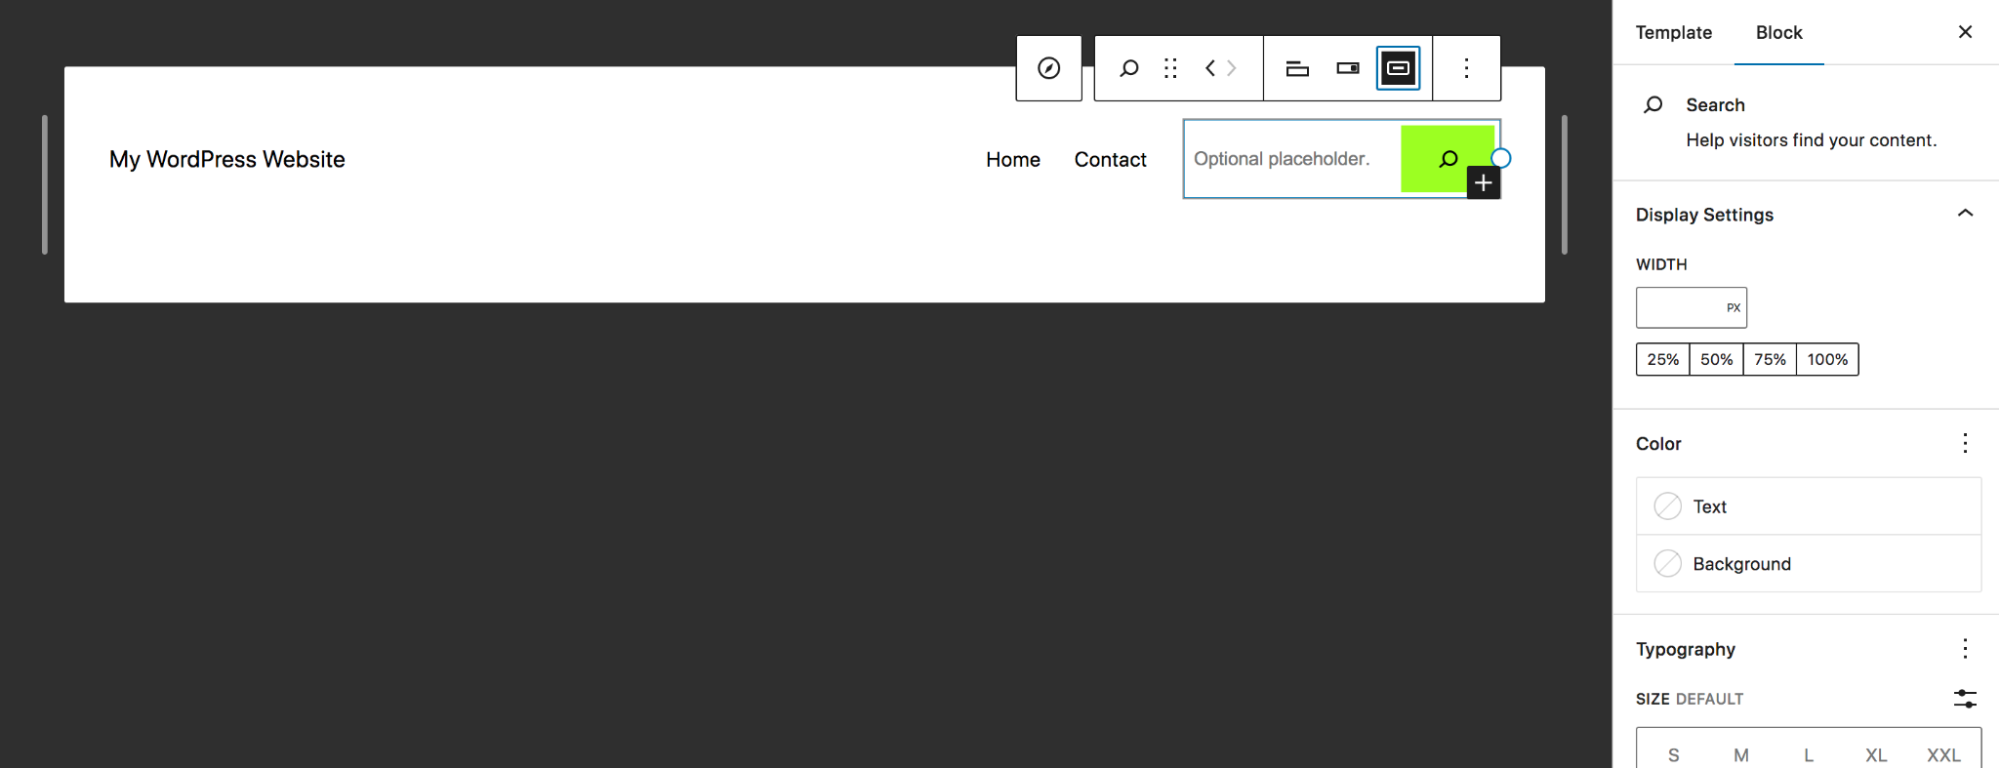
Then, using the Settings panels you’re already familiar with, style it however you’d like. We added placeholder text and changed the button color.
You can also select the entire header and style it, using the Settings panel on the right to change the background color, typography, padding, and more. Imagine all the ways you can apply these techniques across your site!
10 advanced tips to get the most out of the block editor
Now that you know the basics, let’s take a look at some tips for getting the most out of the block editor.
1. Take advantage of keyboard shortcuts
Keyboard shortcuts are a very handy way to speed up the editing and page building process because you don’t have to lift your fingers off the keys. With a little practice, you can become quite fast!
There are lots of great shortcuts that you can explore, but we’ve listed just a few below. Keep in mind that these will vary based on the device you’re using. For these examples, we’re listing the shortcuts for Windows computers:
- Show or hide the Settings panel: Ctrl + Shift + ,
- Navigate to the next part of the Editor: Ctrl + `
- Save changes: Ctrl + S
- Undo a change: Ctrl + Z
- Duplicate a selected block: Ctrl + Shift + D
- Insert a new block before a selected block: Ctrl + Alt + T
- Move a selected block up: Ctrl + Shift + Alt + T
See the full list of keyboard shortcuts, including those for different operating systems, in the WordPress documentation.
2. Set styles for your site and blocks
If you have a website with multiple users or are a developer who hands off the site to a client, global styles can be incredibly powerful. You can use these to set predefined color palettes and block styles that are available for users. This helps your website stay on brand, no matter who’s working on it.
To access and set style variations, go to Appearance → Editor and click the Styles icon at the top right.
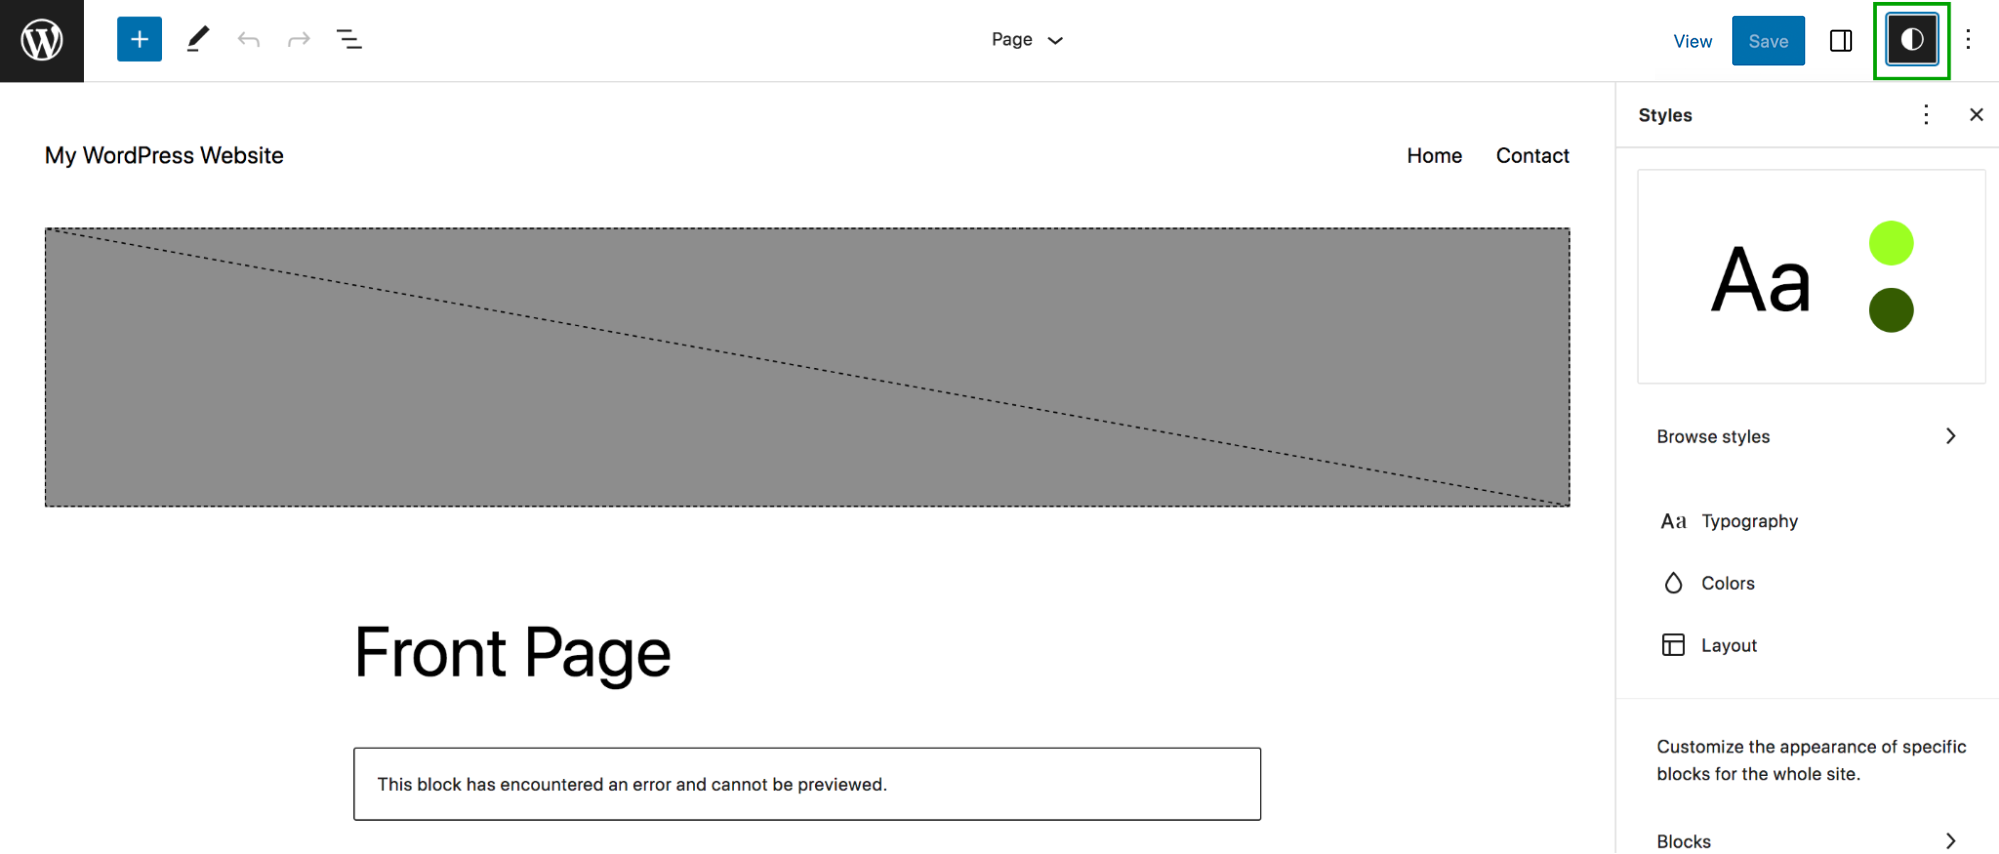
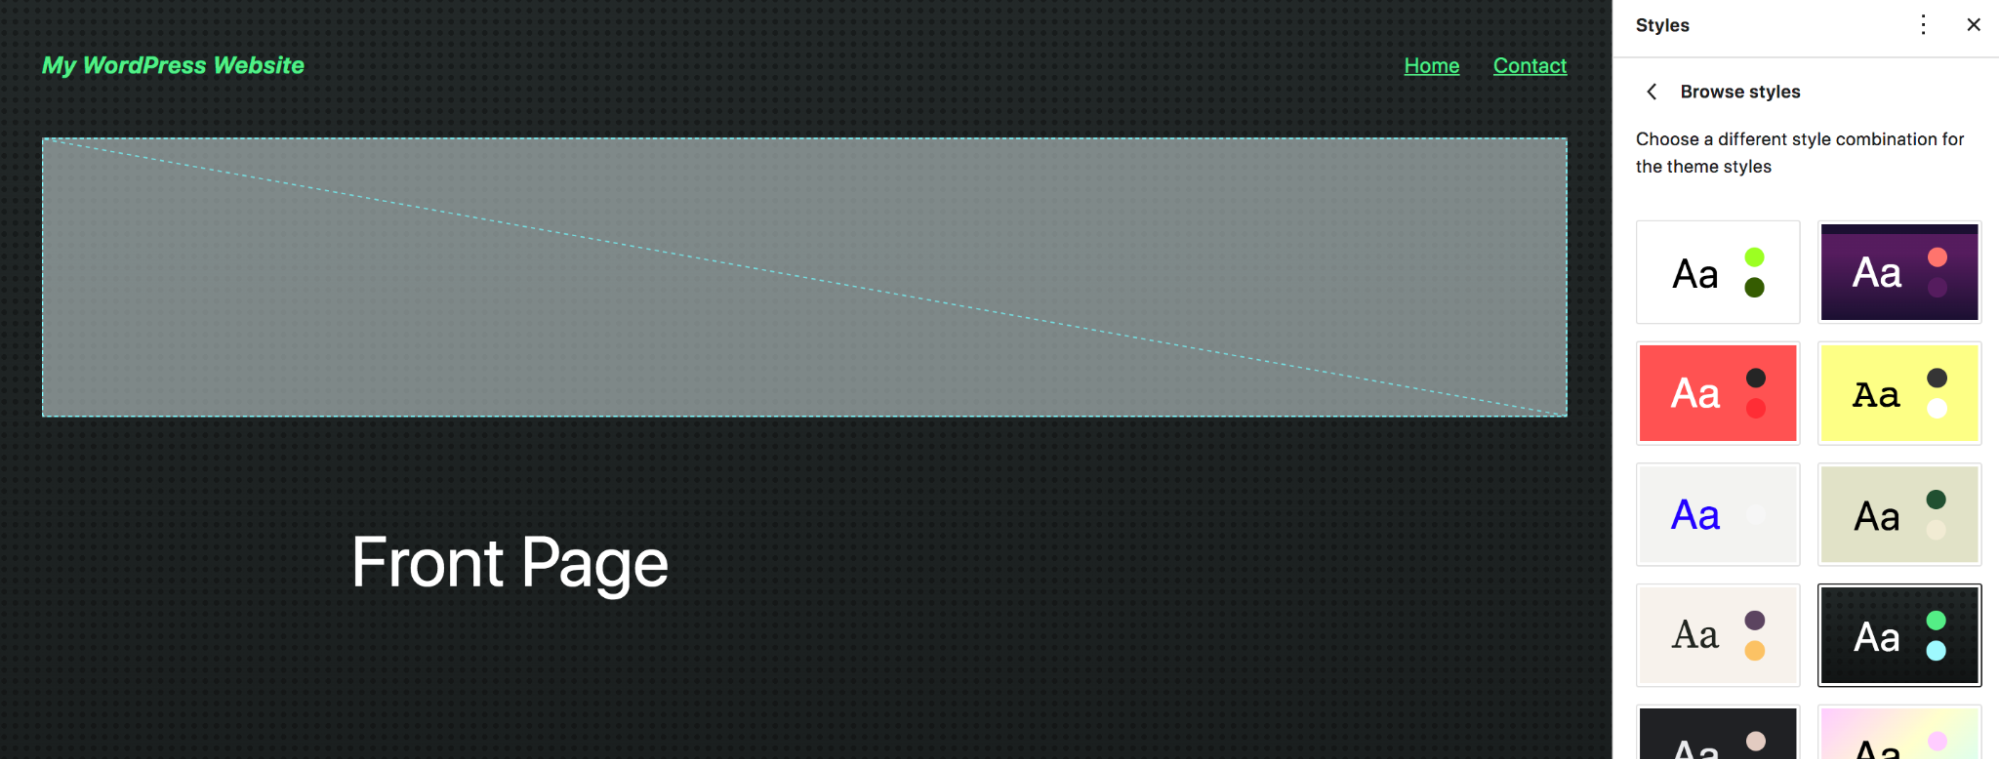
Note that any changes made here will apply to the entire site, so edit carefully! Click Browse styles to see a list of pre-built options. You can toggle through these and instantly preview how your site will look on the left-hand side.
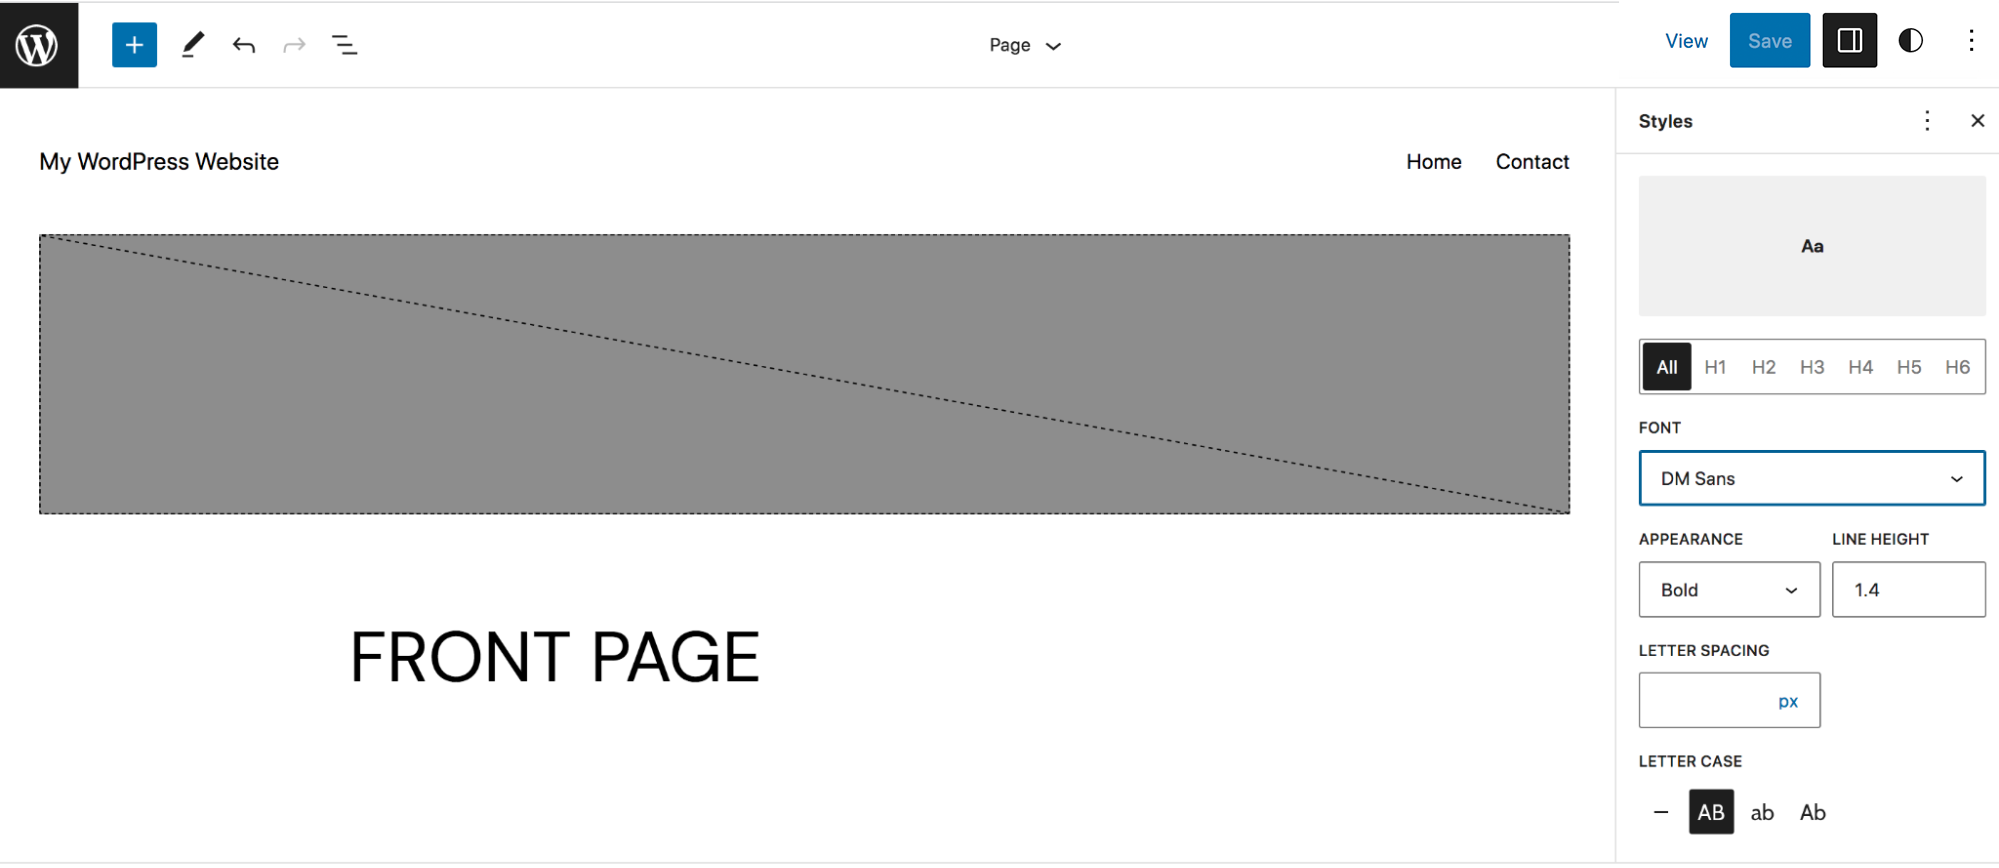
Or, if you navigate back to the Styles panel, you can set typography, colors, and layout options. For example, click Typography, and you’ll see choices for text, links, headings, and buttons. We selected Headings and changed the font, font weight, and letter case.
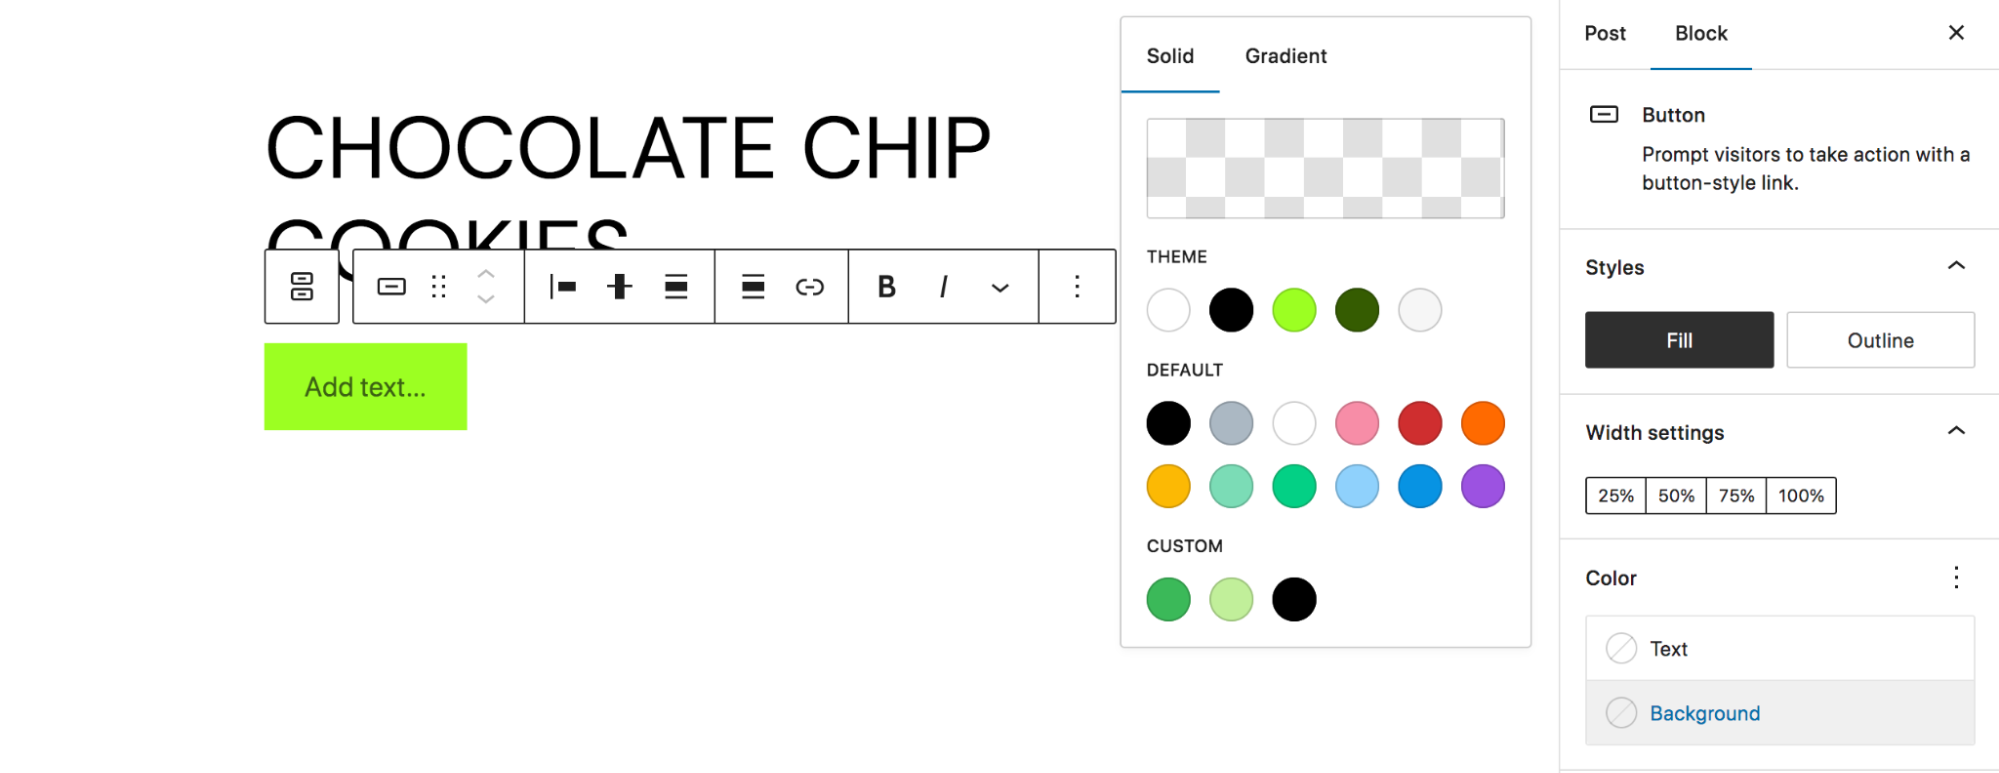
Back in the Styles panel, you’ll also find a Blocks option. Open this, and there will be a list of the blocks on your site. In this example, we’ll open the Button block. The options available will vary a bit based on the block you selected, but for this one, you can edit typography, colors, and layout. Click on Colors and you can set the default colors for buttons across your site.

Or, you can click on Palette to define the color options that users will see when adding buttons to pages and posts. We chose to add custom colors to the Button block.

Now, when someone adds a button to your site, they can choose from the custom colors that you set.
3. Create synced patterns (formerly reusable blocks)
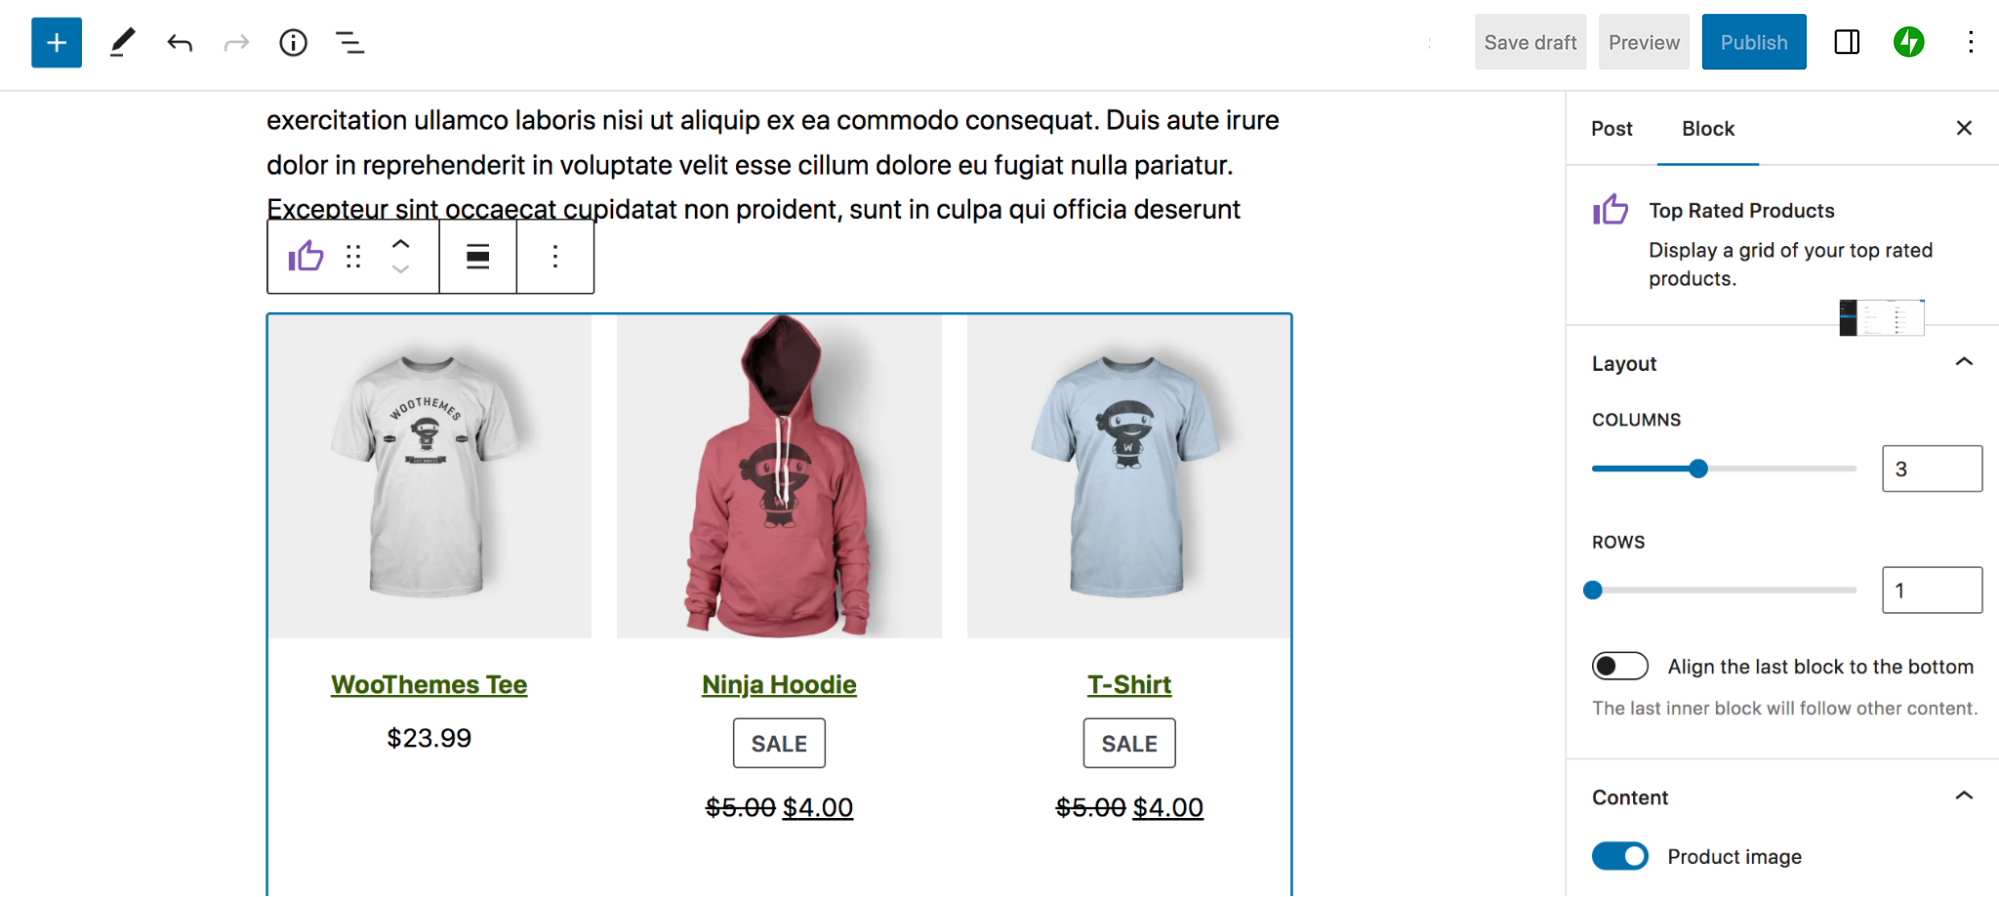
Synced patterns (reusable blocks) are great because you can save them, then use them anywhere you’d like on your site. And when you make design changes to one, it will update everywhere. This is perfect for calls to action that you might use often or similar situations. In this example, we’ll create a Top-Rated Products block that we can use to promote popular products wherever we’d like on the site.
Let’s start by adding it to our page and styling it.
Once you’re done, click on the block, then select the three vertical dots in the toolbar that appears on top of the block. Then, choose Create pattern/reusable block.
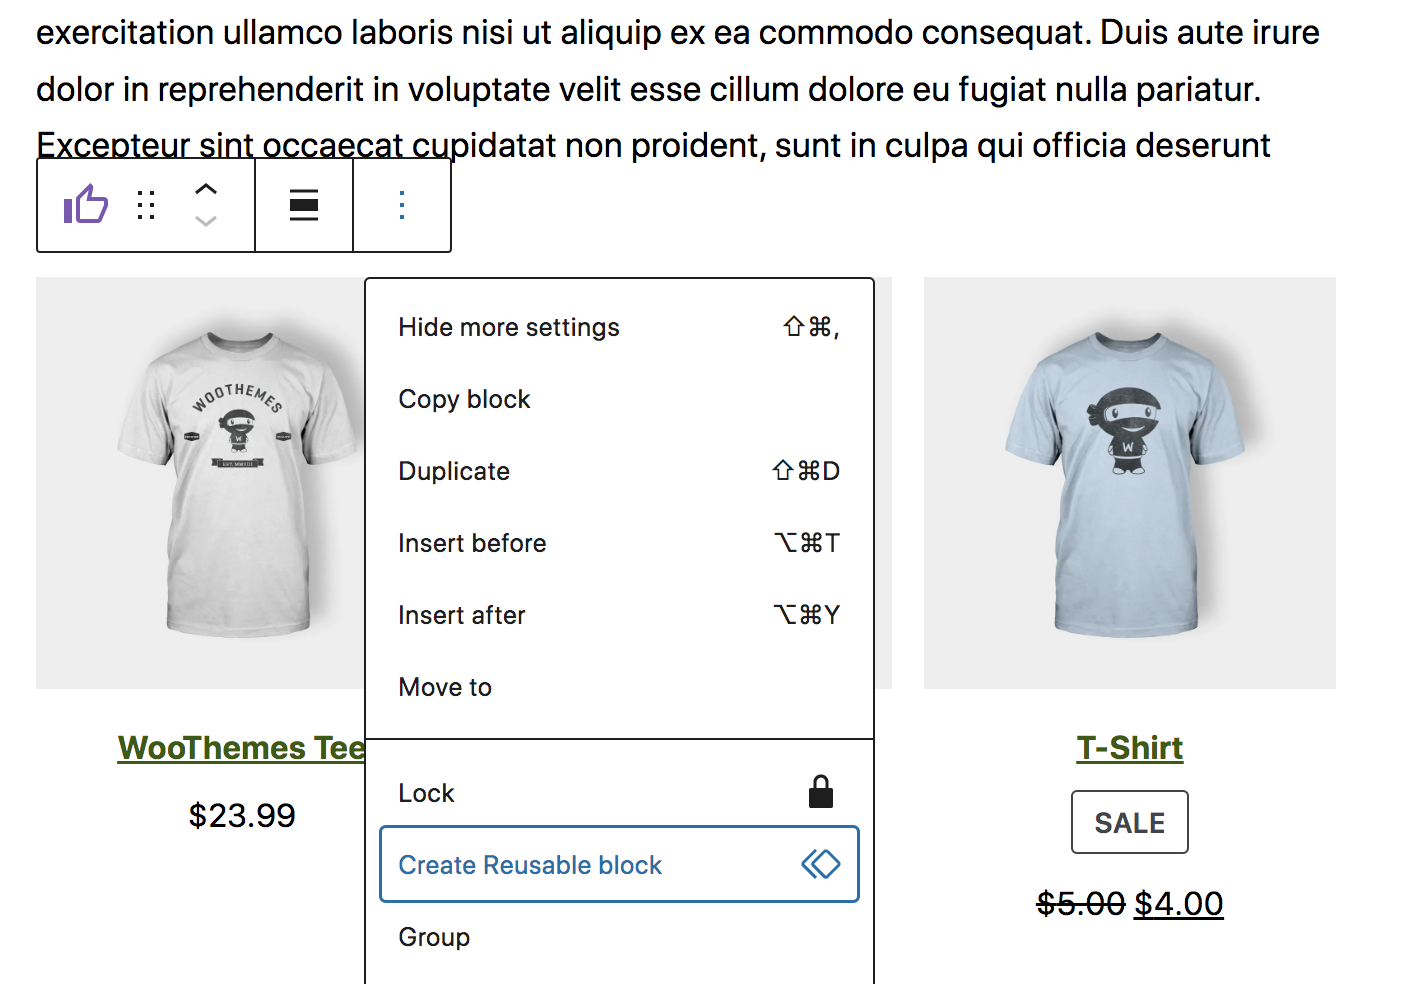
This will prompt you to create a name for your block, then save it to your library. Then, when you’re working on another page or post, you’ll see a new Reusable tab in the Block Inserter. This will show all of your reusable blocks and allow you to add them into your content at any point.
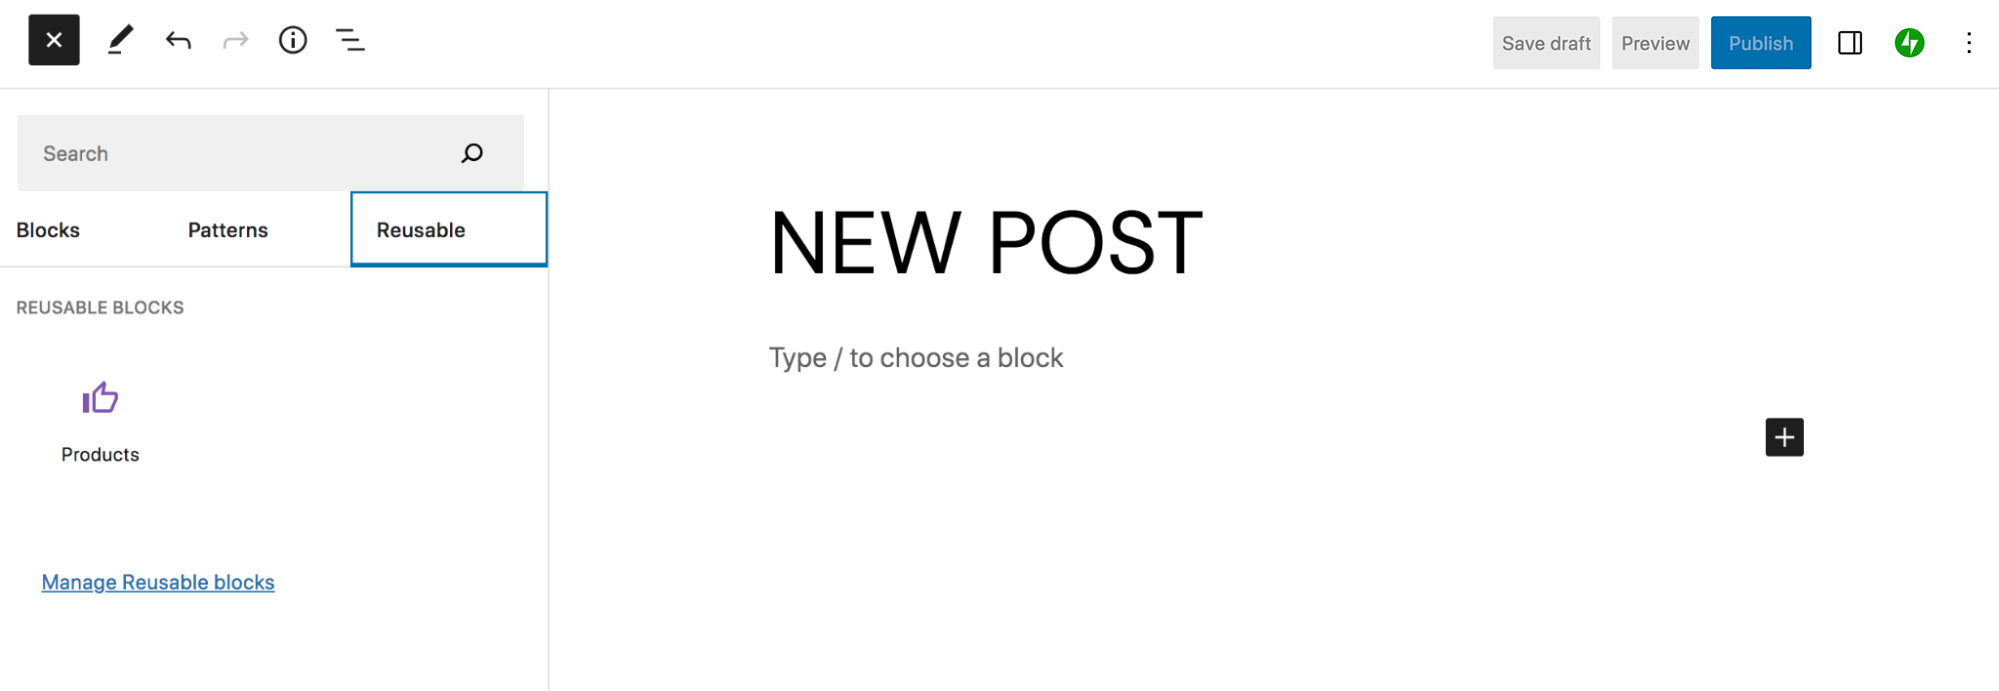
If you click the link there that says Manage Reusable blocks, you can see a full list of your reusable blocks, and edit, add, or rename them.

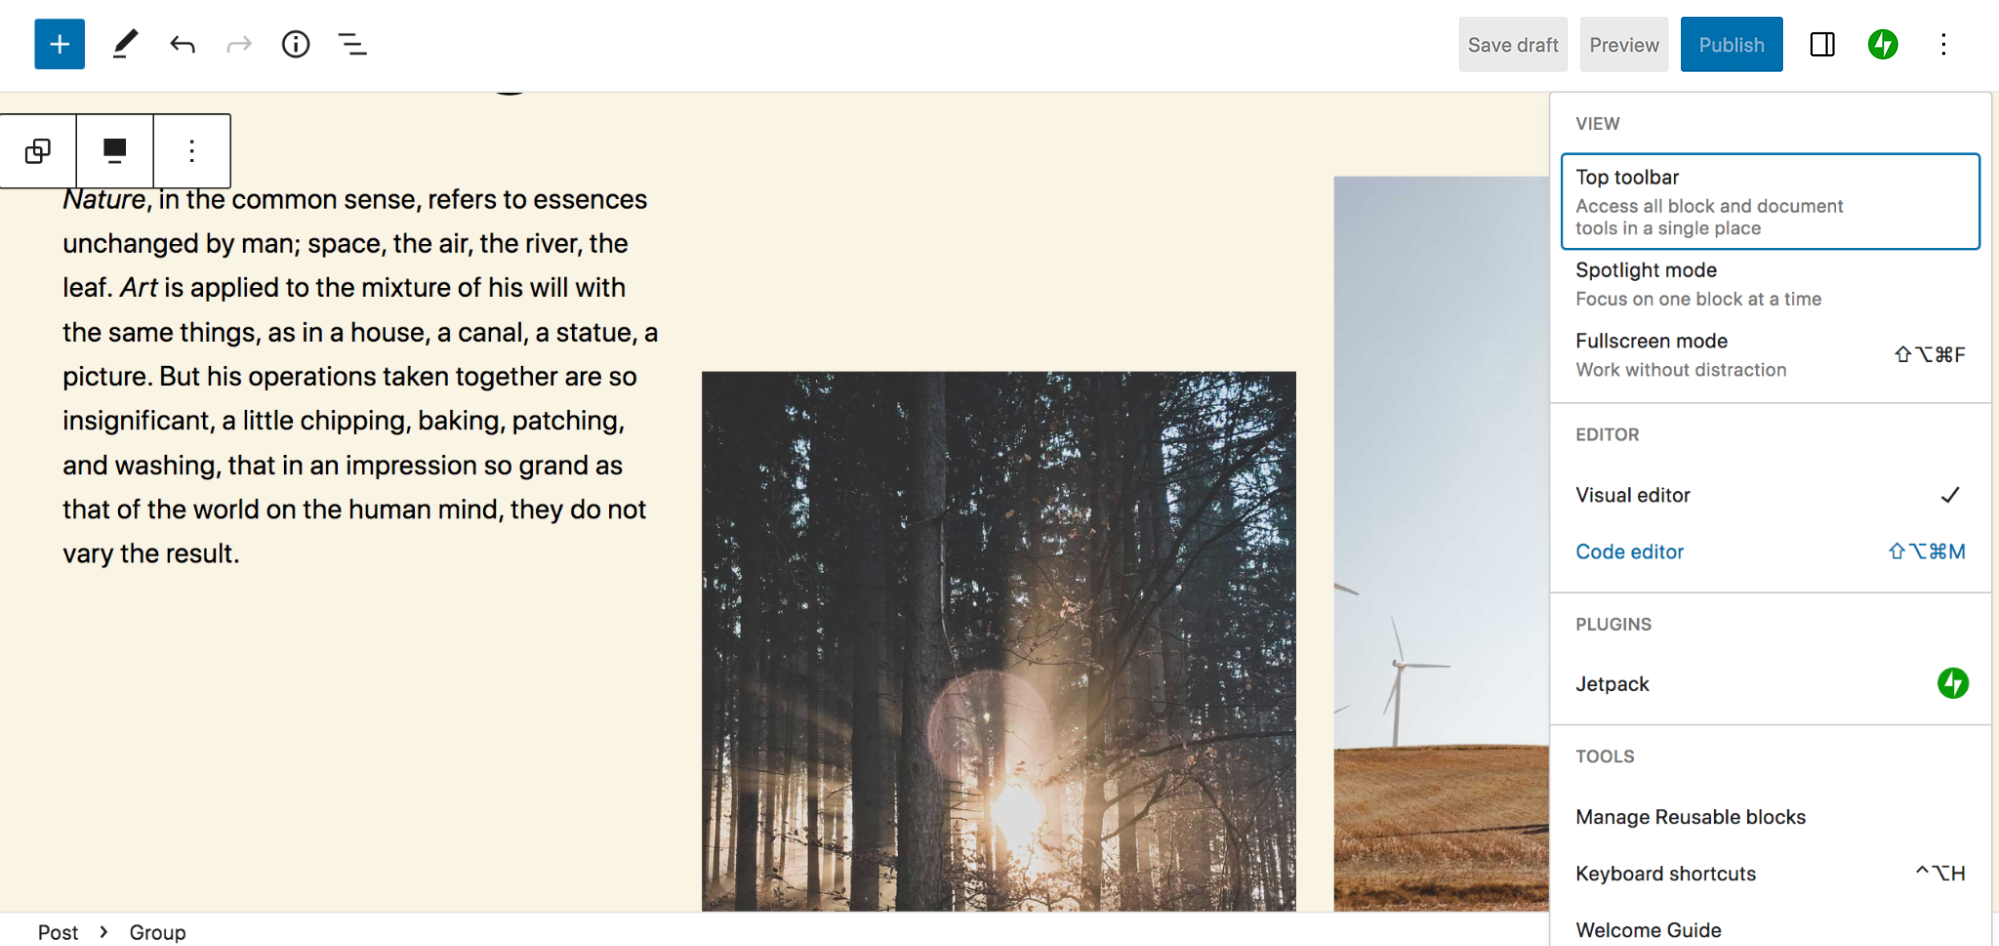
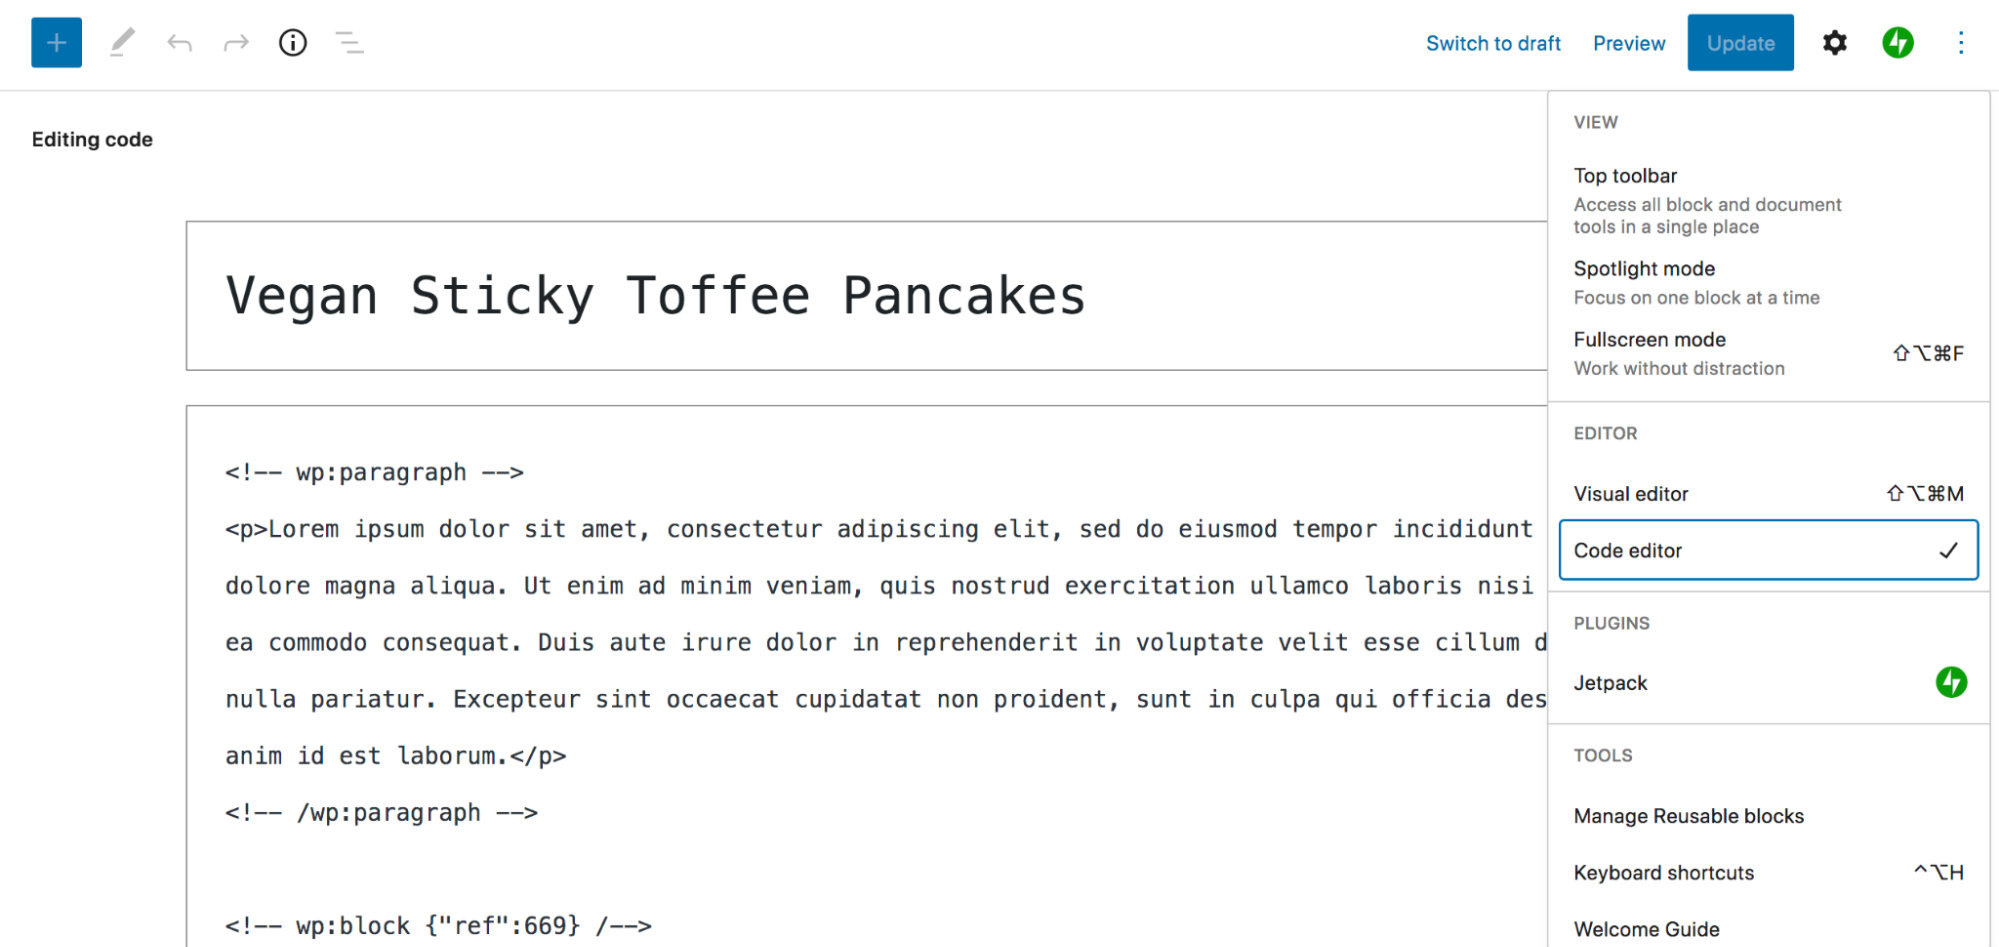
4. Use the code editor
If you’re a developer or have some coding experience, you might want to be able to quickly apply precise changes to an individual page or post. All you need to do to access the code editor is open up the page or post you’re working on and click the three vertical dots at the top right. Then, choose Code Editor.
Now, you’ll see all the content on the page in HTML form. You can edit this code and make changes however you see fit, and switch back and forth between the two editors.

Remember, though, that editing code can be dangerous and could even break your site. Make sure you back up your WordPress site before making major code changes.
5. Make the most of List View
List View is a neat feature that helps you quickly and easily navigate between blocks while you’re working. To access this tool, click the three vertical lines at the top right of the block editor. There, you’ll see a list of all the blocks that make up your page or post.
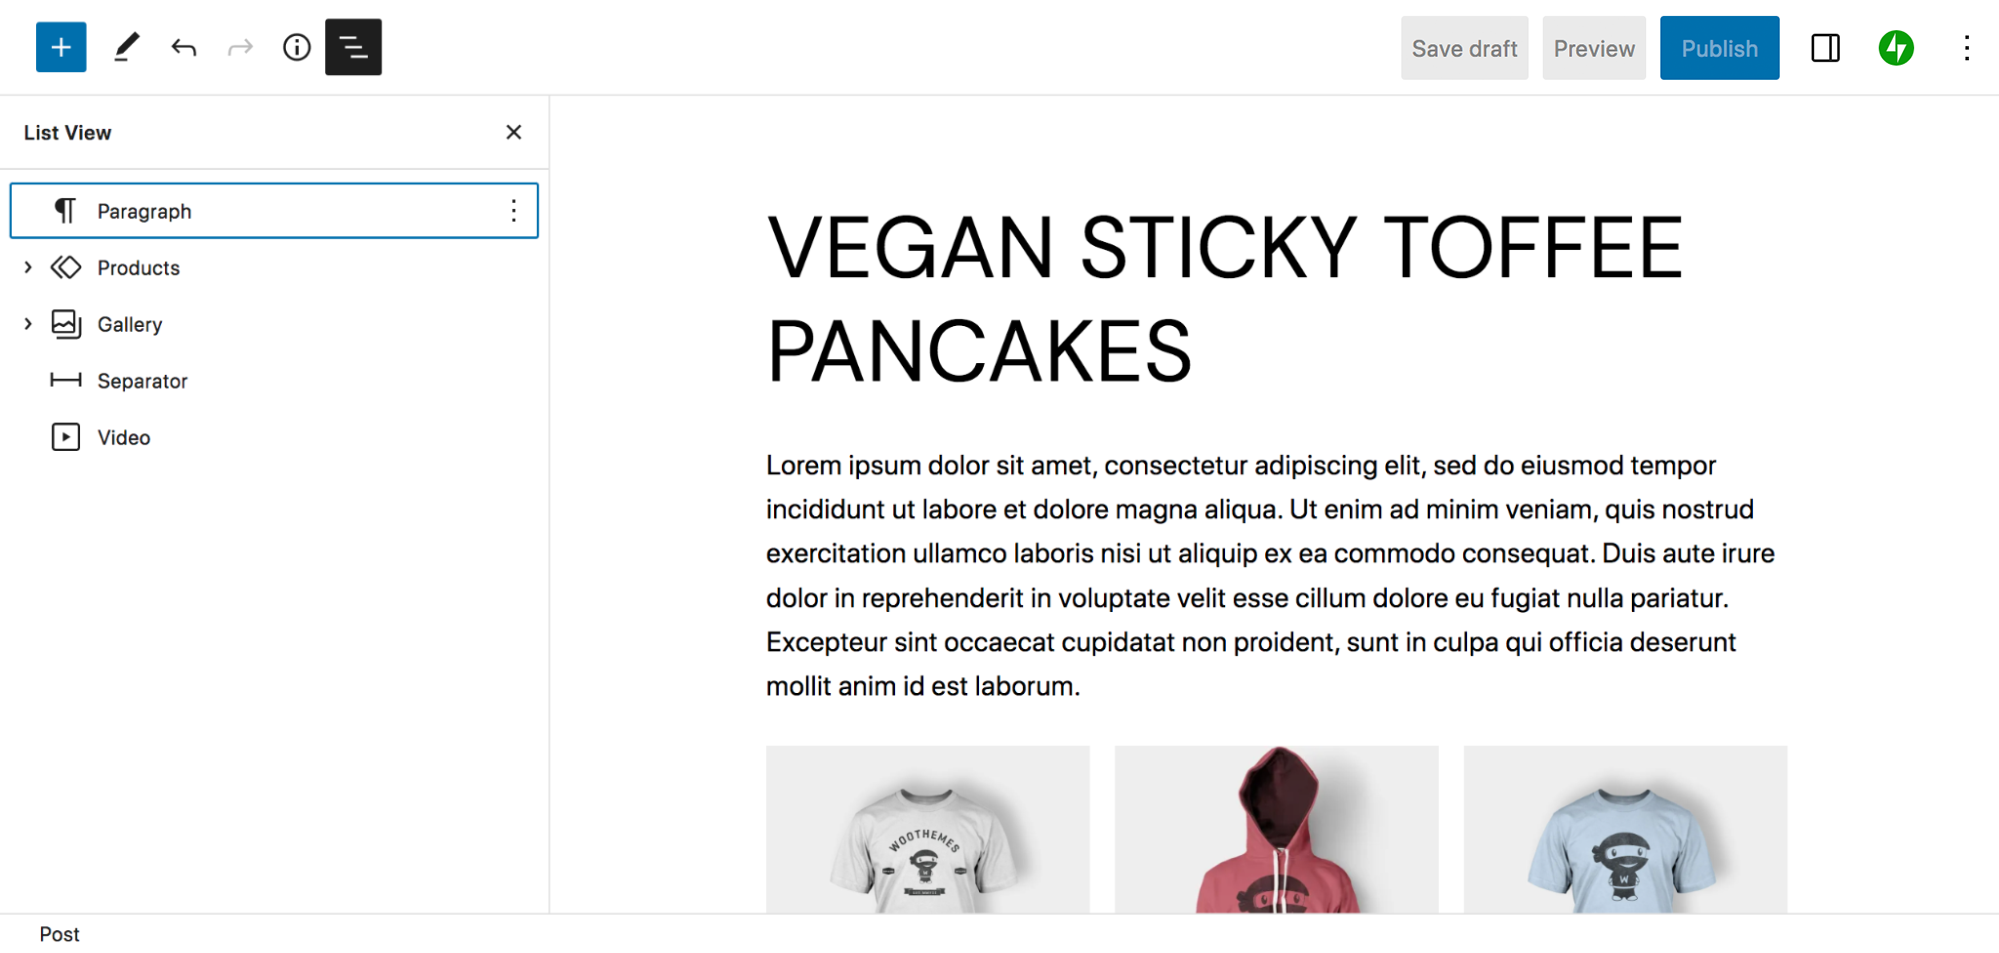
If you see an arrow to the left of a block, you can click and expand that item to see all the blocks nested underneath. For example, the Gallery block has three Image blocks inside.
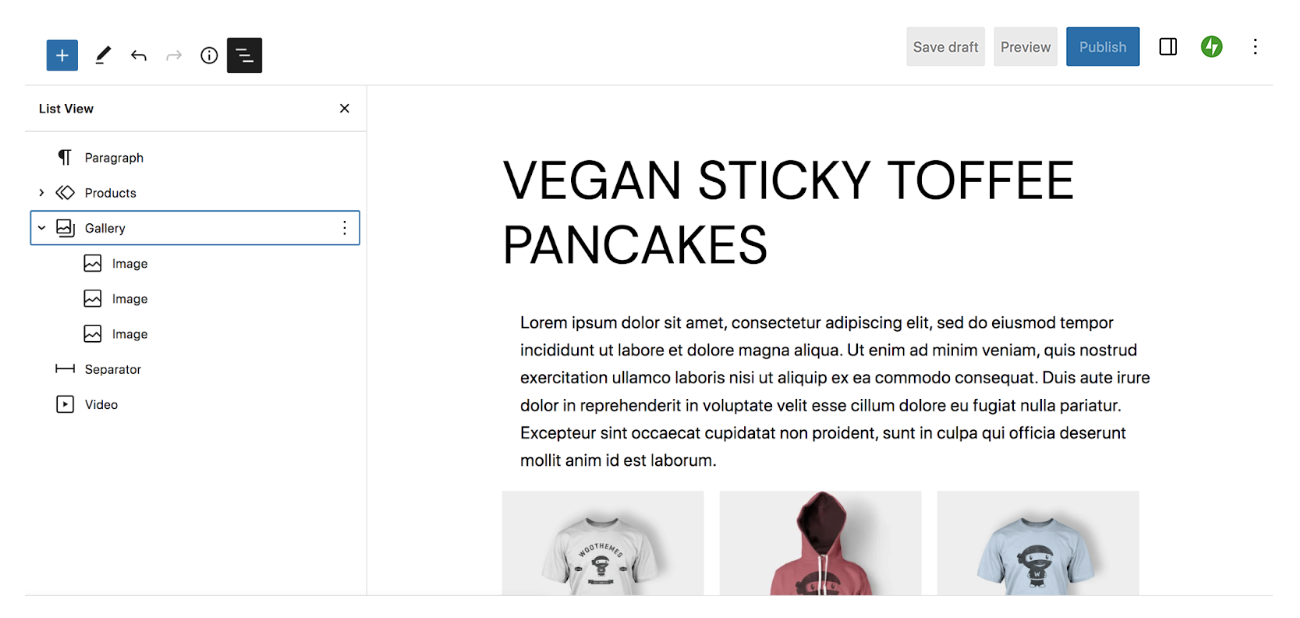
This is an excellent way to get an overview of all the elements that make up your page or post. You can also drag a block inside of List View to quickly move it around without having to scroll up and down the page. And if you click on a block, you’ll automatically be taken to it inside the Editor, which is particularly helpful if you have a lot of content.
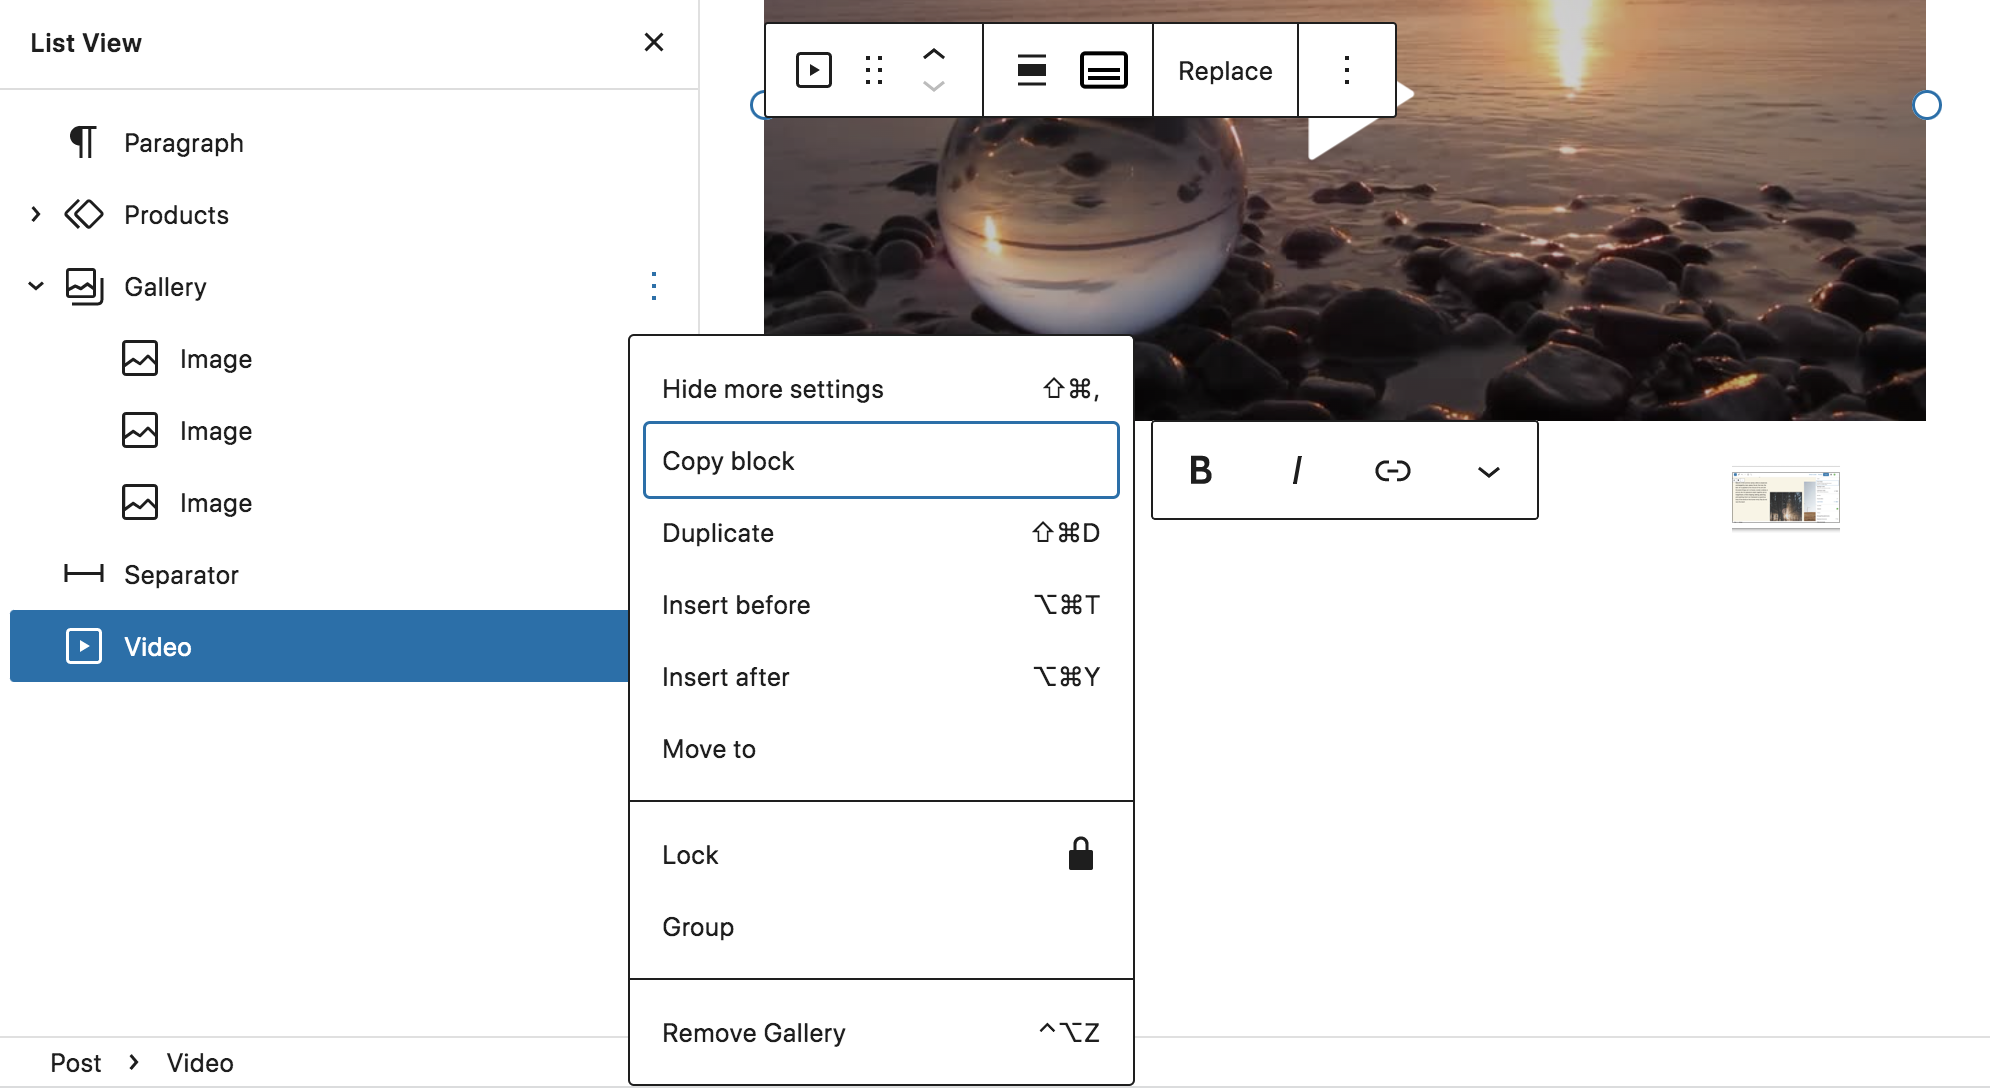
If you click the three vertical dots that appear to the right when you hover over a block, you’ll get even more options. You can copy or duplicate the block, insert a block before or after the one you’ve selected, move, remove, or lock the block, or group multiple blocks together.
Learn more about the powerful List View.
6. Add more blocks and patterns to your library
While WordPress comes with a lot of great blocks and patterns by default, there may be times that you need some extra options. There are a few ways you can do this:
The first way is through your theme. Many block themes include their own templates, block patterns, and blocks that are available to you upon installation. For example, the Wabi theme includes patterns for subscribe forms, projects, and headlines. And Bricksy has dozens of ready-to-use patterns that make building layouts quick and easy.
Certain plugins may also add blocks and patterns to your library. For example, WooCommerce introduces blocks for displaying products and filters, showing the cart, adding reviews, and more. Jetpack introduces a huge volume of blocks that cover everything from calendars and forms to social media feeds and payment options. And Sensei LMS adds blocks for things like quiz questions and image hotspots.
There are also plugins available that were specifically designed to add blocks to your library. Here are some examples:
- Ultimate Blocks: Content filters, reviews, countdowns, sliders, and more
- Otter Blocks: Accordions, tabs, maps, pricing sections, and more
- CoBlocks: FAQs, events, media cards, social sharing options, and more
- Kadence Blocks: Icons, info boxes, table of contents, advanced row options, and more
7. Easily add content from Google Docs or your computer
If you often write content in Google Docs, or work with someone who does, the block editor will be a huge timesaver for you. Instead of having to individually copy and paste each paragraph, image, link, etc. you can just paste the entire Google Doc into the block editor. WordPress will automatically convert the document into the correct blocks.
If you don’t use Google Docs, you can still easily add content like media to the block editor. Just drag and drop an image directly from your computer into the editor and WordPress will convert it to an Image block.
8. Set up Query Loops
The Query Loop block is a special tool that enables you to display lists of posts based on a specific set of attributes that you define. For example, you could display a grid of products grouped by price. Or you could list companies by location in a business directory. The possibilities are pretty endless.
All you have to do is search for the Query Loop block in the Block Inserter, then add it into your page or post. You’ll then see two options: Choose and Start Blank.

While you can certainly create your own query loop from scratch, for this example, we’ll select Choose. We went with a simple list style feed, then clicked the gear icon in the top right to open the Query Loop block settings.
Toggle Inherit query from template to display further customization options. There, you can choose a post type to display (posts, products, etc.), set an order, and decide whether to include sticky posts. If you click the + next to Filters, you can add options for narrowing down the content display, such as categories, authors, and keywords. This allows you to create a truly custom list.

Read our full guide to the Query Loop Block.
9. Utilize the theme.json file
The theme.json file takes the concept of global styles that we discussed earlier one step further. If you’re a developer, this gives you a huge level of control over blocks and user preferences. You can find this file inside your theme directory, which you’ll want to access via file transfer protocol (FTP) or through your host’s cPanel.
Here are a few ways you can use the theme.json file:
- Create a default color palette
- Configure custom font sizes
- Remove the option for custom colors in the block editor
- Enable or disable the controls and options that are available to users for blocks
As you can see, you can use this file to make it easier for users or clients to utilize their site within the boundaries of a brand or style. Instead of being overwhelmed by options, they can see just the controls that they need.
Learn more about the theme.json file and see code examples.
10. Lock blocks for consistency and protection
If you have multiple users on your site, you may want to lock certain blocks that you don’t want edited or moved. Or, this may simply keep you from accidentally making changes yourself! Either way, this is a helpful, easy-to-use feature of the block editor.
All you have to do is select the block, then choose three vertical dots at the right of the toolbar that appears. In the new dropdown menu, select Lock.

A new menu will appear that allows you to either disable movement, prevent removal, or both. Configure these settings and click Apply.
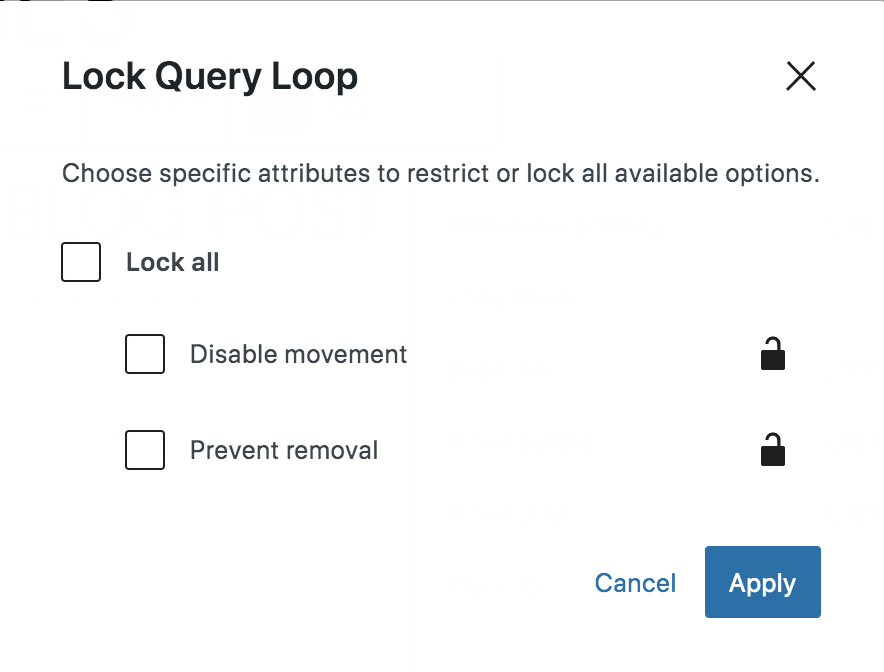
When you save your page, this block will be locked!
The core list of blocks
We’ve talked a bit about how to add blocks to your library. But which blocks are available by default? Let’s take a look.
Text blocks:
- Paragraph: Add standard, text-based paragraphs
- List: Create bulleted or numbered lists
- Heading: Separate your content with headings
- Table: Add a table with multiple columns and rows
- Quote: Highlight sections of text and add attribution
- Classic: Use the Classic Editor in block form
- Code: Include formatted code on your site
- Preformatted: Add text that’s displayed exactly how you type it
- Pull quote: Emphasize text in a more styled way than the Quote block
- Verse: Write and style poetry on your site
Media blocks:
- Image: Include images in your content
- Gallery: Create beautiful galleries of images
- Audio: Embed audio files into your content
- Cover: Add content blocks on top of a visual background
- File: Link to downloadable files
- Media & Text: Place media beside a block of text
- Video: Embed a video into your content
Design blocks:
- Buttons: Add one or more calls to action in button form
- Columns: Create visual columns and insert blocks inside each one
- Group: Group blocks together and customize them as you see fit
- Row: Arrange blocks side by side
- Stack: Arrange blocks on top of one another
- More: Display a “read more” link on archive pages
- Page Break: Add pagination to pages or posts
- Separator: Add a line between two blocks for visual separation
- Spacer: Include blank space between blocks
Widgets blocks:
- Archives: Display a date-based archive of your posts
- Calendar: Show your posts in calendar format
- Categories: List posts by category
- Custom HTML: Insert HTML code into your page or post
- Latest Comments: Show your most recent comments from readers
- Latest Posts: Display your most recent blog posts
- Page List: List all of your published pages
- RSS: Show content from any site’s RSS feed on your own
- Search: Add a search feature anywhere on your site
- Shortcode: Add WordPress shortcodes into your content
- Social Icons: Link to your social media profiles
- Tag Cloud: Add a tag cloud to your site
Theme blocks:
- Navigation: Edit your site’s navigation menu
- Site Logo: Add your logo to your site
- Site Title: Display your site name
- Site Tagline: Display your site tagline
- Query Loop: Show posts based on specific parameters
- Posts List: Display posts using integrated patterns
- Avatar: Include a user’s avatar
- Post Navigation Link: Display links to next and previous posts
- Comments: Show post comments
- Post Comments Form: Display the comment form
- Login/out: Enable users to click and either log in or out
- Term Description: Show the description of a taxonomy on its archive page
- Archive Title: Show the taxonomy name on its archive page
- Search Results Title: Display a title above search results
- Template Part: Add template parts to your pages and posts
The WordPress block editor also includes dozens of embed blocks that allow you to easily embed social media feeds, videos, podcasts, music, and more from third-party platforms. See the full list, along with more details about all the default blocks, from the WordPress documentation.
Frequently asked questions
Still have questions? Let’s answer some common ones below.
Is the block editor free on WordPress?
Yes! Since the block editor is included with WordPress installations by default, and WordPress itself is free, then the block editor is also completely free.
Does WordPress come with the block editor by default?
Yes, all WordPress installations include the block editor automatically.
Does the WooCommerce product editor use the block editor?
At this time, the WooCommerce product editor does not use the block editor. However, WooCommerce does include a set of blocks that you can use within your posts, pages, and other content. You can also use the Site Editor to customize the WooCommerce product template, archive pages, search results, and more.
Does the block editor have an HTML editor?
Yes, the block editor does have an HTML editor. To access it, simply open the page or post you’re editing and click the three vertical dots at the top right. Then, select Code Editor. You’ll now see the page content as HTML code and can make edits accordingly.
How does the block editor compare to the classic TinyMCE editor?
Prior to the release of the block editor, WordPress used a TinyMCE editor, also known as the Classic Editor. But the block editor was built and designed to be more powerful and easier to use than the previous solution.
It’s a much more visual editor than TinyMCE, allowing beginners and developers alike to build beautiful, complex pages and posts. It also opens up the ability to design and customize elements like headers, footers, and templates without any code at all.
How does the WordPress block editor compare to page builders?
There are many benefits of using the block editor rather than a WordPress page builder. To begin with, the block editor is completely free, and included with WordPress by default. This means that you won’t have to install any additional plugins to use it, nor will you have to worry about compatibility issues with WordPress core or major plugins.
Some page builders are tied into specific themes, so if you decide to switch, you’ll have to rebuild much, if not all, of your content. This isn’t the case with the block editor. As long as you’re using a theme that supports the block editor, your content will largely remain the same if you switch.
There are lots of extensions and plugins that expand the capabilities of the block editor, since it’s a core WordPress feature. Having these at the tip of your fingers allows you to truly create something unique.
Finally, a page built with the block editor should load faster than one built with a page builder. Its code output is lighter and cleaner, and it doesn’t require any plugins that take up space on your server and in your database. You can see more information in the Pros and Cons section of this article.
Can the WordPress block editor slow down my website?
No, the block editor is generally very fast and should not slow down your website. It is built into the core of WordPress, so it is highly optimized. The code it produces is clean and efficient.
Problems with speed are usually caused by other factors. These can include poorly coded third-party blocks, large image files, or slow web hosting. To keep your site fast, use well-coded blocks and optimize your images before uploading them. A fast website is important for keeping visitors happy and for better search engine rankings.
Will I lose my content if I switch from the Classic Editor to the block editor?
You will not lose your content when you switch to the block editor. WordPress automatically converts your old posts into a “Classic” block. This means your existing text and images will look the same on the front end of your site.
You can then choose to leave the content in the Classic block or convert it into individual blocks for more control. It is a good idea to convert your most important pages to individual blocks. This allows you to update the design and layout using modern block features.
How do I fix common problems with the block editor, like blocks not loading?
If the block editor is not working correctly, the issue is often a plugin conflict. The first step is to clear your website and browser cache.
If the problem continues, you should temporarily disable all your plugins. Then, turn them back on one by one until the editor breaks again. This helps you find the plugin causing the conflict. Another common cause is an outdated version of WordPress or your theme. Always make sure your site is fully updated to prevent such problems.
Is the block editor a good replacement for page builder plugins like Elementor or Divi?
The block editor is a strong replacement for many page builder plugins, especially for new websites. It is built into WordPress, which means it is fast, secure, and will always be compatible.
Page builders can add extra code that slows down your site and may cause a “lock-in” effect, making it hard to switch themes later. For most users, the block editor, combined with a good block theme, provides all the tools needed to build a professional website without the extra weight of a page builder.
Can I still use my favorite widgets with the block editor?
Yes, you can still use your widgets, but they work differently in modern themes. With a block theme and Full Site Editing, there are no traditional widget areas. Instead, you can place any block anywhere you want in your header, footer, or sidebar.
This includes a special “Legacy Widget” block that allows you to insert any of your old widgets. This approach is more flexible because you are not limited to specific widget-ready areas. You can use the power of blocks anywhere on your site.
What is theme.json and why is it important for the block editor?
The theme.json file is a central configuration file for block themes. It allows theme developers and advanced users to control settings for the entire website from one place.
With this file, you can define your website’s color palette, font sizes, spacing, and default block styles. This ensures a consistent design across all pages. For a regular user, you do not need to edit this file directly. However, it is the technology that powers the global style options you see in the Site Editor, making it a very important part of modern WordPress design.
