
Whether you’ve been working in the WordPress community for a while or are new to the platform, you’ve probably heard the term “block themes”. Perhaps you’re currently using a classic theme on your site and are curious about switching to a block theme. Or maybe you’re not sure where to start when it comes to choosing a theme to begin with.
So let’s dive into the topic of block themes. In this post, we’ll talk about what they are and explore their benefits. Then, we’ll briefly touch on how to switch to a block theme, see some examples, and learn how to set up and use a block theme.
What are block themes in WordPress?
Block themes are an incredibly powerful type of theme that allow site owners to edit all aspects of their WordPress website without code, including headers, footers, and page templates. They do this with blocks — individual elements like paragraphs, images, and columns — that users can drag and drop to build their website.
With block themes, even the most inexperienced website owner can design and build a beautiful site. But, at the same time, developers can harness the power of block themes to speed up their workflow and create even more intricate, effective sites.
What is full site editing (FSE) in WordPress?
Full site editing (FSE) encompasses the features used to expand blocks beyond content to reach all aspects of a website. This allows everyone to build and design everything from pages and posts to checkout processes and sidebars without needing to work with code.
The key elements of full site editing include:
- The Site Editor, which is the interface used for building pages, templates, template parts, and more with blocks
- A Styles tool, which allows you to configure the look and feel of blocks and your site as a whole
- Templates, which are layouts for things like blog posts and Checkout pages
- Template parts, which include individual elements like headers and footers
- Block patterns, which are unique design groupings that you can use across your site, such as a pricing table
- The theme.json file, which is a tool for those familiar with code to configure default block styles and settings in more detail
Block themes unlock the features of full site editing. Without a block theme activated, a website cannot use these tools.
What are the benefits of using a block theme?
There are a number of benefits to block themes. Let’s take a closer look at just a few.
1. The ability to edit your entire WordPress site without code
Thanks to full site editing, you can use blocks to build everything from pages and posts to Checkout pages, blog post templates, and headers. Simply drag and drop elements into the page, then use a simple settings panel to customize the look and functionality of each one.
You can also take advantage of features like the Styles panel, where you can set colors, fonts, spacing, and other design options across your entire website.
This means that everyone has the capability to build a beautiful, functional website, even if they aren’t a developer.
2. An improved workflow
Both experienced WordPress developers and beginners can work much faster using block themes. Instead of needing to edit theme files or write code to make changes to templates and other site elements, users can simply drag, drop, and edit settings.
With reusable blocks, you can create and configure a block exactly how you’d like, save it, then use it as many times as you’d like across your website. And when you make a change to one, it will update for every instance.
And with block patterns, you can quickly add entire sections to pages and templates, reducing the need to create individual elements.
3. Better website performance
Using a block theme enables you to build a full-featured website without needing to install a page builder plugin. This can eliminate the bloat involved with these types of tools, while still allowing you to benefit from advanced features.
In addition, the code output from the block editor is both lighter and cleaner than that of page builder plugins. So if the same template is built with the block editor rather than a page builder, it should load faster.
4. The ability to adapt to the future of WordPress
Block themes and full site editing are the future of WordPress. There are constantly new themes and features being released that can make your site even better. And plugin developers are always working to release new tools that make integrating their features into the Site Editor even simpler.
If you want to future-proof your WordPress site, then a block theme is the way to go.
How do block themes differ from classic WordPress themes?
In simple terms, block themes are made entirely of blocks, while classic WordPress themes only use blocks for content like pages and posts. Instead of the WordPress Customizer, Navigation, and Widget areas, the ability to edit the design and functionality of your site is housed in the Site Editor.
At the code level, block themes are composed of block-based HTML templates. Classic themes, however, rely on PHP files. The file storage for classic and block themes is also set up differently.
Can a classic theme be converted into a block theme?
Yes, absolutely! While the steps involved in converting a classic theme to a block theme vary depending on the themes you’re working with, the process typically consists of these steps:
- Back up your website and use a staging site if possible.
- Copy all existing widget content and custom code. Then, ensure that existing plugins are compatible with your new block theme.
- Choose and activate your new block theme.
- Configure your sitewide styles.
- Build the framework of your site.
- Tweak (or rebuild) any pages or posts, as necessary.
- Test the site in full, then push the new design live.
Read all the details in our guide to switching from a classic theme to a block theme.
Five examples of WordPress block themes
Want to see some examples of block themes in action? There are lots of great options to choose from, but let’s look at five of them in more detail.
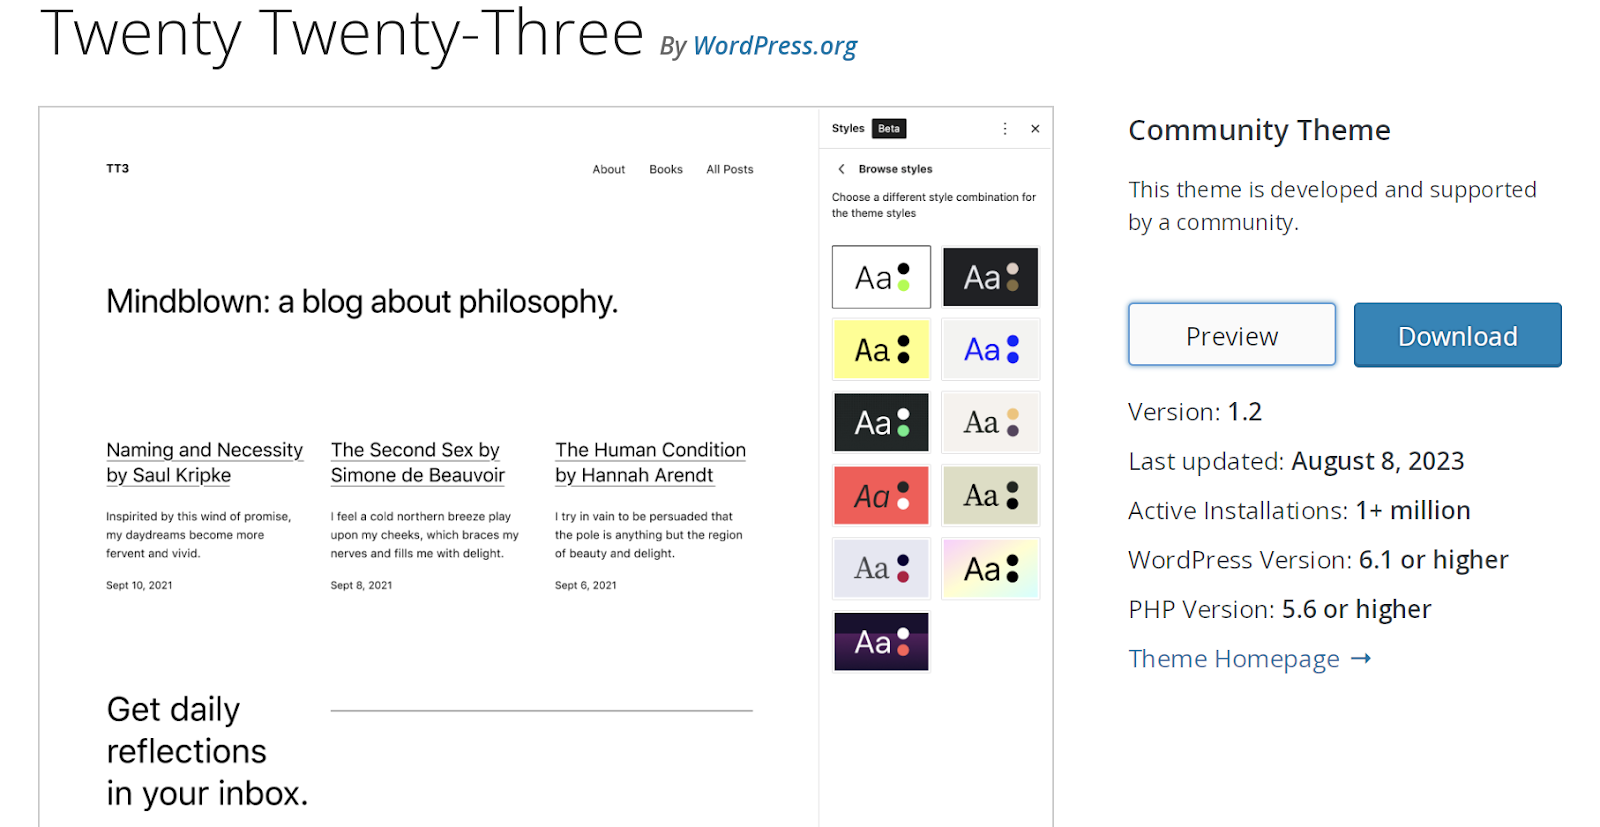
1. Twenty Twenty-Three
The Twenty Twenty-Three theme is a community theme, which means that not only is it free, it’s also built and supported by the WordPress community.
It has a clean foundation, which makes it the perfect option for getting your feet wet with block themes. It’s also an excellent choice for simple websites, and gives you a lot of opportunity to add your personal touch.
It includes ten unique style variations, along with various straightforward templates, including 404, Search, and Archive.

2. Bricksy
Bricksy is another free option available from the WordPress.org theme repository. It’s chock-full of block patterns that can make designing a modern website super quick and easy. For example, you can drag and drop image grids, beautiful column designs, or even entire page patterns. Then, just customize them to your liking and you’re good to go!
The Bricksy theme does offer a premium version that includes additional features along with support from the development team.
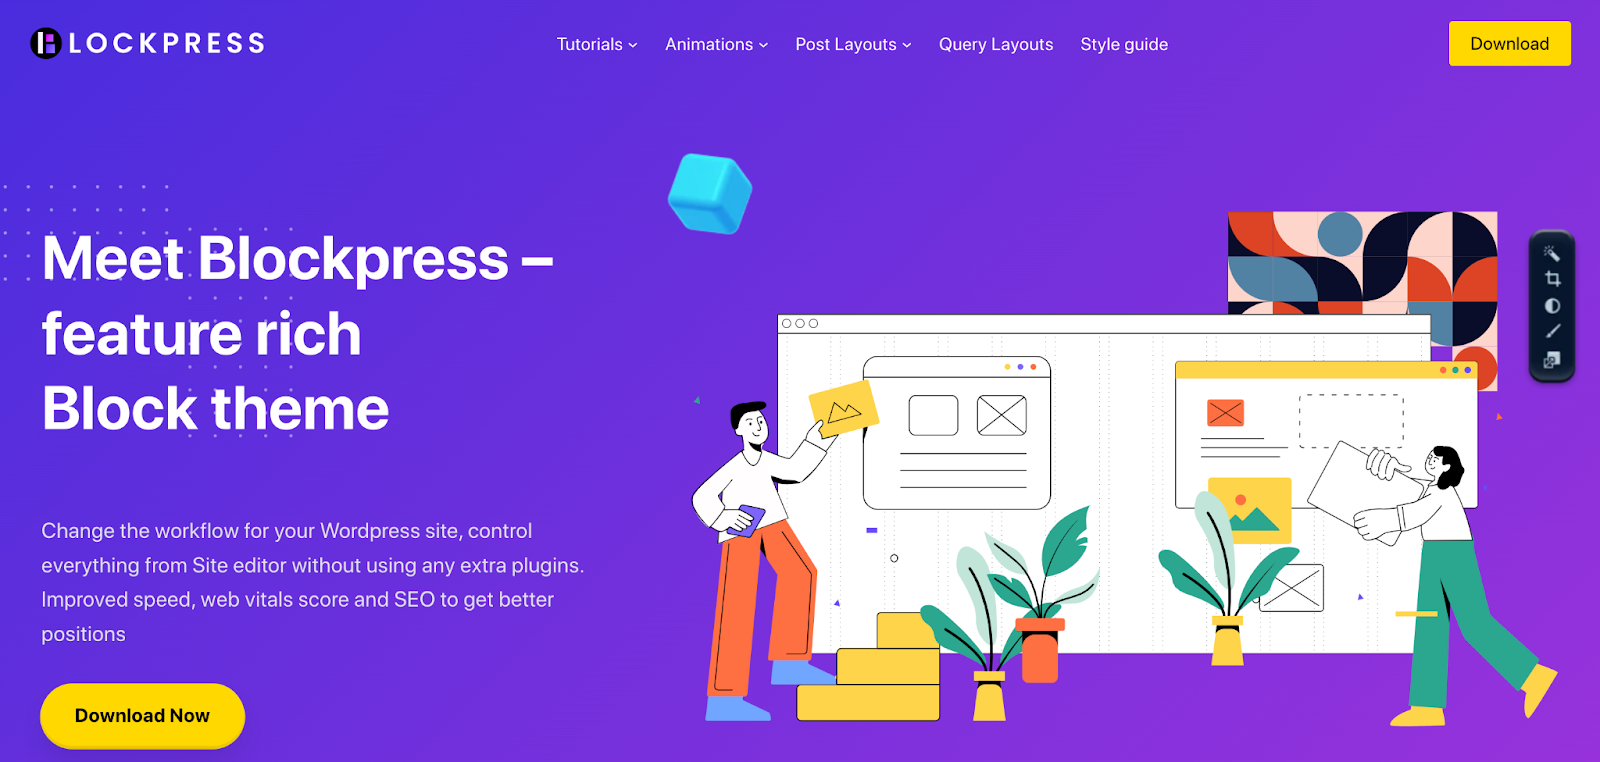
3. Blockpress
The Blockpress theme markets itself as a “feature rich block theme,” and that’s a great description. It really dives into performance, with features like conditional asset loading and optimized WooCommerce templates.
Not only does it embrace full site editing, it also includes tons of block patterns and full page templates that make designing your site simple and fast.
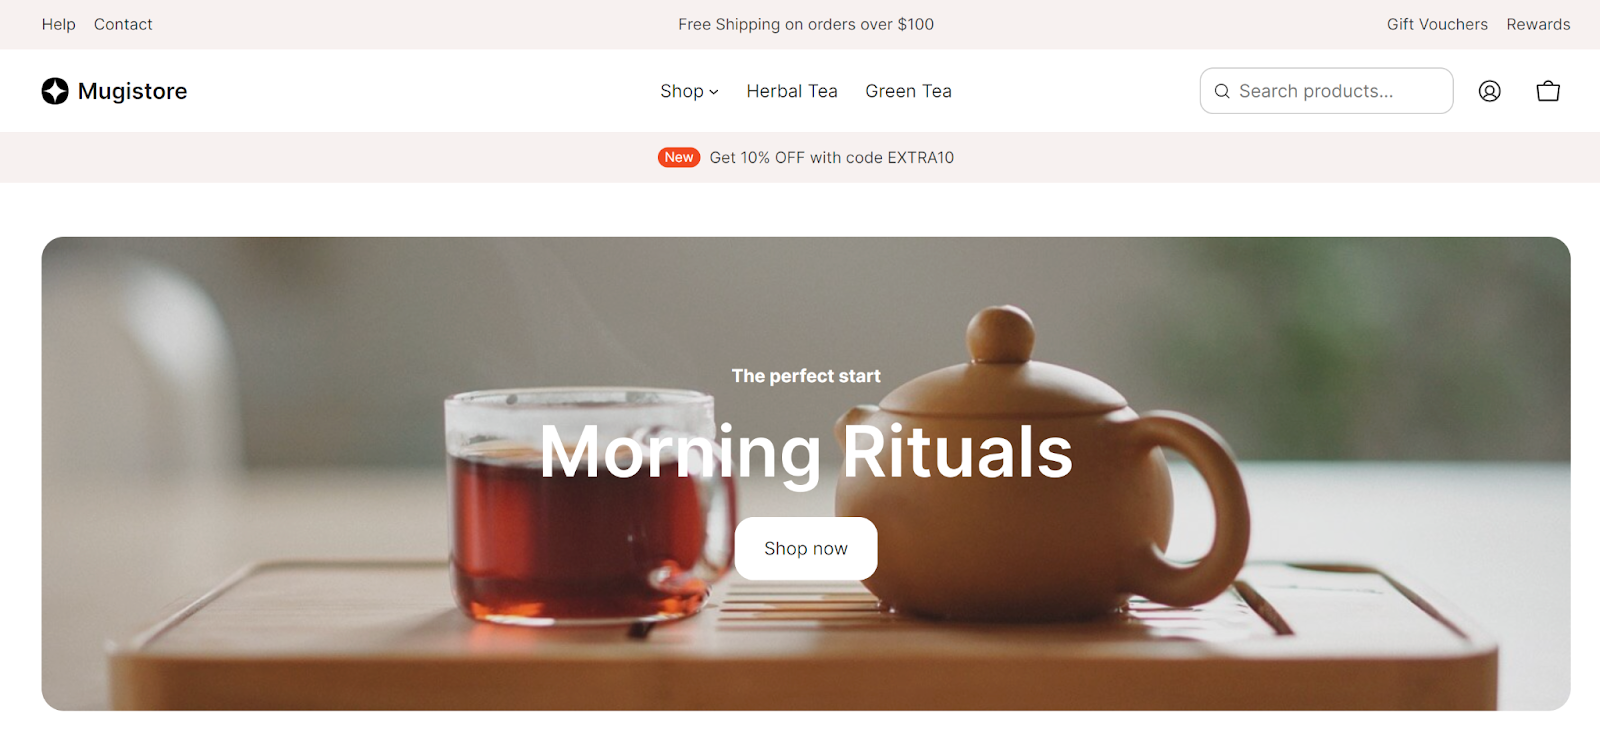
4. Mugistore
This premium block theme ($59) caters specifically to ecommerce stores, including blocks for mini carts, product categories, calls to action, pricing pages, and more. It also offers predefined style variations and page designs for a truly custom site.
If you’re not a merchant, you can also check out the other themes from AinoBlocks, with designs for small businesses, online news sites, and resumes.

5. Tove
The Tove theme is another free block theme option available from the WordPress.org repository. While it was built with cafés and restaurants in mind, you can use the power of full site editing to make it look great for any industry.
It includes more than 40 block patterns — pricing tables, calls to action, hero images, FAQs, and more — including several header and footer designs.
How to set up and use a WordPress block theme
Once you’ve chosen a block theme, it’s time to install and activate it on your website. If you’re working with an existing website, make sure you make a full backup before following the instructions below. The best option for this is a tool like Jetpack VaultPress Backup, which includes real-time backups and fast, easy restores.
Now, log into your WordPress dashboard and navigate to Appearance → Themes. Then, click Add New at the top.
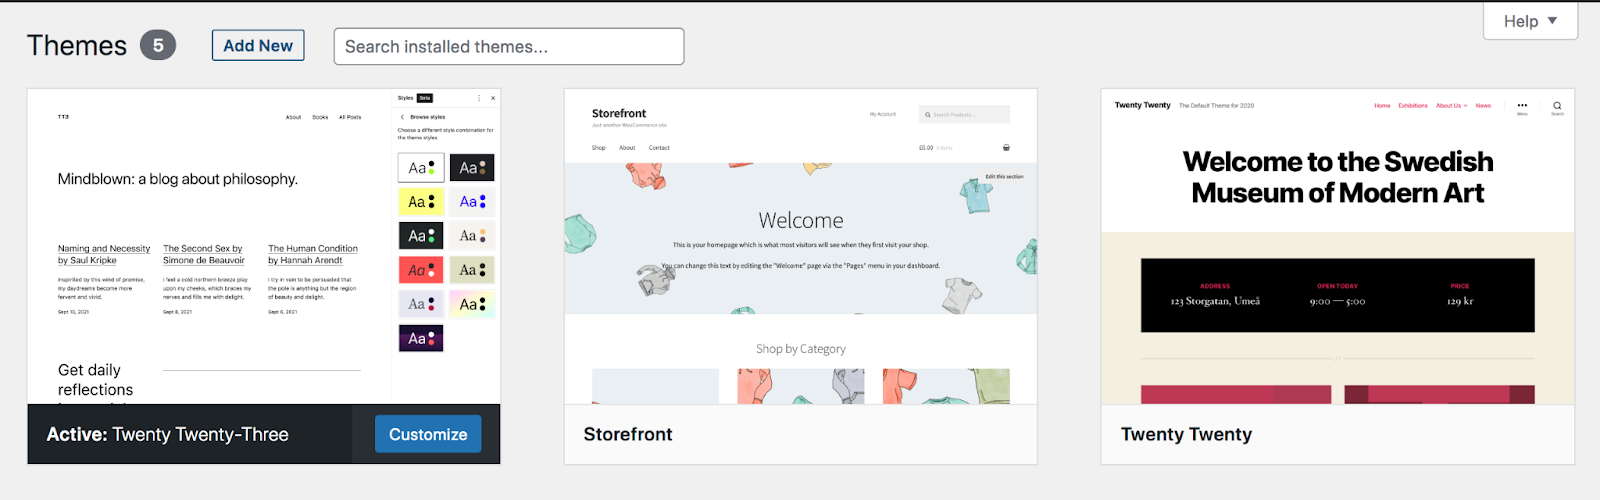
If the block theme you want to use is available in the WordPress.org theme repository, look for it using the search bar at the top right.
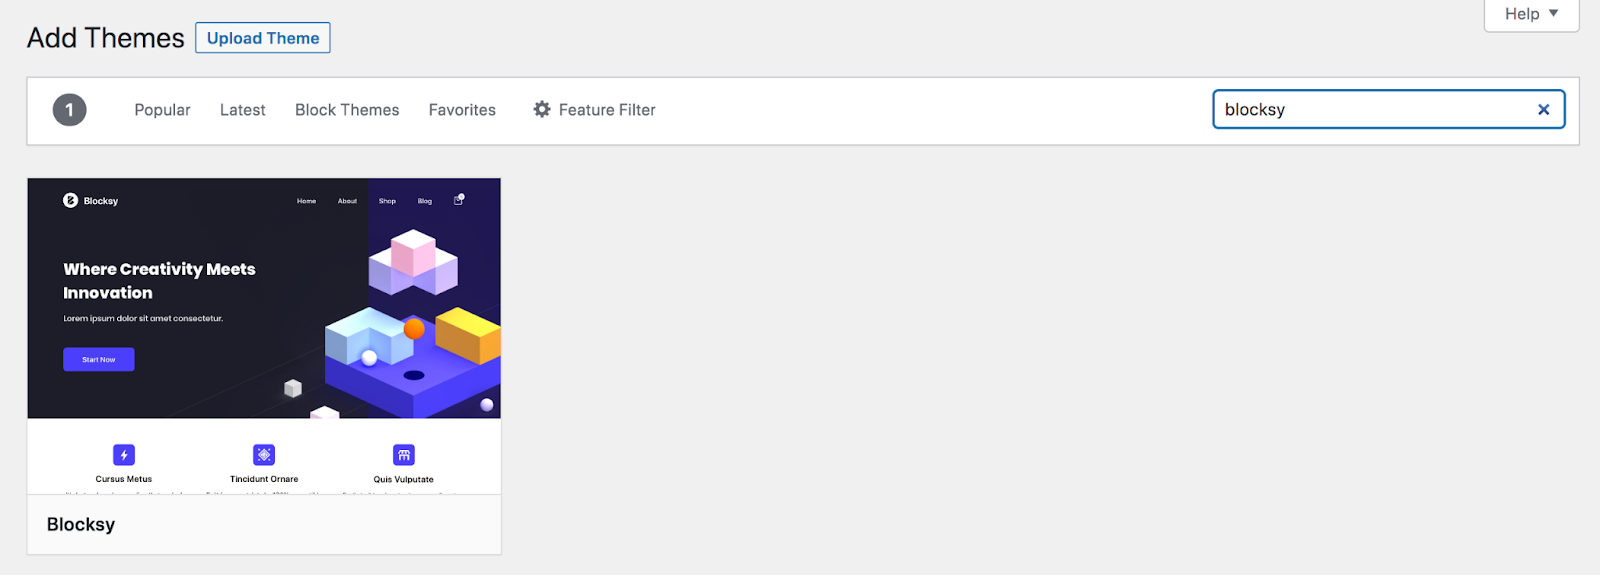
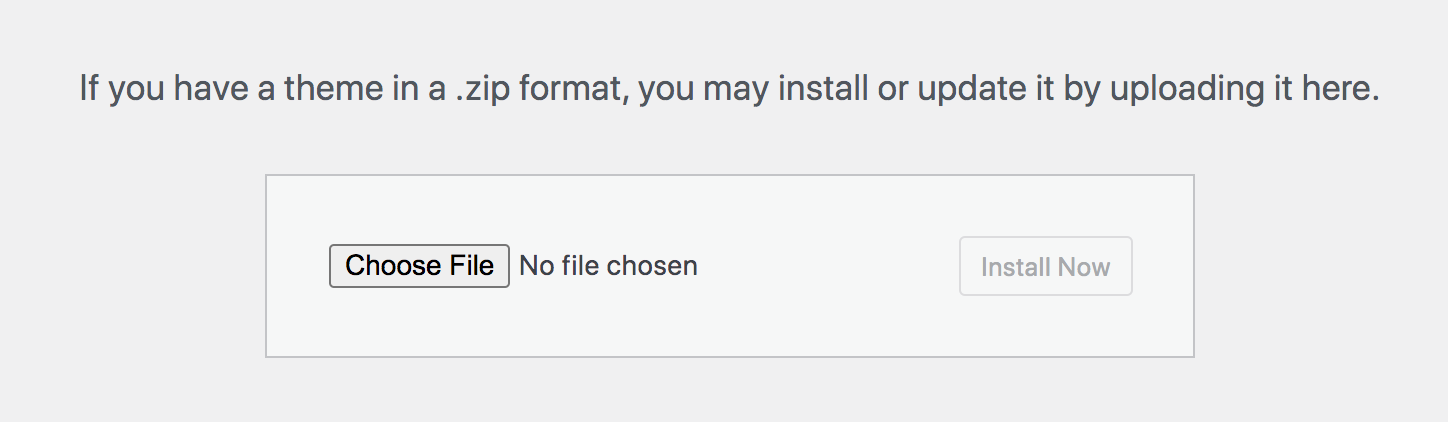
Or, if you downloaded a theme from another source, such as a premium theme developer, you can click the Upload Theme button at the top left. There, you can choose the theme file and upload it to your site.
Hover over the theme you want to use and click Install → Activate. Now you can start using and customizing your theme!
How to customize the design of a block theme
Once you’ve installed your theme, you’ll want to customize it to match your needs and brand. Let’s take a look at a few ways to do this.
Note that for the purposes of this tutorial, we’re using the Twenty Twenty-Three theme.
Edit your block theme’s navigation
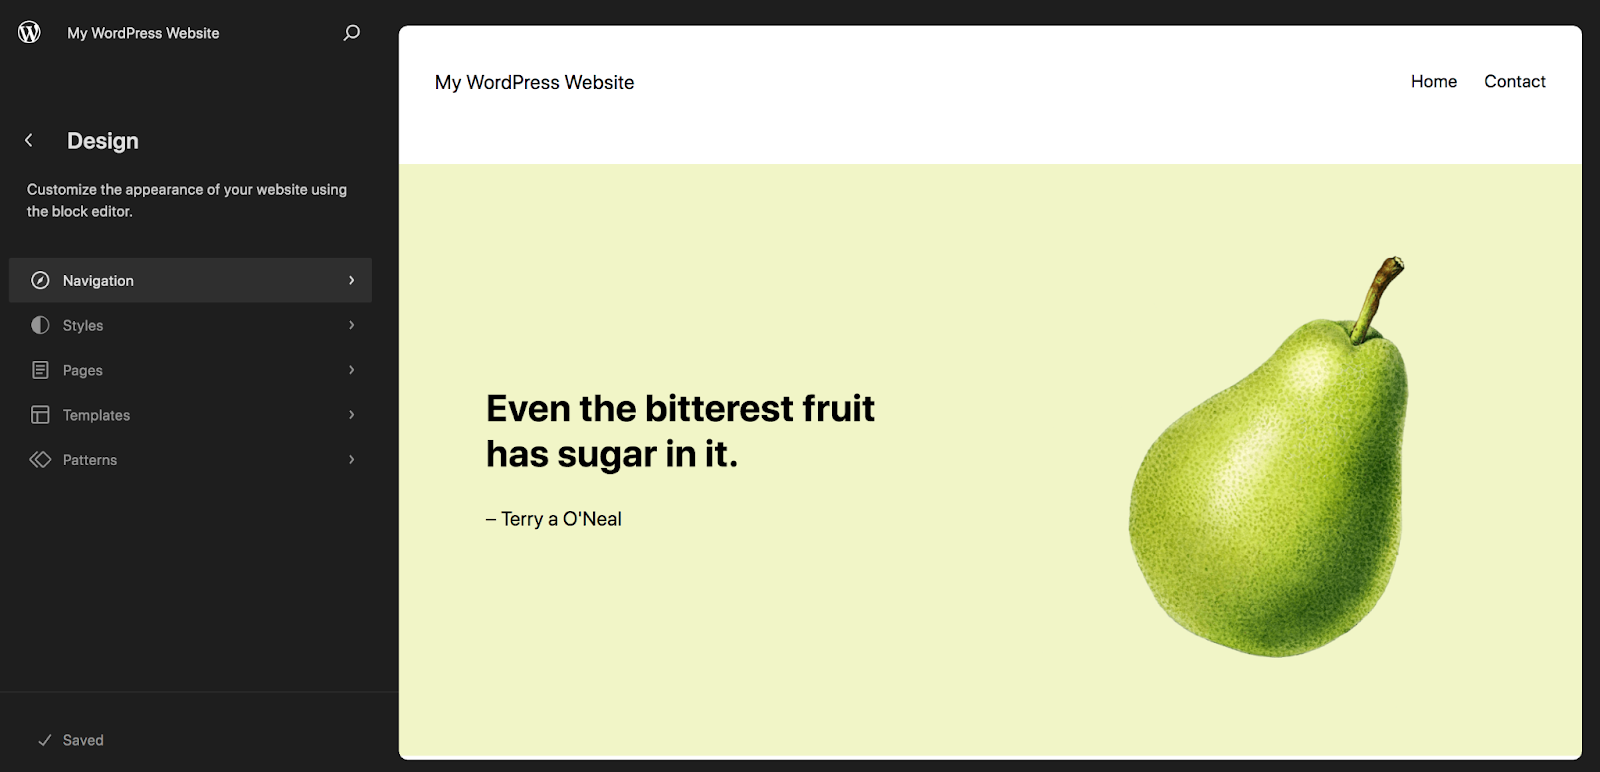
Start by going to Appearance → Editor in your site’s dashboard. Then, select Navigation.
While you may have navigation in other places, like your footer or sidebar, let’s focus on the main menu, which typically lives in the header.
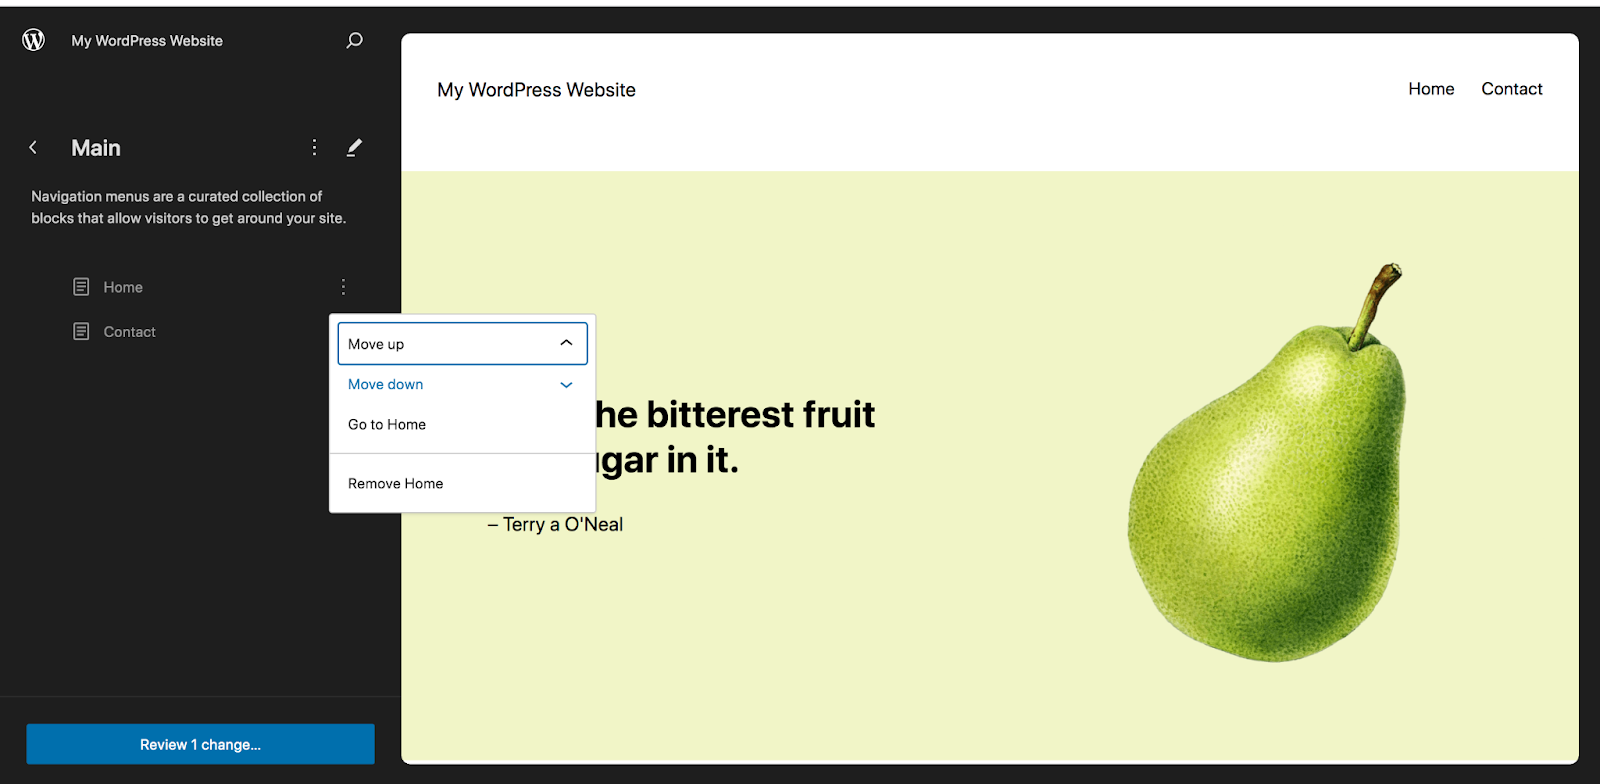
In the Navigation panel, you’ll see a list of the pages in your main menu. If you want to move them around, simply click on one and drag and drop it into place. You can also click the vertical ellipses that appear when hovering over a page, and choose to move it up or down, visit the page, or remove the page from the menu entirely.
If you click the pencil icon next to the menu name, it will take you to a new page, where you can add and remove items from the menu using the Navigation block.
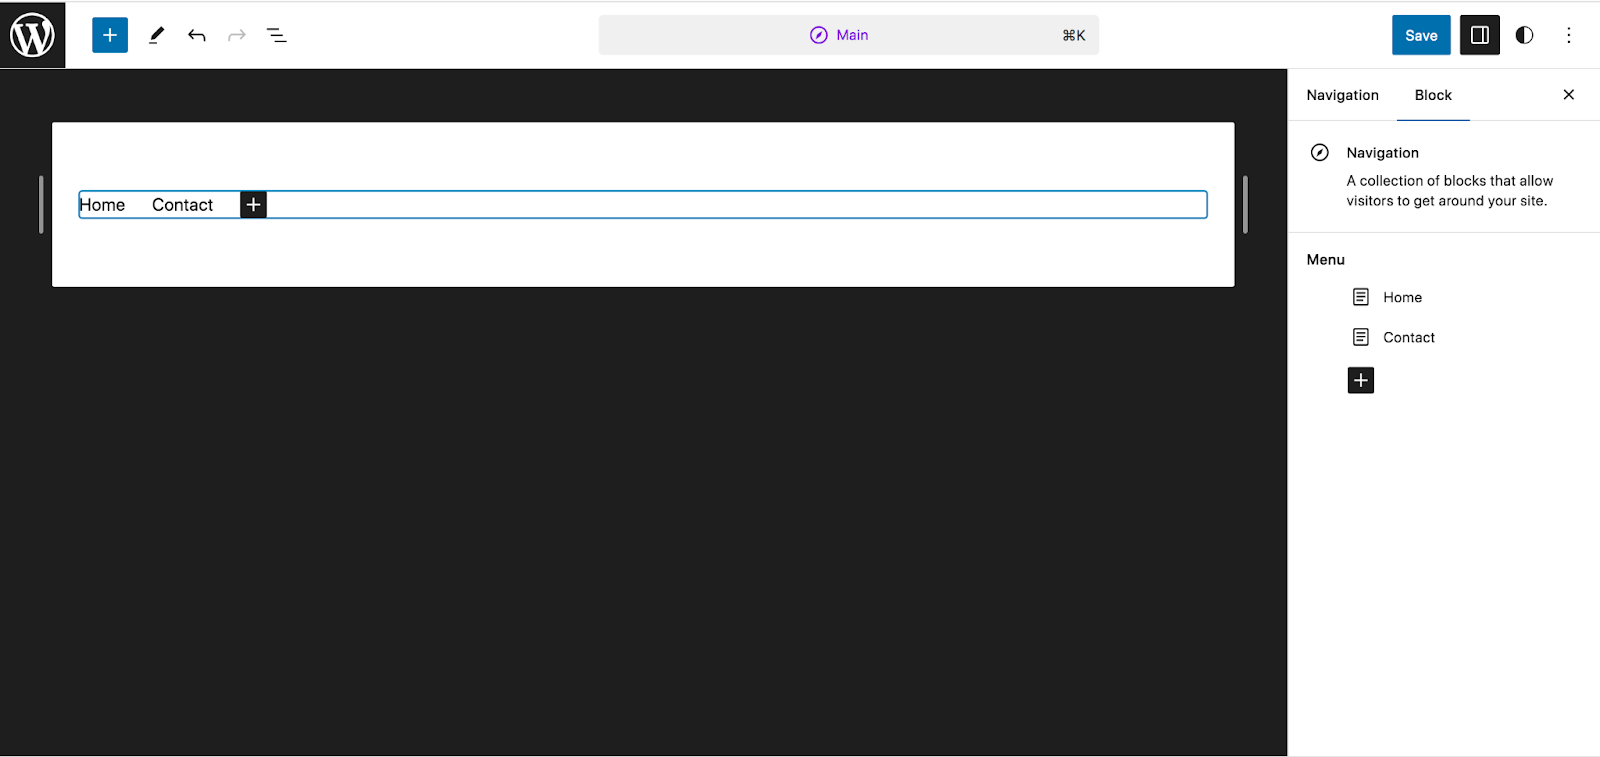
On the right-hand side, you’ll see the list of pages again. If you click the black + icon, you can choose from various items that you can add, including page links, custom links, social icons, and search bars. Click Browse All if you want to see all of your options.
To simply add a link to a page on your site, click Page Link.

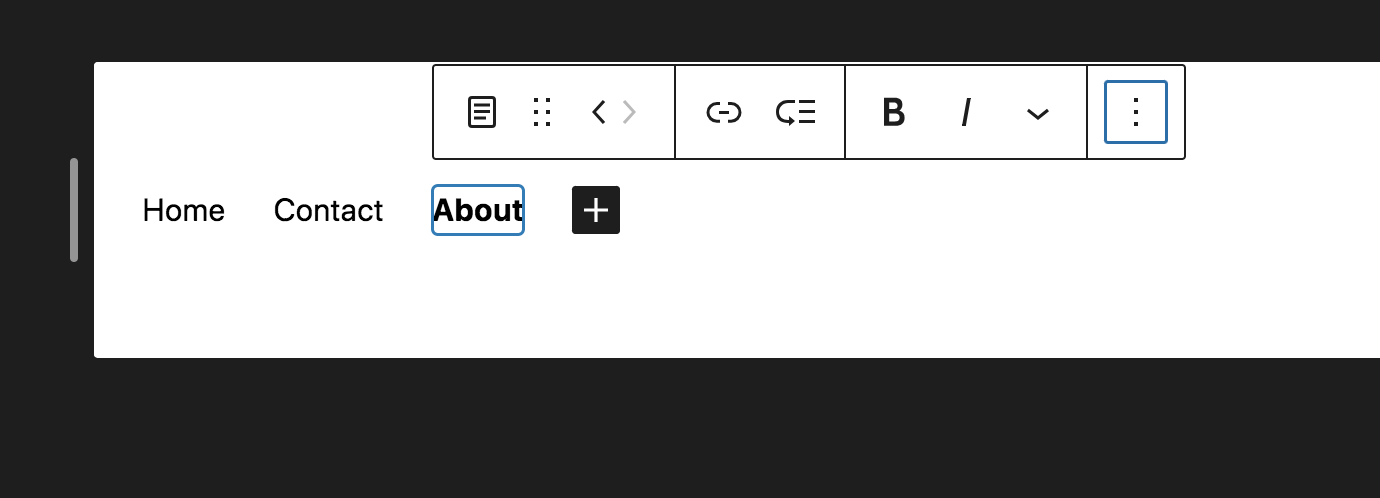
Now, search for the page you want to add, select it, and it will show up in your menu. In the preview of the menu at the top left, click on an individual item to edit the options for it using the panel on the right side of the page. For example, you might rename the page or switch the URL.
In the menu that appears directly above the item you want to edit, you can bold or italicize the text, add a dropdown menu, and more.
You can experiment with all of these tools and add pages until you get the exact look and functionality that you’re going for. When you’re made all your changes, click the blue Save button at the top right.
Change your block theme’s styles
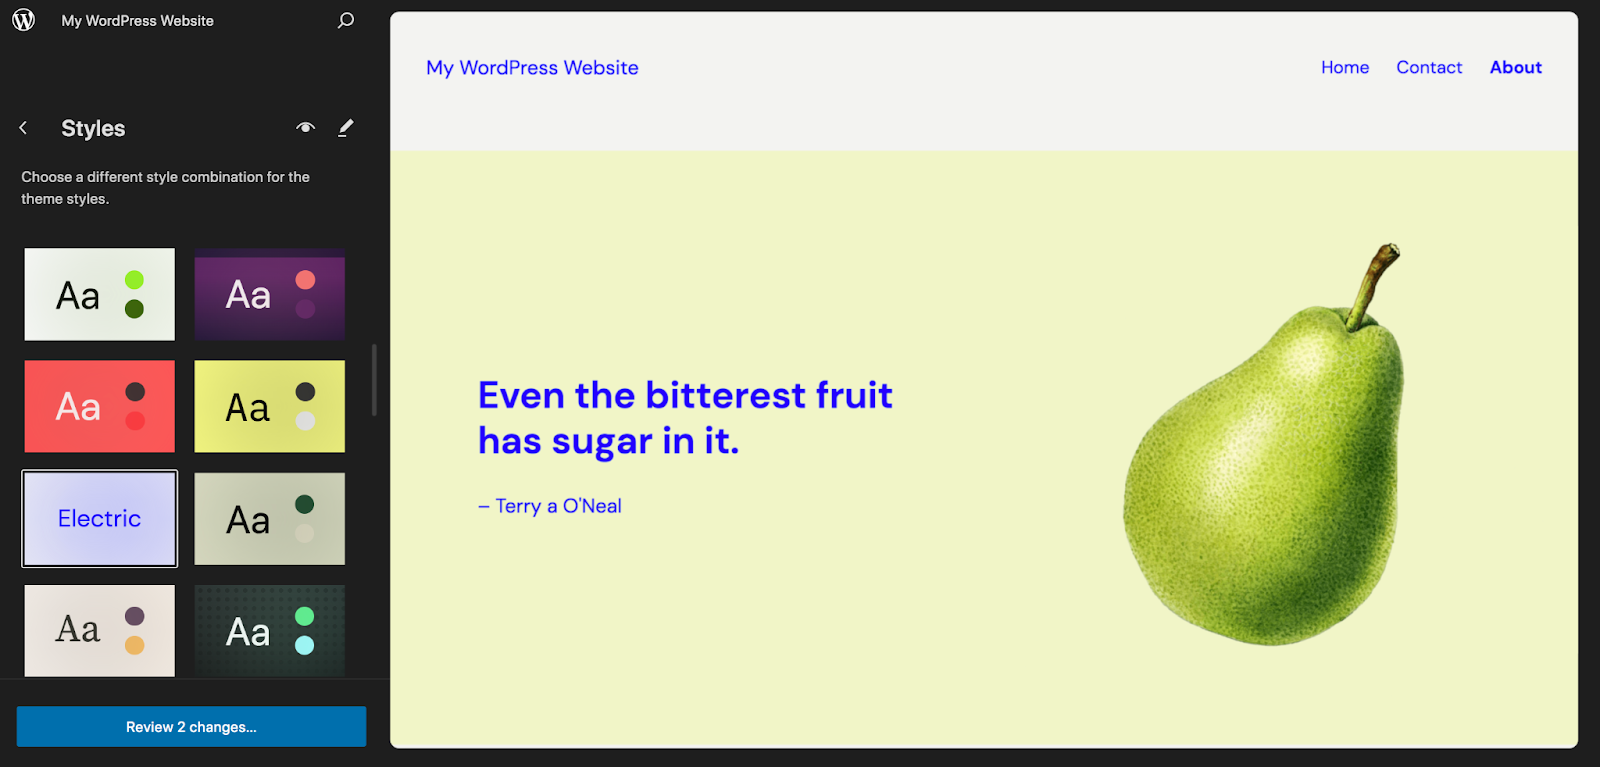
Back in the Editor, choose Styles this time to navigate to all the style options for the theme you’re using. Right out of the box, you’ll see a grid of predefined theme styles that you can choose from. Select one to preview it on the right side of the page.
You can choose one of these, then make edits as you see fit, or simply proceed to the next steps. Click the pencil icon to open the Styles panel on the right side of the Editor.
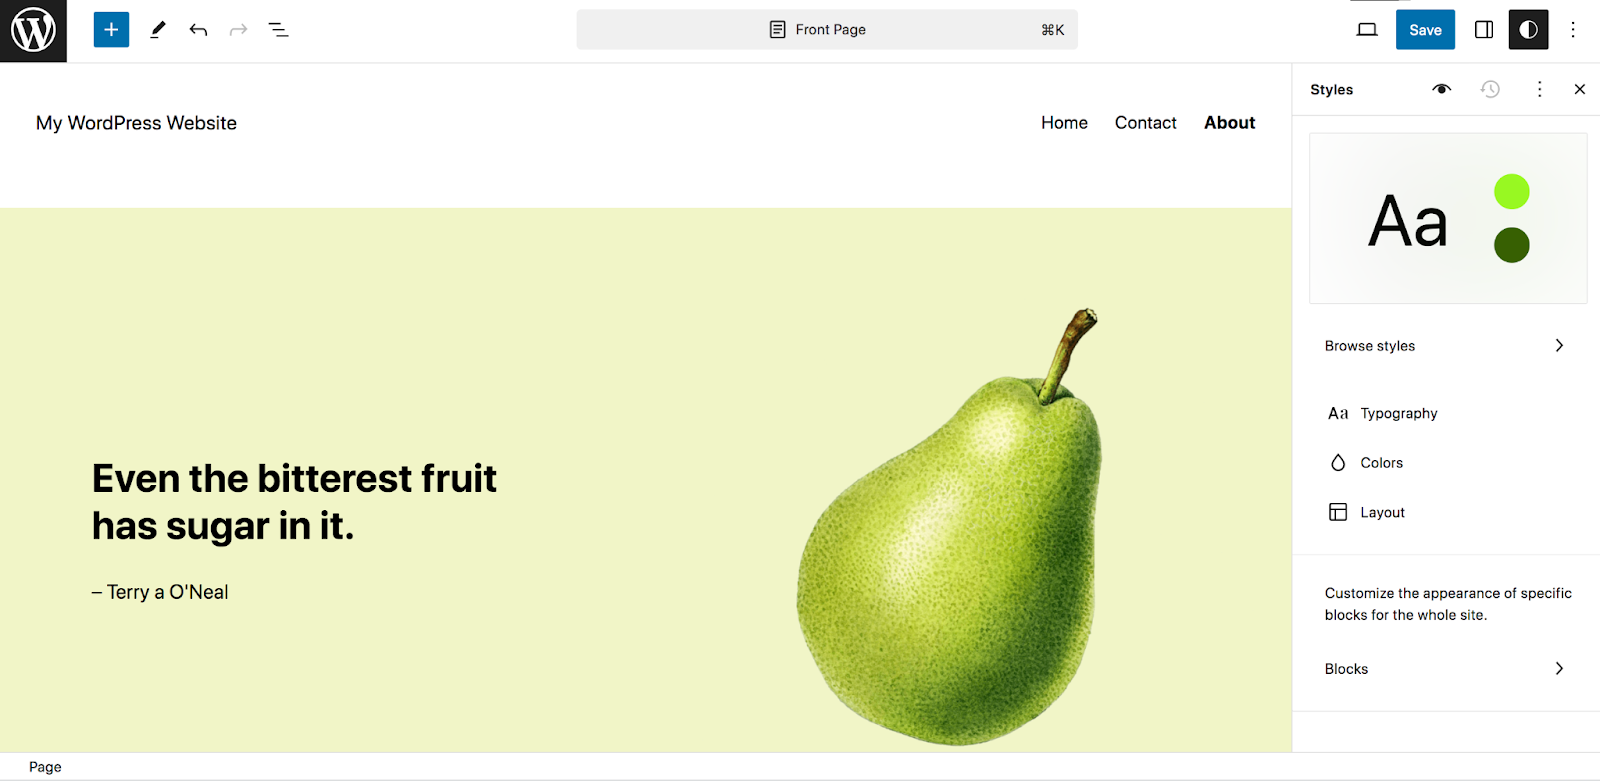
The first option you’ll see is Typography. Clicking this will present you with a list of elements like text, links, and headings.
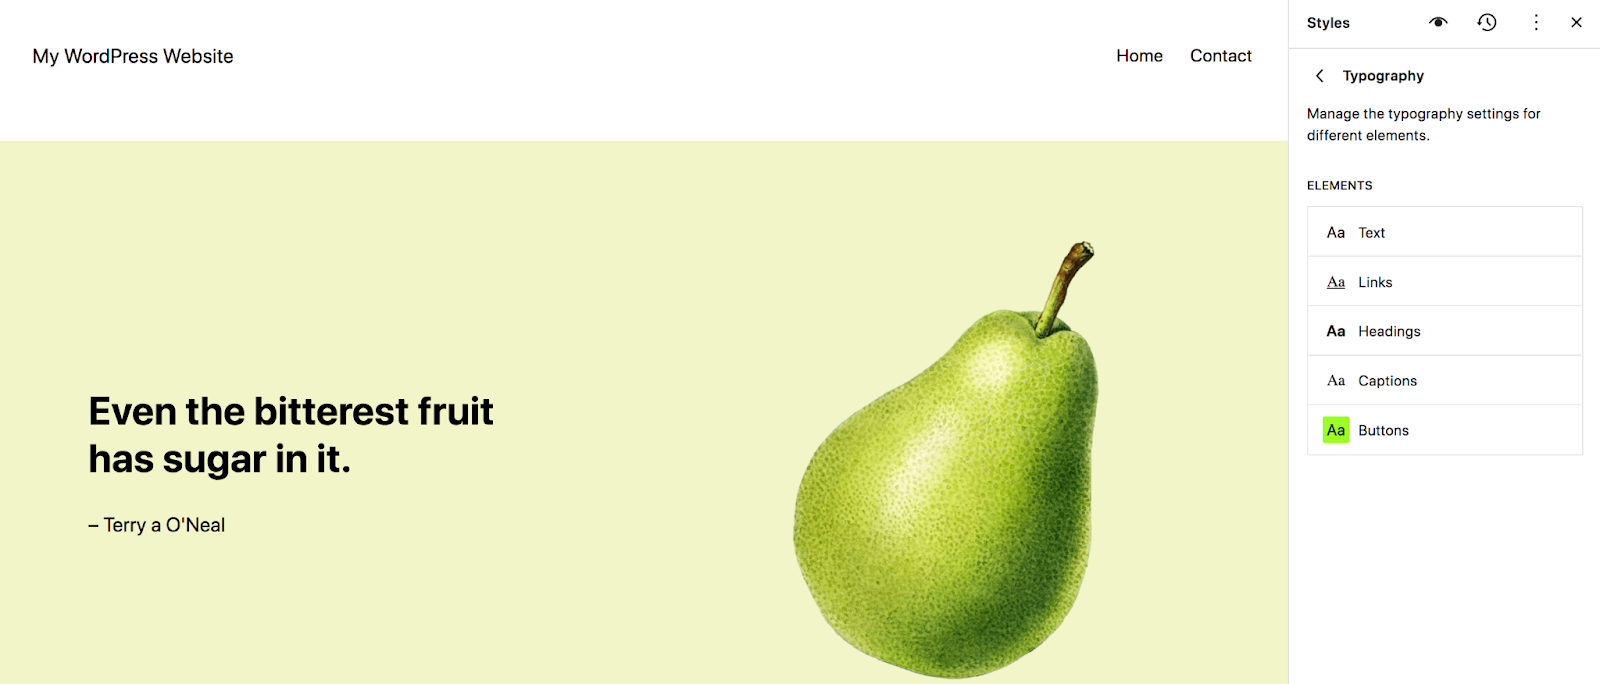
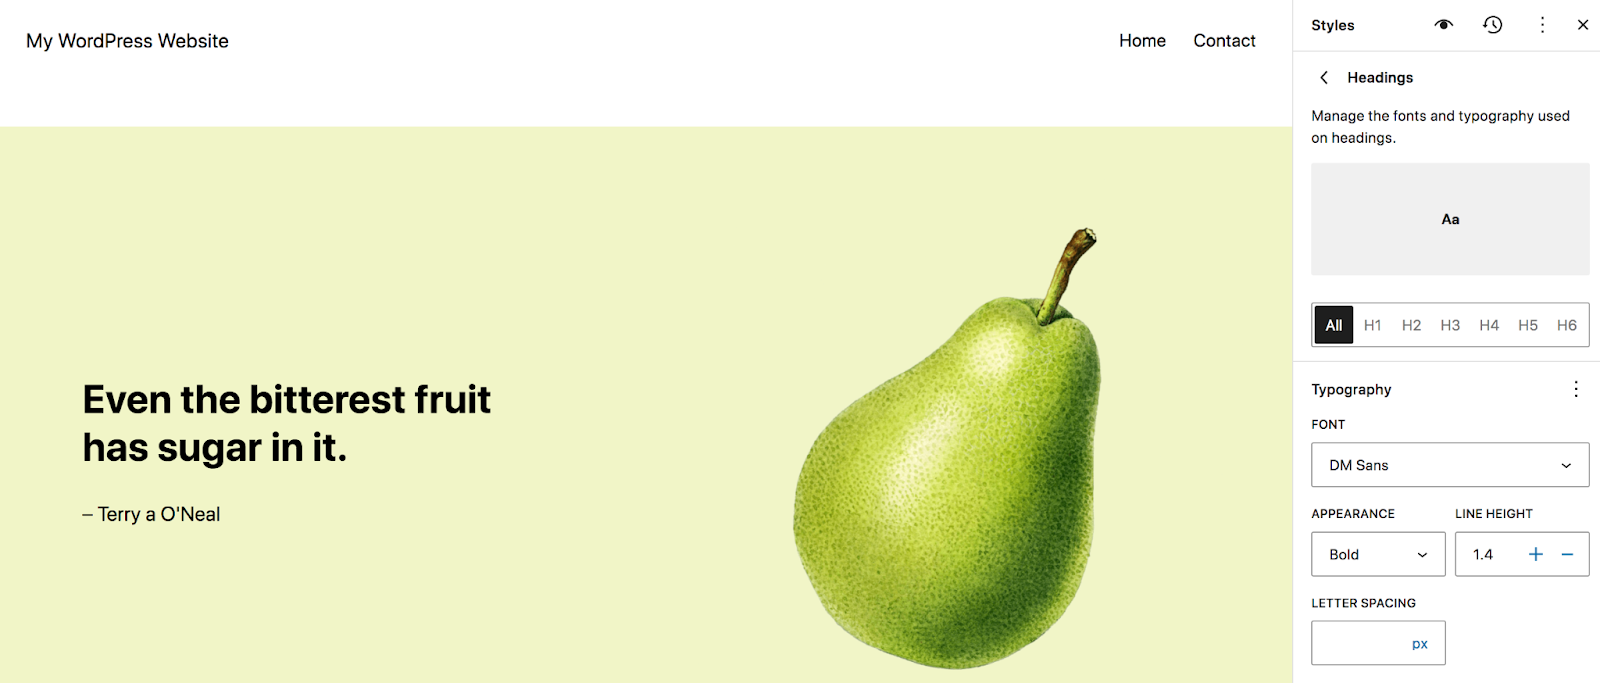
For example, select Headings to choose the typography for the headings across your site. Choose the font, appearance (bold, italic, etc.), line height, letter spacing, and letter case.
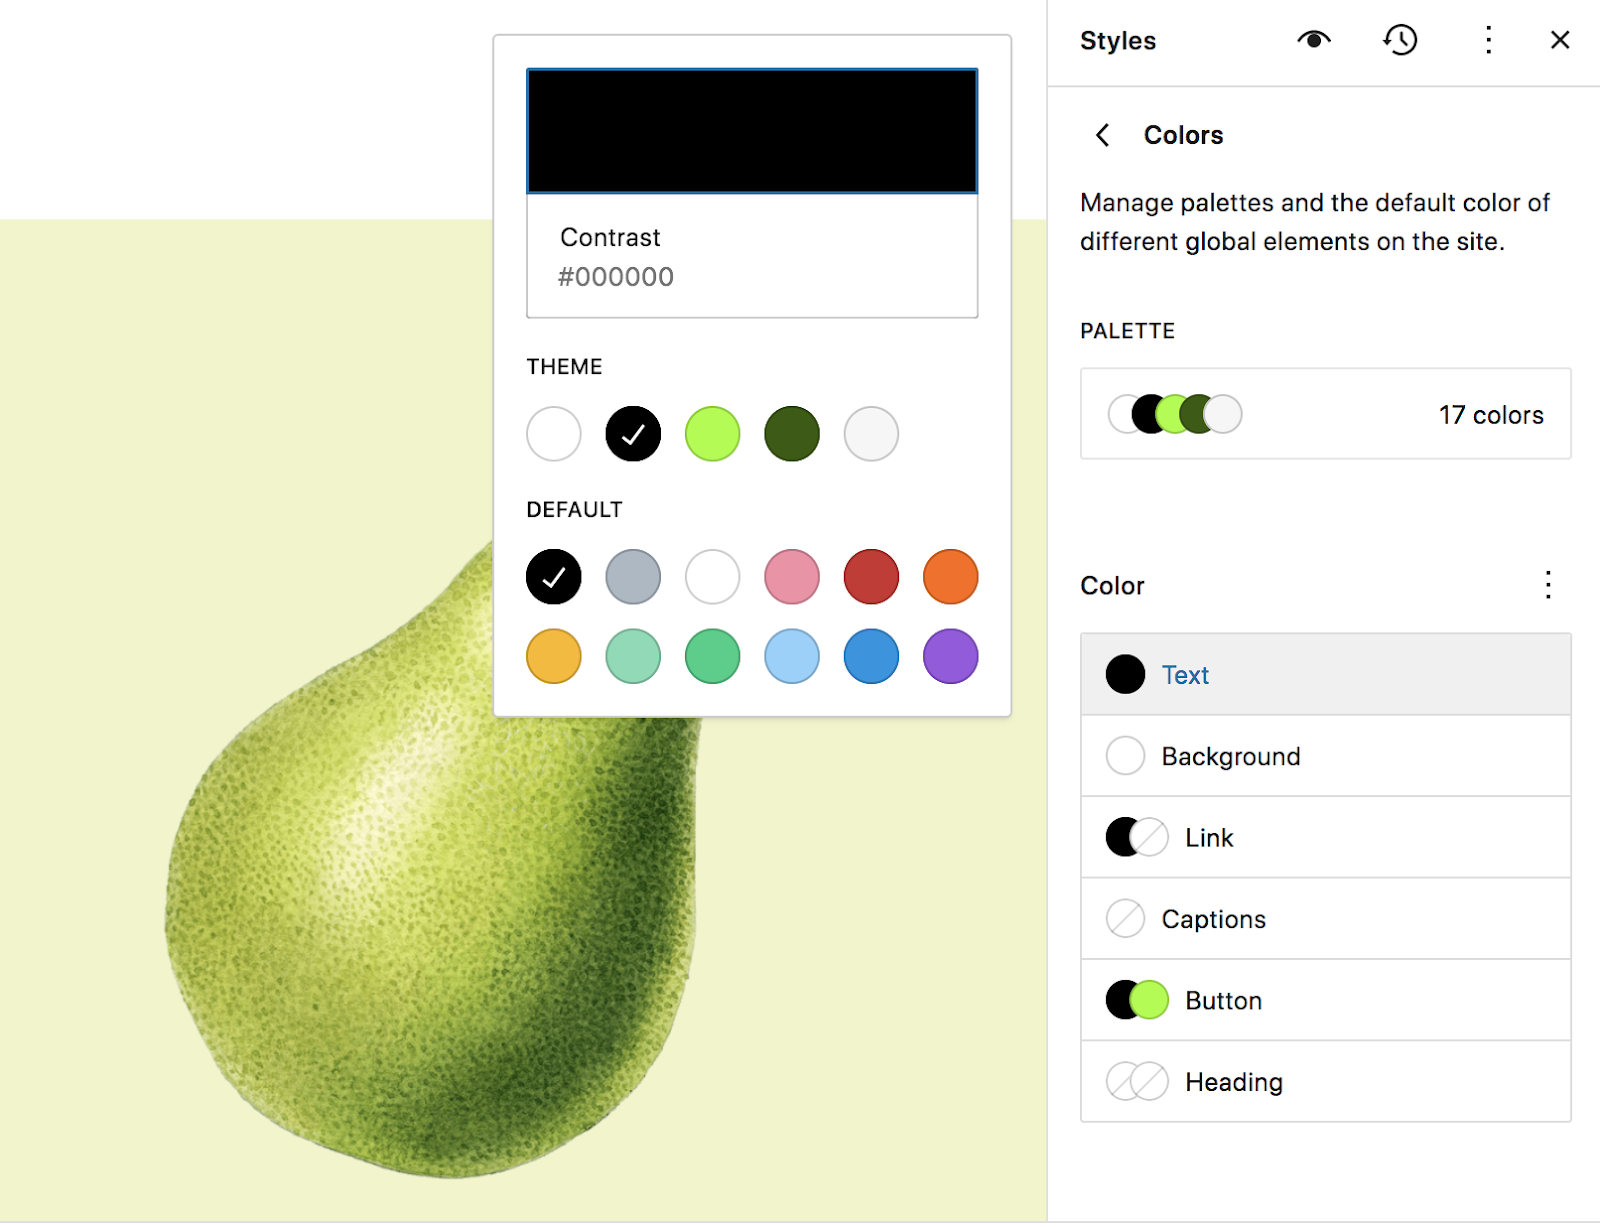
Back in the Styles panel, select Colors. There, you can set your Palette, which controls the options you can choose from when creating pages, posts, and templates throughout your site. This is extremely beneficial when it comes to accelerating your design process and equipping everyone working on your site with the information they need to be consistent.

You can also set the default colors for elements like text, background, links, and more.
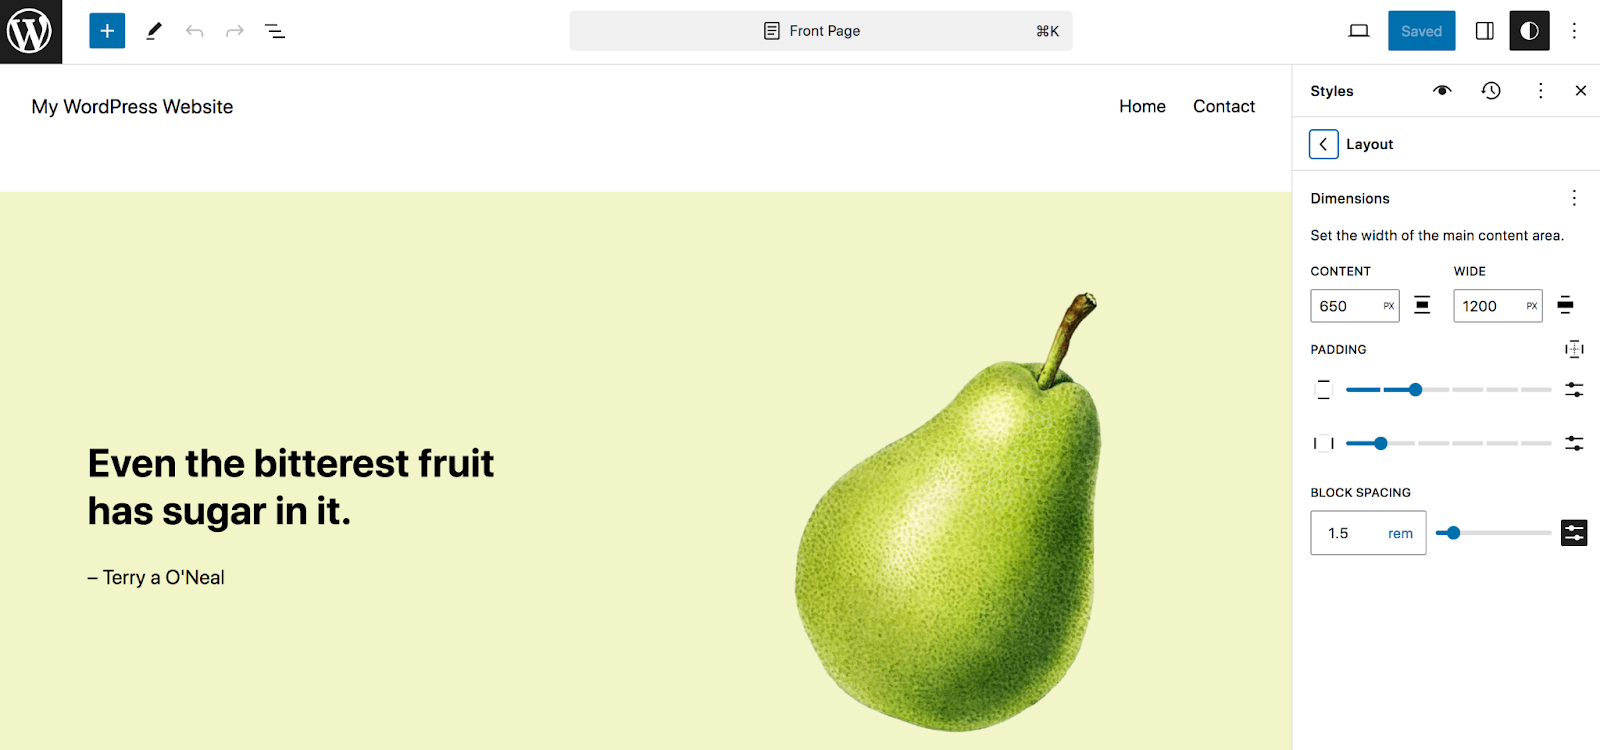
Again in the Styles panel, choose the Layout option. This lets you set the width of the main content area on your site, along with its padding and block spacing.
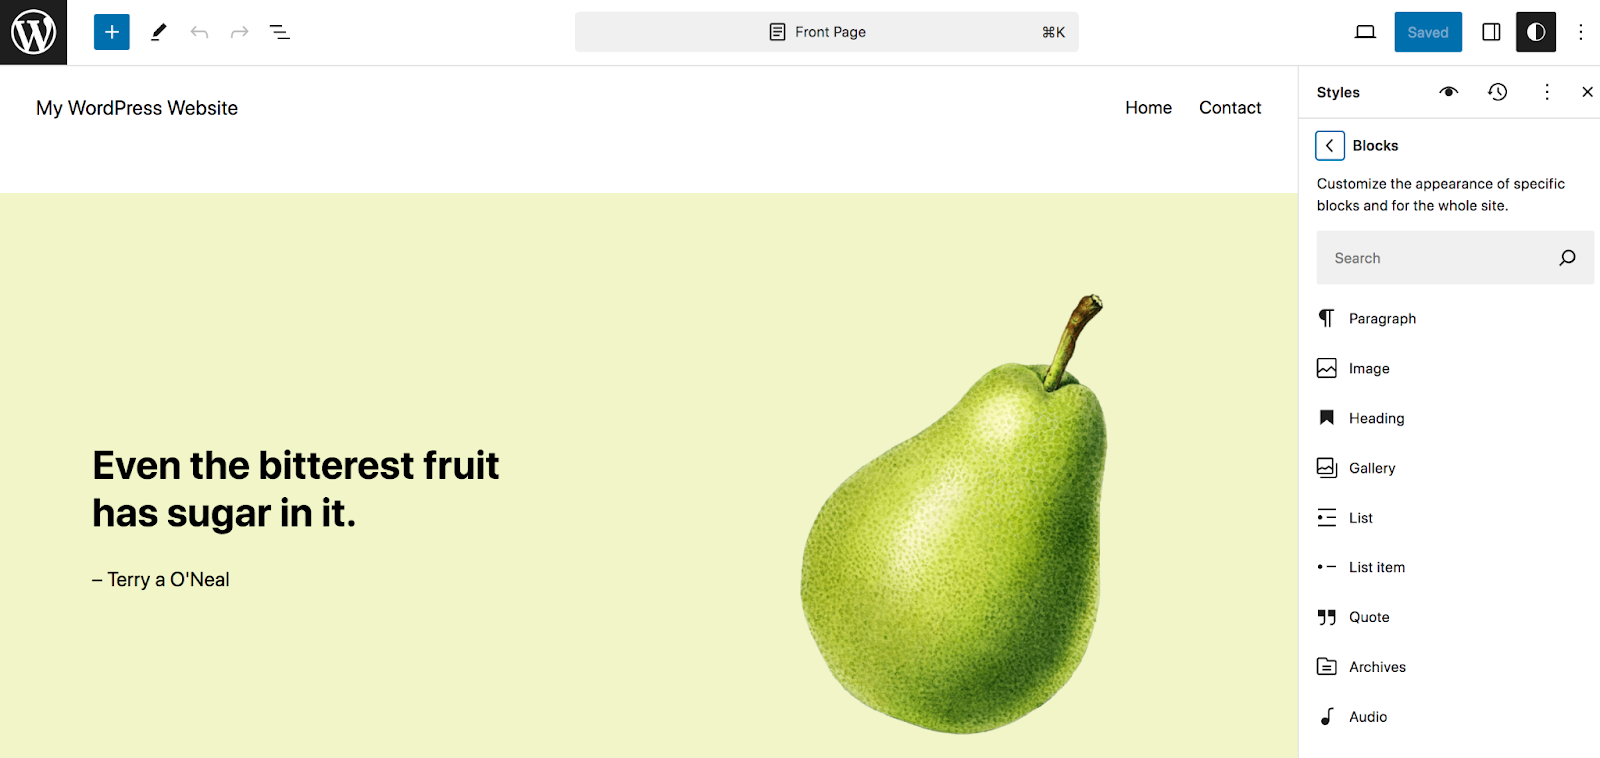
The final element in the Styles panel is Blocks. This section allows you to configure global settings for specific blocks. When you first open it, you’ll see a list of all the blocks in your library. You can scroll through these or use the search box to look for a specific one.
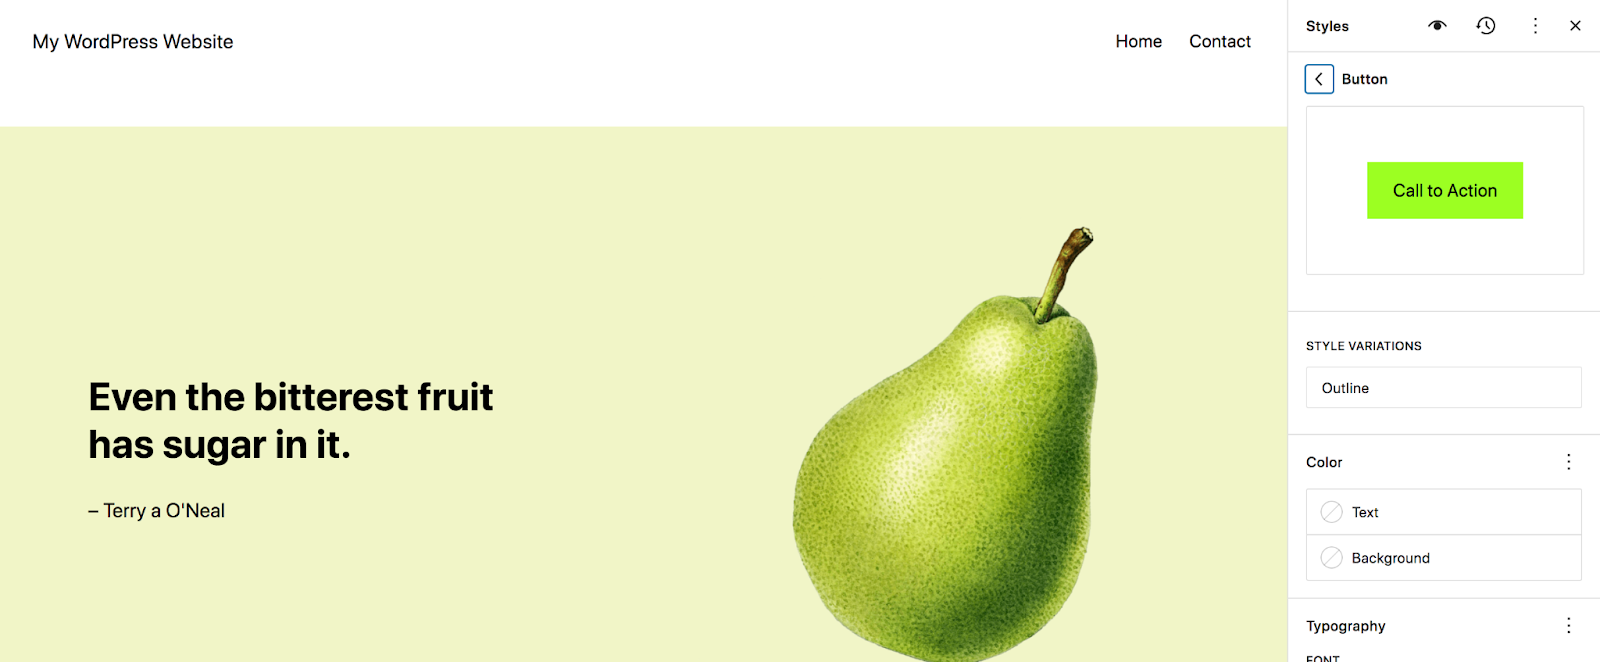
The options for each will vary, but let’s take a look at the Button block. Once it’s open, you’ll see a list of settings specific to that block. For example, here you’ll see choices like text and background color, typography, padding, border, and effects.
Any changes that you make will apply to all instances of that block across your site. As you can see, this can save you a tremendous amount of time.
Create and edit your site’s pages
Back in the Site Editor, you’ll also see an option for Pages. Here, you’ll see a list of the pages on your website. You can click on one to view information, edit it, or move it to the trash. Or, choose Manage all Pages to navigate to the Pages section of the WordPress dashboard.

We’re not going to go into creating and editing pages in this particular article because you can do so with the block editor even if you’re not using a block theme. For a full tutorial, read our complete guide to the WordPress block editor.
Edit the templates included with your block theme
Now, click on Templates in the Site Editor. This will take you to a list of the templates included with your theme.
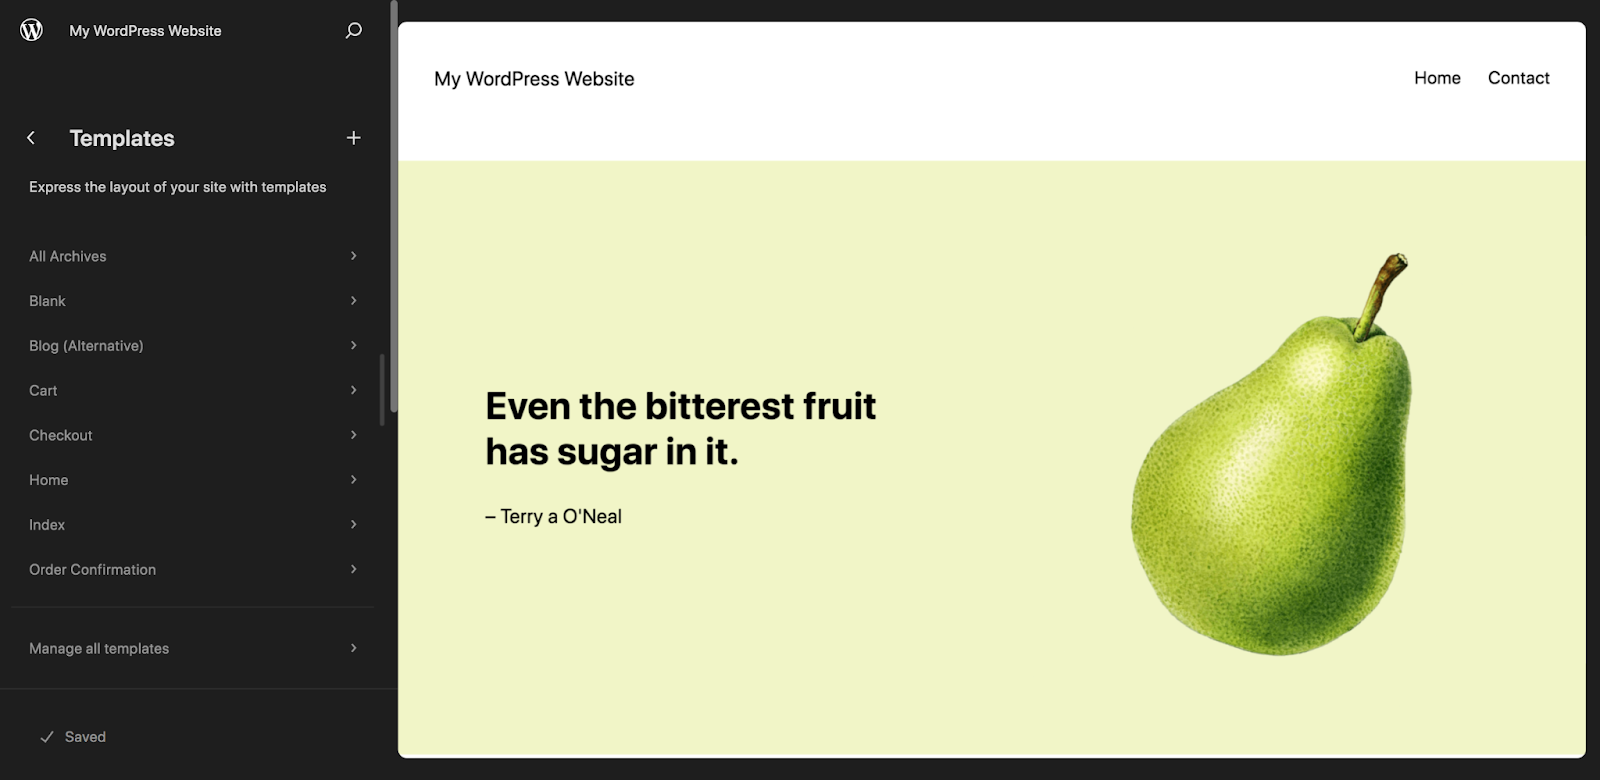
These will vary depending on your theme, but let’s take a look at a standard one: the Single template, which is used for blog posts. Once you click on Single, you’ll see all the blocks that are there by default, including things like the Title block, Post Content block, and Post Featured Image block.
You can make edits to these as you see fit. For example, you might move the featured image below the title, or change the font of the blog post text.
You can also add new blocks to this template. In our example, below, we’ve already added a call to action that will display at the bottom of each blog post, before the comments.

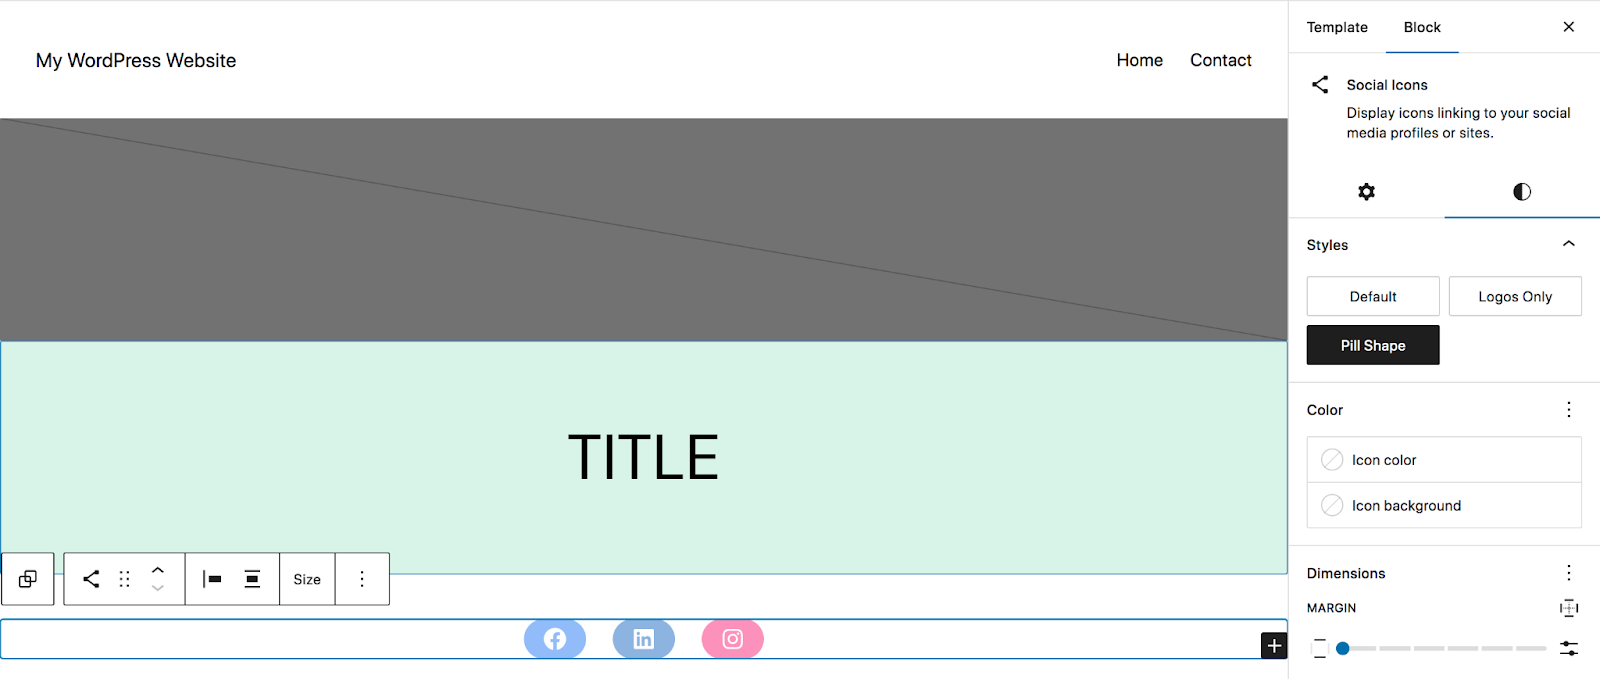
Now, let’s add some social media icons below the blog post title, so that readers can easily navigate to your social accounts for more content. To do this, find the Social Icons block and drag it directly beneath the Title block.
Click the + icon at the far right to add a social account.
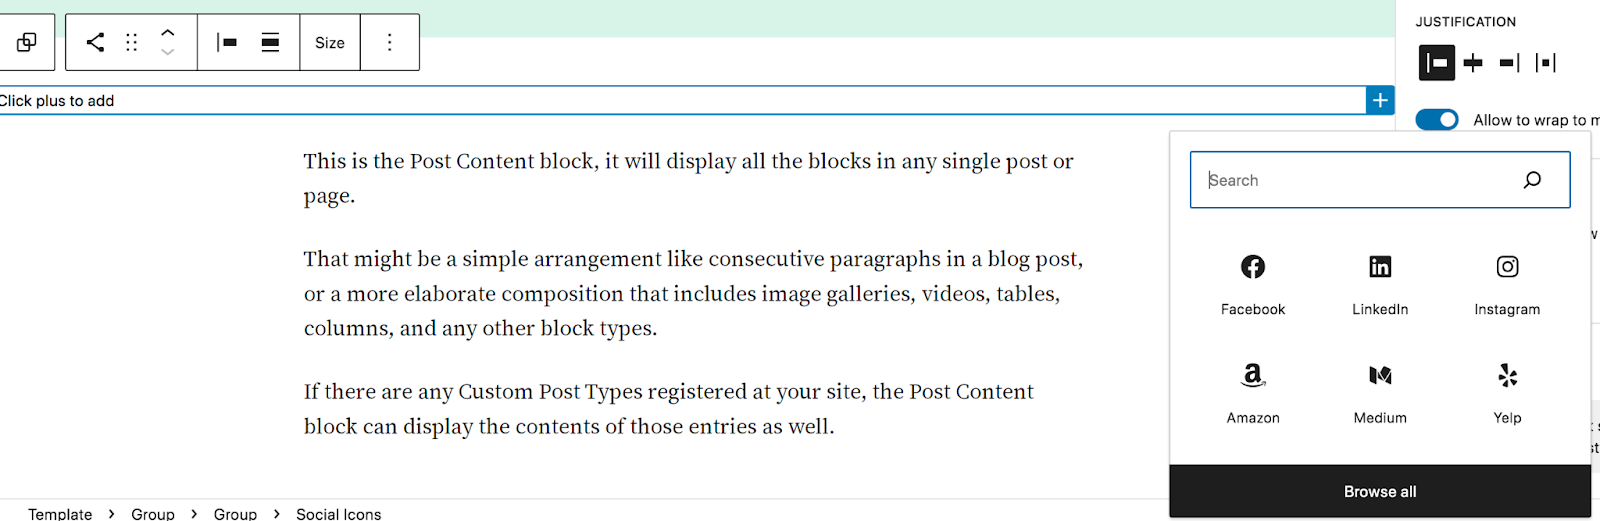
You can either select one from the list, click Browse all to see all the options, or use the search bar to find the one you’re looking for. Repeat this for all the accounts you want to include.
Then, click on an individual icon to add a link to your account.
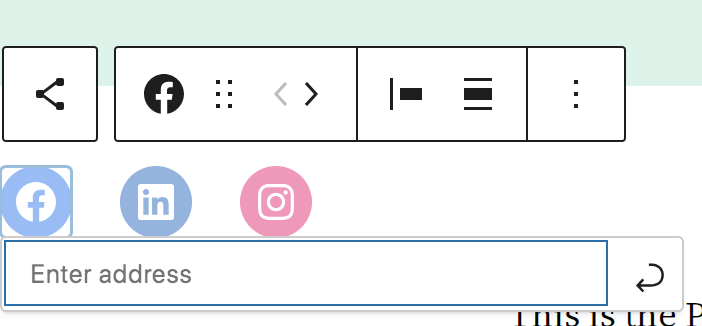
You can use the toolbar that appears above the Social Icons block to change the alignment, move icons around, and more. Or, use the Settings panel at the right to make additional changes, such as the shape and color of the icons.
Once you’ve made all the changes, click the blue Save button at the top right. All the updates will be reflected across any post types that use that template.
You can imagine the possibilities with being able to customize templates this easily. Quickly create a beautiful, branded 404 page. Simplify your Checkout process. Add a call to action to your Search page. Include size charts on all of your product pages. The options are truly unlimited.
Edit patterns and template parts
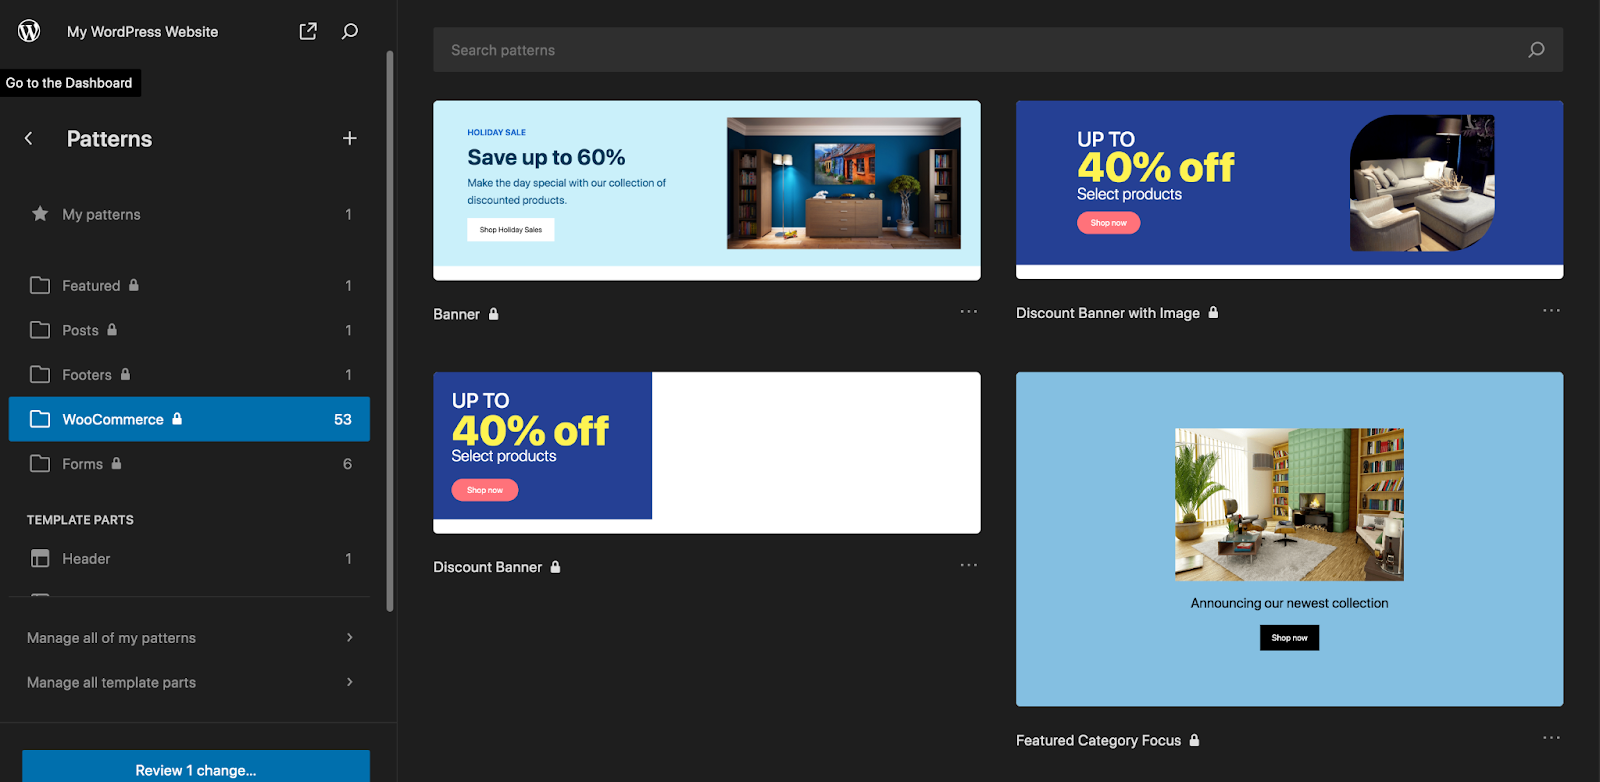
Back in the Site Editor, open the Patterns section. Here, you’ll see a list of your patterns, which are essentially block-based layouts for segments of your pages — e.g. forms, banners, and calls to action.
Template parts are similarly composed of blocks, but are typically part of your overall site structure rather than individual pages and posts — e.g. your header and footer. For the purposes of this tutorial, let’s open the Footer template part.
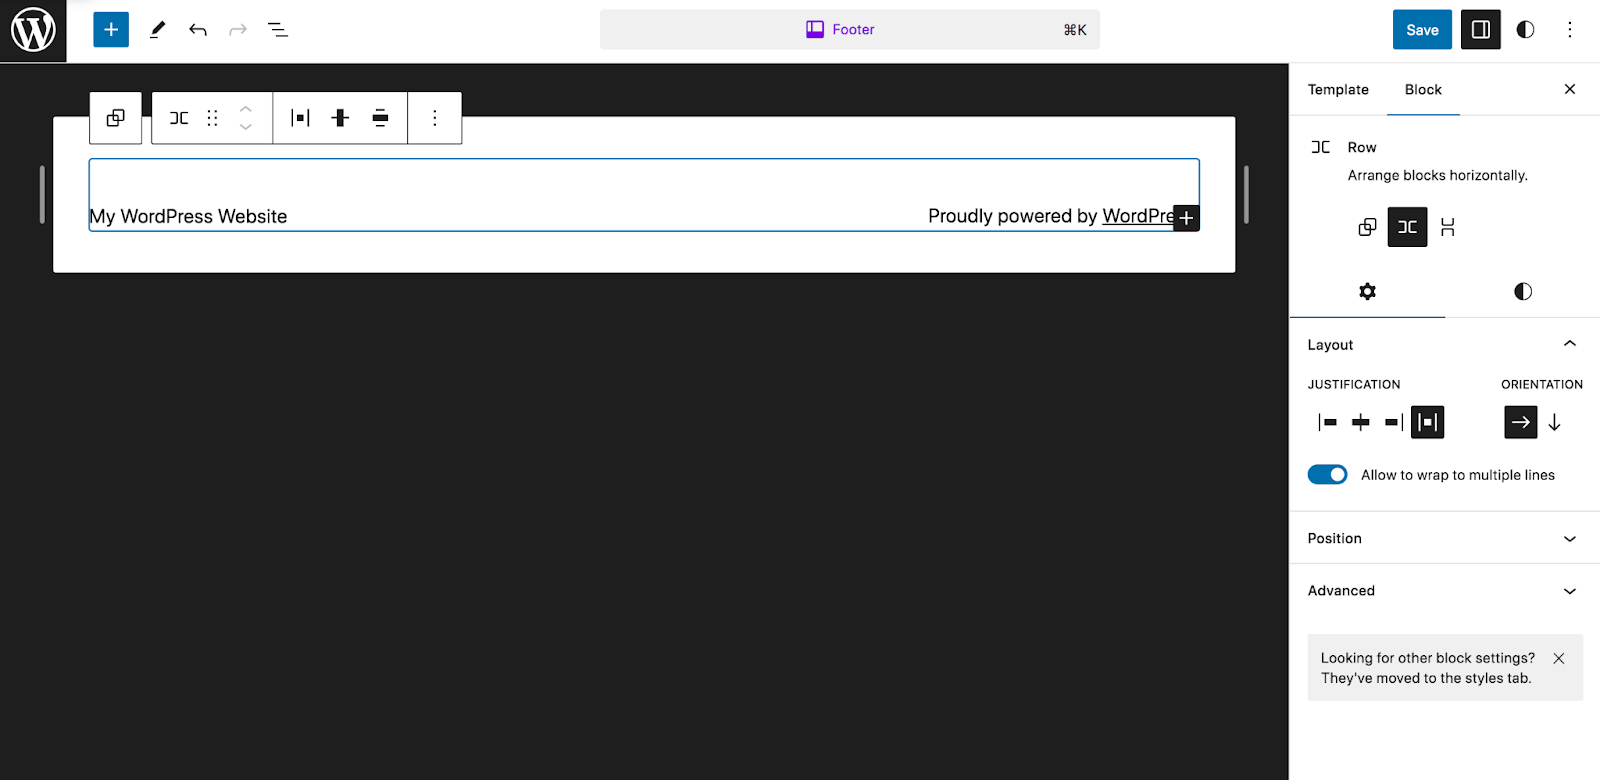
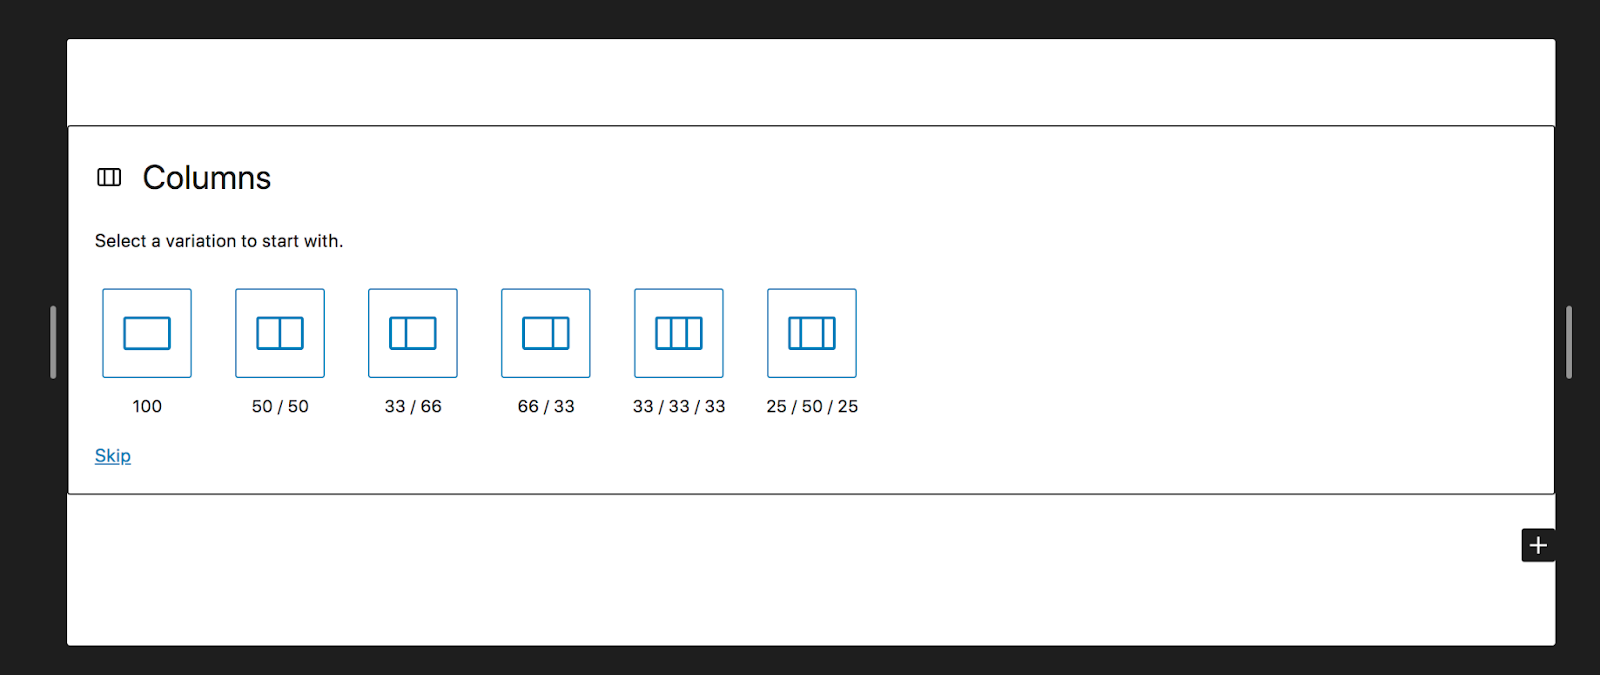
You’ll see that it’s set, in this case, to display a Site Title block and a Paragraph block. Let’s instead create something with a bit more content. First, we’ll remove what’s currently there. Then, we’ll add a Columns block and select 33 / 33 / 33. This will create three equally-sized columns.
In the first column, we’ll add a Social Icons block. In the second, we’ll add a Recent Posts block. Then, in the third, we’ll include our logo.
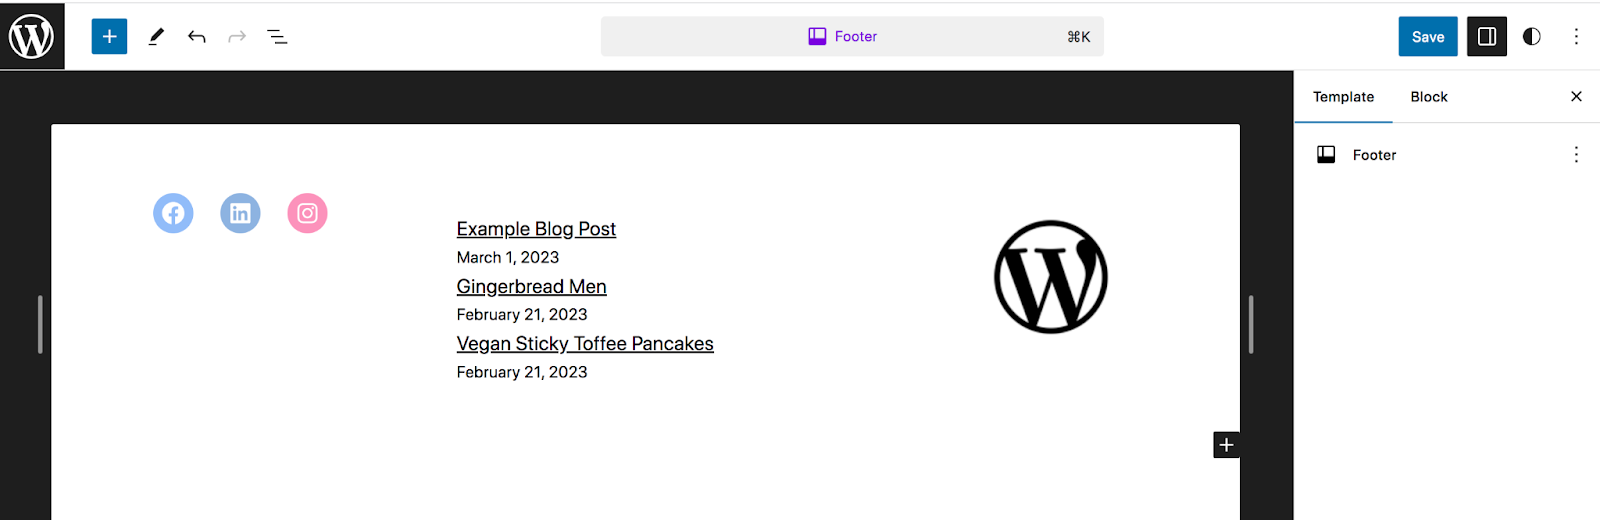
Again, when you click Save, the changes will be reflected across the entire site.
Advanced: How to create a block theme from scratch
There are several instances in which you may want to create your own theme. Perhaps you’re a developer and want to create something custom that you can use for client sites. Or maybe you run multiple websites and want to use the same theme, with the same customizations, across each one. Thankfully, with full site editing, this process isn’t nearly as complicated as you might think.
Your first step is to download a block theme of your choosing as a starting point. Then, make any theme customizations that you’d like, following the steps outlined above.
Your next step is to install the Create Block Theme plugin, which is free from the WordPress repository. Once the plugin is activated, go to Appearance → Create Block Theme in your WordPress dashboard.
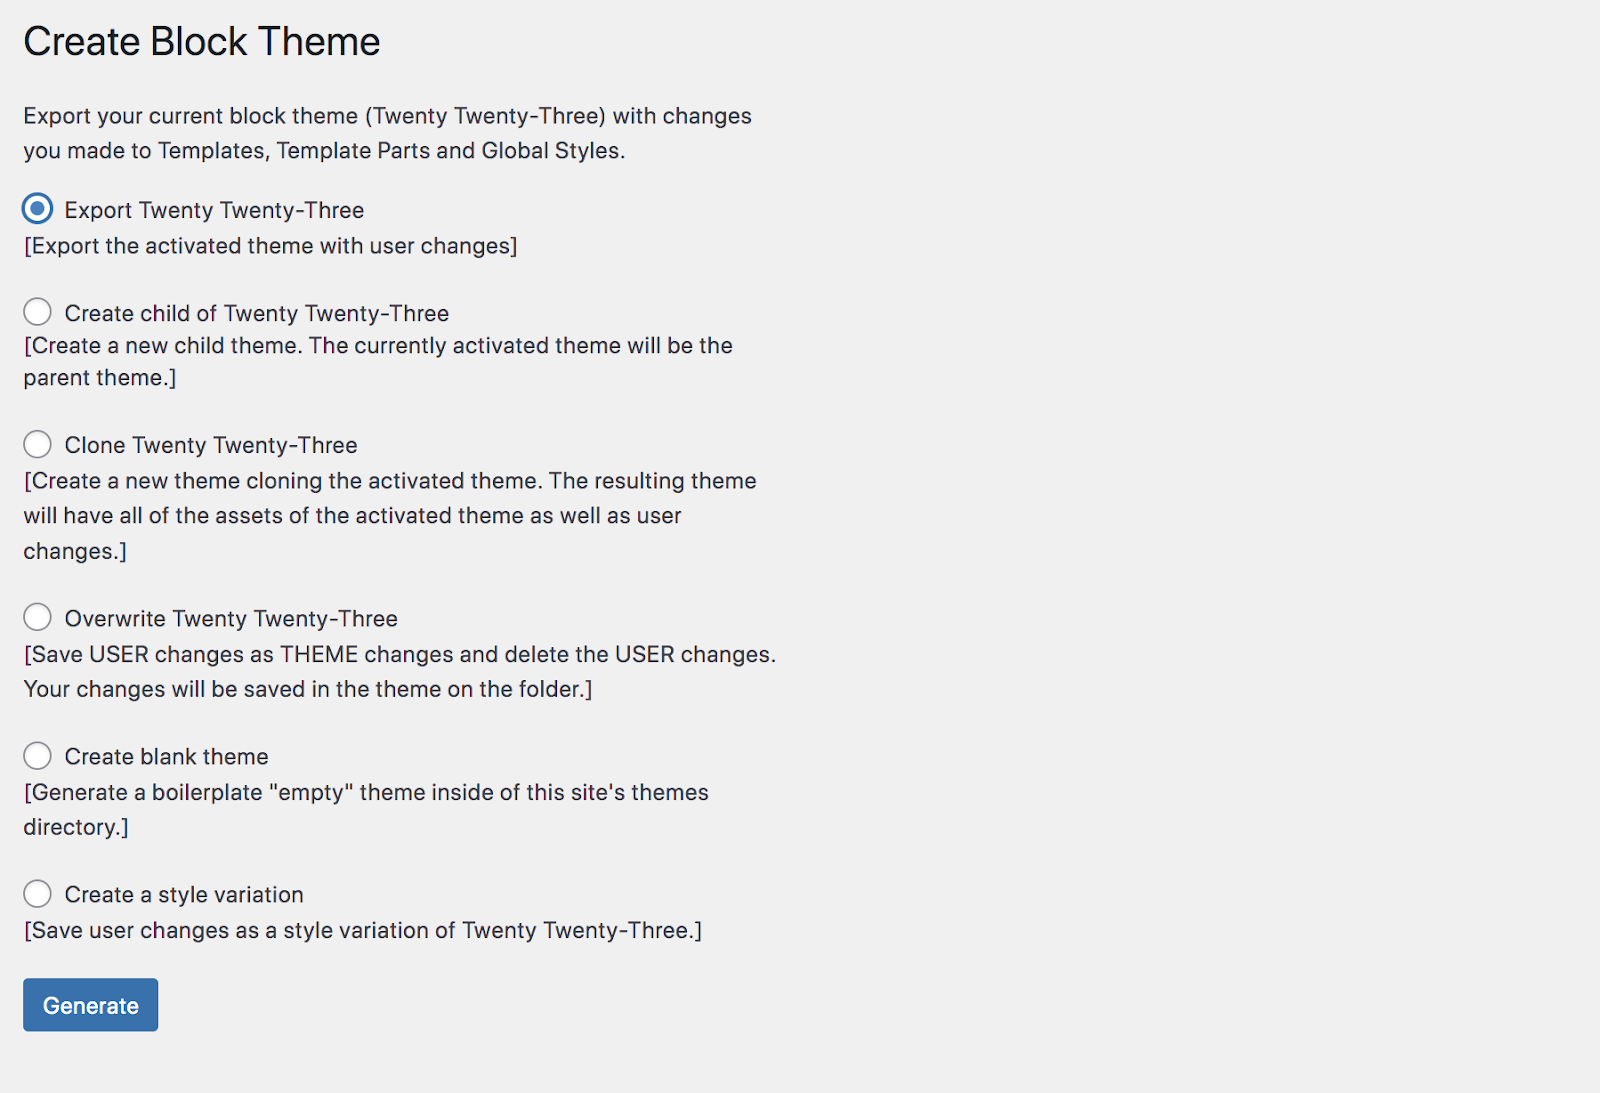
You’ll see several ways that you can export your theme:
- Export (export the active theme with the changes you made)
- Create child (create a new child theme with the activated theme as the parent)
- Clone (clone the active theme)
- Overwrite (save user changes as theme changes and delete the user changes)
- Create blank theme (generate blank theme inside of the theme directory)
- Create a style variation (save user changes as a style variation of the active theme)
Depending on the one you choose, you may have to fill out a few additional fields, like the theme name and author name. You can then generate the theme, download it as a .zip file, and use it on any site that you’d like.
Want to develop a block theme completely from scratch? Learn all about creating a block theme from the WordPress developer resources handbook.
Frequently asked questions about block themes
Still have questions? Let’s answer some common ones about block themes.
Are there any limitations to using block themes?
In general, block themes are incredibly flexible. They allow you to create any sort of design you’d like for your site, even without working with code.
However, there are some plugins that aren’t currently compatible with block themes. Examples of these include plugins that are designed for editing classic menus, managing comments that don’t work with the comment blocks, and using the WordPress Customizer.
The majority of established WordPress plugins, though, are adapting to work seamlessly with block themes and the Site Editor.
Are block themes compatible with all WordPress plugins?
While the majority of established plugins work seamlessly with block themes, there are a few cases in which you might need to find an alternative solution. Examples include:
- A plugin that works using widgets only
- A tool that was designed to modify classic menus rather than the Navigation block
- A comment management plugin that doesn’t work with the comment blocks
- A plugin that solely uses the WordPress Customizer
However, in most situations, you should be able to use the tools you need.
Can I use custom CSS to style my block theme?
Yes, absolutely. Go to Appearance → Editor and select Styles. Then, click the “Edit Styles” icon shaped like a pencil. This will open the Styles panel. Once there, click the vertical ellipses at the top right, followed by Additional CSS.

Now, you can add any CSS you’d like to customize the look of your site.
Can I use block themes to customize the header and footer?
Yes, this is exactly where block themes shine! You can create the header and footer for your site, along with navigation menus by simply dragging and dropping blocks into place.
In your dashboard, go to Appearance → Editor → Patterns. Underneath Template Parts, you’ll see your header and footer. Click on whichever one you’d like to edit, then use blocks as you normally would. You can read through the “Edit patterns and template parts” section of this article for more detailed instructions.
Here are just a few examples of ways you can enhance your header and footer with blocks:
- Quickly create navigation menus
- Add a search bar to make information easier to find
- Include social media icons in your header or footer
- Display a list of recent posts in your footer
- Add an email capture to your footer
The options are endless!
Can I use block themes to set up the navigation menu?
Yes, you can. In your dashboard go to Appearance → Editor → Navigation. There, you’ll be able to add pages and links to your menu, nest items to create submenus, remove items, and more.
Can I create a child block theme?
Yes, you can create a child theme with a block theme as the parent. This enables you to make changes to the child theme without editing the code of the parent theme. Many themes already come with a child theme. But you can also create one using the Create Block Theme plugin. Or, if you’re familiar with code, you can do so manually.
Are there any performance concerns to be aware of when using block themes?
In the majority of cases, using a block theme will enhance the performance of your WordPress site. Block themes load styles just for the rendered blocks on a page, and they’re not required to manually enqueue stylesheets — both of which improve load times.
And by using a block theme, you can access all the functionality and design capabilities you need without having to install a bunch of different plugins or use site builder tools full of unnecessary features.
If you want to improve your site load times even further, you can install a plugin like Jetpack Boost. Built specifically for WordPress, it lazy loads images, improves Core Web Vitals, includes a powerful image CDN, and analyzes your site speed, so you can make improvements.
