
Using web fonts, CSS, and JavaScript can make your website more unique and interactive. But waiting for these file types to load can be frustrating for your site’s visitors.
This is where preloading key requests in WordPress can come in handy. By telling browsers to download these file types earlier in the request chain, they’ll be on hand when the browser is ready to render the content. In turn, this can speed up your perceived page load time and provide a better overall web experience.
In today’s guide, we’ll discuss what preloading key requests means, along with the potential performance benefits for your website. Then, we’ll explain how to do this on your WordPress site with Google Fonts, Font Awesome, CSS, and JavaScript.
What does “preload key requests” mean in WordPress?
When someone visits your website, their browser will send multiple HTTP requests to your site’s server, asking it for the files that make up your content. The server will take a certain amount of time to start responding to these requests and sending information to the browser, which is referred to as the Time to First Byte (TTFB).
Next, the browser will start downloading content (PHP, JavaScript, and CSS) from your site files and rendering it to display viewable pages (HTML) on the front end. Once this process has been completed, the visitor can see your fully-loaded webpage.
A browser will use a ‘request chain’ to ask for and render content in a sequence. That means there are multiple steps of smaller requests within the larger ones, with the end result being that a visitor can view the content on your site.
Essentially, ‘preloading’ means telling a user’s browser to download essential files first instead of waiting until the end of the loading process. These are typically fonts (particularly web fonts), CSS, JavaScript, and sometimes images.
Key requests are unique because your browser wouldn’t typically request these files until later in the loading process. So, there will be a delay when the browser gets to that point and discovers that it must request the files. By telling the browser to load these files first, it will have them handy when it needs to render them.
What are the benefits of preloading key requests?
The main benefit of preloading key requests is improving the perceived performance of your site. This means that a user’s browser can render your content more quickly, and visitors will feel like your site is faster. But, your site is really just preloading essential content to make it appear that way.
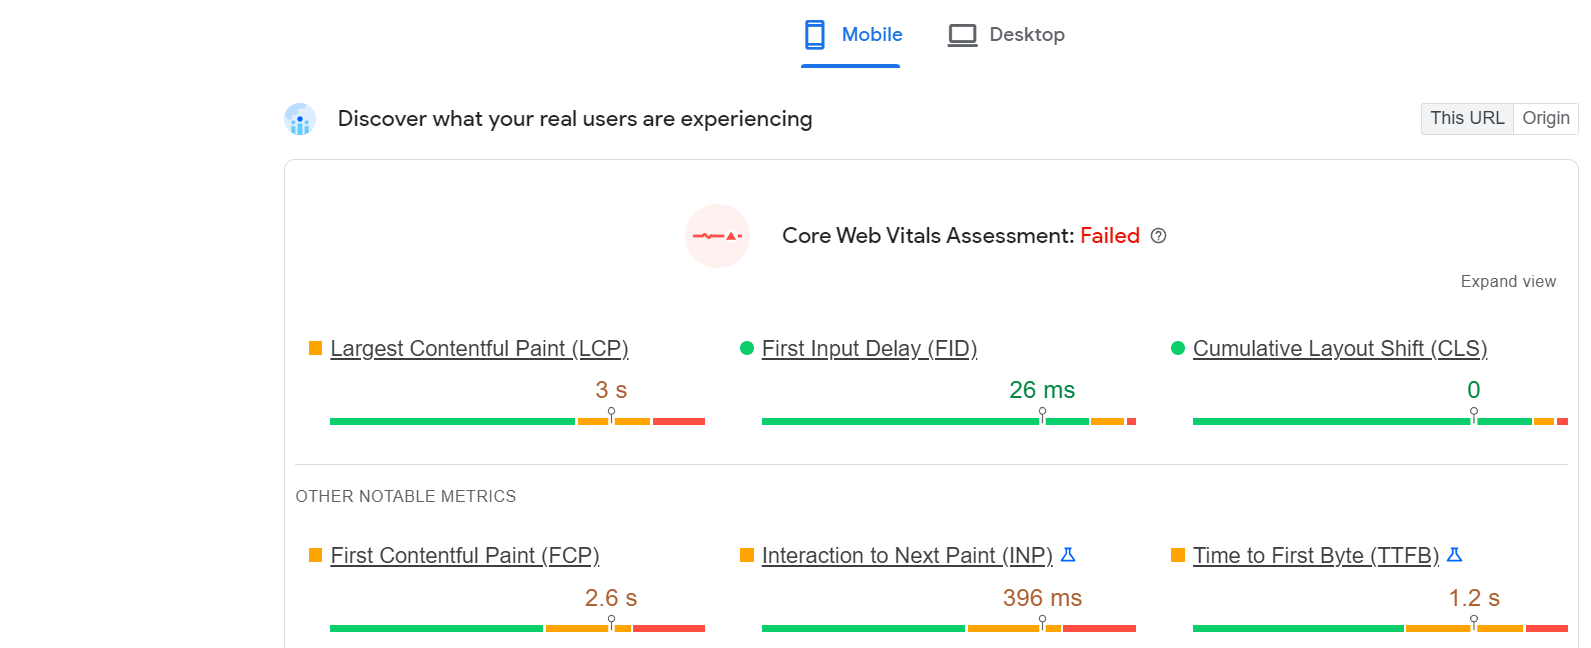
Furthermore, preloading requests is essential to your Core Web Vitals scores. These Google metrics measure your site’s loading performance, interactivity, and visual stability, giving you a score that signifies your website’s overall user-friendliness.
These are the three Core Web Vitals:
- Largest Contentful Paint (LCP): How long it takes for the largest element on your page to load.
- First Input Delay (FID): How long it takes for the browser to respond to user interaction with your content.
- Cumulative Layout Shift (CLS): How much the elements move around while the page is loading.
In particular, preloading key requests can have a significant impact on your LCP score. By preloading images, fonts, and other large files, you’ll be able to reduce the time it takes for them to render.
Additionally, preloading can affect your First Contentful Paint (FCP) score. This metric measures how long it takes for the first HTML element on your page to be displayed. If you can preload that element, the browser will be able to show the initial parts of your content more quickly.
What’s more, search engines, like Google, favor fast-loading and interactive content. Therefore, beyond providing a better user experience, improving these performance metrics can boost your website’s Search Engine Optimization (SEO).
Essentially, performance improvements can help push your site’s pages up in the rankings and get your content in front of more users. Plus, preloading key requests is relatively easy. Later on in this post, we’ll show you exactly how to do it!
Are there disadvantages of preloading key requests?
Preloading requests might sound like a great idea from a performance perspective. That being said, trying to preload too many elements can work against you.
A browser can only process so many requests at once. So, if you tell it to preload multiple elements, it could create a ‘bottleneck’ that works against your site’s page load time.
Therefore, it’s worth carefully choosing which elements should be preloaded for the greatest impact. In most cases, these will be web fonts, CSS, and JavaScript, since these tend to be the heaviest files.
How to check if your site is preloading key requests
A couple of different tools can identify whether your site is preloading requests and suggest elements that could benefit from this optimization technique. For example, PageSpeed Insights is one of the most popular options for identifying performance problems on your website.
To use this free tool, simply enter your site’s URL and click on Analyze. This will generate a detailed performance report.
Scroll down to see the performance opportunities, diagnostics, and passed audits. You should be able to find the Preload key requests suggestion in one of these sections.

If you prefer not to navigate back and forth between your site and PageSpeed Insights, consider installing the Google Lighthouse Chrome extension. It enables you to generate reports from within the browser and view a page’s performance metrics.

Similarly, GTMetrix can generate detailed performance reports for any site. It lets you analyze pages from multiple locations and track their performance over time.
Under GTMetrix’s Structure tab, you’ll be able to see whether preloading key requests could help your site’s performance.

How to preload key requests in WordPress
Before making any significant changes to your WordPress site, like adding custom code, it’s always worth making a complete backup. This safety precaution means you’ll have a functional version of your website on hand if you make any mistakes.
This is where Jetpack VaultPress Backup comes in handy. This user-friendly plugin automatically creates comprehensive backups of all your data, including its files, database tables, and WooCommerce product information. These backups are saved in real time and stored securely in the cloud. You can restore them in just a few clicks — even if you’re on the go or can’t access your site at all.

1. Fonts
Sometimes, fonts can get buried within other files on your website, including CSS and JavaScript files. Unfortunately, this can slow down the page rendering process.
To preload requests with fonts in WordPress, copy and paste this code into the <head> section of your page:
<head>

 <!-- ... -->

 <link rel="preload" href="/assets/Font-Name.woff2" as="font" type="font/woff2" crossorigin>

</head>
Remember to substitute “Font-Name” for the name of your font. Furthermore, including “crossorigin” is essential if your font comes from a third-party source because it tells the browser that it needs to load the file from an external server.
2. Google Fonts
Google Fonts includes an open-source library of nearly 1500 font families. If you’re looking for custom fonts to use on your site, you can likely find one there.

Using Google Fonts can help bring a unique design to your site, but the browser must also download the font files when rendering the content. Depending on your font, this can increase your page load time.
When preloading Google Fonts, it’s also a good idea to ‘preconnect’ them first. This step tells the browser in advance that it will need to connect to a third-party site (e.g., Google Fonts) to retrieve a resource.
Additionally, after adding your preloading code, it’s worth including a link to its stylesheet. That way, if your user’s browser is unable to preload the font in question, it will still be able to render it.
Simply add the following code to the <head> section of your page:
<link rel=”preconnect”

      href=”https://fonts.gstatic.com”

      crossorigin />

<link rel=”preload”

      as=”style”

      href=”$fontURL&display=swap” />

<link rel=”stylesheet”

      href=”$fontURL&display=swap”

      media=”print” onload=”this.media=’all'” />

<noscript>

  <link rel=”stylesheet”

        href=”$fontURL&display=swap” />

</noscript>
Within your code, you’ll need to substitute “$fontURL” for a link to your Google Font. For instance, it might look like this:
https://fonts.googleapis.com/css2?family=Tangerine:ital,wght@0,400;0,700;1,400;1,700
Then, just make sure to save your edits!
3. Font Awesome
Font Awesome is a great resource for custom icons and fonts, with both free and premium options within its library. You might use some of these icons to supercharge the design within your menus, headers, footers, and content areas.
Like Google Fonts, preloading Font Awesome icons can be a good idea for speeding up the perceived page load time. Just add this code to the <head> section of the page:
<link rel="preload" as="style" href="//maxcdn.bootstrapcdn.com/font-awesome/4.3.0/css/font-awesome.min.css"/>

<link rel="preload" as="font" type="font/woff2" crossorigin href="//maxcdn.bootstrapcdn.com/font-awesome/4.3.0/fonts/fontawesome-webfont.woff2?v=4.3.0"/>
You’ll need to swap out the file path for the font or icon you’re using on your website. Then, save your changes!
4. CSS
Cascading Style Sheets (CSS) is a design language that works together with HTML to determine a web page’s style and presentation. With custom CSS, you can quickly change the appearance of different elements.
Each styled HTML page on your website will have a corresponding stylesheet with all of your CSS. A browser needs to load this file when rendering a web page, so it’s worth telling the browser that it should preload this resource.
Fortunately, there’s an easy way to preload CSS. Simply add this code to the <head> section of your page:
<head>

  <link rel="preload" href="styles.css" as="style" />

</head>
Make sure to substitute “styles.css” for the name of the stylesheet. Additionally, keep in mind that while this code will work in Google Chrome, it isn’t supported by all browsers.
5. JavaScript
JavaScript is another one of the common scripting languages used in WordPress. It lets you create dynamic content like animations, moving carousels of images, and automatically-updating feeds.
Rendering JavaScript is typically more complex because its files are comparatively heavy, requiring a longer process to display content. That’s why telling a browser to preload heavy JavaScript can be beneficial for speeding up page load time.
Like with CSS, you’ll just need to add this simple line of code to the <head> section of the page:
<head>

  <link rel="preload" href="ui.js" as="script" />

</head>
As before, substitute “ui.js” for the name of the JavaScript file, and save your changes.
Bonus: Install a free plugin to improve Core Web Vitals
Preloading requests is just one technique you can use to improve your WordPress site’s Core Web Vitals scores.
If you’re looking for a more comprehensive (and free!) solution, consider installing Jetpack Boost. This tool is developed by Automattic, the same company behind WordPress.com.

This user-friendly plugin scans your entire website and gives you a score on desktop and mobile devices. Furthermore, Jetpack Boost isn’t just useful for the three Core Web Vitals. Its optimization methods can improve other metrics, including Time to Interactive (TTI) and Total Blocking Time (TBT).
You’ll be able to use a simple toggle system to optimize CSS loading, defer non-essential JavaScript, and lazy load images. The premium version of the plugin will also automatically generate critical CSS whenever you make changes to your website.
Alternatively, Jetpack Complete can take your WordPress site to an entirely new level. This plan contains multiple tools for performance, including access to Jetpack’s image Content Delivery Network (CDN), which can both save bandwidth and improve your page load time. Plus, you’ll get advanced WordPress security and growth tools.
Frequently asked questions about preloading key requests
At this point, you should have a good understanding of how to preload key requests in WordPress. Still, we’ll go over some frequently asked questions just to be sure!
Does preloading requests improve user experience?
Preloading requests can improve the user experience by decreasing your site’s perceived loading times. Since visitors won’t have to wait as long for your content to render, they’ll be less likely to feel frustrated and potentially leave your website for a different one.
Does preloading requests improve Core Web Vitals?
Preloading key requests in WordPress can improve your Core Web Vitals scores, particularly, when it comes to Largest Contentful Paint (LCP). In fact, when you decide on which elements to preload, it would be wise to include your ‘largest’ or ‘main’ content, as this is what would likely benefit most from it.
Preload key requests vs. preload critical assets
It’s worth noting that preloading key requests means the same as preloading critical assets. Both terms refer to telling a browser to load particular resources in advance to render a page’s content more quickly.
Preload vs. preconnect vs. prefetch
Preloading, preconnecting, and prefetching might seem like similar concepts, but they actually mean slightly different things. They are all tags that instruct a browser in which order to load content, but they serve distinct functions.
First, preloading involves loading content needed to render the page within a user’s browser. It’s a high-priority tag that will get a resource ready within a few seconds.
By contrast, prefetching concerns the subsequent elements that might need to be loaded. The browser will look for resources in advance and store them in its cache. It’s a very low-priority tag, so you shouldn’t use it for urgent resources.
Finally, preconnecting is used when you want to tell a browser to connect to a particular domain. If your site uses a resource from a specific third-party site (like Google Fonts), preconnecting tells the browser that it will need to connect to that domain at some point in the loading process.
What else can I do to improve my site’s performance?
Various tasks can help improve your WordPress site’s performance, including:
- Using a CDN to serve your content to visitors worldwide
- Deferring (or deleting) unused CSS
- Eliminating render-blocking resources
- Minifying CSS and other resources
- Making fewer HTTP requests
It’s also worth choosing a high-quality WordPress host that will provide you with performance-optimization features like dedicated caching, an uptime guarantee, and a vast network of data centers worldwide.
Improve your WordPress site’s performance by preloading key requests
Page load times can significantly impact your website’s user experience and search engine rankings. So, you’ll want to do everything in your power to speed up the time it takes for a browser to display your site’s content.
When you preload key requests within your pages, a visitor’s browser will have resources (like fonts, CSS, and JavaScript) at the ready. Then, there won’t be a delay while loading your content and making it accessible to users.
Preloading key requests is just one step toward improving your site’s performance. Using Jetpack Boost, you can easily configure your website to lazy load images, defer non-essential JavaScript, and more. Better yet, the plugin is free to use. Check out Jetpack Boost today!
