When a WordPress site starts redirecting visitors to spam or malicious URLs, it’s not a minor glitch. It’s a serious security breach that directly affects user trust, search visibility, and your reputation.
These redirects usually stem from malware injections or compromised files that quietly hijack traffic for fraudulent or monetized schemes. If your site suddenly sends visitors to gambling, adult, pharmaceutical, or fake software domains, that behavior almost always points to an active infection.
In this guide, you’ll learn how these spam redirects happen, how to spot them early, and the exact steps to clean up your site and lock it down going forward.
Need a simple way for visitors to share images, documents, or other files through your website? A file upload form makes it easy — no coding required. With Jetpack Forms, you can quickly create a WordPress form that lets people upload files securely and seamlessly.
In this guide, we’ll discuss scenarios where it makes sense to allow file uploads in WordPress forms. We’ll also look at why Jetpack Forms is the best tool for the job and show you how to use it.
Installing WordPress in a subdirectory is a smart, efficient way to run multiple installations on the same domain without cluttering your root directory. Whether you’re setting up a secondary blog, client site, or staging environment, using a subdirectory keeps your structure clean.
This guide explains exactly how to install WordPress in a subdirectory manually, without relying on auto-installers. You’ll also learn why this method matters, how it affects URLs, and common mistakes to avoid.
Managing a WordPress site looks simple from the outside, but once you’re handling updates, security, performance, backups, and content every week, the workload adds up. Miss a task, and you risk slow load times, broken features, or security threats that reach your visitors before you notice something’s wrong.
That’s why you need a strong website management workflow. It keeps your site stable, protects your brand, and frees you up to focus on publishing, marketing, and growth.
In this guide, you’ll learn what WordPress website management includes, the tasks worth prioritizing, and the automation tools — like Jetpack and Automattic for Agencies — that help you maintain a fast, secure, reliable website with far less manual work.
Fast-loading images keep visitors engaged and improve your search rankings. But you shouldn’t have to sacrifice sharp visuals to get better performance. WordPress image optimization plugins compress, resize, and convert your images automatically, often cutting file sizes in half without anyone noticing a difference in quality.
In this guide, we’ll rank popular WordPress image optimization plugins. You’ll learn what to look for, how each tool performs, and which one fits your site’s needs.
If you run an online business, it’s pretty important that customers receive your emails. Even if you use a robust email marketing plugin, messages like order confirmations or password resets may be blocked or fail to arrive in people’s inboxes.
This is where SMTP (Simple Mail Transfer Protocol) plugins come in handy. These tools are designed to authenticate emails and verify their source, ensuring that messages arrive safely at the intended destination.
In this guide, we’ll explore the best WordPress SMTP plugins for your website. We’ll also discuss what to look for in an SMTP tool and share essential configuration tips to help you get started. So, let’s dive right in.
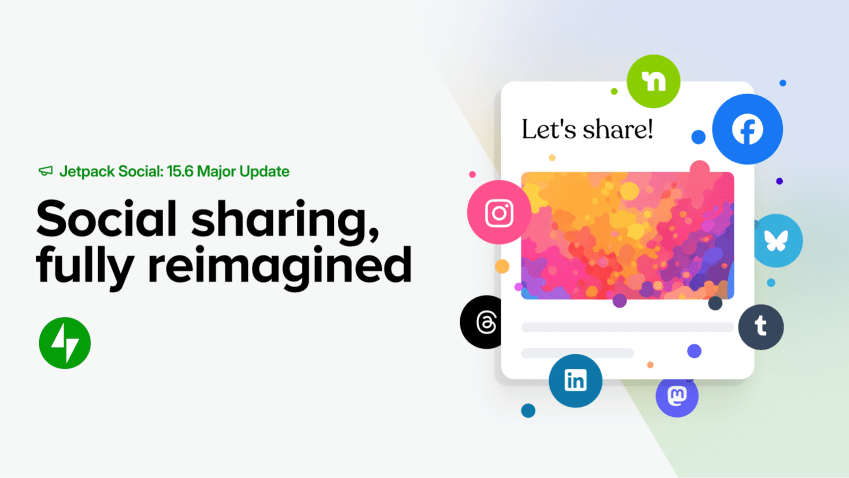
If you use Jetpack Social to share your WordPress content across social media, you’re going to love what just shipped. With Jetpack 15.6, we’ve rolled out a comprehensive set of improvements that make it easier to customize your posts for each platform, preview exactly what your audience will see, and publish with confidence.
This isn’t a minor update. It’s a top-to-bottom revamp of how social sharing works inside the WordPress editor.
See it in action
Want a quick look at how everything works together before we break it down? Watch the demo:
Now let’s walk through each improvement.
Customize your social posts for each network
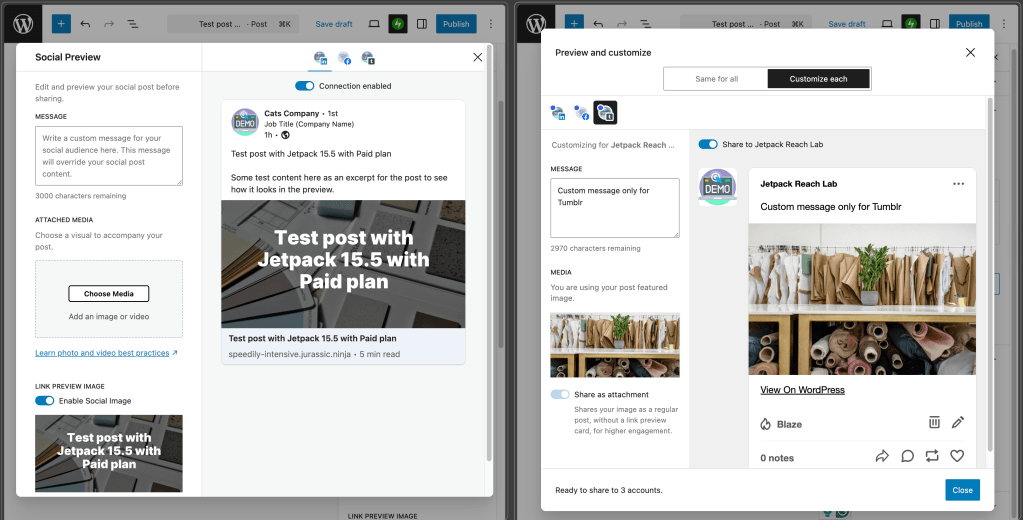
Every social platform is different. What works on LinkedIn doesn’t always work on Facebook or Tumblr. Now, with Jetpack Social, you can tailor your message, media, and formatting for each connected account, all from a single interface inside the WordPress editor.
Want a professional tone for LinkedIn and something more casual for Facebook? Done. Need a shorter caption for one network and a longer story for another? You can handle it all without ever leaving WordPress.
This feature is available on paid Jetpack Social plans.
A screenshot with the before and after UI for the Jetpack Social preview modal.
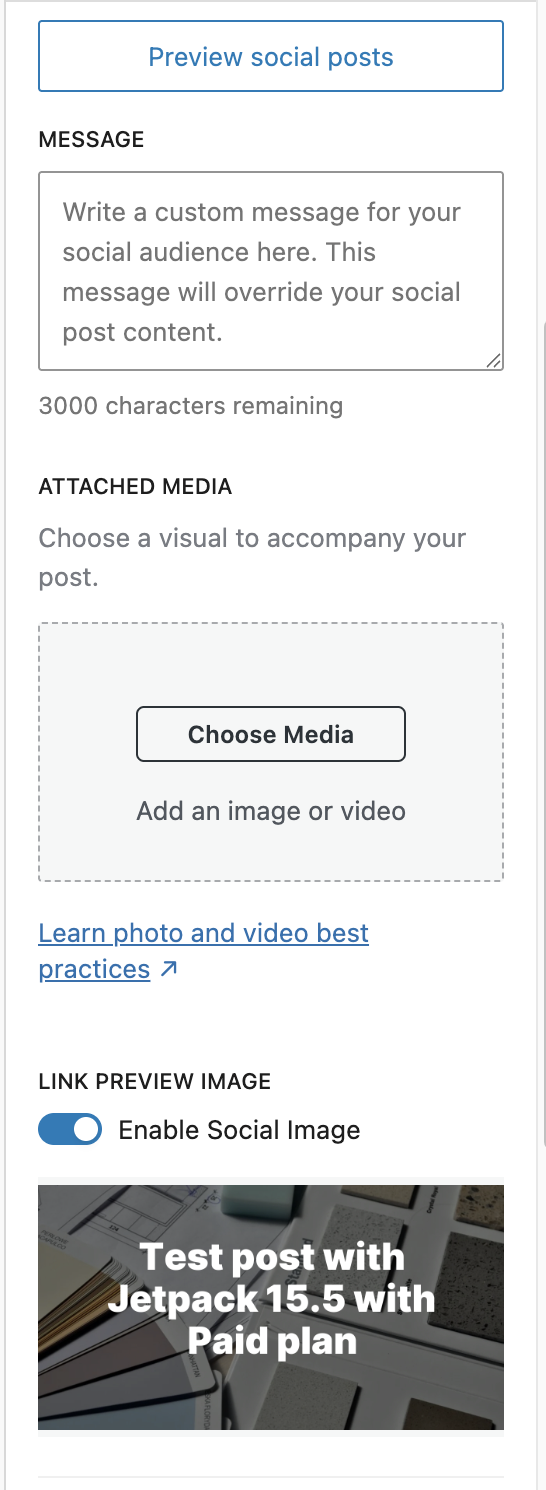
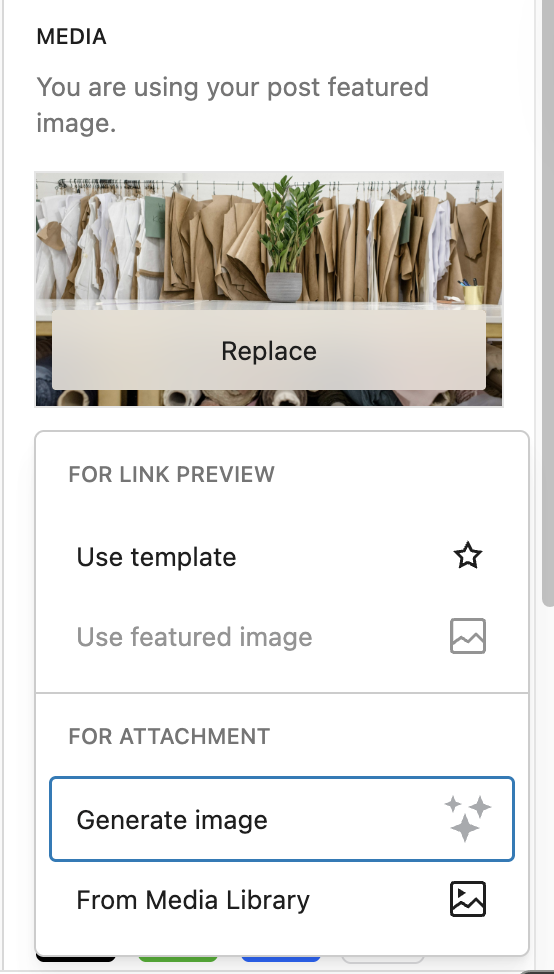
A cleaner, more intuitive sharing panel
We’ve streamlined the social sharing panel in the editor sidebar. Previously, media options and the Social Image Generator lived in separate sections, which made things confusing. Now they’re combined into a single, unified media section so you can manage your images, templates, and settings in one place.
What changed:
✅ Media picker, image templates, and AI generation are now in one section
✅ Fewer clicks to configure your social post
✅ Cleaner layout that’s easier to scan
✅ Visual dot indicators on active connections, so you can instantly see which accounts are enabled
Less confusion. More control.
Before the changes
After the changes
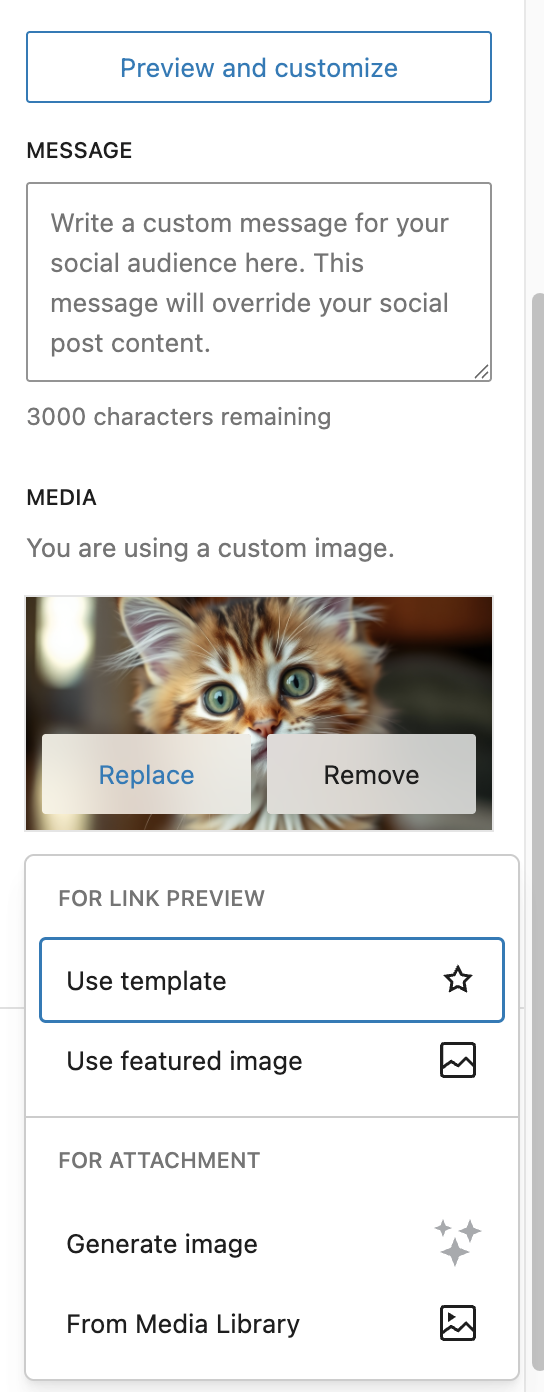
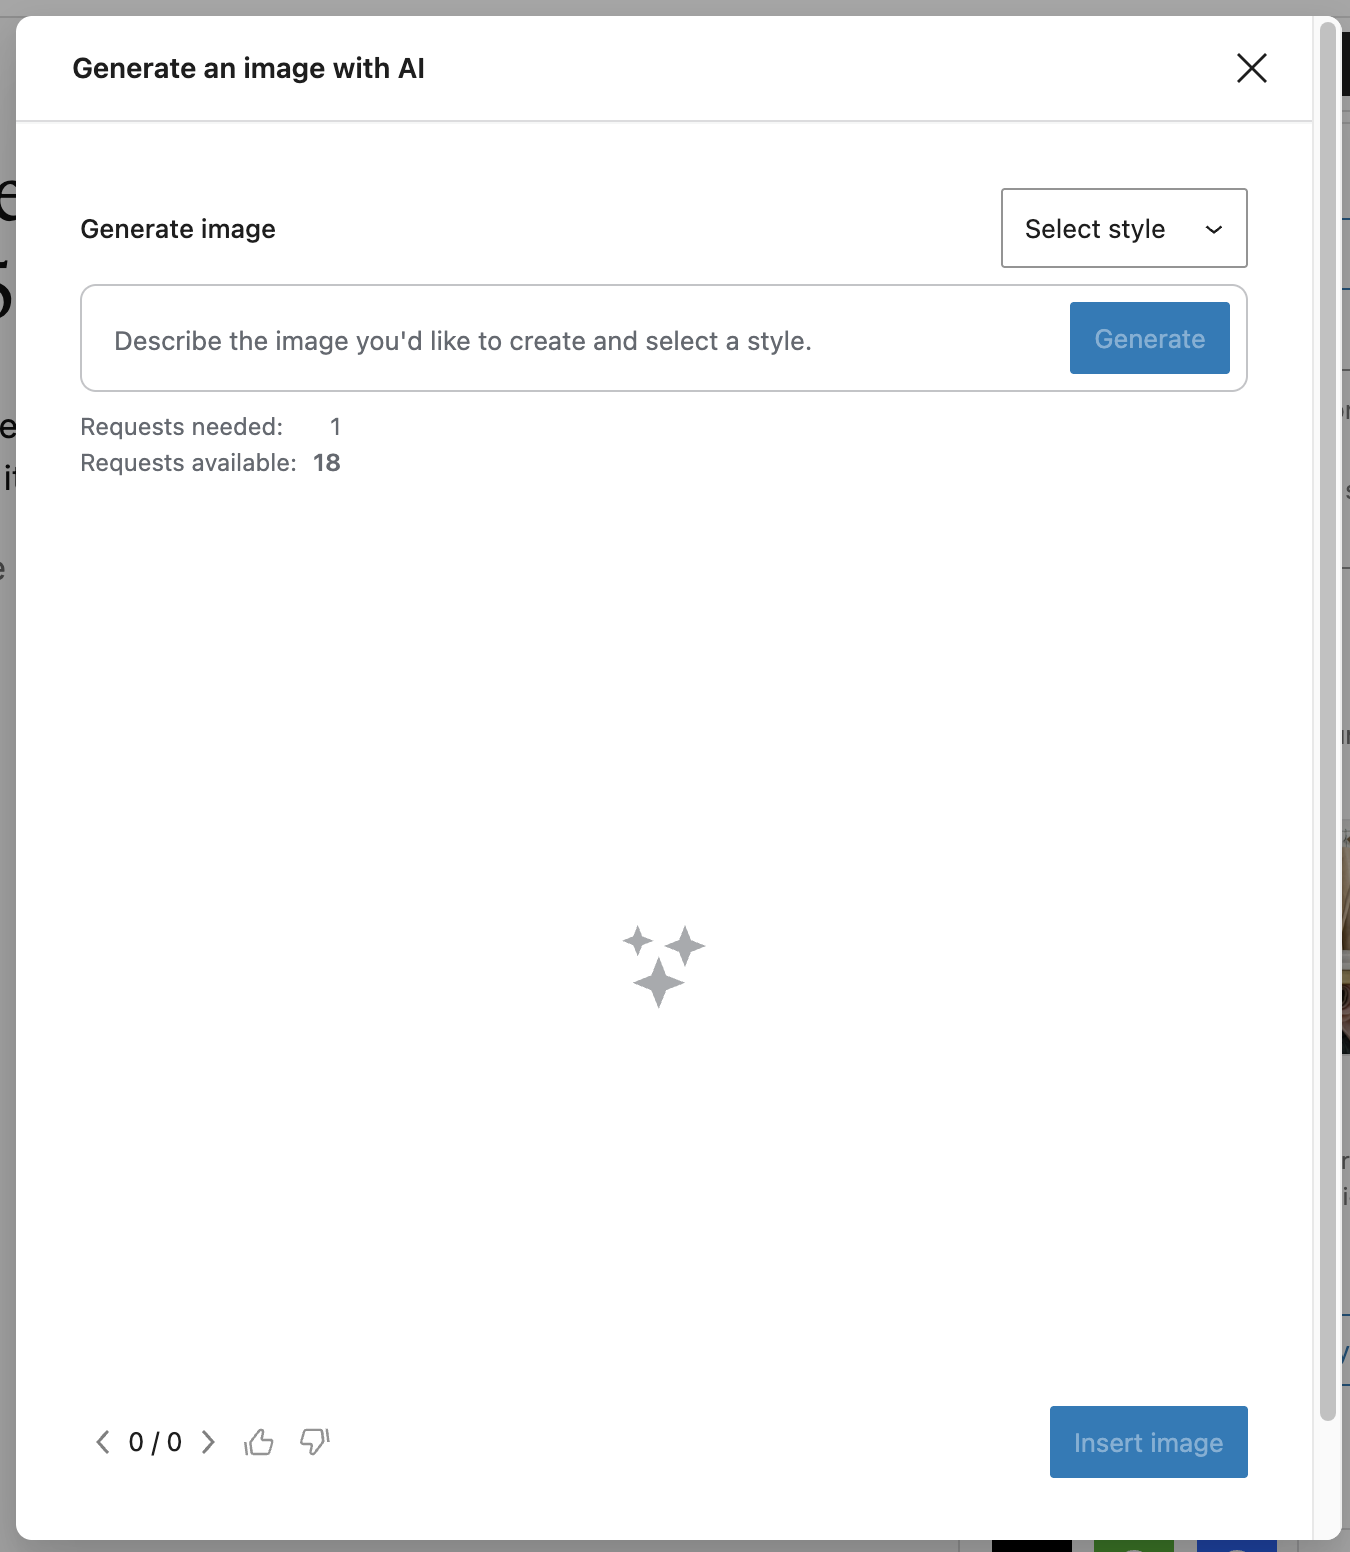
AI-powered image generation
Need an eye-catching image for your social post? Jetpack Social now includes the option to generate images using Jetpack AI, right from the editor. You can still use the template-based Social Image Generator, but now you also have access to AI-powered image creation for when you need something more custom or unique.
A screenshot showing the media options available for Jetpack Social.
A screenshot of the image generation modal
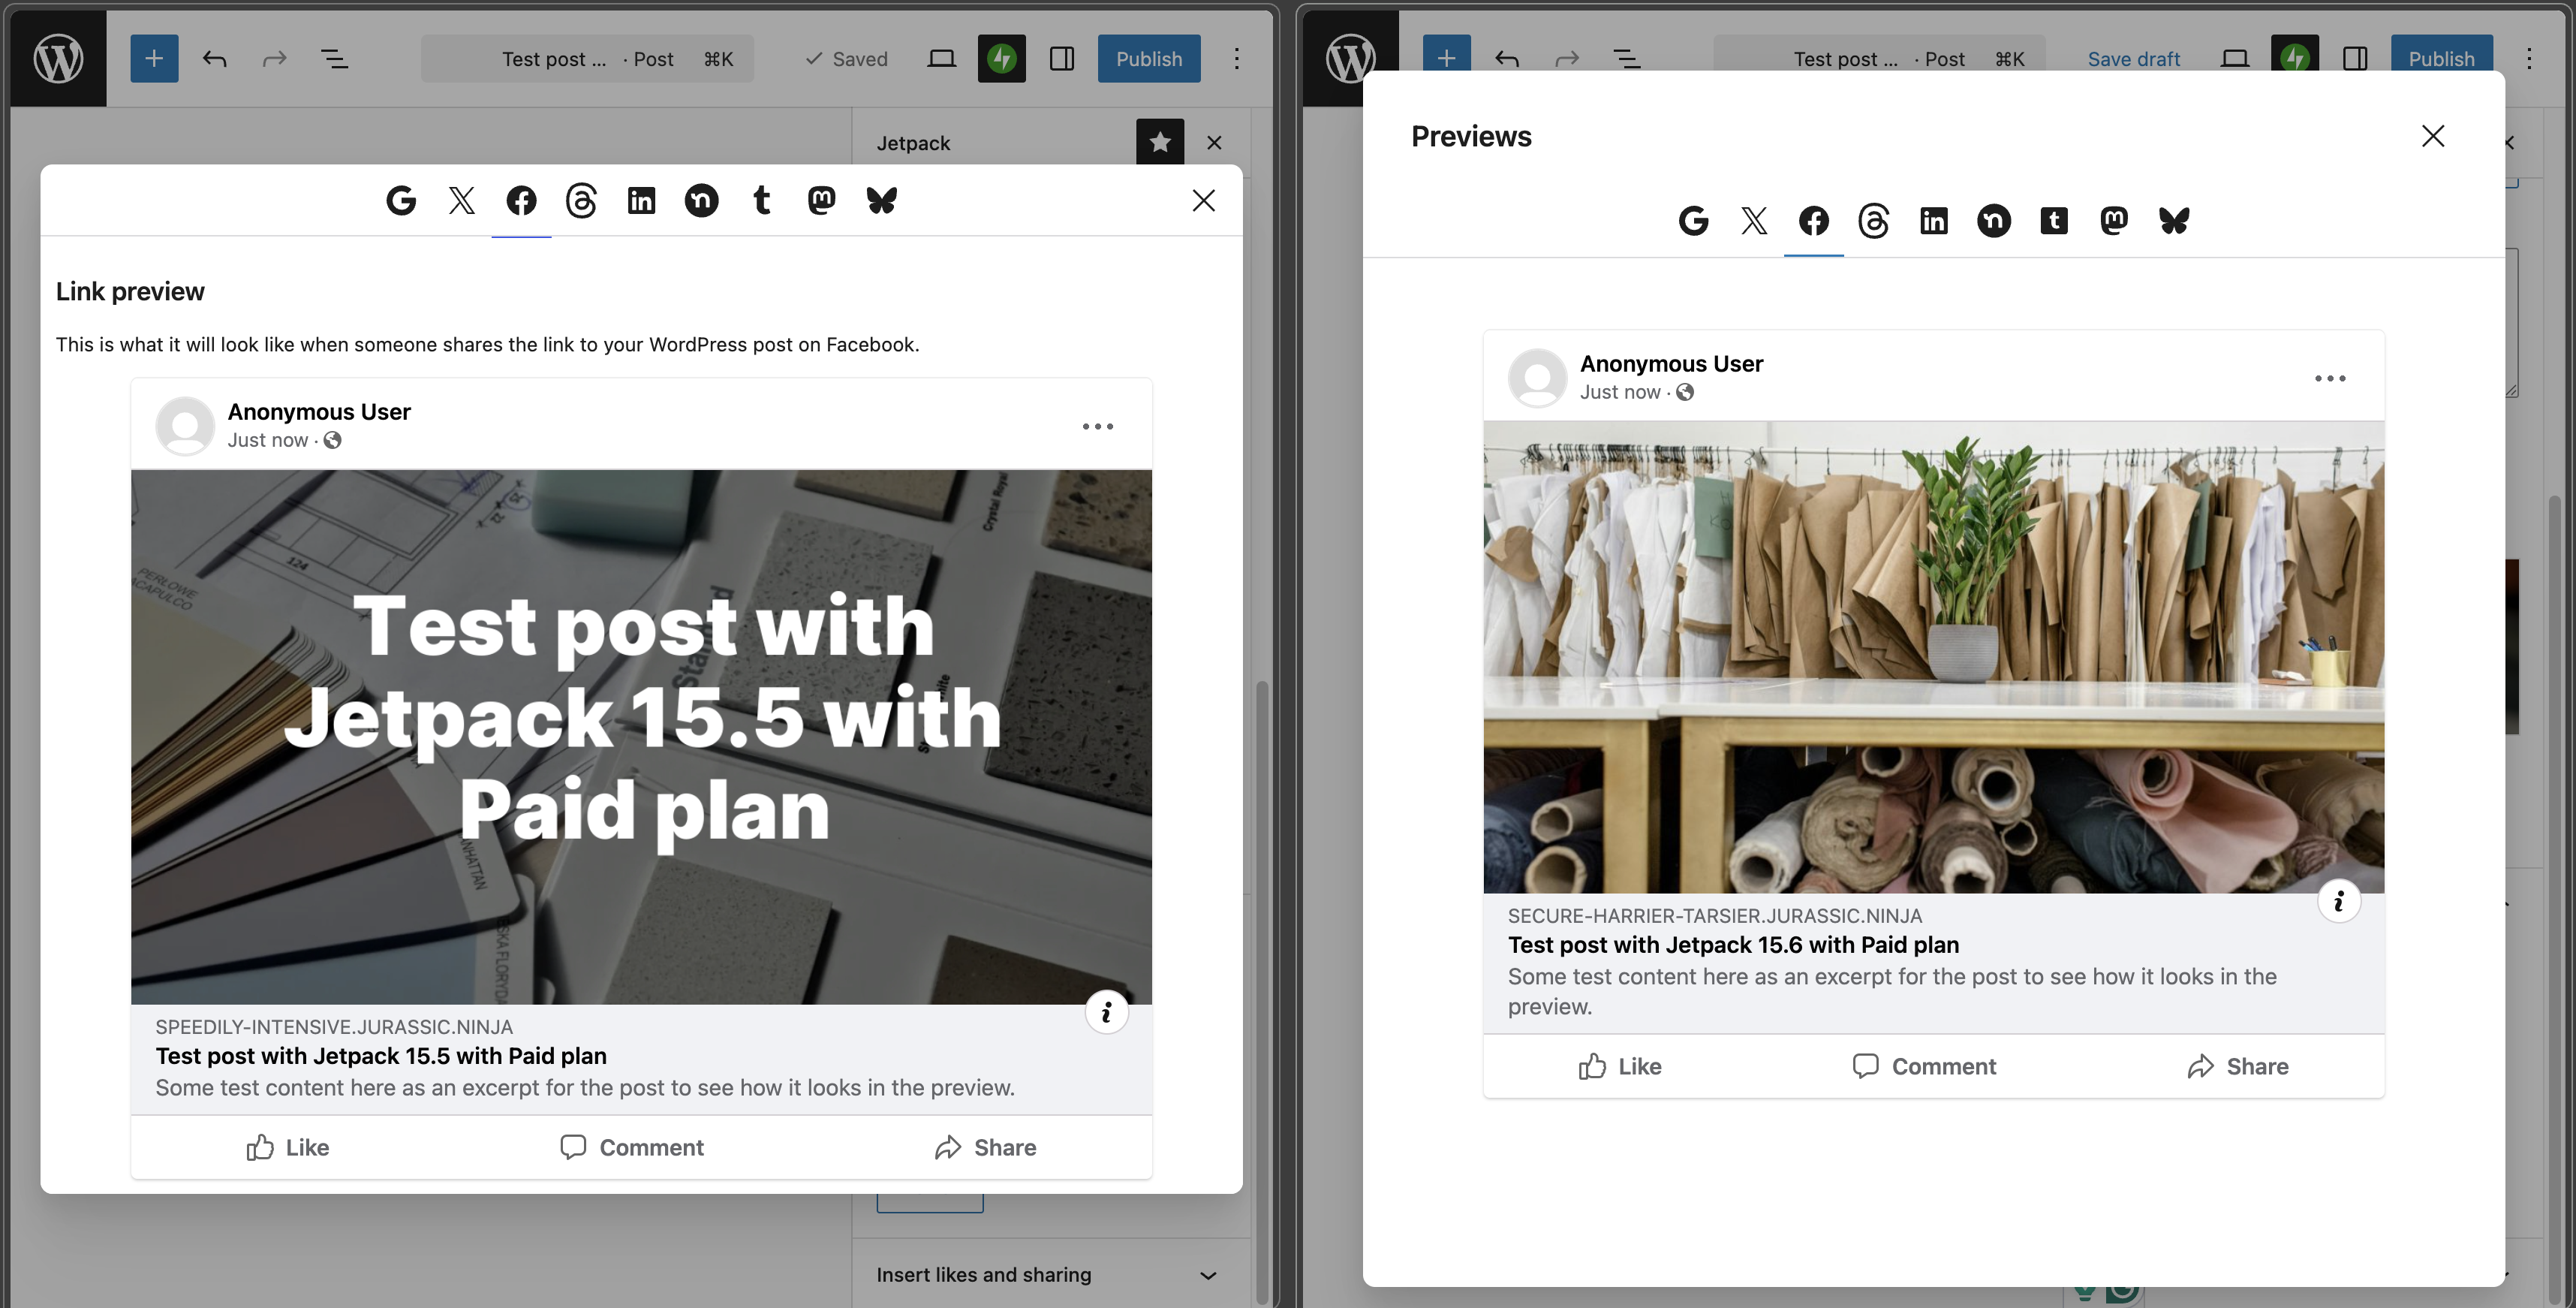
See how your links will look on every platform
The link preview modal has been completely redesigned. It’s cleaner, more consistent, and fully accessible. No more layout jumping when navigating between tabs.
Key improvements include:
🔍 Accurate rendering of how your post will appear on each social network
♿ Improved accessibility across the entire modal
🔗 Shared with Jetpack SEO so you can preview your post for both social networks and search engines in one place
🧵 Threads and Tumblr previews fixed for more accurate rendering, including gallery posts and custom messages
That last point about SEO is a big deal. If you’re using Jetpack’s SEO tools to optimize your meta tags and search appearance, you’ll now get social and search previews from the same component. Two birds, one modal.
A before-and-after screenshot of the link preview modal.
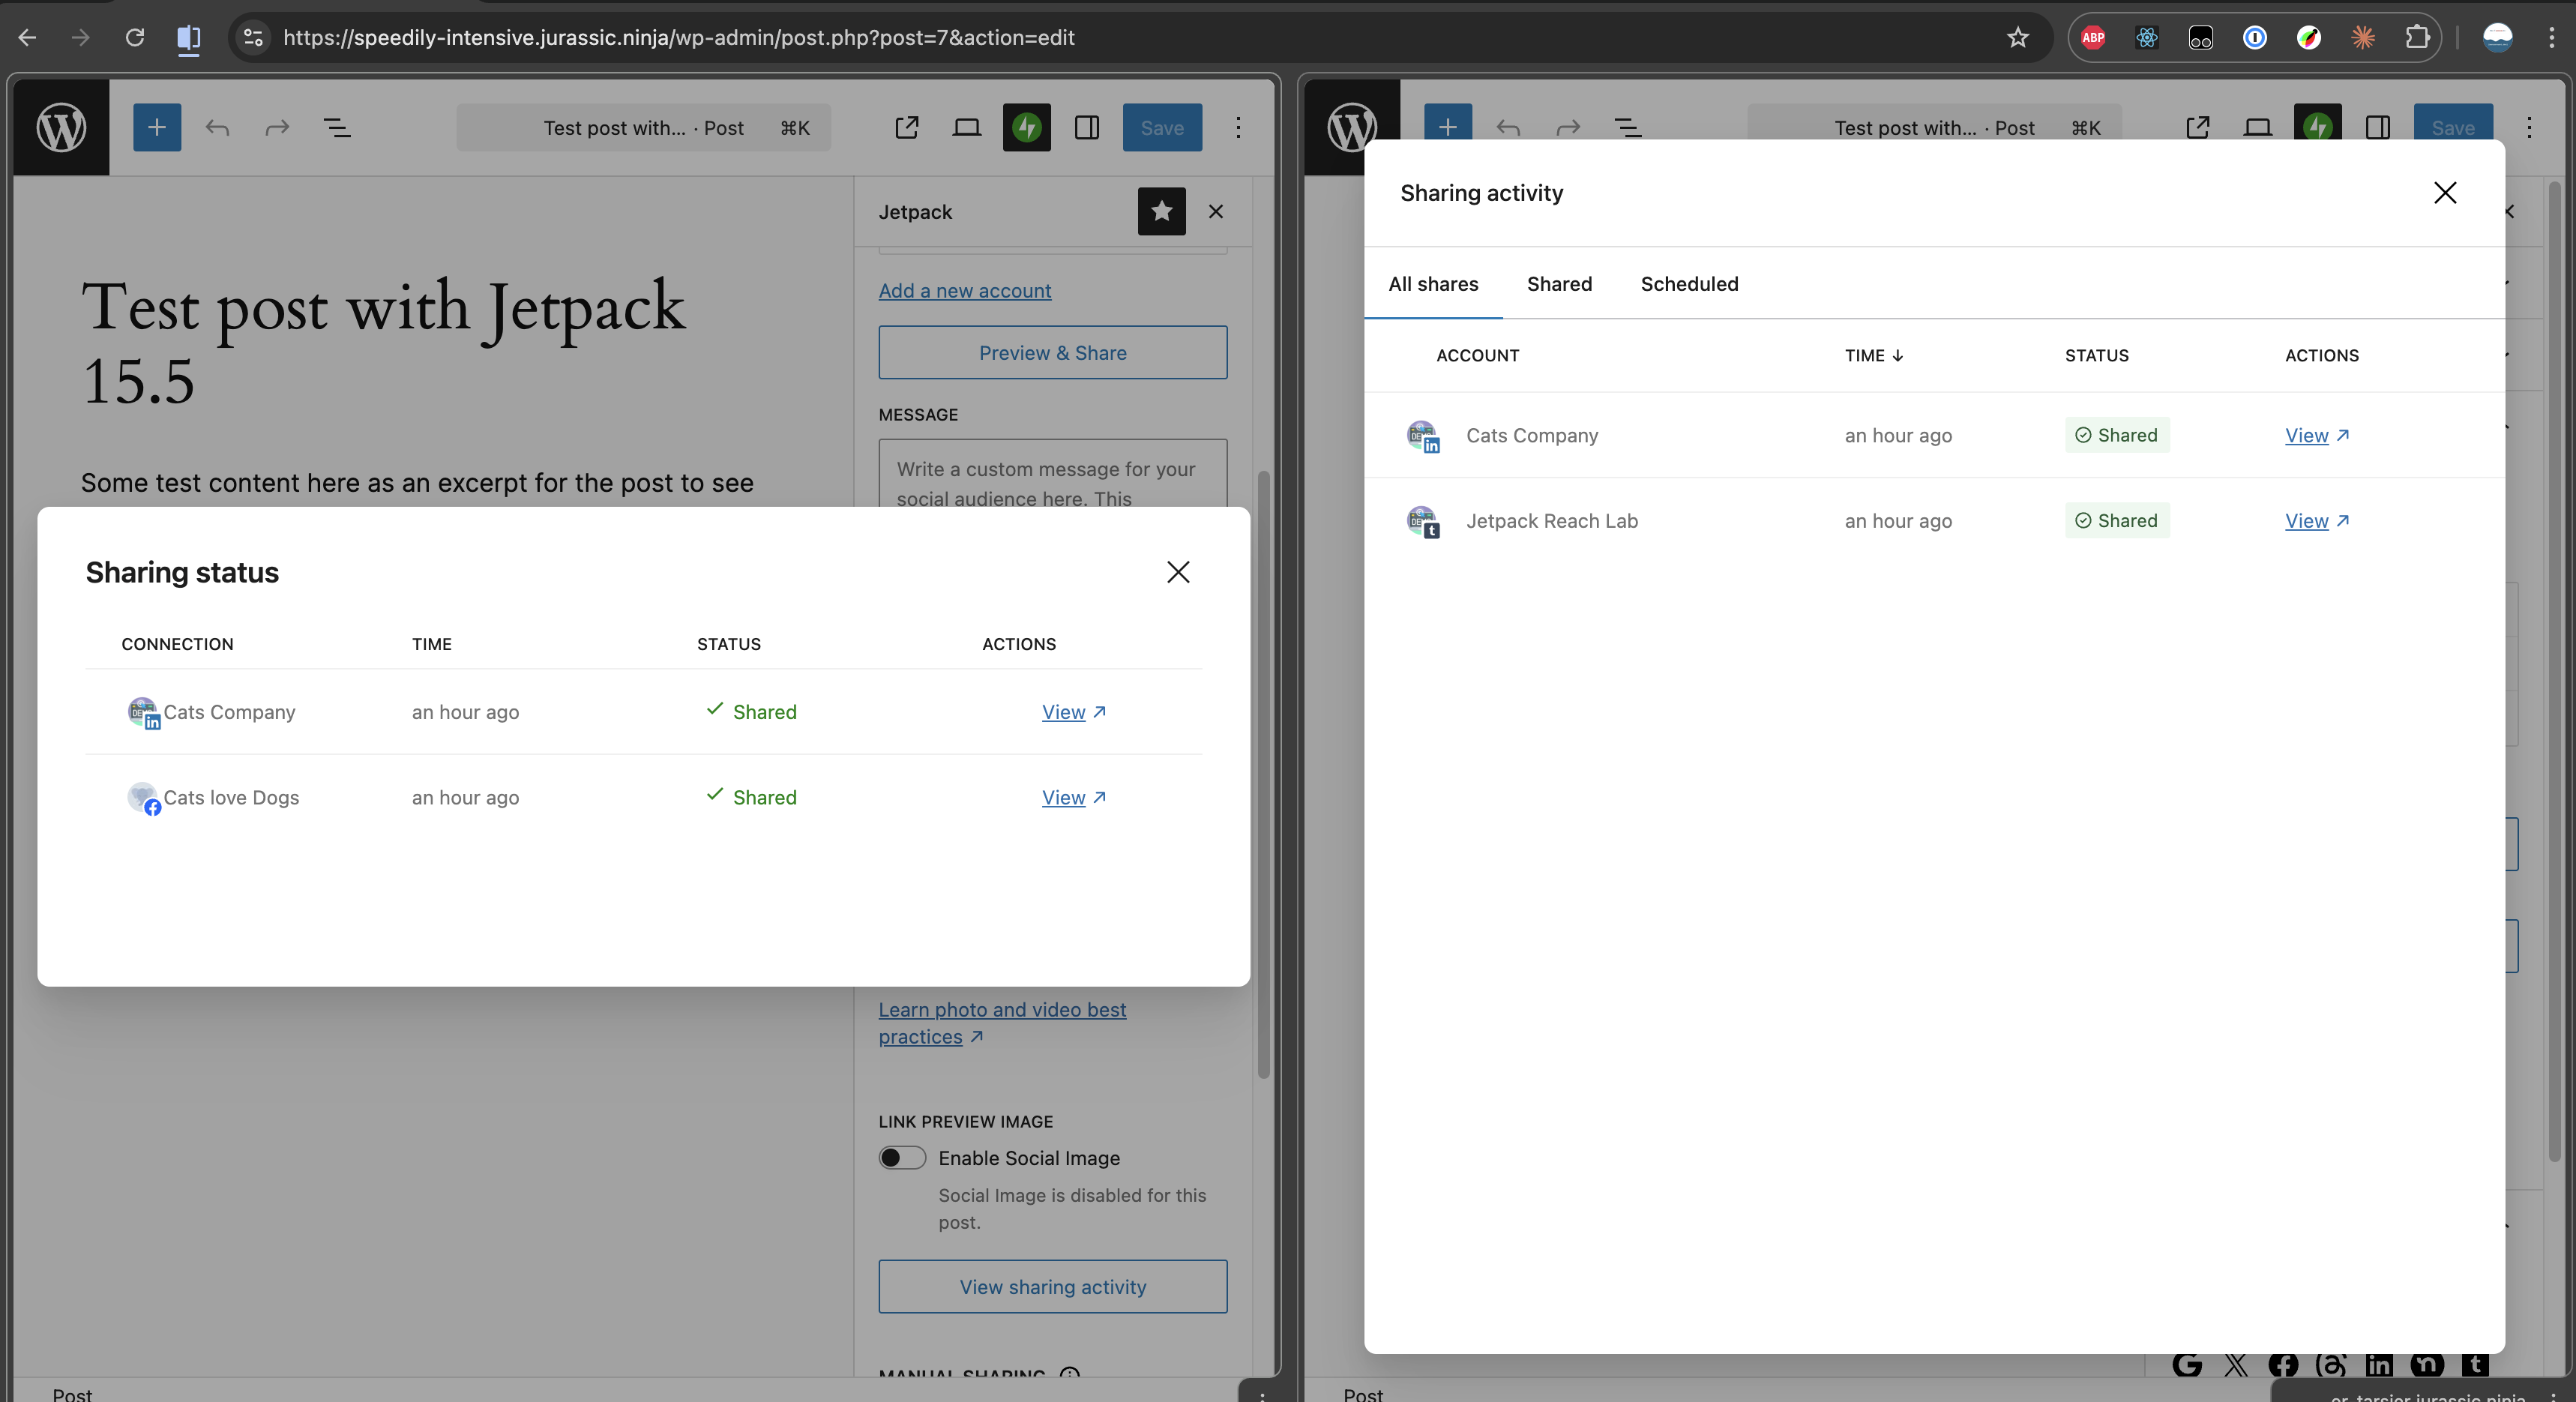
See your sharing history at a glance
We’ve unified the sharing activity view into a single, consistent modal. Previously, your sharing history and scheduled shares were shown in separate windows with inconsistent layouts. Now everything lives together, so you can quickly check:
📤 What’s been shared to each connected account
⏰ What’s scheduled and when it’s going out
✅ What’s coming next in your publishing queue
This is especially useful if you’re using Jetpack Social to automate your social media workflow and want a quick status check without digging through multiple screens.
A before-and-after screenshot of the social sharing history/activity.
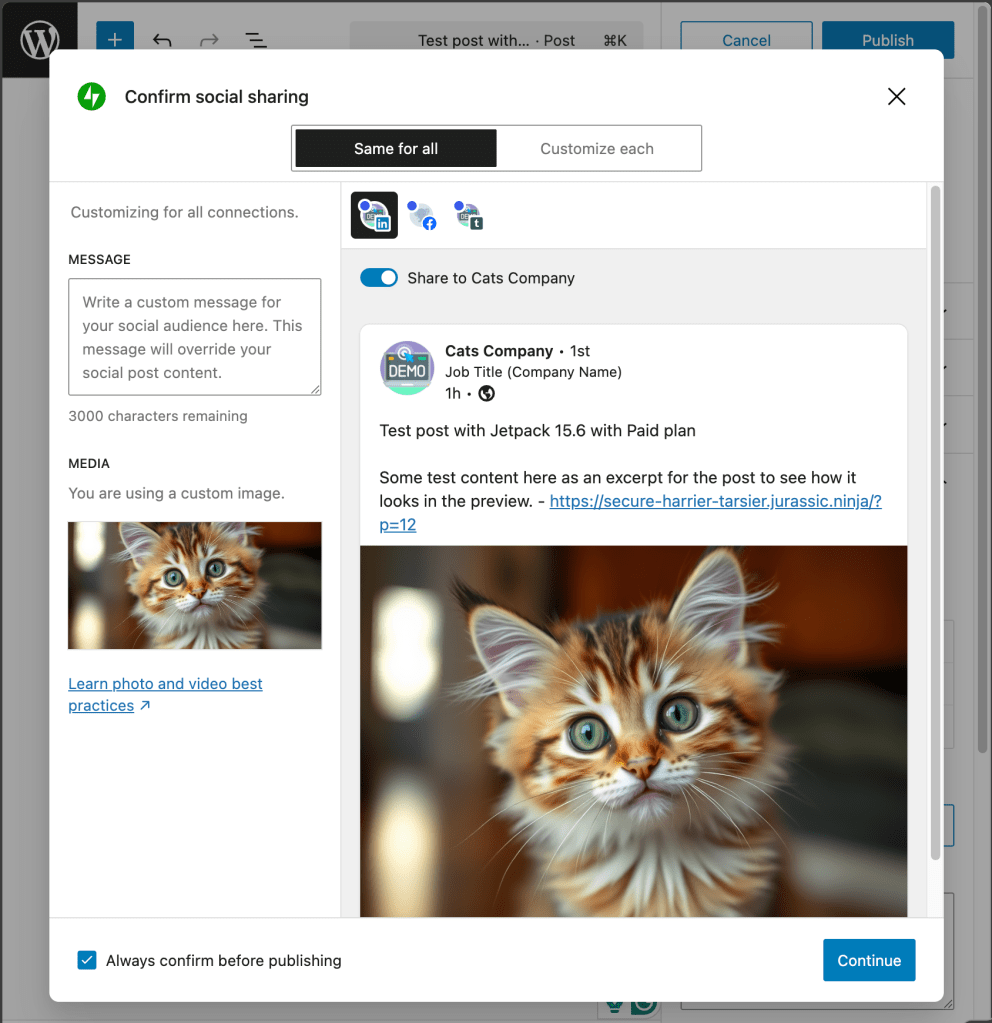
Review before you publish
When you click “Publish,” Jetpack Social now shows an optional confirmation modal that gives you a quick preview of what will be shared to each platform. Think of it as a final safety net before your content goes live.
Here’s why this matters:
Catch typos or formatting issues before they hit social media
Verify that the right image and message are attached to each network
Opt out anytime if you prefer a faster, no-interruption workflow
No more “I didn’t realize it posted that to LinkedIn” moments.
A screenshot of the pre-publish confirmation preview for Jetpack Social
Consistent sharing across every platform
Under the hood, we’ve also made changes to ensure that your posts are shared with a consistent structure across all connected networks. Previously, different platforms could receive slightly different content. Now, what you see in your preview is what your audience gets, everywhere.
This release also includes important reliability fixes:
LinkedIn sharing fixed with an updated share endpoint, resolving failures some users experienced
Threads gallery previews now render correctly for posts with multiple images
Tumblr previews properly prioritize your custom message when one is set
Pocket sharing button retired, keeping the interface focused on actively supported platforms
These are the kind of improvements you might not see, but you’ll definitely feel. Fewer surprises, fewer inconsistencies, and more trust that your social presence matches your brand.
Try the new Jetpack Social experience
These improvements are available now in Jetpack 15.6. If you’re already using Jetpack Social, just update to the latest version and you’ll see the changes right away.
If you’re new to Jetpack Social, there’s never been a better time to start. Publish once, share everywhere, and now, with the control and polish your content deserves.
Setting up a local WordPress environment is a common need for developers, designers, and technical marketers. It allows for experimentation, development, and testing, without risking a live website. XAMPP is often the first tool people try when setting up WordPress locally, but it’s not the most efficient or modern solution.
This guide explains how to install WordPress on XAMPP step by step. Then, it presents a better alternative for local WordPress development and why it might be the smarter choice moving forward.
Installing WordPress on a subdomain is a common way to create microsites, staging environments, or language-specific sections of a website. Why? Because it allows for clean separation without the overhead of separate hosting accounts.
This guide walks you through how to install WordPress on a subdomain, from domain configuration to installation and verification.