
Google Analytics 4 (GA4) is Google’s default analytics platform, replacing Universal Analytics in July 2023. If you run a WordPress site, you need GA4 to understand how visitors interact with your content, measure conversions, and evaluate performance across pages and campaigns.
This guide explains how to properly install GA4 on WordPress using several methods, while covering the technical nuances that experienced users expect.
You’ll learn how to:
- Set up a GA4 property in Google Analytics.
- Install GA4 in WordPress using three different methods.
- Verify that your tracking code works.
- Optimize settings for accurate data collection.
This guide assumes that you’re already familiar with WordPress basics and have administrative access to both your site and your Google Analytics account.
Set up your GA4 property in Google Analytics
Before connecting GA4 to WordPress, you need to create and configure a property in Google Analytics. This ensures that your site has a place to collect and process incoming data.
Step 1: Create a GA4 property
Go to analytics.google.com and sign into your Google Analytics account.
Then, open the Admin panel by clicking the gear icon in the bottom-left corner. Under the Account column, select your account or create one.
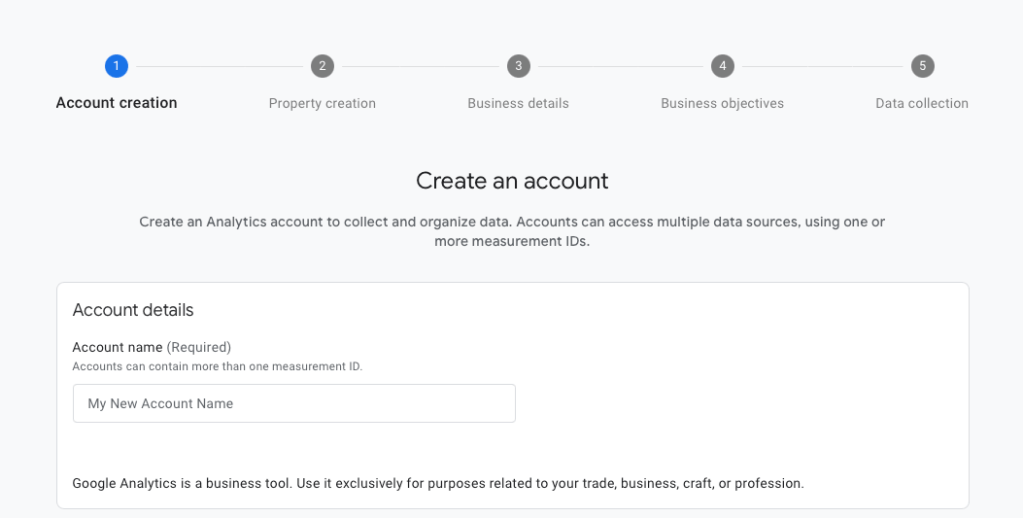
Under the Property column, click Create Property.
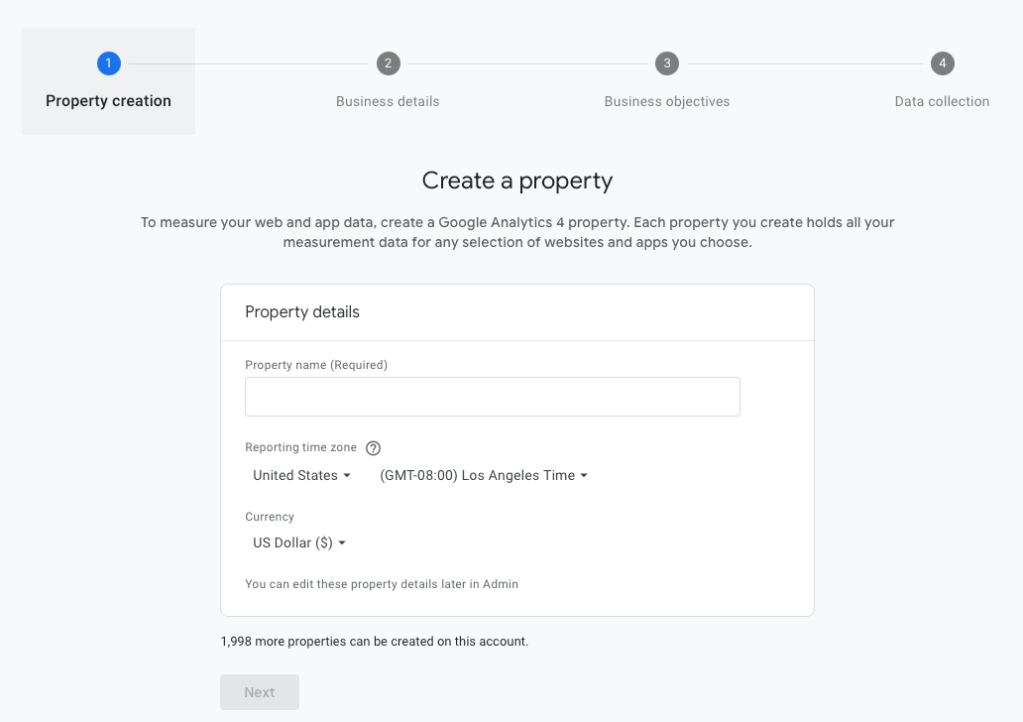
Enter a property name, then choose your reporting time zone and currency.
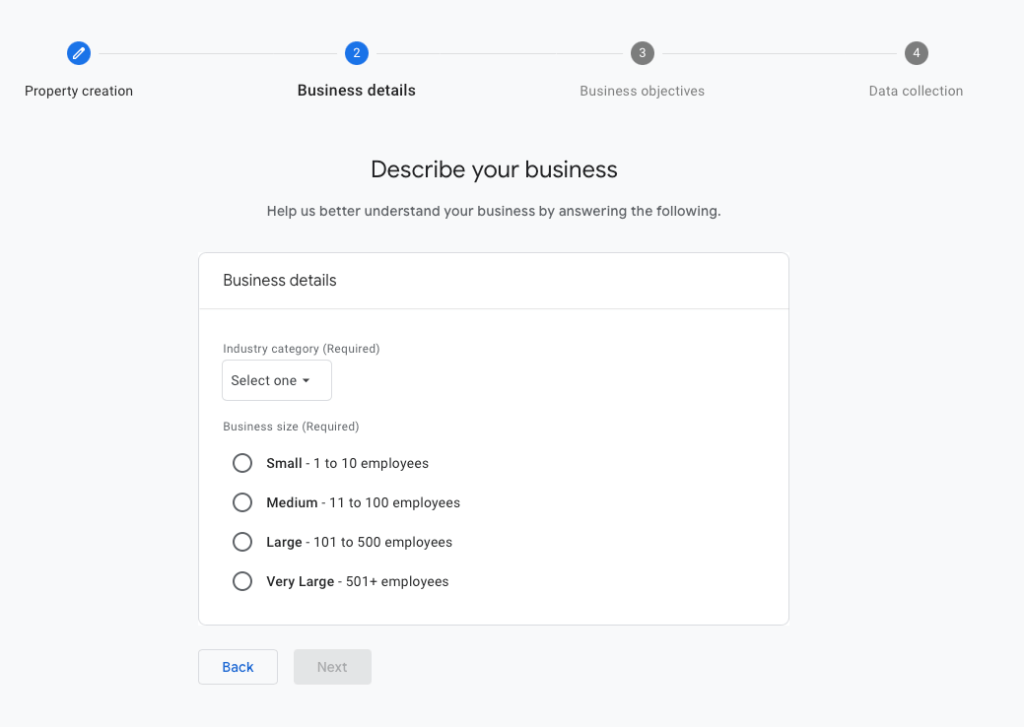
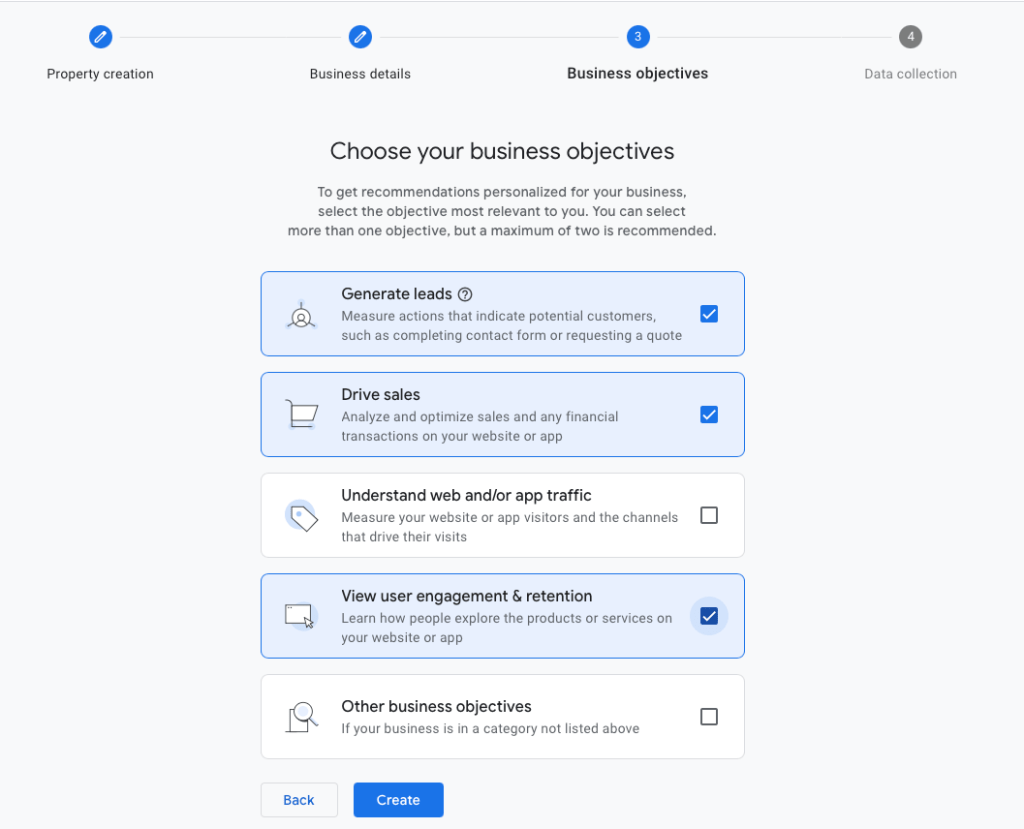
Click Next, answer a few business-related questions, and select Create to finish setup.
Step 2: Add a data stream
Once the property is created, choose Web as your data collection platform.
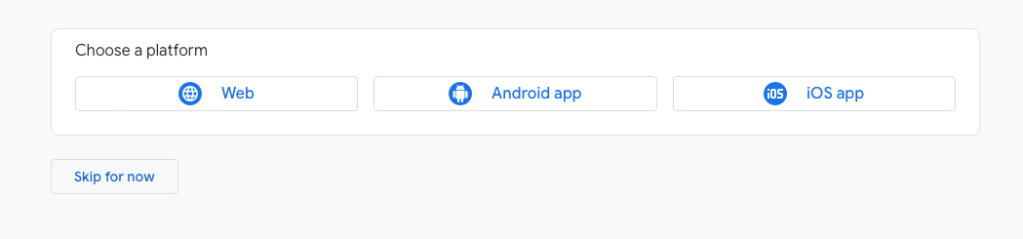
Next, enter your website URL and give the data stream a recognizable name.
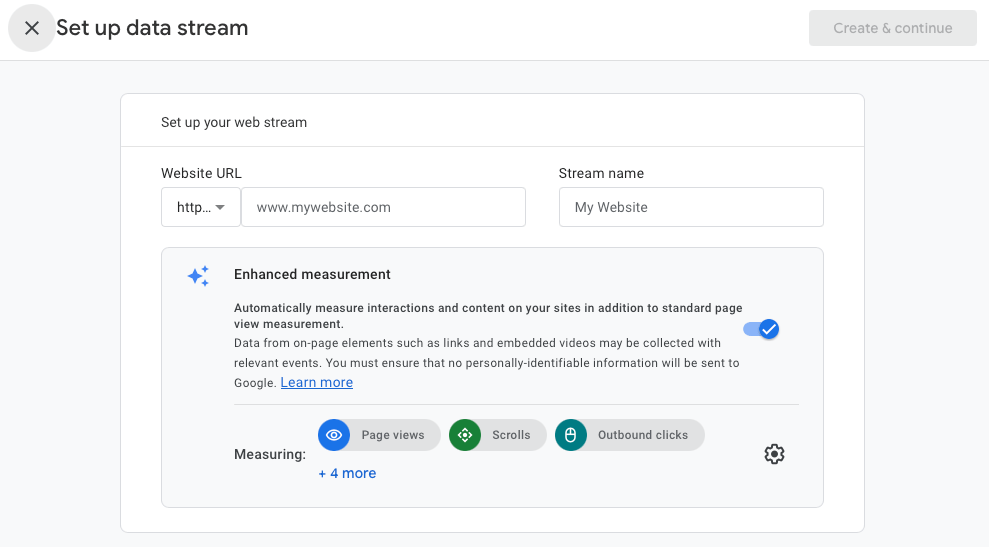
Click Create & continue.
After the stream is created, Google Analytics displays a Measurement ID that looks like G-XXXXXXXXXX. Copy this ID, as you’ll need it to connect GA4 to your WordPress site.
Method 1: Add Google Analytics to WordPress using a plugin
Using a plugin simplifies updates and reduces the risk of theme-related issues, and requires little to no manual coding. While several plugins support GA4, two options stand out depending on the level of integration you want.
Option A: Use Site Kit by Google

Site Kit is Google’s official WordPress plugin. It connects GA4 with other Google services like Search Console and places the tracking code automatically.
To install Site Kit, go to Plugins → Add New in your WordPress dashboard. Search for Site Kit by Google, then click Install Now and Activate. Follow the guided setup to connect your Google account, grant the required permissions, and select the GA4 property you created earlier.
Once connected, Site Kit automatically adds the GA4 tag to your site. It also verifies Search Console and displays key analytics data directly in your WordPress dashboard.
Option B: Use GA Google Analytics by Jeff Starr
To use this tool, install and activate the GA Google Analytics plugin, then go to Settings → GA Google Analytics. Paste your GA4 Measurement ID in the appropriate field.
Make sure tracking is enabled for all users you want to measure, and optionally exclude logged-in admins if needed. Save your changes to apply the setup.
This approach keeps things minimal and efficient with no Google login required.
Method 2: Add Google Analytics manually via your theme header
If you prefer not to use a plugin, you can add GA4 manually by inserting the tracking script into your site’s head section. This approach gives you direct control over the code, but it also requires more care when managing theme updates.
To get the tracking code, go to your GA4 property Admin → Data Streams → Web.
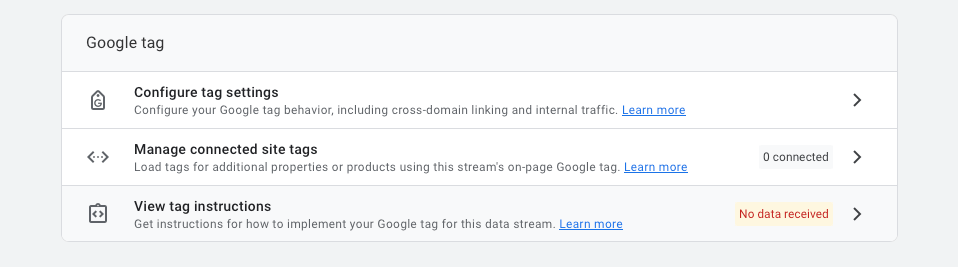
Under “View tag instructions,” choose Install manually and copy the script provided.
It will look similar to this:
<!-- Google tag (gtag.js) -->

https://www.googletagmanager.com/gtag/js?id=G-XXXXXXXXXX

<script>

  window.dataLayer = window.dataLayer || [];

  function gtag(){dataLayer.push(arguments);}

  gtag('js', new Date());

  gtag('config', 'G-XXXXXXXXXX');

</script>
Next, open your WordPress dashboard and go to Appearance → Theme File Editor.
Locate the header.php file, found in your active theme. Then, paste the code just before the closing </head> tag and save the file.
Be aware that this method isn’t update-safe. If your theme updates, WordPress may overwrite your changes. To avoid losing the tracking code, use a child theme or place the script through a custom header injection method instead.
Method 3: Add Google Analytics using Google Tag Manager
If you need more advanced tracking control, Google Tag Manager (GTM) gives you flexibility to manage events, deploy multiple tags, and apply conditional logic without editing your site’s code repeatedly.
Step 1: Create a GTM container
Go to tagmanager.google.com and sign in with your Google account. Click Create Account, name it, and set the container type to Web. After clicking Create and agreeing to the terms, Google provides two GTM code snippets — one for the head and one for the body of your site.
Step 2: Add GTM to WordPress
You can add the GTM code to WordPress in one of two ways.
Option 1: Use a plugin
Install a plugin like Insert Headers and Footers or Header Footer Code Manager.
Paste the GTM head snippet into the header section and the body snippet into the body section provided by the plugin. Save your changes to apply the container sitewide.
Option 2: Manually edit your theme
Edit header.php and body.php to include GTM code. Insert the header snippet inside the <head> and the body snippet immediately after the <body> tag.
Step 3: Add the GA4 tag in GTM
In Google Tag Manager, go to Tags and click New. Choose Google Analytics: GA4 Configuration as the tag type and enter your GA4 Measurement ID. Under “Triggering,” select All Pages. Save the tag, then publish your container.
Once live, your GA4 tracking is active through GTM.
Verify your Google Analytics installation
After you finish setting up GA4, confirm that tracking is working correctly. You can use one or more of the following methods to verify data collection.
1. The real-time report
Open Google Analytics and go to Reports → Real-time. Visit your website in a new incognito or private browser window. If GA4 is installed correctly, you should see at least one active user, which represents your visit.
2. Tag Assistant (Google Chrome extension)
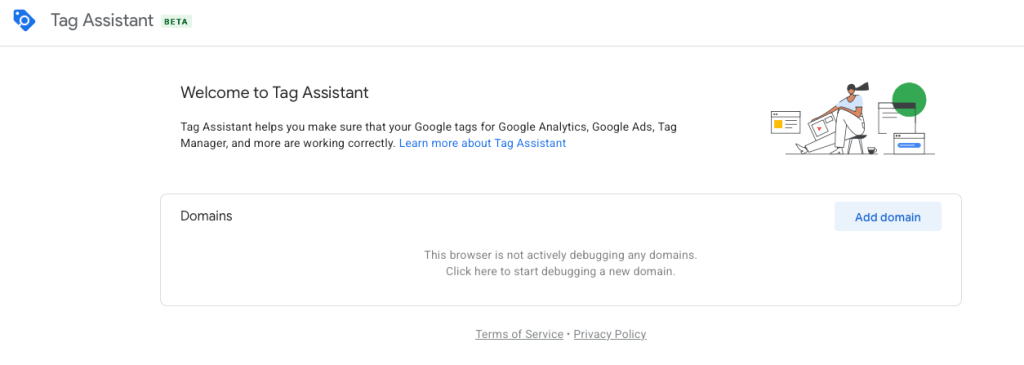
Install the Google Tag Assistant Chrome extension, then open your site and activate Tag Assistant. It should detect your GA4 Measurement ID or GTM container and confirm that the tag is working properly.
3. DebugView in GA4
If you’re using Google Tag Manager, enable Preview mode in GTM. Then open Google Analytics and go to Admin → DebugView. As you interact with your site, GA4 displays incoming events in near real time, allowing you to confirm that tracking data is being received.
Simple, yet powerful stats to grow your site
With Jetpack Stats, you don’t need to be a data scientist to see how your site is performing.
Get Jetpack StatsBest practices for Google Analytics on WordPress
Tracking only pays off when your data stays clean and your setup reflects how people actually use your site. Keep the following best practices in mind to get more reliable insights from GA4.
Exclude admin users from tracking
If you’re using a plugin, enable the option to exclude logged-in users from tracking. This prevents your own visits and internal testing from skewing traffic and engagement data.
Set up custom events
GA4 does not track everything out of the box. Consider adding events like:
- Button clicks
- Form submissions
- Scroll depth
- Video plays
Use UTM parameters for campaign tracking
When running email campaigns, ads, or promotions, add UTM parameters to your URLs. GA4 will automatically detect these and organize data under Acquisition reports, making it simpler to evaluate campaign performance and traffic sources.
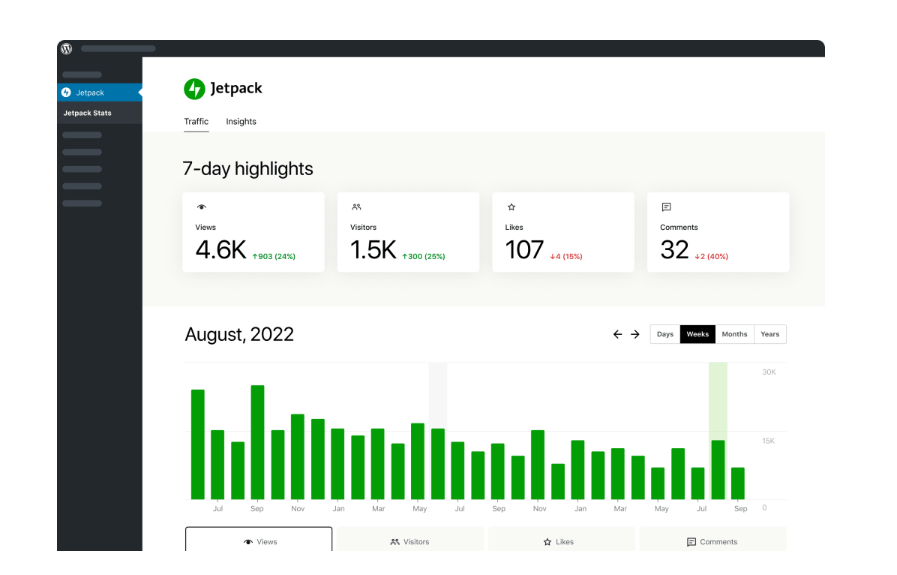
Complement GA4 with Jetpack Stats for quick insights
If you want fast, at-a-glance metrics without navigating the GA4 interface, Jetpack Stats provides lightweight analytics directly inside your WordPress dashboard. It shows top posts, traffic sources, and user engagement without having to parse complicated information.
Jetpack Stats doesn’t replace GA4’s event-based tracking or reporting depth, but it works well as a supplement when you need quick visibility into site activity without leaving WordPress.
What to do after Google Analytics is installed on WordPress
Installing GA4 is only the first step. To turn raw data into useful insights, you need to spend time configuring and refining your setup.
Start by defining conversions in GA4, such as form submissions, purchases, or other key actions that matter to your site. These conversions help you measure success beyond page views.
Next, explore GA4’s Exploration reports to analyze user behavior in more detail. These reports let you examine paths, funnels, and engagement patterns that aren’t visible in standard reports.
You can also set up Audiences to group people based on behavior, traffic source, or engagement. These audiences support deeper analysis and can power remarketing efforts if you’re running ads.
Finally, define event parameters to pass additional context with your events, such as a form type, button label, or page category. These details make your event data more meaningful and easier to analyze.
GA4 is structured differently from Universal Analytics, so spend time understanding how it collects and structures data. The more closely you align GA4 with how people actually interact with your site, the more valuable and actionable your analytics data becomes.
Using Jetpack Stats alongside Google Analytics
Google Analytics 4 provides deep, event-level reporting, but it can feel excessive if you only need high-level traffic insights. For many site owners, opening GA4 just to check basic performance adds unnecessary complication.
Jetpack Stats offers real-time metrics like views, clicks, and referrers right in the WordPress dashboard. It works out of the box, with no external property setup and no scripts to manage manually. This is a win-win for you and your marketing team.
Jetpack Stats doesn’t replace GA4’s depth or flexibility, but it pairs well with it. GA4 handles detailed analysis and conversions, while Jetpack Stats gives you fast visibility into how your site is performing day to day.
Frequently asked questions
What is the easiest way to add Google Analytics 4 (GA4) to a WordPress site?
The most beginner-friendly way to add GA4 to WordPress is by using the Site Kit by Google plugin. It connects directly to your Google account and inserts the correct tracking code without requiring manual edits. It also enables additional Google services like Search Console and AdSense.
For those who prefer more control, Google Tag Manager or manual integration via theme files are valid alternatives, but they require more technical oversight and maintenance.
Can I install GA4 on WordPress without using a plugin?
Yes, you can install GA4 on WordPress manually by inserting the GA4 tracking code directly into your theme’s header.php file. This involves copying the gtag.js code snippet from your GA4 property and pasting it just before the </head> tag.
However, this method has drawbacks. If your theme updates or changes, you risk losing the code. Using a child theme or a plugin that manages header scripts is a safer alternative if you’re not using a plugin like Site Kit.
How can I verify that GA4 is working on my WordPress site?
To confirm GA4 is tracking properly on your WordPress site, open the Real-Time Report in your GA4 dashboard and visit your website in an incognito browser. You should appear as an active user.
You can also use the Google Tag Assistant Chrome extension or DebugView in GA4 for deeper verification. These tools show whether the GA4 tag is firing correctly and whether your events are registering as expected.
Should I use Google Tag Manager or install GA4 directly?
Use Google Tag Manager (GTM) if you need advanced tracking, like event-based analytics, custom triggers, or multiple marketing tags. GTM separates tag management from site code, making it more straightforward to update analytics without editing WordPress files.
However, for basic site tracking, direct installation through Site Kit or a simple plugin is faster and easier to manage. Choose GTM if your analytics strategy involves more than just page views.
How do I exclude admin users from GA4 tracking in WordPress?
Most Google Analytics plugins for WordPress include a setting to exclude logged-in admin users from being tracked. This prevents your own visits from affecting your data.
For example, in GA Google Analytics, you can uncheck tracking for users with certain roles. If you’re using manual installation, you’ll need to add a PHP condition around the GA script to prevent it from loading for admins. Accurate data starts with filtering out internal traffic.
What events should I track in GA4 for a WordPress blog or business site?
Start with basic events like page views, scrolls, outbound link clicks, and site search. For more insights, track custom events like:
- Contact form submissions
- Newsletter signups
- Button clicks
- Video plays
- File downloads
These can be added through Google Tag Manager or using the gtag() function. Customizing your events to key user actions improves your reporting and helps identify conversion points.
How do I find my GA4 Measurement ID to use in WordPress?
To find your GA4 Measurement ID log into Google Analytics, click Admin (the gear icon), and select Data Streams under your G4 property. Select Web then copy your Measurement ID, formatting as G-XXXXXXXXXX.
Paste it into your WordPress plugin or theme file as instructed. The Measurement ID is required to link your site to the correct GA4 property.
Does GA4 work with WooCommerce and other WordPress plugins?
GA4 works with WooCommerce, but not out-of-the-box. For eCommerce tracking, you need additional plugins or custom configurations. Options include:
- Site Kit + WooCommerce integration (limited eCommerce support).
- WooCommerce Google Analytics Pro for advanced GA4 tracking.
- Custom GA4 events via Google Tag Manager to track purchases, cart activity, and checkout steps.
If you’re running an online store, make sure your setup tracks revenue, product impressions, and conversion events accurately. Default GA4 does not provide these without customization.
Can I use Jetpack Stats instead of Google Analytics on my WordPress site?
Yes, Jetpack Stats is a popular alternative to Google Analytics for WordPress users who want simple, privacy-focused site analytics. It provides insights like page views, popular posts, referral traffic, and visitor counts within the WordPress dashboard.
Unlike GA4, Jetpack Stats doesn’t require separate setup with Google and doesn’t rely on cookies or external scripts, which can be helpful for speed and compliance. For small to medium sites, it’s often enough on its own or can be used alongside GA4 for a fuller picture.
Simple, yet powerful stats to grow your site
With Jetpack Stats, you don’t need to be a data scientist to see how your site is performing.
Get Jetpack Stats