
If you’re ready to start selling products on your WordPress site, WooCommerce is the best way to do so. Built specifically for WordPress, it gives you everything you need to create a beautiful, powerful, and fully customizable online store — no technical background required.
With an open source foundation, WooCommerce grows with your business, whether you’re launching your first product or managing a thriving catalog. In this guide, we’ll walk you through how to set up your WooCommerce store step by step.
1. Install WordPress on your site
Before you install WooCommerce, you’ll need to have a WordPress site up and running. Start by choosing a hosting provider that supports WordPress — many offer a simple, one-click installation. Once WordPress is installed, log in to your WordPress dashboard to make sure everything is working as expected.
This is also a great time to set your site title and tagline under Settings → General. Don’t worry about making it perfect right away — you can always update it later as your store takes shape.
2. Choose a theme
A WordPress theme impacts the overall design and layout of your website — including fonts, colors, menus, page templates, and more. It can also add functionality to your site.
When choosing a theme for your WooCommerce store, it’s important to pick one that’s built specifically for ecommerce. WooCommerce-compatible themes are designed to work seamlessly with shop features like product galleries, carts, and checkout pages, so everything feels polished and consistent right out of the box.
Performance and flexibility matter. A lightweight, well-coded theme will help your site load quickly and avoid bloat that can slow things down.
Finally, choose a theme that’s responsive (mobile-friendly), regularly updated, and supported by its developer. A good theme should work smoothly on all screen sizes and stay compatible with the latest versions of WordPress and WooCommerce. Speed test scores, support forums, and update logs are all good indicators of long-term reliability.
For more guidance, check out this guide to choosing a theme from WooCommerce.
3. Install WooCommerce
To install WooCommerce, go to Plugins → Add Plugin, search for “WooCommerce,” and click Install → Activate. WooCommerce will then open a setup wizard that walks you through the basic steps.

You’ll be asked to enter your store address and choose your industry. Then, you’ll pick the type of products you plan to sell — physical goods, digital downloads, or services — and choose your theme.
When the wizard finishes, you’ll be taken back to your dashboard. Now WooCommerce is installed and ready to use.
4. Configure general store settings
Go to WooCommerce → Settings to access the main configuration panel. Start with the General tab. Here you can confirm your store address, choose the default currency, and select the countries you’ll ship to.

The settings in this section are important because they control how your store works behind the scenes. You can also choose whether to enable taxes. If you turn on taxes, a new Tax tab will appear at the top.
Critical WooCommerce settings to verify:
- Currency, weight, and dimension units match your products.
- Store pages (Shop, Cart, Checkout, My Account) exist and are assigned correctly.
- Guest checkout is enabled/disabled intentionally (don’t guess).
- Taxes display is set correctly (inclusive vs exclusive) for your region.
- Emails: confirm order emails are enabled and the “From” name/address is correct.
5. Add your first products
Go to Products → Add new product to create your first item. Start by entering the product name and a description. Note that this description field will appear beneath the rest of your product details and is ideal for extra details and specifications.

Then, scroll down to the Product Data section. Here you can enter information like the price, SKU, stock level, and shipping details. You’ll also choose a product type, with default options for Simple, Grouped, External/Affiliate, and Variable. Read the full WooCommerce documentation to decide the best choice for your situation.

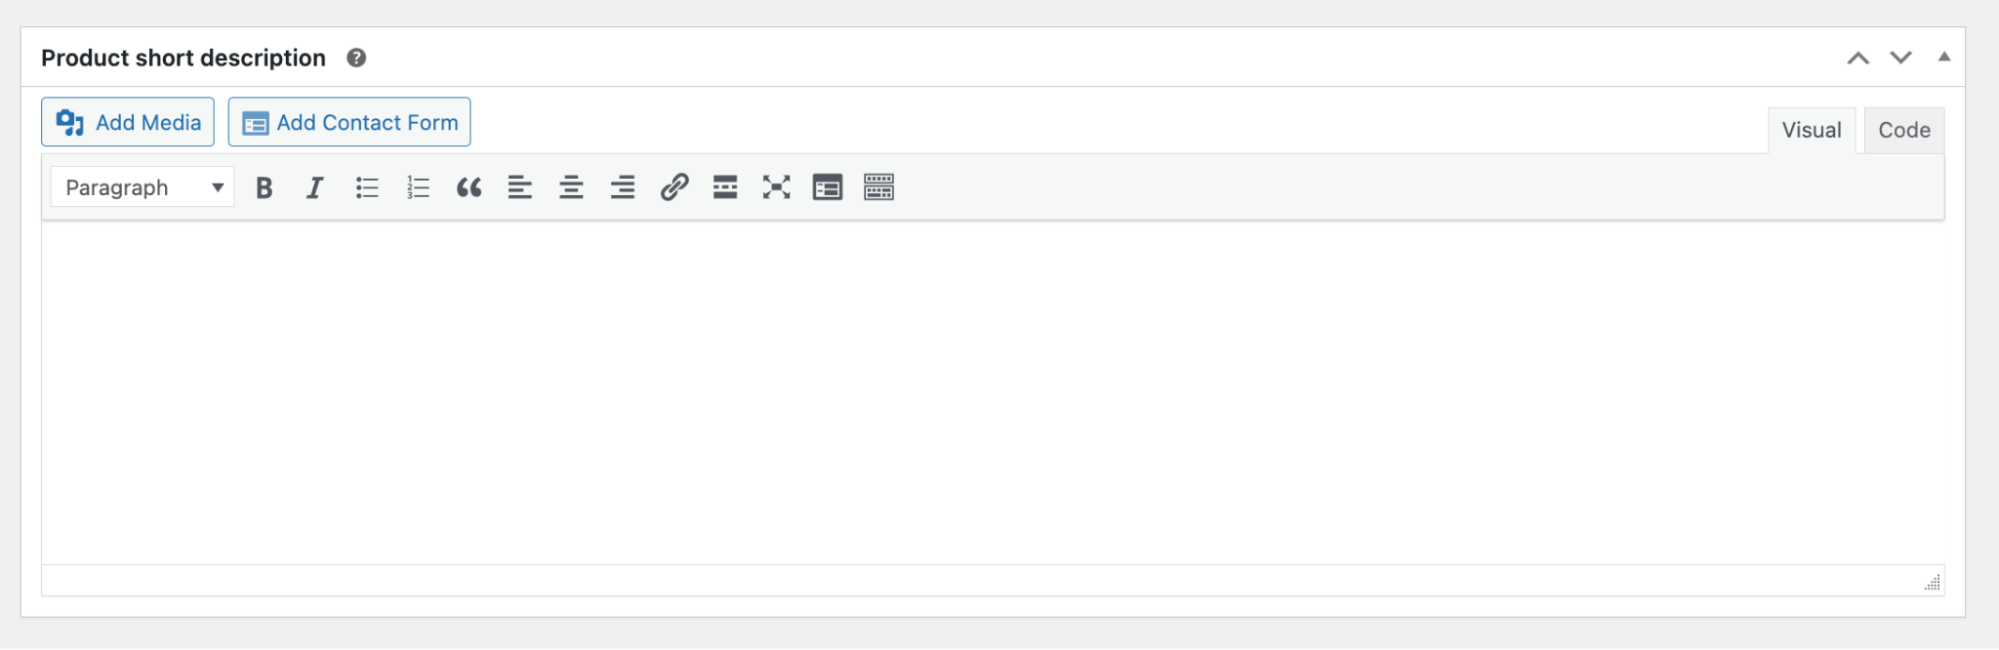
In the Product Short Description field, include the most pertinent information about your item. This will appear above the fold, alongside the primary photo, title, and price.
On the right-hand side of the page, you’ll see options for Product Categories and Product Tags. These are useful for organizing your product catalog and making it easier for shoppers to find what they’re looking for.
For example, if you sell clothing, you might create categories for Accessories, Hoodies, and T-shirts, with tags for 100% Cotton, Linen, and Silk.

Finally, use the Product Image (the primary picture) and Product Gallery (secondary photos) sections on the right-hand side of the page to add photos for your item. You can upload these directly to the Media Library, then add alt text to describe the image for screen readers and search engines.

Once everything looks good, click Publish to make the item live on your site!
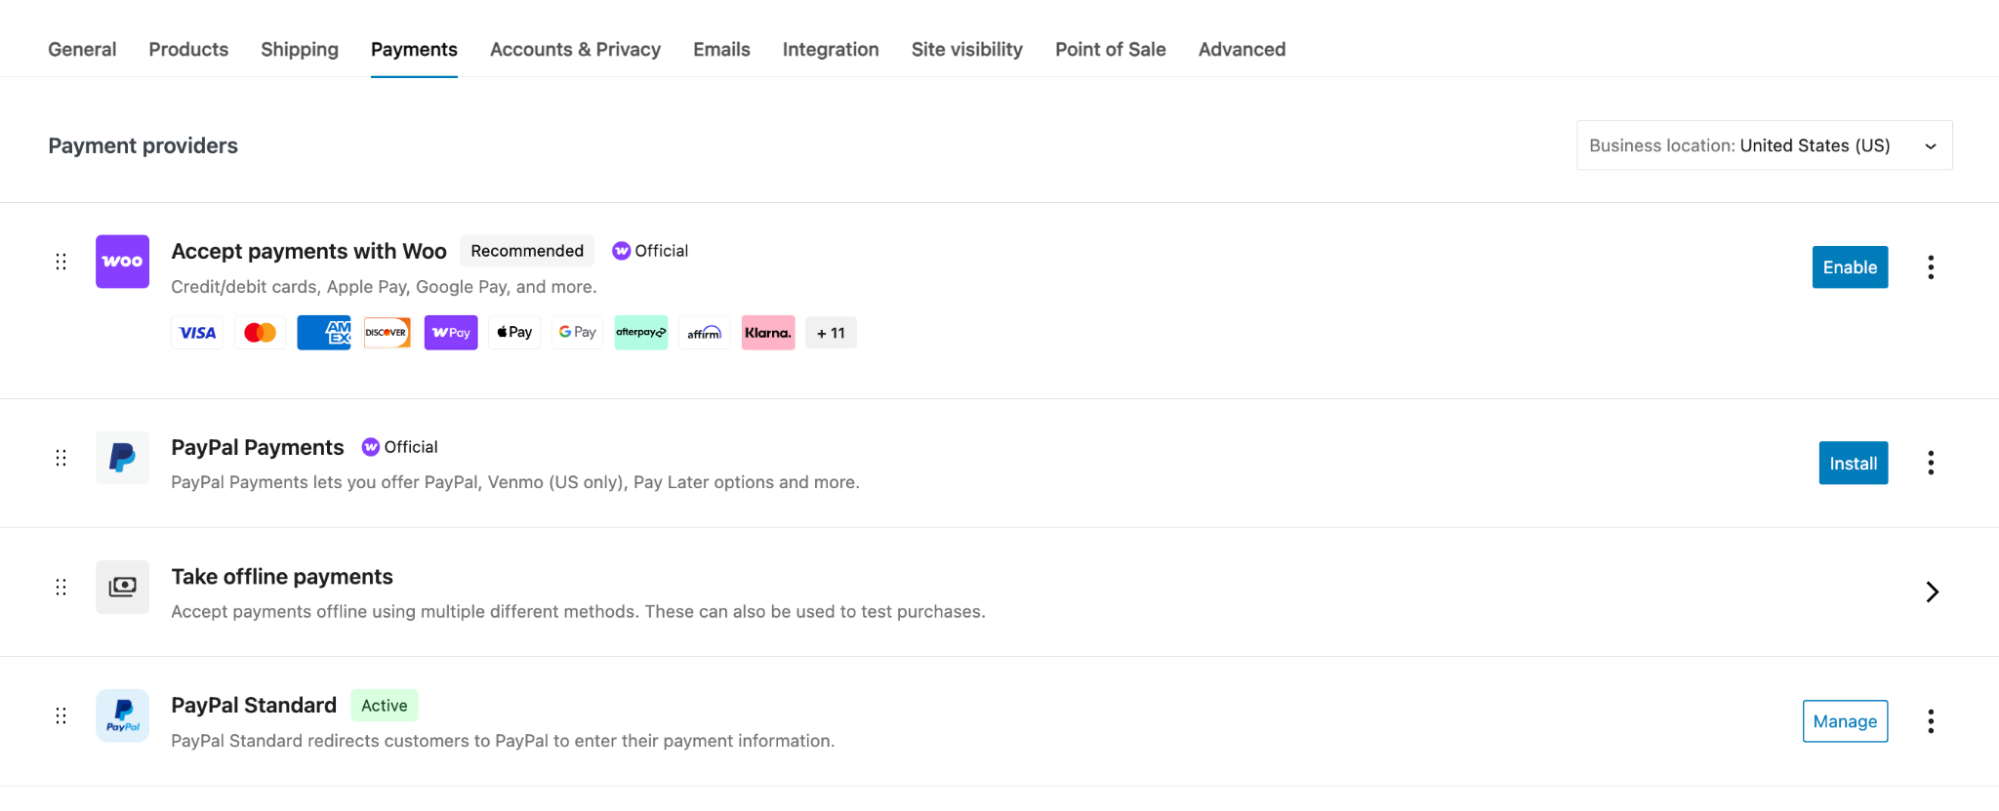
6. Set up payment methods
Payment gateways enable you to securely accept payments on your store. There are quite a few payment gateways available and you’ll likely want to choose one that supports a variety of methods, including credit and debit cards and digital wallets.
WooPayments is one excellent option. It enables you to accept a wide variety of payment methods — including Apple Pay, Google Pay, Tap to Pay, and local options — and supports more than 135 currencies. Plus, it runs right in your WordPress dashboard so you never have to switch back and forth between windows.
To configure your payments, start by installing any gateway extensions that you need. Then, go to WooCommerce → Settings → Payments. There, you can enable any payment methods you’d like and choose any applicable options.
7. Configure shipping options
If you sell physical items, you’ll need to decide how you want to handle shipping for your store. There are a variety of approaches you can take — offer free shipping on all purchases or based on certain conditions, charge a flat fee, calculate real-time rates, and more. You’ll also need to think about the carriers and services (e.g., Priority, Overnight, etc.) you want to offer.
For more guidance on making these decisions, read these posts from WooCommerce:
- Shipping Methods and Fulfillment: Everything You Need to Know
- What’s Better: Free Shipping or Lower Prices?
- How to Start Shipping Internationally
By default, you can offer free shipping, flat-rate shipping, and local pickup. To configure these, you’ll first need to create Shipping Zones, which allows you to assign shipping methods based on the areas that you service. For example, you might offer free shipping within your state and flat-rate shipping for the rest of the country.
Go to WooCommerce → Shipping → Shipping Zones. At the top, click Add Zone. Then, set a name for your zone and select the regions you want to include. You can do this by country, state, and even zip code.
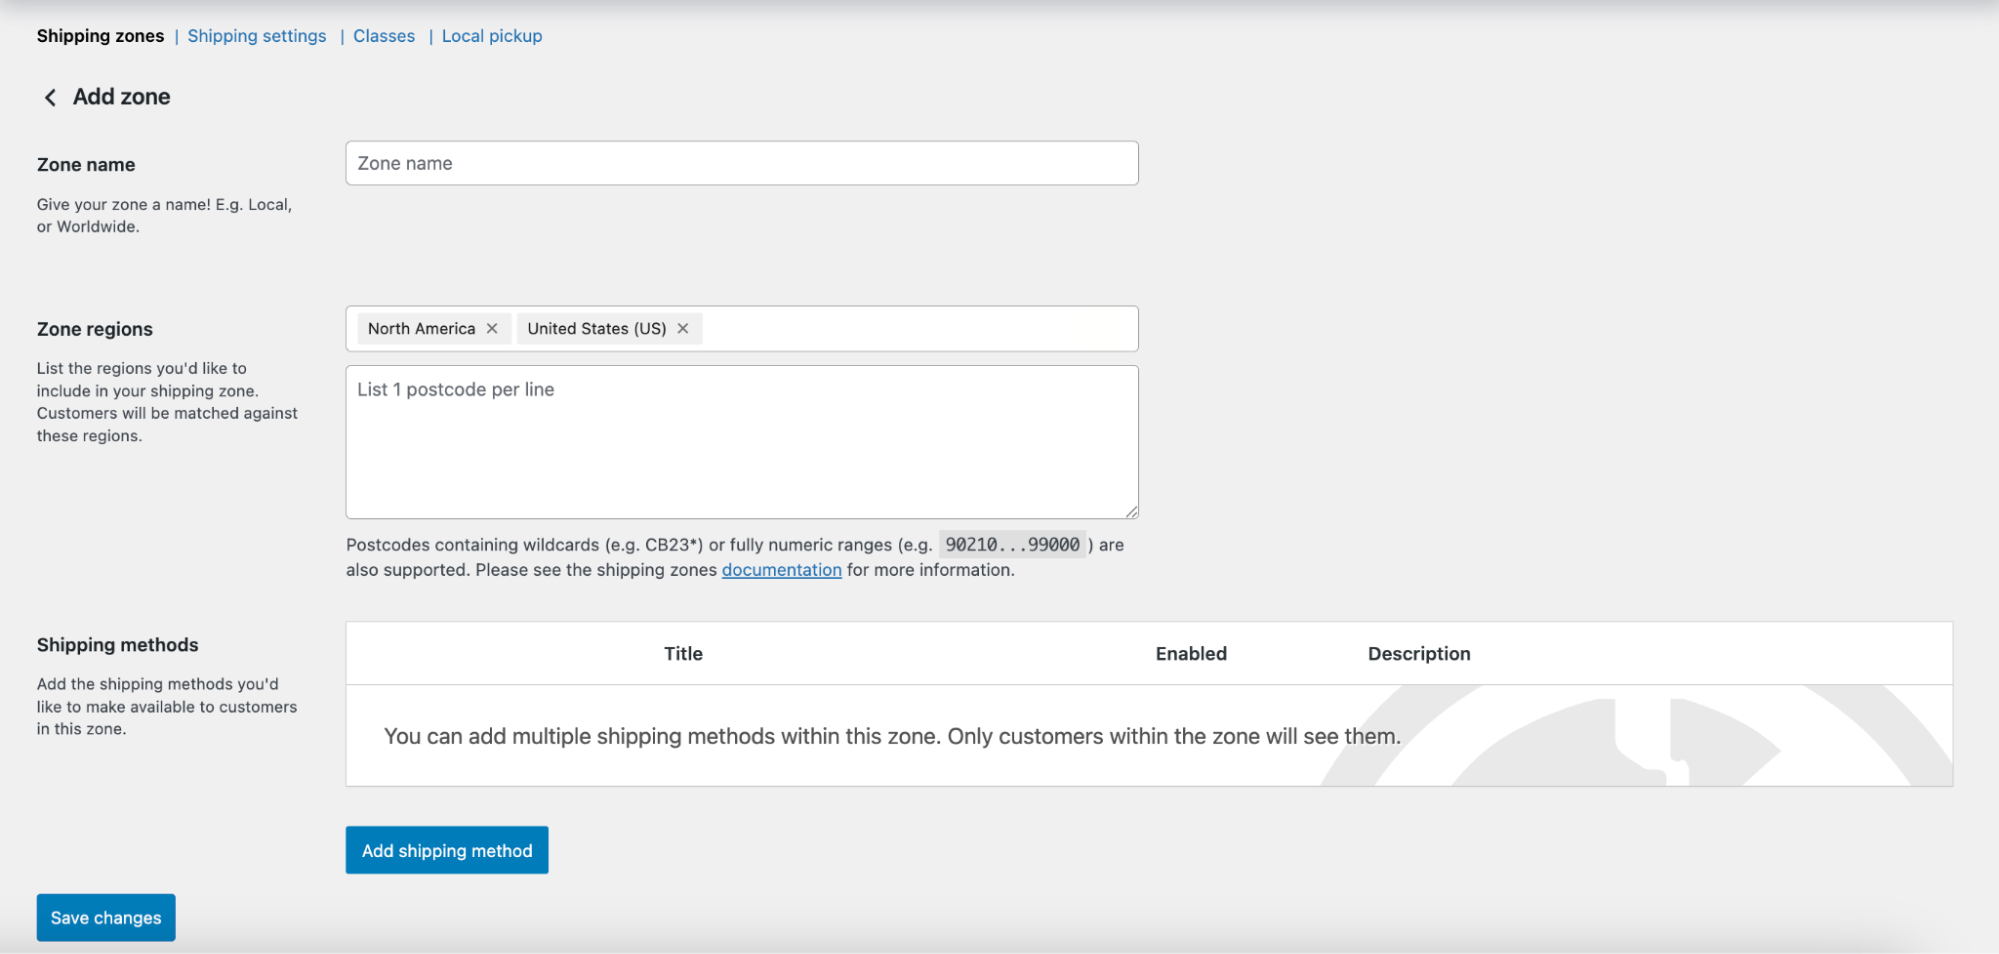
Then, click Add shipping method to assign methods to your shipping zone. The settings will change based on the method you choose. For example, if you select Free Shipping, you can choose the requirements the shopper must meet (e.g., a minimum order total). Click Create and save.

Once you’re done creating shipping methods, add any additional shipping zones that you may have for your store.
If you’d like, you can also create Shipping Classes, which let you set rates for specific types of products. For example, if you sell art prints, you might charge a higher rate for framed variations of the same product. Once you’ve set these up, you can assign a Shipping Class in the Product Data box of each individual item.
Check out the full shipping documentation for all the details.
There are also a variety of extensions that can enhance the shipping process for both your customers and your team. Create table rates based on a huge number of factors, display real-time rates from USPS and other carriers, integrate with third-party shipping tools, and more.

WooCommerce Shipping, for example, is a free extension that simplifies the shipping process from start to finish. Print labels from USPS, DHL, and UPS, take advantage of significant discounts on rates, and split shipments into multiple packages. The best part? It runs completely in your WordPress dashboard so you don’t have to switch back and forth between windows.
8. Set up taxes
If you collect sales tax, start by making sure that tax settings are enabled by checking the box next to Enable taxes under WooCommerce → General.
To configure tax settings, navigate to WooCommerce → Tax. There, you can set how you want to display taxes to customers, create additional tax classes, determine how to configure taxes, and more. There are also tabs at the top that enable you to set tax rates based on area.
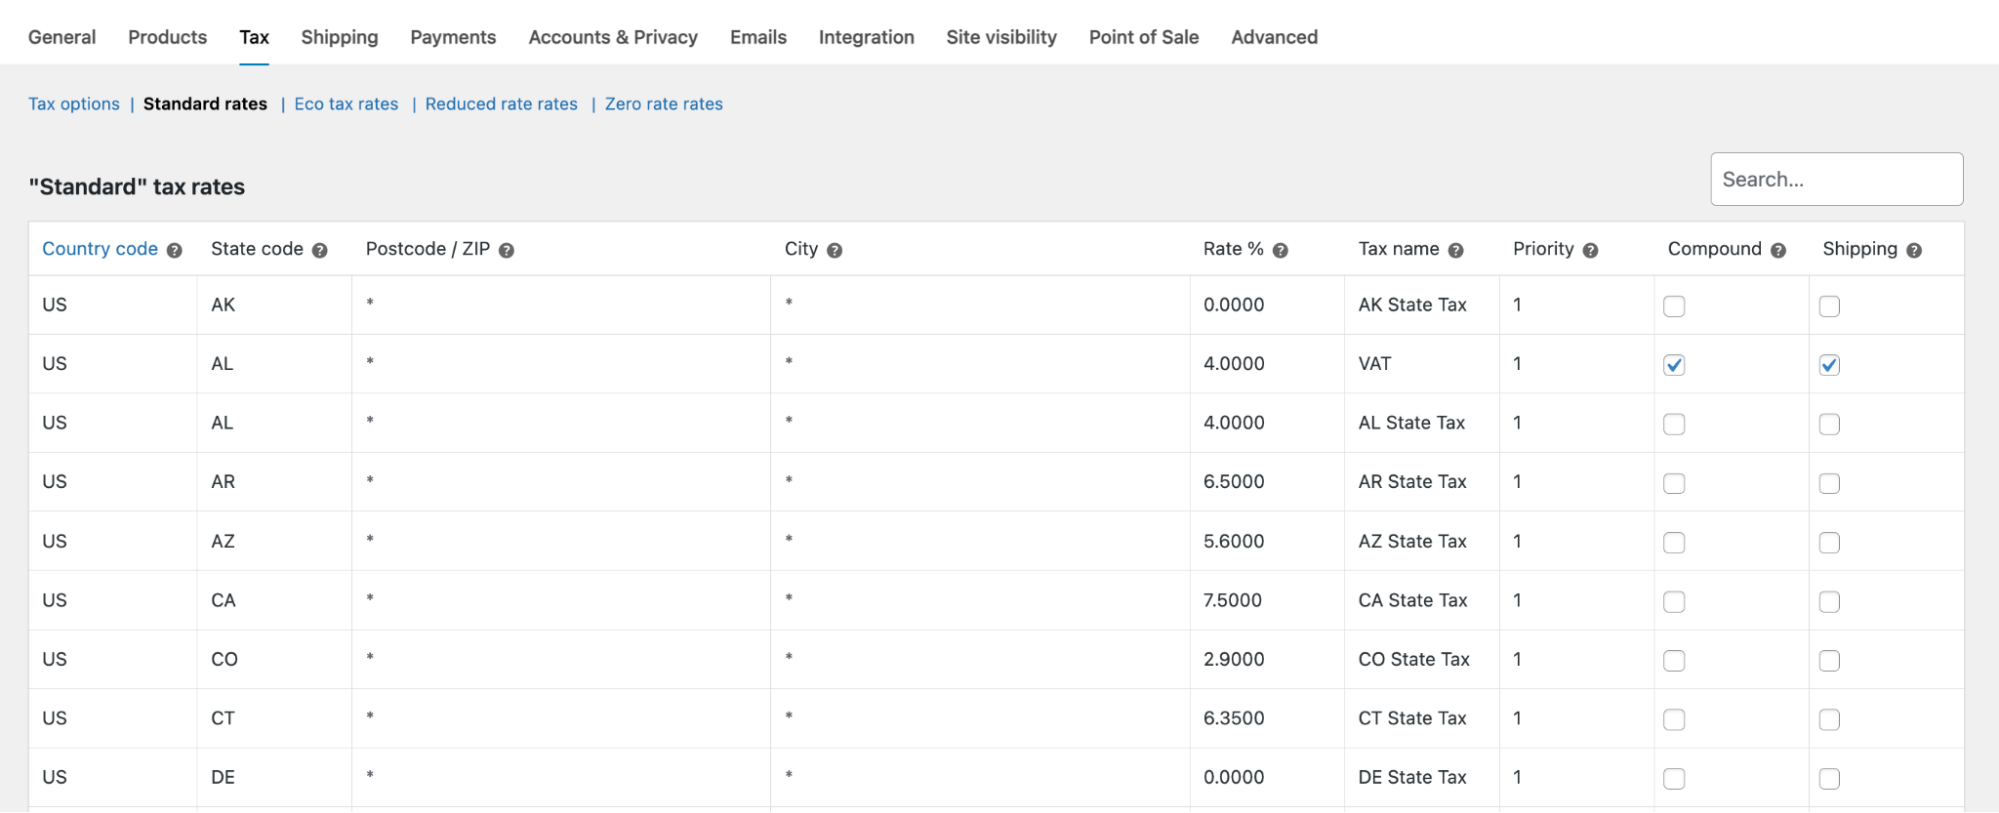
This may seem a bit overwhelming if you’re just starting out. For a detailed walkthrough, read this post on navigating ecommerce taxes and, if possible, consult a tax professional.
9. Install Jetpack to speed up & secure your store
Jetpack is a powerful plugin built specifically for WordPress and designed to make your online store safer, faster, and easier to manage. It quietly handles the behind-the-scenes work so you can focus on building your store with confidence. Whether it’s keeping your site online, safeguarding customer data, or improving load times, it gives you a solid foundation before you even list your first product.
You can install it right from your dashboard — just head to Plugins → Add Plugin, search for “Jetpack,” then install and activate it.

Once activated, Jetpack will prompt you to connect to a WordPress.com account. If you don’t have one yet, creating an account is quick and free. Then, you’ll be able to access a suite of tools under Jetpack → Settings, including spam protection, performance optimization, real-time backups, and downtime monitoring.
These features ensure that your store is secure, loads quickly for customers, and is protected from data loss. There are a variety of plans available depending on the features you need.
10. Customize your store design and create pages
There are several different ways to edit the design of your WooCommerce store, depending on the theme you’re working with.
If you’re using a block theme, go to Appearance → Editor. There, you can use elements called “blocks” to edit the layout of templates for everything from individual pages and products to category archives and checkout processes.
By selecting Style, you can also configure the design — fonts, colors, layouts, etc. — for your site on a global level.
This guide to using block templates will walk you through everything in detail.
If you’re using a Classic theme, you can go to Appearance → Customize to make global layout and design customizations. Your theme may also have a theme-specific settings panel — check the documentation for full instructions.
Of course, you’ll also need to build pages for your ecommerce store. At a minimum, you’ll likely need a homepage, an About us page, and a Contact page. To create pages, go to Pages → Add new. At the top, write a title for your page.
Then, click the blue + icon at the top right to open the block library. There, you can drag and drop elements — like paragraphs, headers, images, videos, product feeds, and more — into place on the page.
Once you’ve added a block, expand the Settings panel on the right to make edits. The available settings will vary based on the block you’re working with, but include changes to fonts, colors, backgrounds, and images.
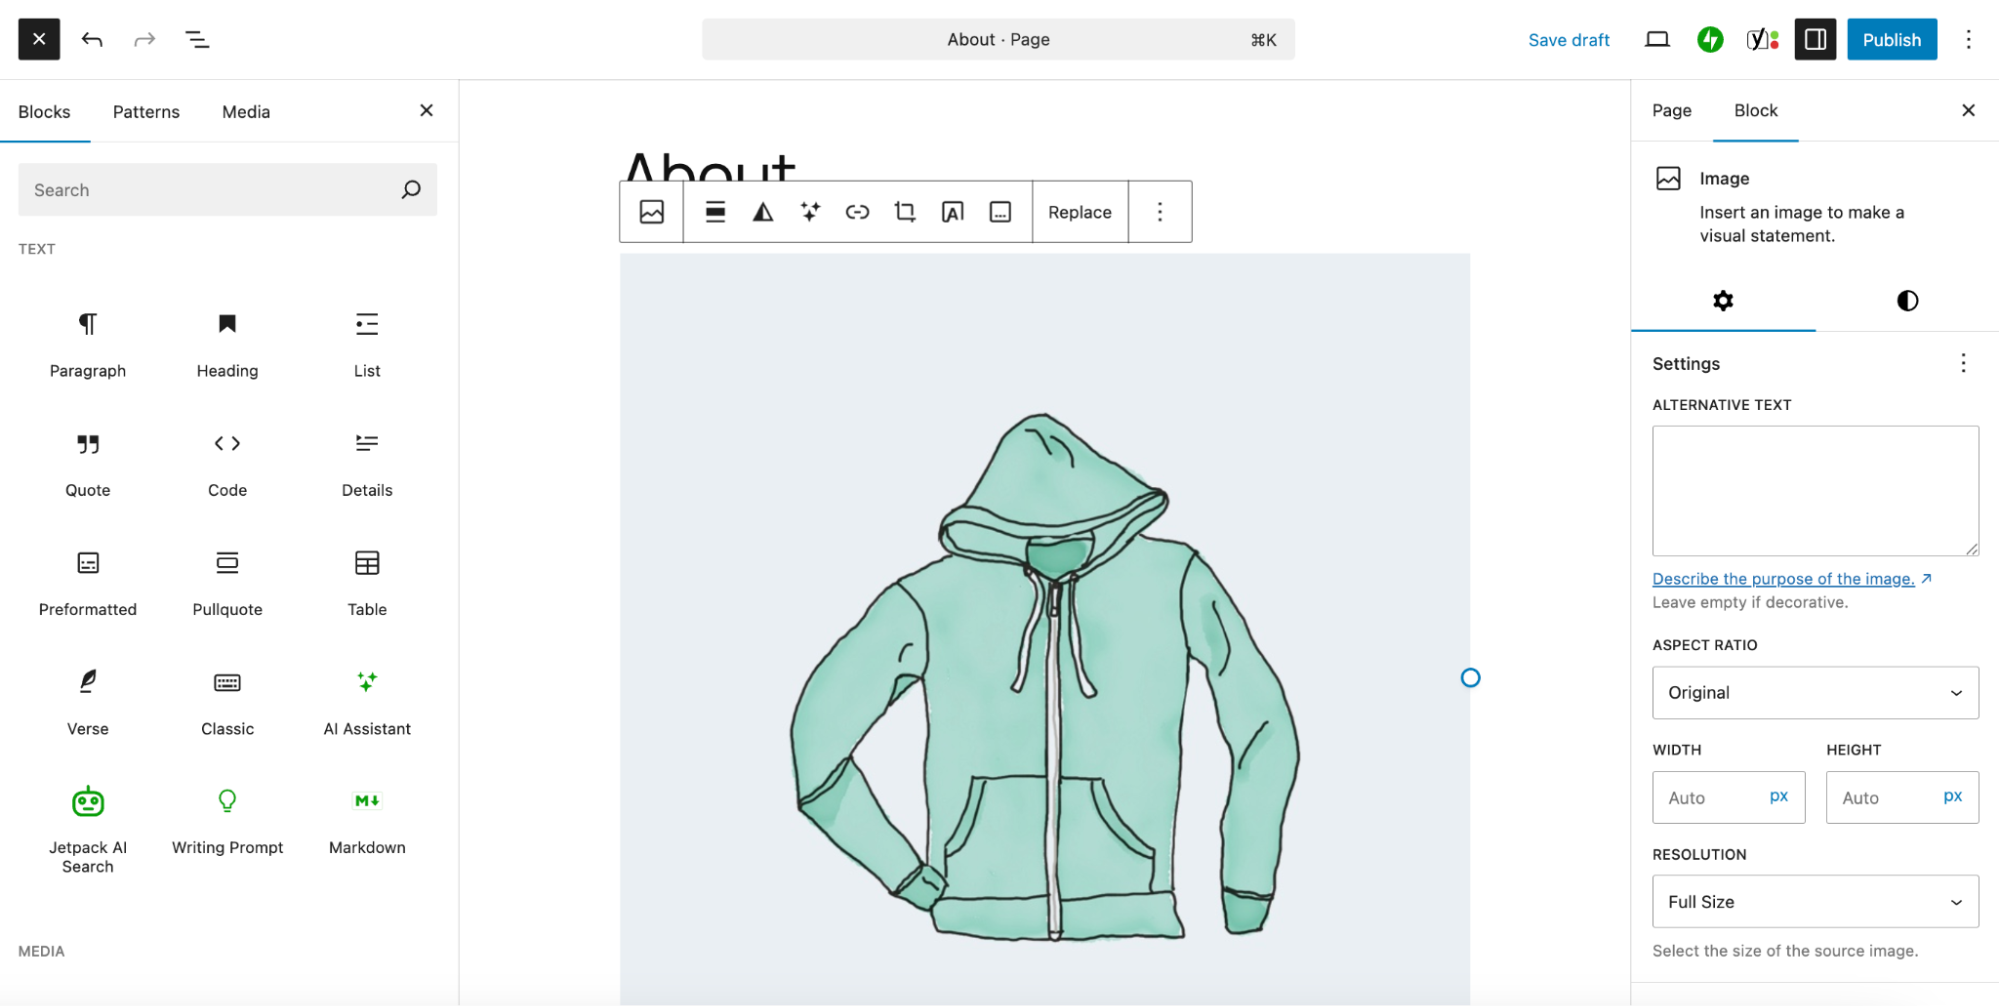
Add as many blocks as you’d like, dragging and dropping them to create the layout of your page. Once you’re done, click the blue Publish button at the top right.
Want more details? Read our guide to the block editor.
11. Test everything
Before launching your store, test it. Go through the entire shopping experience as if you were a customer. Add a product to the cart, go to checkout, and place a test order.
Ensure that the order appears in your dashboard under WooCommerce → Orders. Make sure emails are sent correctly and payment statuses are accurate.
This is not a time to take shortcuts. Go through every page, click every link, and test every form. Check on a variety of devices and from multiple browsers. If possible, have members of your target audience look through things as well.
12. Add key legal pages
Online stores need a few legal pages to set expectations and protect both sides.
Start with a Privacy Policy. WordPress includes a default version that you can create under Settings → Privacy.
Next, create pages for Terms and Conditions, as well as your Return and Refund Policy. Be clear and direct. Explain how refunds work, how long they take, and any restrictions.
Once these pages are live, add them to your site’s footer and link to them during checkout.
13. Protect your store and customer data
Keeping your store safe should be a top priority. With a Jetpack Security plan, you can access real-time backups, malware scanning, spam protection, a website application firewall, and more. These features run in the background and require no coding or tech experience on your end.

Not only do these measures protect your customers, they also save you a lot of hassle, stress, and potential legal issues.
For more guidance, read our full article on securing your online store.
14. Improve store performance
If your store loads too slowly, potential buyers will leave and shop elsewhere. Thankfully, Jetpack offers several tools that can speed up your site without hassle.
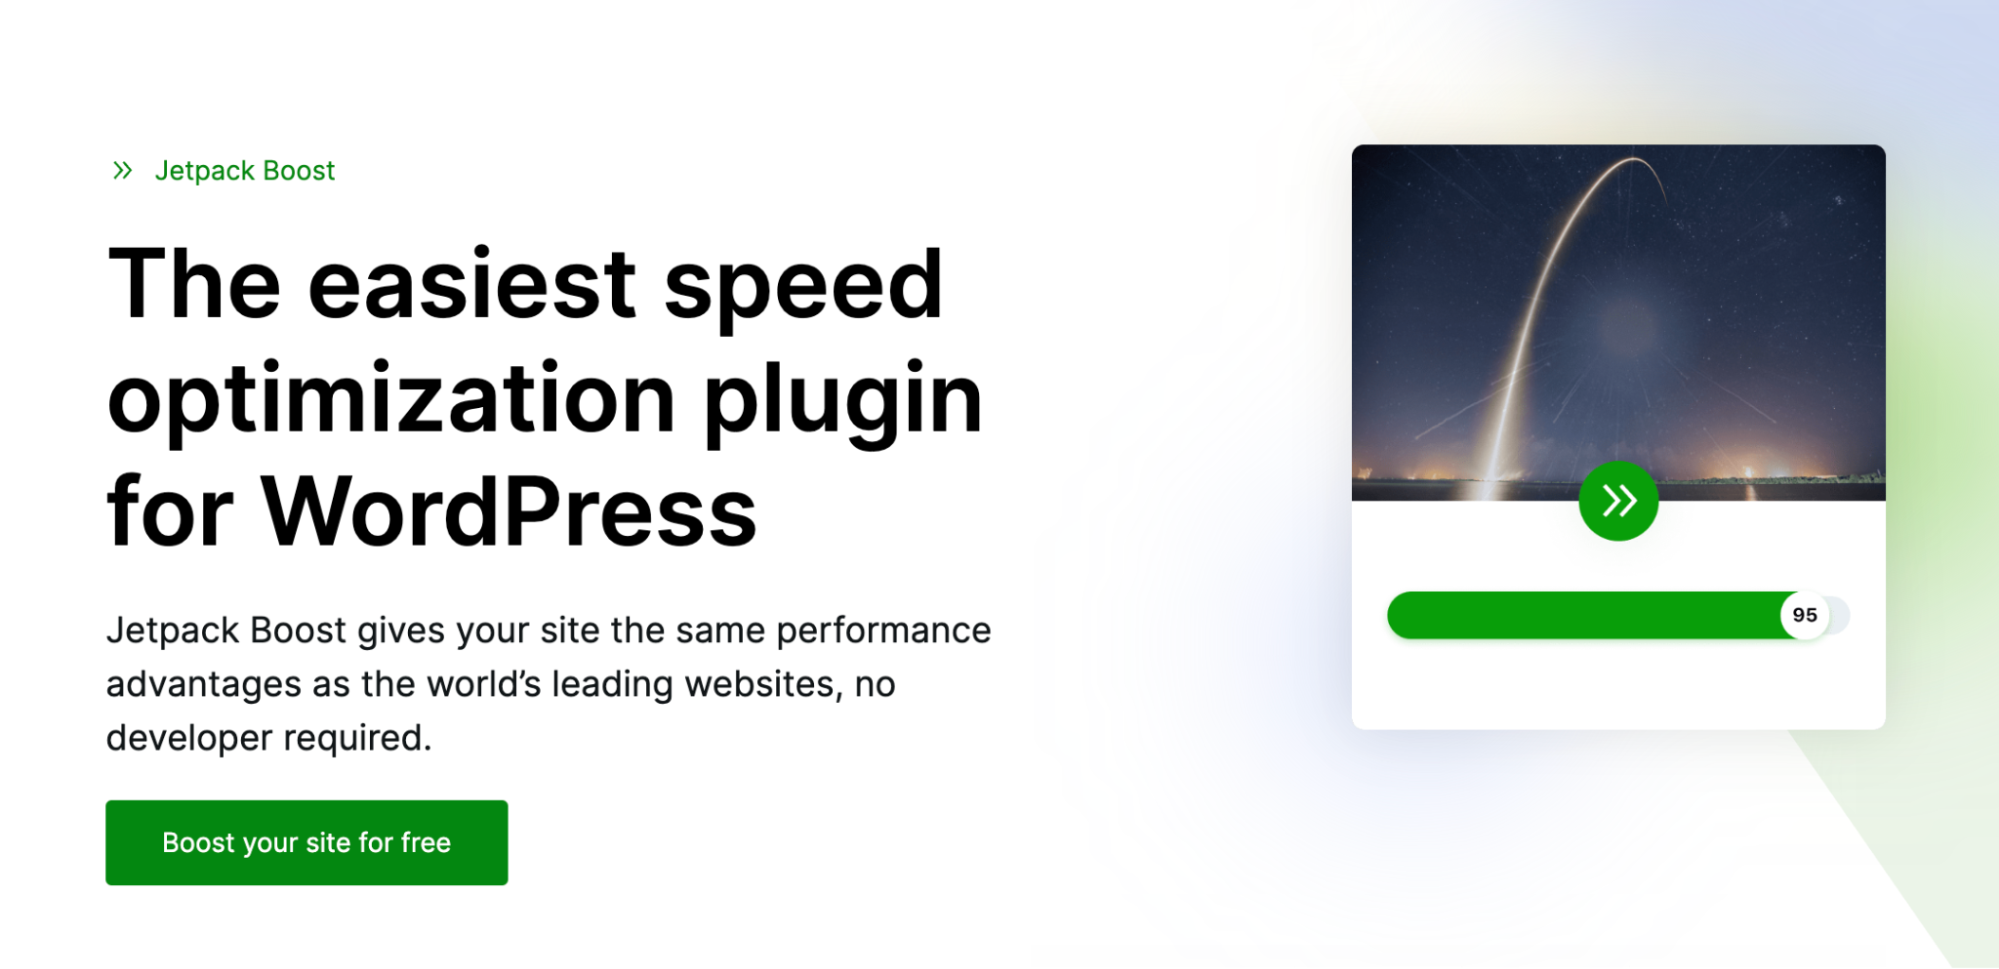
Jetpack Boost has settings for page caching, code optimization, image compression, a CDN, and more — all of which you can enable with a few toggles.
Host a lot of product videos? Jetpack VideoPress takes the weight of large video files off your server, speeding up your website without introducing ads from third-party platforms.
Finally, Jetpack Search introduces instant search to your site. Shoppers can see results in real time, filter by a wide range of factors, and even get spelling corrections and suggestions.
15. Start small, then grow
Once you’ve finished testing, you’re ready to launch. Congratulations!
And remember, you can always expand your store as you grow. Thanks to a wealth of WooCommerce extensions and WooCommerce plugins, you can add functionality, reach new locations, sell new types of products, and scale as large as you’d like without missing a beat.
Keep your WooCommerce store running smoothly
Once your store is live, your work isn’t over — but it also doesn’t have to be overwhelming. Keep things running smoothly by regularly updating WordPress, WooCommerce, your theme, and essential plugins like Jetpack. These updates protect your store, improve performance, and ensure that everything continues to work as it should.
As your business grows, keep an eye on your stats to learn what resonates with customers. Jetpack’s built-in analytics and performance tools make it easy to track clicks, spot trends, and optimize your product pages over time. Add new items when you’re ready, refine your descriptions and images, and set a simple routine to review orders and fine-tune your settings.
With the right tools in place, managing your WooCommerce store becomes more efficient — and a lot more rewarding.
Frequently asked questions
Can I use any WordPress theme with WooCommerce?
No, you should only use themes that are specifically made to work with WooCommerce. While many themes might appear to function, using one not built for ecommerce can cause significant problems. Your product pages may look broken, the shopping cart could have errors, and the checkout process might not work correctly.
This creates a poor experience for your customers and can result in lost sales. Always look for themes advertised as “WooCommerce compatible” or “WooCommerce ready.” The free Storefront theme is an excellent starting point because it is made by the developers of WooCommerce.
How much does it cost to start a WooCommerce store?
The WooCommerce plugin itself is free, but you will have other necessary costs to run your store. You must pay for a domain name, which is your website’s address, and web hosting, which is where your site’s files are stored online.
You might also choose to buy a premium theme for a professional design or purchase premium extensions for additional features. For example, extensions can add subscription billing or advanced shipping options. While the core software is free, you should create a budget for these other items.
What is the most common problem when setting up WooCommerce?
The most common problem new users face is configuring shipping rules correctly. Shipping can be confusing because there are many options. You have to create shipping zones for different countries or regions. Then you need to add shipping methods, such as flat rate or free shipping, to each zone.
Many people get stuck here and discover that shipping costs are not being calculated correctly during checkout. The best approach is to start simple. Set up one shipping zone for your own country with a single flat rate. Test it thoroughly to ensure it works before adding more complex rules.
What is the best payment gateway for a new WooCommerce store?
For new stores, WooPayments is often the best and easiest option to begin with. WooPayments is developed by the creators of WooCommerce, so it integrates seamlessly with your store. It allows you to accept credit cards, debit cards, and other popular payment methods directly on your site.
The setup process is simple and is managed from your WordPress dashboard. Other popular WooCommerce payment gateways include Stripe and PayPal, which are also very reliable and trusted by customers. The most important factor is choosing a gateway that is available in your country and simple for your customers to use.
How do I make my WooCommerce store secure?
Securing your store requires using a good hosting provider, installing a security plugin, and maintaining strong passwords. Security is extremely important for any online business. First, choose a high-quality web host that provides security features. Next, install a security plugin like Jetpack Security to protect against common attacks.
Always use strong, unique passwords for your WordPress admin account. You should also enable two-factor authentication for an additional layer of protection. Finally, keep your WordPress software, theme, and all plugins updated, as updates often contain critical security fixes.
Can I use WooCommerce to sell services instead of physical products?
Yes, you can definitely sell services with WooCommerce. The platform is not limited to physical items that require shipping. To sell a service, you just need to mark the product as “Virtual” when you create it in your dashboard. When you check the “Virtual” box within the product data section, all the shipping-related fields will disappear.
This setup is perfect for selling items like consulting time, website maintenance plans, or coaching sessions. You can also use the WooCommerce Bookings extension if you need to allow customers to schedule appointments for your services.
How do I test my WooCommerce checkout process before launching?
You should create a test product and complete a full purchase yourself to test the entire checkout process. Before your store goes live, it is critical to confirm that customers can successfully buy from you.
Create a product and set its price to a very low amount, such as $1.00. Then, visit your live website and act as a customer. Add the product to your cart, proceed to the checkout page, fill in all your details, and complete the purchase with a real payment method. This test verifies that your payment gateway is working, shipping costs are correct, and confirmation emails are sent properly.
What is a WooCommerce extension and which ones do I need?
A WooCommerce extension is a plugin that adds new features and capabilities to your online store. The core WooCommerce plugin gives you all the basic tools to sell online, while extensions add more powerful functions.
For example, if you want to offer recurring payments, you would use the WooCommerce Subscriptions extension. If you need more complex shipping rules, you might use a table rate shipping extension. New stores usually do not need many extensions at the start. It is best to begin with only the essentials, such as a payment gateway and an SEO plugin, and add more as your business grows.
