
You need a web server to host a WordPress website, which typically means paying for a hosting plan. But with the right tools, you can transform a regular computer into a local server capable of hosting WordPress. This applies whether you’re using Windows, macOS, or Linux.
Hosting WordPress locally is an effective way to work on new projects without spending money on hosting. It also enables you to keep web development private and is much faster than interacting with a remote server.
In this guide, we’ll show you how to install WordPress locally on Windows, macOS, and Linux. We’ll include complete instructions for each operating system (OS) so you can get to work right away.
Just choose the OS where you want to install WordPress to jump straight to the relevant instructions:
- Installing WordPress locally on Windows using WordPress Studio
- Installing WordPress locally on Mac using WordPress Studio
- Installing WordPress locally on Windows using XAMPP
- Installing WordPress locally on macOS using MAMP
- Local WordPress installation process on Linux
- Troubleshooting common errors when installing WordPress locally
Installing WordPress locally on Windows using WordPress Studio
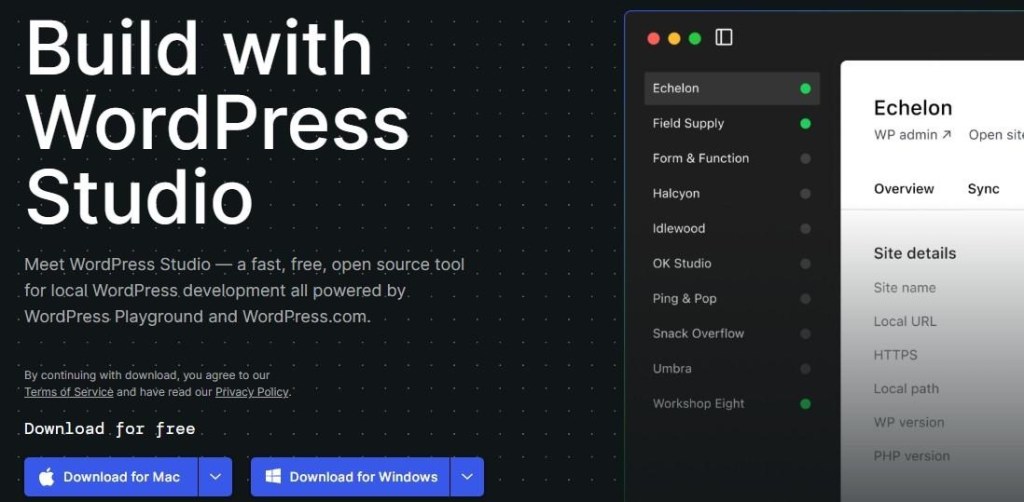
If you have a Windows computer, installing WordPress locally is a straightforward process thanks to WordPress Studio. Developed by Automattic, the people behind WordPress.com, this free software enables you to store your WordPress site on your device.
Here’s how to get started:
Step 1: Download WordPress Studio
Visit the WordPress Studio page and select the Download for Windows button.
Choose between Windows on Intel/AMD and Windows on ARM. Here’s how to decide:
- Intel (x64): Select this if your Windows PC has an Intel or AMD processor that uses the standard x86‑64 architecture. Most Windows PCs fall into this category.
- ARM: Select this only if your PC has an ARM-based processor, like some Surface Pro X devices or other ARM Windows laptops/tablets.
To check your processor, go to Settings → System → About. Look under Device specifications → Processor. If it mentions Intel or AMD, pick Intel/x64. If it mentions ARM, select ARM.
The download will then start. When it’s ready, click to open the setup file.
Step 2. Add your website
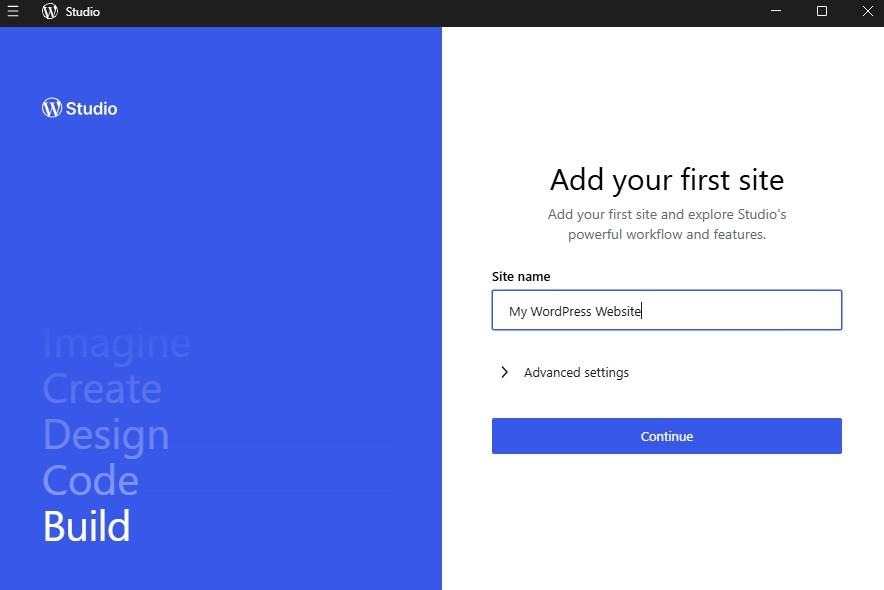
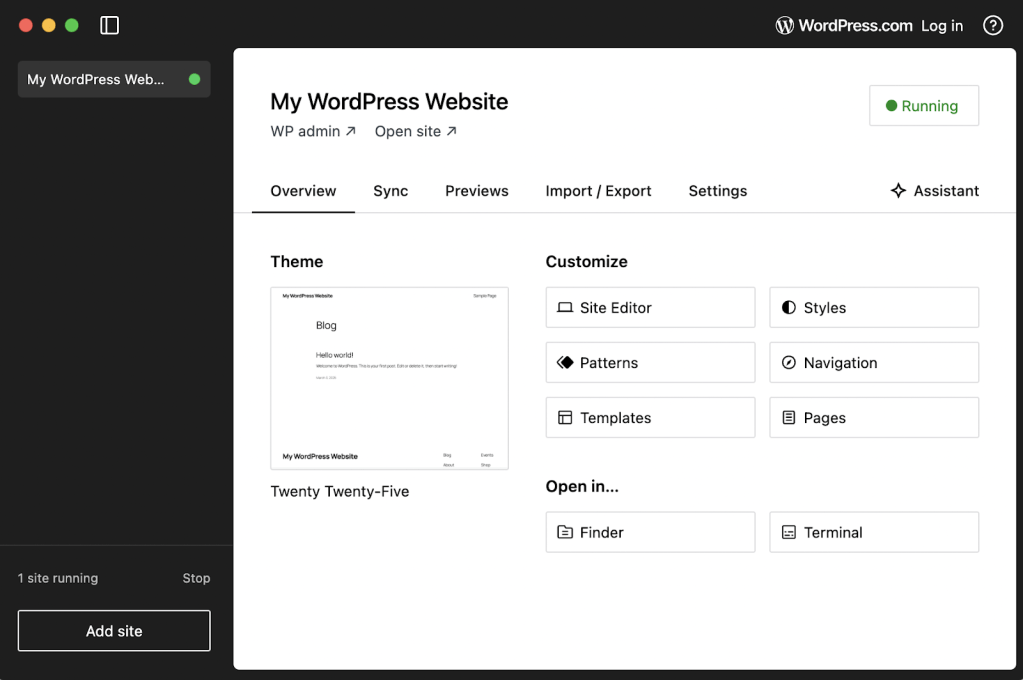
Once WordPress Studio is installed, you can start creating your website. Simply enter a name.
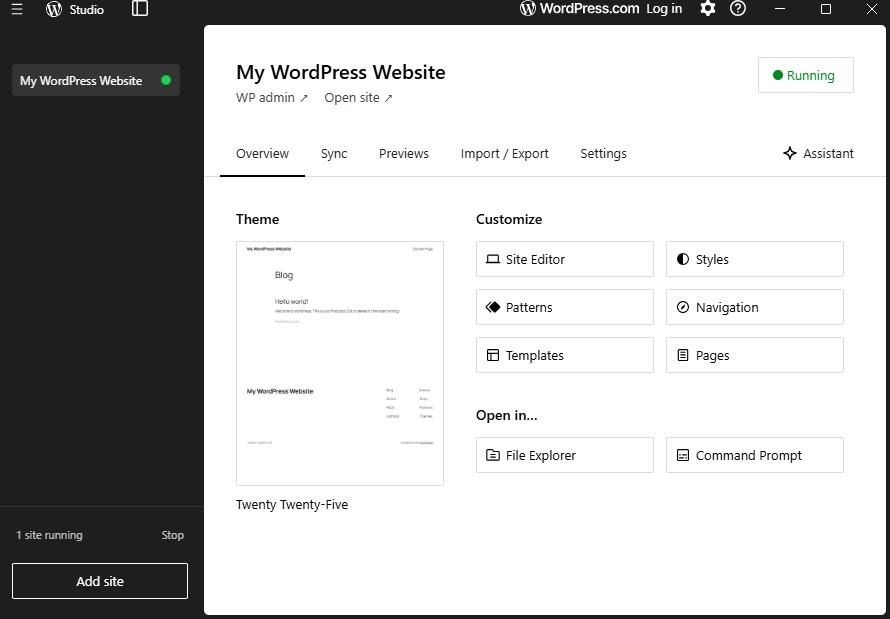
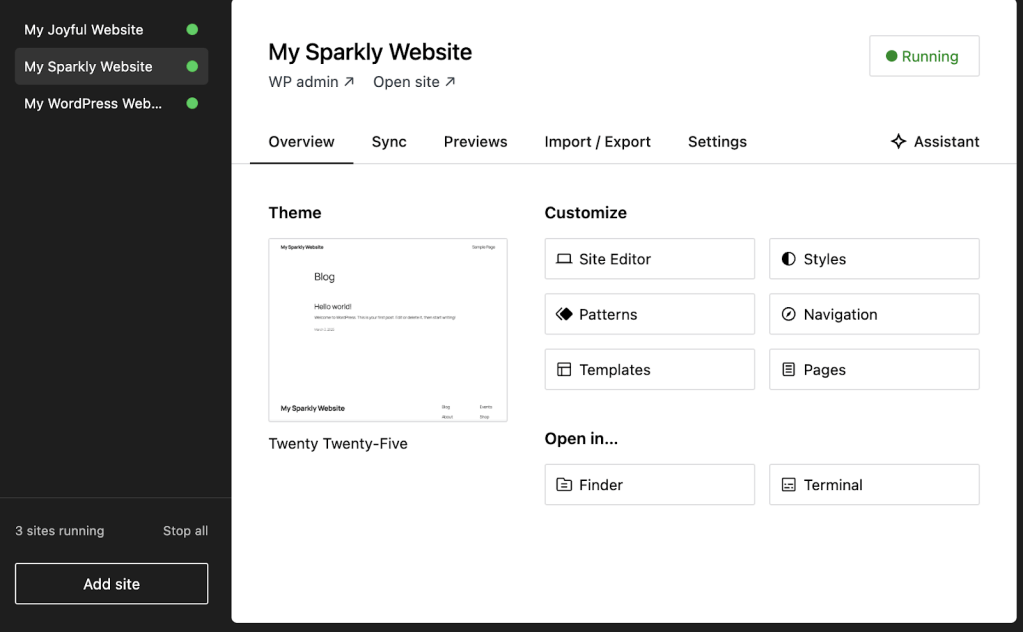
The software will then create your website. When it’s ready, you’ll have access to the admin dashboard, where you can import and export files, customize the design, and more.
You can create as many websites as you want. Just click on Add site. If you have a WordPress.com account, you can easily connect to it to sync your existing sites.
If you click on WP admin, your local site will open in a browser, where you’ll have access to the full WordPress dashboard.
Here, you can install plugins and themes, configure site settings like permalinks and comments, and more.
Now, every time you want to work on your website, you can simply open it through the WordPress Studio app on your computer.
Installing WordPress locally on Mac using WordPress Studio
If you’re a Mac user, installing WordPress locally with WordPress Studio is a straightforward process. This makes it an ideal option if you’re hoping to launch a local WordPress site quickly.
Later on, we’ll also show you another method, using MAMP. Both MAMP and WordPress Studio are free and open-source. However, WordPress Studio is a better choice for beginners and developers who need to share local sites with clients or colleagues.
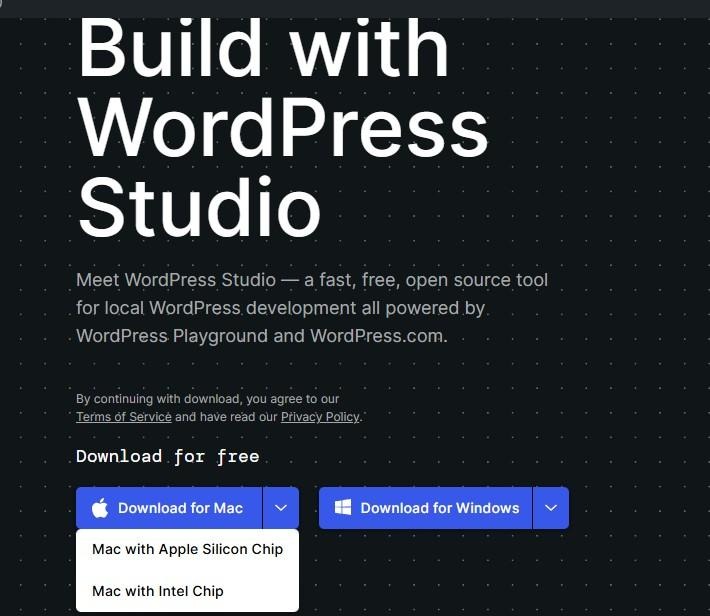
Step 1: Download WordPress Studio
To install WordPress, visit the official WordPress Studio page and download the installer for your operating system. For Apple devices, check whether your system uses a Silicon or an Intel Chip.
Once the file is on your computer, open it and drag the WordPress Studio app to your Applications folder.
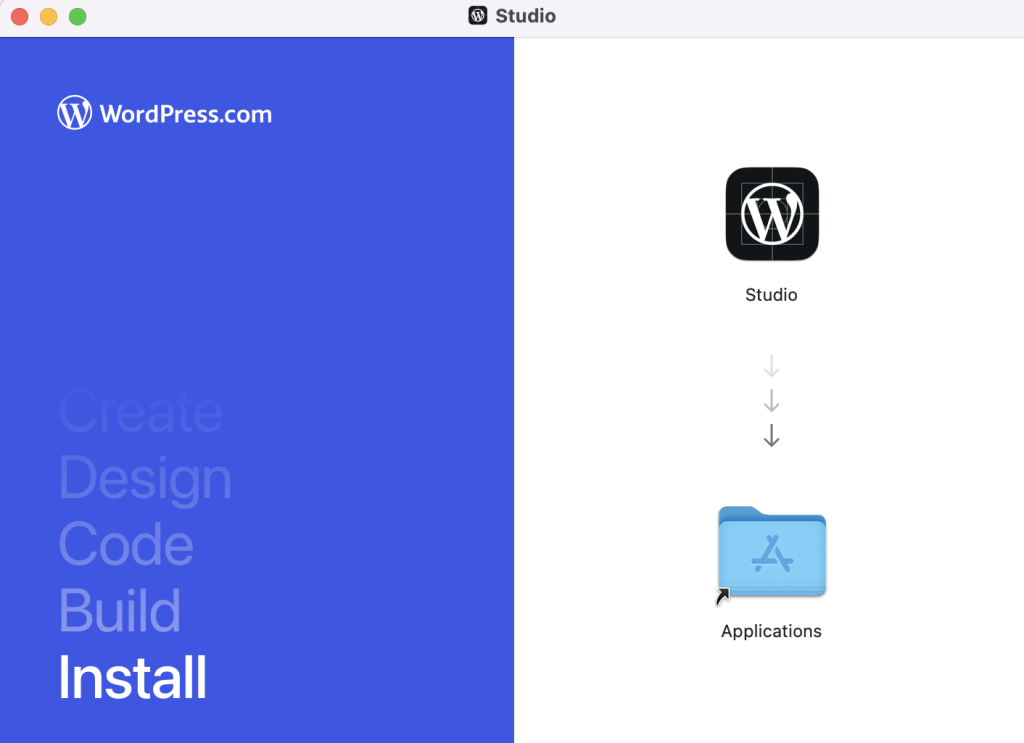
Double-click on the WordPress Studio app and confirm your choice in the popup. You should now be able to add your first site.
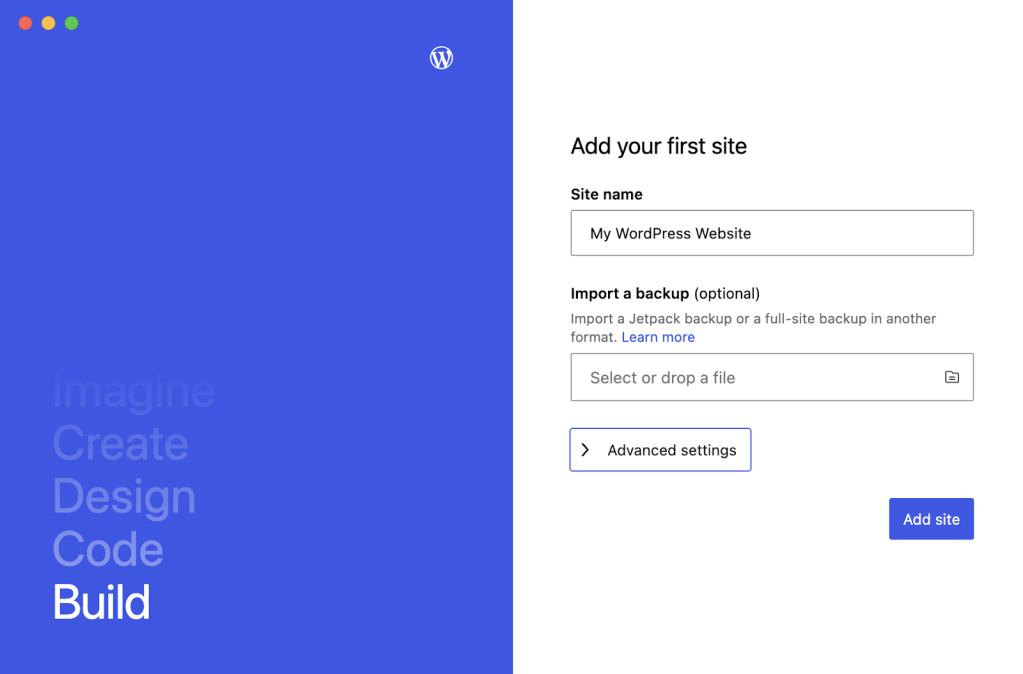
Simply enter a site name and click on Add site. You can import a Jetpack backup and change the default directory for your WordPress site under Advanced settings if you’d like.
Step 2: Connect to WordPress.com (optional)
Your new local WordPress website should open in the sleek WordPress Studio app. Note that you’re free to add as many websites as you want.
As with a live WordPress installation, you can change your site template, customize the design, edit the navigation menu, and more. In the Settings section, you can change the site name and find the local URL for your website.
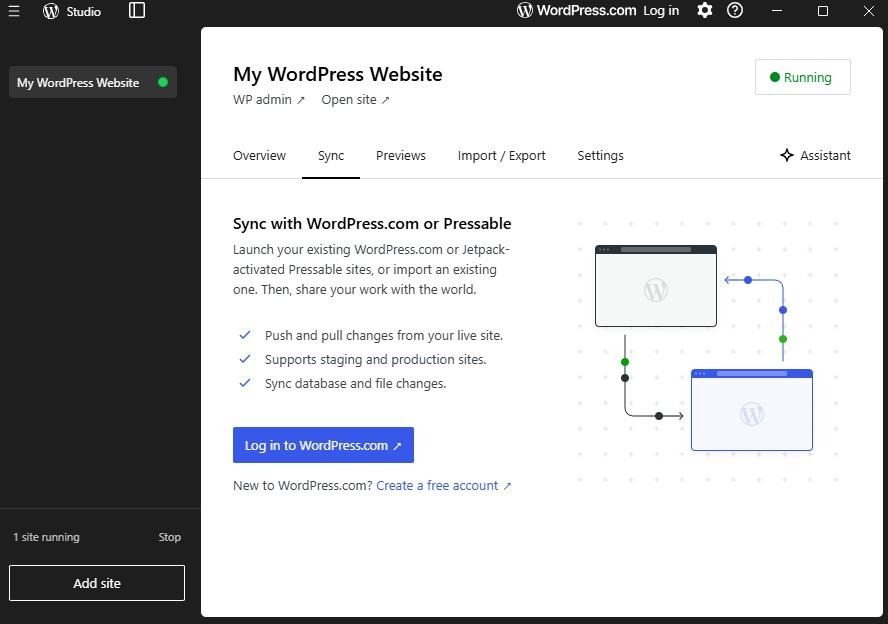
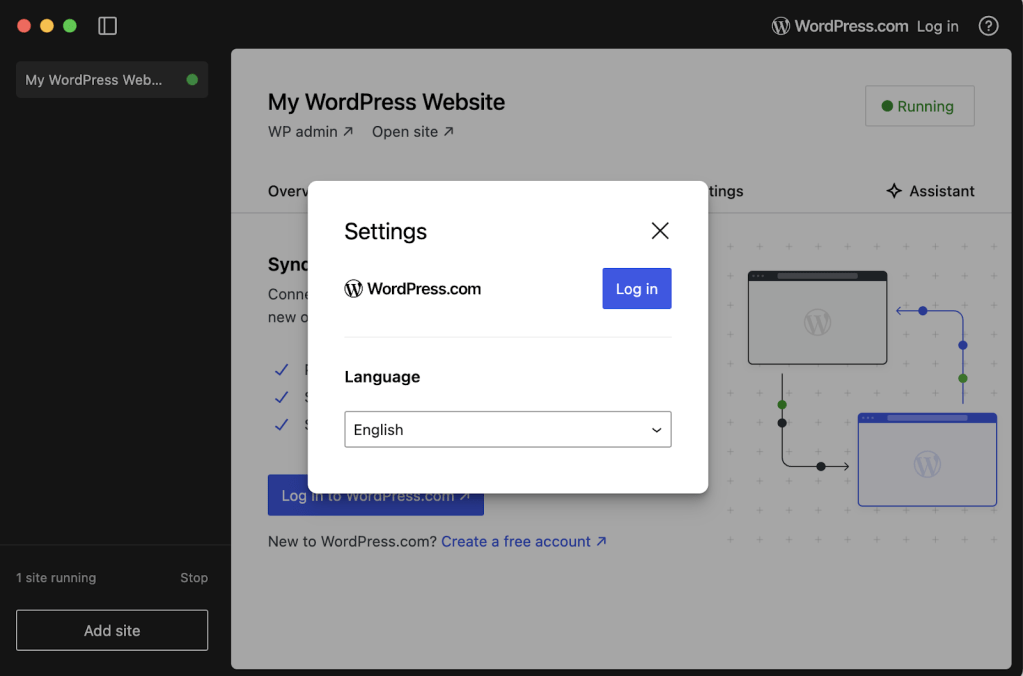
If you only want to set up a local WordPress site, your work here is done. However, if you want to connect to an existing WordPress.com instance or use preview sites (to get feedback from colleagues and clients), you’ll need to connect to a WordPress.com account. If you don’t yet have an account, you can create one here.
Click on the WordPress.com button in the top right-hand corner of the dashboard. Then, choose your preferred language and select Log in.
A new browser tab will open for you to authorize your WordPress.com account. Make sure that the details are correct, then click on the Approve button to sync WordPress Studio with your account.
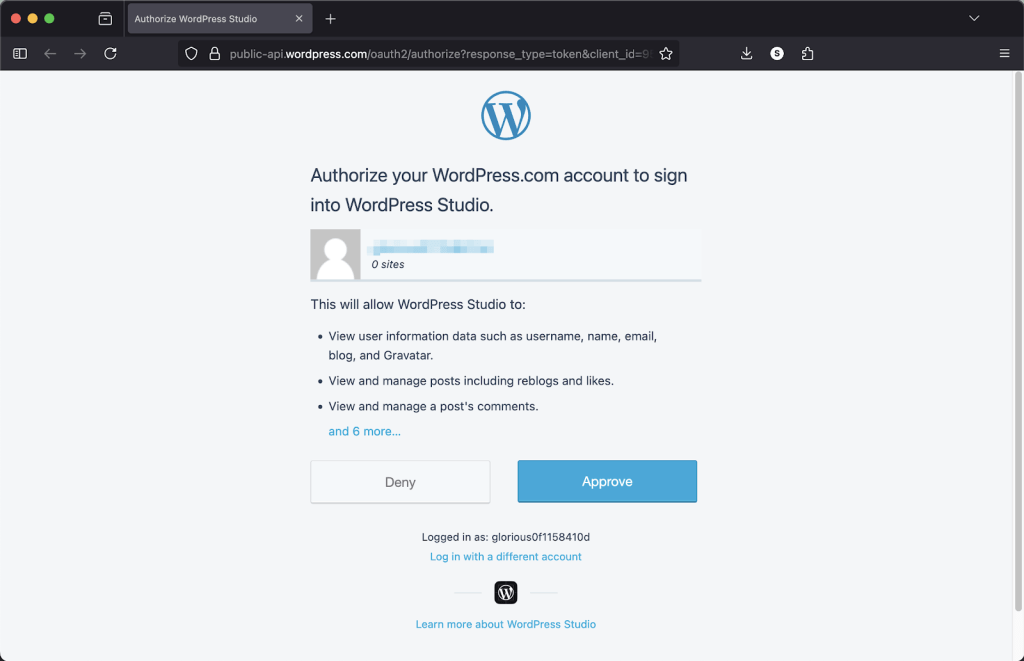
You’ll see a success message once the account has been authorized. Close the window and return to the WordPress Studio app.
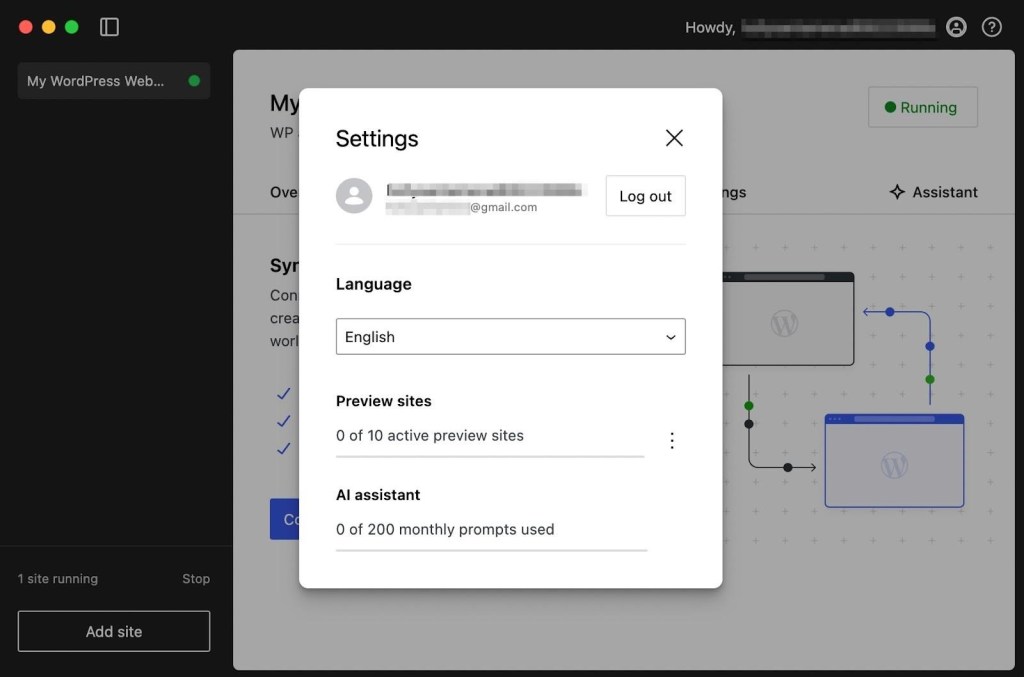
You should now see your WordPress.com account name in the top right-hand corner of the dashboard. In the Settings popup, you can preview your active sites.
Step 3: Activate WordPress Studio features (optional)
As mentioned earlier, WordPress Studio is a fantastic tool for developers and agencies. Let’s look at how to leverage some of its features.
If you want to add more sites to your local staging environment, just click on Add site in the bottom left-hand corner and give the new instance a name. You’ll then see all active staging sites listed in the WordPress Studio sidebar.
Since you’re already connected to your WordPress.com account, you can pull up an existing site from the Sync tab. Here, click on Connect site.
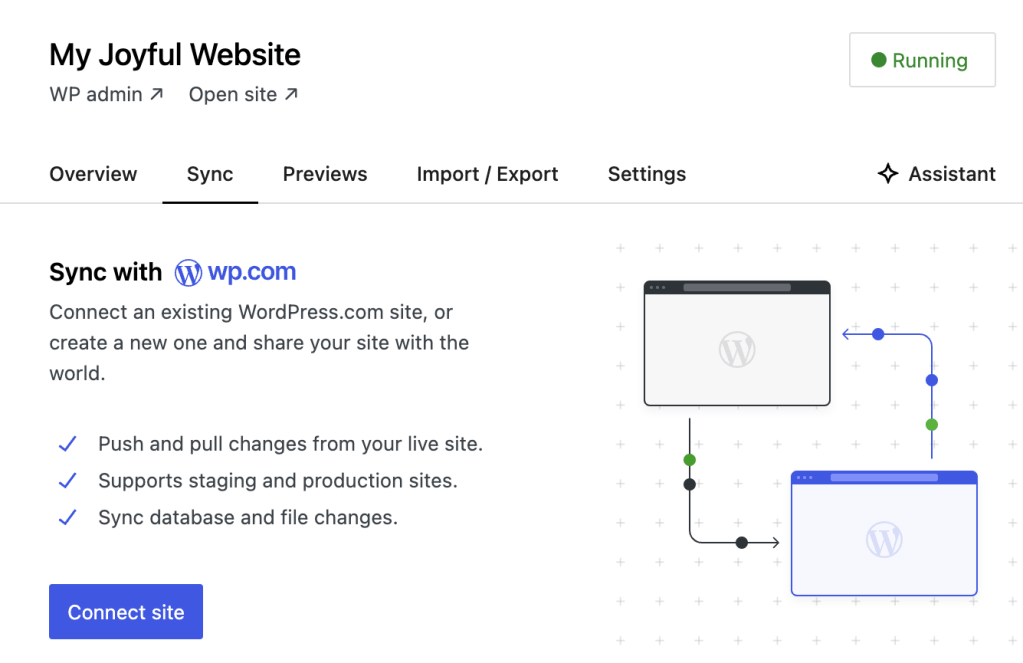
Use the search bar to find the right site or go to the link in the bottom left-hand corner to create a new website from your WordPress.com account. Note that you’ll need at least the Business plan to access this feature.
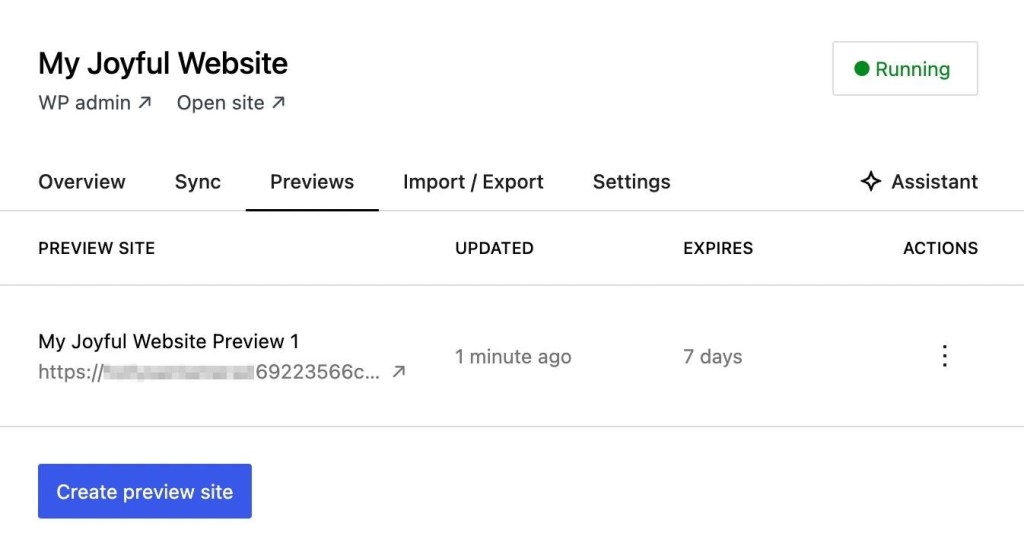
Preview sites are ideal for sharing snapshots of your sites with colleagues and clients. You can create up to ten preview sites for free and host them on a temporary domain for seven days.
If you want to make sites permanently accessible to outsiders, you’ll need to purchase a hosting plan. To do this, use the Import / Export feature.
While you can upload an existing site from a backup file, you can also export your entire local site or database. Once you have the backup file, you can deploy it to a WordPress site, hosted on your chosen environment.
Installing WordPress locally on Windows using XAMPP
To install WordPress locally using XAMPP, you’ll need an environment that meets all the WordPress software requirements.
For WordPress to run, you’ll need server software, PHP, and a database. On top of that, you’ll require a system with some basic minimum hardware requirements.
If your device can run most software without slowing down, it should be more than sufficient to host a local WordPress website. However, you might want to consider installing the software through WordPress Studio, as shown earlier. This is more straightforward, especially for non-technical users.
Step 1: Install XAMPP
XAMPP is a local development environment stack. It stands for “Cross-Platform, Apache, MariaDB, PHP, and PERL”.
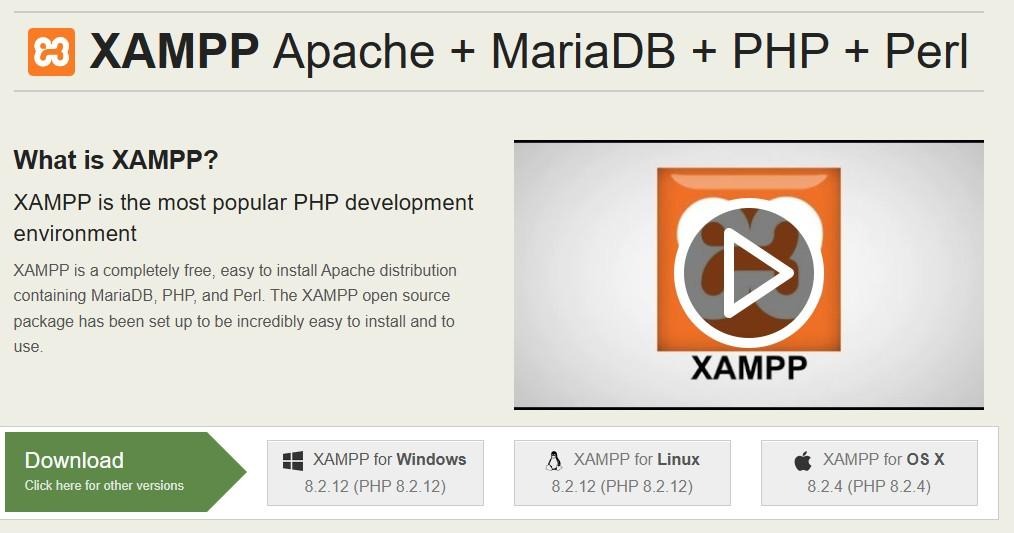
This stack includes all the software you need for WordPress to run. Apache is the server software, MySQL handles the database, and PHP is also included. Installing XAMPP saves you from having to download, install, and configure each of these components separately.
To get started, go to the XAMPP download page and choose the latest version of the software. Once the download is complete, launch the installer.
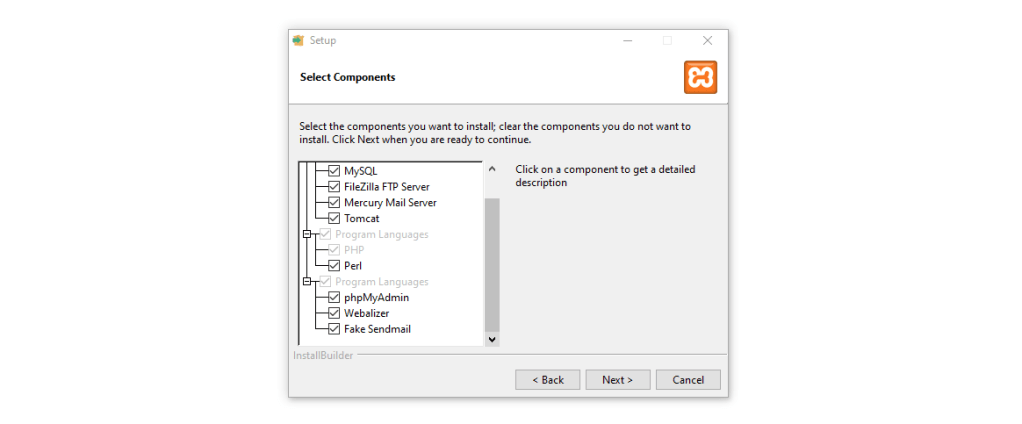
The installer will ask what components of the stack you want to set up. The critical components for WordPress are Apache, MySQL, and PHP. You’ll also want to install the phpMyAdmin, Webalizer, and Fake Sendmail components to make site management easier.
Now the installer will ask you to choose where to set up XAMPP and in which language. After you make your selections, it will take a few minutes to get everything ready.
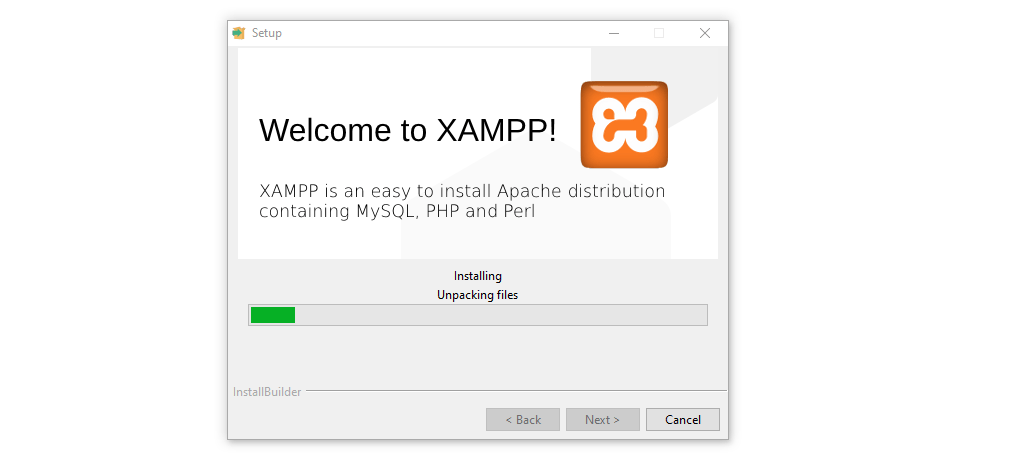
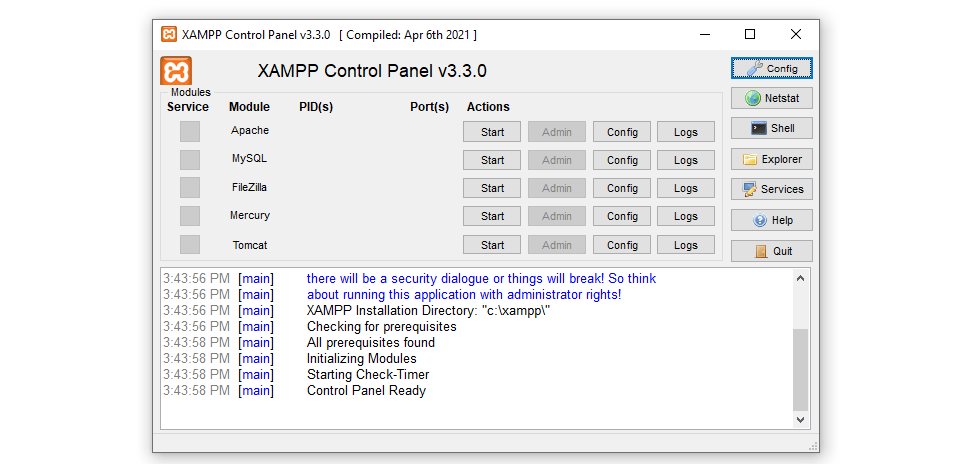
Once the installation is complete, XAMPP will ask if you want to launch the control panel. Choose Yes and move on to the next step.
Step 2: Configure XAMPP
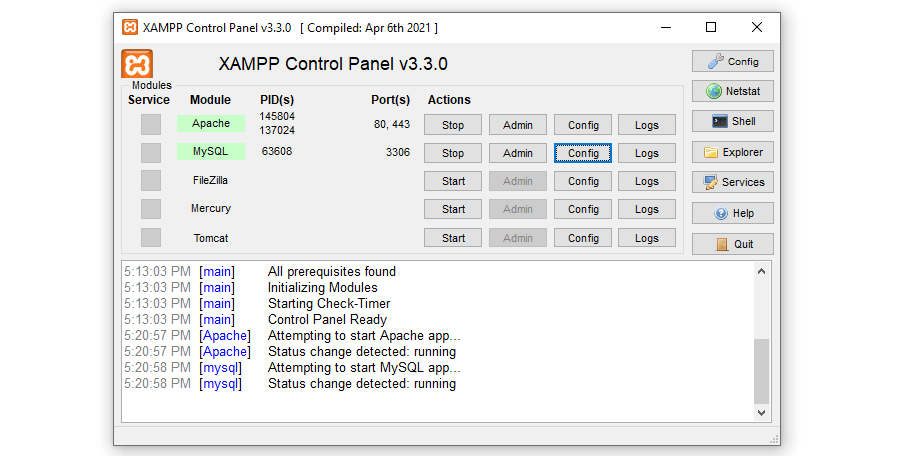
Let’s start by taking a look at the XAMPP control panel. This is the main interface you’ll use to manage your local websites, so you can think of it as the equivalent of a hosting dashboard.
Before you can install WordPress, you’ll need to configure the Apache server for the right port, and do the same for MySQL. To get started, click on the Config button next to the Apache module and select the Apache (httpd.conf) option.
This will open the Apache configuration file using your default text editor. Once the file is open, use the search feature to look for the word “port”. You’ll find a section of the configuration file that reads something like this:
## Listen: Allows you to bind Apache to specific IP addresses and/or# ports, instead of the default. See also the <VirtualHost># directive.## Change this to Listen on specific IP addresses as shown below to # prevent Apache from glomming onto all bound IP addresses.##Listen 12.34.56.78:80Listen 80
The lines that start with a “#” symbol are comments. They explain how to configure the port the server will listen on. Port 80 is the default for HTTP communications. You can configure Apache to listen on a different port if that one is ‘occupied’.
During this step, you may also want to change the default document root directory. By default, XAMPP uses the htdocs folder within the directory where you installed it. All website files will go inside that directory, and you can change it by modifying the httpd.conf lines that read:
## DocumentRoot: The directory out of which you will serve your# documents. By default, all requests are taken from this directory, but# symbolic links and aliases may be used to point to other locations.#DocumentRoot "C:/xampp/htdocs"<Directory "C:/xampp/htdocs">
To change the directory, change the folder that the DocumentRoot line points to. If the directory doesn’t exist, you’ll need to create it manually.
Note that the directory might not be located in drive C:. That will depend on where you installed XAMPP.
When you’re done deciding, close the configuration file and look for the my.ini option under Config for the MySQL module. This will open the MySQL configuration file.
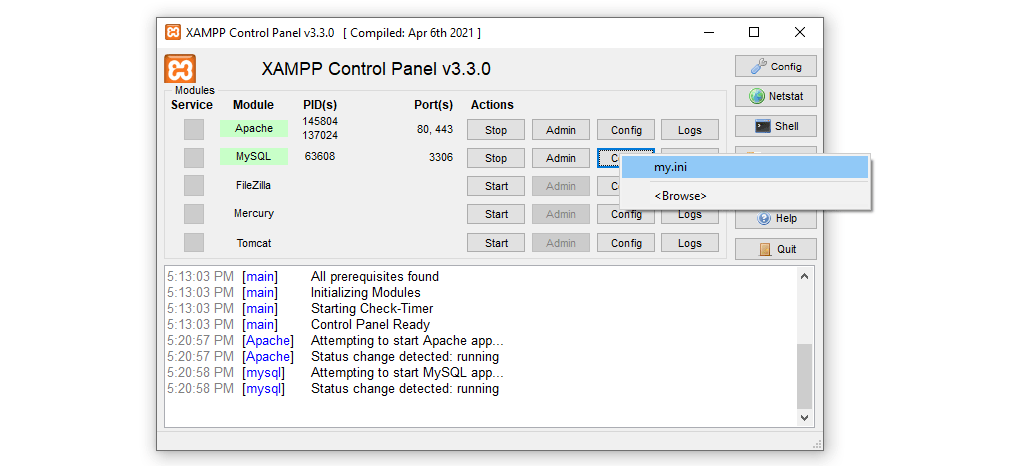
Go ahead and note the number that appears next to port=. You’ll need this port number during the WordPress install setup process. For now, don’t change anything else in the configuration file — just close it.
The next step involves creating a MySQL database for WordPress. Before you do that, you’ll need to start the services that the content management system (CMS) will use.
You’ll notice a Start button next to each of the XAMPP modules in the control panel. Click on the corresponding buttons for the Apache and MySQL modules, which are all you need for now.
The control panel log will show if there are any errors while starting the services. If they start without any hiccups, the module names will display with a green highlight.
Now you’re ready to set up the MySQL database that your WordPress website will use.
Step 3: Create a new MySQL database
You installed both MariaDB and phpMyAdmin during the XAMPP setup process. Now you’re going to use phpMyAdmin to create a blank database.
To do this, go to the XAMPP control panel and click on the MySQL → Admin option. This will launch phpMyAdmin in a new tab, and the URL should look something like this: localhost.com/phpmyadmin.
Keep that URL in mind because you’ll need to use it to access your website.
Once you’re inside phpMyAdmin, go to the Databases tab and look for the section that reads Create database. Here, you’ll set the name and encoding system the database will use.
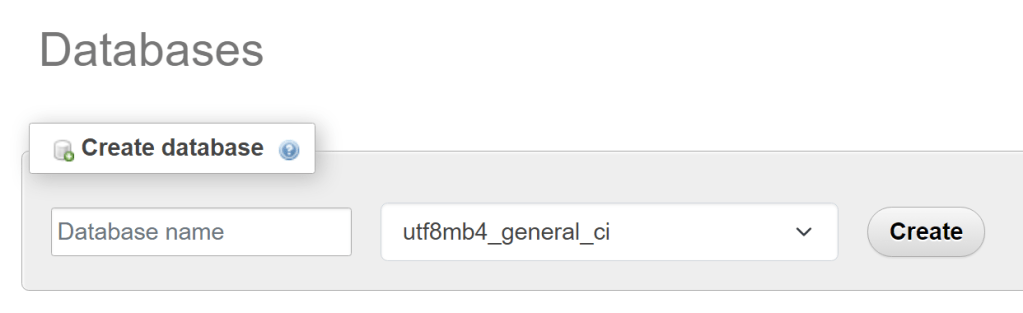
For security purposes, choose a database name that isn’t easy to guess (so not something like “wp_database”). It’s best to use a mix of letters and characters, and write it down because you’ll need to remember the name for the next step.
For the encoding system, leave the default option, which is utf8mb4_general_ci. Then, click on Create, and phpMyAdmin will ask if you want to add any tables to the database.
Leave the database blank for now and don’t add any tables to it. The WordPress installer will take care of adding all the tables the CMS needs during the next step.
Step 4: Install WordPress
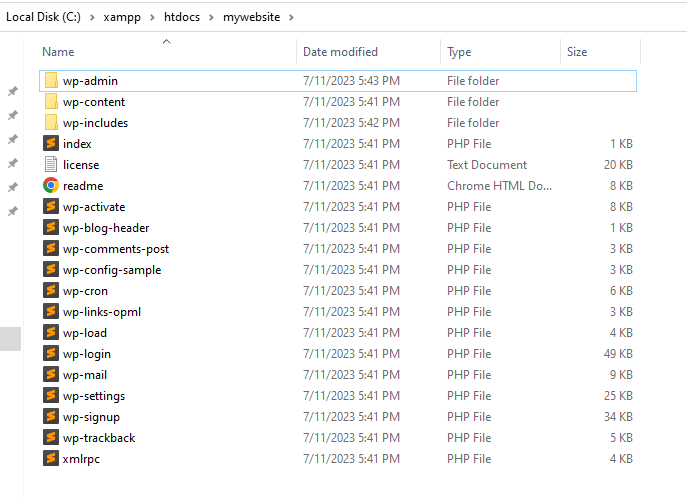
Go ahead and download the latest version of WordPress from the official website. Once you have the zip folder ready, copy it and navigate to the XAMPP document root directory. In this example, that’s C:/xampp/htdocs, but it might be different depending on how you configured your setup.
Once you’re inside, create a new folder for your website and name it anything you want. Open that folder and extract the WordPress install zip file inside. When you’re done, the file and folder structure should look something like this:
Now you’re ready to run the WordPress installer, which will help you install WordPress offline and set up a database for it.
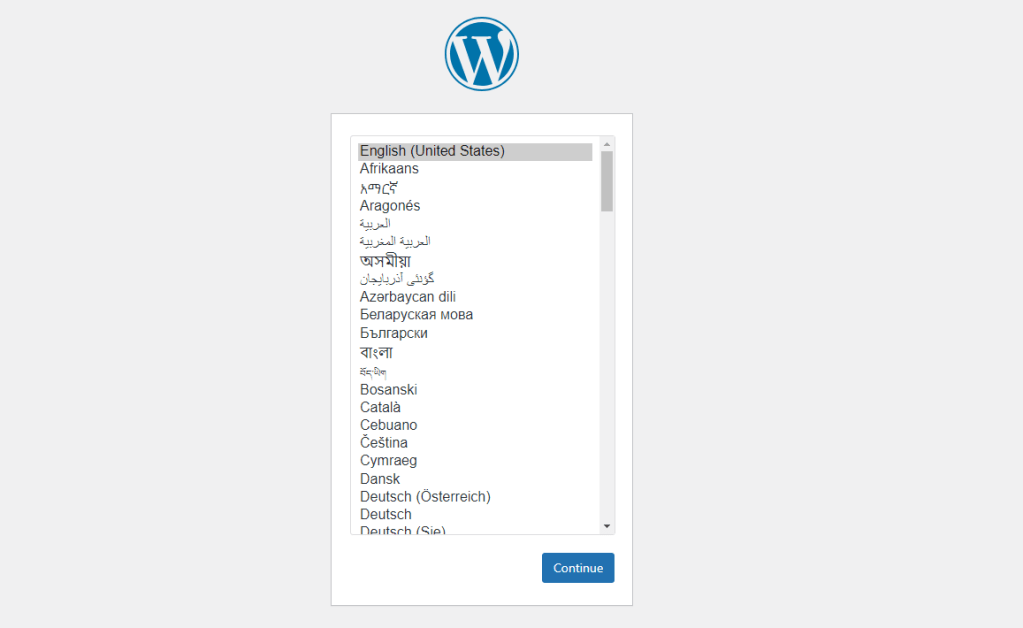
To access the installer, open your browser and go to localhost/mywebsite/wp-admin/setup-config.php. Note that you’ll need to replace mywebsite with the name of the folder you just created for your site.
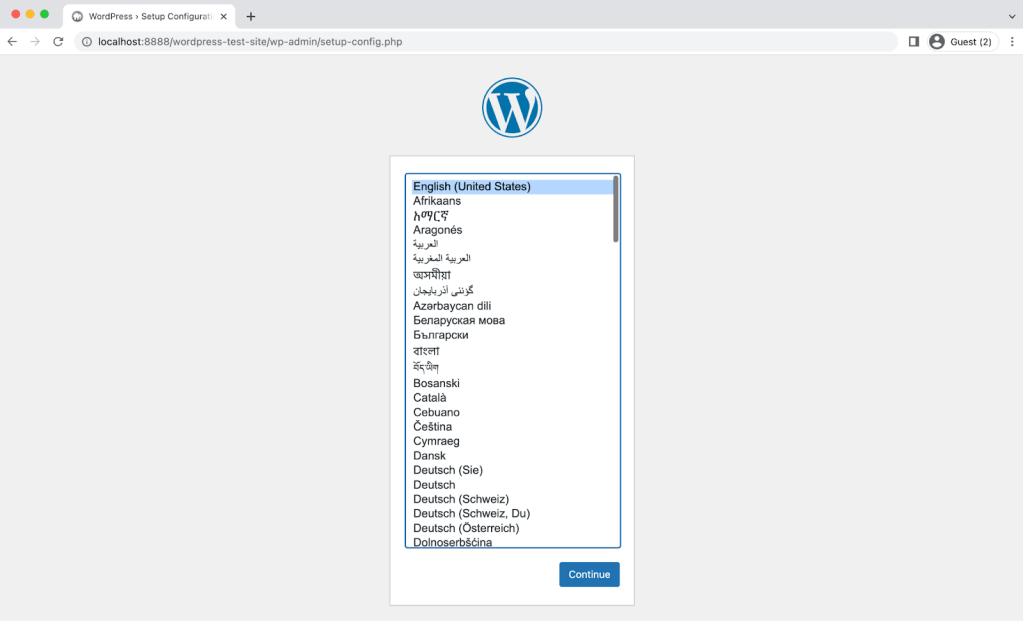
If everything is set up properly, your browser will show the first screen of the installer. Here, you can choose what language to use for your website.
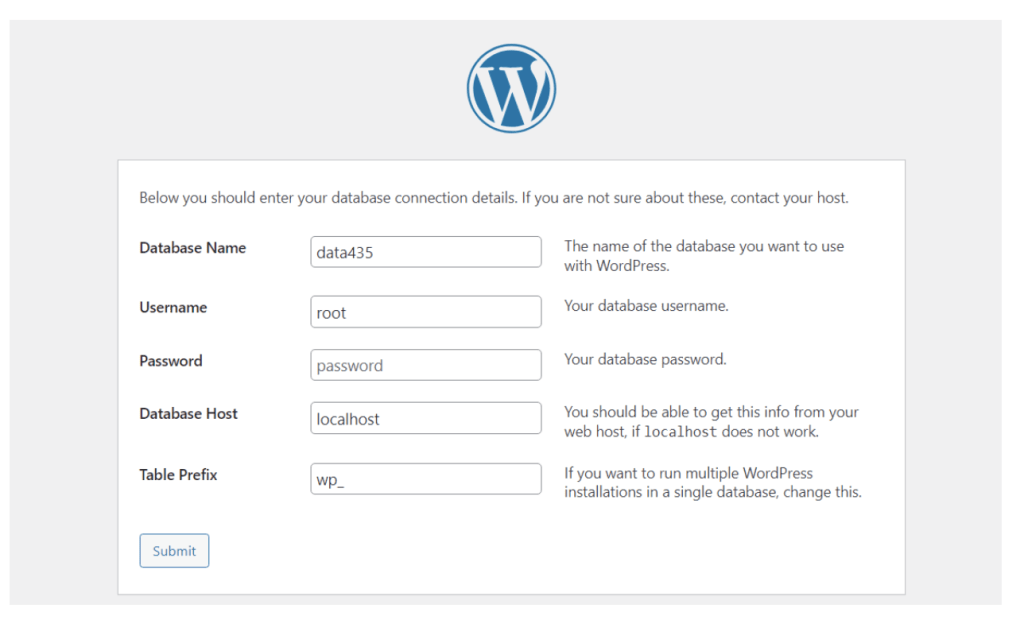
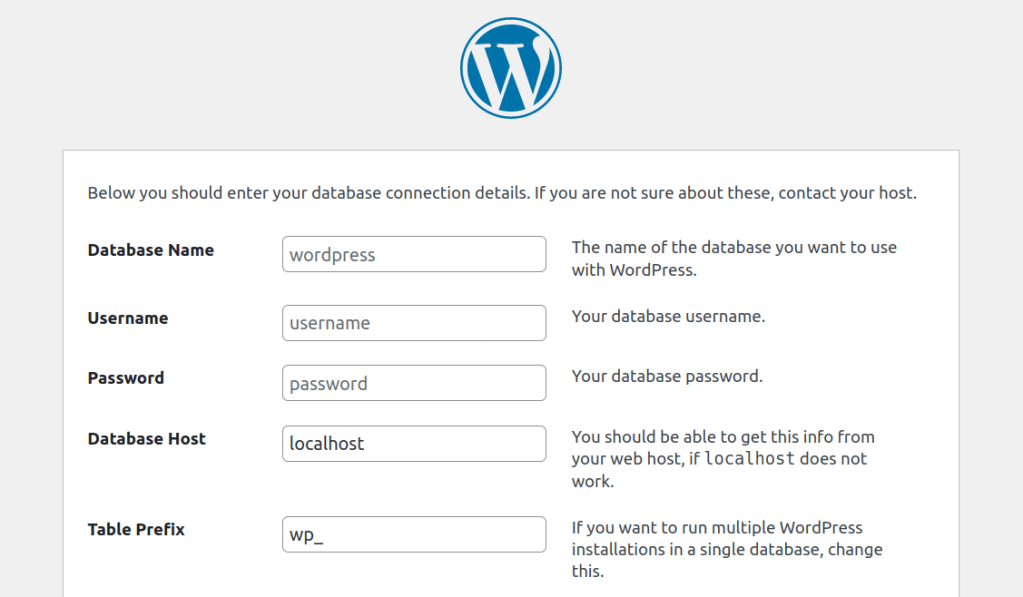
You’ll also need to know the database name, username, password, host, and table prefix before you continue. You should already have all that information at hand (from previous steps).
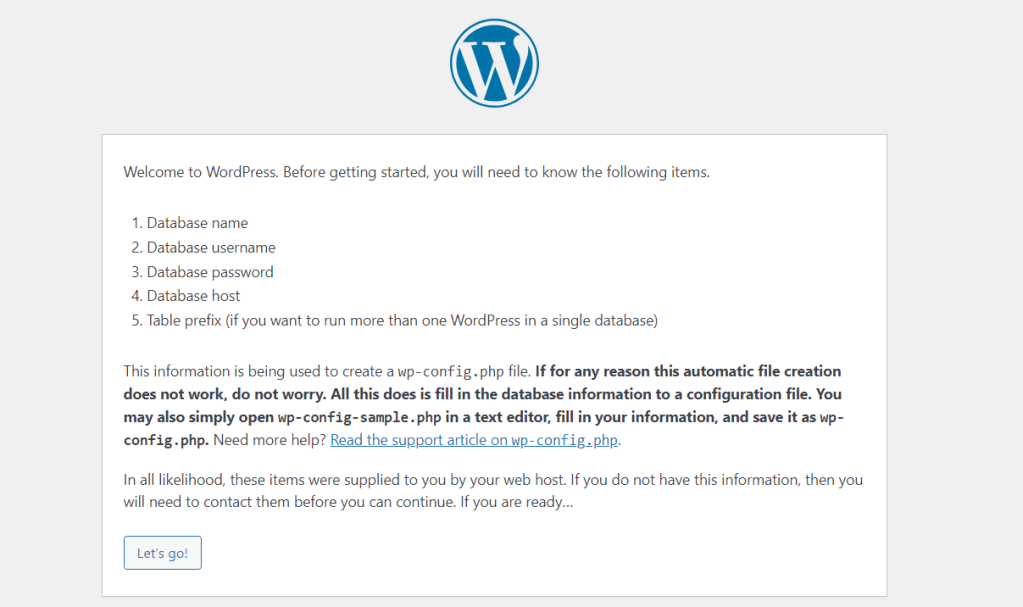
Next, enter the name of the database you created during the last step. Enter “root” as the username, and leave the password field blank. Leave the Database Host field as localhost, and the Table Prefix as wp_.
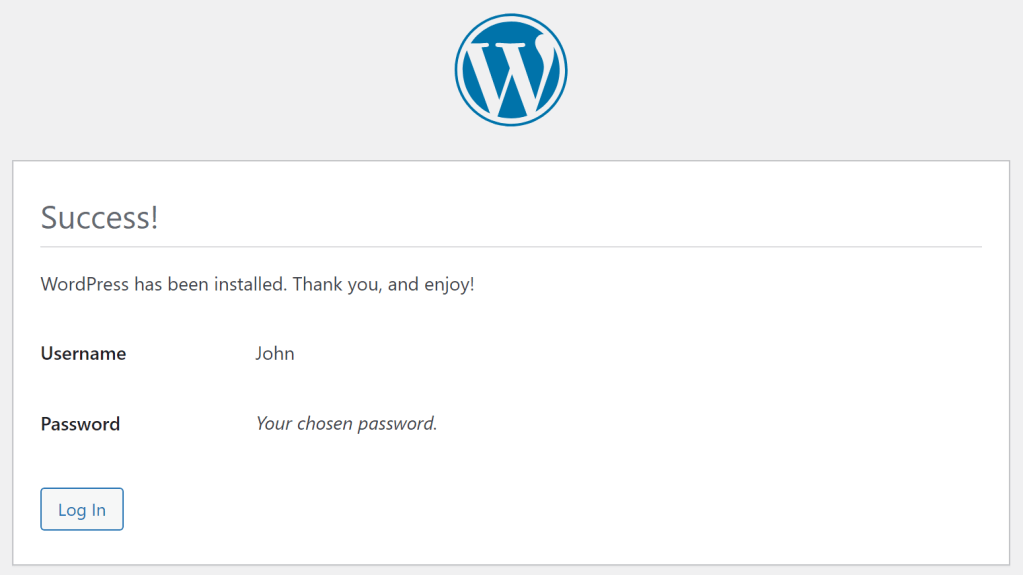
Click on Submit, and confirm that you want the installation to proceed. Now WordPress will prompt you to set an admin username and password, as well as a title for your website. You can change all of this later, so enter the details you want.

Click on Install WordPress, and that’s it! You should see a success page immediately afterward. From there, you can click on Log In to access the dashboard.
Now that you have WordPress installed locally, you can use it by entering the localhost/yourwebsite URL in a browser, as long as you have XAMPP running and its modules are active.
Note that if you close XAMPP or stop the Apache and MySQL modules, you won’t be able to connect to your local site. To do so, you’ll need to restart the application.
Installing WordPress locally on macOS using MAMP
In the following steps, we’ll walk through how to install WordPress locally on an Apple device. First and foremost, you’ll need to select the right tool for the job, like MAMP.
Step 1: Install MAMP
MAMP is a popular tool that enables you to create a local server on your Mac in just a few seconds. The acronym stands for Macintosh, Apache, MySQL, and PHP, as these are the major elements needed to run the software.
To get started, simply navigate to the MAMP website and click on the Download button.
At this point, you’ll see a drop-down menu with options for different operating systems. You’ll either need to choose Download for Mac (Intel) or Download for Mac (Apple), depending on the version of your device.
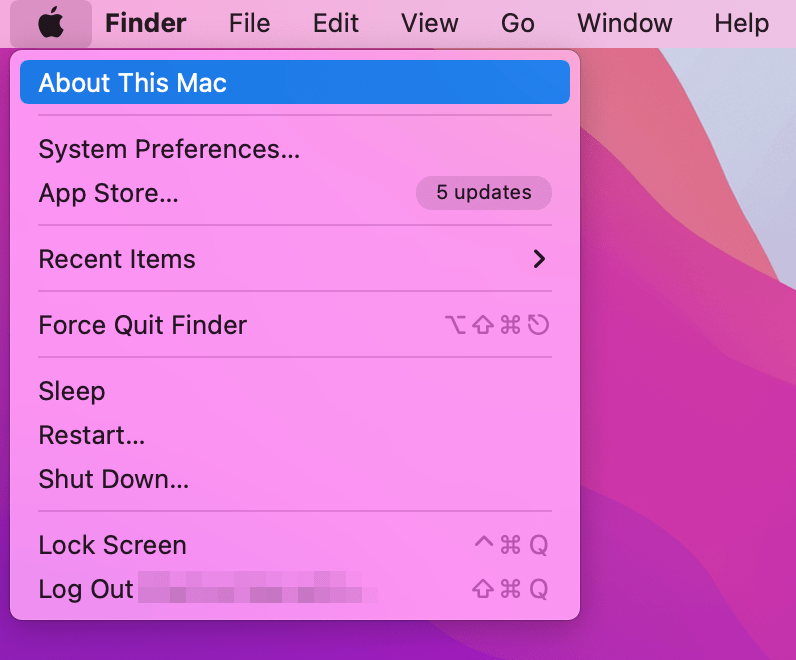
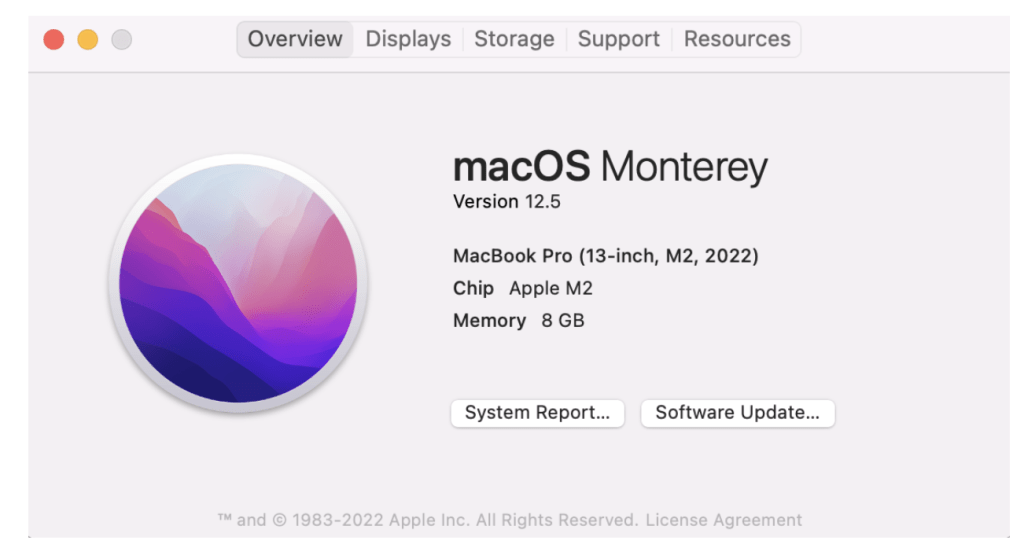
To check this, simply hit the icon in the upper left-hand corner of your desktop screen. Then click on About this Mac. This will open a pop-up window with key information about your device.
You’ll find the information you need just below the name of your device’s software. For instance, the above device lists Apple M1 as the chip. That means you should download the second version of MAMP (Mac for Apple).
Once you click on the download button, you may see the following screen:
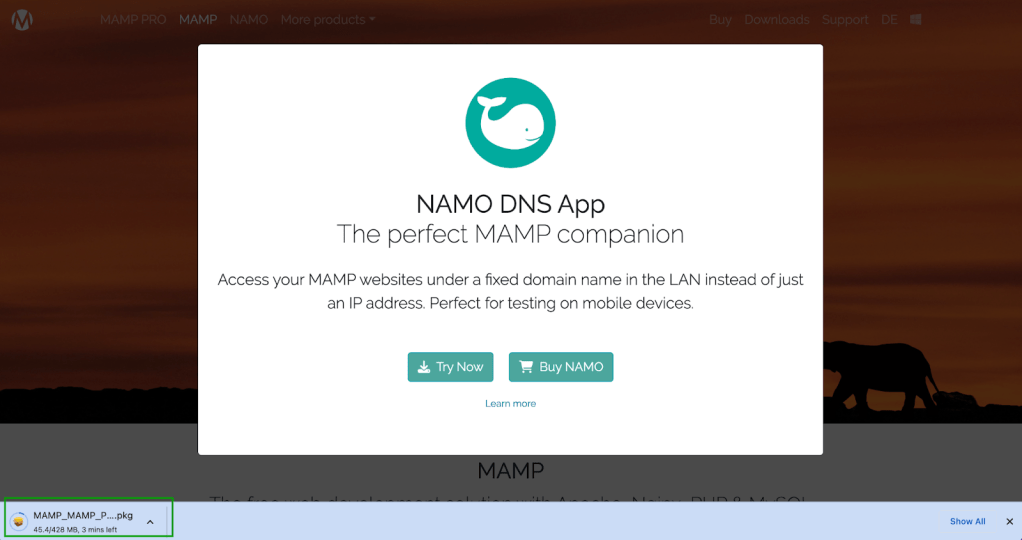
The pop-up is advertising a companion tool for users who need to test on mobile devices (which may interest you later on). You should be able to see your download in process in the bottom-left corner of the screen. Note that it may take a few minutes to complete.
Once it’s ready, you’ll see MAMP’s installation wizard.
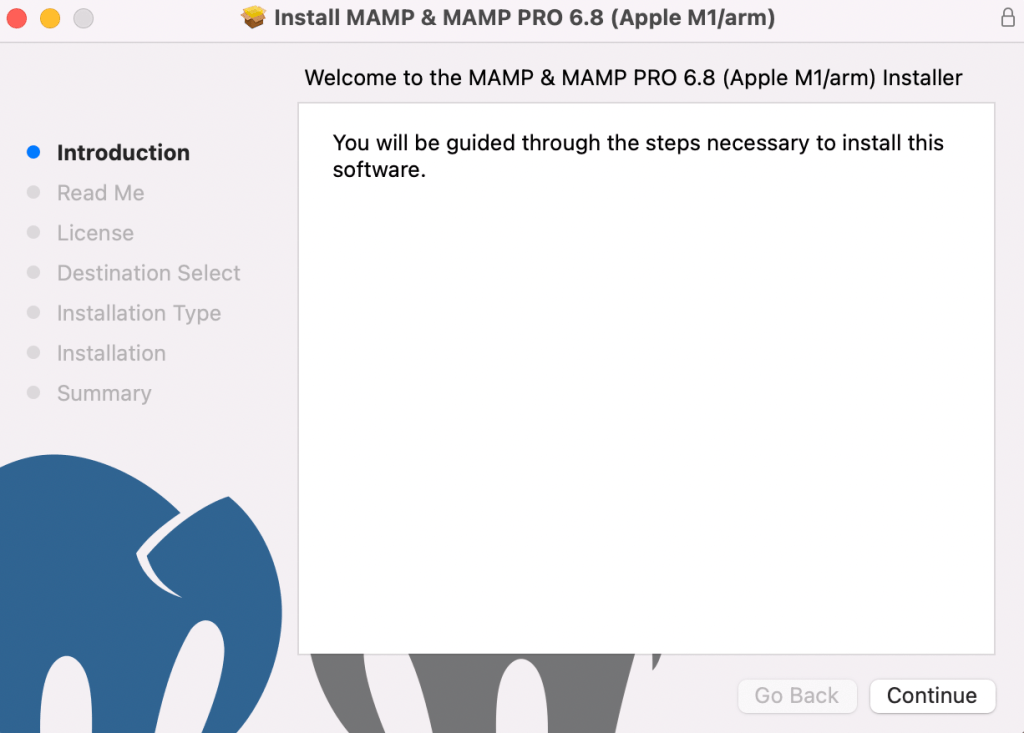
Start by clicking on Continue to follow the instructions. You’ll then need to review some important information under the Read Me section, as well as the license agreement.
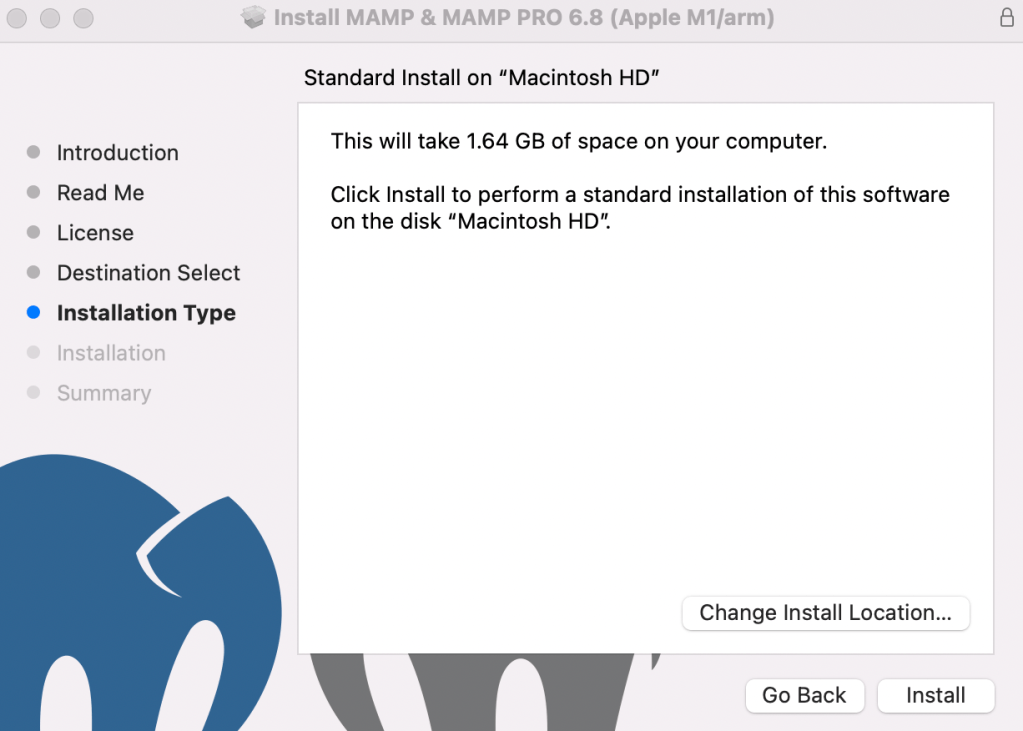
Next, you’re directed to the Destination Select step, skipping directly to Installation Type. Here, you’ll be able to see how much storage space the MAMP installation will need.
Verify that you have enough space on your device, and click on Install.
You’ll have to enter your login credentials, then select Install Software.
When the installation is complete, you should see the following message:
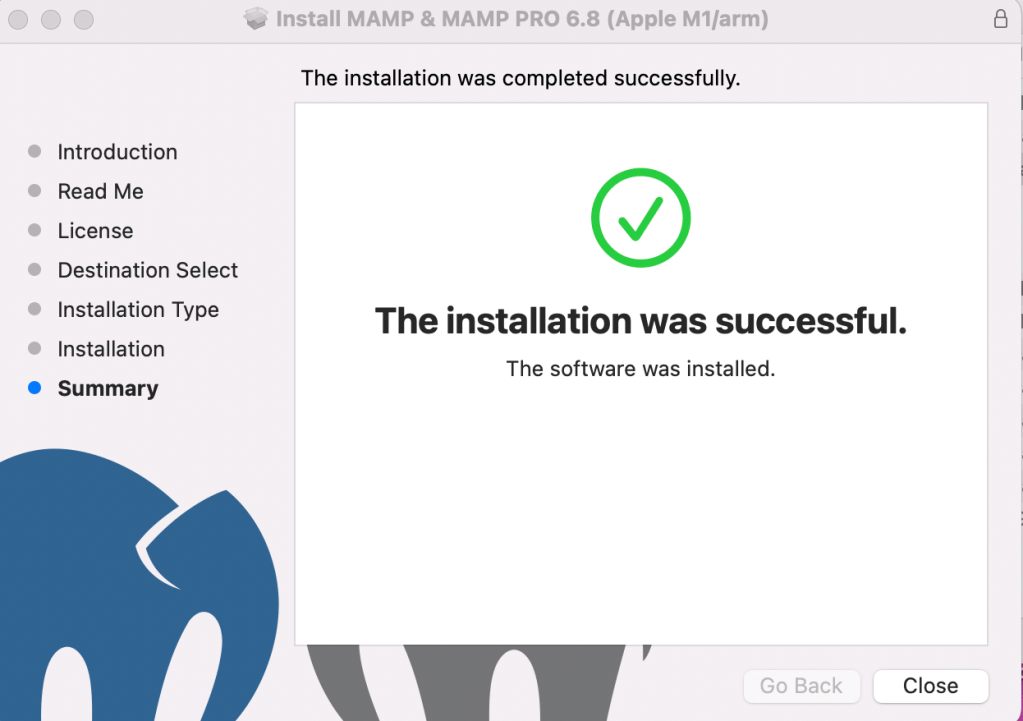
Now, you can continue to the following step to configure MAMP.
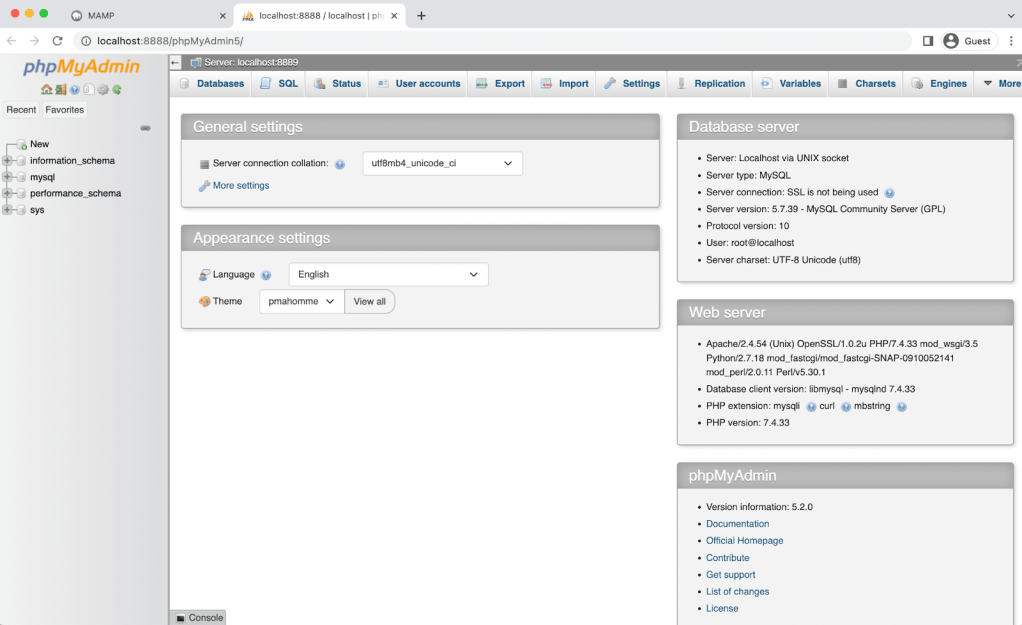
Step 2: Configure MAMP
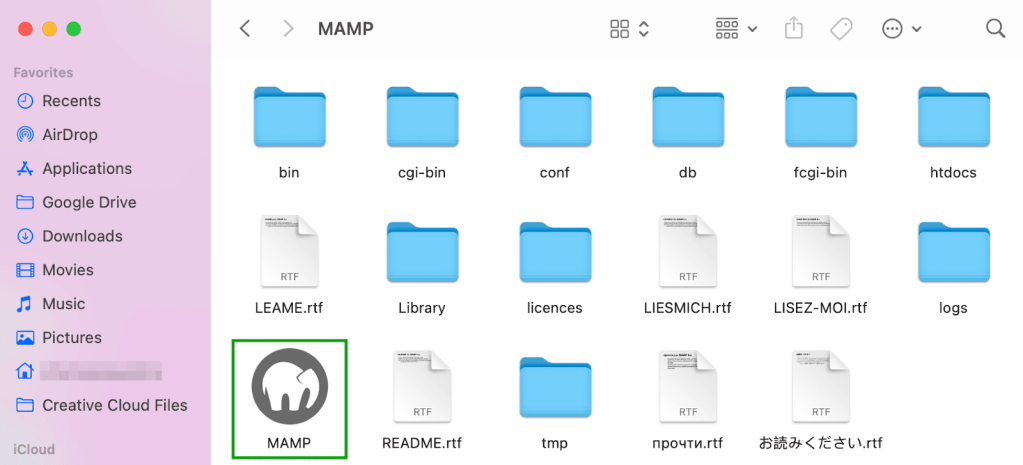
When you take the time to properly configure MAMP, organizing your work can become a lot easier. To begin, open your Applications folder and find your MAMP installation.
Make sure to select the free version, not the pro tool. Then double-click the MAMP application within that folder.
This will open up the following window:
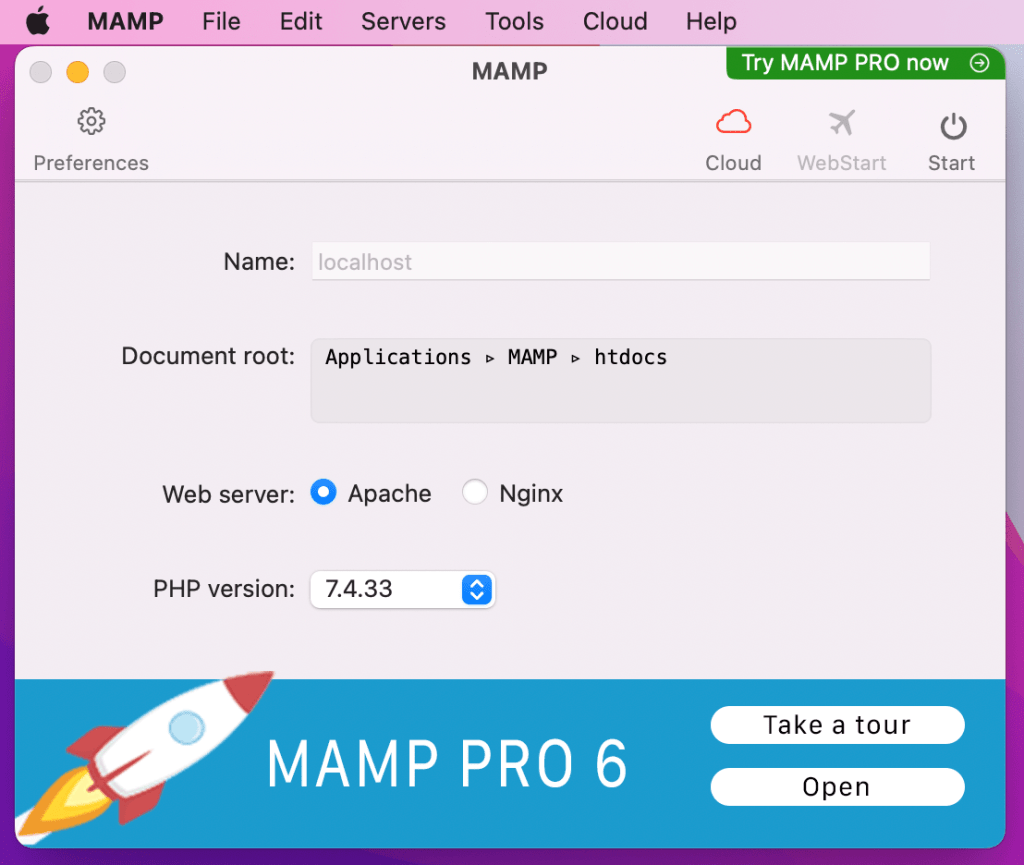
Now, open your Preferences and go to the Ports tab. Here, you’ll want to check your Apache Port and make sure that it’s set to “8888”. If it isn’t, go ahead and update it.
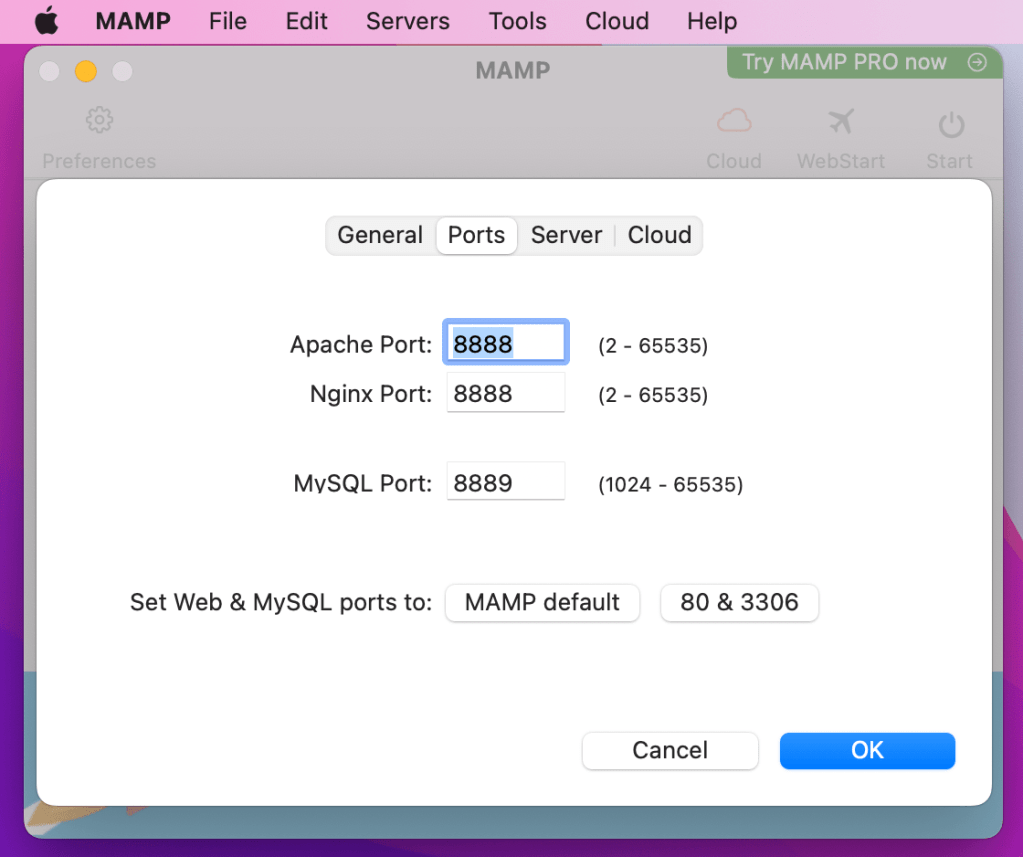
Your MySQL Port should be set to “8889”.
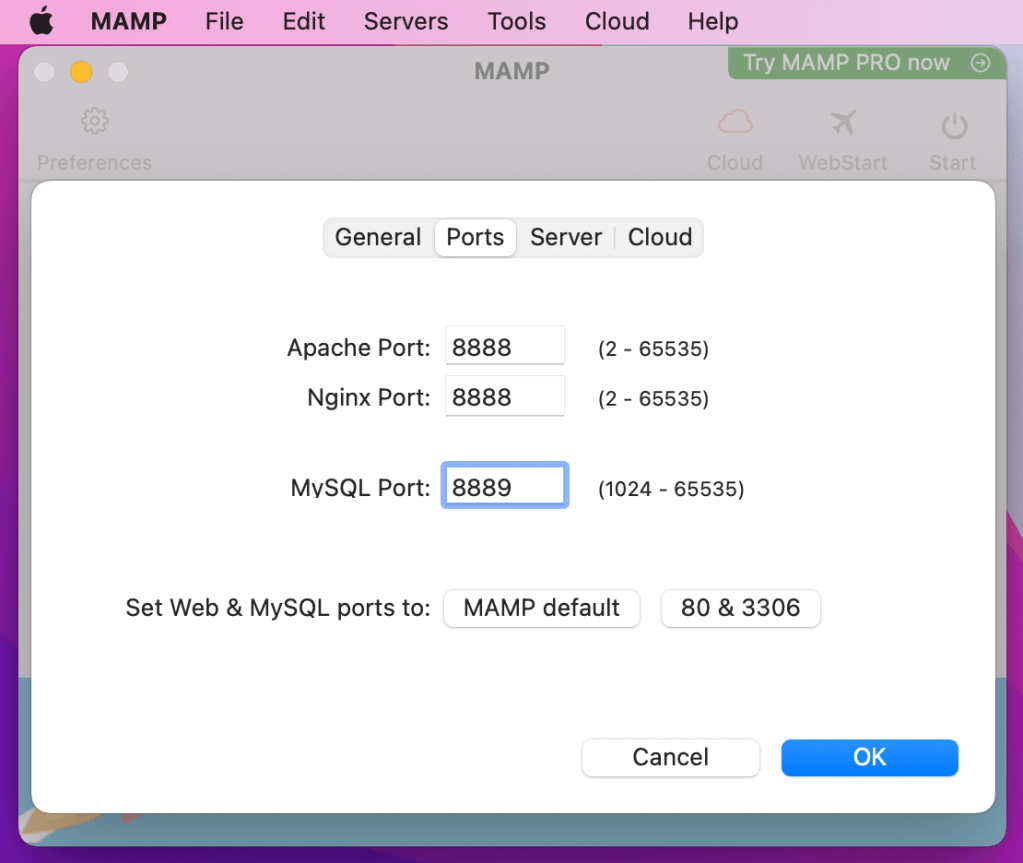
When you’re ready, click on OK.
Next, you’ll need to set your document root folder. This is where you’ll store your site. Click on the Server tab and look for the Document root field.

By default, your website will be stored in Applications → MAMP → htdocs, but you may want to put it somewhere else. If that’s the case, just click on Choose and select your preferred location.
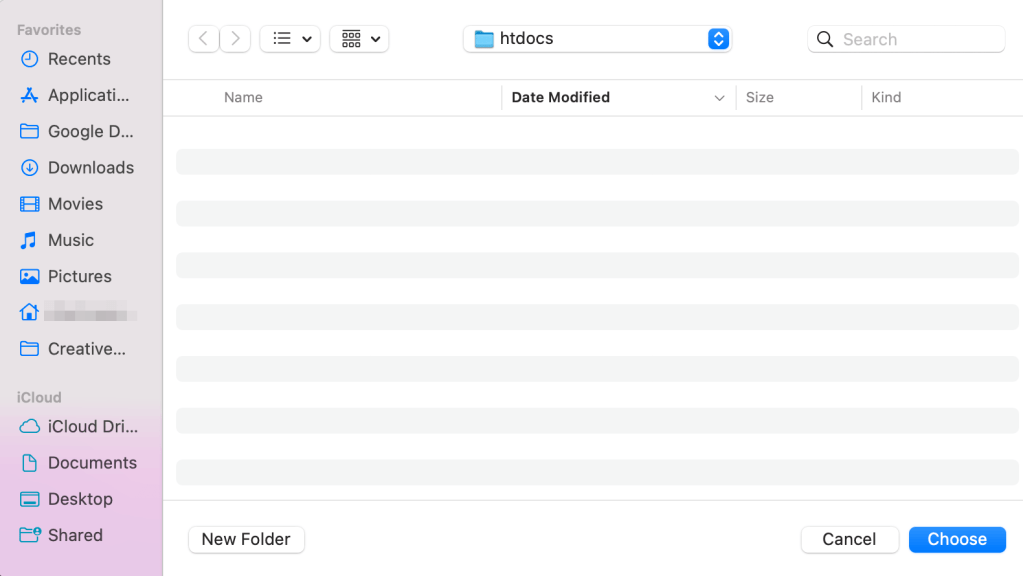
Alternatively, you can choose New Folder to put it somewhere new.
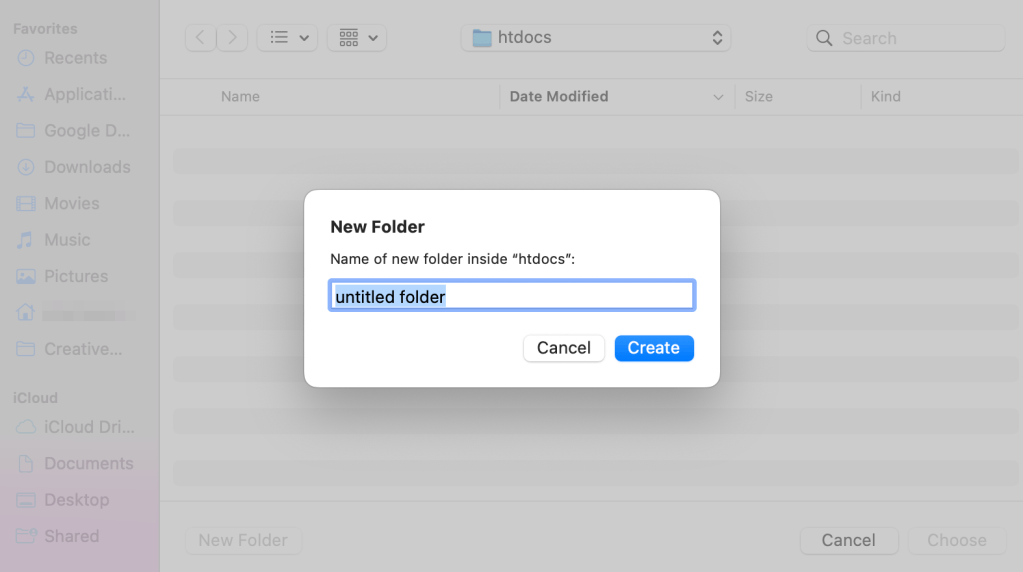
For example, you might name the new root folder “localsites”.
Next, hit Create and then Choose again. You should see the new file path in your MAMP pop-up.
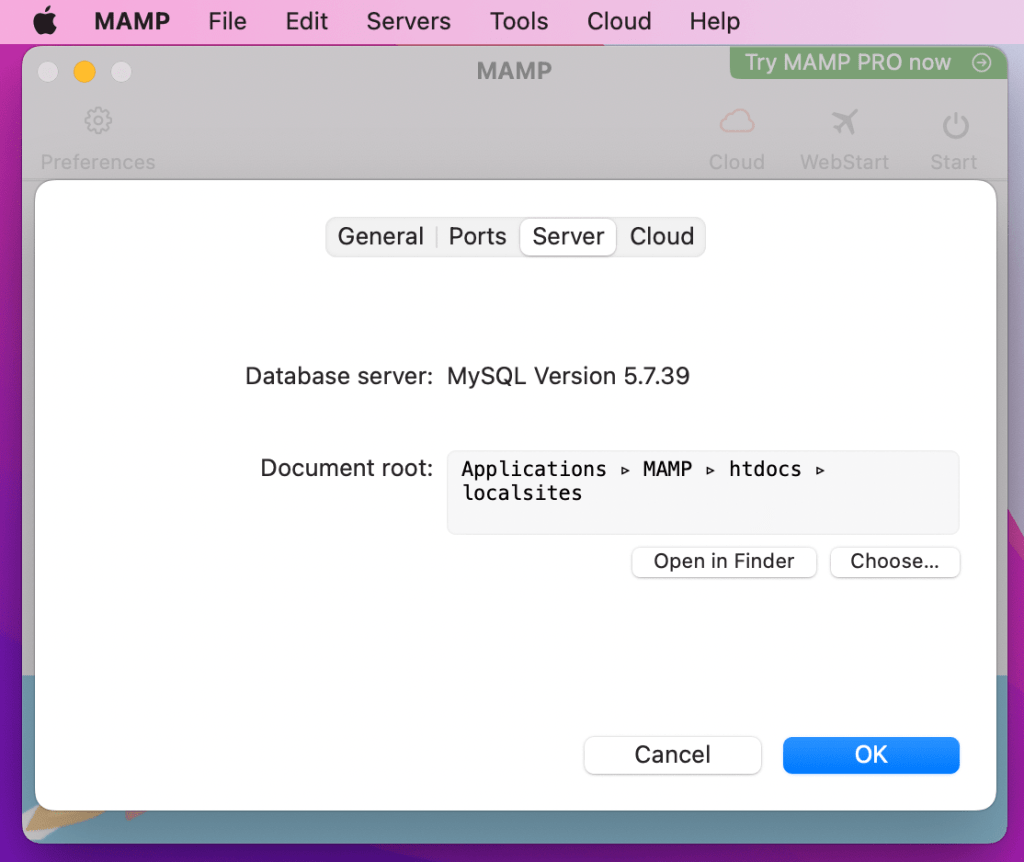
Click on OK to save your changes.
Now you’re ready to start your MAMP servers. To do this, simply click on the Start button in the upper-right corner of your MAMP settings.
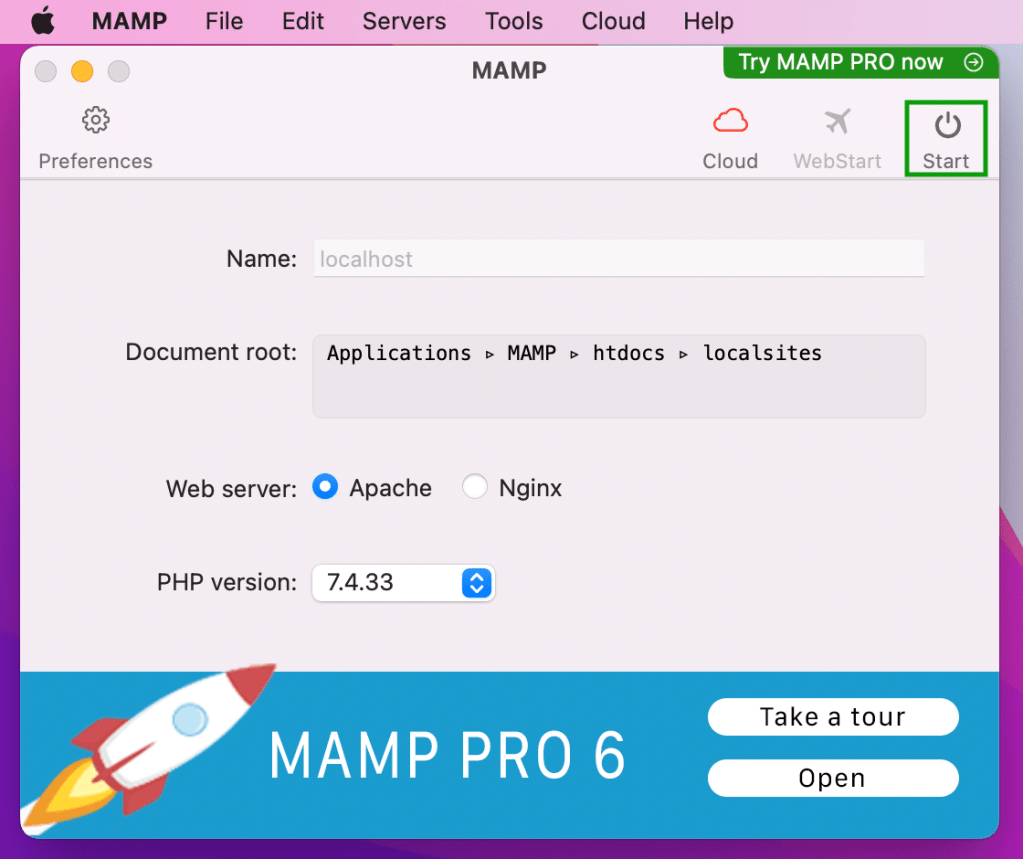
Now you’re ready for the next step!
Step 3: Create a new MySQL database
After you hit the Start button, your MAMP control panel will launch in your browser.
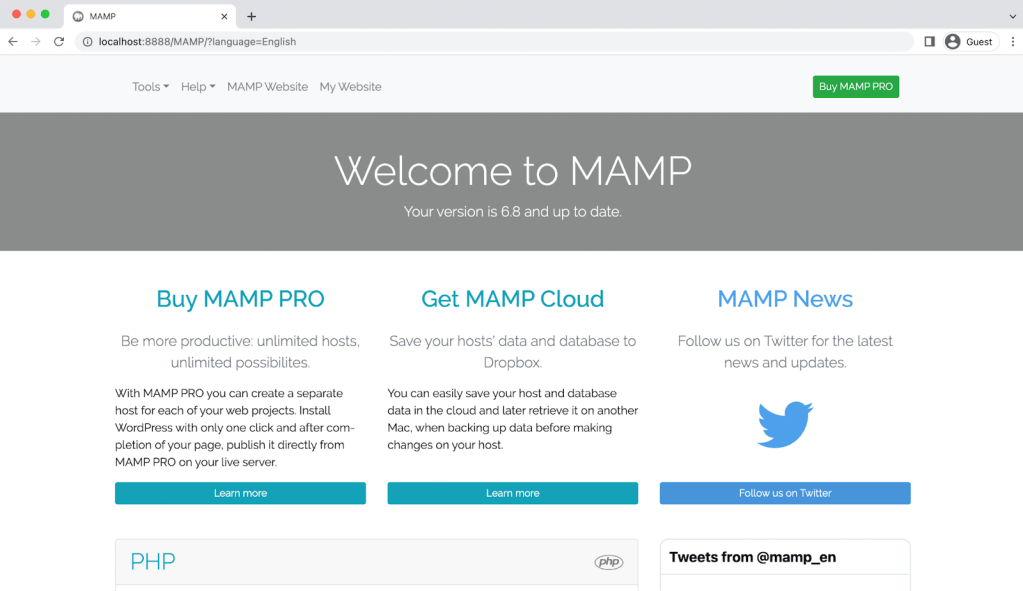
This is where you’ll need to complete the next step, which is creating a new MySQL database.
To get started, open your Tools menu and select phpMyAdmin.
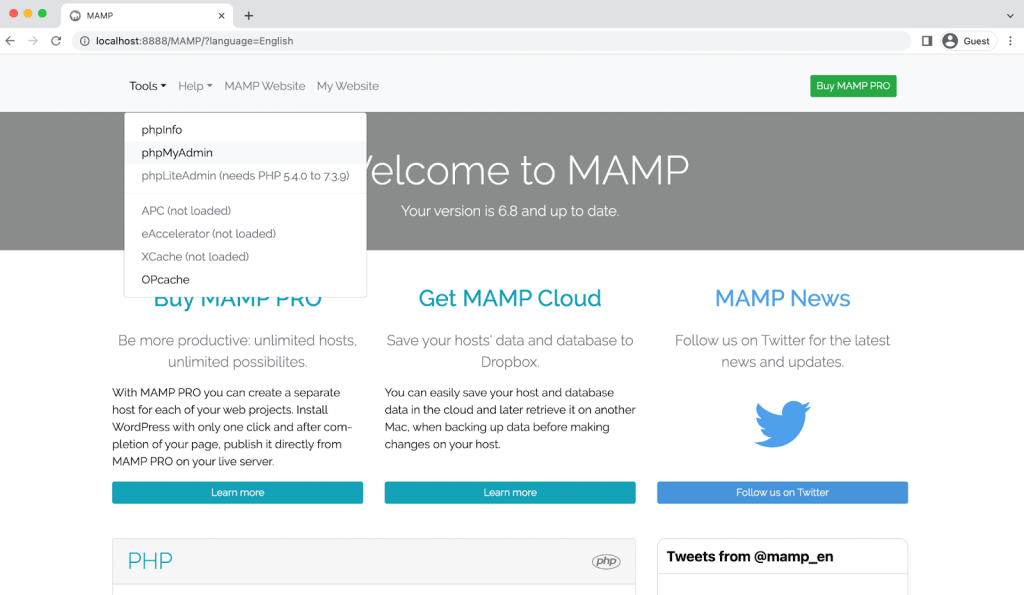
This will open your phpMyAdmin page.
Now, click on the Databases tab.
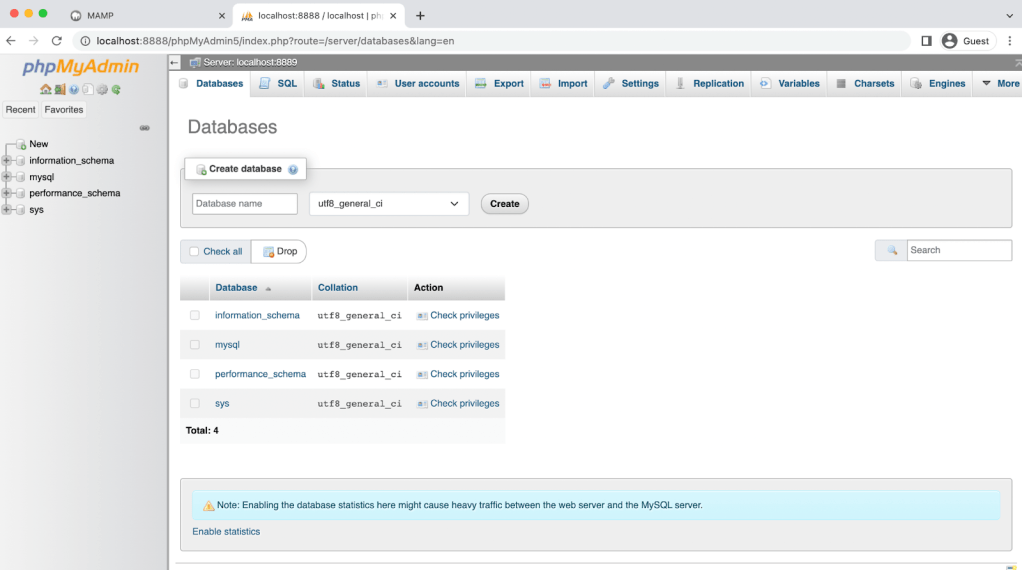
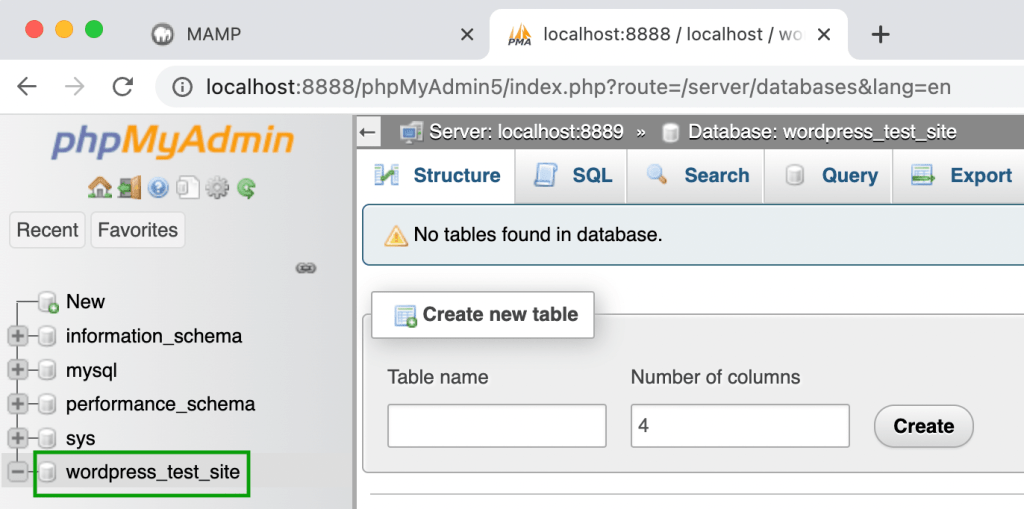
Under the Create Database section, enter a database name and make sure that utf8_general_ci is selected. You can stick with something simple, like “wordpress_test_site”.
When you’re happy with your selections, click on Create. You should then see your new database in the left-hand column.
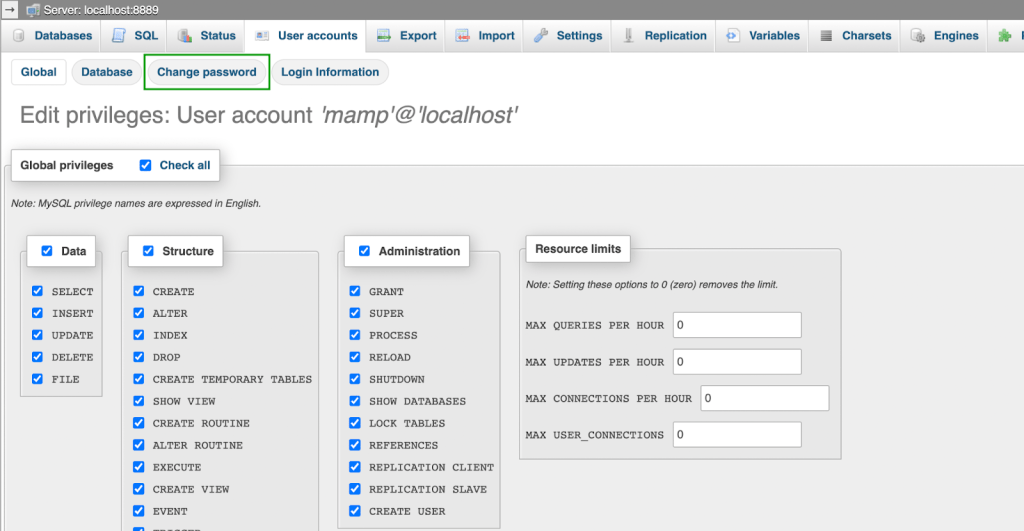
To complete the WordPress installation, you must update your user credentials. Return to your main phpMyAdmin screen and navigate to the User Accounts tab.
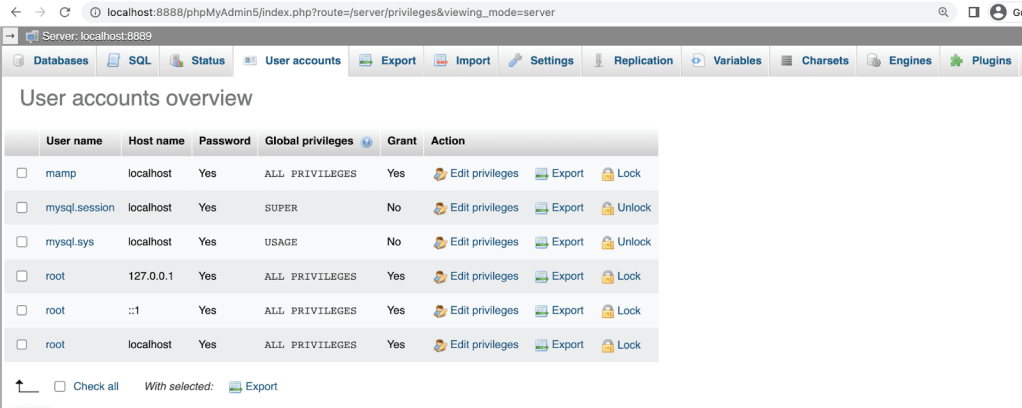
Locate the account with the username mamp, and click on Edit privileges → Change password.
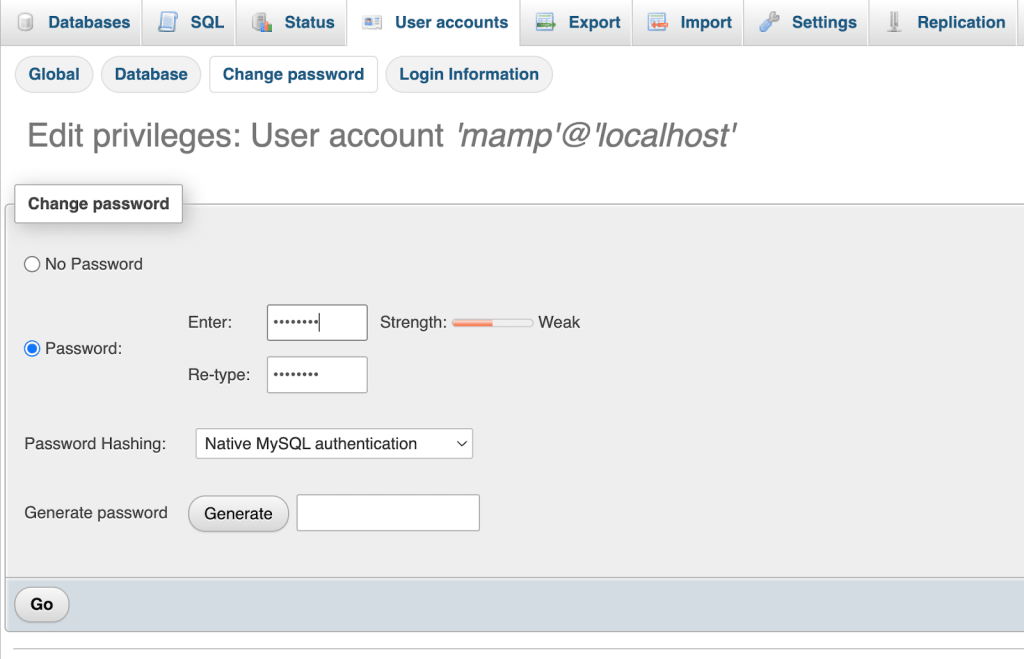
On the following screen, enter a strong password of your choice, and then retype it. After that, hit Go.
If you want to change your username, you can click on the Login information tab. Otherwise, your username will be “mamp” and your host name will be “localhost”.

Now you’re ready to install WordPress locally on your Mac device.
Step 4: Install WordPress
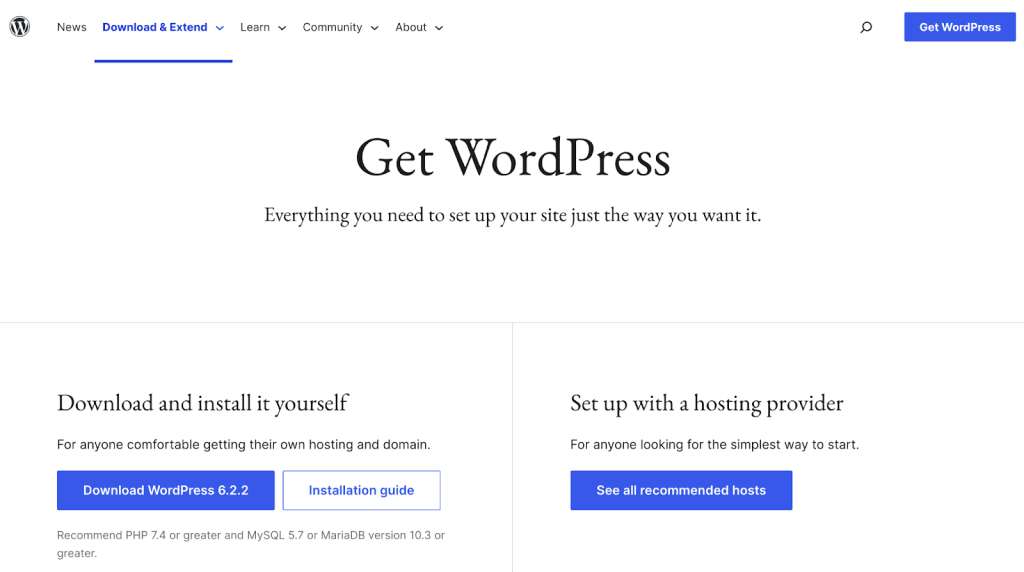
Finally, you’ll need to install WordPress. Go to WordPress.org and download the file.
Once the download is complete, extract the .zip file to find the WordPress install folder.
Next, go to Applications → MAMP and locate the root folder you named in step two. In the example above, it was within the htdocs folder and was renamed “localsites”.
Now, drag the WordPress folder into your document root folder. You might want to give it a new descriptive name, like “WordPress-test-site”:
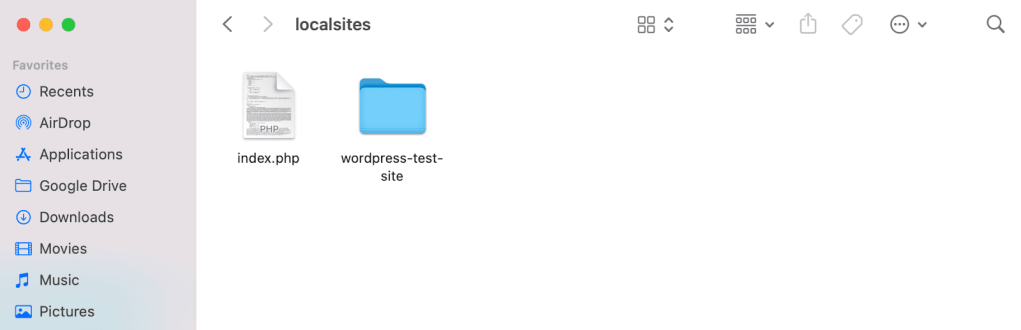
Now, delete the index.php file you see above. This is a crucial step, so don’t skip it!
In a new browser tab, enter “http://localhost:8888/” and you should see the following:

Next, click on the link to access your WordPress installation. If you’ve configured everything correctly, this should open up your WordPress setup wizard.
Start by choosing a language, and then hit Continue. You’ll see the following welcome page:
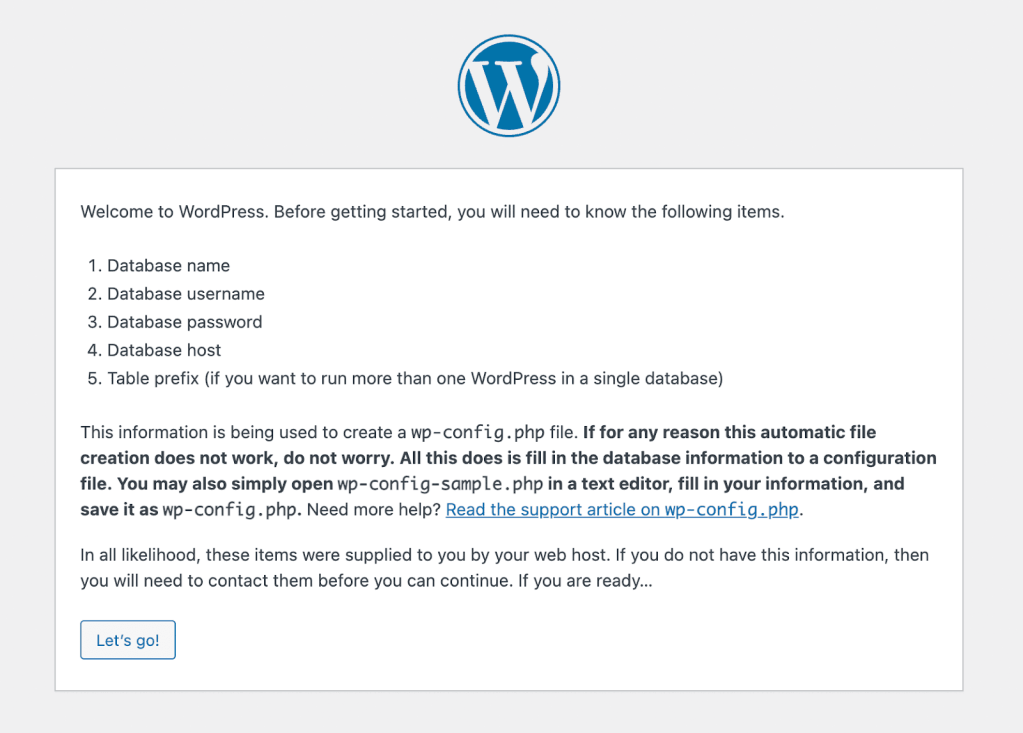
Now, click on Let’s Go! to begin the installation process.
You’ll need to enter the name of the database you created in the previous step, as well as your username and password. Then select Submit and Run the installation, and you’ll see the final page of the installation process.
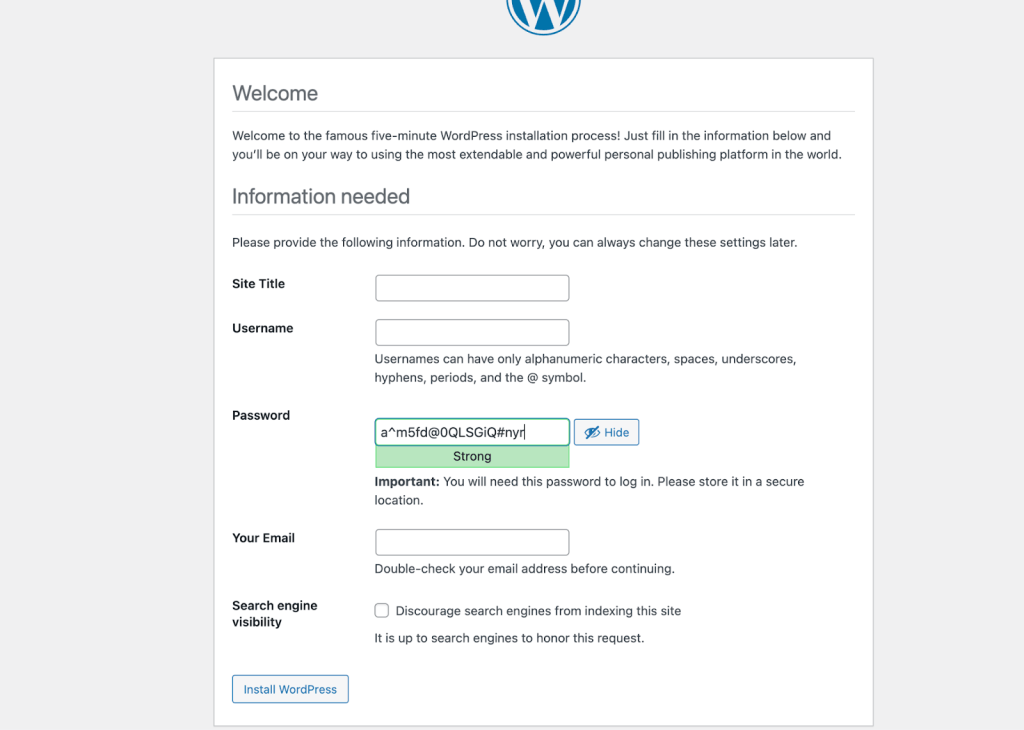
Here, you’ll need to pick a site title, username, and password for the WordPress installation. Additionally, you’ll have to enter a valid email address.
When you’re happy with your selections, hit the Install WordPress button on the bottom-left part of the page.
Now you can select Log In, and enter your credentials to access your WordPress dashboard.
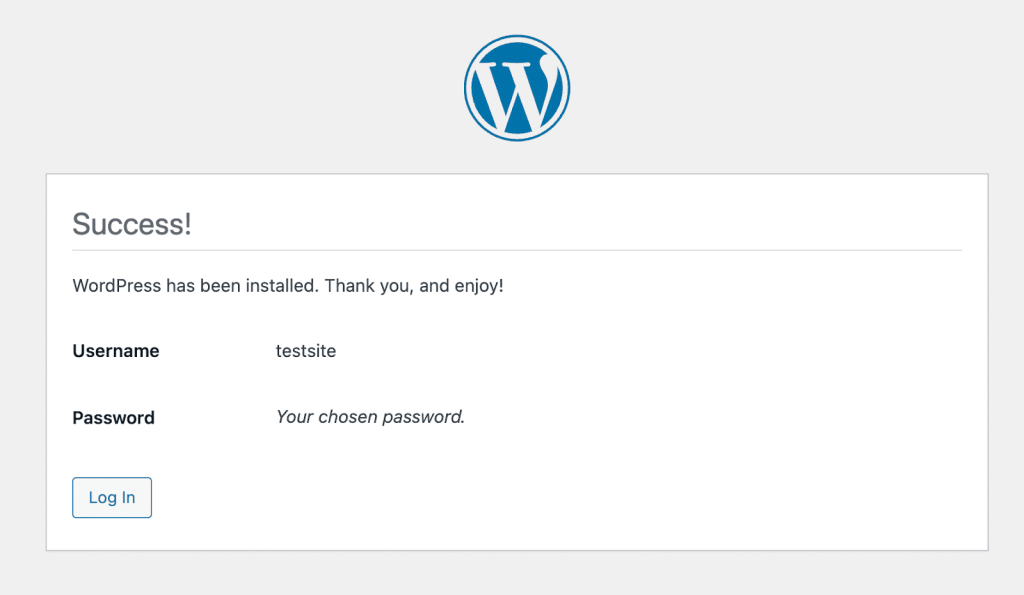
That’s it! You now have WordPress installed on your local device.
Local WordPress installation process on Linux
You can install WordPress locally on Linux, but it works a bit differently than it does with macOS or Windows. The most straightforward approach is to set up a LAMP stack, so we’ll start by explaining what that is and how it works.
Step 1: Install LAMP
If you’re using a Linux distribution, you already have the first part of the LAMP stack. The rest you’ll need to download, install, and configure manually. This can be a more involved process than with other operating systems if you’re not familiar with using the terminal.
The first component that needs to be installed is Apache. To do this, run the following commands in the terminal:
sudo apt updatesudo apt install apache2
After running the second command, you’ll need to confirm that you want to download the Apache files.
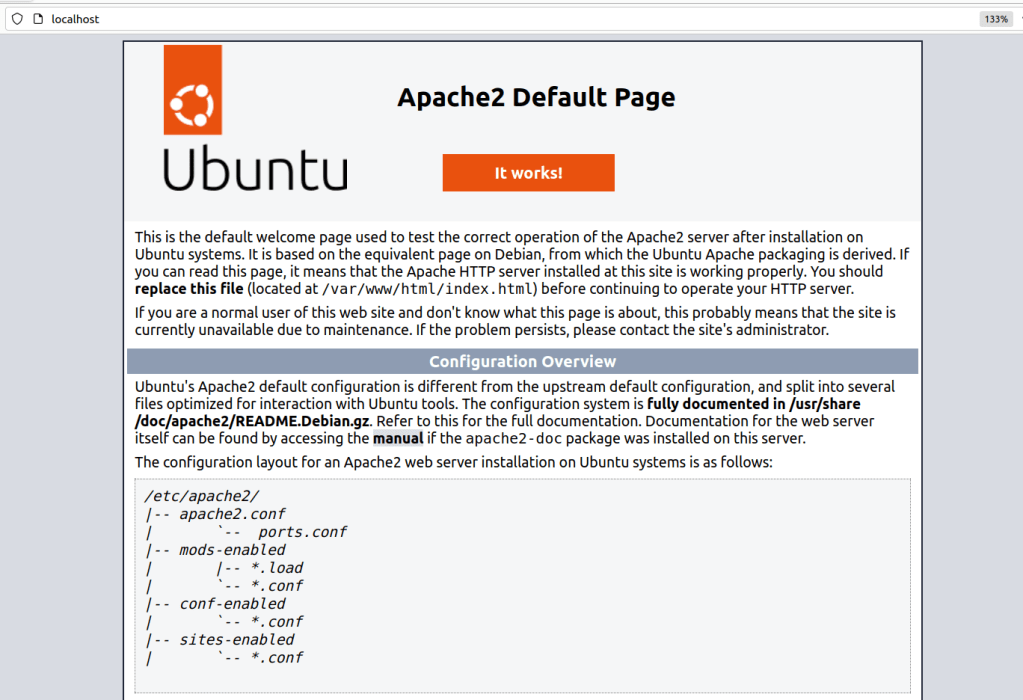
Once the download is complete, Apache should start running immediately. To confirm that Apache is working, open the browser and go to localhost. You should see an Apache page.
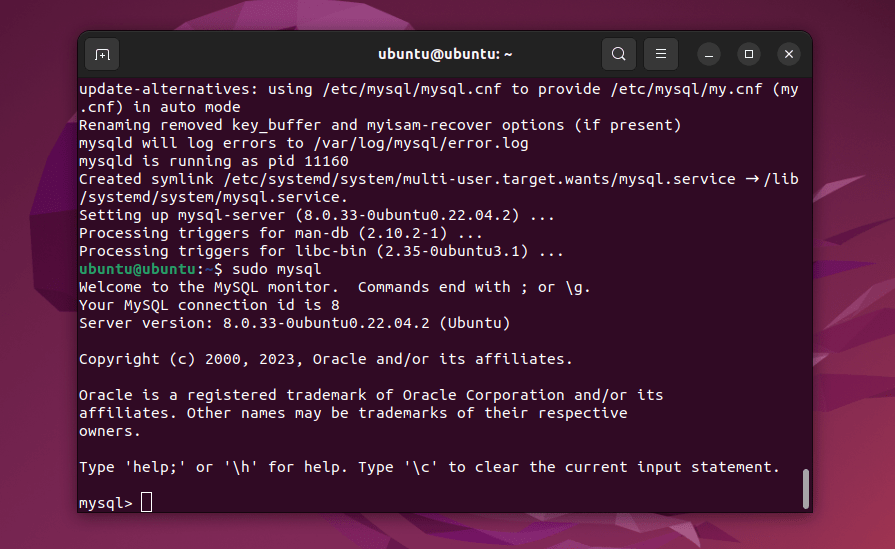
Next, you’ll need to install MySQL. Return to the terminal and run the following command:
sudo apt install mysql-server
Once the installation is complete, you can determine whether the MySQL server is running by entering the sudo mysql command in the terminal. If it is, you’ll see an output that looks like this:
You can exit the server by typing exit. Once that’s done, you can move on to installing PHP via the following command:
sudo apt install php libapache2-mod-php php-mysql
Once PHP finishes installing, you have all the components of the LAMP stack. Then it’s time to configure those components, so they’ll work with a local WordPress install.
Step 2: Configure LAMP
You don’t need to do a lot of configuration to get a local site up and running. By default, when you install Apache, it will set the web server root directory to /var/www/html. In other words, that’s the folder where you’ll install WordPress.
You can change that directory by modifying the Apache configuration file. The easiest way to do this is with the following command:
Sudo nano /etc/apache2/apache2.conf
This will enable you to edit the apache2.conf file using nano. Look for the “directory” section in the configuration file:
<Directory /var/www/> Options Indexes FollowSymLinks AllowOverride None Require all granted</Directory>
You can change the /var/www/ directory location to any other that you prefer. Once you do, save the changes to the configuration file and close it.
Moving on, Apache will be listening on the 80 and 443 ports by default. That works perfectly for a local website.
If you want to change those ports, though, you’ll need to modify the Apache ports.conf file. To do that, use this command:
sudo nano /etc/apache2/ports.conf
When the file opens, look for the portion that includes one or several lines that start with “Listen”, like:
Listen 80
You can add or remove lines to change what ports Apache listens on. When you’re done, save the changes to the ports.conf file and close it.
Finally, you might want to change the port that MySQL listens on. That port should be 3306 by default. To change it, you need to modify the MySQL configuration file using the following command:
/etc/mysql/mysql.conf.d/mysqld.cnf
Look for the line that reads “Port”, and change the number after the “=” sign. When you’re done, save your changes to the file.
Step 3: Secure MySQL and create a new database
Now that you have the basic LAMP setup and configuration out of the way, it’s time to create a database for your WordPress website.
Before you do that, it’s a good idea to run the MySQL secure installation shell script. This is a script that will help improve the database’s security by doing things like setting up a password for the root account.
To run the script, enter the following command in the terminal:
sudo mysql_secure_installation
The script will prompt you to decide what kind of password validation you want to enable for MySQL. Enter “Y” to enable the validation and confirm the level of password security you prefer.
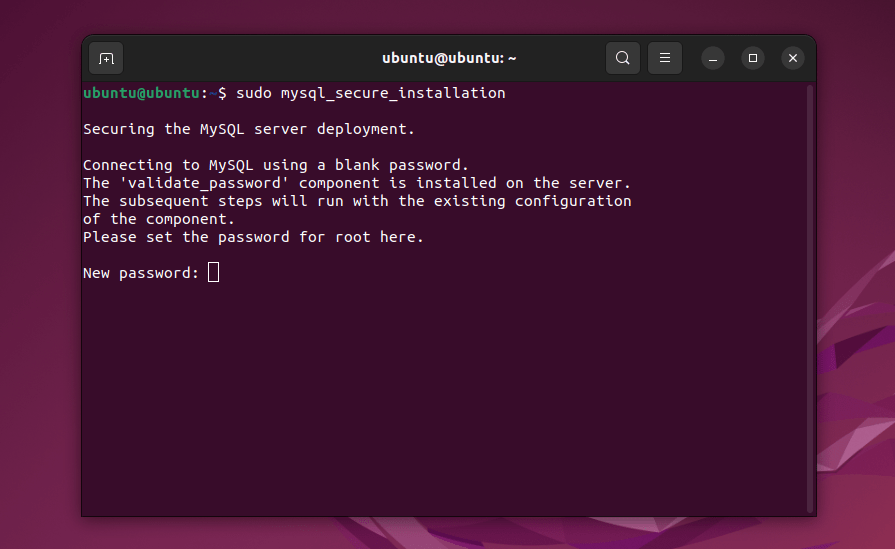
After selecting an option, enter the password you want to use (that meets the security criteria you just chose). Keep in mind that this will be the password for the database root user, so be sure to note it down somewhere.
Now you’ll move on to creating the database. Start by entering the following command in the terminal:
sudo mysql -u root -p
The terminal will prompt you to enter the password you set a minute ago. You’ll be connected to the MySQL server in the terminal. Then use the following command:
CREATE DATABASE database_name DEFAULT CHARACTER SET utf8 COLLATE utf8_unicode_ci;
Replace the “database_name” value with the name you want the database to have. After running the command, the terminal should show a “Query OK” message.
To determine whether the database is working, type the SHOW DATABASES; command into the terminal while connected to the MySQL server. The server will return a list of databases, including the one you just created.
With that out of the way, it’s time to install WordPress.
Step 4: Install WordPress
If you didn’t change the default root directory, it should be located in /var/www/html. You’ll need to open that directory in the terminal and download the latest version of WordPress directly to it, using the following two commands:
cd /var/www/htmlsudo wget -c http://wordpress.org/latest.tar.gz
After the file finishes downloading, you can extract it using this command:
/var/www/html$ sudo tar -xzvf latest.tar.gz
This will extract the files into a folder called “WordPress”. Right now, the file structure should include a /var/www/html/wordpress folder.
Before you do anything else, you’ll need to set ownership of that folder to your user. Here’s the command that will do it:
sudo chown -R www-data:www-data /var/www/html/wordpress
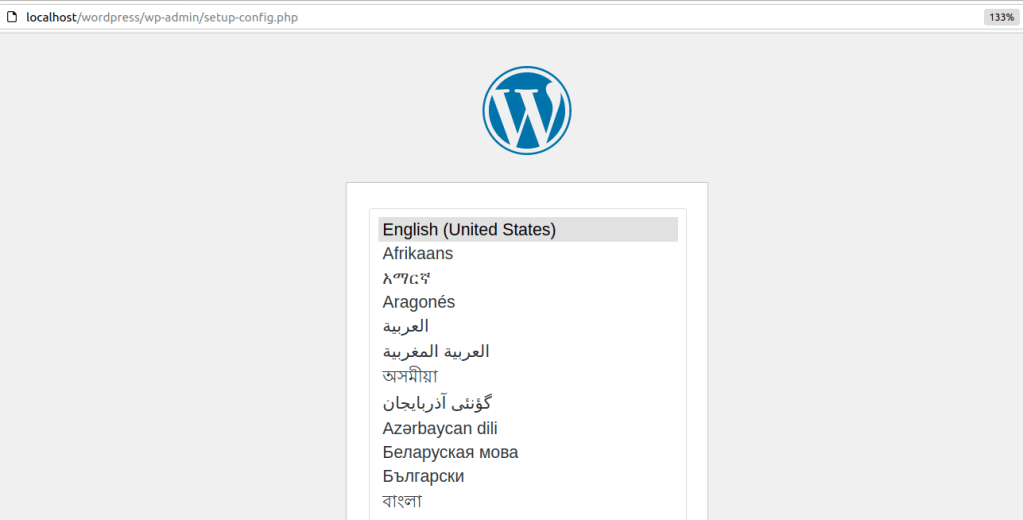
Now you can access the WordPress installer using your browser, by navigating to localhost/wordpress. Choose the language of the installation and click on Next.
The installer will confirm that you know the details about the database before proceeding. Enter the database name, username, password, host, and table prefix on the next screen.
You can leave the database host and table prefix presets. Simply enter the name of the database and your credentials, and click on Submit.
Finally, the installer will prompt you to enter a site title and a username and password for the administrator account. Add your email as well, and click on Install WordPress.
After the installation finishes, you’ll be redirected to the login page, and you can start using your local WordPress website right away.
Troubleshooting common errors when installing WordPress locally
Even with a perfect guide, you can hit a snag. Here are fixes for the most common issues.
Error: Apache won’t start
This is usually a port conflict. Another application (or another web server) is using Port 80.
In your XAMPP or MAMP settings, change the Apache port to 8080 and access your site via http://localhost:8080.
Error establishing a database connection
This means WordPress can’t communicate with your MySQL database. Double-check that the database name, username (‘root’), and password (often blank by default) you entered in the wp-config.php file are 100% correct.
Also, ensure that the MySQL service is running in your control panel.
PHP version errors
If you see errors related to outdated PHP, ensure you have downloaded the latest version of XAMPP or MAMP, as these come bundled with current PHP versions required by WordPress.
Frequently asked questions about installing WordPress locally
Do you still have questions about installing WordPress locally? Let’s address them!
What are the benefits of installing WordPress locally?
Having a local WordPress development environment can come in very handy. You can use this setup to work on projects that aren’t ready to go public, like new websites, plugins, and themes.
A local setup offers the advantage of being unindexed. Visitors won’t be able to find it through search engines or connect to it. Pages will also load very quickly because you’re not connecting to a remote server, which makes the development process much more responsive.
If you’re happy with your work and you want to take it online, you can always migrate your local site to a standard web host. There are a lot of migration plugins you can use for this job that make the process very intuitive.
Can I migrate my locally‑installed WordPress site to a live server?
Yes, you can migrate a local WordPress website to a live server. The easiest way to do this is by using a migration plugin. These plugins typically create a full backup of your site that you can upload to the live web server.
Other plugins may take care of the migration process for you by connecting both websites. This will typically only work if your local website can be accessed online, which is a feature some development environments offer.
A few WordPress web hosts provide custom local development tools. If you use these tools, you might be able to push local websites to a live site with a few clicks.
Can I access my locally‑installed WordPress site from other devices on my network?
Yes, you can access your locally installed WordPress site from other devices on your network. The easiest way to do this is by using the IP address of the computer hosting the WordPress site.
For example, if the IP address of the computer hosting the site is 192.168.1.100, you can access the site from another device on the network by typing http://192.168.1.100 into the browser.
Some WordPress development tools also enable you to set up local domain names. These names map to your local IP address, which makes it possible for other devices on the network to use the domain to access the site.
What are best practices for managing multiple local WordPress installations?
Most local WordPress development tools enable you to set up and manage multiple local WordPress installations. The main thing to keep in mind if you have multiple local sites is that you’ll need to assign a domain name to each of them.
You can’t assign multiple websites to the localhost address. However, your OS will let you map local domain names to individual IP addresses. This way, you’ll be able to access each site separately.
If you use a local development tool that supports virtualization, you might be able to start and stop websites from running. That means every WordPress website won’t be running in the background at all times, consuming local resources and slowing down your device.
How can I update my locally‑installed WordPress, themes, and plugins?
Updating a local WordPress site, as well as its plugins and themes, works just the same as with a live website. You need to access the WordPress dashboard, see what updates are available, and execute them from there.

The update process should work just as normal, as long as you have internet access. Just keep in mind that a local WordPress site can still experience the same kind of errors as a regular site.
Can I use a local WordPress installation for plugin and theme development?
Yes, you can use a local WordPress website for plugin and theme development. In fact, a lot of developers do just that because it enables them to work on new projects in a secure environment with very fast loading times.
With a local website, you don’t need to update plugin or theme code using SFTP. You can simply modify files using your favorite text editor and save them, and the changes will reflect instantly.
The same applies to uploading files. Since you’re working on a local device, all you have to do is create files and/or move them from one directory to another.
What is the difference between a local WordPress installation and a staging site?
Staging sites are clones of a main site that you can use for development and testing purposes. Some WordPress web hosts offer staging sites as part of their plans, and they’re hosted on their servers.
You can also use a local WordPress website for staging. If you want to do that, you’ll need to copy a live website and clone it on a local setup. When you want to push the local website online again, you’ll need to do the same process but backwards.
In terms of functionality, there’s no difference between a local and a staging site, except that the local one is offline.
How do I back up my local WordPress installation?
Backing up a local WordPress site works much the same as backing up any other WordPress installation. You can use backup plugins like Jetpack VaultPress Backup to automate the process, or create a manual backup by copying your entire WordPress folder (usually in htdocs or www) along with your local database.
Store these copies wherever you like — on an external drive, in the cloud, or another safe location — so you can restore your site if anything goes wrong.
How do I import and export content from my locally‑installed WordPress site?
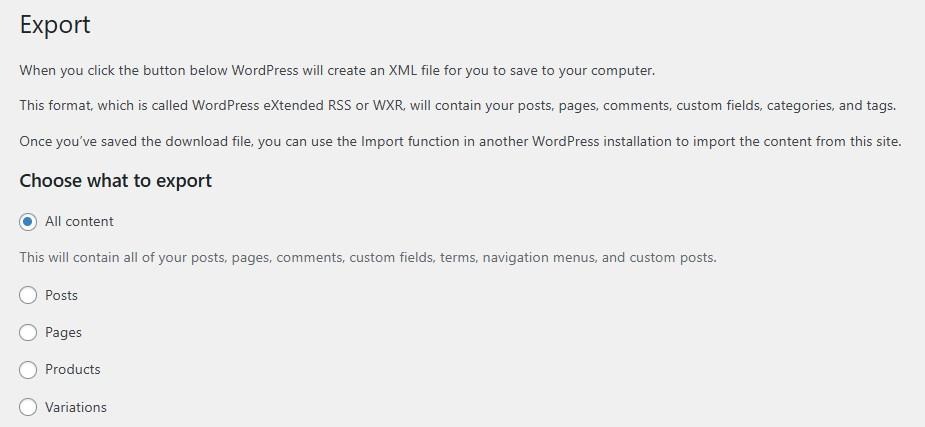
WordPress has built-in tools for importing and exporting content, and these work just as well on a locally installed site. To export content from your local site, go to Tools → Export in the dashboard and choose what you want to export, like pages, posts, products, etc.
This generates an XML file that you can import into another WordPress site, whether it’s online or local.
When importing the content on the new site (Tools → Import), WordPress will ask you which user to assign the imported content to and whether to include media files.
Note that importing media from a local site can sometimes cause issues, so you may need to manually copy media files from your local wp-content/uploads folder to the new site.
Can I install WordPress Multisite locally? If so, how?
Yes, WordPress Multisite can work in a local server environment. The installation process works just as it does with any other WordPress site.
To set up Multisite, you’ll need to edit the WordPress wp-config.php file. The only difference is that, with a local setup, you don’t need to connect to the website via SFTP to edit the file.
All you have to do is find the local WordPress root directory and edit the wp-config.php file from there. Add the following code above the line that says “/* That’s all, stop editing! */”:
define('WP_ALLOW_MULTISITE', true);
Once you enable Multisite, you can configure it by logging in to the WordPress dashboard and navigating to the Tools → Network Setup screen. WordPress will give you code snippets to add to wp-config.php and .htaccess.
After making these changes and logging out and back in, your site will have Multisite enabled. From there, you can add new sites using either subdirectories or subdomains.
