
Backing up your WordPress site is essential for security. If your website goes down, you’ll be able to restore it to its former state. But there are a few different ways you can back up your site, and you might be looking for the option that gives you the most control over the process.
That’s where a WordPress backup using FTP can come in handy. Although this method is typically more time-consuming and complicated than other approaches, it does offer more flexibility.
In this post, we’ll provide an overview of WordPress FTP backups and compare them to other common methods. Then, we’ll show you how to create this type of WordPress backup.
What is an FTP backup?
Before we show you how to create a WordPress backup with FTP, let’s go over the basics.
First, you might be wondering — what exactly is FTP? This acronym stands for “file transfer protocol”. As the name suggests, it’s a protocol that enables you to transfer files.
To employ this method, you’ll need to use an FTP client. Some options, like the popular FileZilla, are free to install and use.
After you install an FTP client, you’ll need to connect your website to the program. This enables you to access your site’s files remotely on your computer. Then, you’ll transfer and save those files manually to create your backup.
After that, you can store your FTP backup anywhere you like. You might opt to keep it on your local device or transfer it to an off-site location, like a cloud storage solution. For maximum security, it’s best to keep multiple backup copies in different places.
How do FTP backups compare to other backup methods?
If you’re not very familiar with website management and security, you might not be sure how FTP backups compare to other backup methods.
For instance, one popular alternative is to use dedicated backup software. When it comes to WordPress, the most powerful, real-time backup solution is Jetpack VaultPress Backup.
No matter what WordPress backup plugin you use, you’ll typically be able to create both manual and automatic backups. Additionally, a backup plugin usually provides you with access to off-site backup storage for added security.
Some tools also allow you to schedule backups. For instance, you might schedule them weekly or daily.
The best software will enable you to create real-time backups. This means that every change made on your site will trigger the creation of a brand new, up-to-date backup.
So how do these two approaches compare?
Creating WordPress backups using FTP is a manual process. It can be time-consuming, error-prone, and a little tedious. You’ll need to create the backup yourself, and then transfer it to your preferred storage location.
Still, this can be preferable for some users since it gives you flexibility and control over the process. As an example, when you’re manually selecting files using FTP, you can easily leave some out if you don’t think they’re necessary.
Using backup software generally means you have less control over the exact settings, files saved, etc. However, you gain a plethora of benefits like automation, real-time backups, greater security, off-site storage, and seamless backup restoration.
Of course, you can also employ both of these methods! The more backups you have, the more secure your site’s data and your changes will be. So you may want to set up automatic backups using a plugin, and make occasional FTP backups as well.
What are the prerequisites for FTP backups?
If you’ve decided that you want to create a WordPress backup with FTP, you’ll need to ensure that you have all the tools to do so. Here’s a list of what you’ll need:
- FTP software. As mentioned earlier, you’ll need an FTP client for this process. FileZilla and Cyberduck are both reliable and free options that you might consider using.
- FTP access. To connect your website to an FTP client, you must have FTP access. This means you’ll need your website’s FTP credentials from your hosting provider. Usually, these are pretty easy to find in your host’s control panel.
- Storage space. When you’re using a backup plugin, off-site storage may be included. But if you’re creating a manual backup with FTP, you’ll need your own, designated storage space. Your storage type is up to you, but a cloud solution is the most secure option.
- Database access. If you want to create a complete WordPress backup, you’ll need to make a copy of your database as well. So you’ll need to be able to access it, typically by logging in to your web host’s control panel.
As you can see, there are quite a few elements required to create a WordPress backup with FTP.
How to back up your WordPress site via FTP
Now that you know about the benefits and prerequisites, we’re going to walk you through the steps required to back up your WordPress site using FTP.
Step 1: Install an FTP client
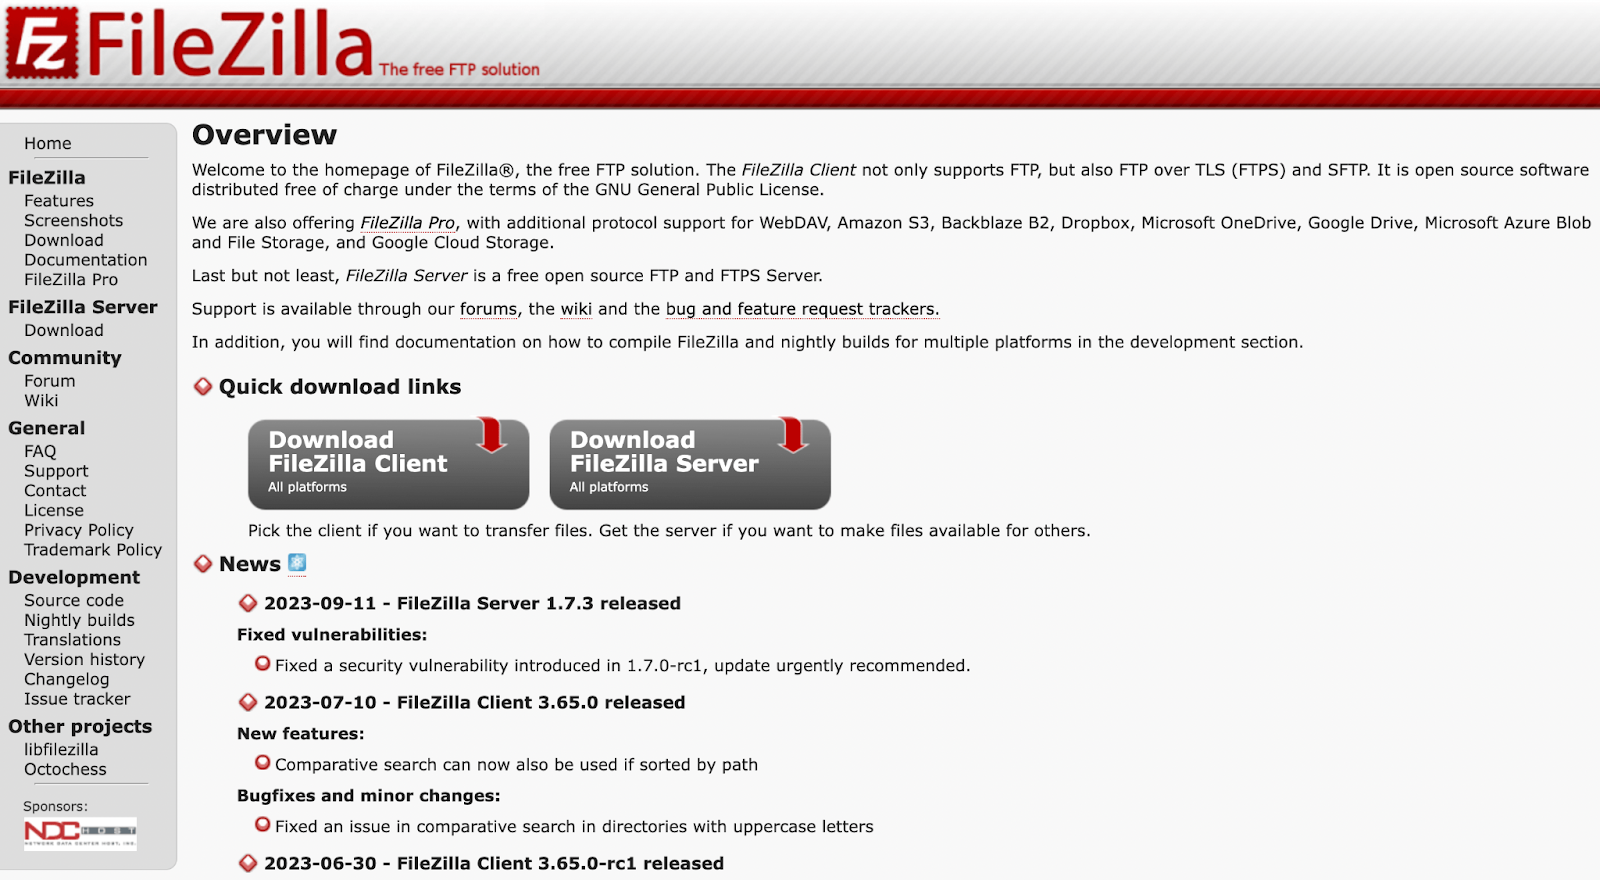
For this tutorial, we will use FileZilla because it’s free and has an excellent reputation. To get started, simply navigate to the FileZilla website.
Click on the Download FileZilla Client button. Then, choose your operating system.
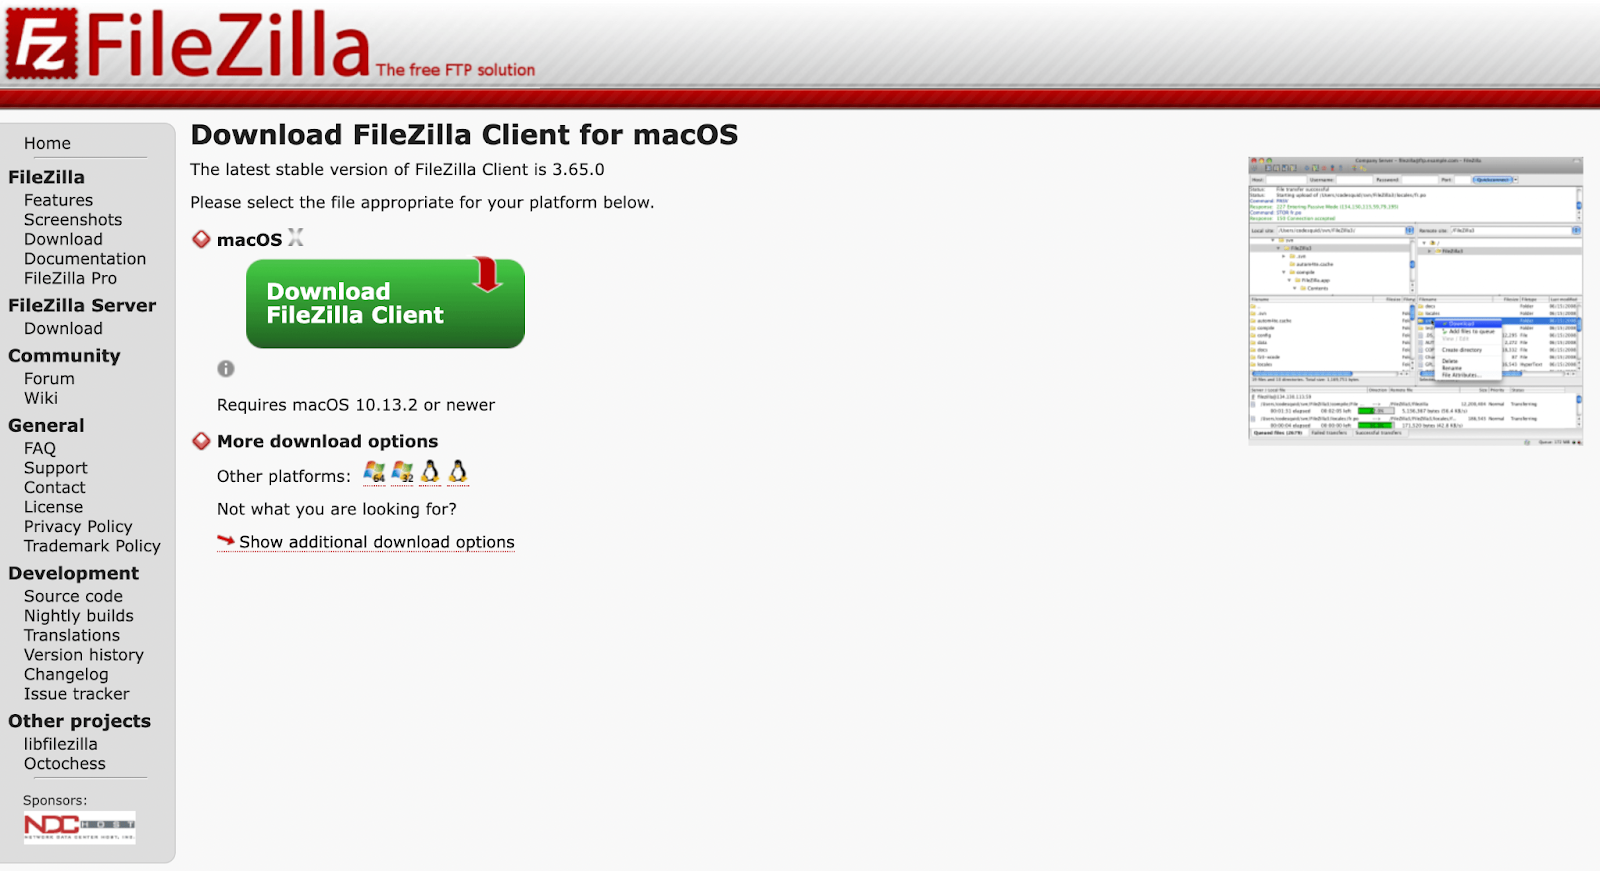
We’ll be using macOS for this tutorial. But as you can see, there are also options for Windows and Linux.
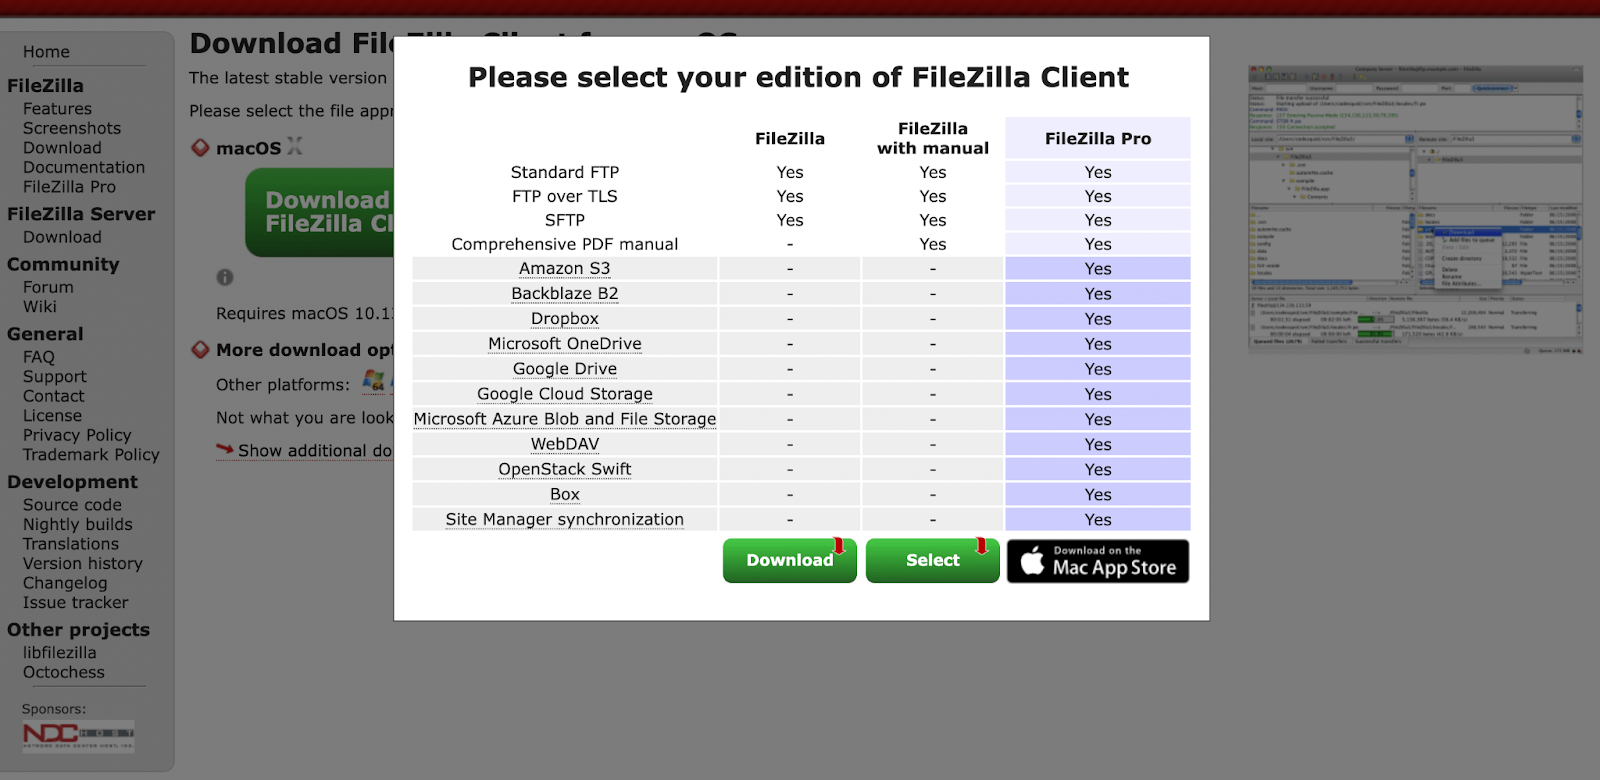
After you choose your OS, you should see the following pop-up. Simply choose the standard FileZilla option on the left.
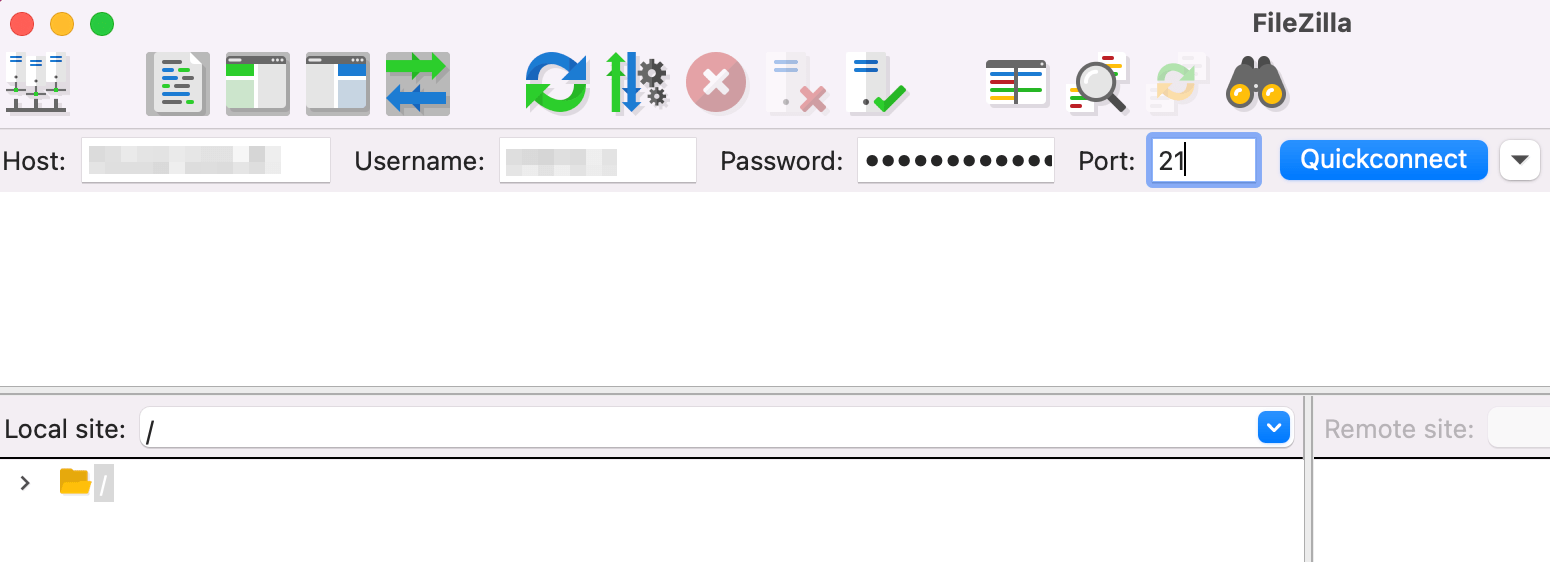
Once the software is installed, go ahead and open it. You should see something similar to the following:

On the left side of this screen, in the Local site section, you should be able to see the files on your computer. The right side is currently empty because you haven’t connected FileZilla to your website yet.
Step 2: Enter your FTP credentials and connect to your WordPress site
Next, you’ll need to enter your FTP credentials and connect your WordPress site to the FileZilla software.

As you can see, you’ll need to fill in Host, Username, Password, and Port. Host refers to your host server’s IP address.
If you don’t know what your FTP credentials are, you can find them in your web hosting account. The steps to take will vary by hosting provider, but let’s go over how this process might look.
After you log in to your hosting account, locate your control panel. This may be in the advanced settings.
Then, search for FTP or SFTP (a more secure version of FTP). In this example, it’s under FTP Accounts in the Files section:
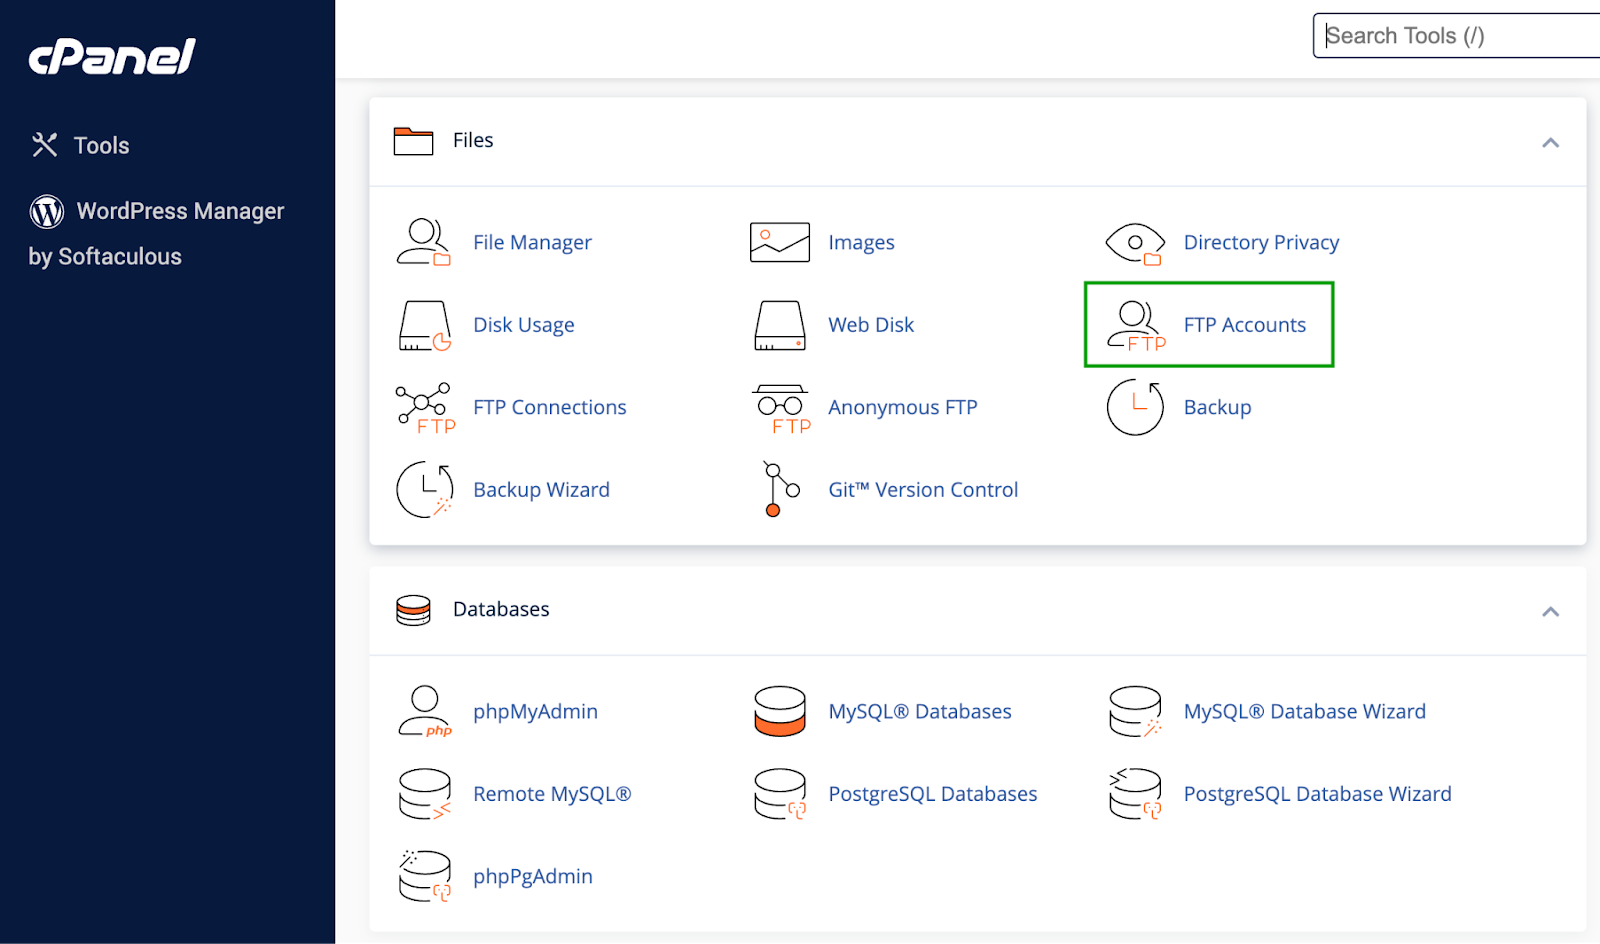
Simply open this section to find your FTP credentials.
Keep in mind that sometimes when you locate your FTP credentials, under “password” you’ll simply see something like “cPanel password”. If you’re not sure what that is, it’s usually the same password that you use for your hosting account.
Next, return to FileZilla and input your credentials:
Then click on Quickconnect. At this point, you may see a pop-up about a security certificate.
If you’re working with a trusted web host, you shouldn’t have to worry about this. Simply review the information and continue on.
When the process is complete, you should see your WordPress site’s files populate in the right-hand panel, under Remote site.

This means you’ve successfully connected your website to FileZilla, and you’re ready to create a WordPress backup with FTP.
Step 3: Create your WordPress backup with FTP
If you want to make a complete copy of your site’s files, and you’re using macOS, simply select the first row in the Remote site panel and hit “command a” on your keyboard.
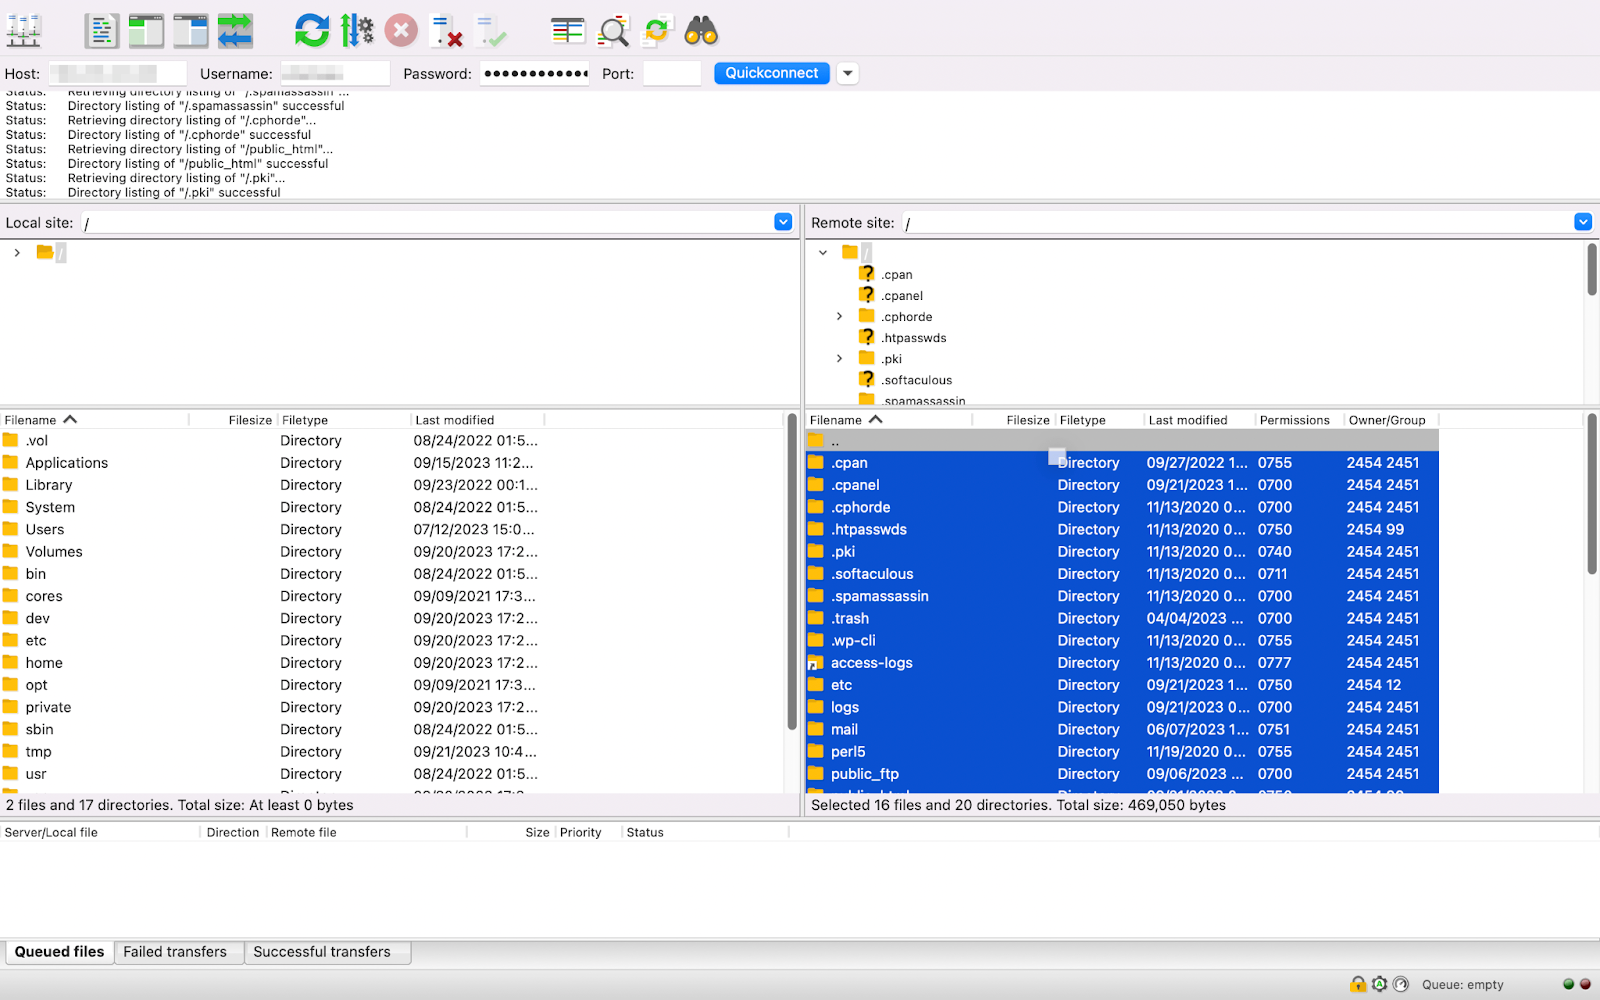
This allows you to select all of your website’s files. Then, drag them to the left side of your screen into the Local site section.
It’s a good idea to create a designated folder for your backup and drag it there for easy organization. You could title it something like “Complete WordPress backup”, followed by the date.
After your WordPress FTP backup is complete, you can then transfer it to a remote storage location for added security. That’s it!
How to back up your WordPress database
Now you know how to make a full backup of your site’s files using FTP. But you’re not quite done yet. A WordPress website is actually made up of two parts — its files and its database.
Therefore, if you want to make a complete WordPress backup, you’ll need to make a copy of your database as well. To do this, log in to your hosting account and navigate to your control panel.
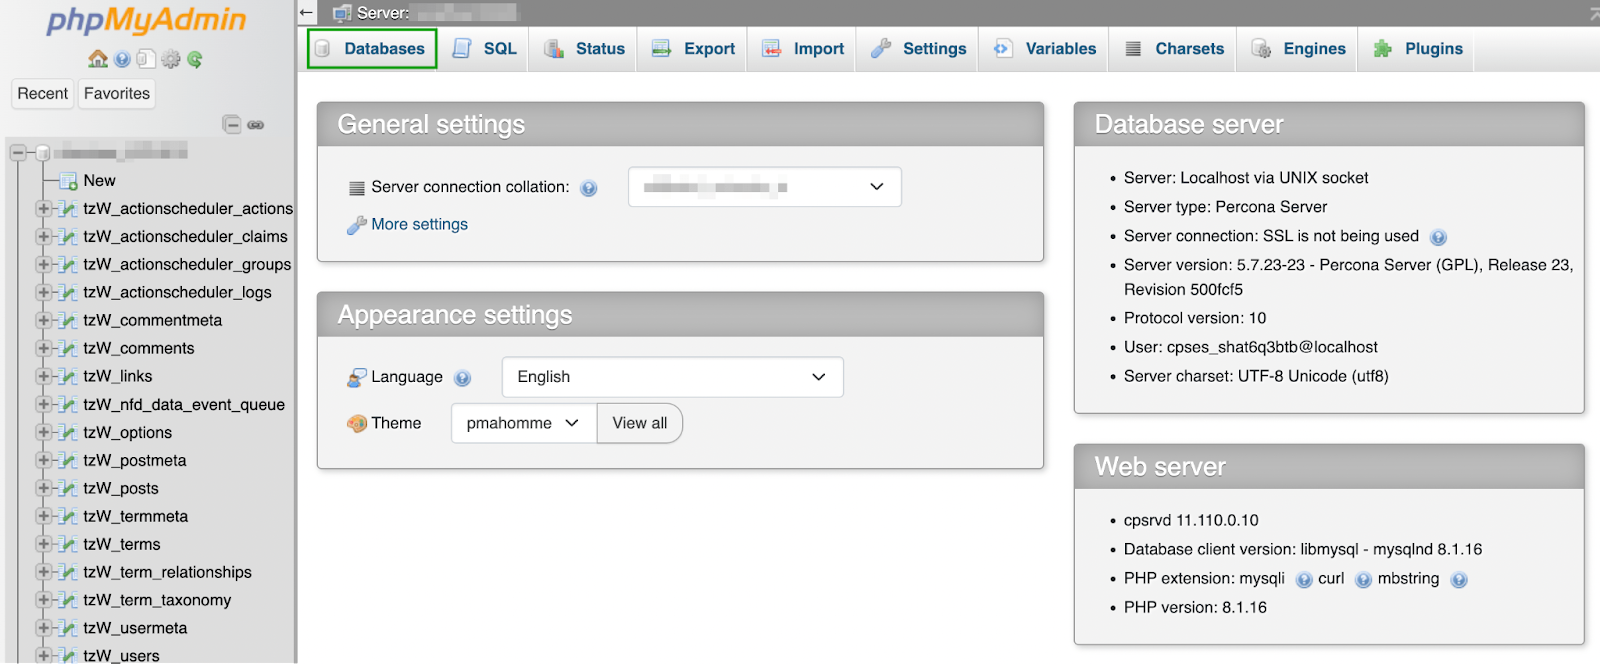
In many cases, this means accessing cPanel. Then, find the Databases section and select phpMyAdmin.

Next, navigate to the Databases tab.
Select your database. This will open a new screen that shows its tables. As you can see, there are tables for comments, posts, etc.

Select the tables you’d like to save. If you want to make a copy of everything, click on Check all at the bottom of the screen.
Then navigate to the Export tab. There, you’ll see two options for exporting your database.
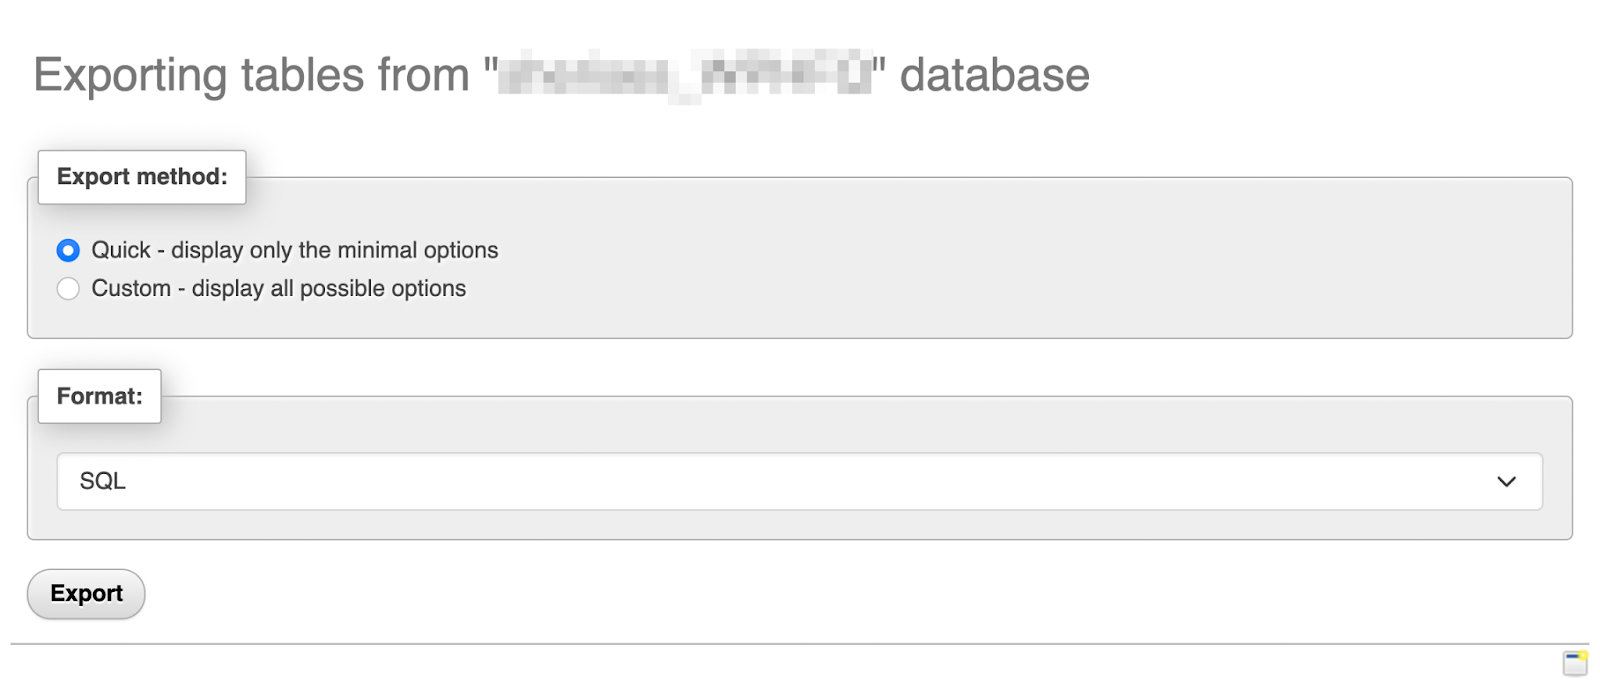
You can choose Quick or Custom. The second option gives you greater control over the data you export. For instance, it lets you deselect specific tables.

Make your selections and continue to the Output section.
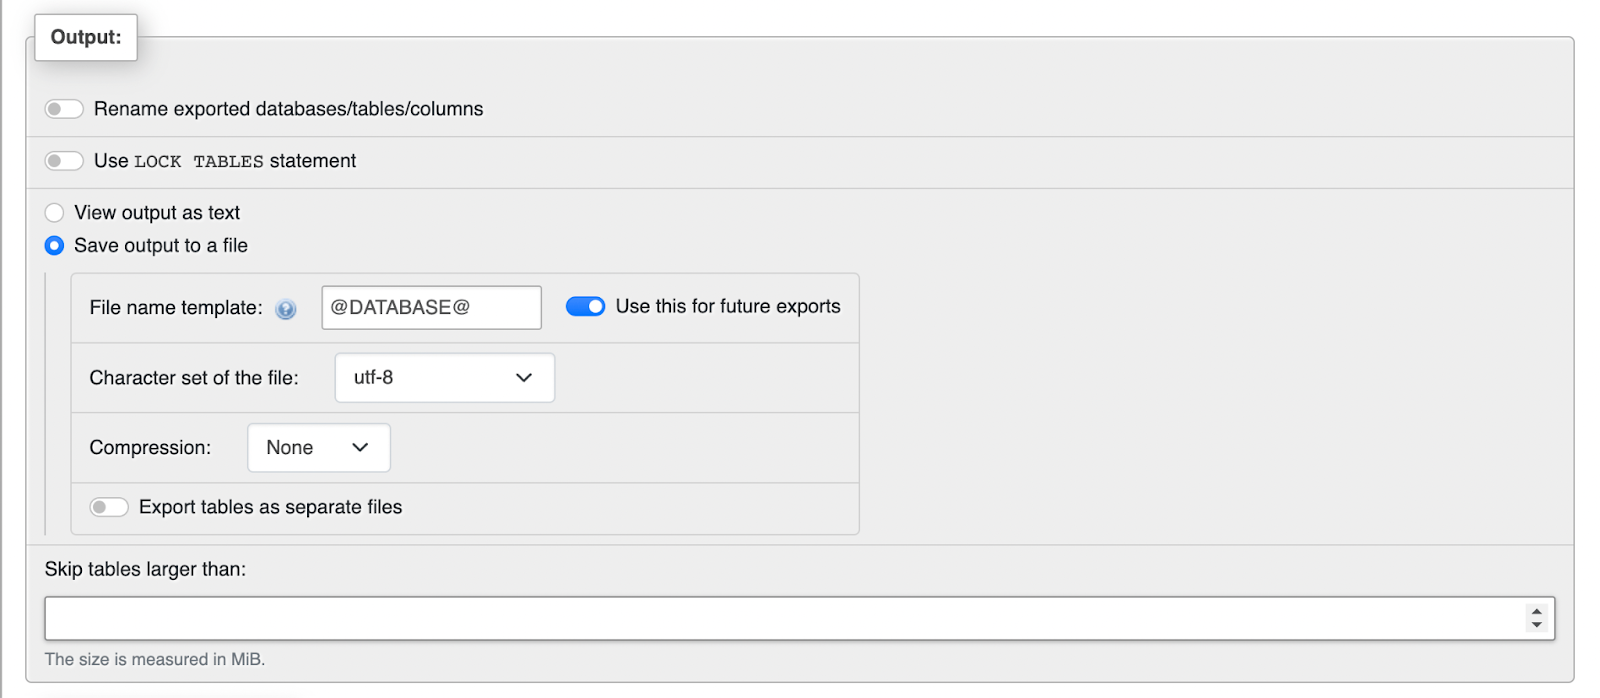
Here, you might want to select your preferred Compression method. You can probably leave all the other settings as they are.
Keep in mind that if you choose the Quick option, you won’t get these customization choices. Just make sure that the format is set to SQL.
Regardless of the export option you selected, scroll to the bottom of the page and hit Export when you’re ready. All that’s left is to save the copy alongside your FTP file backup.
How to restore a WordPress FTP backup
At this point, you’ve created a full backup of your WordPress site, complete with your site’s files and database. Next, you’ll want to know how to restore your WordPress site in case of an emergency.
Step 1: Import your website’s database backup
The first step to restoring your WordPress FTP backup is importing your database. Once again, you’ll need to log in to your hosting account.
Go to your control panel, find the Databases section, and open phpMyAdmin.
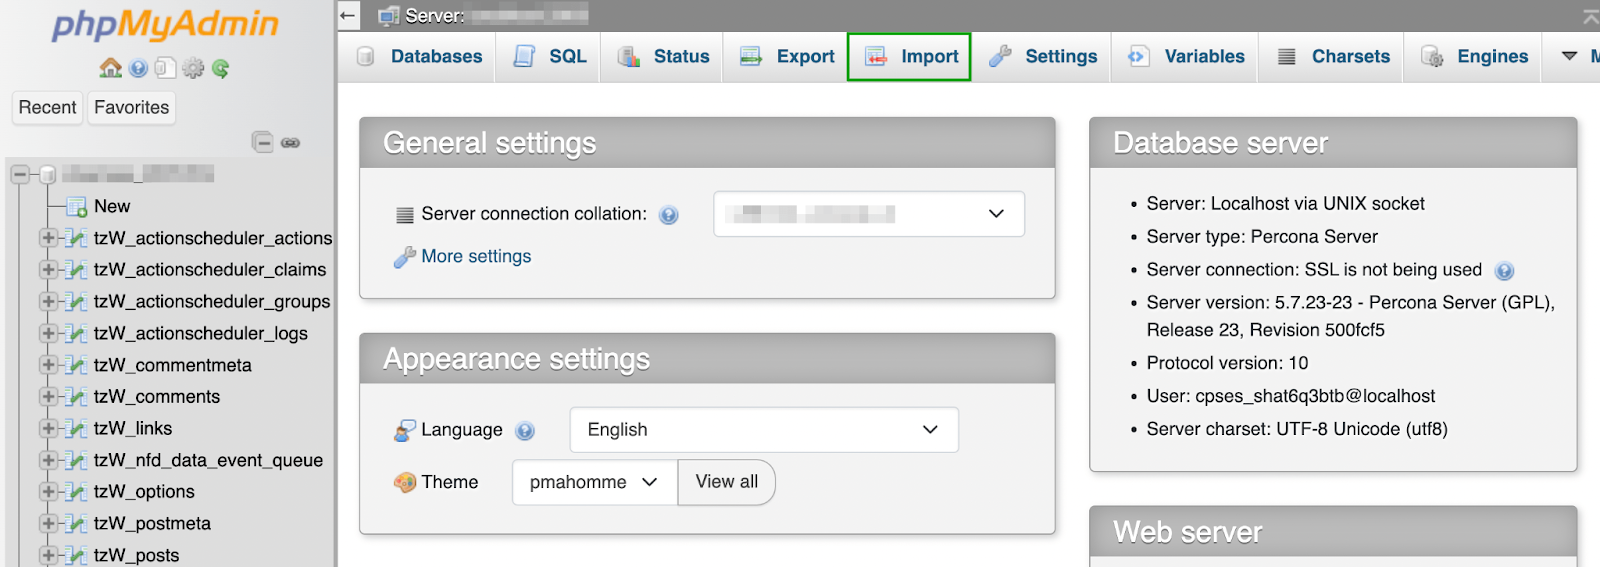
Then, navigate to the Import tab.

Click on Choose File and select the database copy you created in the previous section. Make sure your format is set to SQL.
Scroll down and hit Import. Keep in mind that this process may take a while.
Step 2: Upload your website’s backup files
Once you’ve imported your database backup, you’re ready to upload the file backup you created previously using FTP.
To do this, log back into your FTP client and reconnect to your WordPress site. Make sure your WordPress FTP backup is open and unzipped on the left (on your local device).
Then, highlight all your files on the right.

Right-click on your selection to open your menu, and select Delete to wipe all your old website files.
If you’re using FileZilla, now all you have to do is drag your WordPress FTP backup from the left to the right panel. Other FTP clients may have an “Upload” button or something similar.
Depending on how large your backup is, this could take a while. When the process is complete, visit your website to verify that it’s restored and working properly. That’s it!
How to automate the backup process with Jetpack VaultPress Backup
Now you know how to back up and restore WordPress using FTP. Keep in mind that this process only creates one complete backup. You’ll need to repeat these steps regularly to properly secure your WordPress site.
If you don’t want to deal with this process, you may be curious what your alternatives are. With that in mind, we’ll now look at how you can automate the entire backup process.
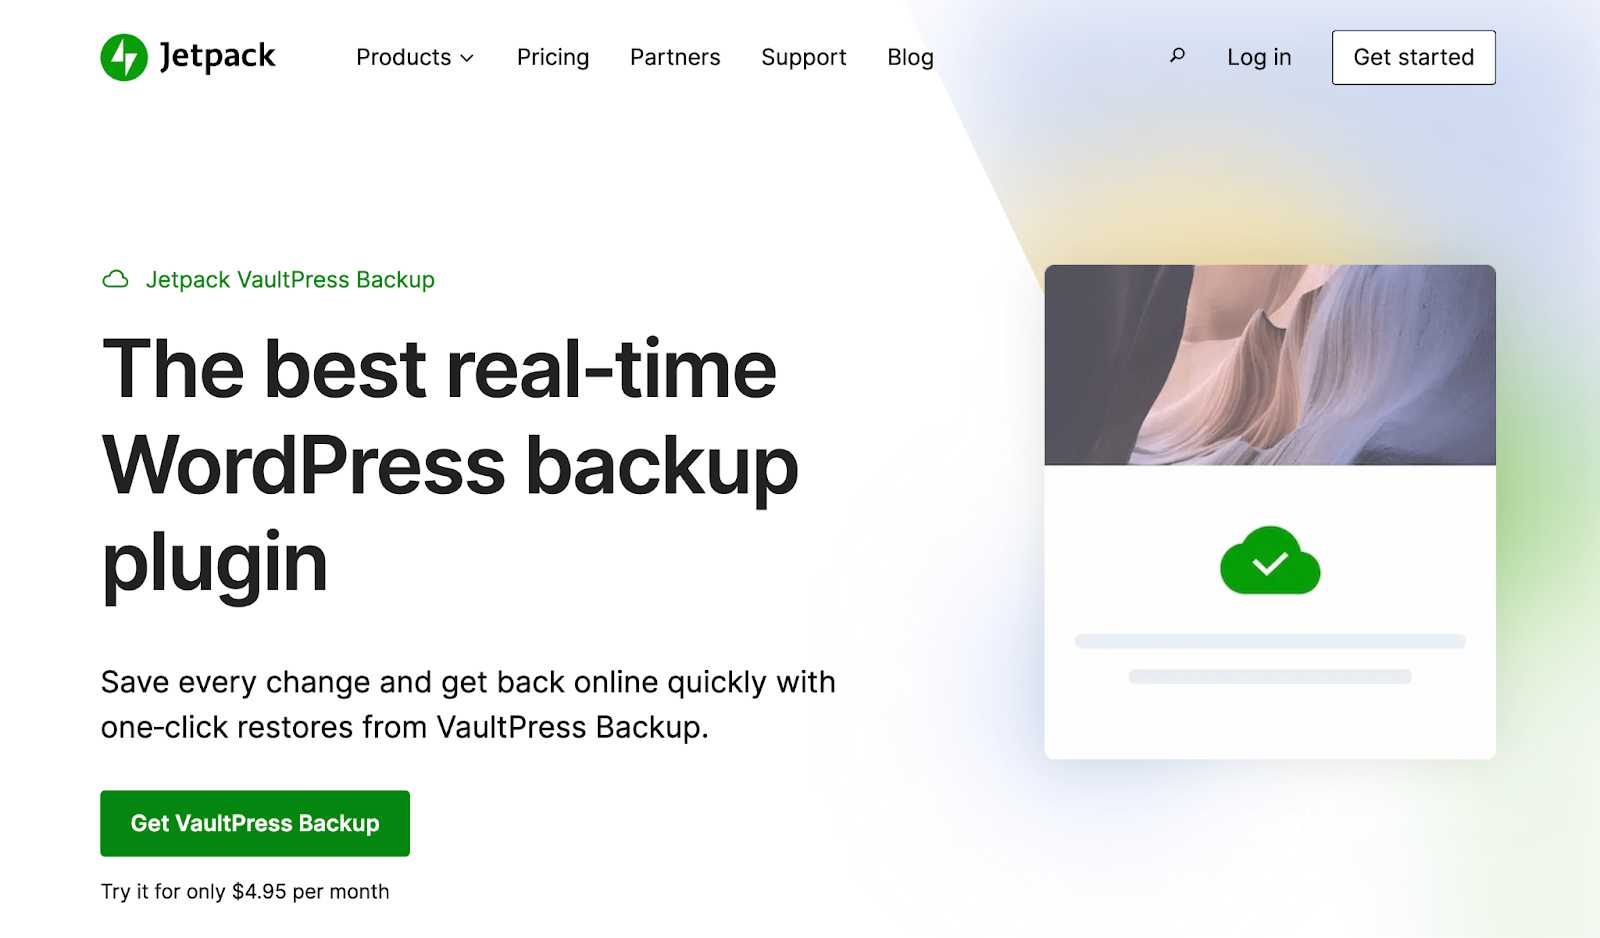
The best real‑time WordPress backup plugin
Save every change and get back online quickly with one‑click restores from VaultPress Backup.
Get VaultPress BackupWhat is Jetpack VaultPress Backup?
First and foremost, you might be wondering — what exactly is Jetpack VaultPress Backup?
To put it simply, it’s a powerful WordPress backup plugin that enables you to create real-time cloud backups and one-click restores.
It’s important to note that VaultPress Backup requires a premium Jetpack plan. Instead of the standalone VaultPress Backup plugin, you can also elect to access VaultPress Backup functionality through a Security or Complete plan on the Jetpack plugin. This option unlocks additional security and performance features that can take your site to new heights with an all-in-one WordPress tool.
Advantages of using VaultPress Backup vs. FTP backups
There are many advantages to using a backup plugin like VaultPress Backup, rather than conducting manual FTP backups.
The main benefit is simple — you’ll save lots of time and energy. As you’ve seen in the above tutorial sections, creating manual WordPress backups with FTP is a time-consuming process. Not to mention the fact that it might be a little daunting for WordPress beginners.
With VaultPress, you can configure the plugin to create backups in real time. Every change you make on your website will be saved immediately.
Additionally, when you create your own manual FTP backups, you’re responsible for finding a safe place to store your copies. On the other hand, VaultPress Backup provides you with access to ultra-secure off-site cloud storage.
How to back up your site with VaultPress Backup
Now, here’s how you can easily back up your site with VaultPress Backup.
First, you’ll need to purchase a premium Jetpack plan that includes VaultPress Backup. That means either Jetpack Security, Jetpack Complete, or the standalone version of VaultPress Backup.
To get started with Jetpack, you’ll need to install and activate the plugin of your choice and connect your website to your Jetpack account. Jetpack will guide you through this entire process, and it should only take a minute or two.
Once that’s done, navigate to your WordPress dashboard. Go to Jetpack → VaultPress Backup.
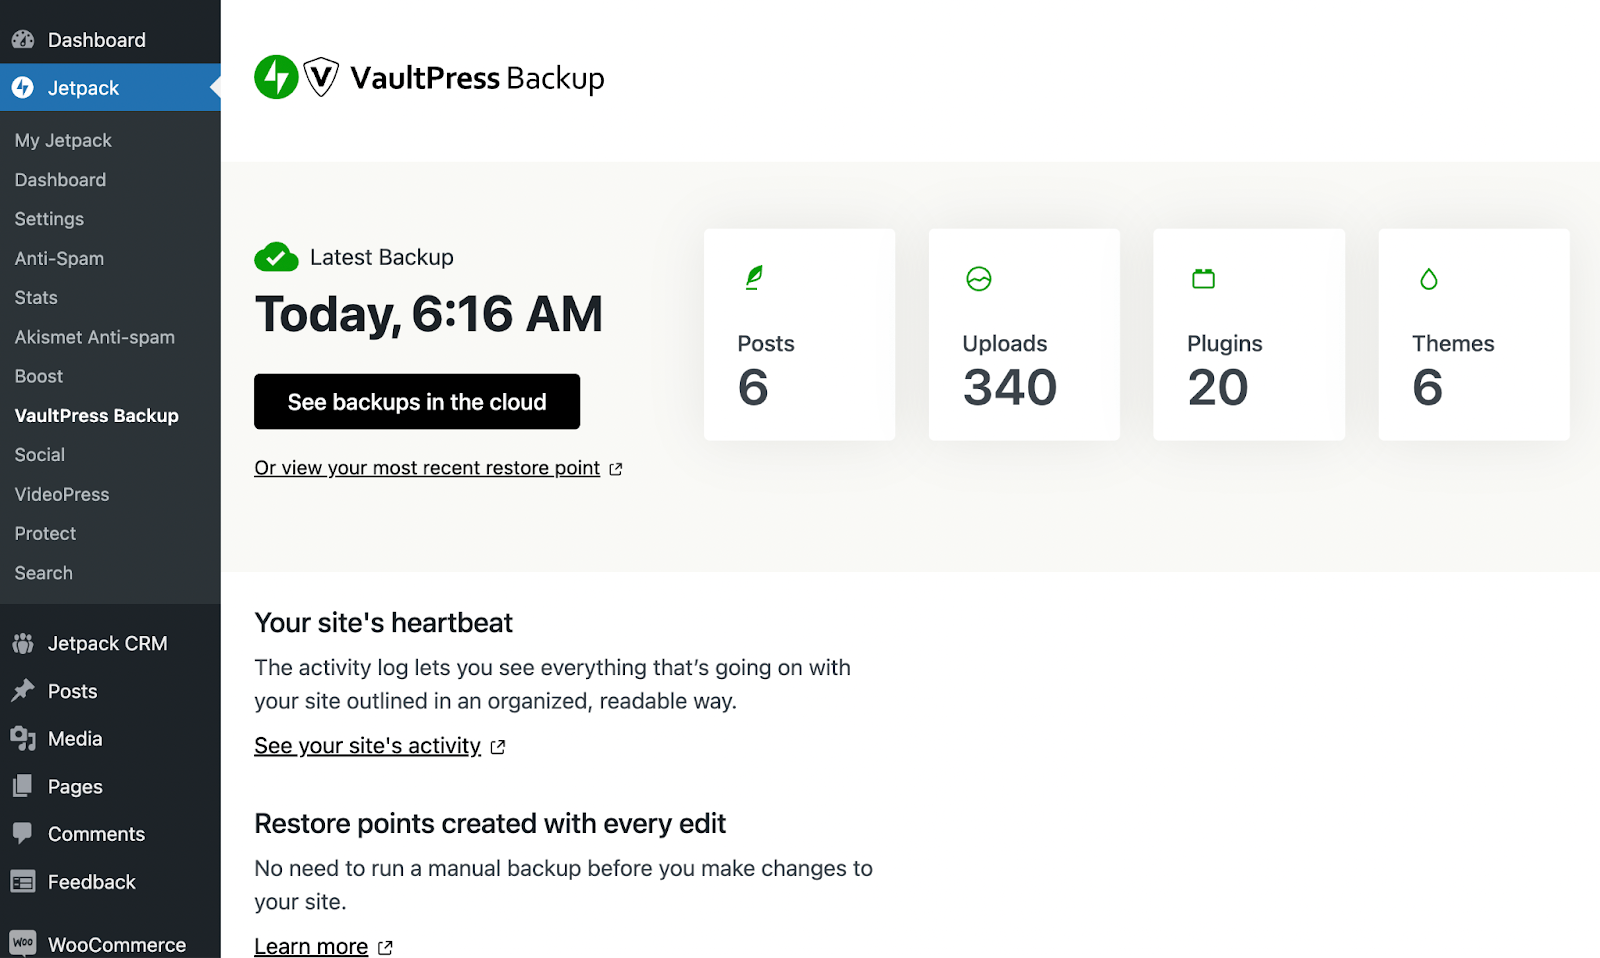
When you installed the plugin, it should have immediately started generating your first real-time backup (without any work from you). If it’s finished, you should see something similar to the above.
You can then click on the black button to See backups in the cloud, which will take you to your highly secure off-site storage. You can also check out your site’s “heartbeat” (a.k.a. its activity log) or your restore points.
As you can see, this is everything you’ll need to manage your WordPress backups! Jetpack VaultPress Backup can drastically simplify your backup workflow because it enables you to set it and forget it.
Frequently asked questions
So far, we’ve shown you how to create and restore a complete WordPress backup with FTP. We’ve even provided you with a faster, alternative approach to making WordPress backups.
If you still have any lingering doubts about any of these topics, here are some answers to frequently asked questions:
Why should I create backups of my WordPress site?
No matter what type of WordPress website you manage, creating backups is crucial. That’s because they can help secure your website’s content and data in case of an emergency.
For instance, you could be editing your website when your host experiences server issues, causing your site to break. While less likely, your site could also be hacked or infiltrated with malware.
If you have a recent backup at the ready, you’ll be able to restore your website and move on with your daily tasks.
When should I use manual FTP backups vs. an automated solution?
While creating manual FTP backups can be a good free solution for those on a budget, it has a lot of downsides. Most importantly, it’s not the most beginner-friendly option.
It requires you to install software for an FTP client, access your hosting credentials, and more. You’ll also have to manually back up your database separately using phpMyAdmin.
Meanwhile, a premium automated solution like VaultPress Backup allows you to set it and forget it. All you have to do is install the backup plugin, and the rest will be taken care of for you. Plus, with VaultPress, your backups are stored in a secure offsite location. If you use FTP, you’ll have to find a place to secure your large backup files.
Can I use any FTP client software for creating backups?
You can use a variety of FTP client software to access your website’s files. Then you’ll need to create the backup manually by copying all the files and saving them to your local device.
Since saving backups on your computer isn’t the most secure strategy, you might want to transfer them to a cloud storage solution.
Additionally, you can’t access your website’s database using an FTP client. So, if you want a complete WordPress backup, you’ll need to export your database. With WordPress, you can usually access it in your web host’s control panel using phpMyAdmin.
Popular FTP clients include FileZilla and Cyberduck.
How often should I perform backups of my WordPress site?
Ideally, you should keep real-time backups of your WordPress site. That way, you’ll never lose any important changes.
If you’re looking for a backup solution with this advanced feature, Jetpack VaultPress Backup is the best option. It creates automatic real-time backups and stores them safely in cloud storage. Plus, you’ll get one-click restores, so managing your backups couldn’t be easier.
What files and folders should I include in my FTP backup?
When you create an FTP backup, you’ll want to include all the essentials, like themes, plugins, etc.
If you’re not very familiar with file management, it’s best to include all of your site’s files in your FTP backup, just to be safe. This way, you don’t exclude any important information accidentally.
Do I need to back up my WordPress database separately from the files?
If you’re creating a WordPress backup with FTP, you’ll need to back up your database separately. That’s because you won’t be able to access it using your FTP client.
On the other hand, if you use an automated solution like VaultPress Backup, the plugin will back up both your website’s files and database for you.
How can I ensure the integrity of my backup files during the FTP transfer?
Unfortunately, you can’t secure the integrity of your backup files during FTP transfer. For a superior transfer process, you can use SFTP (secure file transfer protocol) instead.
Are there any limitations when using FTP for WordPress backups?
Using FTP can be a time-consuming process, and it’s not the most beginner-friendly method. You’re also accessing your site’s files directly, which means that mistakes can be costly.
Furthermore, you can’t create a database backup when using FTP. You’ll have to do that manually from your hosting provider’s control panel.
Jetpack VaultPress Backup: Automated real-time backups for WordPress
If you manage a WordPress site, creating regular backups is critical for web security reasons. That’s because, in the case of a hacking event, severe server malfunctions, or malware infiltration, a backup can save you from losing all of your data and content.
You can create a WordPress backup with FTP, using a tool like FileZilla. Then you can access your web host’s control panel to create a copy of your database as well, thereby securing your site’s posts, pages, and more. After that, you’ll need to find a secure place to store your FTP backup.
Or, you can skip the hard work and opt for an automated solution — Jetpack VaultPress Backup. This tool ensures that you always have a recent (and complete) backup to restore, without the hassle.
The best real‑time WordPress backup plugin
Save every change and get back online quickly with one‑click restores from VaultPress Backup.
Get VaultPress Backup