
If you have a WordPress site, it’s important to make sure that your file permissions are set correctly. The wrong settings can break parts of your site, stop you from uploading files, or even open it up to attackers.
In this guide, we’ll walk you through what file permissions are, which settings you should use, how to apply them, and how to fix related errors. You don’t need to be a developer to follow along, but if you are, you’ll still find value in the technical examples.
What are file permissions?
File permissions are rules set on your server that control who can read, write, or run your website’s files and folders. These rules help keep your website secure and working properly.
Each file or folder has three types of users:
- Owner: Usually the user who installed or manages the site
- Group: Other users in the same group on the server
- Public: Everyone else
Each user type can be given three types of access:
- Read: Can view the contents
- Write: Can change the contents
- Execute: Can run the file, or open the folder
File permissions are represented by three-digit numbers. For example, 755 means:
- Owner has read (4), write (2), and execute permissions (1), which total to 7
- Group has read (4) and execute (1), which come to 5
- Public also has read (4) and execute (1) permissions, which total to 5
The wp-content directory, which contains your WordPress themes, plugins, uploads, and other files should always have its permissions set to 755. This means that only the owner has full access to these important files.
Default WordPress permission settings
By default, WordPress sets secure permissions to protect your website. Directories (or folders) like wp-content are set to 755. This means they need execute permission to be opened.
Meanwhile, files are assigned 644 permissions. This means that the owner can read (4) and write (2) the files, and the group and public can only read (4) the files. So, all the files within the wp-content directory (plugins, themes, etc) will have 644 permissions.
The .htaccess file, which controls the configuration of your server, is typically set to 644 as well.
The wp-config.php file has stricter file permissions: 600 or 640. This file contains essential database connection details and security keys, so access is typically limited to the owner.
If permissions are too loose (like 777), anyone can do anything with your files, which poses a huge security risk. At the same time, if permissions are too strict, you’ll have very little control over your site.
Quick file permission cheat sheet
| Item | Recommended Permission |
| All folders | 755 |
| All files | 644 |
| wp-config.php | 600 or 640 |
| .htaccess | 644 |
| wp-content/uploads | 755 |
How to check your current file permissions
Now, let’s look at how to check your file permissions to make sure that your website is secure.
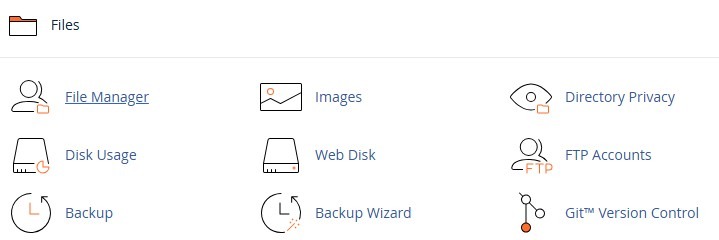
To do this, you’ll need access to your site’s hosting account. Here, log into the cPanel and open the File Manager.
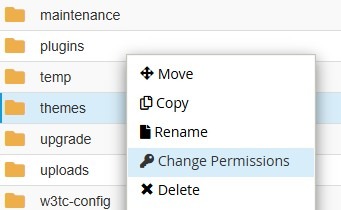
Now, go to your site’s root directory, which is typically named public_html. Right-click on any file or folder, and select Change Permissions.
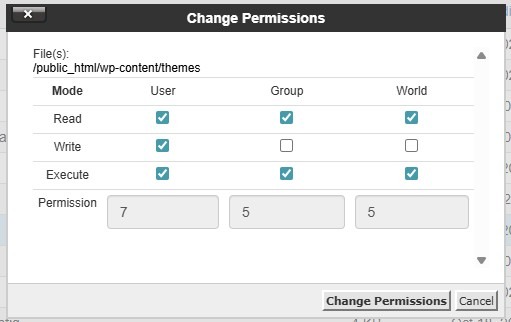
A window will open, where you can view and change permissions.
Alternatively, you can use a file transfer protocol (FTP) client like FileZilla to connect to your site’s backend. You’ll need your FTP credentials, including host (server IP or hostname), username, password, and port number. You can find this information in your hosting account.
To check file permissions via FTP, you just need to follow the same steps.
You can also use a terminal or SSH client to connect to your server (if your host allows it). Open your terminal and connect to your server via SSH:
ssh username@your-server-ipReplace username with your server’s user account (often root or a specific user) and your-server-ip with your server’s IP address or domain.
Now, navigate to your WordPress directory and use the following command to view file permissions:
ls -lIf you want to view all permissions within the WordPress directory, use this command instead:
ls -lRIf something doesn’t look right, don’t worry — you can change the permissions.
How to fix permissions (step-by-step)
Before you make changes to your permissions, you’ll want to back up your website. This way, if you make a mistake or something goes wrong, you’ll be able to restore your files and folders.
Let’s look at two main ways to edit permissions in WordPress.
If you have SSH access
Connect to your server via SSH and navigate to your WordPress folder with the following command:
cd /path/to/wordpressTo set all folders to 755, use this command:
find . -type d -exec chmod 755 {} \;To set all files to 644, use the following:
find . -type f -exec chmod 644 {} \;To lock down wp-config.php, enter the following:
chmod 600 wp-config.phpIf your server needs the group to have access, use 640 instead.
If you’re using an FTP client or the File Manager
Access the WordPress directory as shown earlier, then right-click on the folder and choose Change Permissions.
Enter 755, tick the box to apply to directories only, and save your changes. Now, do the same again with 644, this time for files only.
You may also want to change file permissions for wp-config.php to 600 or 640.
What about ownership?
Permissions work hand in hand with ownership. Each file has a user and a group assigned. If your web server (like Apache or Nginx) doesn’t “own” the files, it can’t write to them.
In SSH, run the command ls -l. You’ll see the owner and group names in the third and fourth columns.
If you have root access, you can also fix ownership by running the following command:
chown -R www-data:www-data /path/to/wordpressReplace www-data with your server’s web user. On some hosts, this might be Apache, nginx, or your account username.
If you don’t have root access, contact your hosting provider and ask them to fix ownership for you.
Common errors caused by wrong permissions (and how to fix them)
Wrong permissions can trigger errors on your website. Let’s look at some common issues and how to fix them.
403 Forbidden errors
This error usually means the server can’t access a file or folder. To fix it, make sure that folders are set to 755 and files 644.
Also, wp-config.php should not be publicly accessible. Permissions for this file should be 600 or 640.
“Unable to create directory” or “Could not write file”
This is a common problem when uploading media or installing plugins. To troubleshoot it, check that the wp-content/uploads folder is 755 and make sure the web server owns the folder.
Also, avoid using 777 for the upload folder unless absolutely necessary. These permissions allow anyone to access the uploads folder.
Plugin or theme update failures
These happen when WordPress can’t write to the file system. Apply the correct permissions (755 for folders and 644 for files) and make sure ownership is correct. Files should be owned by the web server user (e.g. www-data on Ubuntu/Debian, apache on CentOS).
If prompted for FTP credentials, add the following code to the wp-config.php file:
define('FS_METHOD', 'direct');Use this only if you trust your host’s setup. Remove the line if problems occur.
We guard your site. You run your business.
Jetpack Security provides easy‑to‑use, comprehensive WordPress site security, including real‑time backups, a web application firewall, malware scanning, and spam protection.
Secure your siteBlank screen or 500 error
A white screen often means a PHP error or wrong file permissions. Once again, make sure that you have the correct file permissions and ownership. A recent update may have affected these permissions.
If you have access, you can check your server error logs to identify the cause. You also have the option to enable debugging in wp-config.php. Just add the following lines of code:
define('WP_DEBUG', true);

define('WP_DEBUG_LOG', true);

define('WP_DEBUG_DISPLAY', false);
Then, check the wp-content/debug.log file.
There might also be an issue with the .htaccess file. So, rename it and reload the site. If it works, simply generate a new .htaccess file by going to your WordPress dashboard and clicking on Settings → Permalinks → Save Changes.
Best practices to keep your WordPress site secure
There are many things you can do to protect your website. Firstly, you’ll want to make sure that no files and folders on your site are set to 777, as this would allow anyone (including hackers) to make changes to them.
As mentioned earlier, it’s also important to back up your site before making changes to your permissions. This way, you won’t lose any content or data if something goes wrong.
Keeping your plugins, themes, and core files up to date is also essential for site security. Outdated software can cause compatibility issues that affect your site’s performance, while also making it easier for malicious users to access your files and folders.
Another best practice is to use a security plugin to monitor changes on your website. With regular scans, you can catch permission issues early and rectify them in a timely manner.
Final steps to confirm your file permissions are correct
Now that you know how to check and edit file permissions, here’s how to ensure that they are correct. Once you’ve made your changes:
- Try uploading an image to see if it works.
- Update a plugin.
- Browse your site to make sure nothing is broken.
If anything still seems off, ask your host to check ownership settings.
Add a layer of protection with a security plugin
Setting the correct file permissions is a good starting point. But if you’re serious about keeping your site safe, go one step further.
You still need protection from malware, unexpected file changes, spam, and failed backups.
That’s where Jetpack Security comes in. This is a complete protection bundle for WordPress sites. It includes three powerful tools that work together to keep your site healthy and secure:
- VaultPress Backup: This automatically backs up your site in real time. So, if a bad plugin update or file issue occurs, you can restore everything with just a few clicks.
- Jetpack Scan: It monitors your site for malware, suspicious code, and unauthorized changes. It also lets you fix most issues with one click, directly from your WordPress dashboard.
- Akismet: It filters spam comments and form submissions before they reach your site, saving you time and helping your site load faster.
These tools work quietly in the background. You don’t need to log into multiple services or learn how to use complicated settings. Everything stays inside your WordPress dashboard. You get alerts when something looks wrong, and you have options to take action right away.
Combining the right file permissions with active scanning, backups, and spam protection gives you full control over your site’s safety. With Jetpack Security, you’re not just reacting to problems; you’re staying ahead of them. Get started today!
Frequently asked questions
What are the recommended WordPress file permissions?
For most WordPress sites: set folders to 755 and files to 644. Use stricter permissions for wp-config.php (600 or 640) and keep .htaccess at 644.
Should I ever set WordPress permissions to 777?
Setting WordPress permissions to 777 creates a major security hole on your site and should be avoided. This code gives every user on your server the ability to read, write, and execute your files. If a hacker finds a file with 777 permissions, they can add malicious scripts or delete essential content without any restrictions.
You should never use 777 for any file or folder on a live website. Even if a plugin or theme developer asks you to change permissions to 777 for troubleshooting, you must change them back to safer settings like 755 or 644 immediately after you finish.
Why do I see a 403 Forbidden error after changing file permissions?
A 403 Forbidden error usually means your server configuration blocks access because the permissions are too strict. If you set a folder to 700 or a file to 600, the web server might not have the rights to read the content it needs to display your page.
This often happens when you remove “read” access for the “World” or “Group” categories in your FTP client. To fix this, access your site via FTP and reset your folders to 755 and your files to 644. These settings allow the server to read the files while keeping them secure.
How can I reset all file and folder permissions in WordPress at once?
You can reset all permissions at once using an SSH (Secure Shell) connection if your hosting provider offers it. This method is much faster than changing them manually one by one.
Once you log in to your server via the command line, you can run specific commands that target all folders to set them to 755 and all files to set them to 644. However, you need to be very careful with these commands. A simple typing mistake could break your entire site. If you are not comfortable using command lines, ask your web host support team to run a batch reset for you.
Can correct file permissions prevent my WordPress site from being hacked?
Correct file permissions act as a strong barrier against many types of attacks, but they are not a complete cure-all. They limit what an unauthorized user can do if they gain access to your system. For example, if a hacker gets in through a vulnerable plugin, proper permissions might stop them from rewriting your core configuration files.
However, permissions cannot stop attacks like SQL injections or weak passwords. You should view file permissions as one essential layer of defense that works best alongside a reputable security plugin, strong passwords, and regular updates.
What is the difference between 755 and 644 permissions?
The difference lies in who can execute the file or folder. The code 755 is typically used for directories (folders). The “7” allows the owner to do everything, while the “5” allows everyone else to read and execute the folder contents but not write to them. This “execute” permission is necessary for folders so you can navigate inside them.
The code 644 is used for individual files. It allows the owner to read and write, while everyone else can only read. Files rarely need the “execute” permission unless they are specific scripts, which is why 644 is safer for documents, images, and PHP files.
What permissions should wp-config.php have?
Use 600 when possible. If your host requires group access, use 640. wp-config.php contains database credentials and security keys, so it should be more restricted than normal files.
We guard your site. You run your business.
Jetpack Security provides easy‑to‑use, comprehensive WordPress site security, including real‑time backups, a web application firewall, malware scanning, and spam protection.
Secure your site