Test changes and debug issues without risks to your self-hosted production site, by cloning to an existing staging site in just a few clicks.
Before you start
Before cloning your production (live) site to a staging site, please make sure:
- Your live site is online and accessible.
- Your live site is a self-hosted Jetpack site. This process will not work for sites hosted on WordPress.com.
- Your staging site is online and accessible.
- While not strictly necessary, a fresh WordPress installation on your staging site is highly recommended. This is because the clone/copy process will not delete any files currently on the destination site.
Copy your website
To clone your site to a staging site, using Jetpack VaultPress, please follow these steps:
- Set up SSH/SFTP/FTP credentials on your live site, according to our guide about adding credentials.
- Set up your staging site, according to the process of the host. The staging site must be accessible online, with a URL that is different from your live site.
- At cloud.jetpack.com/backup, click the Copy site button.
- Enter the server credentials for the staging site, when prompted.
- Select Clone from latest point to clone using the most recent backup. To clone from an earlier backup, scroll down and find the backup in your Activity Log, then click Clone from here.
- Select the items you wish to clone and click Confirm configuration.
- A final confirmation message will appear to confirm you want to overwrite all content on the destination site with the content from your backup. Click Yes, Continue to begin the cloning process.
- Follow the cloning progress from the Jetpack Cloud dashboard, or click Go to Activity Log to return to your site’s Activity Log.
Note: when using a staging site, Jetpack VaultPress Backup doesn’t keep your production and staging sites in sync. Any changes you make to the live site will need to be cloned to staging each time. Follow these steps to sync changes from production to staging:
- Click on the ‘Backup now’ button to create a new and current backup of your production site from here: https://cloud.jetpack.com/backup/
- Once the backup is complete, select ‘Copy site’ from the same page.
- To initiate the cloning process, select your staging site as the destination from the list of available sites.
Log in to your staging site
After cloning your site, you’ll be prompted to log in to your staging site. For that, use the WP-Admin username and password for the site you copied from. The cloning process overwrites everything, including the WP Admin user information. It also automatically updates all of your site’s URLs.
Important: After logging in to the staging site, the Jetpack Safe Mode prompt will be shown everywhere on the dashboard. More information about Safe mode is here.
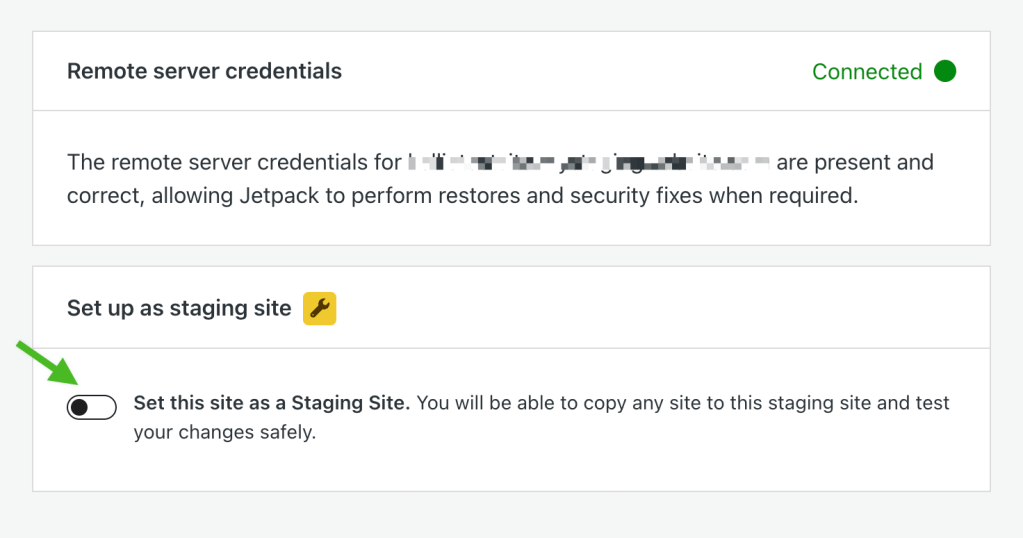
Turn an existing site into a staging site
You can turn any Jetpack-connected website with a paid backup plan into a staging site to use for quick testing later. Follow these steps:
- Enter and save your remote server credentials under cloud.jetpack.com/settings
- Click the toggle to Set this site as a Staging Site.
Still need help?
Please contact support. We’re happy to advise.
