
Sometimes, you need to take a page offline. Whether you’re cleaning up old content, revising a page, or simply no longer need a post live on your site, knowing how to unpublish content in WordPress is a skill worth having. Fortunately, WordPress provides a few options to control visibility without permanently deleting your content.
This guide explains the different ways to unpublish a post or page in WordPress. You’ll learn when to make content private, password-protected, or hidden from search engines, depending on your goals. Let’s get started!
TL;DR
- Choose the right unpublishing method: draft, private, password protected, trash, noindex, or redirect.
- Use Draft when you want to remove the page from public view and continue editing.
- Use Private or password protection when limited access is still needed.
- Use Trash only when the page is no longer needed and can be restored temporarily if required.
- Use a 301 redirect when the page has traffic, backlinks, rankings, or an obvious replacement page.
- Use
noindexwhen the page may stay accessible but should not appear in search results. - Update menus, internal links, sitemaps, and campaign links after unpublishing.
- Test the old URL as a logged-out visitor to confirm the outcome.
Why unpublishing might be necessary
Unpublishing isn’t a last resort. Instead, it’s a practical way to manage your content and keep your site accurate. Here are a few situations where unpublishing makes sense:
- You need to remove outdated or inaccurate information: Old content misleads visitors and weakens your site’s credibility. Take it down to maintain trust.
- You’re overhauling your content or redesigning your site: Unpublish pages while you make updates to avoid confusing your audience.
- The content is seasonal or time-sensitive: Once the moment passes, take the page offline to keep your site relevant.
- You’re rewriting for SEO or readability: Unpublish posts during major edits so visitors only see high-quality, optimized content.
- The content violates legal, privacy, or compliance standards: Take it offline immediately to avoid exposure to regulatory risk.
Once you’ve clarified the reason, you can select the method you’ll use to unpublish content — whether that’s switching to draft, marking it private, or adding password protection.
How to unpublish a single page or post
If you only need to remove one post or page from public view, WordPress gives you two simple options. You can either switch the content back to draft or make it private, depending on whether internal users still need access.
Switch a post or page to draft
Use this method when you plan to update and republish the content later:
- Go to Pages or Posts in your WordPress dashboard.
- Hover over the item you want to remove and click Edit.
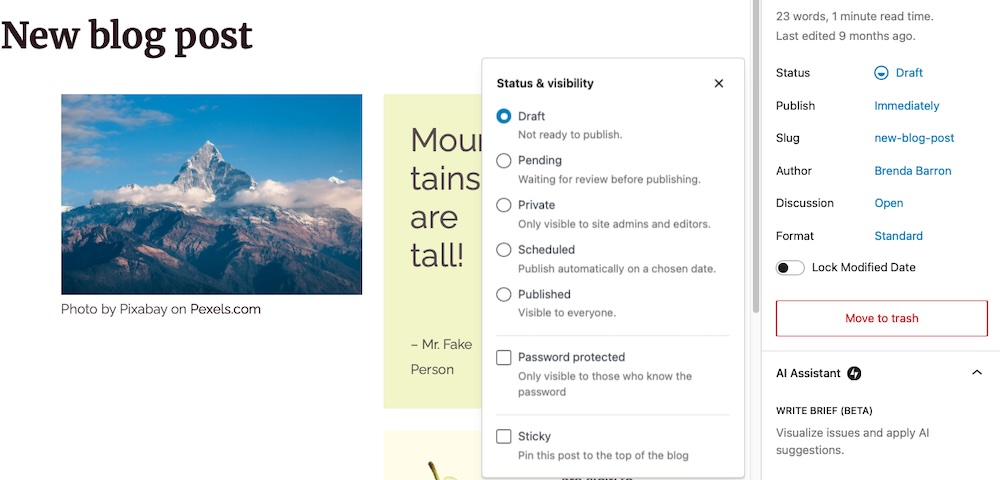
- In the editor, find the Status section and click it to open the Status & visibility module.
- Click Draft and confirm your selection.
Once unpublished, the content disappears from your live site but stays in your dashboard, ready to be updated and republished whenever you’re ready.
Make the content private
Use this method when only logged-in admins and editors should see the content:
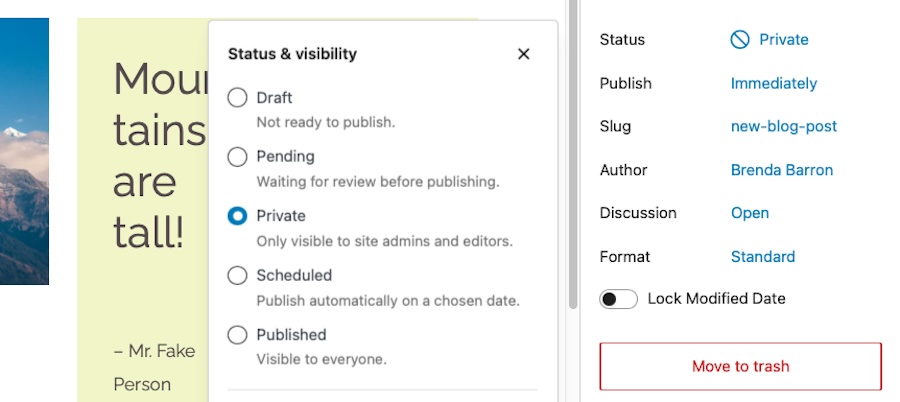
- Open the page or post in the editor, then locate Status. Click it to view the Status & visibility panel.
- Select Private and save your changes.
WordPress publishes the content with restricted visibility. Only admins and editors can view it while it stays hidden from the public and search engines.
How to unpublish multiple pages at once
If you need to remove a batch of posts or pages, like outdated content or landing pages from a completed campaign, WordPress lets you unpublish them all in one go.
Use the bulk edit tool
- In your WordPress dashboard, go to Posts or Pages.
- Select the checkboxes next to the items you want to unpublish.
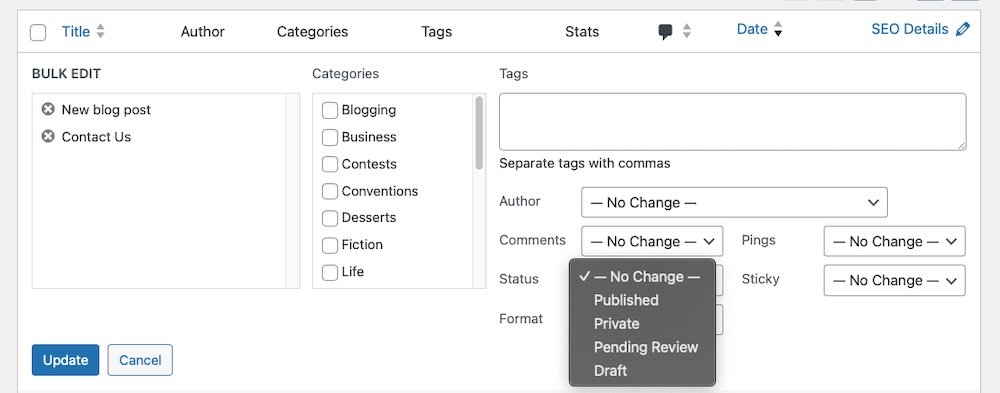
- In the Bulk actions dropdown, choose Edit and click Apply.
- In the bulk editor that appears, change the Status to either Draft or Private.
- Click Update to apply the changes.
This method removes the selected content from public view without deleting it, saving time when you need to manage multiple posts or pages.
How to limit access without unpublishing: password protection
If you don’t want to fully unpublish a post or page but still need to control who sees it, password protection offers a simple solution.
To configure your site so a password is required to restrict access, complete the following steps:
- Open the post or page as usual.
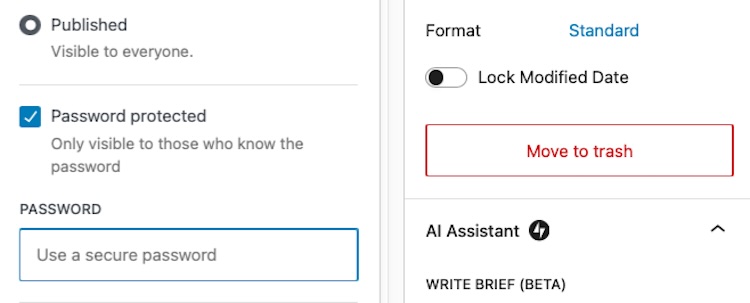
- Click Status to open the Status & visibility section, then select Password protected.
- Enter a secure password and click Update to save your changes.
Only visitors with the password can view the content. WordPress applies the password to the post or page and not to media files. If someone has the direct URL to an image or file, they can still access it unless you take extra steps to secure those assets.
This method works well for client-specific pages, internal resources like press kits, or content awaiting final review. If you use the same password on multiple posts, visitors only need to enter it once per session to access all related content.
How to temporarily hide the whole site
If you need to take your entire site offline for maintenance, a redesign, or testing, WordPress doesn’t offer a built-in option. Thankfully, plugins can take care of this for you.
The most powerful AI tool for WordPress
Turn your ideas into ready-to-publish content at lightspeed.
Elevate your contentEnable maintenance mode
Maintenance mode displays a temporary message to visitors while keeping the dashboard accessible to logged-in users. To configure this, you’ll need to install a plugin like Maintenance. Once installed, open the plugin’s settings and enable maintenance mode.

Customize the message shown to visitors, then save and activate your changes.

Only authorized users who are logged in will be able to browse the site. Make sure the plugin sends a 503 Response Code. Enable this under the Advanced Settings section.
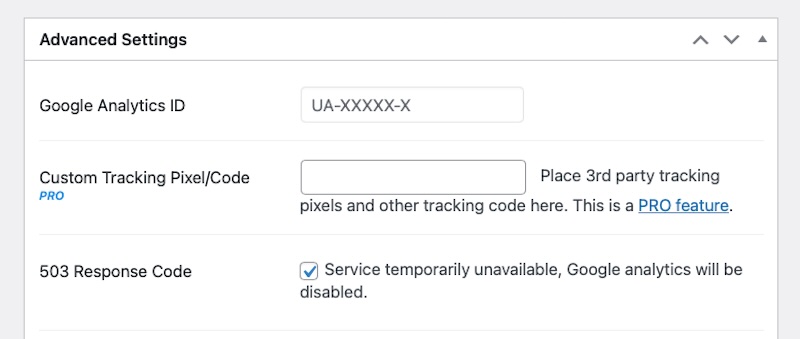
This signals to search engines that the downtime is temporary and prevents them from indexing an incomplete or broken version of your site.
Discourage search engine indexing
If your site is live but not ready for public viewing, you can ask search engines not to index it — no plugin required.
To do this, go to Settings → Reading in the WordPress dashboard. Then, check the box next to Discourage search engines from indexing this site. Click Save Changes to confirm.
Keep in mind that this is a request, not a command. Most search engines respect it, but it doesn’t guarantee exclusion from search results.
Managing redirects and internal links
Unpublishing content, especially permanently, can create broken links and frustrate your visitors. To avoid this, update your redirects and clean up internal links.
Set up redirects for removed content
If you’ve unpublished a piece for good, redirect its URL to a related piece of content. A plugin like Redirection comes in handy for this. Use it to set up a 301 redirect from the removed URL to the new destination.
This keeps visitors and search engines on track and prevents error pages from showing up.
Clean up your internal links
After you unpublish a page, check the rest of your site for links that still point to it. If you find any, edit or remove those links in your posts, pages, menus, or widgets.
If you don’t want to go the manual route, use a plugin like Broken Link Checker to scan for outdated URLs instead.
Fixing broken links maintains a smooth experience for your visitors and avoids unnecessary confusion.
What to check before and after unpublishing
Unpublishing a page or post might seem simple, but it affects traffic, SEO, and user experience — especially on larger or content-heavy sites.
Here’s what to review before and after you take content offline:
Before unpublishing
Take a moment to assess the role the content plays on your site before you unpublish it:
- Check for critical traffic and backlinks: Use tools like Jetpack Stats or Google Search Console to see if the page receives steady traffic or has valuable backlinks. If it does, plan a redirect to preserve that value.
- Decide if the content will return or be replaced: Knowing whether you’re taking the content down temporarily or permanently helps guide your next steps. A short-term draft may not need a redirect, but a permanent removal does.
- Create a backup: Before you make any changes, save a copy of the page or post. Most backup plugins like Jetpack VaultPress Backup let you download content or restore it later if needed.
- Notify your team: Let your team know if you’re unpublishing shared content — like landing pages or internal resources — so no one’s looking for it later.
After unpublishing
Once the content is offline, check for issues and update your site accordingly:
- Verify that the change is live on the front end: Visit the page’s URL in an incognito window or logged-out browser to make sure it’s no longer accessible.
- Test redirects if you’ve set them: If you redirected the content, confirm that the new destination loads correctly.
- Monitor for 404 errors and lost traffic: Use analytics tools to track any spikes in 404 errors or dips in traffic. Jetpack Stats, again, helps you catch issues early.
- Update your content records: Document the change in your content audit or editorial calendar. Keeping track of what’s been removed helps you avoid duplicate work and keeps your content strategy organized.
A smarter way to bring content back: use Jetpack AI Assistant
When you take a post offline, the next step often involves getting it ready to go live again. That might mean tightening the structure, rewriting outdated sections, or improving your headline to match current search intent. These updates take time, especially if you’re staring at a blank screen.
Jetpack AI Assistant accelerates that process. It’s built directly into the WordPress editor, so you can work on your content without switching tools or opening a new tab. It’s designed to support your writing process, not take it over.

Let’s say you’re bringing a post back from draft status. Use Jetpack AI Assistant to:
- Reword a paragraph to make it clearer or more concise
- Draft a new section based on an outline or keyword
- Improve the tone or flow of an introduction
- Suggest alternate titles that better match how people search
- Translate content into other languages
- Adjust tone, including formal, informal, humorous, and more
- Generate tables, FAQs, or list structures to add clarity to your content
Every change stays synced in the block editor, so you can keep editing without needing to switch up your workflow. You stay in control, choosing what to keep, refine, or remove.
Jetpack AI Assistant offers 20 free requests. After that, continued use requires a subscription. For content creators managing multiple drafts or updating older content, this tool can make a real difference. You spend less time rewriting from scratch and more time reviewing and publishing content that feels fresh and polished.
Whether you’re taking a post offline to refine and republish or looking to scrap old content and replace it with something brand new, Jetpack AI Assistant can help you get a handle on your latest content project.
The most powerful AI tool for WordPress
Turn your ideas into ready-to-publish content at lightspeed.
Elevate your content