
WooCommerce product page templates include all the essentials, but they’re also highly flexible. You can easily enhance them by adding forms for product inquiries, bulk order requests, or any other customer needs, creating a more interactive and personalized shopping experience.
Adding WooCommerce forms directly to product pages is a game-changer. It makes your store more interactive and customer-friendly while reducing the kind of back and forth that slows down sales.
In this guide, we’ll take a closer look at the benefits of adding forms to product pages. We’ll also discuss the type of forms you can add and show you how to get started with Jetpack Forms.
The benefits of adding forms to product pages
Adding forms to your WooCommerce product pages is beneficial for both your business and your customers. Here are some key advantages:
Business benefits
Forms reduce customer service inquiries. Instead of fielding dozens of emails about special requests, product questions, or customization details, forms capture all this information up front.
For example, shoppers won’t have to reach out separately to ask about product customizations or bulk orders. With the right form displayed directly on the product page, they can understand their options and instantly submit a request.
This cuts down on repetitive work and frees up your time while facilitating better data collection. Whether you’re gathering design files, size measurements, or event dates, the right form collects accurate data that’s easy to parse.
Plus, the information you collect can highlight trends in customer requests. For example, if a lot of shoppers ask for a particular customization, you might turn it into a standard product option. Or if people often request an item in bulk, you can stock more inventory to accommodate their needs.
Customer experience benefits
Forms on product pages make shopping more interactive and personal. They let customers personalize products to fit their exact needs — selecting specific materials, adding custom text, or choosing bulk quantities. This enhances the buying experience and builds confidence that they’ll receive exactly what they want.
Another benefit for customers is clear communication of needs. Instead of worrying whether you’ll understand their email instructions, customers can enter details in a structured form, using elements like dropdown menus.
Types of forms you can add to WooCommerce product pages
There are many different types of forms you can create, depending on your business and customer needs. Here are a few examples:
Quote request and bulk order forms
If you offer custom pricing or bulk order requests, a form allows customers to instantly ask for a quote.
These are also useful for B2B sellers, wholesalers, or custom product providers. Customers can specify quantities, specifications, or preferred delivery timelines, straight from the product page. You can then respond with tailored quotes.
Product customization forms
If your business offers engraving or other personalized products, adding a customization form directly on the product page makes the buying process smoother and more engaging. When shoppers can easily enter details like a message or custom name while they browse, they’re more likely to complete their purchase.
Even a simple field such as “Enter engraving message here” can encourage customers to personalize their order — and that added convenience can lead to more conversions, especially for gift items.
File upload forms
These forms are essential for print on demand shops, apparel businesses, or design services. Customers can upload logos, images, or artwork directly on the product page, eliminating extra communication steps.
Special requirement forms
These are ideal for products that need specific instructions, like food (allergy notes), event tickets (dates and times), or fragile goods (delivery notes).
For example, if you sell subscription food boxes, customers may want to request non-dairy items. In this case, you’d create a text box so they can provide clear instructions and requests.
How to create your first WooCommerce form
Now, let’s look at how to create your first WooCommerce form. For this tutorial, you’ll need to install Jetpack, which includes Jetpack Forms. This powerful tool enables you to build different types of forms within the block editor.
Go to your WordPress dashboard, click on Plugins → Add Plugin, and look for “Jetpack – WP Security, Backup, Speed, & Growth” in the search bar.
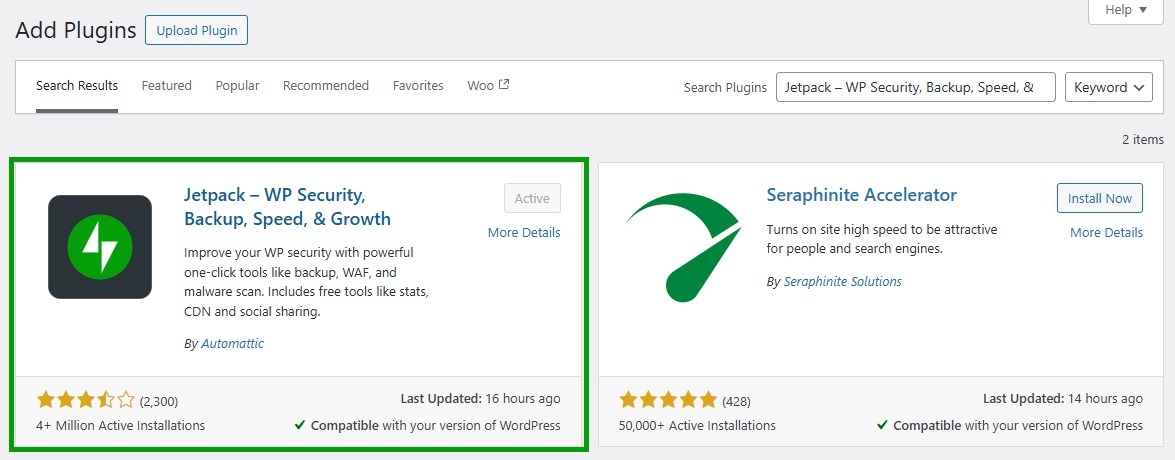
Select Install Now and Activate, then connect to your WordPress.com account or create one for free.
After connecting to your account, you’ll instantly have access to Jetpack Forms.
Step 1: Add a form to your product page
If you have a dedicated page for your product or service, open it in the block editor. Navigate to Pages → All Pages and choose the one you want to work with.
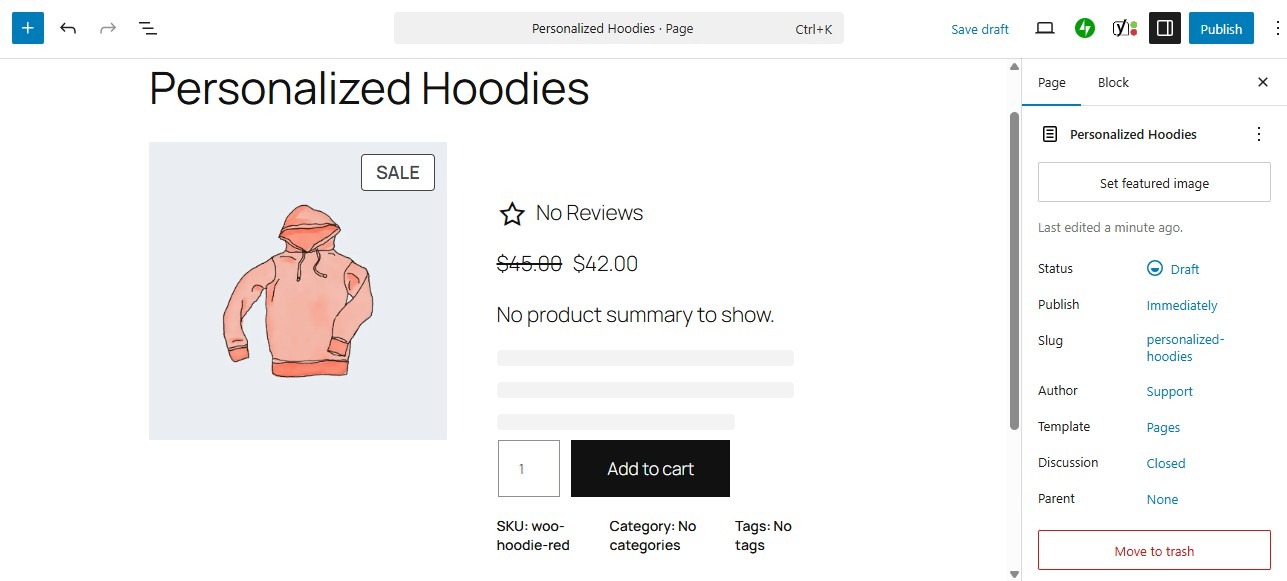
If you want to add the same form to all of your products, open the product page template instead. Go to Appearance → Editor and select Templates. Here, click on the Single Product template.

In the block editor, click on the plus icon (+) to add a new block and choose Form. Jetpack will present some pre-made templates, including ones for registration forms, contact forms, and more.
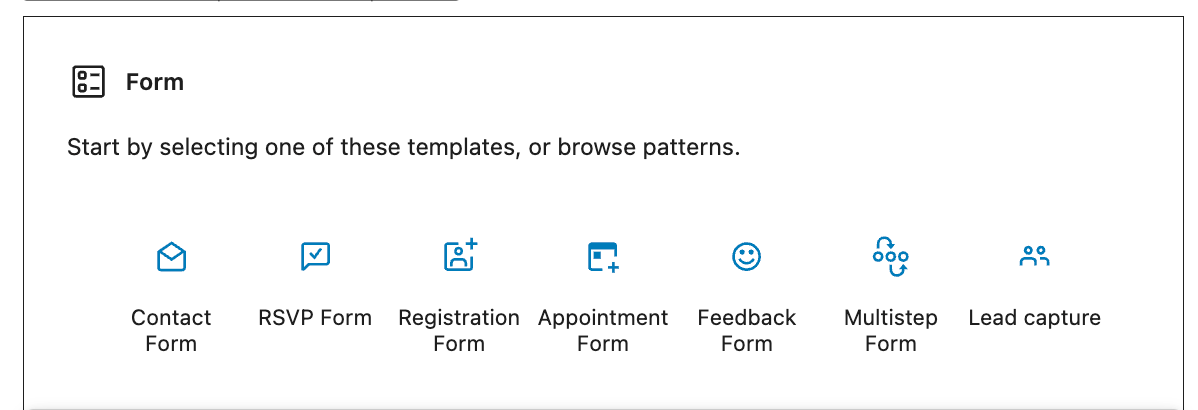
If you don’t see the template you want, simply select a basic contact form and customize it. By default, the form already contains fields for collecting customer details, such as name and email address.
Step 2: Customize the form
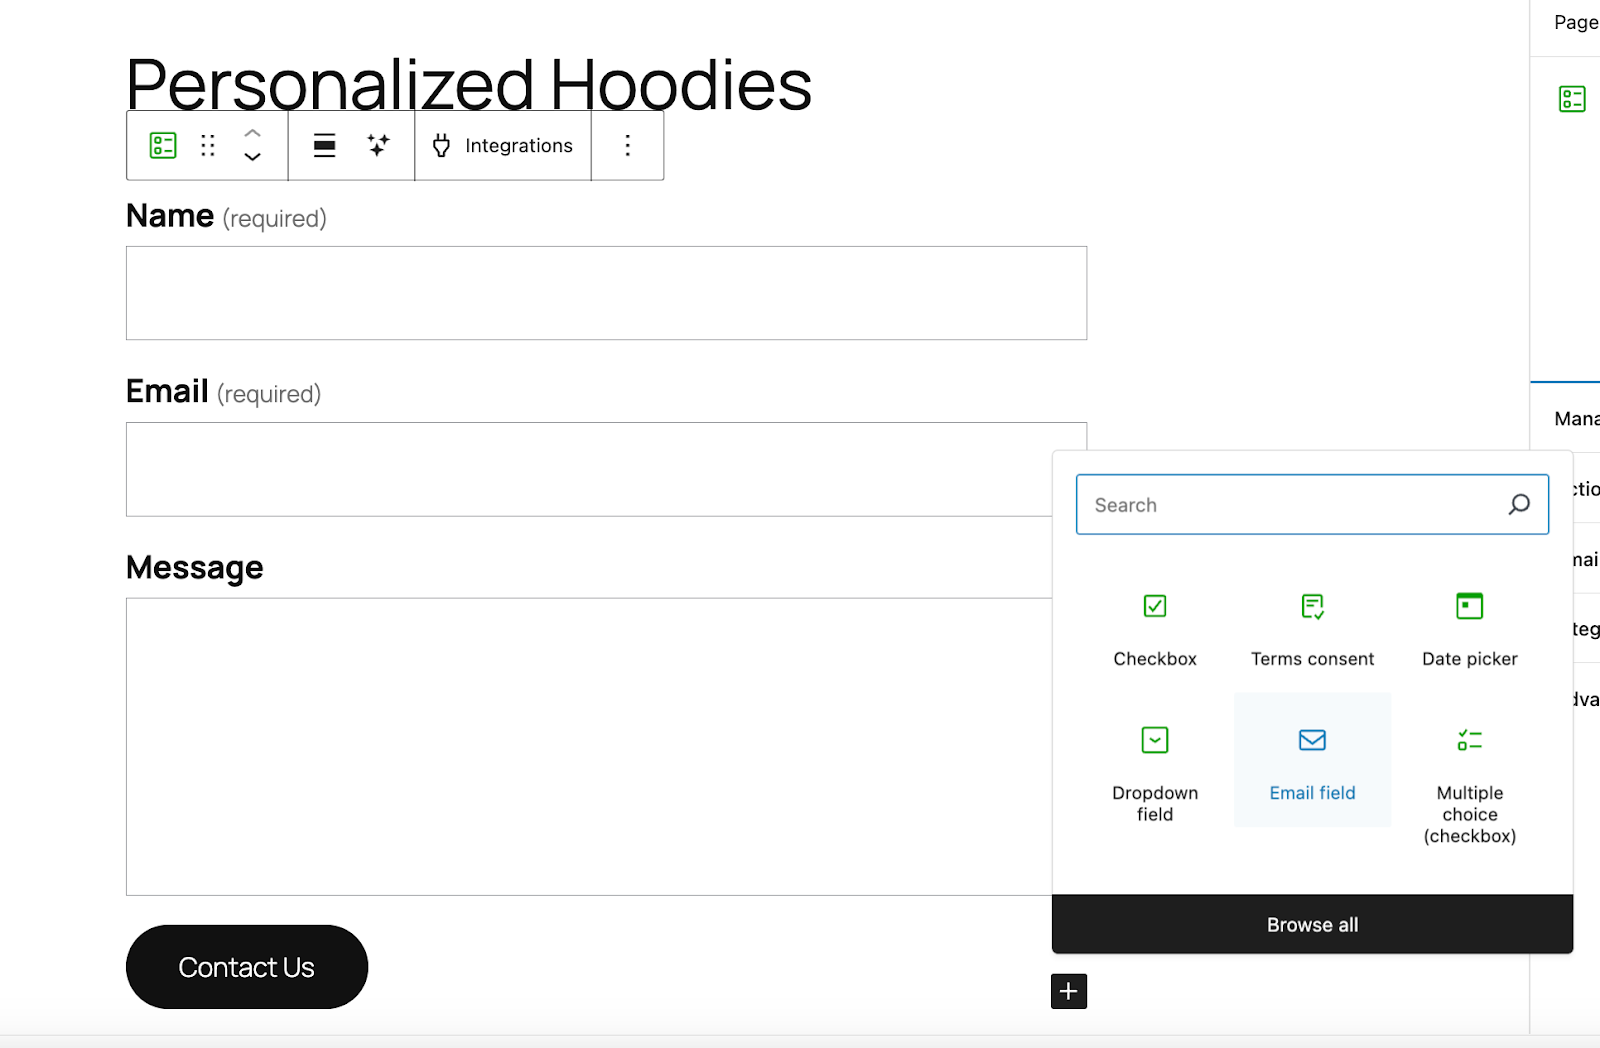
Jetpack Forms enables you to add, remove, and edit form fields as needed. Let’s say you want a custom pricing form. Start by adding a contact form.

Then, select the form and click on the + icon at the bottom of the block to add a field. Jetpack gives you several options, including checkboxes, dropdown fields, and multiple choice options.
For example, if you’re taking bulk order requests, you might ask shoppers to select a quantity range.

You could also add a text field so shoppers can write the personal message they want to include with the item.

After you install Jetpack, you can purchase a plan for the Jetpack AI Assistant, which generates images, text, tables, and other content based on simple prompts.
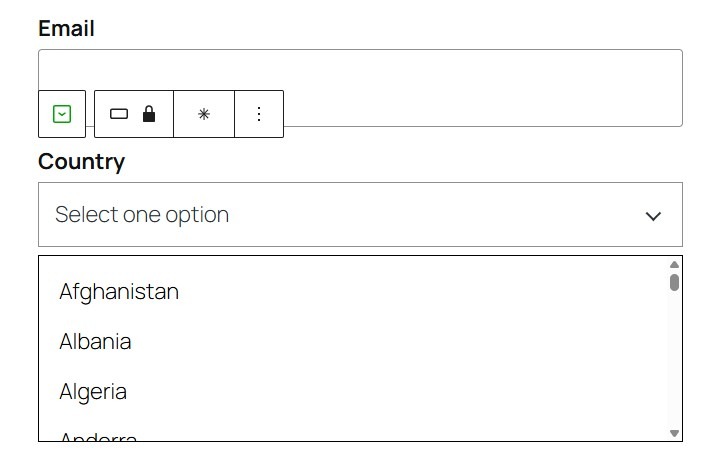
You can use the AI Assistant to quickly edit your product page forms with custom fields. For example, you might want shoppers to state their location. Adding a dropdown field with a list of all countries can be very tedious and time-consuming, but you can ask the AI Assistant to create it for you instead.
Simply enter your prompt and Jetpack will add your requested field.
Note that you can customize the look of your form to align with the design of your product page. Select an element, like the button, and use the settings on the right to change its color, font, and more.
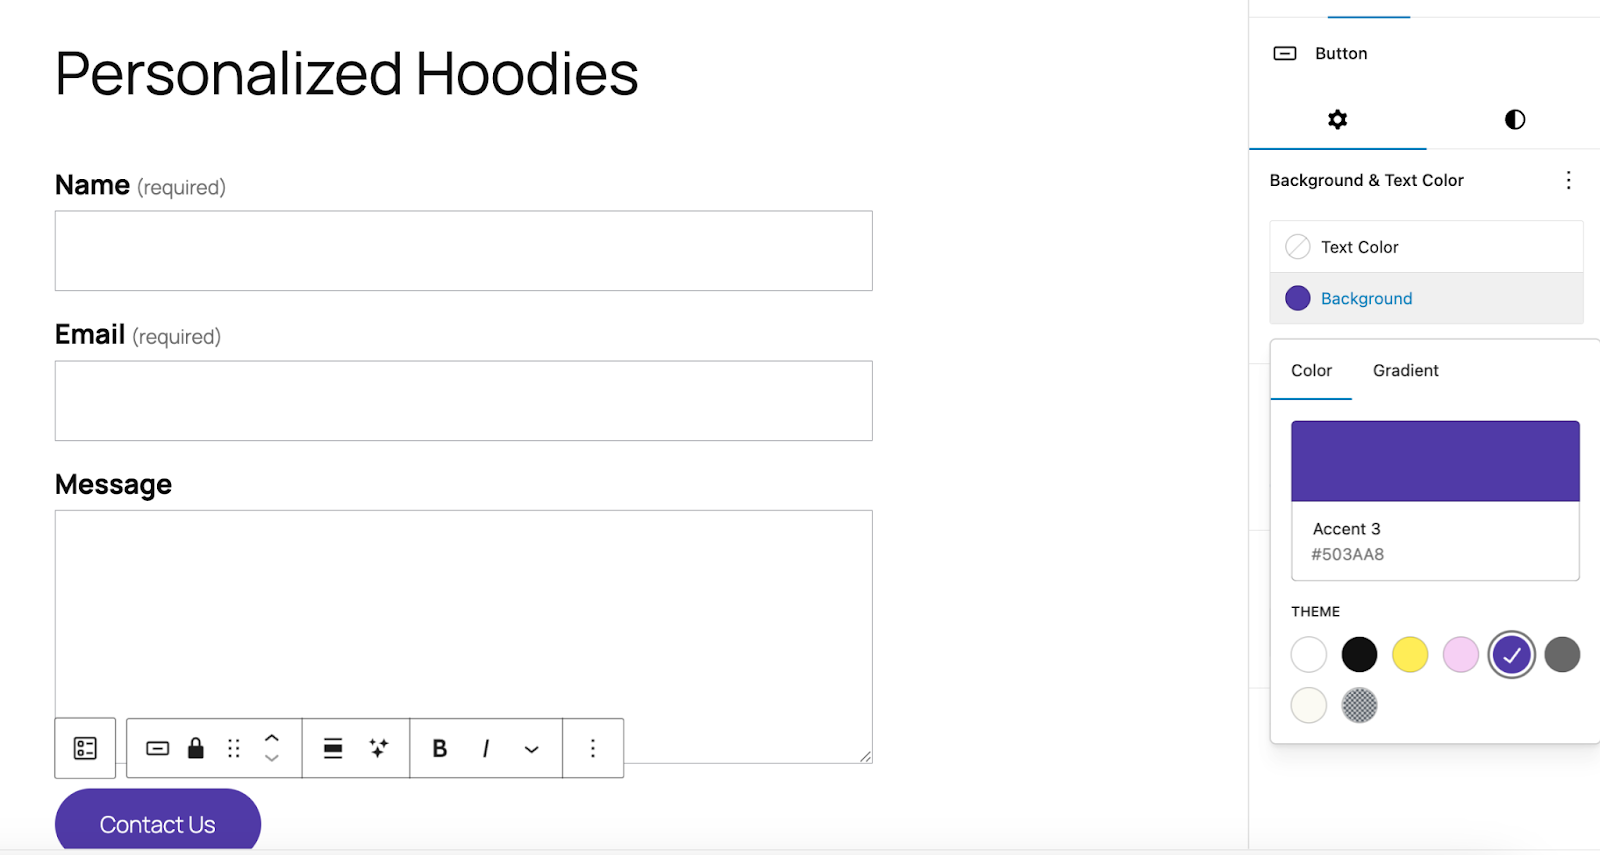
You can also change the text label of existing fields, move fields up or down, and more.
Step 3: Configure form settings
Once you’ve designed your product page form, you’ll need to configure some settings. Select the form and navigate to the block settings on the right.
If you select Action after submit, you’ll see an option to edit the message displayed to shoppers after they submit the form. You can also decide whether to show them a summary of their submission, display a custom message, or redirect them to another page.

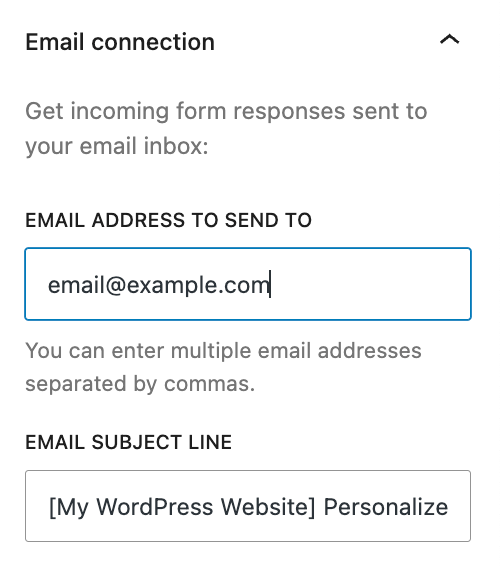
In the Email connection section, confirm the email address where you want to receive the submissions.
When you’re ready, save your changes and visit the product page on the front end to test your form. Make sure that you receive form submissions to the email address you chose.
Level up your WooCommerce store with AI-powered forms
By adding forms to your WooCommerce product pages, you can streamline operations and enhance personalization. They also make it easier for customers to submit specific requests, which can increase conversions.
With Jetpack Forms, it’s easy to create custom forms tailored to any type of request — from bulk orders and quotes to dietary preferences, personalized messages, and more. The built-in AI Assistant makes setup effortless: Just describe the fields you need and it will automatically create the perfect form for you. In minutes, you can turn your product pages into powerful, interactive touchpoints that make shopping smoother and more personal for every customer.
Are you ready to boost sales with AI-powered forms? Get started with Jetpack today!
