
PHP is an essential part of any WordPress website. For this reason, you want to make sure it’s running as smoothly as possible. But knowing the best way to navigate this process isn’t always easy.
The good news is that we’re here to help. By understanding the principles behind PHP and the process of updating it, you can maintain this core element of your site.
In this guide, we’ll introduce you to PHP and explain why it’s important. Then we’ll show you how to safely check, update, and upgrade your PHP version on three different web hosts.
An introduction to PHP
Code is the basis for every single website. The exact programming language may vary between systems, but one thing is certain: it’s absolutely critical to the proper functioning of a site. For WordPress, that essential technology is PHP.
PHP is a popular open-source scripting language used particularly for web development. This server-side code creates a lot of what you see on a site’s back and front ends.
Here’s how PHP works: first, someone visits your website. This action causes whatever browser they’re using to launch a search for your site’s server.
Then, PHP code accesses your main database — in the case of WordPress, this is likely MySQL — and retrieves the requested data. Finally, PHP takes the last crucial step and translates that data into an HTML format.
If this description has your head spinning, don’t worry! You probably don’t need to understand this process in detail. All you need to know is that PHP is an essential part of how your WordPress website receives and displays data. Without it, you wouldn’t be able to run WordPress at all.
Why is PHP essential to WordPress websites?
When it comes to WordPress, the process described above is required to present any content to your visitors. Additionally, the same steps occur when you use the WordPress back end.
When you access your admin dashboard, the PHP within your files will retrieve the data you need. This principle also applies to any plugins or themes that your website is running.
If you’re in doubt about just how integrated PHP is with WordPress, just take a look at your core files. You’ll notice that there are quite a few of them, many of which you’ll need access to if you want to change your site’s fundamentals:

Given how interconnected WordPress is, any changes in your PHP version can affect how your entire website runs. Well-written PHP will make sure that everything else runs smoothly. On the other hand, a less recent version can cause a negative ripple effect for you and your visitors.
PHP might run as a core aspect of your site, but that doesn’t mean it won’t need maintenance from time to time. Like most software — including the main WordPress platform itself — you’ll need to update the code at least semi-regularly to avoid any complications.
Three reasons to keep your WordPress PHP version updated
Now that we’ve covered how important PHP is, let’s look at a few specific reasons why you might want to keep it maintained. Updated PHP:
- Improves your site’s speed.
- Allows you to stay on top of your website’s security.
- Helps maintain your overall stability.
Keep in mind that these reasons apply to any website that runs on WordPress.
Here are the top reasons to update your site’s PHP version:
1. Improve your site’s speed
Unfortunately, an outdated PHP version can really slow your site down. Older versions won’t be optimized to make the most of server resources and may operate slower. Since PHP is so central to your site, this can lead to less impressive speeds across the board.
Given that site speed is a critical part of any user experience, you could be looking at a few negative consequences. For one thing, visitors today expect lightning-fast loading times with every click. Even a small increase from one to three seconds can increase your bounce rates by 32%.
Of course, it’s not just about a smooth browsing process. A website’s speed is tied to its position in search engine rankings — the slower your speeds, the lower your ranking tends to be. This can lead to less organic traffic.
If you want to see how dramatic these speed changes can be, consider trying an experiment. If you’re running outdated PHP, use a tool like GTmetrix to measure your website’s speed:
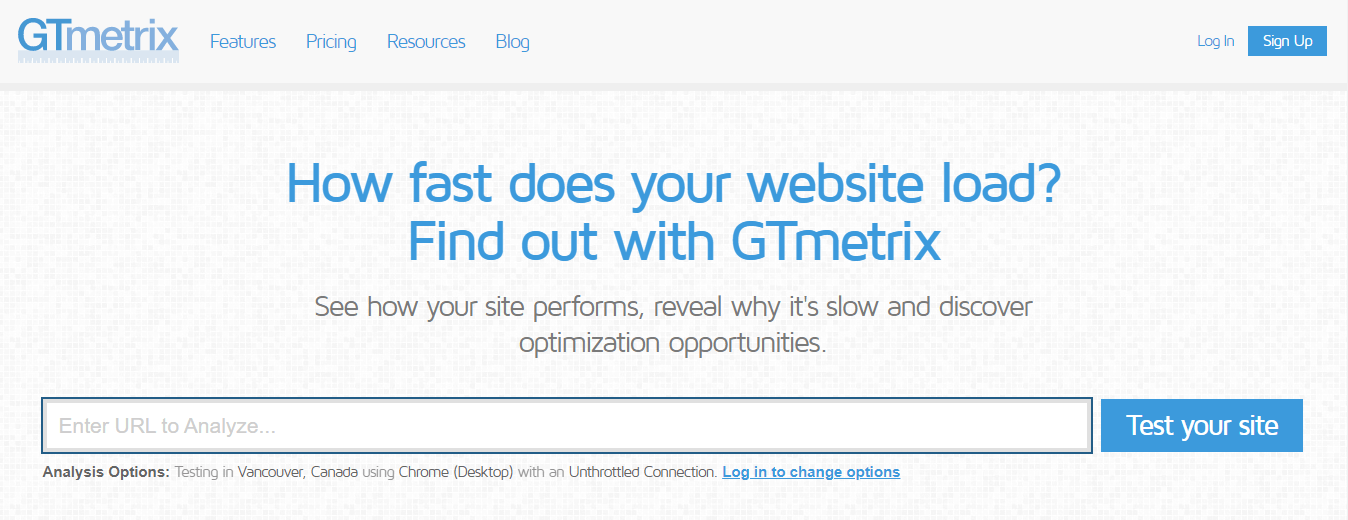
You might find that your site is not performing as well as it could. Then, update your PHP and retest. You may be surprised at just how big of an impact this single action can have. Updating your PHP is well worth the effort in terms of speed alone.
2. Stay on top of your security
We probably don’t have to tell you about the importance of strong WordPress security. Safeguarding user data can protect it against malicious actors looking for access. Doing this can be especially important if you handle sensitive information like credit card numbers.
Updating your PHP version is a simple yet effective way to maintain a strong layer of security. One reason for this is potential security weaknesses. Just like with WordPress, plugins, and themes, developers will release patches to fix any vulnerabilities.
Still, keep in mind that PHP is an open-source language. While this is often a fantastic way to encourage development within the community, it also comes with a downside: anyone can modify the code, including hackers.
When you combine that with the fact that so many websites use this language, it’s often a popular target for malicious actors. As they find new ways to infiltrate your PHP code, developers react by creating more secure versions.
You can think of your PHP version as one of many layers of security. Unfortunately, no single protection method is perfect. Even protection such as malware scans and firewalls aren’t foolproof. But if you’re properly maintaining your PHP, you can take away one more opportunity for malicious actors to access your site.
3. Maintain your overall stability
PHP versions that don’t properly use their server resources can lead to excessive memory use. This, in turn, can cause your site to crash, damaging the user experience and potentially affecting your search engine rankings.
Updates can help correct this issue by optimizing your use of server resources. With a lower demand for memory, you’re decreasing the chance that you’ll overwork your system. You might also avoid hiccups that can happen if the version is not compatible with your plugins or theme.
By boosting that stability, you’ll be in good company. According to WordPress statistics, older PHP versions tend to get less common as time goes on.
Additionally, as we covered before, updates are crucial to security. Having to recover from an attack can mean being offline for a long time. A step towards a safer site is also a step towards a more stable one.
How to check your WordPress site’s PHP version
So far, we’ve talked about why updates are so important for your website’s PHP. But you can’t start the process unless you’re sure you need a new version. Here are two ways to determine what PHP version your WordPress website is currently running on.
1. Use the WordPress back end
Fortunately, WordPress is a fairly user-friendly platform. Its developers have included several measures to help you keep your website in top shape.
This includes notifications about any new PHP versions. So you might see this alert on your dashboard if you’re running an outdated version:

Near the top of a message like this, you should see your PHP version listed. In this example, it’s PHP (7.2.31). This message will also show you the minimum recommended version that you should consider switching to.
Another option is to go to Tools → Site Health → Info. Then scroll down to the Server option. Click on it to reveal your PHP version.

Finally, if neither of the above methods works, you can also use a plugin. Plugins are probably the easiest way to add functionality to your site. In this case, you can use one to make your administrative management even simpler.
First, you’ll need to pick the plugin you want to use. We recommend looking for one that has positive reviews, high ratings, and recent updates. These are usually indicators of a quality plugin.
We’ve chosen to use Display PHP Version. It’s simple, lightweight, and easy to use. Install and activate it to get started. Then, go back to your WordPress dashboard and scroll down to the At a Glance section.
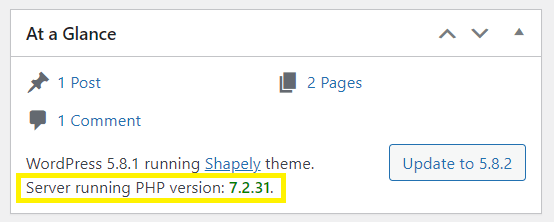
You should then see what version of PHP your site is running, right underneath your WordPress version. While you can update WordPress from here, you won’t get the option to update your PHP version.
2. Access the information via a new PHP file
If you don’t have access to your back end or simply prefer a different method, don’t worry! You can also use a slightly more technical approach to get the information you need.
You can start by opening up your text editor of choice and creating a new file. You’ll then want to enter the following code from phpinfo() File:
<?php phpinfo(); ?>
Next, name the file phpversion.php and save your work. Make sure it’s saved as php and not txt. After that, access your root directory and upload the file. You can either do this with your hosting service’s file manager or a File Transfer Protocol (FTP) client.
From there, you’ll be able to access information about your PHP version by going to example.com/phpversion.php. Remember to replace example.com with your website’s URL.
Once you’re done, make sure that you delete the file. Publicizing core information about your site like this opens up more opportunities for hackers. So you’ll want to delete it to keep the data secure.
Three things to do before you update your PHP version
1. Create a backup of your site
First, we recommend that you create a thorough backup of your current site. Updating your PHP is unlikely to cause any problems, but errors can happen. This is especially likely if any of your plugins or themes happen to be incompatible with the update.
Having a copy of your data can be a smart way to guard against an unlikely site crash. Plus, backups are also an important part of site maintenance in general. If you’re not already creating them on a set schedule, we strongly recommend it.
There are several WordPress backup plugins you can use to do this, but we’ll walk you through how to do it with Jetpack Backup.
Start by making sure you have Jetpack Backup installed and activated. You should then see a setup screen that looks like this:

From here, you’ll need to connect your site to WordPress.com. This is necessary even if it’s not your hosting provider. You can then pick your pricing plan. Your first backup should start automatically. It may take a bit of time, but that’s normal.
After that, you can view your backup by going to Jetpack Backup in the WordPress dashboard.
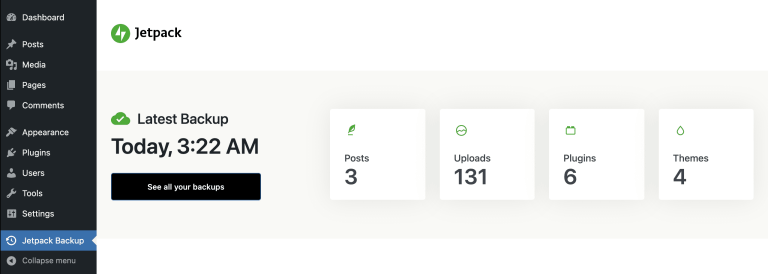
You’ll be able to see when the last backup was completed. You can also click See all your backups if you want to view any older copies.
2. Make sure WordPress is up to date
Before you update your PHP version, we recommend that you check your WordPress version. This is because outdated WordPress software could potentially be incompatible with your new PHP data.
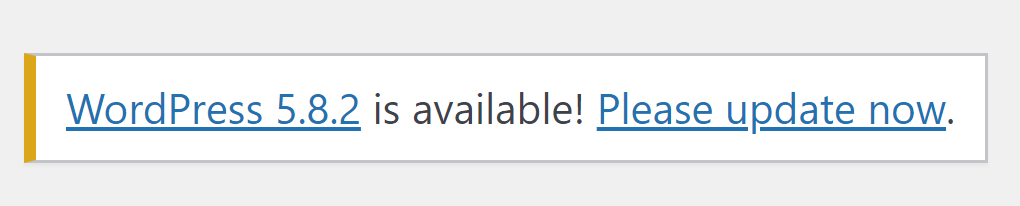
This process is simple. WordPress updates are essential for any site, so the developers make the alerts obvious:
If you’re not seeing this alert, head over to Dashboard → Updates:

If there’s an update available, you should see it listed here. Then, follow the prompts to complete the process. You may also want to consider turning on automatic updates so you can skip this step in the future.
3. Check your plugins and themes for compatibility
PHP plays a role in almost every part of your site. Unfortunately, that means there are a few opportunities for it to clash with other programs. Plugins and themes can be particularly tricky.
That’s why we recommend that you check these for compatibility before you start the update process. This helps prevent any potential issues that could crash your site.
Just like with PHP, developers should update their applications to work well with the latest WordPress versions. Thus, enabling auto-updates may be the easiest way to ensure compatibility. Alternatively, you could also establish a manual update schedule.
On the other hand, complications can also crop up if your themes and plugins are updated but your PHP isn’t. Making sure all of your technology is updated is the easiest way to avoid errors on your website.
How to upgrade PHP versions with cPanel
Once you’re finished preparing to safely upgrade, you can update your PHP version with cPanel. Here are our step-by-step walkthroughs on how to do this on three of the leading hosting services.
1. Bluehost
If you’re like most Bluehost customers, you’re probably operating on the Bluerock interface. Older customers may still be working with the Legacy setup. We’ll take a look at both, starting with Bluerock.
Begin by logging into your Bluehost control panel. Then, go to Advanced → Software → MultiPHP Manager.

From here, you’ll be able to pick the website you’d like to update. Choose the PHP version you want to use. Then, click Apply to finish the process.
If you’re using the Legacy interface, you’ll also start at the Bluehost control panel. This time you’ll find the Hosting tab and select cPanel.
Then, scroll down until you find the Programming section. Select PHP Config followed by the version you’d like to use. Finally, click on Save Change when you’re done.
A lot of other hosts also use this cPanel approach. These include:
It means that if you’re using any of these providers, you can simply follow these instructions in their interfaces as well. Don’t worry if you get lost, as most services will offer a knowledge base that you can reference.
2. DreamHost
Next up, let’s take a look at DreamHost. Keep in mind that DreamHost has a minimum supported PHP version for security and performance reasons.
Fortunately, upgrading your PHP version is typically seamless. You can start by going to the Manage Websites page. Then, click on Manage.

Next, select Modify. You’ll then be able to pick the latest PHP version from the dropdown menu. When you’re all set, hit Change PHP Version to save your changes.
3. A2 Hosting
Finally, let’s quickly walk through changing your PHP version on A2 Hosting. Start by logging into your cPanel account. Then, navigate to the Software section and click Select PHP Version.
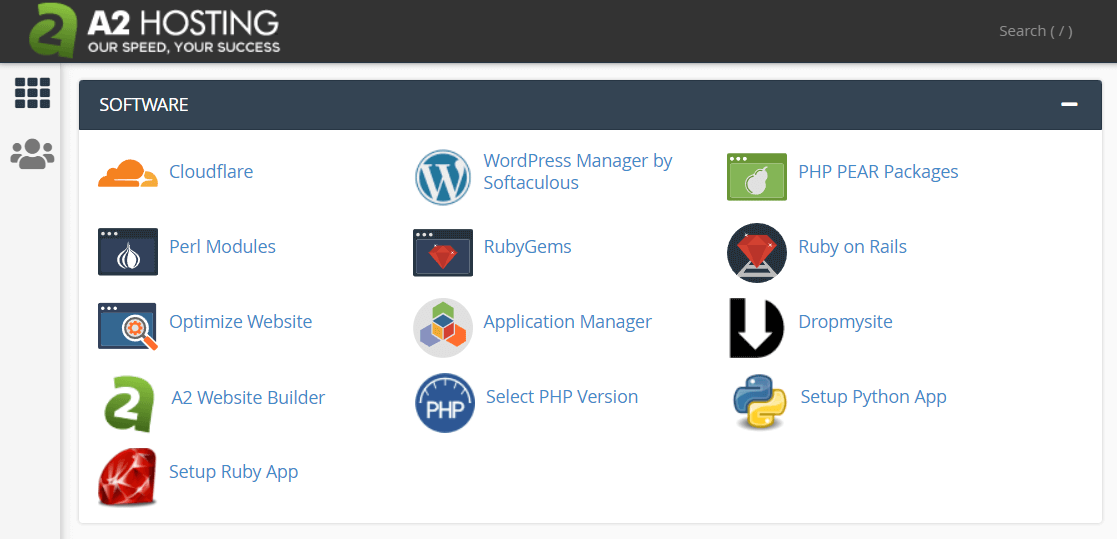
Once you’ve selected that, you’ll see the current PHP version. You’ll also see a list of your other options. Click on the one you want to apply. There’s no need to save your changes — the update will happen automatically.
How to ensure that the new PHP version is working
Once you’ve finished your setup, you probably want to make sure that the changes have actually been applied. One way to do this is to revisit the steps for checking your PHP version that we covered earlier. These should now reflect the most up-to-date software.
Nevertheless, not all updates will apply correctly. If you want to avoid any hiccups, you can always try navigating around the front end of your website. If everything went well, you shouldn’t notice any differences.
You can also check up on your plugins. As we covered earlier, there’s always a risk that some programs will be incompatible. If you’re not seeing any errors and they seem to be working smoothly, there’s unlikely to be an issue.
On the other hand, you might notice a few glitches with your plugins. When this happens, we recommend that you uninstall the malfunctioning program. If that fixes the problem, it may not be ready to work with the new software. Alternatively, it may need an update itself.
We also recommend that you repeat this process with your themes. This includes any that you might not currently be using. Deactivated code is still somewhere on your site, which means that keeping plugins and themes you’re not using updated (or removing them entirely) can prevent these errors as well.
Stay up to date with your WordPress PHP version
Updates are a natural part of any software’s life cycle. Thanks to how central PHP is to your WordPress website, applying these changes is particularly important. Fortunately, staying up to date with your current PHP version can be easy if you understand the principles behind it.
In this article, we introduced you to PHP and covered why it’s so important to keep it updated. We also showed you a few ways to check your current version. Finally, we gave you some tips to help you stay safe during updates, and showed you how to start the process with three different hosts. If you’re interested in learning how to add custom PHP code to your site, see our article on adding custom code to WordPress.
