
Video is one of the most valuable assets in a website owner’s toolkit. Adding videos to your site can help build visitor confidence, improve conversion rates, and make your site more attractive to search engines.
In this guide, you’ll learn how to add videos to your WordPress site by embedding them from offsite sources like YouTube, Vimeo, TikTok, Instagram, and Facebook, and by uploading them directly to your site using WordPress blocks.
Let’s start by looking at some key reasons why you should include video on your site.
What are the advantages of embedding videos on my site?
Successful websites are optimized for both human and nonhuman (search bot) visitors. The goal is for your site to serve both audiences, via well-organized, accessible, and helpful content. Video can be useful here in many ways.
How videos can help your visitors
Humans use information to make decisions, like “Should I buy this product?” and “Is this a good organization for me to support?” So giving them the information that they need to feel comfortable moving ahead with a purchase or sign-up leads to increased conversions.
A video showing your offer or mission in action lets people better imagine the potential impact to their own life. “Meet the Owners” and “Meet the Team” videos build a human connection with the people behind your brand. How-to and educational videos position you as a trustworthy expert and authority within your category.
Videos, when paired with written content, also give site owners the chance to appeal to a variety of learning styles and cognitive needs. With more options to digest your content, you’ll make an impact on a wider audience and expand your reach.
How videos can help your search results
Adding video content can open up a new avenue for people to find your site. It gives your content another chance to attract visitors via video search results. And if you host your video on a platform like YouTube, you may also attract attention to your videos from YouTube’s existing audience.
Beyond attracting eyes to the videos themselves, search engines may be more likely to rank your existing pages when you add video content. Videos tend to improve the amount of time visitors spend on a page — a signal to Google that people are enjoying the content they found. And if Google believes visitors are having a valuable experience, they’ll be more likely to move the page higher up the rankings.
Plus, Google likes a steady stream of fresh content — video or otherwise. So adding rich media to your pages can positively impact your results.
How to embed a video in WordPress
You can easily embed videos from a wide variety of sources on your WordPress site. Let’s see how.
1. Embed a YouTube video by pasting a URL
If you paste your YouTube video URL into a paragraph block on its own line, WordPress automatically creates a YouTube Video block, which you can then customize using the Block Toolbar.
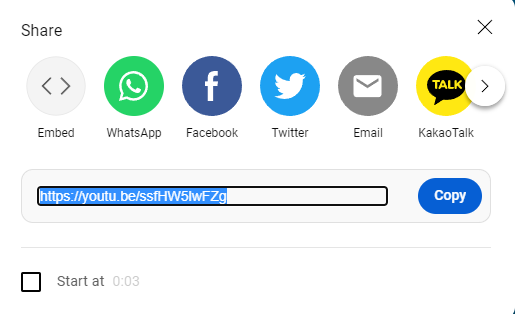
Copy the URL for your video from the address bar on the YouTube page, or click the Share button for the video and copy the link from the popup window. Use the Start at checkbox to choose a custom starting point if you’d like. This option will update the link, so make sure you copy the URL AFTER setting the start time.
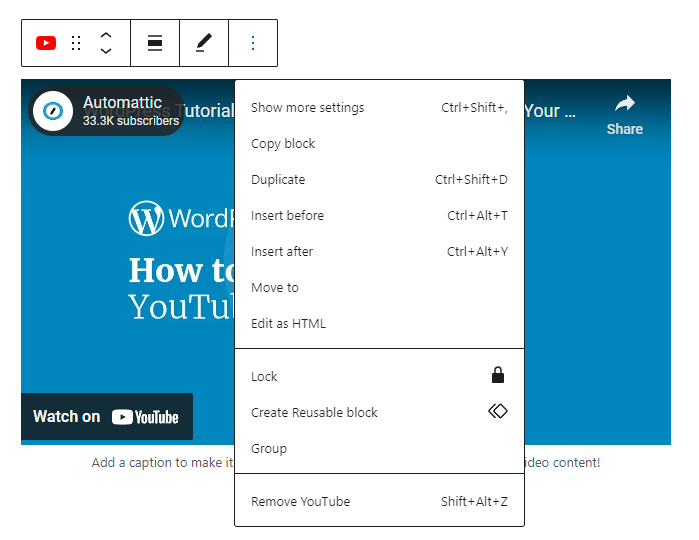
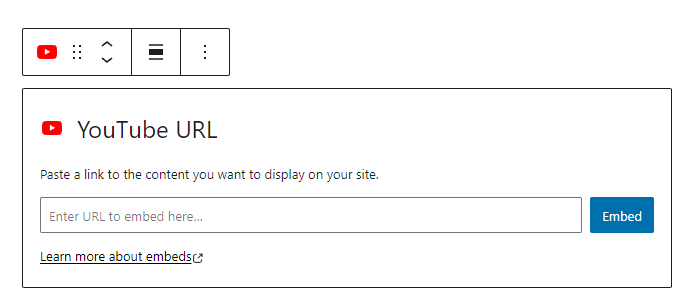
2. Embed a YouTube video using the YouTube block
Click the + icon or type /y to launch the block search window with YouTube as the first option. Choose the YouTube block, enter the video URL, and click Embed.
Or, if you paste a YouTube link into a Video block, WordPress will automatically convert it into a YouTube block.
You can learn more about the YouTube block, and its settings on the WordPress.org support page for YouTube embeds.
3. Embed a Facebook video by pasting a URL
This is the quickest way to embed a Facebook video in WordPress. If you paste your Facebook video URL into a paragraph block on its own line, WordPress automatically creates an Embed block, which you can customize using the Block Toolbar.
Get the URL for the video by clicking on the timestamp for the post on Facebook. It’s located next to the Post Visibility icon, which shows you whether the video is public — you’ll see the globe icon — and available for sharing. The post and the person or page’s timeline must be set to public for the embed to work.

You will then be on the video page with a direct URL like this one.

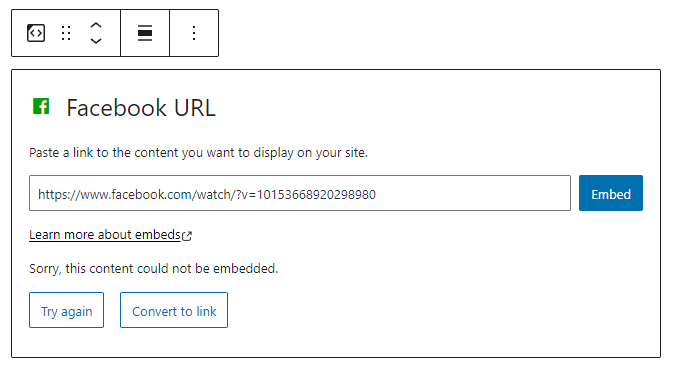
4. Embed a Facebook video using the Facebook block
Click the + icon or type /fa to launch the block search window with Facebook as the first option. Choose the Facebook block type, enter the URL, and click Embed.
5. Embed a Facebook Live video
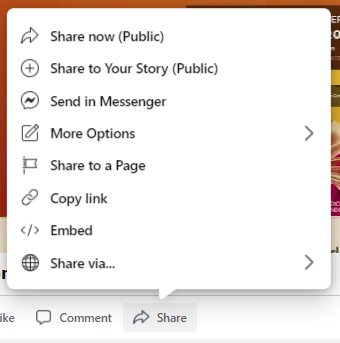
Click on the video’s Share link in Facebook, then choose Embed.
Among the customization options is a checkbox to include the full post and a field to select a specific start time. Make those choices before clicking the Copy Code button, as your selections will update the code.
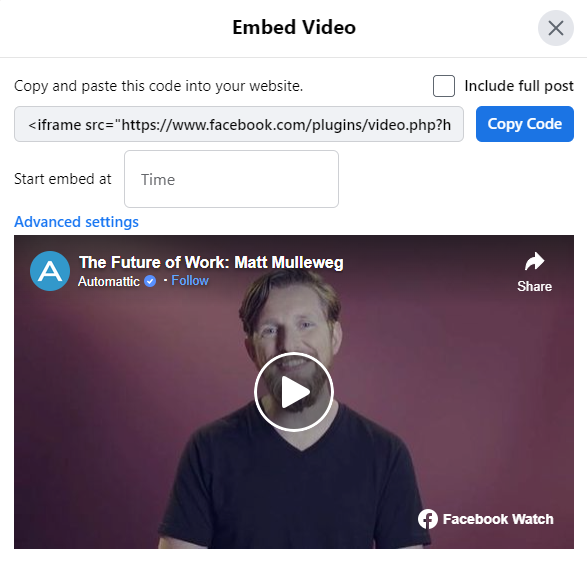
Click the Advanced settings link to customize your video player using the Embedded Video Player Configurator. You can use this tool for both Facebook videos and Facebook Live videos.
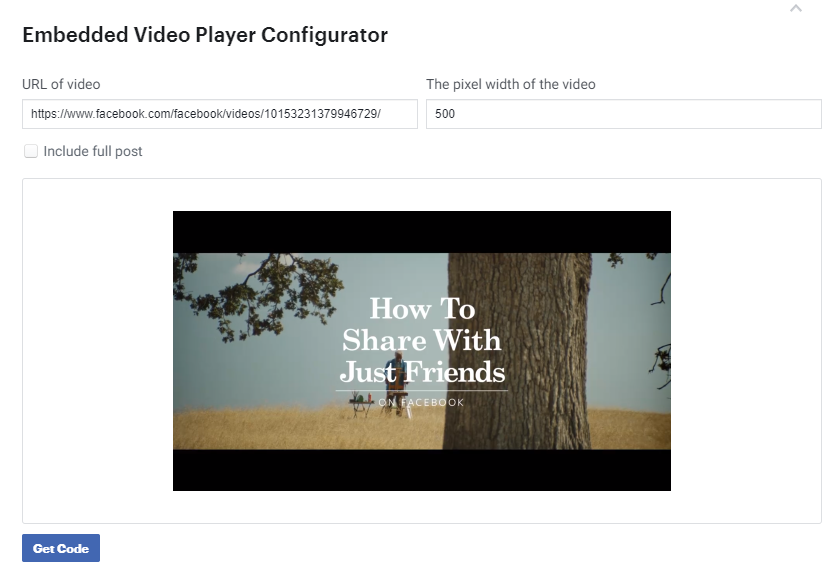
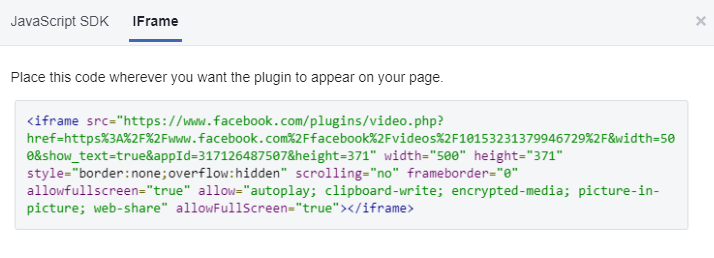
Paste in your Facebook Live video URL, choose your configuration options, click Get Code, and copy the HTML snippet. Use the iFrame code for easier implementation, as the JavaScript SDK method requires you to add custom code to your WordPress theme files.
For additional customization of items, including autoplay, lazy load, and captions, you can manually customize the embed code using the settings described on the Meta for Developers page for the Embedded Video & Live Video Player.
Once you’ve copied the iFrame code, paste it into a Custom HTML block. Click the Preview link to see the embedded video before publishing the page.

6. Embed an Instagram video by pasting a URL
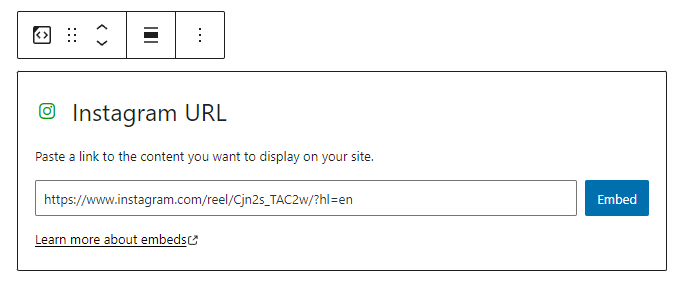
This is the quickest way to embed an Instagram video in WordPress. If you paste your Instagram video/reel URL into a paragraph block on its own line, WordPress automatically creates an Embed block, which you can customize using the Block toolbar.
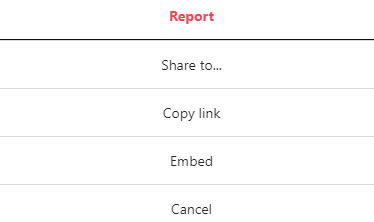
In Instagram, copy the URL for your video by clicking the three-dot menu icon on the top right of the window and choosing Copy link. The link will automatically be copied to your clipboard.
7. Embed an Instagram video using the Instagram block
Click the + icon or type /ins to launch the block search window with Instagram as the first option. Choose the Instagram block type, enter the video URL, and click Embed.
8. Embed an Instagram video with Instagram’s embed code
In Instagram, click the three-dot menu icon on the top right of the window and choose Embed. A window will open with the embed code and a button for “Copy Embed Code.” A checkbox will give you the option to “Include caption.” If you use that option, make sure to check it before copying, as your selection will update the code.
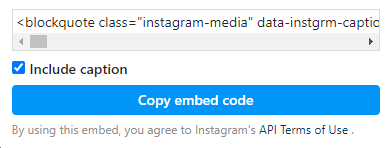
Once you’ve copied the Instagram embed code, paste it into a Custom HTML block. Click the Preview link to see the embedded video before publishing the page.
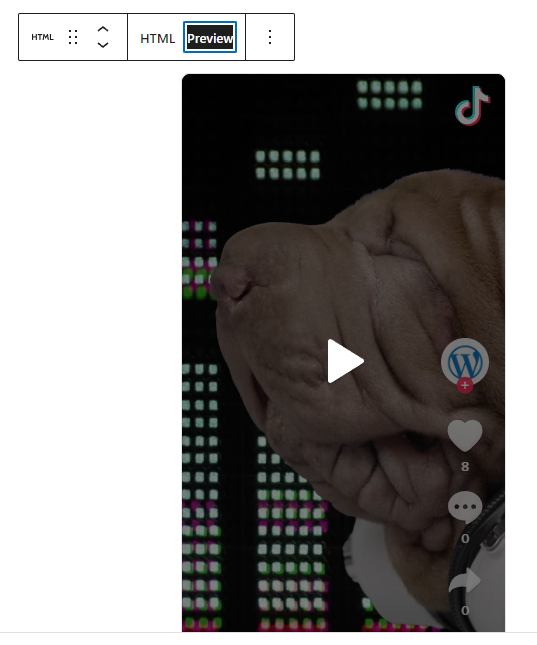
9. Embed a TikTok video by pasting a URL
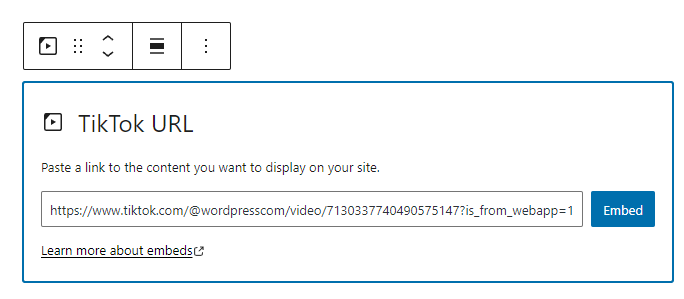
This is the quickest way to embed a TikTok video in WordPress. If you paste your TikTok video URL into a paragraph block on its own line, WordPress automatically creates a TikTok block, which you can customize using the Block toolbar.
To get the TikTok video URL, go to the TikTok page for the video and click Copy Link.

10. Embed a TikTok video using the TikTok block
Click the + icon, or type /tik to launch the Block Library search window with TikTok as the first option. Choose the TikTok block type, enter the URL, and click Embed.
The Finest Video Hosting for WordPress
Stunning-quality video with none of the hassle. Drag and drop videos through the WordPress editor and keep the focus on your content, not the ads.
Get VideoPress11. Embed a Vimeo video by pasting a URL
This is the quickest way to embed a Vimeo video in WordPress. If you paste your Vimeo video URL into a paragraph block on its own line, WordPress automatically creates a Vimeo block, which you can customize using the Block toolbar.
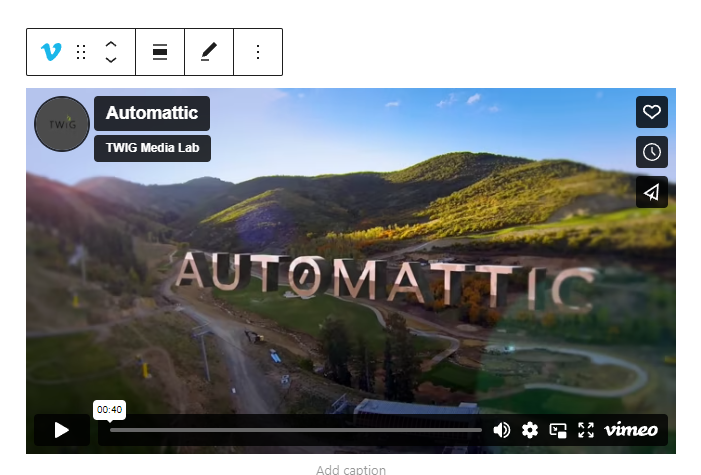
Copy the URL for your video from the address bar on the Vimeo page, or click the Share icon on the page and copy the link from the popup window. Use the Start video at checkbox to choose a custom starting point for the video. This option will update the link, so make sure to copy it after setting the start time.

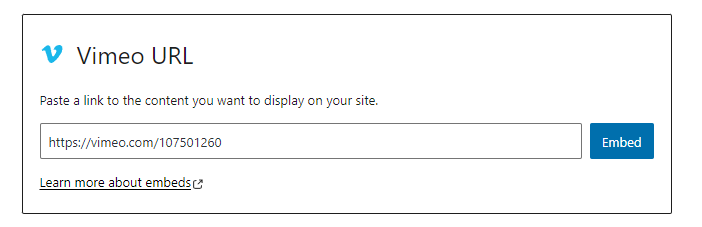
12. Embed a Vimeo video using the Vimeo block
Click the + icon, or type /vim to launch the block search window with Vimeo as the first option. Choose the Vimeo block type, enter the video URL, and click Embed.
If you paste a Vimeo link into a Video block, WordPress will automatically convert it into a Vimeo block.
You can learn more about how to embed Vimeo videos on the WordPress.org support page for Vimeo embeds.
The best video hosting and embedding solution for WordPress
Jetpack VideoPress is video hosting built for WordPress. With Jetpack VideoPress, when you add a video to a page or post, it’s automatically uploaded to the WordPress.com cloud and is manageable via the Media Library. The video is converted to streaming video and hosted on WordPress.com servers, leveraging a global content delivery network (CDN) for a fast user experience.
Jetpack VideoPress is responsive and has advanced customization options to match your site’s branding (it can even adapt automatically to match the color scheme of video content). Plus, it offers an ad-free experience for viewers, picture-in-picture video capabilities, and more.
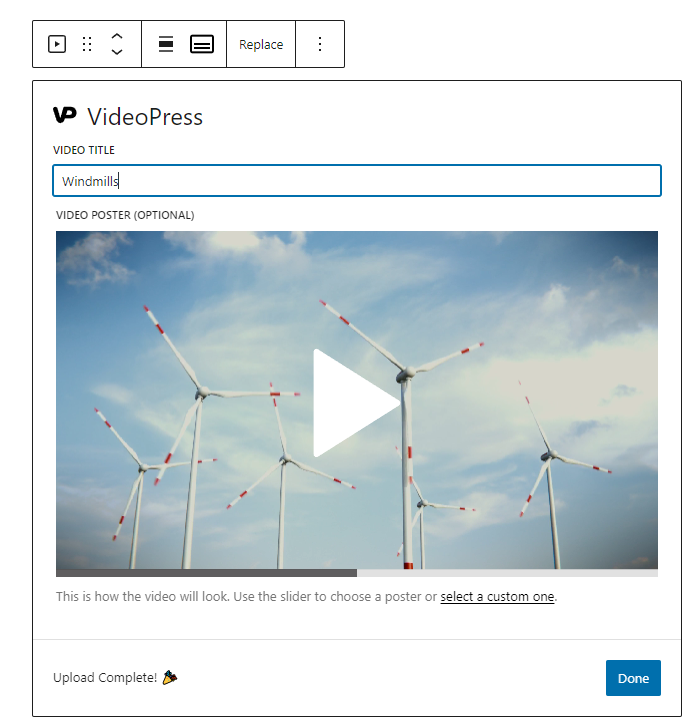
Embed a Jetpack VideoPress video by dragging and dropping
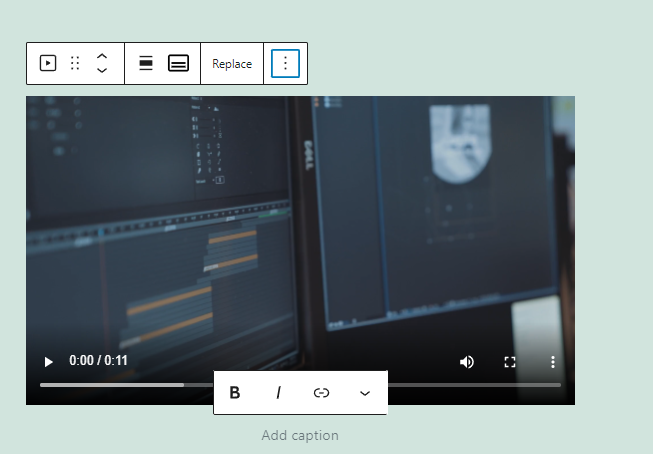
Once you’ve either installed Jetpack and purchased a plan that includes Jetpack VideoPress, or installed the dedicated Jetpack VideoPress plugin, you can simply drag a video file from your desktop into a Paragraph block. Then, WordPress will automatically create a VideoPress block, which you can customize using the Block toolbar.
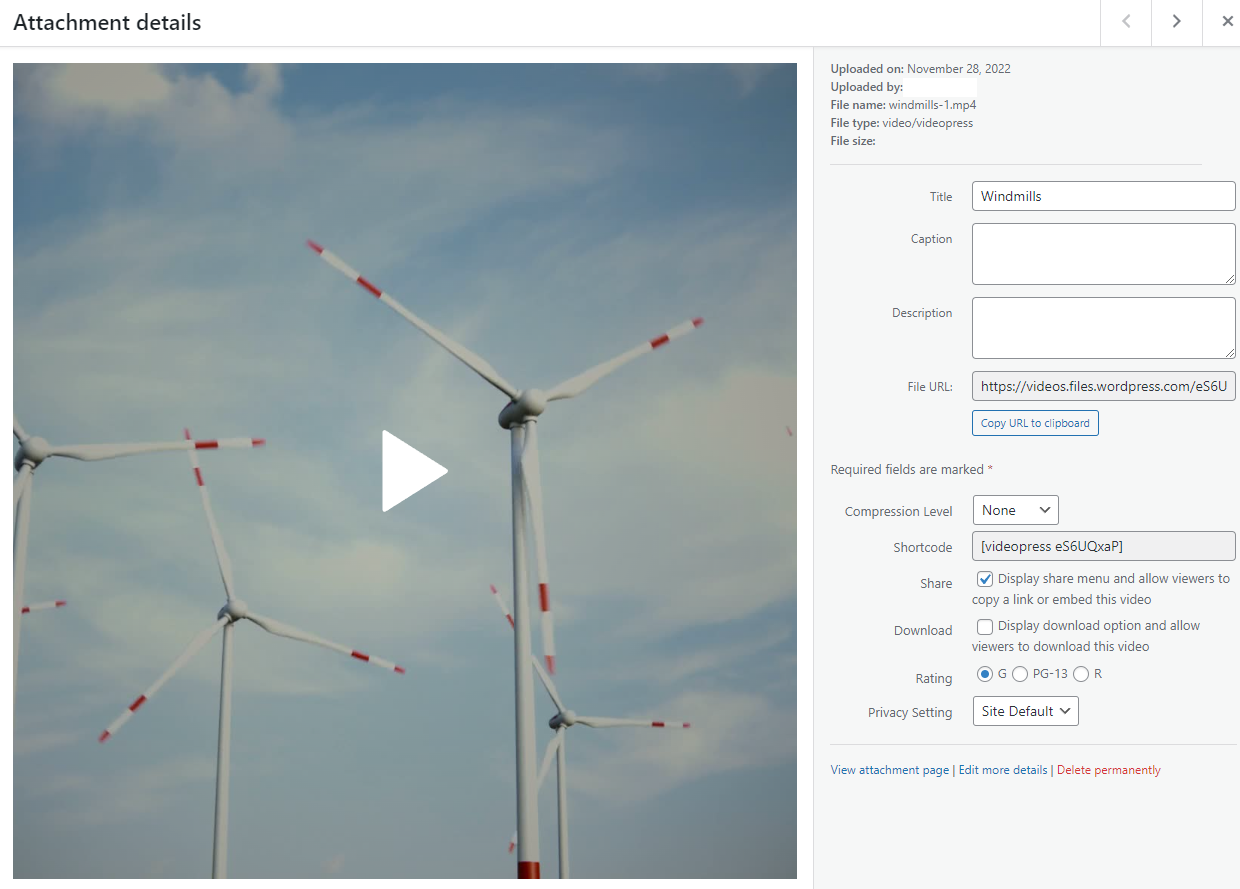
Click on the three-dot menu and choose “More Settings” to access a wide variety of player and video settings. Learn more about the multiple setting options in the article Add a Video Using the Block Editor.

When you click on a video in your Media Library, in addition to the standard Title, Description, and Caption fields, you can also manage the video file compression level and its sharing, download, and privacy settings.
Embed a Jetpack VideoPress video using the VideoPress block
Click the + icon, or type /videop to launch the block search window with VideoPress as the first option. Choose the VideoPress block type, enter the video URL, and click Embed.
If you want to use the Video block instead, but have your videos hosted on Jetpack VideoPress — instead of on your site or a platform like YouTube — you can simply paste the VideoPress link into the Video Block, and it will not automatically convert it to the VideoPress block.
The VideoPress and Video blocks have different options available through their More Settings panels. Get more info on the Video Block options from the WordPress.org support page, and on the VideoPress Block options from this Jetpack article.
How to upload a video to WordPress
Uploading a video to WordPress is as simple as dragging and dropping a video file into a paragraph block in the Block Editor. WordPress generates a Video block and automatically adds your video to the Media Library.
For more information on how to add a video, see How to Upload a Video to WordPress & Add it to a Page or Post.
The potential issue with uploading your video instead of embedding it is that many standard web hosting servers are not optimized for streaming, leading to slow load times and video buffering. They may have file size upload limits, preventing you from uploading video files over 250MB or 500MB. You can also incur extra costs for resource overages.
With Jetpack VideoPress, you can upload a video directly to the WordPress.com cloud via your site admin and avoid file upload or site size limitations imposed by your web host. Read about the benefits of using Jetpack VideoPress below. Get more information on how to upload videos, including video file specification recommendations, on the Jetpack support page for uploading your videos.
Frequently asked questions about embedding videos in WordPress
What is the easiest way to embed a video on WordPress?
The easiest way to embed a video on WordPress is to paste the URL of the video into a paragraph block on its own line. WordPress will auto-convert the link into the appropriate block type, and you can customize it from there.
The next easiest method is to use a Video block, either the standard Video block or a dedicated block like the YouTube, Vimeo, or TikTok blocks. This approach adds the step of launching the selection window and selecting a block type.
Between the WordPress blocks and the embed codes provided by the video platforms, no additional plugins are needed to embed a video. The main reason to use a plugin is when you want advanced capabilities like greater control over the player, the elimination of ads, the ability to control post-roll recommendations, and custom viewing permissions. In this case, the best option is Jetpack VideoPress.
What if my embedded video URL is not working?
There are several potential causes for a video embed to fail. The first thing to check is the video or post’s privacy settings. The page or channel you’re trying to share the video from may be set to private or have that specific video set to only display on specific sites.
In these cases, you’ll need to link to the video instead of embedding it. If it’s your video that you’re trying to embed, adjust the channel and video privacy settings to make it shareable.
Other potential causes include WordPress security plugins or issues with a browser extension. For example, the DuckDuckGo privacy extension blocks Facebook videos and other video embeds that track viewer/visitor data.
What about linking to the video instead of embedding it in WordPress?
There are times when you may want to link to a video instead of embedding it. Some videos can’t be embedded on your site due to privacy and sharing settings. If you want your viewers to see them, you need to link to those videos. Set the links to open in a new tab so that after they watch a video and close the tab, they’ll still have your site open.
What’s the difference between embedding and uploading videos to WordPress?
Embedding
When you embed a video on your site, the source site handles the storage and streaming, saving the site owner disk space and bandwidth. Large video and social sites have servers and networks built for speed, so videos start fast and play without buffering.
The downsides to embedding include losing control over branding, plus the insertion of ads and related videos that can distract your viewers and even take them off your site.
Uploading
When you upload a video to WordPress, you have greater control over the player’s look and controls, with no co-branding.
The downside to uploading your videos includes potential issues with slower video load times and streaming speeds, plus hosting limits on maximum file size and overall storage that can get costly when exceeded.
You can get around these issues by using Jetpack VideoPress.
What is the best solution for uploading videos to WordPress?
Here are some key reasons Jetpack VideoPress is the best solution for uploading videos to your WordPress site:
- It keeps the focus on your content. The VideoPress player has no co-branding, no distracting ads, and no offsite links to take the visitor away. The player is customizable to match your brand and site colors and features an “adaptive seekbar” option that adjusts its display to match the colors of your video.
- It’s designed and built specifically for WordPress. Jetpack VideoPress is fully integrated within your WordPress admin, making it easy to implement and use.
- It offers high-quality (HD) video playback in 4k resolution up to 60FPS. Visitors can use the player’s Quality Selector to choose the format they want to watch, from 480p through 4k.
- Great performance speeds mean fast-loading videos. Jetpack VideoPress subscriptions include high-speed streaming with adaptive bitrates and a global CDN.
- It includes 1TB of video hosting in the WordPress.com cloud and file uploads up to 5GB. Take advantage of WordPress.com’s reliable infrastructure while avoiding potential issues and extra fees due to upload, storage and bandwidth limits.
Additional features include:
- A picture-in-picture button that opens the video in its own window for convenient viewing
- Options for visitors to increase or decrease their playback speed
- Tools that allow admins to pause and resume video uploads when needed
- Privacy options to restrict views to visitors of your site
- The option to make your videos available for download
- Video stats via Jetpack, accessible through your WordPress dashboard
- The ability to add subtitles, captions, and chapters to a video
Where can I learn more about Jetpack VideoPress?
VideoPress is part of the Jetpack suite. It’s included with the Jetpack Complete plan, or you can get the Jetpack VideoPress plan separately. Install the plugin to test out the free version, which gives you video hosting for one video up to 1GB in size.
Learn more at Jetpack.com/videopress/.
The Finest Video Hosting for WordPress
Stunning-quality video with none of the hassle. Drag and drop videos through the WordPress editor and keep the focus on your content, not the ads.
Get VideoPress