
WordPress websites can become vulnerable if they’re not well-maintained. A few skipped updates or a bad plugin, and your site is at risk. Attackers can also get in through the login page if it’s not properly secured or bring your site to a halt with distributed denial of service (DDoS) attacks.
Too much gloom and doom?
Well, thankfully, these attacks can be easily prevented if you take the necessary steps to harden WordPress. The content management system (CMS) gives you full control over your site’s settings, which means you can implement strategies to protect it from different types of attacks.
In this guide, we’ll give you a full course in WordPress security. We’ll discuss what tools you should use, go over 18 steps to harden WordPress, and show you how Jetpack Security can help you keep your site safe with a single plugin. Let’s get to it!
The importance of hardening your WordPress site
Cyberattackers tend to scour the web for sites with vulnerabilities they can exploit. Even if your site is relatively new, attackers can still target it to distribute malware or steal data.
That makes WordPress security crucial for all websites. At the time of this writing, there are over 50,000 documented WordPress vulnerabilities. That includes over 7,800 known vulnerable plugins and approximately 670 themes.
Vulnerabilities continue to increase year after year, owing to WordPress’ growing popularity and the large number of new plugins and themes on the market.
If your site is targeted, you might lose access to it and your data can be compromised. Depending on how serious the breach is, it can take a while to repair your website and that can lead to many lost conversions. Furthermore, if you run a larger online business, being the victim of a cybercrime can lead to serious financial losses.
The good news is that there’s plenty you can do to protect your WordPress website. But to keep it secure, you’ll need to be proactive.
Essential tools to harden your WordPress site
Throughout this guide, we’ll refer to several security tools that you can use. These will help you implement measures to harden your WordPress site. Let’s take a look at what they are.
1. A vulnerability scanner
A vulnerability scanner is software that looks through your website for security issues. In the case of WordPress, a scanner will go through your site’s files, plugins, and themes to look for potential gaps in protection that attackers can exploit.
The scanner compares the data it finds against a database of vulnerabilities, like WPScan. This is the largest database of known WordPress security vulnerabilities, which is updated on a continuous basis.
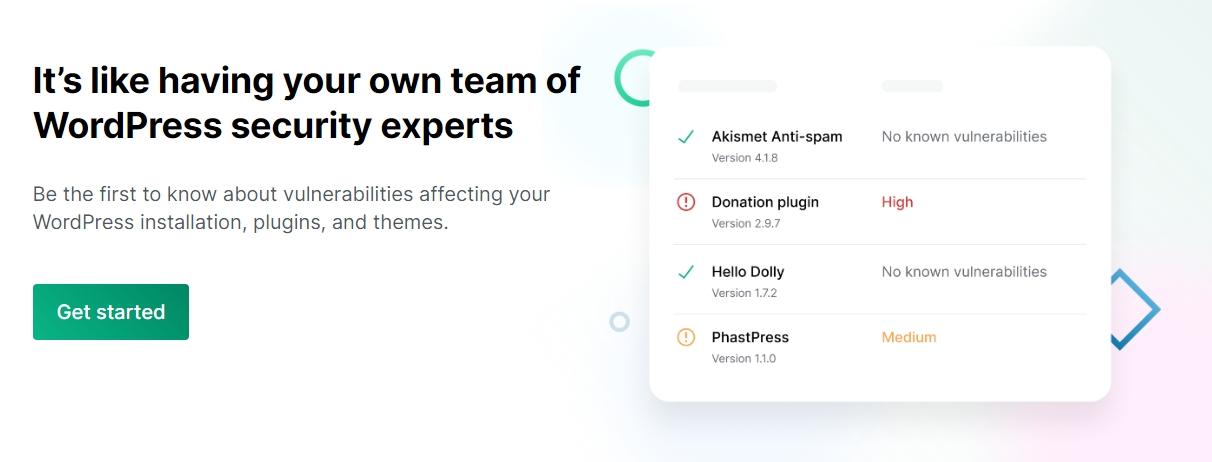
Jetpack Protect is a top option when it comes to scanning your website for vulnerabilities. The plugin enables you to leverage the WPScan database by running automatic scans on your website.
If Jetpack detects a vulnerability, it will notify you and show you how to address the issue. In most cases, this will involve deleting or updating the vulnerable plugins or themes.
2. A malware scanner
A malware scanner works similarly to a vulnerability scanner. In this case, the software focuses on finding infected files and helping you either quarantine or delete them so you can rid your website of malware.
In most cases, vulnerability and malware scanners work hand in hand. WPScan, for example, can help you identify both vulnerabilities and malware on your WordPress website.
If you use Jetpack and you have access to the Security plan (or upgrade Protect to premium), the plugin will scan your website for malware and vulnerabilities. If it finds anything wrong with your website, the plugin will give you options for resolving these issues, often with just a click or two.
3. A web application firewall (WAF)
You’re probably familiar with the concept of a firewall. This is a program that blocks incoming or outgoing traffic from a server or computer.
A web application firewall (WAF) works similarly. It’s designed to help you block incoming malicious traffic or prevent malware on your site from sending information.
Most WAFs come preconfigured with rules about what kind of connections to block. They can even identify known malicious IP addresses depending on their settings.
Jetpack Protect includes a WAF with straightforward configuration settings. You can set the WAF to use automatic rules, which are provided and updated regularly by security experts at Jetpack. These automatic rules are made to block high severity exploits so that even if you have a vulnerability in an extension, the WAF rule may be able to protect your site.

The plugin also lets you put specific IP addresses on an allowlist or blocklist. This can be useful if you want to limit who can access the dashboard.
4. An offsite backup solution
Backup tools make copies of your website and restore them if needed. The idea behind backups is that you’ll always have a recent copy of your site in case it malfunctions, or you’re faced with a security issue that you can’t easily fix.
For added security, it’s recommended to store backups both on and off your site, in case one of them fails. This way, your website’s data is never truly lost.
While you can back up your site manually, using a dedicated plugin like Jetpack VaultPress Backup can give you peace of mind and automate the entire process.
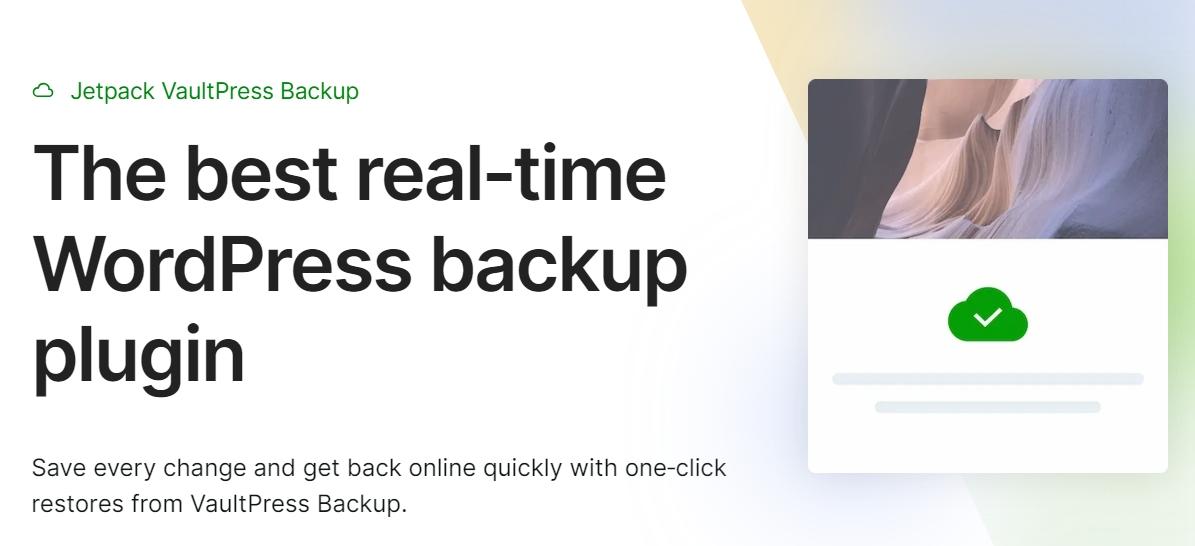
This plugin creates real-time backups of your website and stores them off site for up to 30 days. All of this happens automatically, although you can also create your own manual backups if you wish.
Jetpack saves any changes you make to your site as they happen. This eliminates the risk of partial data loss when you need to restore a recent backup. Simply go to the activity log and choose the date and time to which you want to restore, and Jetpack will start to restore your site right away (even if it’s totally offline).
Speaking of the activity log…
5. An activity log to monitor site changes
An activity log is a tool that gives you a breakdown of things that happen on your website. You can use these logs to monitor different kinds of activity, including logins, plugin installations, post uploads, and even changes in your site’s configuration.
The importance of an activity log can’t be overstated. If you collaborate with others to run a website, this tool will give you insight into what everyone else is doing.
You can also use an activity log to troubleshoot problems. For instance, if your vulnerability scanner suddenly detects a problem with a plugin, you can check the logs to see when the plugin was installed and by whom.
Jetpack includes an activity log with a free WordPress.com account, where you can see the last 20 events on your site. With a premium license, you’ll get access to events from at least the last 30 days
How to harden your WordPress site in 18 steps
Aside from the tools we covered in the previous section, you’ll also need to take steps to harden WordPress. Here are the most important security measures for your WordPress site.
1. Back up your site
Backups are perhaps the most important part of a comprehensive security strategy. Having recent backups at all times means that if your website is under attack or infected by malware, you can always restore your content.
Ideally, you’ll use a plugin that automates backups. This eliminates the risk of forgetting to perform a backup after making significant changes to your website.
As we’ve mentioned, Jetpack VaultPress Backup is a powerful backup solution that’s included on its own or with a qualifying plan like Jetpack Security. It uses a real-time backup system. This means it saves every time you make a change to your site, so every new modification is protected right away.
This system is preferable to scheduled backups. With the latter, you run the risk of data loss if the last restore point is too far back. This is not an issue if you use VaultPress Backup.
2. Install an all-in-one security plugin
There are a lot of WordPress security plugins to choose from. Some tools are designed for specific purposes, like enabling a WAF or two-factor authentication (2FA). Others take a more holistic approach and combine multiple features to protect your site.
The idea behind all-in-one security plugins is to minimize the number of third-party tools you need to set up on your website, while getting access to as many features as possible.
Jetpack offers a broad range of security features. If you opt for the free plugin, you get access to an activity log, WAF functionality, a secure authentication option, and more.

You can expand the range of security features the plugin offers by signing up for the Jetpack Security plan. This plan gives you access to a backup solution, automated malware scanning with one-click fixes available, spam protection, and more.
In terms of value, Jetpack Security offers one of the most comprehensive security solutions for WordPress users. And if you want, you can always start using the free plugin and update to the premium version once you’re comfortable.
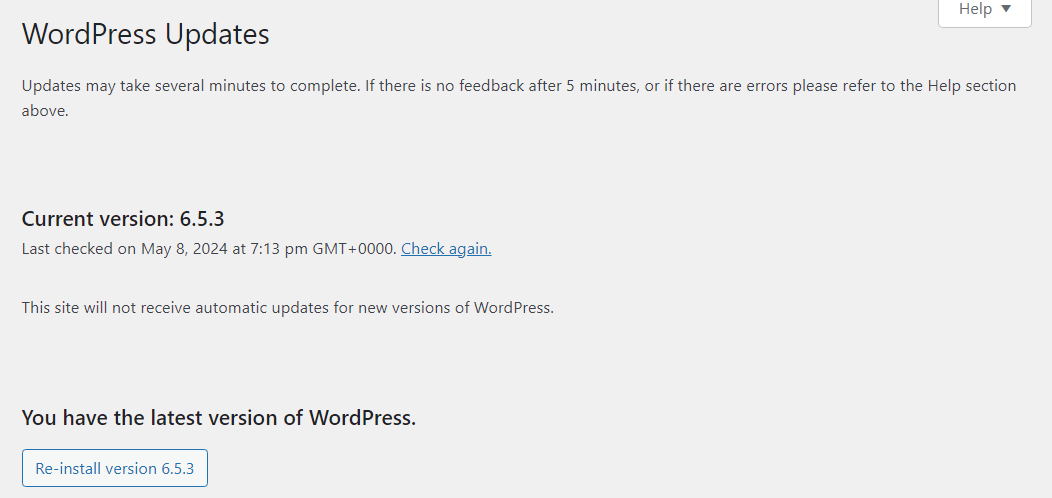
3. Update WordPress core
Updating WordPress to its latest version is one of the most important things you can do to improve your website’s security. That’s because newer versions tend to include security fixes and improvements. Moreover, the software’s developers often release patches to fix urgent vulnerabilities.
Using outdated versions of WordPress can also lead to compatibility issues with plugins and themes. These can cause key elements on your website to stop working.
Keeping WordPress updated is simple. When you access the dashboard, WordPress will tell you if there are any updates available. You can update WordPress by clicking on Dashboard → Updates.
Note that updating WordPress might lead to compatibility issues if your plugins or themes don’t support the newer version. To recover from this, you’ll want to create a backup of your site before major updates.
If you use VaultPress Backup, this won’t be necessary. The plugin will back up your site in real-time so you’ll have a restore point available before the update, in case you need to restore your site.
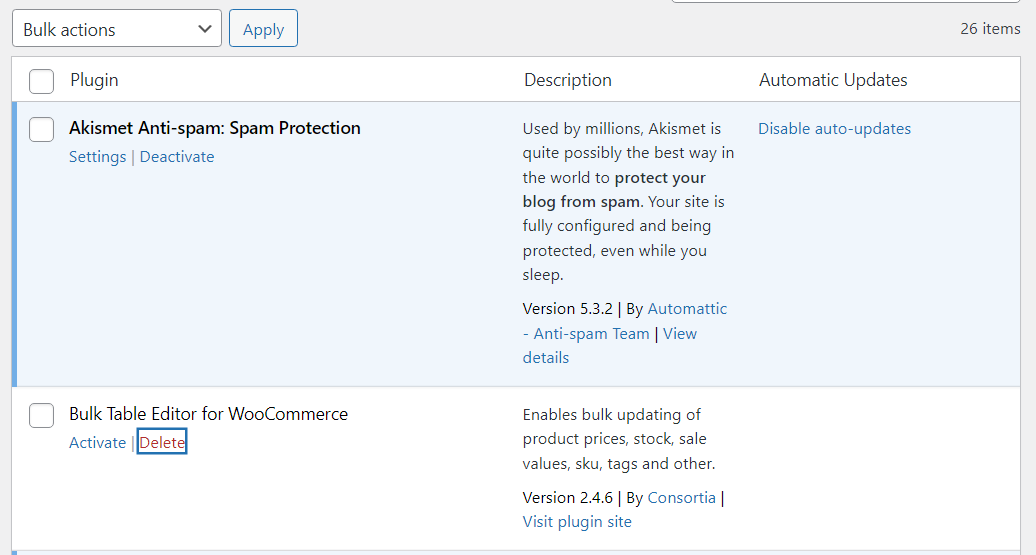
4. Remove unused plugins and themes
As your site grows, you may need new plugins and could even switch to a different theme. This might introduce more vulnerabilities to your site. As a rule of thumb, it’s smart to remove any plugins or themes that you no longer need.
The process is simple.
Go to your plugins or themes page in the dashboard. Then, deactivate and delete any that you’re no longer using.
If you decide to re-install some of these plugins at a later date, that’s fine. It will only take a few minutes to install and activate them, though you may need to configure their settings again.
5. Update all remaining plugins and themes
After you clean up your list of plugins and themes, you’ll want to check to see if any of the remaining elements on your site require updates. Plugin and theme updates can be just as important as WordPress core updates in terms of security, as they’re some of the most common vectors for attacks.
WordPress will notify you about any available plugin and theme updates when you access the dashboard. Ideally, you’ll update your site’s components as soon as new versions are available.
You can do this from the plugin and theme pages in the dashboard.
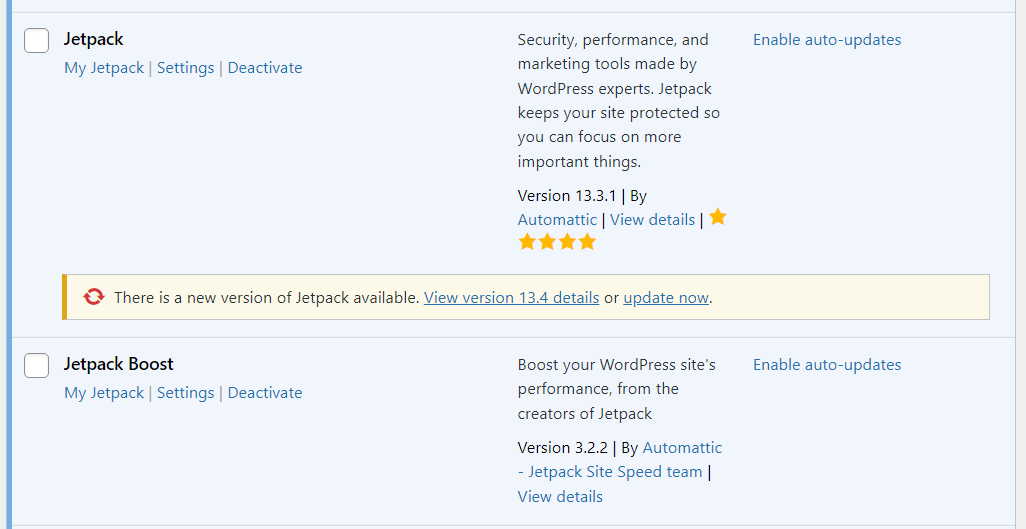
If you’re too busy to check your site every day, you can enable auto-updates for each plugin This is a simple measure, but it can drastically minimize the risk of vulnerabilities on your website.
6. Enforce a strong password policy
Quite often, website breaches aren’t caused by WordPress vulnerabilities but by human error. Many people use weak credentials to log into their websites, making it easier for hackers to gain access to the dashboard.
The best way to avoid this is to enforce a strong password policy. When you register an account on your WordPress website, a secure password is generated for you.

If you use Jetpack, you’ll also have access to two-factor authentication (2FA) functionality, which you can use to further protect the login page.
This can be very useful if you have multiple users on your site (like authors and shop managers). Even if your users stick to weak passwords, you’ll have the fallback of 2FA to protect your website against attackers with access to these credentials (more on this later).
7. Limit login attempts
Generally speaking, if someone can’t remember their login details, they’ll usually try a few different credentials and then request a password reset.
If you notice (through the activity logs) that an individual is trying a large number of username and password combinations, you’re probably dealing with an attack. That’s why it’s a good idea to limit the number of login attempts a user can make within a specific period of time.
This is a feature that’s available in Jetpack. The plugin offers brute force protection that can recognize known malicious IP addresses and block them from attempting to log in.

Brute-force protection is active by default with Jetpack. You can review its configuration by going to Jetpack → Settings. Here, you can also add allowed IP addresses, so Jetpack doesn’t mistakenly stop you from accessing the login page.
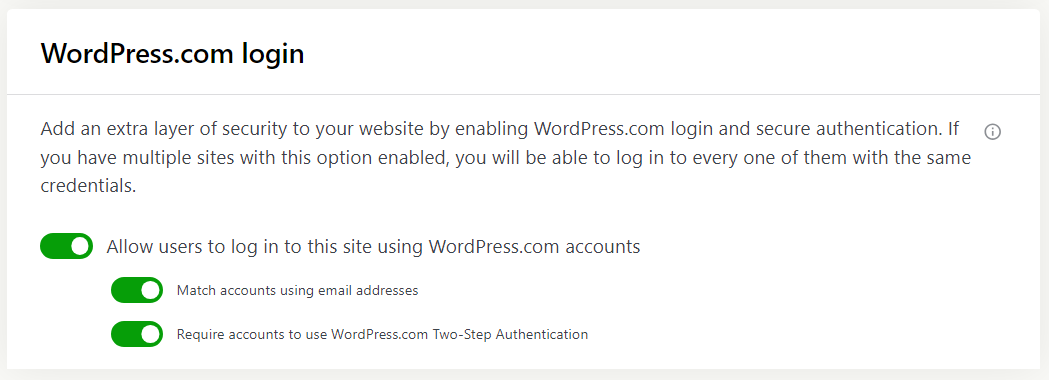
8. Harden login security with 2FA
A recent survey indicates that over 40 percent of developers consider implementing 2FA as their top priority. This measure minimizes the risk of attackers gaining access to your website with stolen credentials.
Two-factor authentication is a critical security feature as many users have weak passwords or re-use their credentials across a variety of sites. With 2FA, you require these users to provide another form of authentication.
As we discussed, Jetpack enables you to use 2FA for your WordPress website. This requires users to set up a WordPress.com account. They can then use this account to log into other WordPress websites, even those that use the open-source version of WordPress.
2FA is available with the free version of Jetpack. The feature can be toggled on or off, and you don’t need to tinker with advanced settings to configure it, as it relies on WordPress.com.
9. Remove unused user accounts
Inactive user accounts can pose a security risk for your website, particularly if they have high-level permissions (we’ll talk more about this in the next section). These accounts provide added opportunities for security breaches as their credentials might be compromised and shared on the web.
This is why a lot of websites will automatically delete your account if it’s inactive for long periods of time (after warning you, of course). WordPress gives you full control over your user list, which means you can add or delete users at will.
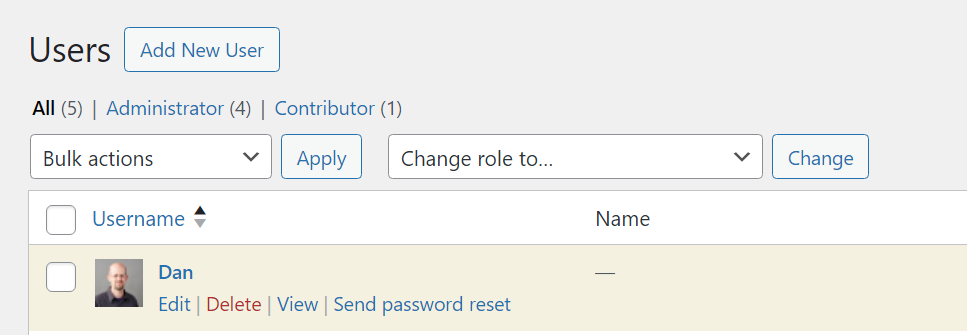
Deleting users is a simple process. Go to Users → All Users, find the account, and select the Delete option. WordPress will ask you for confirmation, but the user itself doesn’t need to approve account deletion.
You might want to contact users before deleting their accounts. But if an account has been inactive for years, it should probably be removed.
10. Assign the right role to the remaining users
After cleaning up the user list, your next step should be to review permissions for the remaining users. WordPress uses a simple role system, with each role having a predetermined set of permissions.
The only user role with full access to all WordPress settings is the administrator. For the sake of security, there should only be one administrator. Other WordPress roles include authors, editors, contributors, and subscribers.
Some plugins also add new user roles with updated permissions.
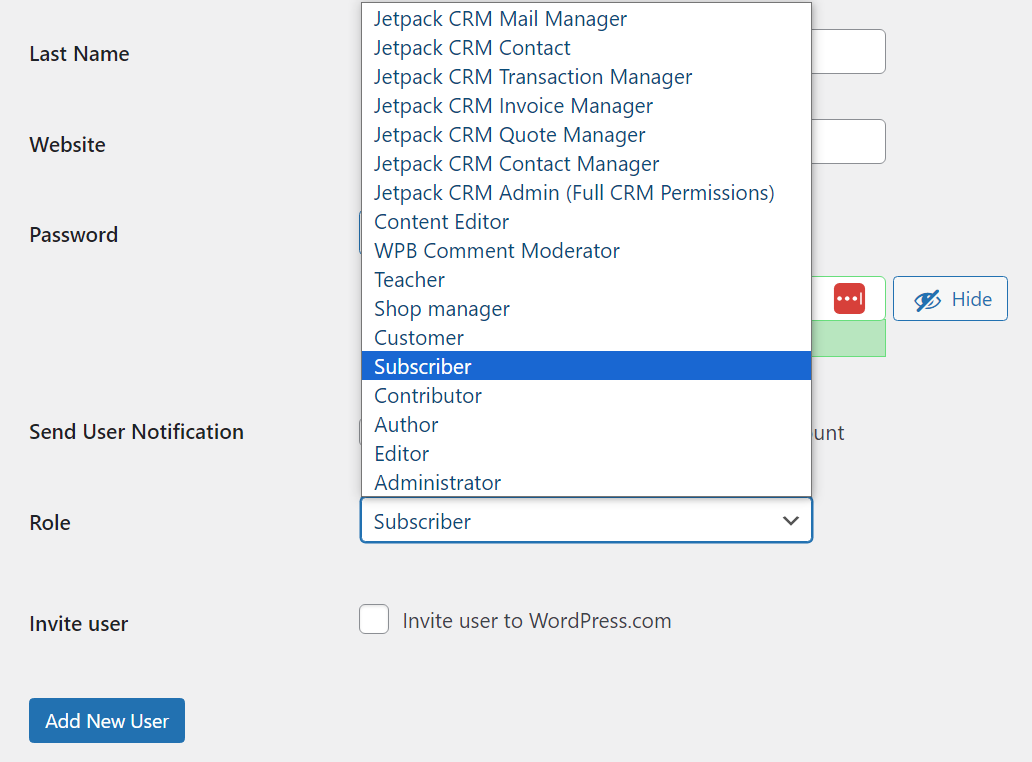
Each role comes with permissions that enable users to do certain tasks. Authors, for example, can publish and edit their own posts, but not those created by other users.
Ideally, no user should have a role that gives them more permissions than they need. Assigning the wrong roles can lead to security issues as users might change WordPress settings that they shouldn’t touch.
It’s important to review the user list periodically to ensure that everyone has the correct roles assigned. This simple practice will help you minimize security issues caused by team members with incorrect permissions.
11. Rename the default “admin” account
The WordPress administrator account is the crown jewel for attackers. If they gain access to it, they’ll be able to do anything they want on your website, including stealing data and planting malware.
By default, WordPress uses the admin username for the administrator account. You can change this while creating the account, but not afterward.
If you’re using the admin username, that’s an easy guess for most attackers, which means they only need to get your password. WordPress doesn’t enable you to change existing usernames, even as the administrator.

To circumvent this, you can create a new administrator account, with a stronger username, and then delete the first one. Note that you can only do this if you’re the administrator.
12. Change the default database prefix
By default, WordPress uses the wp_ prefix for site databases. This makes it relatively easy to guess the database name, which in turn, can help attackers connect to it.
You can reduce the risk of automated SQL injection tools identifying the database by changing that prefix. Ideally, you’ll do this during the setup process. The WordPress setup wizard will ask you what database prefix to use before setting up your website.
If your site is already live, you’ll need to modify the wp-config.php file to change the database prefix. Connect to the website using the file transfer protocol (FTP) and look for the wp-config.php file in the WordPress root directory.
Edit the file and look for the line that says $table_prefix = ‘wp_’;. Go ahead and replace the wp_ value with the prefix you want to use. Your FTP client should upload the changes when you save and close the file.
Now, access the database using phpMyAdmin. Select your database and use the SQL tab at the top of the screen to run the following query for each table in the database:
RENAME table wp_xxxx TO otherprefix_xxxx;
Here’s how that query should look in real life:
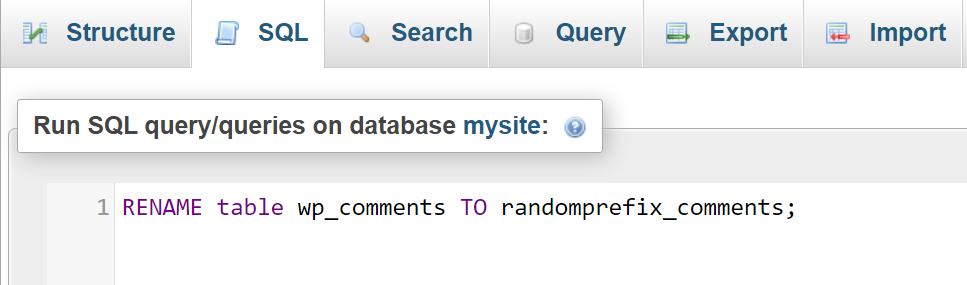
This is a highly sensitive process, so you should make sure to have a full site backup (including the database) before attempting to change prefixes.
Once the process is done, make sure your website is working fine. If you run into any errors, you might have forgotten to rename one of the database tables or executed the wrong query.
We guard your site. You run your business.
Jetpack Security provides easy‑to‑use, comprehensive WordPress site security, including real‑time backups, a web application firewall, malware scanning, and spam protection.
Secure your site13. Hide /wp-admin and /wp-login.php
You probably recognize both of these URL suffixes. They’re used to log into WordPress and access the dashboard. They’re easy to remember, but that can make accessing your website easier for hackers.
From a security standpoint, it makes more sense to use a different suffix for both URLs. To get started, you can check out this tutorial on how to change the WordPress login URL. This includes instructions to change wp-login and wp-admin.php both manually and using plugins.
14. Install an SSL certificate for data encryption
Nowadays, there’s no reason for websites not to use secure sockets layer (SSL) certificates. These certificates validate your site’s legitimacy and enable you to use the HTTPS protocol to send and receive encrypted data.
Some browsers will warn users if their connection to a site isn’t secure or whether it has an invalid or expired SSL certificate.
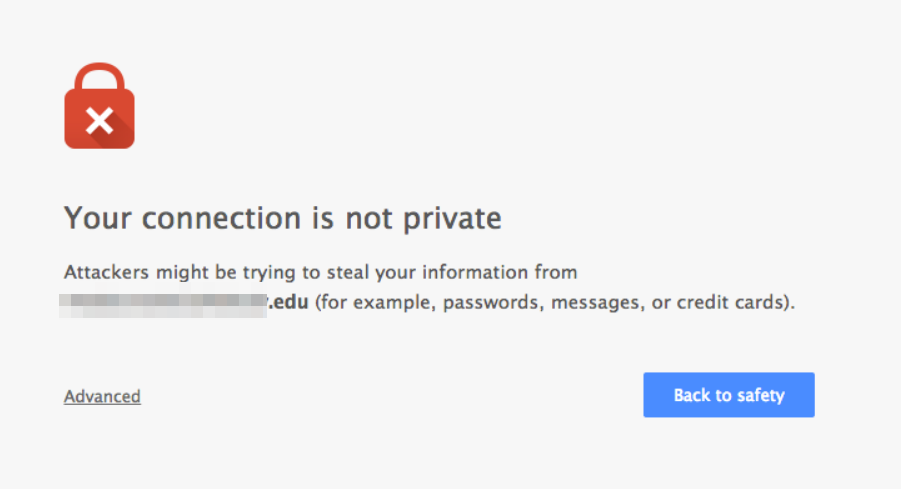
You can follow this guide to get a free SSL certificate for your website and install it. You can also use one of Jetpack’s recommended web hosts, all of which offer free SSL certificates with automatic setup.
15. Restrict FTP access by IP address
By default, anyone who has access to your website’s FTP credentials can connect to it using that protocol. This means that, should attackers get their hands on your credentials, they can modify almost any aspect of your site.
Some web hosts provide you with advanced FTP security measures, like limiting access by IP address. This enables you to choose which addresses can connect to your website via FTP.
Only the administrator and other team members who require access via FTP should have the necessary permissions. This can help minimize security incidents and help you identify who made changes to key files if you run into issues with WordPress.
Ideally, you won’t use FTP at all, and will instead choose SFTP or SSH to access your server.
This process will vary depending on your web host. If you’re not sure whether your hosting provider enables you to restrict FTP access by IP address, you can check their documentation.
16. Secure file and directory permissions
UNIX-based systems use permission rules based on number sets. Individual files and directories can have different sets of permissions, which govern who can access, edit, and execute them.
You can read more about how UNIX permissions work in the WordPress Developer Handbook.
For now, it’s important to note that there are ideal permission levels for WordPress websites and their file systems.
These are:
- 644 or 640 for files. The first set of numbers gives the owner full read and write access to the file, and other users in the group will only have read access. The second set of permissions doesn’t offer read access to users.
- 755 or 750 for directories. This set of permissions works in the same way as the last example, but with directories. 755 gives the owner full read and write access, with other members of the group having read access.
You can change file permissions for your WordPress file system using FTP. To do this, right-click on a file or directory and select the file permissions option (this can vary depending on which FTP client you use).
Some FTP clients will enable you to set file permissions by checking specific boxes as well as using the numerical system. You’re free to choose whichever option you prefer.
17. Disallow file editing
WordPress includes theme and plugin file editors out of the box, although some web hosts disable them by default. These are simple text editors you can use from the dashboard to make changes to the code for the plugins and themes on your website.
Enabling file editing from the dashboard poses a security risk. It means that if attackers gain access to the dashboard, they can directly modify the site’s code without needing FTP credentials or access to the hosting panel.
If your web host enables you to use file editing in WordPress, you can disable this option manually by modifying the wp-config.php file. Open the file and add the following line of code to the end before the line that reads /* That’s all, stop editing! Happy blogging. */:
define('DISALLOW_FILE_EDIT', true);Make sure the value is set to “true”, then save the changes to wp-config.php and close it. If you check the dashboard now, the theme and plugin editors should no longer appear there.
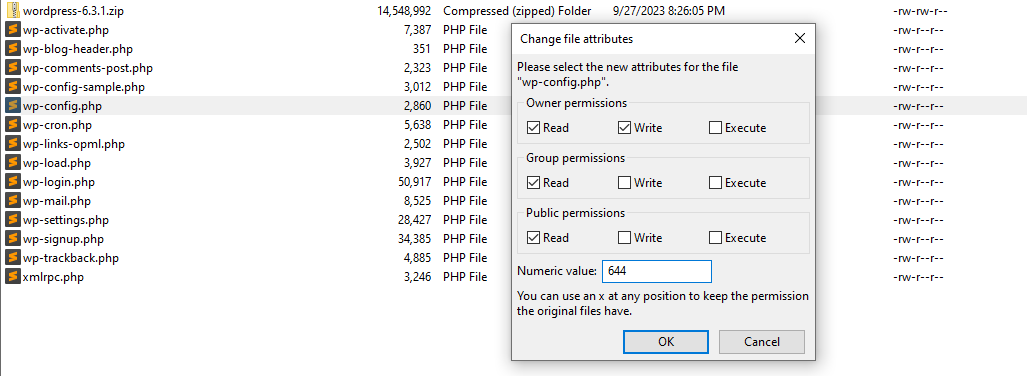
18. Secure your wp-config.php file
As you’ve seen from this WordPress hardening guide, the wp-config.php file is critical from a security standpoint. You can modify the file’s code to boost your website’s protection, so it’s essential that no one else has access to it.
We’ve already looked at a way to protect your wp-config.php file from unauthorized access. Mainly, it involves limiting who can connect to your website via FTP. Ideally, you’ll only have one or a limited number of IP addresses authorized to connect via FTP to reduce risk.
The second security measure you can take is ensuring that proper file permissions are in place. While the recommended permission levels for other files are either 644 or 640, the wp-config.php file should be set to either 440 or 400. Those permission levels mean that other users besides the administrator won’t even be able to get read access to the file.
The importance of backups for disaster recovery
Automating backups is possibly the most important security measure. With a recent off-site backup at hand, you can always restore your website if something goes wrong.
If you use VaultPress Backup, you don’t need to worry about creating backups manually. You can check available backups by going to Jetpack → VaultPress Backup and clicking on the See your backups in the cloud button.
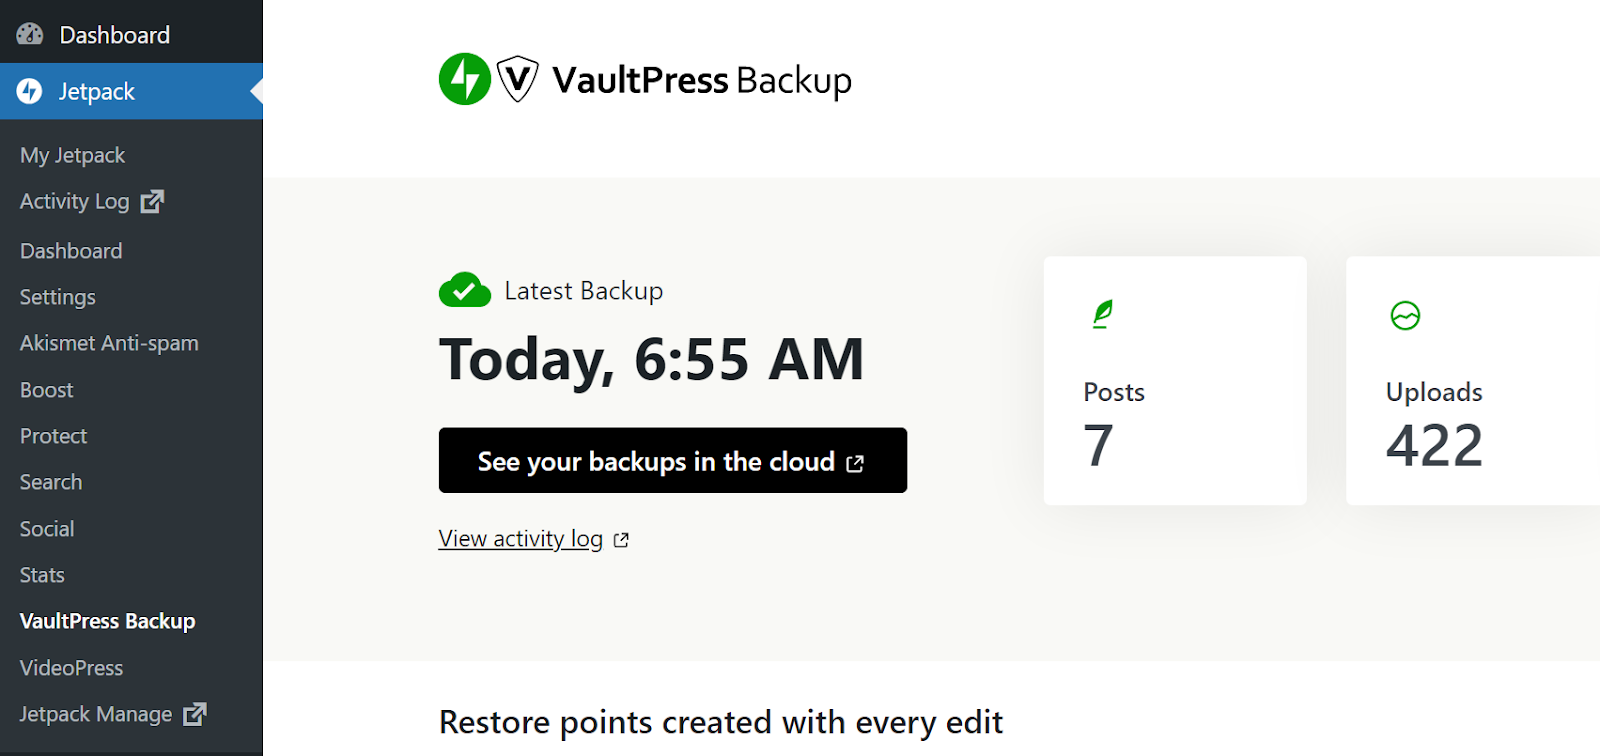
This will show you all the available backups and offer you the option to restore any of them with a single click. VaultPress Backup creates real-time copies of your site anytime you make changes to it, so you’ll always have recent backups available.
How Jetpack Security handles backups for peace of mind
Let’s take a closer look at how Jetpack Security handles backups. Note that the following features are only available with premium plans like Jetpack Security, Jetpack Complete, or VaultPress Backup.
1. Real-time backups
Most backup solutions either require you to create backups manually, or generate them for you on a schedule. For instance, you might have the option to make daily, weekly, or monthly backups.
Daily backups are a great start, but even then, you run the risk of losing critical data when you need to restore your website. If you made any changes to the site after that daily backup and before the next one, you’ll need to re-implement them.
VaultPress Backup solves this problem by creating copies of your site in real time. Whenever you make changes, the plugin will back things up, and you’ll have a new restore point available. This means you run no risk of losing data.
2. Ultra-secure offsite storage
Storage can be an issue with most backup solutions. You can store copies of your site on its server, locally, or even using cloud storage. Offsite solutions are better from a security perspective because if the server goes down, you still have access to them.
VaultPress Backup offers its own offsite storage solution. You don’t need to configure the plugin to work with cloud storage providers as you get access to Jetpack storage.
The plugin will automatically store the last 30 days of backups offsite. At any point, you can select one of these backups and restore it.
3. One-click restores
VaultPress Backup makes it easy to restore your website. All you need to do is select the backup you want to restore and confirm your choice, and the plugin will take care of the rest.
When you access your website again, you’ll see the version that you restored using VaultPress Backup. From that point on, you can continue making changes to the site.
Frequently asked questions
If you still have questions about how to protect your WordPress website or VaultPress Backup, this section will answer them.
What is WordPress hardening, and why is it important?
Hardening WordPress refers to the process of increasing your site’s security. This makes it harder for attackers to access the website.
What are the most common threats to WordPress sites?
Most WordPress vulnerabilities come from outdated plugins, themes, and WordPress core. Outdated software is more likely to have vulnerabilities that attackers can exploit to access or gain control of your website.
How can I monitor my WordPress site for security vulnerabilities?
The easiest way to monitor your site for vulnerabilities is to use a security scanner. Jetpack Security leverages WPScan to review your website for known WordPress vulnerabilities.
Moreover, Jetpack can help you fix any security issues that the plugin finds during scans.
What should I look for in a WordPress security plugin?
The best WordPress security plugins offer a collection of features that will help protect your website while minimizing the need for other third-party tools. You can use Jetpack with the Jetpack Security plan to get access to features like real-time backups, a WAF, spam protection, 2FA implementation, and more.
How many sites trust Jetpack for their website security?
Jetpack is one of the most popular WordPress plugins on the market due to its wealth of security and performance optimization features. Over five million websites use Jetpack, so it’s a great choice for both new and experienced WordPress users.
Can Jetpack Security help with spam comments and form submissions as well?
Jetpack Security includes spam protection features that automatically block or filter spammy comments based on advanced algorithms and data. You can also review flagged comments to ensure there are no false positives.
Where can I learn more about Jetpack Security?
If you want to learn more about Jetpack Security, you can visit the plan’s homepage. There you can find additional information about its features and sign up for a plan.
Protect your website using Jetpack Security
There are a lot of ways to harden your WordPress website. Some of these involve implementing security measures like changing the default login and dashboard URLs, securing your wp-config.php file, and more. In the majority of cases, though, the most impactful thing you can do to protect your site is to use an all-in-one security plugin.
Jetpack Security is a powerful solution. It enables you to protect your login page and defend your site against DDoS attacks. It also provides real-time backups, spam protection, and much more.
If you’re not sure where to start when it comes to hardening WordPress, check out Jetpack Security. You can sign up for a plan and start protecting your website right away!
We guard your site. You run your business.
Jetpack Security provides easy‑to‑use, comprehensive WordPress site security, including real‑time backups, a web application firewall, malware scanning, and spam protection.
Secure your site