
Need a simple way for visitors to share images, documents, or other files through your website? A file upload form makes it easy — no coding required. With Jetpack Forms, you can quickly create a WordPress form that lets people upload files securely and seamlessly.
In this guide, we’ll discuss scenarios where it makes sense to allow file uploads in WordPress forms. We’ll also look at why Jetpack Forms is the best tool for the job and show you how to use it.
What is a file upload form?
A file upload form lets visitors submit files directly through your website. Instead of sending documents by email, they can simply fill out a form and upload their files. Those files are then stored securely on your website.
This feature is incredibly useful if you need to collect documents like resumes, certificates, and signed paperwork. You can also use it to gather images for competitions, personalized products, and more.
Ways to use file upload forms
Here are some common use cases for a file upload form:
- Job applications: Allow candidates to upload resumes, cover letters, and portfolios.
- Creative submissions: Collect artwork, photos, or videos for contests and collaborations.
- Customer support: Let customers attach screenshots, invoices, and warranties when reporting issues.
- Client onboarding: Allow new clients to share contracts, project briefs, or reference files.
- Educational forms: Accept homework submissions, essays, certificates, and registration documents from students.
Regardless of the scenario, a file upload field saves you time and keeps data organized. It also ensures that files are submitted securely.
What’s the best form plugin for file uploads?
There are several WordPress form plugins that support file uploads. However, Jetpack Forms stands out for its simplicity, reliability, and built-in security features.
Designed by Automattic, the people behind WordPress.com, Jetpack Forms integrates seamlessly with the WordPress block editor. This means you can add and customize forms within any page or post. Plus, you’ll get a robust file upload field that supports multiple file types.
Key features included with Jetpack Forms
Let’s take a closer look at the features offered by Jetpack Forms:
1. Drag-and-drop file uploads
With Jetpack Forms, visitors can simply drag the file they want to upload to your form. As the website owner, you can define which file types are allowed (e.g., PDFs, images, documents) and set limits on size or number of files.
This user-friendly interface ensures a smooth experience for both you and your customers.
2. Real-time upload progress
Jetpack Forms displays a real-time progress bar as users upload their files. This reassures them that the upload is working, which is especially helpful for larger files. Plus, it improves the overall user experience.
3. Secure file storage with protected URLs
Security is critical when handling uploaded files. Unlike most form plugins, Jetpack stores uploads securely on your WordPress site with protected URLs so only authorized users can access them.
What exactly does this mean for you? You can keep user files and information truly private and secure without having to dive into server configurations. This protects your visitors, your business, and your time.
4. Seamless integration with Jetpack AI Assistant
When you use Jetpack Forms, you’ll also have access to the Jetpack AI Assistant. This premium feature is free to try and can automatically generate and organize form fields for you, based on simple text prompts. For example, you might ask it to create a required file upload field, and it will simply add it to the form for you.
The AI Assistant can also generate text, images, tables, and other types of content for your WordPress website.
5. Spam protection with Akismet
Jetpack also integrates with Akismet, a spam protection tool for WordPress, also from Automattic. Akismet automatically detects and blocks spammy form submissions before they reach your inbox.
This keeps your inbox clutter-free and protects your website from dangerous files.
How to create a WordPress form with file upload
Now that you know why Jetpack Forms is an excellent choice, let’s look at how to create your first file upload form in three easy steps.
Step 1: Install and activate Jetpack
If you haven’t already, you’ll need to install Jetpack. In your WordPress dashboard, click on Plugins → Add Plugin and look for “Jetpack – WP Security, Backup, Speed, & Growth” in the search bar.

Select Install Now and Activate. Then, connect to your WordPress.com account or create one for free.
Once connected, you’ll have access to Jetpack’s suite of tools, including Jetpack Forms.
Step 2: Create a new form
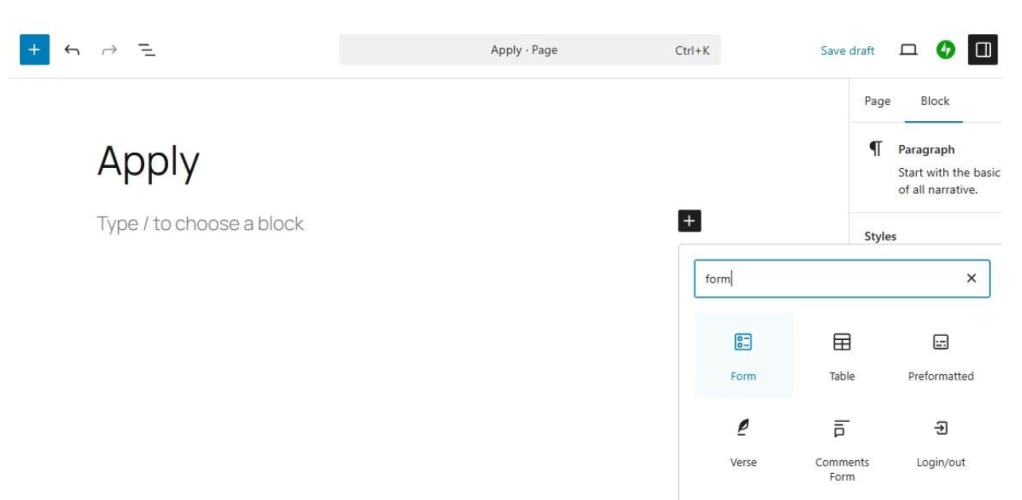
Jetpack Forms works directly within the WordPress block editor. Open the page or post where you want to add your form. Then, click on the plus (+) icon to add a new block and search for “Form.” Drag the Form block into your page.
Now, choose a template. Jetpack gives you several options, including contact, registration, RSVP, and appointment forms.
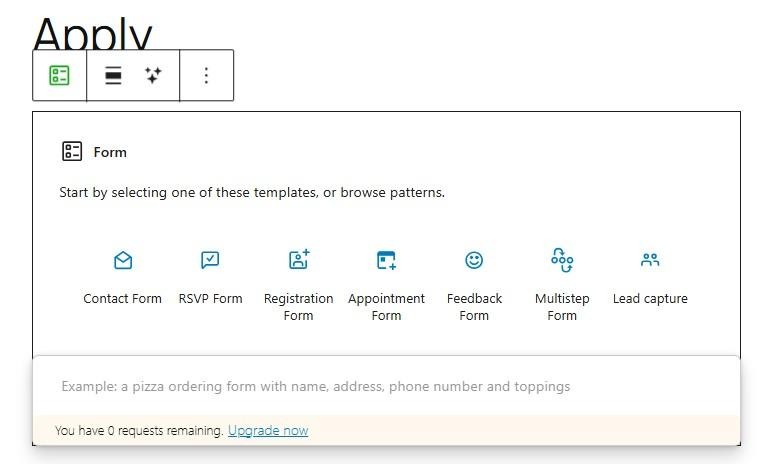
Don’t worry if you can’t see a template for the form you want to create. You can get started with a simple contact form and add more fields later.
Step 3: Add a file upload field
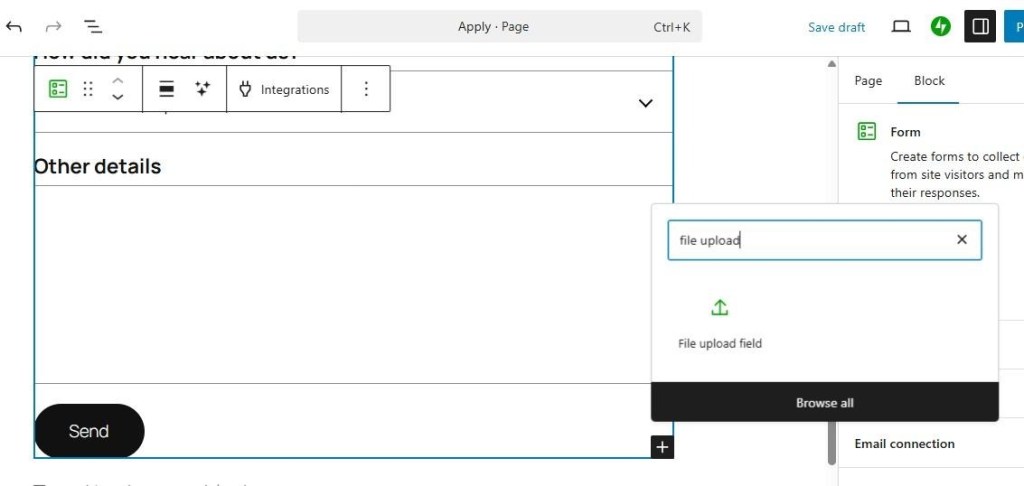
Let’s say you’re using a registration form template. Select the entire form, then click on the plus (+) icon to add a new block.
Here, look for the File upload Field.
Add the block to your form. Here’s what it will look like:
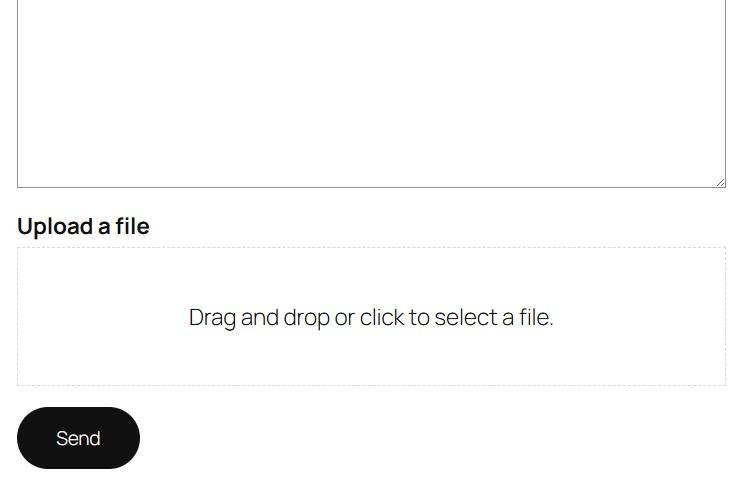
You can edit the label to make it more specific. For instance, you might write “Upload your resume” or “Attach supporting documents.” You could even specify the allowed file types, like PDF or JPG.
Once you’re satisfied, preview your form and click Publish to make it live.
That’s it! You’ve just created a WordPress form with a secure file upload field.
Now, when someone submits a form with an attached file, you can go to Jetpack → Forms → Responses to view the submission and manage the upload.
Frequently asked questions
Let’s answer some questions about file upload fields with Jetpack Forms.
Can I customize the look of Jetpack Forms?
Yes. You can customize colors, spacing, and typography for labels and buttons using the block editor.
What file types can be uploaded?
By default, Jetpack supports common file formats, like images (JPG, PNG, GIF), documents (PDF, DOCX), and compressed files (ZIP).
Can users upload multiple files at once?
Yes. Your form can accept multiple uploads, so users can submit several files in a single submission.
Is there a file size limit?
Files are uploaded and stored on Jetpack servers, which have a 20mb file size limit.
Where are uploaded files stored?
Uploaded files are stored directly in your WordPress dashboard. This makes it easy to access, manage, or delete them later.
Are uploaded files secure?
Yes. Jetpack protects uploaded files using private URLs that can’t be accessed publicly. It also comes with Akismet, which will automatically block spammy content.
Can I use Jetpack Forms for free?
Jetpack Forms is available in the free version of Jetpack, but you’ll need a paid plan to use file uploads.
Try Jetpack Forms today for seamless, secure file uploads
Creating a file upload form in WordPress doesn’t have to be complicated. With Jetpack Forms, you can add drag-and-drop uploads and collect submissions efficiently, all within your WordPress dashboard.
You can use Jetpack Forms to collect resumes, creative submissions, customer support files, and more. The plugin provides a clean and user-friendly interface, with automated spam protection by Akismet.
Are you ready to create your file upload form? Try Jetpack Forms today!
