
If you use WordPress to build and manage your website, you know about its powerful built-in features and ease of use. But did you know that you can add extra functionality and power up your website by using plugins?
We’ve put together this comprehensive guide to help you navigate the world of plugins. Read on as we explore what WordPress plugins are and answer common questions about how to find, use, and install the perfect ones for your site.
What are plugins in WordPress?
Plugins are pieces of software that work on top of WordPress to extend its functionality. Anyone from a single talented developer to a large organization or WordPress.com-backed team can create and submit a plugin to the WordPress repository. It’s a community-wide effort to share newly-developed features with others.
There are tens of thousands of plugins available, and you can use them to add a wide range of features and extend your WordPress experience. For example, you can use plugins to speed up your site, block spam, increase your site’s security, and add a fully-functional ecommerce store to your website.
Are WordPress plugins free, or do they have a cost?
There are both free and premium WordPress plugins available. Some premium plugins also offer free versions of their software with limited features. While free plugins are often useful, premium plugins tend to offer the best reliability, usability, and security, as a dedicated team of developers typically works full-time on creating, maintaining, and supporting the tool.
Is there a directory or list of WordPress plugins?
The WordPress repository is the largest directory of open-source WordPress plugins, currently holding more than 60,000 options. This makes it the perfect place to start when searching for a plugin to add a feature or tool to your site. Any developer can submit their plugin for inclusion in the directory, and the WordPress team manually reviews each submission. All plugins in the WordPress.org directory are free to download, but some may offer additional premium features or functions.
You can access the directory and add plugins to WordPress from within your admin dashboard by clicking on Plugins → Add New. You can also visit the directory and download a plugin that you can then upload to your site.
Where are plugins located in the WordPress dashboard?
You can see the plugins that are currently installed on your WordPress site by clicking on Plugins → Installed Plugins in your WordPress dashboard.
Any plugin highlighted in blue is currently active.
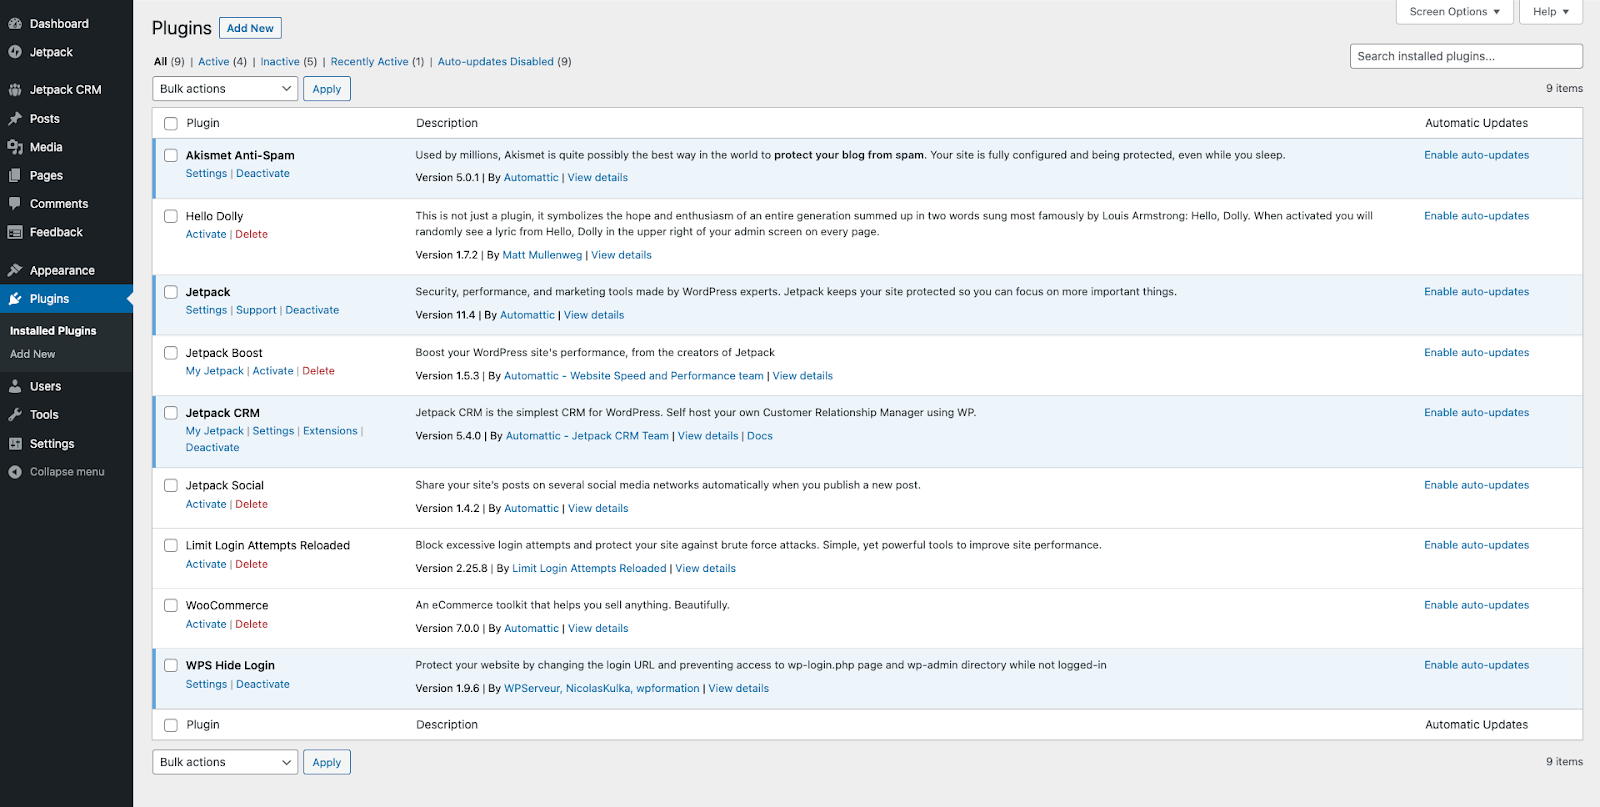
You can change the view to see only active, inactive, or recently active plugins by using the filters at the top of the page.
How to check if a WordPress plugin is safe
One of the best ways to ensure you use safe WordPress plugins is by always finding and downloading them from reputable sources, like the official WordPress plugin directory. All plugins are manually reviewed before being listed. You should also make sure the plugin is regularly updated and compatible with your version of WordPress, so you know the developers will quickly address any security vulnerabilities or issues that may arise in the future.
Using a WordPress security plugin like Jetpack Protect also helps ensure that your plugins are safe by automatically scanning your installed plugins each day for any known malware or security vulnerabilities.
Learn more: How to Choose the Best WordPress Plugins
How to install and activate a plugin on WordPress
There are four main ways to add a plugin on WordPress:
1. Add a plugin through the WordPress admin dashboard
One of the quickest and easiest ways to install a plugin on WordPress is from within your site’s admin dashboard.
First, click on Add New under Plugins in the dashboard. Or, click on Add new at the top of the Plugins screen.
You can then search for and install a plugin or upload a plugin that you’ve downloaded to your computer. Let’s look at both options.
How to find and install a plugin from the WordPress plugin directory.
You can use the search box on the Add Plugins screen to find the perfect tool for your WordPress website.
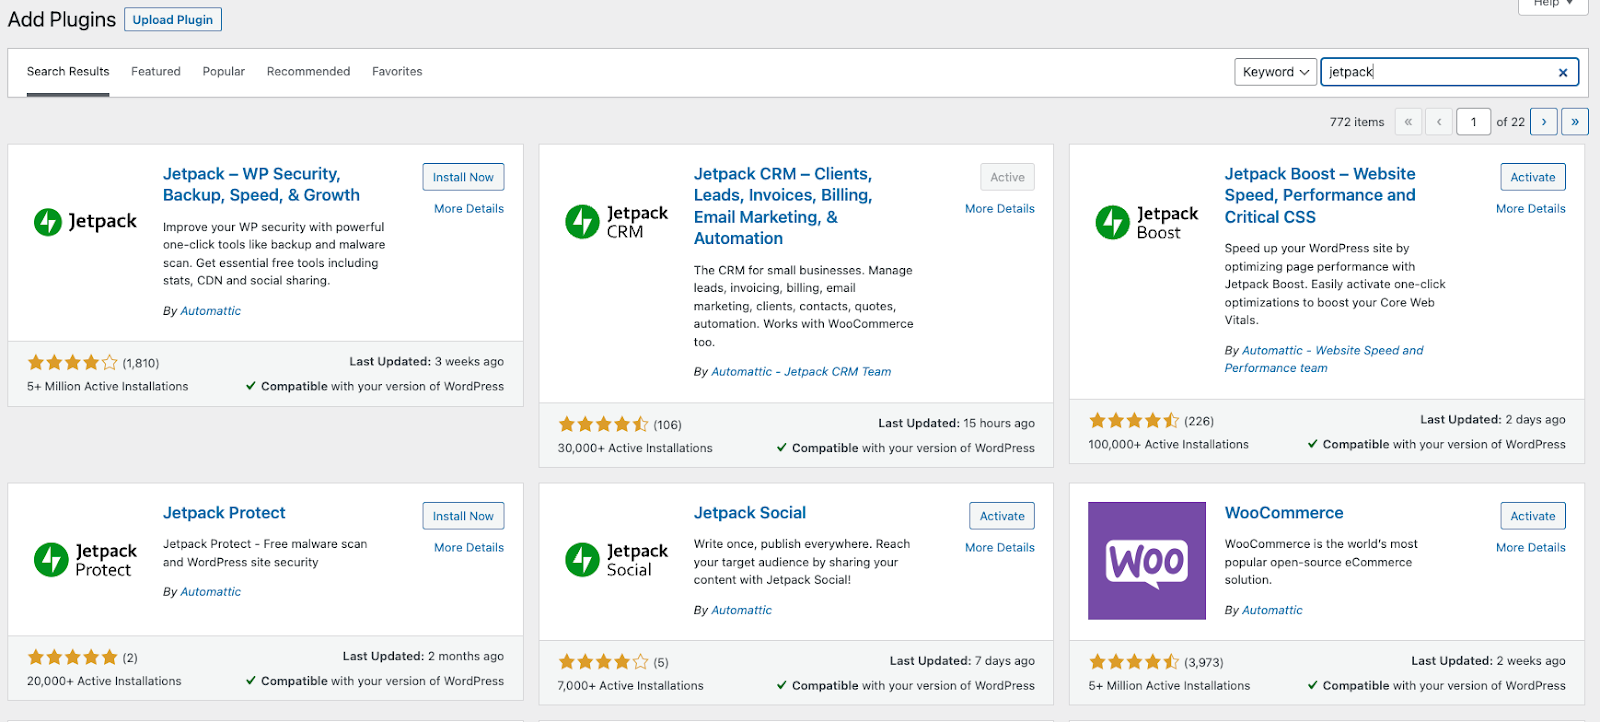
To add the plugin to your WordPress site, click on the Install Now button next to the plugin’s name.

The Install button will then change to show the text “Installing.” Once the plugin is installed, click on Activate to ‘turn on’ the plugin.
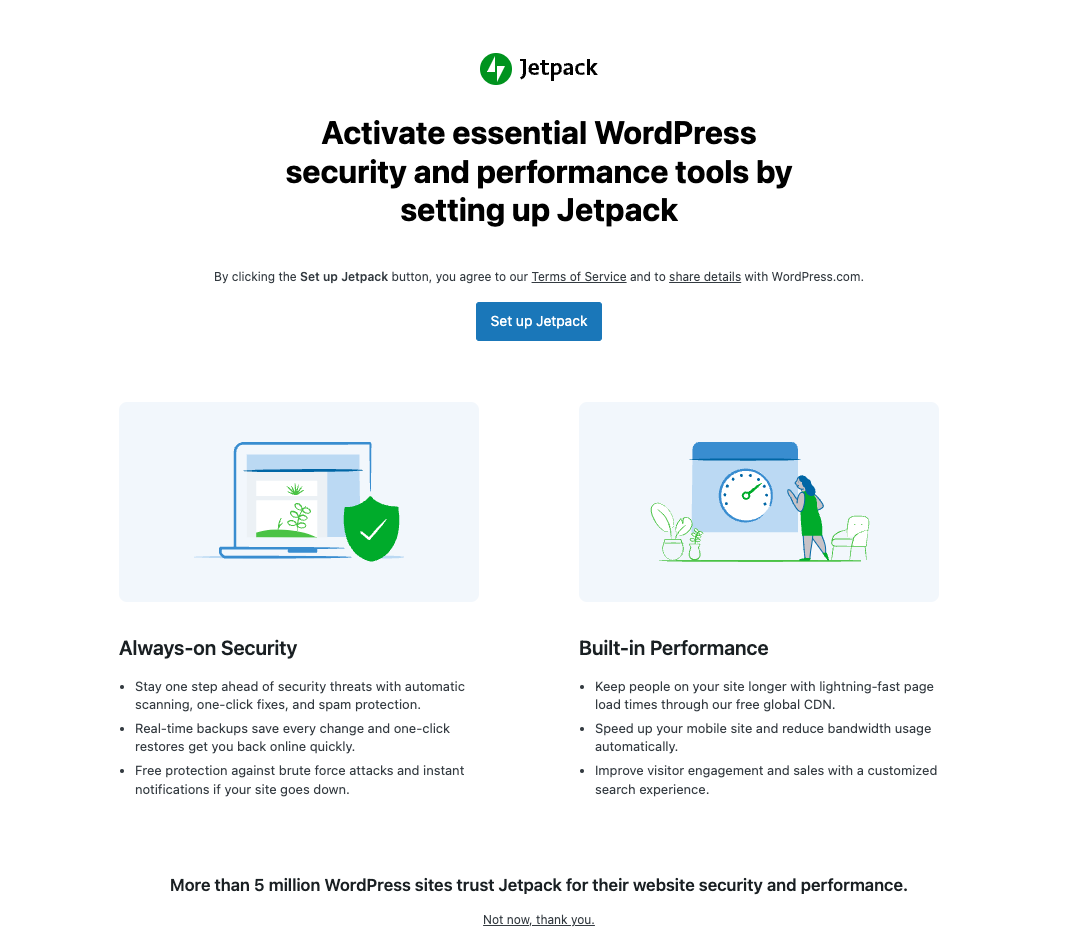
After you’ve activated the tool, you might see a setup wizard that walks you through initial settings. For example, Jetpack looks like this after installation:
How to upload a plugin to your WordPress website
You can also use your WordPress admin panel to upload plugins that you’ve downloaded from the WordPress plugin directory or directly from a developer.
First, click on Upload Plugin. Then click on Choose file and select the .zip file that contains the plugin you want to upload.

Next, click on Install Now to upload and install the plugin to your WordPress site.
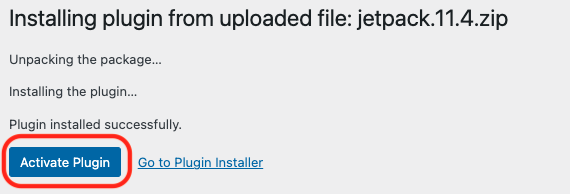
Once the installation is complete, you can activate it by clicking on Activate Plugin.
2. Add a plugin using an FTP client
You can also use an FTP client to add a plugin to WordPress.
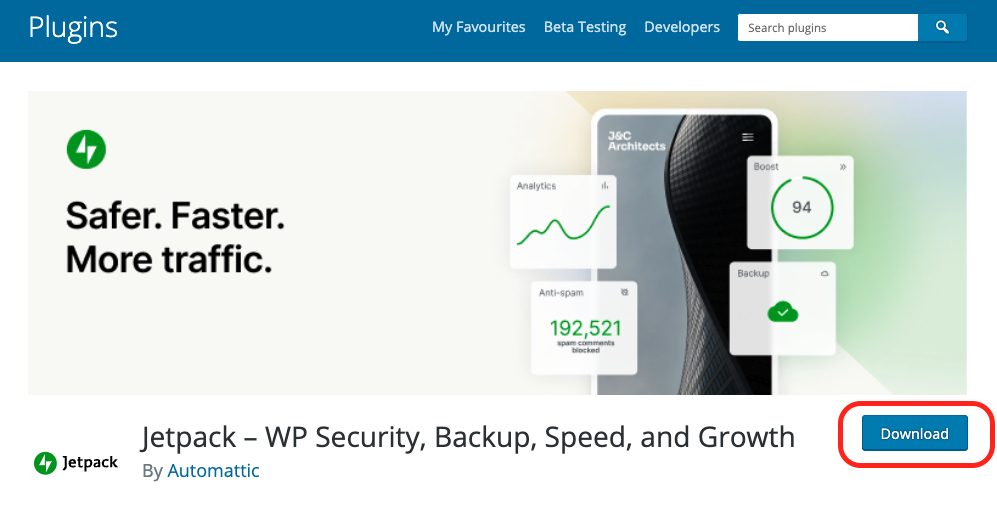
You’ll need to download the plugin to your computer. You can do this by downloading the plugin directly from the developer or by finding a plugin in the WordPress directory and clicking on Download.
Next, unzip the folder. Then, connect to your WordPress website using an FTP client such as FileZilla.
Next, navigate to your site’s /public/wp-content/plugins directory and upload the plugin’s folder.
To activate the plugin, login to your WordPress admin dashboard and click on Plugins.
You’ll see the plugin you just uploaded within the list of plugins installed on your website. Click on Activate to begin using its features.
3. Add a plugin using your cPanel
You can also add a plugin to WordPress by using your hosting provider’s cPanel.
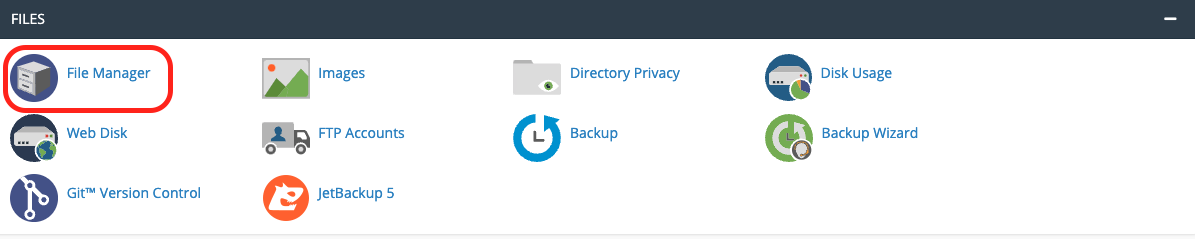
Log in to cPanel. Then navigate to the Files section and click on File Manager.
Select the root directory for your WordPress website and click on the wp-content folder.

Click on the plugins folder.
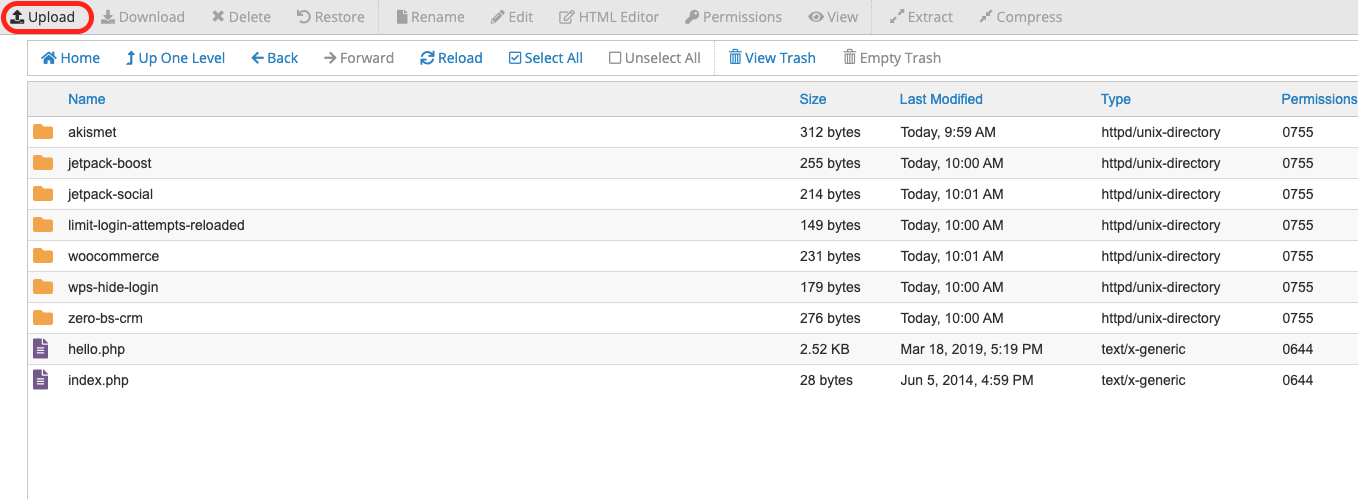
Choose Upload and select the .zip file that contains the plugin you want to add to your site.
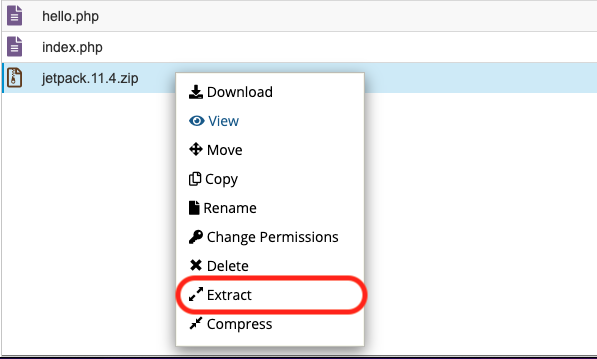
Once the plugin is uploaded, reload your plugins directory, right-click on the .zip file you just uploaded, and select Extract → Extract Files.
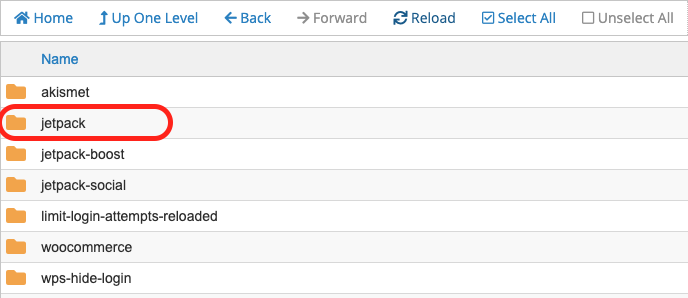
Reload your ‘plugins’ folder and check that you can see a folder with the same name as the plugin you just uploaded.
To begin using the plugin, you need to activate it by logging in to your WordPress admin dashboard and clicking on Plugins → Installed Plugins.
Find the plugin you just uploaded within the list and click Activate.
4. Add a plugin using WP-CLI
You can also install a WordPress plugin using the WordPress Command Line Interface (WP-CLI). To do this, you need to know the plugin’s name in the WordPress plugin directory. You can find this by looking at the URL of the plugin’s page — for example, the Jetpack Boost plugin is called jetpack-boost

To install a plugin, open your terminal and enter:
wp plugin install [plugin name]For example, to install Jetpack Boost, you would enter:
wp plugin install jetpack-boost You can then activate the plugin by entering:
wp plugin activate [plugin name]How to access and customize a plugin’s settings
To begin using a plugin on your WordPress site, you need to install and activate it. Most plugins then add a menu item to your WordPress admin menu or within the Settings, Tools, or Appearance menu of your WordPress dashboard. This allows you to access the plugin and customize its settings.
You can usually find instructions on how to access and customize the plugin on its page in the WordPress plugin directory or within the plugin’s documentation.
For example, you can follow these steps to keep your site one step ahead of security threats and malware with the Jetpack Protect plugin:
- Click on Add New at the top of your WordPress admin dashboard’s Plugins page.
- Enter ‘Jetpack Protect’ into the search bar.
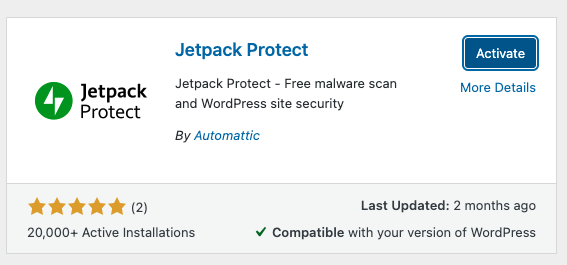
- Find the Jetpack Protect listing and click Install Now.
- Once the plugin has been installed, click on Activate.
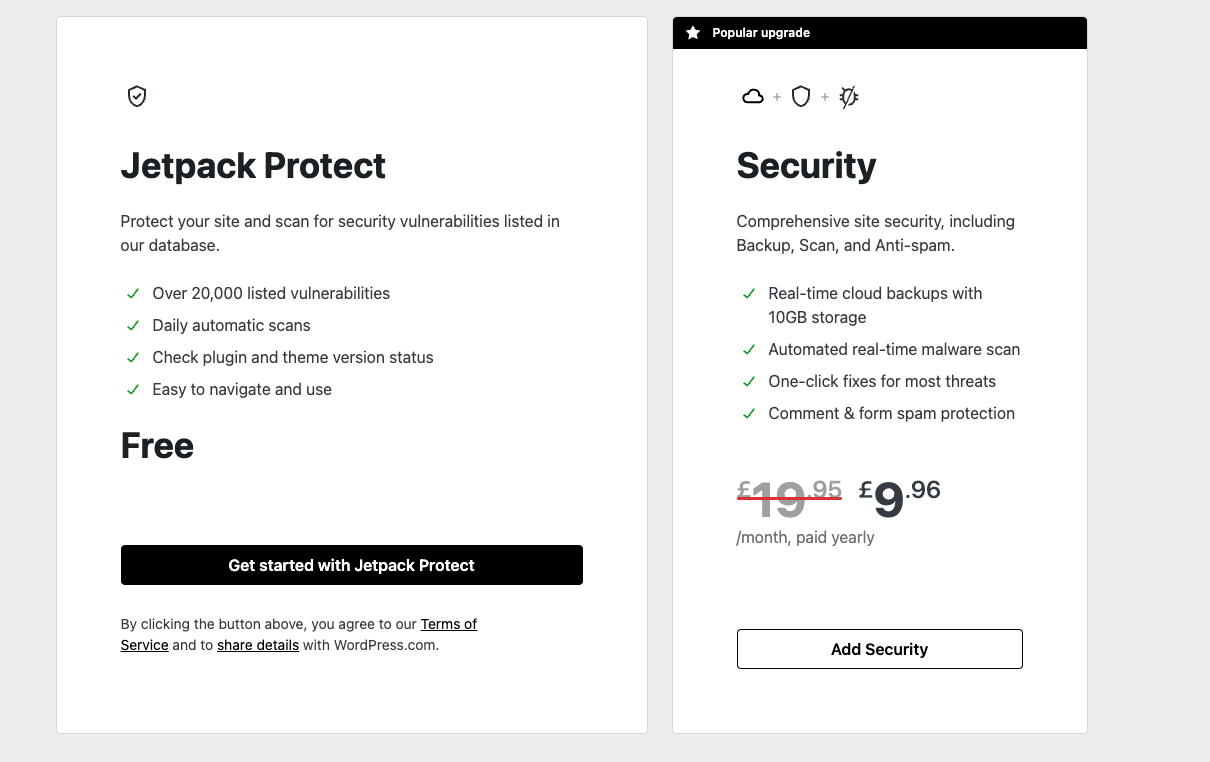
- Jetpack Protect makes setup easy by automatically showing you the configuration screen after it’s been activated.
Select whether you want to use Jetpack Protect for free or enhance your site security with backups and additional real-time malware scanning by upgrading to Jetpack Security.
- That’s it! Your site is now protected against malware. Jetpack Protect automatically starts your first security scan and takes you to the scan results page.
- You can access Jetpack Protect anytime and see your latest scan results by selecting Jetpack → Protect from your WordPress dashboard.
How to update a WordPress plugin
Most WordPress developers regularly update their plugins to add new features, fix bugs, and ensure the tool works with the latest version of WordPress. These updates often address newly-discovered vulnerabilities or security issues, so it’s essential that you help keep your site secure by always using the most up-to-date version.
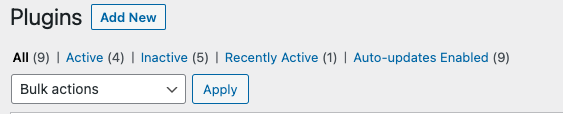
The best way to do this is by enabling automatic plugin updates. To do this, load the Plugins screen in the WordPress dashboard.
You can click on Enable auto-updates next to each plugin.

Or, you can select multiple plugins by clicking the checkbox next to each name and then selecting Enable Auto-Updates from the Bulk Actions drop-down menu.

You can manually update plugins by clicking on Updates on the WordPress admin dashboard menu. The number displayed in the orange circle next to “Updates” shows how many of your plugins and themes have new versions available.
Select the plugins you wish to update and click on Update Plugins.

Alternatively, you can update plugins from the WordPress dashboard Plugins page, which you can access by clicking on Plugins.
Any plugin that needs updating will display a yellow bar, and you can click on Update now.

You can also bulk update plugins from the Plugins page by selecting the plugins you wish to update and clicking Update from the Bulk actions dropdown.
How to deactivate and uninstall a WordPress plugin
Sometimes it’s necessary to stop using a plugin that you’ve installed on your WordPress site. For example, you may no longer want the features the plugin offers, or you might need to deactivate plugins to troubleshoot WordPress errors.
To deactivate a plugin, head to the Plugins page in your WordPress dashboard. Then, select Deactivate underneath the plugin you want to turn off.

You can also deactivate plugins in bulk by selecting the plugins and selecting Deactivate from the Bulk actions dropdown.
The files for deactivated plugins remain on your server, and you can reactivate the plugin at any time by finding it on the Plugins page and clicking Activate underneath its name.
If you don’t intend to use the plugin again, you should uninstall it from your website by deleting it. Here’s how to do this:
After deactivating the plugin, reload the Plugins page in your WordPress dashboard and click Delete underneath the plugin’s name. You can also use the Bulk actions dropdown to delete multiple plugins at once.
Five essential plugins every WordPress site should install
1. A security plugin like Jetpack Protect
You can keep your site secure by installing a plugin such as Jetpack Protect.
Jetpack Protect is a free security and malware scanner that’s easy to use. It will help you stay one step ahead of risks by automatically scanning your site each day. The plugin will then let you know if it finds any vulnerabilities associated with your plugins, themes, and WordPress software, so you can take action to secure your site.
Jetpack Protect leverages a robust database of known malware and security vulnerabilities which contains over 25,000 entries. WordPress security experts update the data as soon as new information becomes available, meaning its daily scans can spot the latest attacks and vulnerabilities.
Jetpack Protect is made by Automattic, the team behind WordPress.com, so it seamlessly integrates with your WordPress site and is guaranteed to work with any future updates. You can download Jetpack Protect for free from the WordPress plugin directory and start protecting your site with one click.

2. An SEO plugin like Yoast
SEO plugins like Yoast SEO can help your website rank higher on search engines by analyzing your content and providing guidance on improving it in line with SEO best practices.
Yoast SEO is one of the most popular WordPress SEO plugins, providing many features that ensure your pages are optimized for search engines. Once you activate the plugin, its default settings automatically implement SEO best practices on your site. Yoast SEO also analyzes your posts and pages for readability and keyword usage, displaying tips to help you improve your content.
A free version of Yoast SEO is available in the WordPress plugin directory. A premium version, which includes advanced features and allows you to analyze each page for multiple keywords, starts at $99 a year.

3. A form plugin like Contact Form 7
You can add forms to your website using a plugin like Contact Form 7.
Contact Form 7 is a popular WordPress plugin with over five million active installations. It’s quick to install and comes with default templates you can use to help your visitors easily get in touch with you. You can also use Contact Form 7 to create your forms, which can include a wide range of fields like drop-down menus, quizzes, and file uploads, and the plugin will email you every time a visitor submits a form.
Contact Form 7 also integrates with Akismet to help guard your site against spam form submissions. A range of third-party add-ons is available to add additional features, such as storing form responses and helping you change the appearance of your forms. You can download and add the plugin to your website for free from within your WordPress admin dashboard or from the WordPress plugin directory.
4. An anti-spam plugin like Akismet
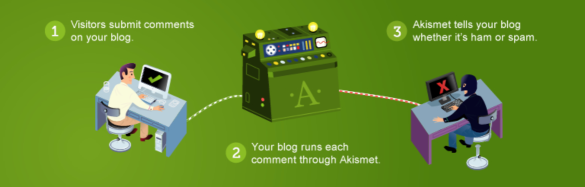
Anti-spam plugin, Akismet, can guard your site against spam in your comments and form submissions. Akismet keeps your WordPress comment section free of spam by automatically analyzing comments, discarding the most ‘spammy’ ones, and flagging questionable entries for you to review.
Akismet is one of the most popular WordPress plugins — it comes installed on every WordPress.com site and is included in many one-click WordPress installations. The plugin is made by Automattic, the team behind WordPress.com, meaning Akismet works seamlessly alongside the WordPress comment system and many other plugins, including Jetpack Comments.
Akismet helps block an astonishing 3,500,000 pieces of spam on average per hour, and this unbeatable spam protection is free for personal websites. Plans for business sites start at just $8.33 a month.
5. A backup plugin like Jetpack Backup
A backup plugin like Jetpack Backup can help you when your website suffers a problem or goes offline by getting it up and running again in minutes. Jetpack Backup is a comprehensive backup solution built specifically for WordPress by Automattic.
Because it utilizes real-time backups, which save every change you make, you never have to worry about losing a single thing — post update, page edit, visitor comment, or customer order.
In addition, Jetpack keeps your backups safe by storing them on multiple servers around the world, and you can even restore your site if it’s offline.
Jetpack Backup also includes a WordPress activity log that stores a complete record of everything on your site. You can select a specific time to restore your website to, and you’ll have your site back in one click.
With over 269 million site backups, Jetpack Backup is a proven choice for site owners. It’s available on a range of affordable plans, with 10 GB storage space, costing just $5 per month for the first year.
Frequently asked questions
Can WordPress work without plugins?
Yes, WordPress can work without plugins. WordPress has all the features necessary to create a website and publish content without a plugin. But plugins add helpful functionality and features to your WordPress website and can help keep your site secure and free of spam.
Can WordPress plugins contain viruses or malware?
WordPress plugins are generally safe, but just like any other software, malicious developers can create plugins containing viruses or malware that could harm your site. In addition, plugins may also contain vulnerabilities that allow hackers access to your site.
You can help protect your site against the risk of viruses and malware by:
- Downloading plugins from reputable sources, like the WordPress plugin directory.
- Regularly scanning your site for malware by using a security plugin such as Jetpack Protect.
- Keeping your plugins up to date.
- Making sure you have regular backups of your site, so you can restore it to a working version if it is ever infected by a virus or malware.
Why do plugins need to be updated on WordPress?
It’s essential to update your WordPress plugins to improve the security and stability of your site. Plugin updates often address security vulnerabilities, fix bugs, and make changes to improve performance and ensure they keep working with the latest version of WordPress. Updating your plugins also ensures you benefit from any new or improved features, and you should make sure you update your plugins as soon as one becomes available.
What should you do if a plugin installation fails?
Plugins installed using the Add new page of the Plugins section of your WordPress dashboard will normally install without any issues. However, sometimes plugin installations fail, which is more common if you manually upload a plugin to your WordPress site. To help resolve failed plugin installations, you can:
- Make sure you download your plugins from a trusted source like the WordPress plugin directory.
- Make sure you’ve selected the correct file and that it’s in .zip file format.
- Try uploading the plugin by using FTP or cPanel.
- Increase your WordPress memory limit.
- If the plugin is in the WordPress plugin directory, install it directly from your WordPress dashboard.
What should you do if a plugin won’t activate?
If your WordPress plugin won’t activate, you can try:
- Eliminating any theme conflicts by switching to a default WordPress theme like Twenty Twenty-Three.
- Checking that the plugin is compatible with your version of WordPress.
- Minimizing plugin conflicts by using tools that offer several of the features you need in one place, such as Jetpack.
What should you do if a plugin won’t update?
If a plugin won’t update, try to solve the issue by:
- Checking if you have sufficient storage space on your server to update the plugin.
- Manually downloading an updated version of the plugin and uploading it to your WordPress dashboard.
- If you’re trying to update a premium plugin, checking if you hold a valid license key.
- Checking if your WordPress installation is up to date.
- Using a tool like cPanel file manager to make sure the plugin’s files have the correct permissions.
How can I roll back a plugin to its previous version?
If a plugin update causes issues with your site, you may need to temporarily revert to a previous version of a plugin. You can do this in three ways:
- If you’re using Jetpack Backup, head to the activity log, navigate to a time you know the plugin was functioning as expected, and select Restore. Note that any other changes you made since the iteration you restore to will be lost.
- Connect to your site via SFTP and add ‘-deactivated’ to the end of the plugin folder’s name. Then download a previous version of the plugin from the developer or WordPress plugin directory and manually upload and activate it.
- Using WP Rollback to revert any theme from the WordPress plugin directory to its previous version.
How many WordPress plugins are there?
There is no definitive list of every WordPress plugin, so it isn’t easy to know precisely how many plugins there are. This is because WordPress is open source, meaning any developer can create and publish plugins. But, WordPress.org hosts the largest WordPress plugin directory, which contains over 60,000 free plugins — so there’s bound to be one that adds the feature you need.
How many plugins should I use on my site?
The number of WordPress plugins you should use depends on what type of site you’re creating and the features and functionality you want it to have.
It’s good practice to ensure you only use the essential plugins you need, as each plugin you install increases the chances of:
- Security risks from malicious code or vulnerabilities.
- Plugins conflicting with each other and causing your site to break.
- Your site slowing down.
Installing a plugin like Jetpack, which offers multiple valuable features, allows you to reduce the number of plugins you need to install and learn how to use.
How many plugins can be considered too many?
There isn’t a set number of plugins that is considered too many. It depends on various factors, including the quality of the plugins, their impact on your site’s performance, and your hosting provider.
