
If you manage a site with lots of content or information, it’s crucial to organize it all in a way that makes sense to visitors. A well-thought-out navigation menu and intuitive design is a good start, but it’s not always enough.
To go the extra mile, you can turn to the WordPress search function to increase your site’s user-friendliness and navigation. You can add this feature to almost any design, or create a dedicated page for it. Then, you can customize it to meet your unique needs, and use tools like Jetpack Search to enhance its functionality.
In this in-depth guide, we’ll talk more about WordPress search and discuss how you can add this vital function to your website. We’ll also explore some troubleshooting tips and frequently-asked questions. Let’s get started!
What is WordPress search?
Before we can discuss how to leverage WordPress search on your website, it’s best to have a basic understanding of what this feature is and how it works. Of course, you’ve probably used plenty of search engines before, like Google.
This type of search engine enables you to look for specific content anywhere on the web, using sophisticated algorithms and vast databases.
WordPress search lets you conduct the same type of inquiry, but it targets the content on a single website.
Typically, the search function is represented by the familiar magnifying glass symbol and is often found in the sidebar or website header. But it’s important to note that you can add a search bar virtually anywhere on your WordPress site.
How does WordPress search work?
WordPress search works like a search engine, only on a smaller scale. It’s included in WordPress core by default, and some themes may style it to match the rest of your theme settings. You can add it to your site using a Search block or widget, depending on the theme you’re using.
When it was first introduced, the standard search tool simply returned results based on the terms users input. Users could then click on the links in those results, and go directly to the pages that contained the specific content they were looking for.
Similar to the larger-scale search engines, though, WordPress has evolved its search function over the years. Initially, it could only return results that contained specific search terms, and in chronological order. Now, it can do a better job of understanding what users are looking for, and return results based on their relevance.
Furthermore, these days, adding a WordPress search bar to your website is easier than ever. You can add one to your pages and posts using the Search Block and the Site Editor. We’ll show you how to do that shortly.
What are the limitations of WordPress search?
While the default WordPress search option is very useful, it does have its shortcomings. First of all, it can only scan content from “the titles and the bodies of your posts and pages.” This includes:
- Page titles
- Media titles (images, videos, GIFs, etc.)
- Alternative text (alt text)
- File names
- Single image captions
- Paragraph text
This may seem like a lot, especially since it includes some elements that aren’t even visible to most users (like alt text and file names). But the fact is that this search still excludes lots of important information, including content contained in the following page and post elements:
- Widgets
- Comments
- Categories
- Gallery captions
- Tags
As you can see, a portion of your site is entirely ignored when you’re using the default functionality. In particular, if you run an ecommerce store, this means that some information from product pages could be completely left out.
Additionally, if your website contains a lot of content, it could take longer for search results to display. This may lead to a poor user experience (UX) for the searcher.
Fortunately, there are many ways you can customize and improve the WordPress search function. But first, let’s talk a little more about why this feature is so important.
Why should I use the WordPress search feature?
If you’re not familiar with web design or development, you may want to keep your website as simple as possible. So you might be wondering if using the WordPress search feature is really worth it.
The answer will depend on a few factors that are unique to your audience and content. But in most cases, you’ll likely benefit from using the WordPress search function. In particular, it can be very useful for sites with a lot of content that’s difficult to navigate, like blogs with extensive archives.

Ecommerce sites with lots of product pages and categories can also benefit from adding a search feature. This will likely result in an improved UX, and can even lead to a boost in conversions.
Alternatively, if your website features an extensive customer support or knowledge base page, it might be useful to add a search element there.

This way, you can provide answers more quickly, and reduce the number of customers reaching out directly to your support team. As a result, customer support representatives will have more time to work on trickier cases and improve satisfaction overall.
It’s important to note that there are some cases when you may not need to add an internal search feature to your site. For example, it might not be necessary for one-page websites and other sites with very limited content. For most websites, though, this particular function is essential.
How to add search functionality to your WordPress site
Now that you know a bit more about how WordPress search works and why you may want to take advantage of this feature, we’re going to show you how to add it to your site!
1. Start by adding the default search functionality
If you don’t need premium search capabilities, you can use the default WordPress search functionality. As we discussed, this might not be ideal since it excludes key information from elements like comments, widgets, and more. Plus, if you have a lot of content to search, it might return results rather slowly.
However, even if you do plan to use the amazing benefits of Jetpack Search, you’ll start with this step as Jetpack Search essentially builds upon the default capabilities.
For this tutorial, we’ll be adding a search bar to the navigation menu in our global header. But keep in mind that the process is similar, no matter where you add your search bar, as long as you’re using WordPress blocks.
To begin, navigate to your WordPress dashboard. Go to Appearance → Editor, and select the page element you’d like to modify. In our example, it’s the menu within the header.
Then, click on the plus symbol (+) to find and add the Search block.

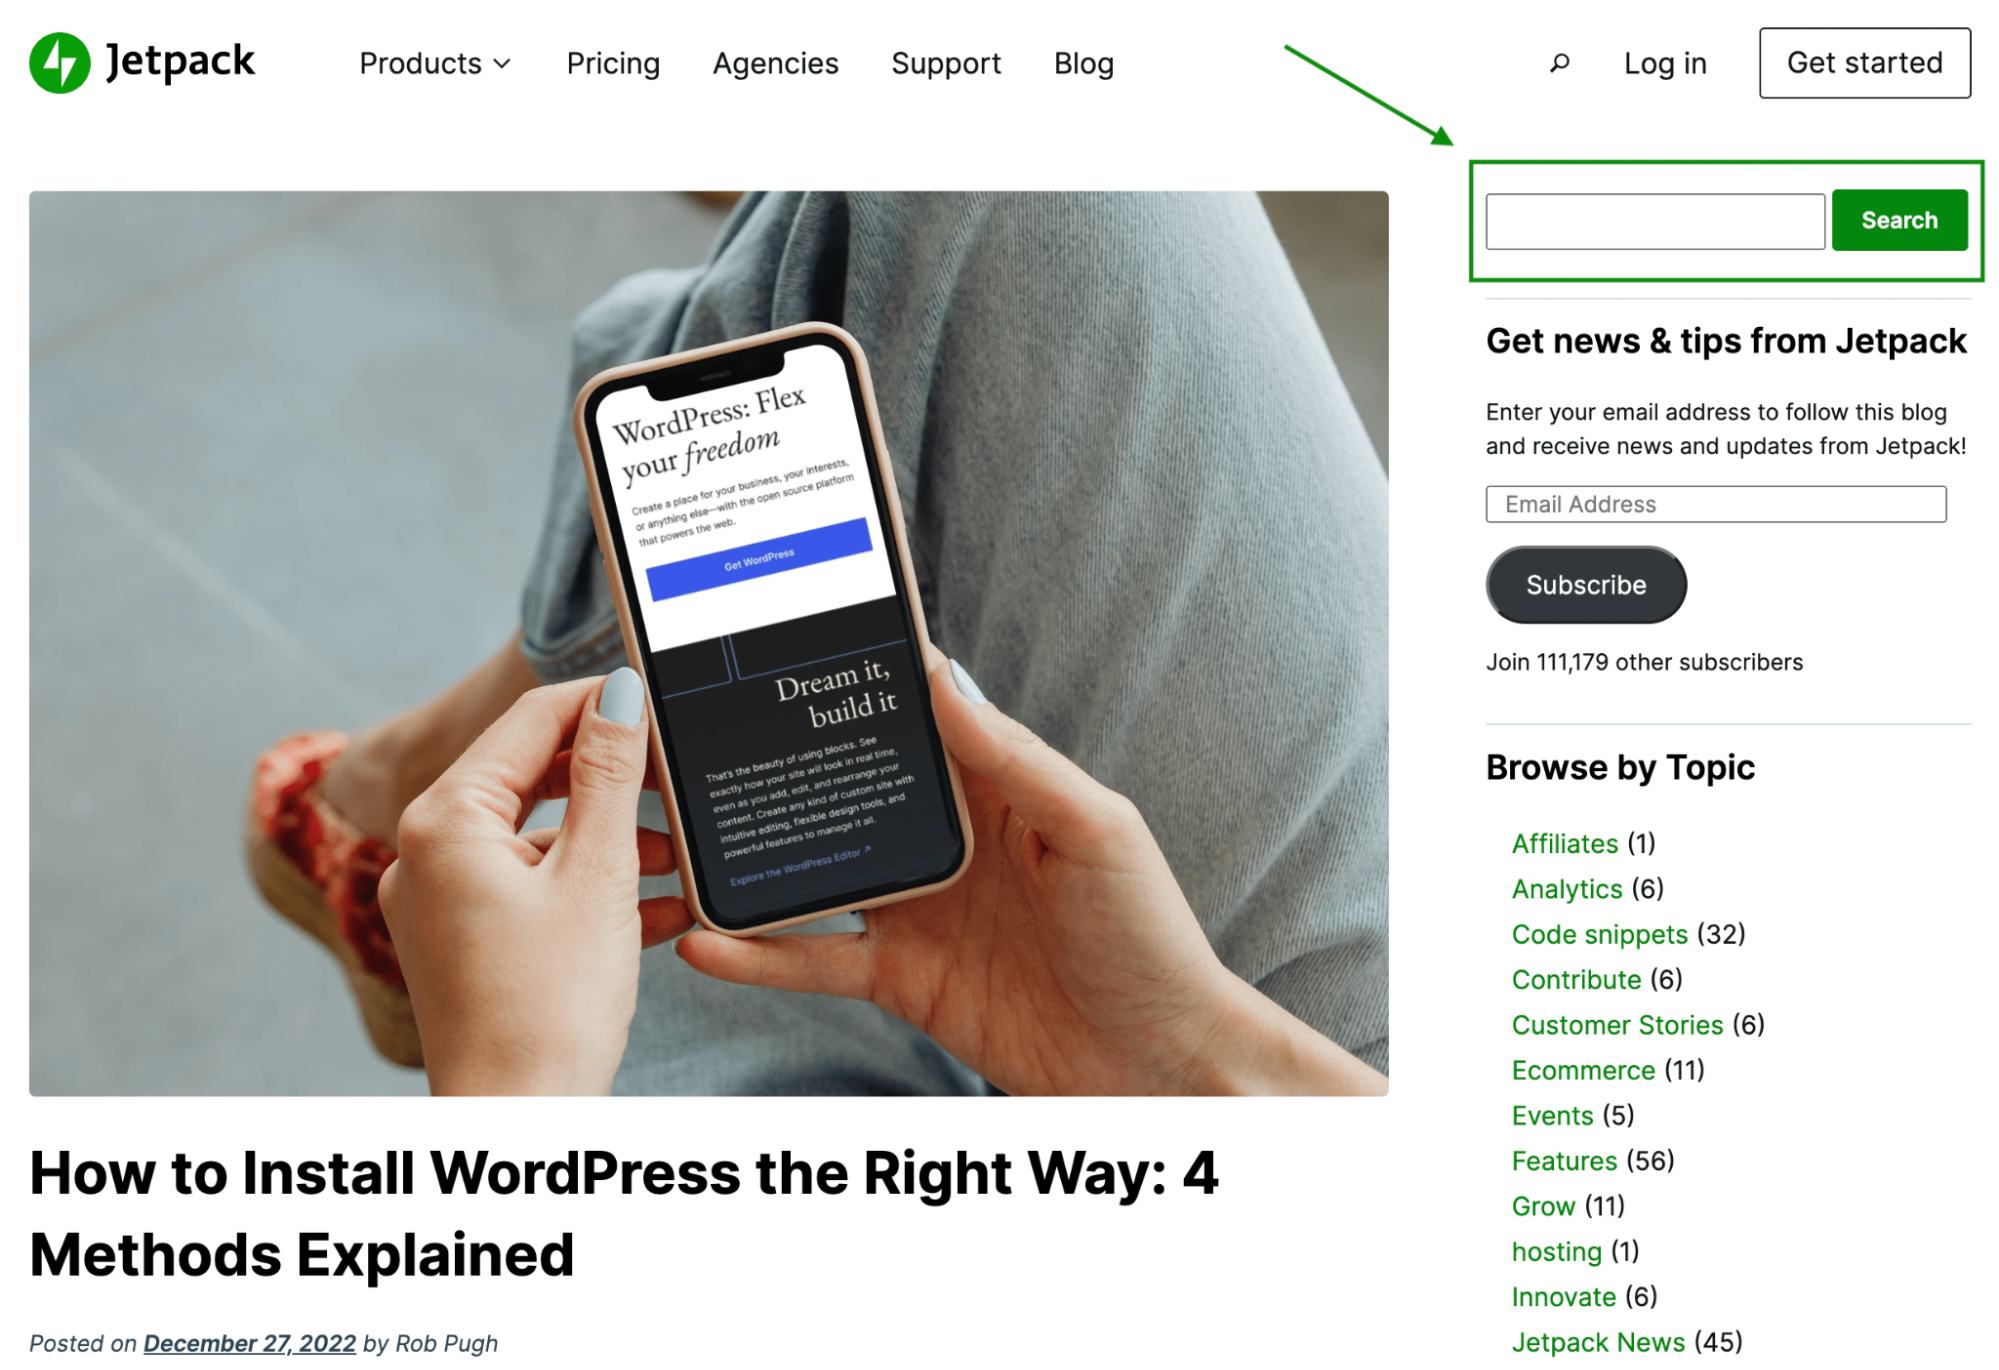
In this example, since we’re adding it to our header, you’ll find it under the Transform submenu. After you’ve added the search bar, simply save your changes or publish your page. Here’s what the final result looks like:

As you can see, by default, the search block shows a brightly-colored magnifying glass and an empty field for inputting a query. These default appearance settings might not be ideal for your site’s color scheme or theme. But don’t worry; we’ll show you how to customize these elements later.
2. Now, install Jetpack Search for enhanced capabilities
As we discussed, the native WordPress search function comes with its limitations, so you may want a more powerful internal search option. If that’s the case, your best choice is Jetpack Search.

This powerful tool will help you take your website’s search feature to the next level. It’s highly customizable and optimized for speed.
Jetpack Search uses “instant search” (a.k.a. AJAX search) to deliver results as fast as possible. Thanks to its real-time indexing, users can see results as they type.
Plus, it allows for advanced filtering, so your visitors can find exactly what they’re looking for in record time. Jetpack Search comes in both free and premium versions. Or you can purchase it as a part of a package with other performance tools.
Before you get started, make sure your site meets the minimum requirements for installing Jetpack Search. These are pretty straightforward. For instance, you’ll need the latest version of WordPress, a WordPress.com account, and a publicly-accessible site.
Then, simply navigate to your WordPress dashboard. Go to Plugins → Add New and input “Jetpack Search.”
Click Install now → Activate.

You’ll then be directed to a screen where you can select either a free or premium plan.
Next, click Approve to connect your site to WordPress.com, then complete the checkout process.
Another great thing about Jetpack Search is that it’s pre-configured. That means it will be ready to go after you choose your plan. You’ll be taken straight to the Customizer screen, so you can confirm that everything is working properly.
How to improve and customize WordPress search
After you’ve added the WordPress search function to your website, you can then customize it to your liking. Continue reading to learn how!
1. Editing the default search functionality
Earlier, we showed you how to add the default WordPress search function to your site. Now, here’s how you can customize your search bar using this standard feature.
Return to the Site Editor or the page or post you want to work with. Then, select the search bar element. Make sure to highlight the embedded Search block and not the parent block, which in our example is the Navigation element.
When you select the Search block, you should see its unique toolbar.

From left to right, you have a search tool, a drag feature, and arrows to move the search element. Then you have three more icons you can use to make adjustments. You can use the first icon to add a label to your search bar.
Alternatively, you can modify the location of your search button.
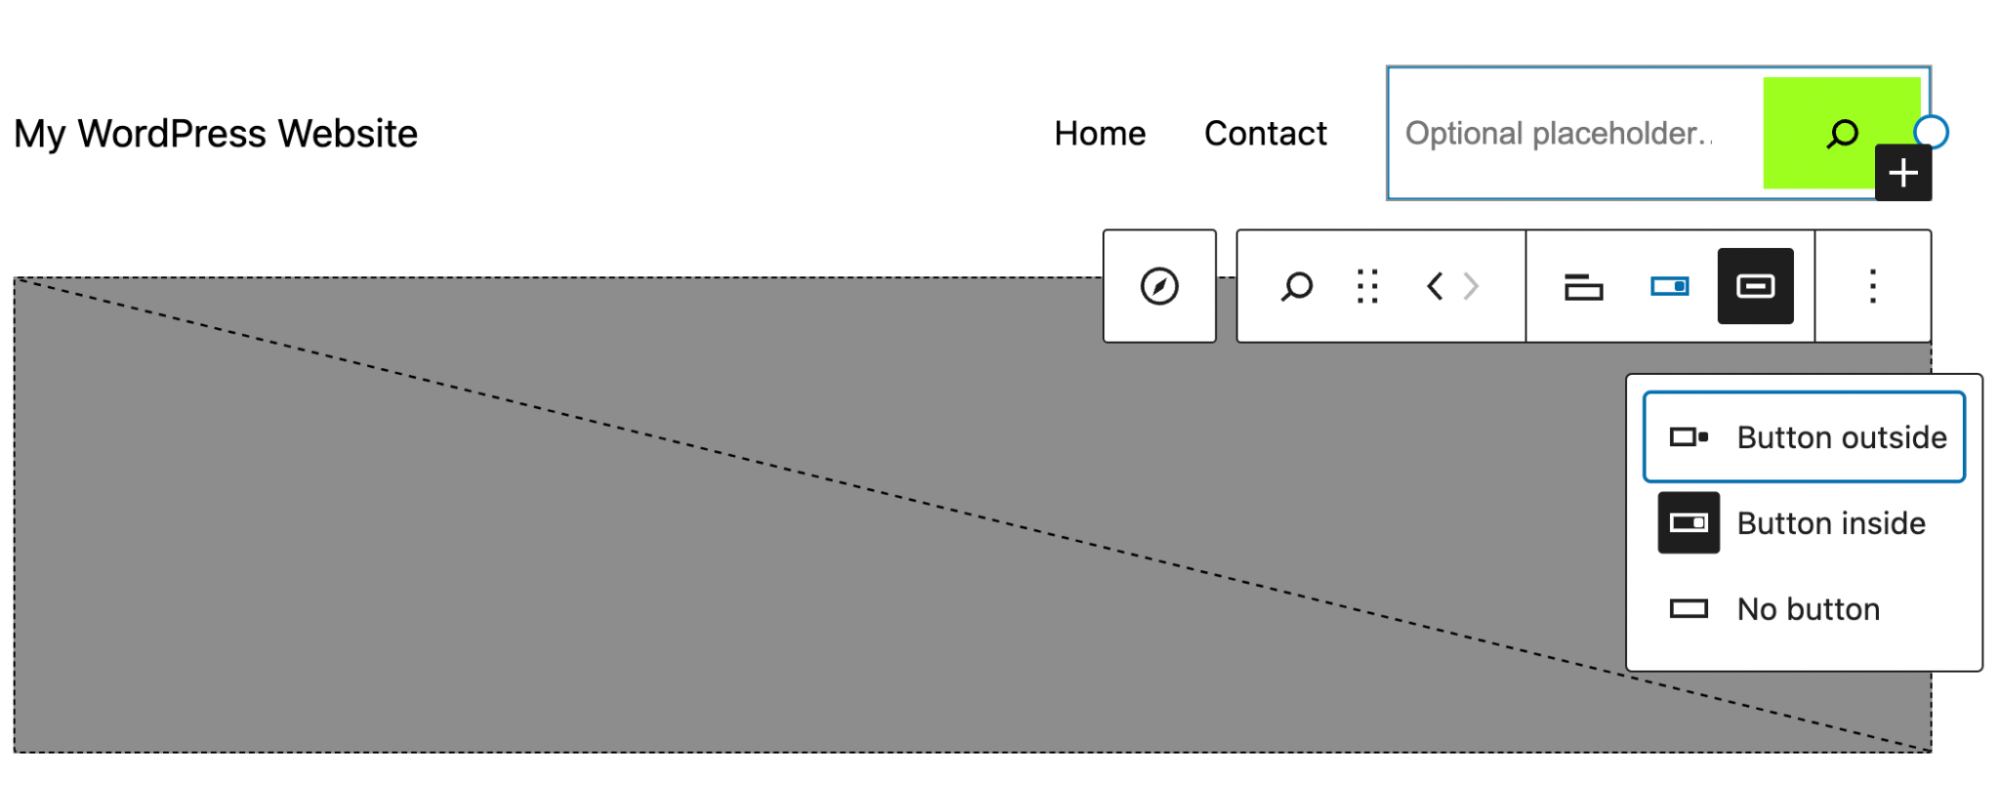
Finally, you can change the magnifying glass symbol to text if you prefer.
Next, you can explore additional settings in the Block menu on the right. For instance, you may want to change the background color of your button.

If you continue to scroll down, you can change other display settings like width, typography, and more. Just keep in mind that while you do get a decent level of control over your search bar’s appearance, you won’t have the ability to change how results are displayed.
2. Advanced customizations with Jetpack Search
At this point, you’ve already modified the search bar to match the look of your site. Now, if you’re using Jetpack Search, you can take things a step further by customizing the user experience of search results.
Customizing the Jetpack Search experience for advanced design and functionality is pretty straightforward. There are a few ways you can go about this, but the easiest approach is to navigate to your WordPress dashboard and go to Jetpack → Settings → Performance.

Make sure that both of the toggle buttons are enabled (this is recommended), and then click on Customize your Search experience.

Under the Options tab, you’ll see that you can customize the Styling, Result Format, and Search settings. When it comes to Styling, you can opt for Light or Dark. You can also display images in results, modify the background color for your search field, and choose from different Overlay Trigger options.
Further down, in the Options menu, you can exclude post types and disable additional settings like infinite scroll and the “Powered by Jetpack” message. As you can see, Jetpack Search allows you to personalize almost every detail of your search bar.
If you want to offer your users the best search experience possible, you might consider creating a dedicated search page. Alternatively, you could include the search element on every page, as we did in our example by modifying our site-wide header. Even better, you may want to provide both options!
What if WordPress search isn’t working as intended?
Once you’ve added and customized your internal WordPress search bar, chances are you won’t have to worry about it any further. But occasionally, your WordPress search tool may not work as intended.
In case this happens to you, let’s go over some common issues and how to resolve them.
1. WordPress search is not returning any results
When you use the native WordPress search function, you may occasionally encounter a 404 error. That means your searches won’t return any results.
If this happens, you may need to regenerate your site’s permalink structure. Fortunately, this can be done in just a few steps within your WordPress permalink settings.
2. WordPress search is not showing all possible results
As we’ve discussed previously, when you add the default WordPress search bar to your site, it only scans certain types of content.
This means that some relevant content may not show up in the search results. You can avoid this by upgrading to Jetpack Search, so visitors can find what they need, no matter where it’s located.
3. WordPress search is very slow
Unfortunately, another common issue with WordPress search is results that take a long time to display. This most often affects larger websites with lots of content and pages, like blogs with lots of posts and sizable online stores.
If this occurs, you can use a WordPress search plugin instead of the default functionality. Jetpack Search is designed for speed, and uses real-time search that allows users to view results as they type.
Frequently asked questions
Hopefully, by now you have a good understanding of WordPress search. But just in case you still have lingering questions, we’re going to cover some frequently-asked questions about this feature.
Why is internal search important for a website?
As we discussed previously, internal search can greatly benefit most websites. This is particularly true for larger sites with lots of information.
For example, blogs with extensive archives will definitely need a search tool. The same goes for ecommerce sites with many product pages that would benefit from a search functionality, such as a WooCommerce product search plugin. Otherwise, visitors may wind up frustrated when they can’t find what they want quickly, and could abandon your website as a result.
While robust and user-friendly navigation menus can help organize larger sites, the WordPress search feature greatly enhances UX and ultimately boosts your business goals.
How can I make WordPress search faster?
While WordPress search can be a valuable tool, if your website houses lots of content and you’re using the default functionality, your users could end up waiting longer than they need to for results.
To make WordPress search faster, you can install and customize a plugin specifically designed for this purpose, like Jetpack Search. Additionally, you may want to implement a caching solution.
Can I customize WordPress’ default search options?
The short answer is yes: you can customize WordPress’ default search options. There’s a lot you can do to alter the search bar’s appearance. If you want more advanced customization options, though, you’ll need to upgrade to a WordPress search plugin.
What is the best plugin to improve WordPress site search?
There are a handful of good WordPress search plugins that you might want to consider. But if you’re looking for a trustworthy, all-in-one solution, Jetpack Search is hands-down the best option.
It comes with advanced filtering, real-time search, and performance optimization. Plus, you can easily pair it with other Jetpack tools to ensure that your WordPress site is always functioning as it should.
Elevate your website with WordPress search
If you manage a large WordPress website with lots of valuable content, you may struggle to present it to visitors in an accessible way. While proper site structure and robust navigation can help with this, they might not be enough. That’s where the WordPress search function comes in handy.
You can easily add a WordPress search bar almost anywhere on your site. You can use the Search block to access the default functionality. But this basic feature may not be ideal for some sites, as it can’t scan certain page elements like widgets, comments, categories, and more.
To ensure that your users get lightning-fast results, you can upgrade to Jetpack Search. This tool also unlocks advanced features like powerful filters to help people find what they’re looking for more easily.
Help your visitors find what they need
Instantly deliver the most relevant results to your visitors with Jetpack Search. No coding required, no ads, and no tracking.
Get Jetpack Search for free