
The wp-config.php file is the heart of your WordPress installation, but for many, it’s a source of fear. A single wrong character can bring your site down. Yet, mastering this file is the key to unlocking advanced security, boosting performance, and troubleshooting some of the most frustrating WordPress errors.
This guide is a practical, hands-on manual from years of experience. We’ll show you precisely what to edit, why you should edit it, and how to do it safely without breaking your site.
Purpose and location of the wp‑config.php file
- Location: Found in the root directory of your WordPress installation. Common paths include public_html/wp-config.php, www/wp-config.php, or a host-specific folder like your site’s name/wp-config.php.
- Primary Purpose: To connect your WordPress software to its database by storing your database credentials (DB_NAME, DB_USER, DB_PASSWORD, DB_HOST).
- Creation: The file is not included in the initial WordPress download. It is generated from the wp-config-sample.php template during the installation process.
- Critical Contents: Contains database credentials, unique Authentication Keys and Salts for securing user sessions, and the WordPress database table prefix.
- Safest Way to Edit: Download the file, edit it locally with a plain text editor, and then re-upload it, overwriting the existing file. Never edit the live file directly on the server if you can avoid it. Always create a full site backup before making changes.
- Biggest Risk: A minor syntax error, such as a missing semicolon or quote, can cause an immediate site-wide outage, most commonly seen as an “Error Establishing a Database Connection” or a blank white screen.
- Key Security Tactic: For enhanced security, you can move the wp-config.php file one level above your WordPress root directory. WordPress is coded to automatically look for it there if it’s not in the root.
What is wp-config.php in WordPress?
Understanding this WordPress configuration file is essential for site administrators who need to troubleshoot or optimize their installations.
The wp-config.php file is a WordPress installation core file containing the details of your website’s most crucial configuration settings. In short, it is the WordPress main config file. The prefix ‘wp’ stands for ‘WordPress,’ ‘config’ is short for ‘configuration,’ and the file type ‘.php’ indicates the type of code contained in the file — PHP.
Without wp-config.php, your website simply wouldn’t function. WordPress requires this file, most importantly, to connect to your database where information like WordPress settings, post content, theme and plugin settings, and user data is all stored. Not only is wp-config.php the bridge between your site’s files and your database, it also allows you to include security keys; change table prefixes; relocate core WordPress file folders like wp-plugins, wp-uploads, and wp-content; and perform other advanced configurations.
Where is the wp-config.php file located?
Now that you know what wp-config.php does, you’re probably wondering, “Where is wp-config.php located?” If you’re looking for the location of wp-config.php in an already existing WordPress site, you’ll find it in the root folder of your WordPress installation. Your root folder contains the wp-admin, wp-content, and wp-includes folders. Beneath these folders, you will see a list of files, many of which begin with the ‘wp-’ prefix. This is where you’ll find your wp-config.php file.

If you’re downloading and setting up WordPress for the first time, however, the wp-config.php file will not be included. Instead, it will be created automatically during the WordPress setup process. During setup, you’ll be asked for certain information like:
- Database Name: Name of the database associated with your WordPress installation
- Database Username: Username used to access your database
- Database Password: Password associated with the database user
- Database Host: The hostname of your database server (usually ‘localhost’ but can vary depending on your hosting provider)
WordPress will then use this information to create the wp-config.php file in your root directory.

You can also manually set up wp-config.php, if you prefer. This might be a good option if you have a lot of customized settings you’d like to add to your site’s configuration.
How do I access wp-config.php?
There are a couple of simple methods for accessing wp-config.php — through secure file transfer protocol (SFTP) or through cPanel, if your hosting company provides it.
1. Accessing wp-config.php via SFTP
Step 1: Install your SFTP client. Your first step will be to download and install an SFTP client if you don’t have one already. Several good options include:
| Application | System | Free or Premium |
| WinSCP | Windows | Free |
| Filezilla | Windows, Mac, Linux | Free and premium options |
| Cyberduck | Windows, Mac | Free |
| Transmit | Mac | Premium |
We’ll be using Filezilla for this example, but other SFTP clients should work similarly.
Step 2: Retrieve your SFTP credentials. Once you’ve installed your SFTP client, you’ll need SFTP credentials from your web host in order to access your server. You’ll find these details in your hosting control panel. Depending on your host, this information may be generated for you or you may have to go through the process of creating an SFTP username and password. If you’re unsure where to find these credentials or how to create them, ask your host’s support or search their help documentation for instructions. The details you’ll need for your SFTP client are:
- Host (your live server’s IP address or url)
- SFTP username
- Password
- Port number
Step 3: Enter your credentials in your SFTP client. Enter your host’s IP address or url, your SFTP username, password, and the port number.
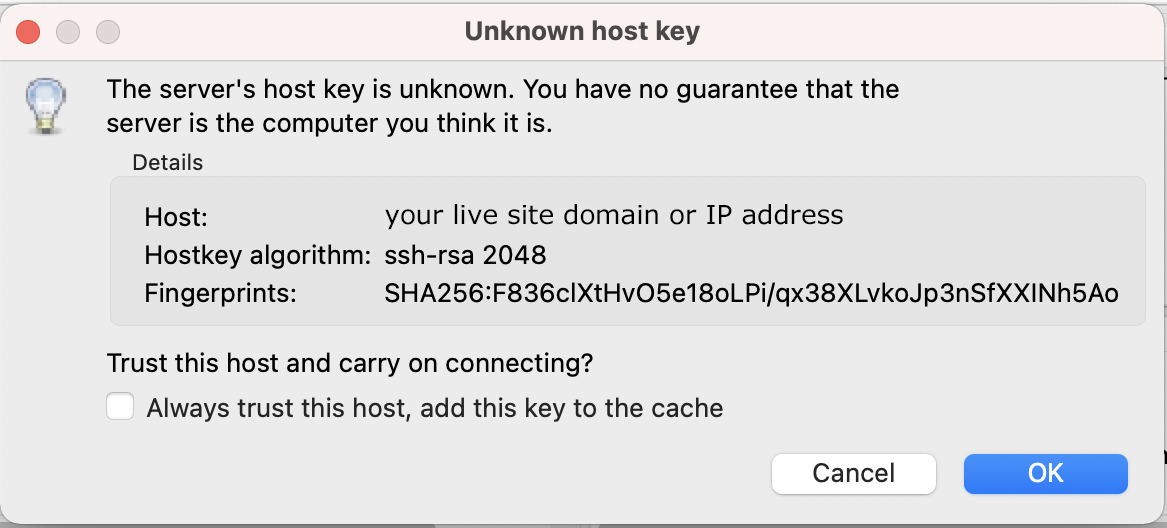
Note: If your SFTP client uses trust on first use (TOFU) authentication, you may get a ‘host key unknown’ alert. Click ‘OK’ and proceed. Check ‘Always trust this host, add this key to the cache’ if you plan on using your SFTP client to access the site again.
Step 4: Navigate to your website’s root directory.
Once you’ve logged into your server via SFTP, you’ll see a file tree displayed in the right-bottom two panels of your screen which lists the directories on your web server (remote). The left side lists the directories from your computer (local).
Your root directory is usually in a folder labeled “www” or “public_html,” but it might use a different name. Root folder naming conventions differ on some hosts, so if you aren’t sure what folder to look in, ask your hosting provider. You’ll know you’re in the correct folder if you see the wp-admin, wp-content, and wp-includes folders near the top of your file list.

Step 5: Select or create a folder on your local computer where you want to add your wp-config.php file. If you already have a folder selected, use the left pane to navigate to and open it. If not, find the directory where you’d like to create a new folder, right click on the left pane, and select Create directory.
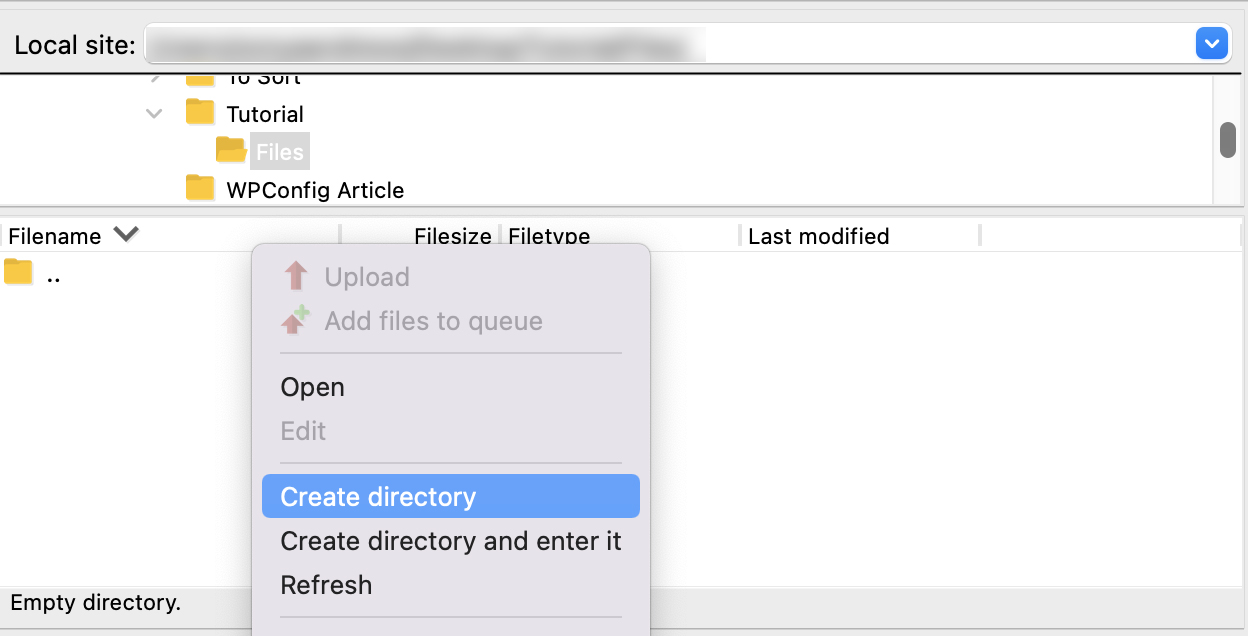
Name your directory and then click OK.
Double click to open the new directory you created.
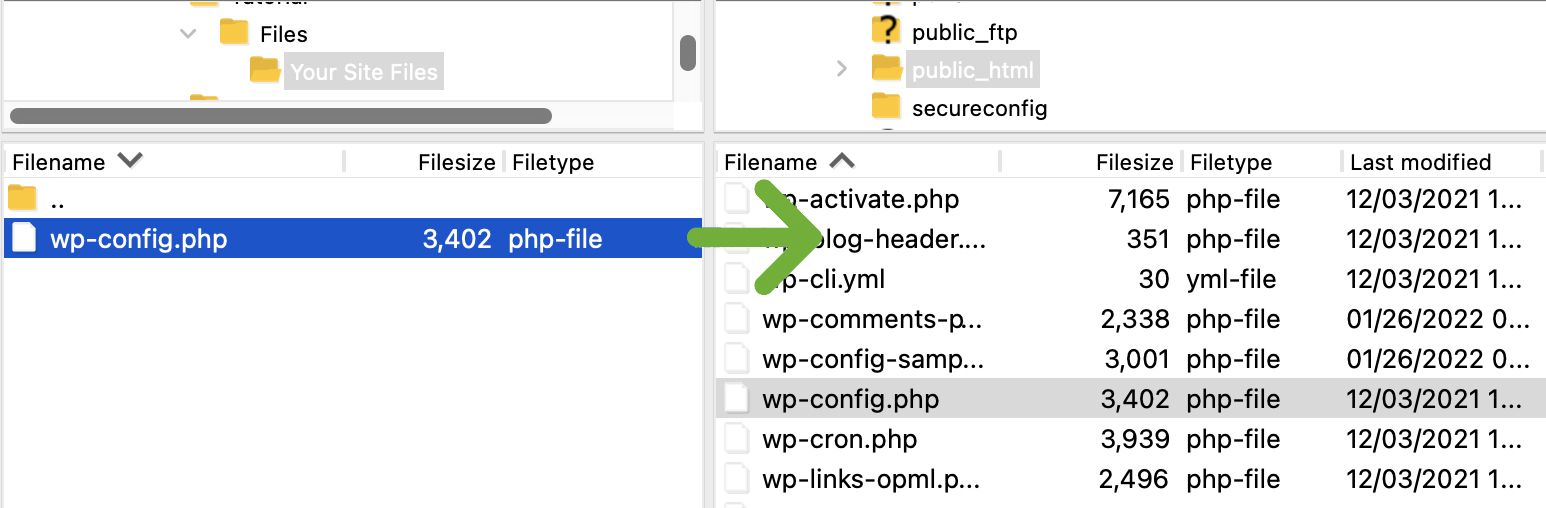
Step 6: Find and download wp-config.php. The wp-config.php file is located in your root folder, so just scroll down to wp-config.php in the bottom right pane of your SFTP client. Right click on the wp-config.php, and click Download, or simply drag the file from the right pane to the desired folder in the left pane.

Your wp-config.php file should now be downloaded to your local machine in the directory you selected previously. You should be able to find it in your computer’s file browser.
2. Accessing wp-config.php in cPanel
If your host uses cPanel, you can access wp-config.php through cPanel’s file manager. If you don’t know how to find cPanel in your host’s dashboard, contact their customer support for help.
Step 1: Open cPanel’s File Manager. Once you’re in cPanel, navigate to the Files section and click on File Manager.
Step 2: Open your website’s root folder. The root folder is commonly called ‘www’ or ‘public_html,’ but it may have another name. Root folder naming conventions differ on some hosts, so if you aren’t sure what folder to look in, ask your hosting provider. You’ll know you’re in the correct folder if you see the wp-admin, wp-content, and wp-includes folders near the top of your file list.
Step 3: Find and download wp-config.php. The wp-config.php file is located in your root folder, so just scroll down to wp-config.php in the right pane of cPanel’s File Manager. Right click on the wp-config.php, and click Download, or single-click wp-config.php and then click the Download option from the top menu.

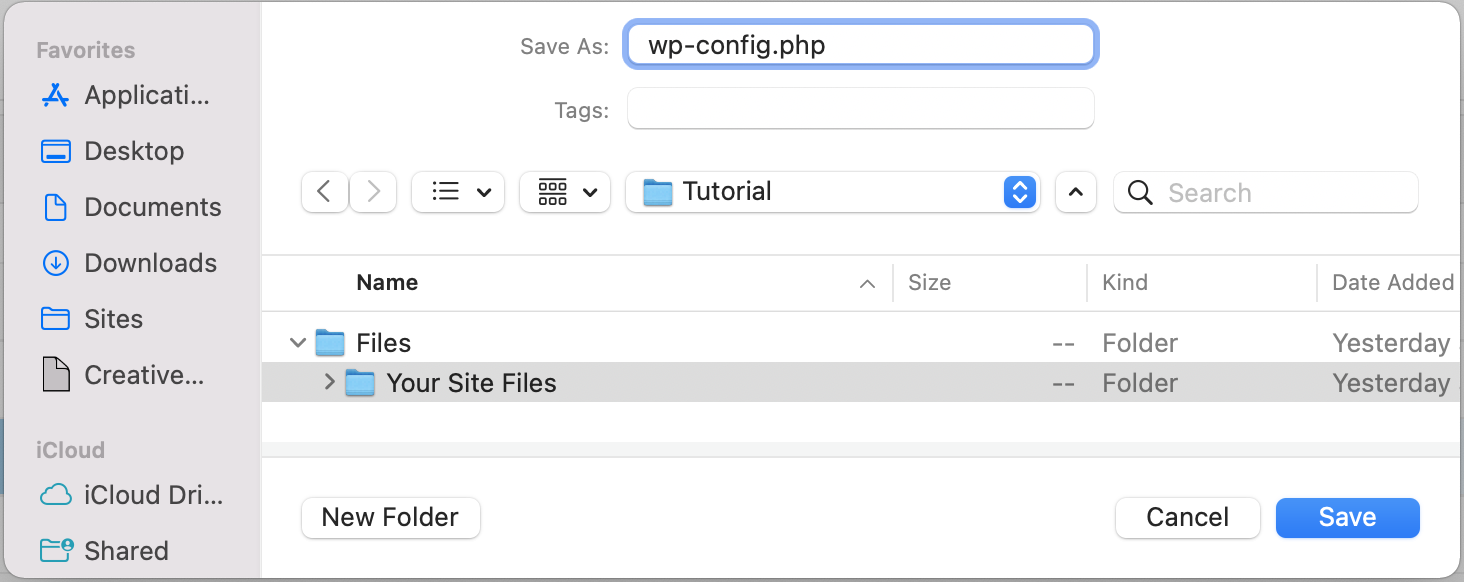
Select or create a folder where you want to place your wp-config.php file (do NOT rename it) and click Save.
Your wp-config.php file should now be downloaded to your local machine in the directory you selected. You should be able to find it in your computer’s file browser.
How to edit your wp-config.php file
There are two options for editing wp-config.php. You can either use a source code editor or you edit it directly in cPanel. Before you edit the wp-config.php file in WordPress, always make sure you back up your site!
1. Back up your site
Any time you make a major change to your site — especially to WordPress core files or plugins — you run the risk of something going wrong. It could be something as minor as a hardly-perceptible display issue to the dreaded white screen of death. To prevent downtime and data loss when making changes to core aspects of your site, always make a backup first. If you don’t have a backup tool installed on your site already, Jetpack Backup is an affordable solution with one-click restores.
All backed up? Good. We can start editing the wp-config.php file.
2. How to edit wp-config.php with a source code editor
The best way to edit wp-config.php is in your code editing software of choice. Since you’re editing a copy of wp-config.php that is offline on your local computer, you don’t have to be connected to the internet to work on your file and you’re less likely to overwrite your original wp-config.php file when you upload it back to your server (unlike editing directly in cPanel).
Step 1: Open wp-config.php in your source code editor. If you aren’t familiar with using a source code editor, there are several free options to choose from.
Free source code and plain text editors:
| Application | System |
| Notepad++ | Windows |
| Atom.io | Windows, Mac, Linux |
| Sublime | Windows, Mac, Linux |
| TextEdit *make sure you’re in plain text mode | Mac (default application) |
| Notepad | Windows (default application) |
Step 2: Edit wp-config.php and save it to your local machine. Your display may look different depending on what program you use to edit your wp-config.php file. This is what some of the code looks like in atom.io:

Add or change whatever information you need to, then save your file. Skip to ‘What can you configure via wp-config.php?’ to learn more about the different types of edits you can make to your wp-config.php file.
Step 3: Log in to your web server via SFTP or cPanel. Navigate to your site’s root folder and find the wp-config.php file.
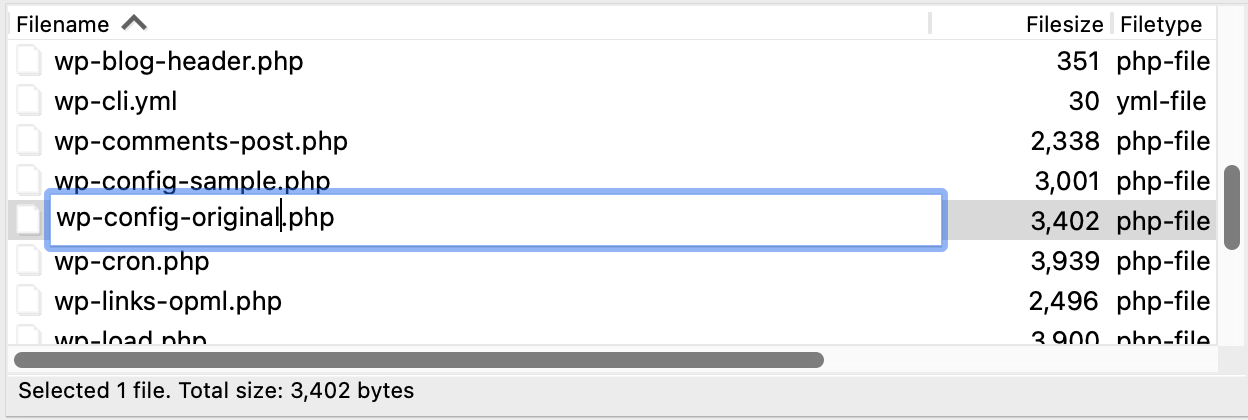
Step 4: Change the file name of wp-config.php on your web server. In case your edited version contains errors, you don’t want to overwrite your original file. You want to be able to restore the original wp-config.php file quickly, so renaming it to something like ‘wp-config-orginal.php’ will not only ensure that WordPress ignores this file but that the contents of the original file still exist on your server.
If you accidentally overwrite your wp-config.php file and your edited version has issues, you can always restore your site from a backup. However, it’s always a good idea to retain a copy of your original wp-config.php file for a quick restore should something go wrong. If you don’t have a backup file somewhere — especially if you have a lot of custom settings — it may be a huge hassle and cause lots of site downtime to recover the original information.
Step 5: Upload wp-config.php from your local machine to your webserver. Using SFTP or cPanel, upload your wp-config.php file to your web server’s root directory.
SFTP client:
cPanel:

Step 6: Visit your website and test that it’s displaying and functioning correctly. You’ve successfully uploaded your wp-config.php file, so now it’s time to make sure that everything is working on your site as you intended. Visit the front end of your site and also log in to the WordPress dashboard to make sure everything is accessible, displays correctly, and that site functionality like forms, navigation, eCommerce features, etc. all work.
Step 7: Delete the old, renamed wp-config.php file. Once you’ve established that your site is functioning properly, you can delete wp-config-original.php (or whatever you renamed it to).
3. How to edit wp-config.php directly in your cPanel
If you don’t have or don’t want to use a source code editor, you can edit wp-config.php directly in cPanel (if your host uses cPanel). This is a little more risky than editing on your local machine. If your internet connection is disrupted while you’re editing, you could lose your changes. You also run the risk of potentially overwriting your original wp-config.php file without first saving a backup. But as long as you make a copy of your original wp-config.php file and have a reliable internet connection, you should be relatively safe editing directly in cPanel.
Step 1: Find wp-config.php in cPanel. In cPanel, click on ‘File Manager.’
Navigate to your root folder (usually ‘public_html’ or ‘www’ but, depending on your host, it may be called something else).
Step 2: Create a new folder for your wp-config.php backup file. In your File Manager main menu, click + Folder to add a new folder. We’ll be making a copy of your wp-config.php file and saving it here as a backup.

Name your new folder something easy to identify like ‘backup config’ so you can easily find it later. Click Create New Folder.
Step 3: Find wp-config.php in the root folder and copy it to the backup folder. In your root directory, scroll down to wp-config.php and right click on the file name. Select Copy.
A dialog box will appear asking you to enter the file path you want to copy the file to. It will usually have the root folder name prepopulated, so you should only need to add the name of the backup folder you just created after ‘/public_html/’ (or whatever your root folder is named). So if your backup folder is named ‘backup config,’ your file path would be something like ‘/public_html/backup config.’
Click Copy File(s).
Once you’ve copied the file over, navigate to your ‘backup config’ folder and you’ll see wp-config.php listed there. You should go ahead and rename this just so you don’t get this wp-config.php file and the one you want to edit confused. Right click the wp-config.php file and click Rename.
You can rename it to whatever you want, but in this case we’ll rename it to wp-config-original.php.

Step 4: Navigate back to wp-config.php in the root directory. Now that we have a backup of our wp-config.php file, we’ll go back to the wp-config.php file in the root directory to edit it.
Select wp-config.php, then click Edit in the top menu of File Manager.
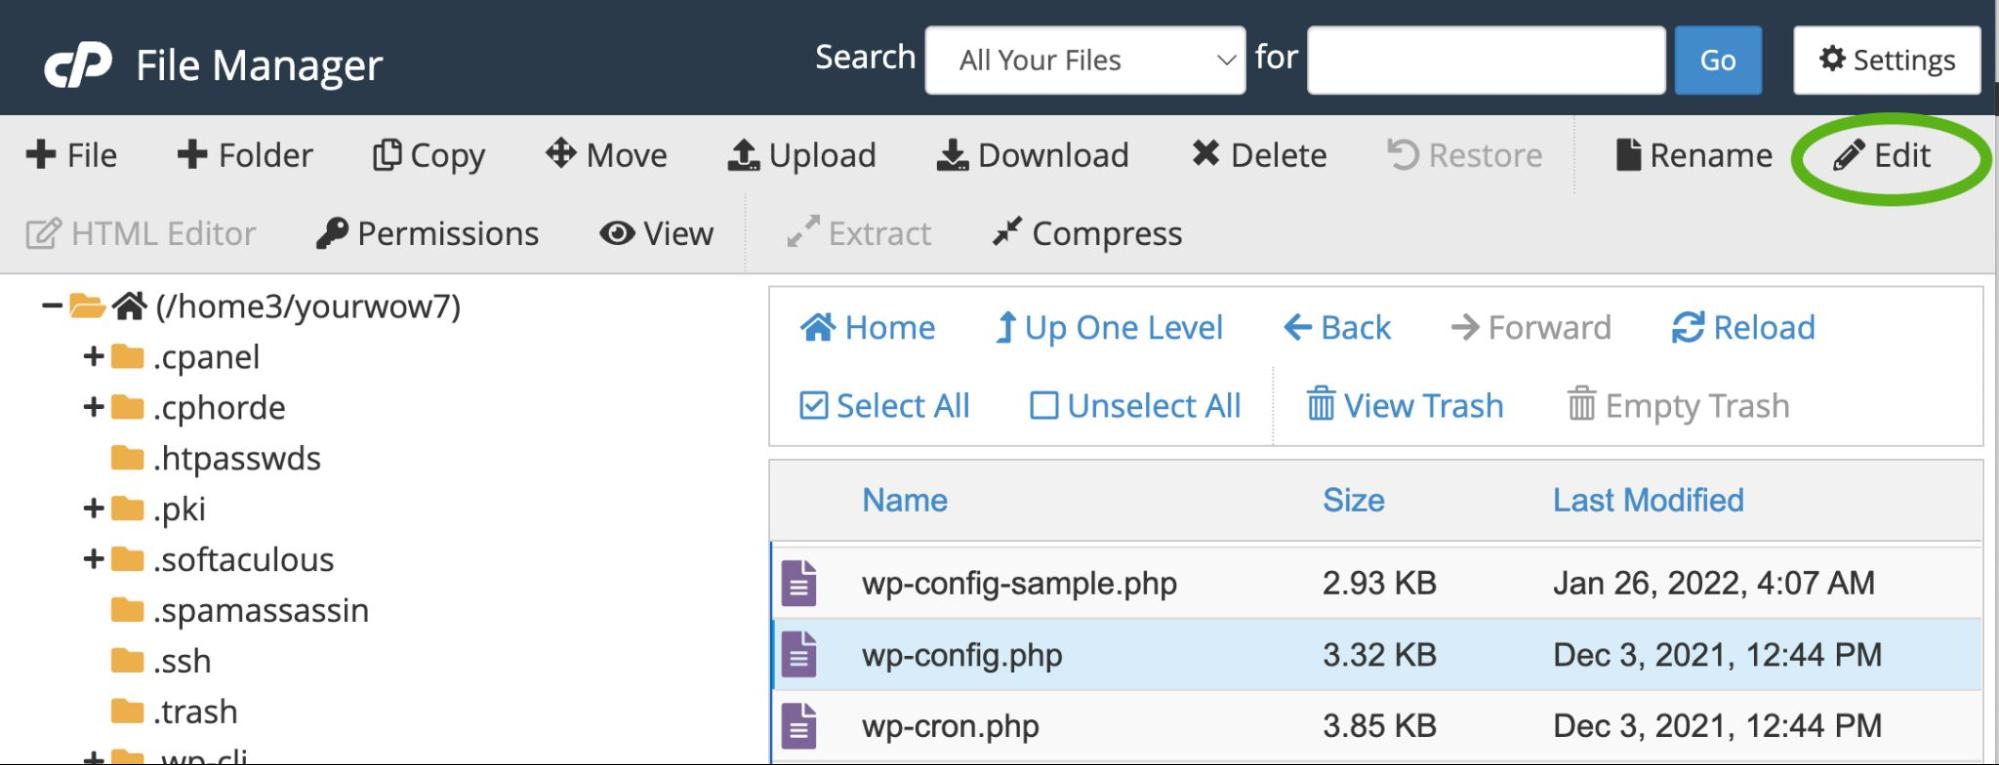
Step 5: Edit wp-config.php. You should now see the contents of the wp-config.php file on your screen. It should look something like this:

Add or change whatever information you need to, then save your file. Skip to ‘What can you configure via wp-config.php?’ to learn more about the different types of edits you can make to your wp-config.php file.
Creating the wp-config.php file manually
You can’t edit your wp-config.php file if you haven’t created one yet! If for some reason, you’re unable to create the wp-config.php file during WordPress setup or you’d simply prefer to create it manually, you’ll want to use the wp-config-sample.php template that’s included when you download WordPress.
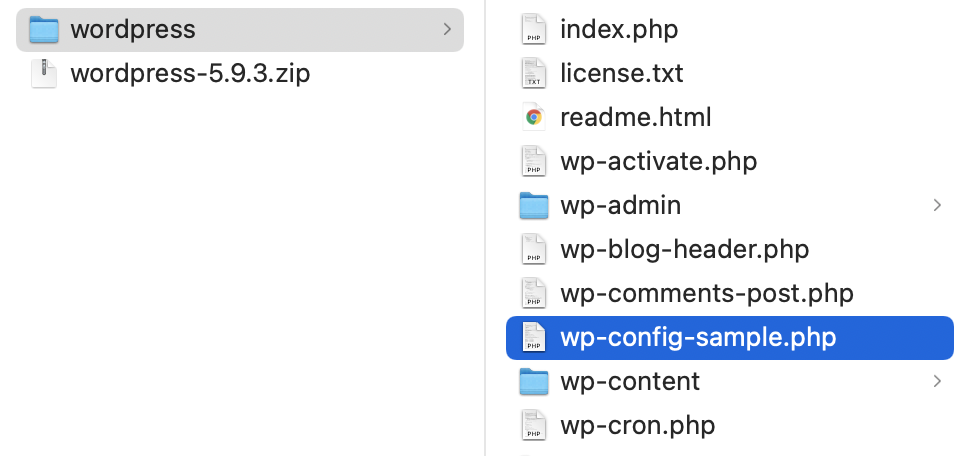
Open wp-config-sample.php in your source code editor. Your display may look different depending on what program you use to edit your wp-config-sample.php file. This is what some of the code looks like in atom.io:

Enter the following database details and any custom settings you may need:
The name of the database for WordPress
define( 'DB_NAME', 'database_name_here' );
Database user name
define( 'DB_USER', 'username_here' );
Database password
define( 'DB_PASSWORD', 'password_here' );
Database hostname
define( 'DB_HOST', 'localhost' );
Database charset to use in creating database tables (usually utf8)
define( 'DB_CHARSET', 'utf8' );
Database collate type (don’t change this if in doubt)
define( 'DB_COLLATE', '' );
Authentication unique keys and salts
Change these to different unique phrases. You can generate these using the WordPress.org secret-key service. These can be changed at any time to invalidate all existing cookies. Just keep in mind that this will force all users to have to log in again.
define( 'AUTH_KEY', 'put your unique phrase here' );define( 'SECURE_AUTH_KEY', 'put your unique phrase here' );define( 'LOGGED_IN_KEY', 'put your unique phrase here' );define( 'NONCE_KEY', 'put your unique phrase here' );define( 'AUTH_SALT', 'put your unique phrase here' );define( 'SECURE_AUTH_SALT', 'put your unique phrase here' );define( 'LOGGED_IN_SALT', 'put your unique phrase here' );define( 'NONCE_SALT', 'put your unique phrase here' );
Define custom WordPress database table prefix
The default database table prefix for WordPress is ‘wp_’, but you can define a custom prefix if you like. Also, if you have multiple installations of WordPress in one database, you can give each a unique prefix. Use only numbers, letters, and underscores.
$table_prefix = 'wp_';
Define WordPress debugging mode
By default, WordPress debugging mode in wp-config.php should be set to ‘false’ unless you’re in development mode and actively trying to debug issues on your site.
define( 'WP_DEBUG', false );
Change this statement to ‘true’ to enable the display of error and warning notices during development.
Add custom values
There are two commented out lines of code after your line defining debugging mode, in between which you can add any custom values you’d like to add to your wp-config.php file.
/* Add any custom values between this line and the "stop editing" line. */YOUR CUSTOM VALUES GO HERE/* That's all, stop editing! Happy publishing. */
For information on custom values that can be used, scroll down to the section ‘What can you configure via wp-config.php?.’
Define the absolute path to the WordPress directory
Below your custom values, after ‘/*That’s all, stop editing! Happy publishing.*/,’ you’ll see a couple other code snippets. The first one defines the absolute path to the WordPress directory. You can leave this as-is unless you’ve set WordPress up in a subdirectory — in which case you would replace ‘/’ with ‘/your-subdirectory/’.
if ( ! defined( 'ABSPATH' ) ) { define( 'ABSPATH', __DIR__ . '/' );}
Set up WordPress vars and included files
This last section in your wp-config-sample.php file declares the absolute path to wp-settings.php, which sets up WordPress vars and included files.
require_once ABSPATH . 'wp-settings.php';
When you’re done editing your sample config file, save it as ‘wp-config.php’ and place it in your site’s root directory using SFTP or cPanel.
NOTE: There’s a specific order to the contents of the wp-config-sample.php file and the order is important. Rearranging the order of information in your configuration file may create errors on your site.
What can you configure in wp-config.php?
There are a lot of things you can configure with wp-config.php beyond the basic settings included in the wp-config-sample.php file. You can enable multisite functionality, set cookie domains, increase allowed memory, manage a variety of security related settings, determine the frequency with which WordPress performs certain core operations, and change other file optimization settings. You can even make changes to your database and file permissions.
What can’t you configure in wp-config.php?
While the list of settings that you can manage in wp-config.php is long, there are some things that you can’t do.
The wp-config.php file is more or less a list of constants that determine certain settings within WordPress core. You can’t use it to make any functional modifications to your plugins or themes — for that, you’ll use the functions.php file.
There are also some hard-coded aspects of WordPress that you cannot alter, even in wp-config.php — like the location of the themes folder.
How to protect wp-config.php from security exploits
Your wp-config.php file contains a lot of sensitive information about your site — information you want to keep out of the hands of hackers. Here are a few tips to help secure your wp-config.php file:
1. Install a security plugin
A security plugin for WordPress will automatically add settings to your website that help protect all aspects — including wp-config.php — from hacking attempts.
Jetpack’s WordPress security tool is an inexpensive option that can help keep your site safe from malicious attacks. Jetpack Security includes:
- Brute force attack protection that stops attacks in their tracks
- Downtime monitoring to alert you the second there’s an issue
- An activity log, so you know if and when suspicious activities occurred
- Secure authentication to prevent unauthorized access
- Malware scanning that alerts you if your site has been hacked
- Spam protection for your pages, posts, and contact forms
Jetpack Security also monitors your site for any changes to core WordPress files, outdated or insecure plugins, and other vulnerabilities so that you can catch them before a hacker finds them and takes advantage.
You can get free vulnerability scanning for your site with Jetpack Protect and easily upgrade Protect to add malware scanning with one-click fixes and our website firewall (WAF) to protect your site around the clock.
2. Deny access to wp-config.php via the .htaccess file
You can use the .htaccess file to help protect wp-config.php. You’ll find this file in your root folder.
Step 1: Download .htaccess
Using SFTP or cPanel, navigate to the root folder of your website. Right click on .htaccess and select download to download the file to your local computer.
Step 2: Add code to block access to wp-config.php
In a source code or plain text editor, open .htaccess and add the following code:
<files wp-config.php>order allow,denydeny from all</files>
Save your file. Make sure that your program does not include a file extension. If you’re using Notepad or Text Edit, it may add a .txt file extension, which you don’t want. The file should simply be named ‘.htaccess.’
Step 3: Upload edited .htaccess back to the root folder
Upload your edited .htaccess file back to your website’s root folder. You’ll be asked if you want to overwrite the existing file. Click Ok.
Now your .htaccess file should block external access to your wp-config.php file.
3. Hide wp-config.php outside the root directory
Since every hacker knows the default location of wp-config.php on a WordPress site, changing the location to a restricted access folder outside the root directory can keep it out of a hacker’s hands.
This process involves a little extra configuration — you can’t just drag and drop wp-config.php outside the root folder. However, the effort is worth it to add an additional layer of protection to your website.
In just a few steps, you can secure your wp-config.php file outside the root folder.
Step 1 : Download your current wp-config.php file
Your root folder is where all your WordPress files live, including the wp-config.php file. It may be named ‘public_html’ or ‘www’. If you’re not sure where your root folder or your WordPress directory are, contact your hosting company.
Once you’ve found your root folder and WordPress directory, download your wp-config.php file to your local machine via SFTP or cPanel.

Step 2 : Create a new directory outside the root folder
Navigate outside of your root directory to the next file folder level up. You should see the name of your root folder as well as several other folders. In this directory, right click and select create directory.
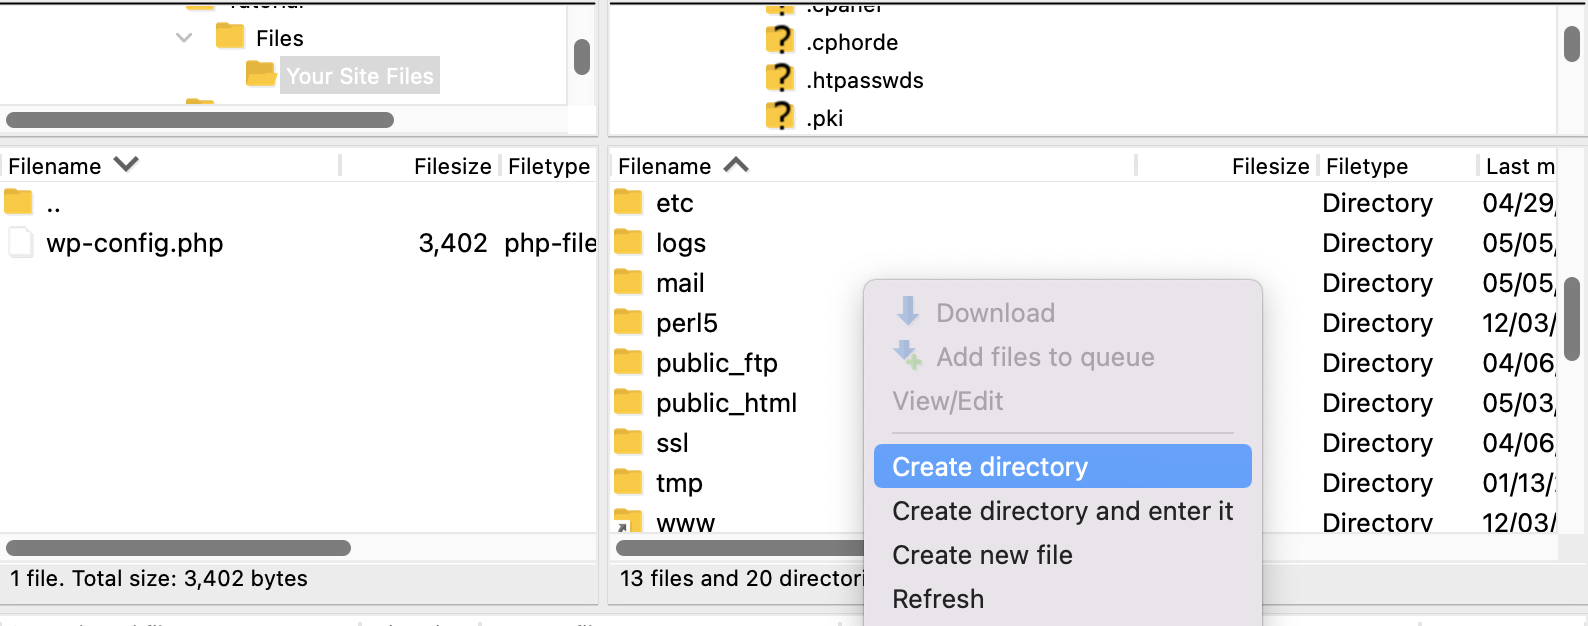
Give your directory a name that you’ll easily remember as the repository for your wp-config.php file. You can even create multiple nested folders if you like — you’ll just need to remember the names of all of them for Step 4.
Step 3: Upload wp-config.php to your new folder
Upload the wp-config.php file you downloaded earlier into your new folder via SFTP or cPanel.

Check your new folder and wp-config.php file permissions and make sure they’re set to 600.

Step 4 : Point WordPress to the new wp-config.php file
You should have a wp-config.php file in your new “secret” directory as well as the original wp-config.php file that’s still in your root directory. In order for WordPress to find and use the correct file, you’ll want to delete all the information in your root directory’s wp-config.php file and replace it with the following code snippet:
<?phpinclude('/home3/usr/secureconfig/wp-config.php');?>
Note: Your file path will look different as you’ll be using your individual server’s directory names.
In cPanel, you can open the root directory’s wp-config.php file and edit it directly or you can edit the copy you downloaded to your local machine earlier using a source code editor. For this example, we’ve edited the copy we downloaded earlier using Atom.io.
Save your wp-config.php file and upload it back to your root directory.

You’ll be asked if you want to overwrite the file. Click Ok to overwrite the file.
Now WordPress should reference your new wp-config.php file in its secure location outside the root folder.
4. Change the name of your wp-config.php file
Changing the name of your wp-config.php file can also help obscure it from hackers. If you do this, you’ll also need to host this file outside of your root folder. If you’ve already followed the steps in Hide wp-config.php outside the root directory, you can change the name of the wp-config.php file by going through these additional steps:
Step 1: In your secure directory outside the root folder, change the file name of wp-config.php
Navigate to your wp-config.php folder hosted outside your root directory and change the name to something unique, like ‘secret-setup-file.php’ or ‘cheese-sandwich.php’ — it doesn’t really matter.
Step 2: Edit the code in wp-config.php in your root directory to reflect the name change
Now that you’ve changed the name, you’ll need to make sure your root directory copy of wp-config.php is pointing to the right file name.
Download the root folder copy of wp-config.php to your local computer and edit it with your source code editor of choice. Change the wp-config.php file name to your new file name, then save it.
<?phpinclude('/home3/usr/secureconfig/cheese-sandwich.php');?>
Step 3: Upload wp-config.php back to the root directory
You’ll be asked if you want to overwrite the existing file. Click Ok.
Now WordPress should point to your renamed configuration file.
wp-config.php edits for better WordPress performance
You can use the wp-config.php file to optimize your WordPress settings and improve the performance of your website. Below are seven edits you can make to wp-config.php to reduce database size and load, improve load time for your site, and conserve server space.
1. Clean up image edits
Every time you edit an image in WordPress, a new set of thumbnails and other image sizes are created. When you restore an original image, those edits are not deleted. This can lead to cluttered media folders. If you want to make sure that only one set of image edits exist on your server and that, when you restore the original, the edits are removed, you can use the following code:
define( 'IMAGE_EDIT_OVERWRITE', true );
2. Repair your database
If your site is running slowly, experiencing errors, and you suspect that your database is corrupt and needs to be repaired, you can enable automatic database repair by using WP_ALLOW_REPAIR and setting the value to ‘true.’
define( ‘WP_ALLOW_REPAIR’, true );
Make sure to disable this feature once the database issue is solved. This script can also be found in the repair.php file: {$your_site}/wp-admin/maint/repair.php.
3. Manage post revision settings
While you’re editing a post, WordPress auto-saves your revisions every 60 seconds by default. If you want longer delays between saves or you’d like more frequent saving intervals, you can modify the auto-save interval.
define( 'AUTOSAVE_INTERVAL', 60 ); // Seconds
WordPress doesn’t have a limit on the number of post revisions that are saved, so if you’d like to reduce the load that post revisions have on your database, you can specify the maximum number or disable the saving of revisions entirely.
Specify maximum number of post revisions
define( 'WP_POST_REVISIONS', 3 );
Disable post revisions
define( 'WP_POST_REVISIONS', false );
4. Manage trash settings
By default, WordPress permanently deletes items in the trash after they have been there for 30 days. If you want to change that frequency, you can use the following code and set the number to the frequency you want.
define( 'EMPTY_TRASH_DAYS', 30 ); // 30 days
You can also disable the trash from being emptied by setting the number of days to zero.
define( 'EMPTY_TRASH_DAYS', 0 ); // Zero days
Note: If you disable the trash being emptied, WordPress won’t ask for confirmation when someone clicks on Delete Permanently. Use this setting with caution!
5. Adjust cron settings
WordPress uses WP-Cron for scheduling time-sensitive tasks like checking for updates and publishing scheduled posts.
If scheduled posts are not being published or other cron jobs are failing to be completed on your site, you might want to try using alternative cron. When ALTERNATE_WP_CRON is set to ‘true,’ visitors’ browsers are redirected to a new connection while cron continues to run in the dropped connection.
define( 'ALTERNATE_WP_CRON', true );
Note: Since this method depends on a non-native WordPress service, there are some risks involved.
You can also change the intervals at which cron processes can run or disable cron entirely.
Disable cron
define( 'DISABLE_WP_CRON', true );
Cron timeout
define( 'WP_CRON_LOCK_TIMEOUT', 60 );
6. Increase memory allocated to PHP
If you have plugins or themes that use a lot of PHP resources, you may be confronted with the message, “Allowed memory size of xxxxxx bytes exhausted.” Some themes and plugins may even specify a PHP memory limit minimum to be able to use their software or specific features of their software (like importing demo data).
WordPress will, by default, attempt to increase PHP memory limits to 40MB for single sites and 60MB for multisite installations, but you may need to set your limit higher. Sometimes, your PHP memory limit is set by your host and while some hosts allow you to edit your PHP memory limit, others do not.
If your host allows you to increase your PHP memory limit, you can add the following code to your wp-config.php file and replace ‘96M’ with the amount of memory you need (remember to use M and not MB after the number):
define( 'WP_MEMORY_LIMIT', '96M' );
This setting increases PHP Memory only for WordPress, not other applications.
Tasks in the WordPress admin area require a lot more memory than activity on the front end of your website. You can increase your admin area memory by defining WP_MAX_MEMORY_LIMIT.
define( 'WP_MAX_MEMORY_LIMIT', '256M' );
Note: Put this code before the wp-settings.php inclusion in your wp-config.php file.
7. Enable/disable Cache
Some caching plugins use the advanced-cache.php file and activate WP_CACHE in your wp-config.php file for you. Sometimes you may need to add it manually by adding the following:
define( 'WP_CACHE', true );
Or you may want to disable caching. In that case, replace ‘true’ in the above statement with ‘false.’
define( 'WP_CACHE', false );
wp-config.php edits for better WordPress security
You can use wp-config.php to manage the security of your WordPress site by blocking external URL requests, requiring SSL for admins, moving WordPress core file and folder locations, overriding default file permissions with more restrictive permissions settings, and more. If you’re interested in using wp-config.php to better secure your website, check out the seven tips below:
1. Define a custom table_prefix
The default prefix for WordPress database tables is ‘wp_’ but you can use any prefix you like with the following code:
$table_prefix = 'customprefix_';
Replace ‘customprefix_’ with your text of choice, but only use numbers, letters, and underscores — no special characters.
Note: If you’re changing the table prefix in an existing install of WordPress, you’ll also need to update your table prefixes in your database, run a search and replace for any references to the previous table prefix, and replace them with the new one.
2. Require SSL for admin and logins
If you want to keep admin login information secure, you can use ‘FORCE_SSL_ADMIN’ so that passwords and cookies are always sent over SSL. Set ‘FORCE_SSL_ADMIN’ to ‘true’ with the following code in wp-config.php:
define( 'FORCE_SSL_ADMIN', true );
Note: You’ll also need to have SSL configured on your server before your site will work correctly with FORCE_SSL_ADMIN set to true.
3. Block external URL requests
For added security, you can prevent external URL requests from your server by defining ‘WP_HTTP_BLOCK_EXTERNAL’ as ‘true’. With this constant enabled, only your website and localhost will be able to make requests.
define( 'WP_HTTP_BLOCK_EXTERNAL', true );
If you want to make an exception for specific hosts, you can define WP_ACCESSIBLE_HOSTS with a list of comma separated host names. If you want to allow all subdomains of a host, prefix the domain name with ‘*.’ (e.g. ‘*.wordpress.org’). and this will only allow localhost and your blog to make requests.
For example, if you want to make an exception for Google Fonts and all subdomains of WordPress.org, you would add the following to wp-config.php:
define( 'WP_ACCESSIBLE_HOSTS', 'fonts.googleapis.com,*.wordpress.org' );
4. Disable the plugin and theme file editor
By default, WordPress site admins have access to the plugin and theme file editor feature in the WordPress dashboard. This can be a security risk. An admin that doesn’t have a good understanding of how to (and how NOT to) edit these files could attempt to make edits that break your site. A disgruntled admin may intentionally sabotage these files, or a hacker may get access to the admin interface and attempt to edit core files through the plugin and theme file editor.
To disable the plugin and theme file editor define ‘DISALLOW_FILE_EDIT’ as ‘true.’
define( 'DISALLOW_FILE_EDIT', true );
Note: Some plugins may check user capabilities with “current_user_can(‘edit_plugins’)”. If you have plugins installed that use this function, they may not work correctly when ‘DISALLOW_FILE_EDIT’ is set to ‘true’. If you define ‘DISALLOW_FILE_EDIT’ as ‘true’ and you experience issues with a plugin afterward, then this function in the plugin code may be the culprit.
5. Disable plugin and theme updates and installations
If you want to block users from being able to update or install plugins and themes from the WordPress admin area, you can set ‘DISALLOW_FILE_MODS’ to ‘true.’ This will also disable the plugin and theme file editor.
define( 'DISALLOW_FILE_MODS', true );
6. Move core WordPress folders
Keeping core WordPress folders in custom locations can help secure your site against hackers. Especially if hackers are using automated scripts to find the default names of certain files and folders, changing their location can protect your site against these types of attacks.
Move the wp-content folder
Your wp-content directory contains your themes, plugins, and uploads. You can move this outside of the WordPress directory by setting WP_CONTENT_DIR to the full local path of the directory or to the full URL.
File path
define( 'WP_CONTENT_DIR', dirname(__FILE__) . '/blog/wp-content' );
URL
define( 'WP_CONTENT_URL', 'http://example/blog/wp-content' );
Note: Do not include the trailing ‘/’ in the file path.
Move the plugins folder
You can protect your plugins by moving the folder location and using the following options to define the path to your new folder:
Set ‘WP_PLUGIN_DIR’ to the full local directory path.
define( 'WP_PLUGIN_DIR', dirname(__FILE__) . '/blog/wp-content/secureplugins/plugins' );
Set ‘WP_PLUGIN_URL’ to the full directory URL.
define( 'WP_PLUGIN_URL', 'http://example/blog/wp-content/secureplugins/plugins' );
If you encounter compatibility issues with plugins, you can set ‘PLUGINDIR’ to the full local directory path.
define( 'PLUGINDIR', dirname(__FILE__) . '/blog/wp-content/secureplugins/plugins' );
Note: Do not include the trailing ‘/’ in the file paths.
Move the uploads folder
Moving your uploads folder is a great way to help protect against scripts that may attempt to upload content directly to the default WordPress uploads folder file path. Use the ‘UPLOADS’ constant to define your path to the uploads folder.
define( 'UPLOADS', 'blog/wp-content/secureuploads/uploads' );
Note: use a relative path to your uploads folder without the leading ‘/.’
7. Override default file permissions
In some cases you might need to adjust file permissions to override default file permissions set either by WordPress or your host. While you could change file permissions individually via SFTP or cPanel, you can also override them en masse by using wp-config.php. You may want to use more restrictive permissions for some files and folders and less restrictive permissions for others, depending on what your objectives are.
To override a file permission, you’ll use the ‘FS_CHMOD_FILE’ constant. To override a directory permission, you’ll use ‘FS_CHMOD_DIR.’
File
define( 'FS_CHMOD_FILE', ( 0644 & ~ umask() ) );
Directory
define( 'FS_CHMOD_DIR', ( 0755 & ~ umask() ) );
Example to provide setgid (group permissions):
define( 'FS_CHMOD_DIR', ( 02755 & ~umask() ) );
Note: ‘0755′ and ‘02755‘ are octal values and must be prefixed with a ‘0’.
Advanced wp-config.php features for developers
Beyond security and site optimization, developers can use wp-config.php to add other custom settings to WordPress environments. Below are just a few features to consider using in wp-config.php:
1. Define WordPress URL
The WP_SITEURL constant lets you define the address where your WordPress core files are located. You should include http:// or https://, the root domain, and the subfolder(s) that house your WordPress core files. Don’t include the trailing “/” at the end of the URL, however.
define( 'WP_SITEURL', 'http://yoursite.com/wordpress' );
When you set the WP_SITEURL address in wp-config.php, the value for ‘siteurl’ in the database will be overridden. Since WP_SITEURL only takes precedence over the ‘siteurl’ value in the database, rather than actually overwriting it, if you delete the WP_SITEURL code in your wp-config.php file, the original database value for ‘siteurl’ will be used.
You can also dynamically set the site url based on server host or server name.
Server host:
define( 'WP_SITEURL', 'http://' . $_SERVER['HTTP_HOST'] . '/path/to/wordpress' );
Server name:
define( 'WP_SITEURL', 'http://' . $_SERVER['SERVER_NAME'] . '/path/to/wordpress' );
Note: It may be safer to use SERVER_NAME than HTTP_HOST. Using HTTP_HOST may allow for file inclusion vulnerabilities. Also, if your server is using Apache and is configured as UseCanonicalName “on”, SERVER_NAME isn’t set dynamically and is instead set by the server configuration. In this case you would want to use SERVER_NAME instead of HTTP_HOST.
2. Define home URL
Your home URL is the url you use to get to the front page of your site. Normally your home URL would be your root domain (e.g. https://mysite.com) even if you install WordPress in a subdirectory.
If you’d prefer to include your subdirectory as part of your home URL, you can use WP_HOME to override the wp_options table value for home. It won’t change it in the database, so if you remove this line from wp-config.php, your site home URL will revert to the value in the wp_options table.
define( ‘WP_HOME’, ‘https://mysite.com/wordpress’ );
You’ll also need to add the following code to index.php in your site’s root directory:
define( 'WP_HOME', 'https://mysite.com' );
Like with ‘SERVER_NAME’ and ‘SERVER_HOST,’ you can also dynamically set ‘WP_HOME.’ Use $_SERVER[‘HTTP_HOST’] between http:// or https:// and your file path to WordPress (without the root domain) as follows:
define( 'WP_HOME', 'http://' . $_SERVER['HTTP_HOST'] . '/path/to/wordpress' );
3. Set cookie domain
If you have a non-standard domain setup, you may want to specify your cookie domain using the ‘COOKIE_DOMAIN’ constant. Use cases for this include:
Serving static content from a subdomain. If you’re serving static content from a subdomain but want to set the cookie domain to the URL where your dynamic content lives, use the following:
define( 'COOKIE_DOMAIN', 'www.mysite.com' );
Note: You don’t need to include the http:// or https:// before the domain name.
Running a multisite network. If you’re running a multisite network in subfolders on a domain and are having problems with cookies (e.g. getting the error ‘Cookies are blocked or not supported by your browser. You must enable cookies to use WordPress.’), you can make sure that cookies belong to the domains they’re requested from and not coming from a single domain by setting COOKIE_DOMAIN to an empty value.
define( 'COOKIE_DOMAIN', '' );
4. Enable multisite abilities
WordPress does not come with multisite capabilities enabled automatically. Most WordPress installations won’t need that feature. But if you do need it, you can easily enable it by using the ‘WP_ALLOW_MULTISITE’ constant.
define( 'WP_ALLOW_MULTISITE', true );
5. Redirect nonexistent subdomains or folders
While you could let visitors land on your default 404 page when content is not found, it might be a better user experience to direct them to a custom page. You can do this easily through wp-config.php using the ‘NOBLOGREDIRECT’ constant.
define( 'NOBLOGREDIRECT', 'https://mysite.com/custompage' );
6. Do not upgrade global tables
If you have a site with large global tables or are sharing user tables between multiple WordPress installations (forum and eCommerce sites may fall into these categories), you can prevent WordPress from doing resource intensive queries against global tables during the upgrade process by setting ‘DO_NOT_UPGRADE_GLOBAL_TABLES’ to ‘true.’
define( 'DO_NOT_UPGRADE_GLOBAL_TABLES', true );
7. Manage auto-update settings
You may want to disable auto-updates of themes, plugins, and WordPress core — especially if you’re in the middle of testing a development site or troubleshooting an issue. You may also want to choose whether WordPress core updates automatically only for minor updates, for all new version releases, or not at all.
Disable auto-updates
To disable all automatic updates entirely, set ‘AUTOMATIC_UPDATER_DISABLED’ to ‘true.’
define( 'AUTOMATIC_UPDATER_DISABLED', true );
Disable WordPress core updates
You can set the ‘WP_AUTO_UPDATE_CORE’ constant to allow automatic updates of all version releases, only minor updates, or disable all automatic core updates.
Disable all core updates
define( 'WP_AUTO_UPDATE_CORE', false );
Enable all core updates
define( 'WP_AUTO_UPDATE_CORE', true );
Enable core updates for minor releases
define( 'WP_AUTO_UPDATE_CORE', 'minor' );
8. Define WordPress upgrade constants
If you’re having trouble upgrading WordPress, you might need to define some additional WordPress upgrade constants to get to the root of your problem. Try to use as few of these constants as possible to solve your issue.
The two most common reasons that you might need to define these constants in wp-config.php are:
- Your host is using symlinks in your installation. If this is the case, you might need to define path-related constants like FTP_BASE, FTP_CONTENT_DIR, and FTP_PLUGIN_DIR.
- Your PHP installation uses an FTP extension that’s incompatible with certain FTP servers. This is a rare situation, but if you find yourself dealing with this, you might need to define FS_METHOD to ‘ftpsockets.’
Below is a list of valid constants and sample code for WordPress updates:
| FS_METHOD | This forces the file system method. In order of preference, it should be set to: direct, ssh2, ftpext, or ftpsockets. Only change this if you’re having update issues. If changing it does not solve the problem, you should change it back to its original value or remove it. If other methods fail, ‘ftpsockets’ will usually work. | define( ‘FS_METHOD’, ‘ftpext’ ); |
| FTP_BASE | The full path to your WordPress installation folder (ABSPATH). | define( ‘FTP_BASE’, ‘/path/to/wordpress/’ ); |
| FTP_CONTENT_DIR | The full path to your wp-content folder. | define( ‘FTP_CONTENT_DIR’, ‘/path/to/wordpress/wp-content/’ ); |
| FTP_PLUGIN_DIR | The full path to your plugins folder. | define( ‘FTP_PLUGIN_DIR ‘, ‘/path/to/wordpress/wp-content/plugins/’ ); |
| FTP_PUBKEY | The full path to your SSH public key. | define( ‘FTP_PUBKEY’, ‘/home/username/.ssh/id_rsa.pub’ ); |
| FTP_PRIKEY | The full path to your SSH private key. | define( ‘FTP_PRIKEY’, ‘/home/username/.ssh/id_rsa’ ); |
| FTP_USER | Defines either FTP username or SSH username. While these are often the same, they may be different. Use the FTP username if you’re updating by FTP and SSH username if you’re updating via SSH. | define( ‘FTP_USER’, ‘username’ ); |
| FTP_PASS | The password for the username defined with FTP_USER. You don’t need to include this if you’re using SSH public key authentication. | define( ‘FTP_PASS’, ‘password’ ); |
| FTP_HOST | The hostname for your SSH/FTP server. Some configurations should use ‘localhost’ as the ‘FTP_HOST’ value to avoid 503 errors when updating plugins or WordPress core. | define( ‘FTP_HOST’, ‘ftp.mysite.com’ ); |
| FTP_SSL | This setting applies to configuring “Secure FTP,” not SSH SFTP. Set this to ‘true’ for an SSL connection only if supported by the underlying transport. This may not be available on all servers. | SFTP:define( ‘FTP_SSL’, true );FTP:define( ‘FTP_SSL’, false ); |
9. Create custom user and usermeta tables
The constants ‘CUSTOM_USER_TABLE’ and ‘CUSTOM_USER_META_TABLE’ are used to assign custom tables for storing user data. These settings are best implemented when initially setting up WordPress.
define( 'CUSTOM_USER_TABLE', $table_prefix.'my_users' );define( 'CUSTOM_USER_META_TABLE', $table_prefix.'my_usermeta' );
Note: If you’re running a multisite installation of WordPress, a usermeta table and corresponding permissions is created for the database of each WordPress instance, even if you manually define ‘CUSTOM_USER_META_TABLE’. Permissions are added for the first user only, so you’ll need to manage user permissions for each site using a custom function or plugin, otherwise you’ll experience login issues.
Ensuring admin access with custom user and usermeta tables during multisite setup:
- After creating your first site and adding your custom user and usermeta tables, copy the wp-config.php file to your next instance and change the $table_prefix variable. If the first site uses ‘my_usermeta’, your second site should use something different (e.g. ‘site2_usermeta’).
- Use a different email address for this next instance than you used for your original install.
- When you’ve completed setup, log in with the auto-generated admin account and password.
- Promote the account you want to use as an admin to the administrator level and then log out of your WordPress admin.
- Log back in with your new admin account and delete the auto-generated account.
10. Save queries for analysis
If you perform and analyze database queries and need to save them for later examination, you can use the ‘SAVEQUERIES’ constant in wp-config.php. The queries are saved to an array which can be displayed using code in your footer.php file. The function will save your queries, what function called them, and the length of time the queries took to execute.
This operation may slow down your site so you should turn this feature off unless you are actively debugging.
Add the following to wp-config.php:
define( 'SAVEQUERIES', true );
In footer.php (in your theme folder), add this code:
<?phpif ( current_user_can( 'administrator' ) ) { global $wpdb; echo "<pre>"; print_r( $wpdb->queries ); echo "</pre>";}?>
11. Configure debugging and error logging
Remember the White Screen of Death? Well, following the release of WordPress 5.2, instead of the dreaded blank, white screen, you’ll now see an error message that says “The site is experiencing technical difficulties. Please check your site admin email inbox for instructions.” when a fatal error occurs.
Of course, if there’s a fatal error, you’ll want to enable debugging and error logging so you can troubleshoot the issue. To do this you’ll want to use the ‘WP_DEBUG’ constant and set it to ‘true’ (the default value is ‘false’).
define( 'WP_DEBUG', true );
Setting ‘WP_DEBUG’ to ‘true’ will allow database errors to print, and raises error reporting levels so that you’ll see warnings when deprecated files or functions are being used.
Before you can print these errors, however, you’ll need to disable recovery mode by setting ‘WP_DISABLE_FATAL_ERROR_HANDLER’ to ‘true’ and enable ‘WP_DEBUG_DISPLAY’.
define( 'WP_DISABLE_FATAL_ERROR_HANDLER', true ); // 5.2 and later define( 'WP_DEBUG_DISPLAY', true );
You can opt not to log the errors and instead just print them on the screen, but you should enable these settings on a development or staging site so as not to print errors visible to the public on your live site. If your settings in your php.ini file are already set to log errors rather than display them, you can override that with the following in wp-config.php:
@ini_set( 'log_errors', 'Off' );@ini_set( 'display_errors', 'On' );define( 'WP_DEBUG_LOG', false );
If php.ini is not set to log errors and you want to enable error logging, you’ll need to do a bit more work.
The default error log and display settings can be found in your php.ini file. In some cases, you may not have access to this file or your hosting company may use user.ini or some other naming convention. If you don’t have access to this file, ask your hosting company to make these changes for you.
Recommended php.ini error settings:
error_reporting = 4339 display_errors = Offdisplay_startup_errors = Offlog_errors = Onerror_log = /home/mysite.com/logs/php_error.loglog_errors_max_len = 1024ignore_repeated_errors = Onignore_repeated_source = Offhtml_errors = Off
If you turn on error logging, remember to delete the file afterwards, as it will often be in a publicly accessible location, where anyone could gain access to your log.
You can also use wp-config.php to turn PHP error_logging on and log them to a file you specify. Make sure WP_DEBUG is defined to true and you place the following above any require_once or include commands:
@ini_set( 'log_errors', 'On' );@ini_set( 'display_errors', 'Off' );@ini_set( 'error_log', '/home/mysite.com/logs/php_error.log' );/* That's all, stop editing! Happy blogging. */
For more examples of error logging techniques you can check out Mike Little’s suggestions on wp-hackers’ email list or the Manchester WordPress User Group.
There are a few important things to keep in mind when implementing debugging and logging settings:
- If ‘WP_DEBUG’ is set to ‘false’, ‘WP_DEBUG_DISPLAY’ and ‘WP_DEBUG_LOG’ will not work.
- If ‘WP_DEBUG’ is set to ‘true’, the other constants will only be active if they’re also set to ‘true’. This includes directives in your php.ini file — not just statements in wp-config.php. So if php.ini sets (‘display_errors’ = ‘Off’); but define( ‘WP_DEBUG_DISPLAY’, true); is set in your wp-config.php file, errors will not be displayed because your PHP configured behavior will take precedence.
- To ensure your directives work as intended, you should explicitly define both php.ini settings and their corresponding wp-config.php settings.
For your public, production WordPress installation, you might consider placing the following in your wp-config.php file, even though it may be partly redundant:
@ini_set( 'log_errors', 'On' );@ini_set( 'display_errors', 'Off' );define( 'WP_DISABLE_FATAL_ERROR_HANDLER', false ); // 5.2 and laterdefine( 'WP_DEBUG', false );define( 'WP_DEBUG_LOG', false );define( 'WP_DEBUG_DISPLAY', false );
Note: If you’re using the default debug log file in its default location of /wp-content/debug.log, you’ll want to limit the file access to SFTP only. Set the log file permissions to 600 and add the following to the .htaccess file in your root directory:
<Files debug.log> Order allow,deny Deny from all</Files>
12. Define the WordPress environment type
If you’re setting up local, development, or staging sites, it can be useful to define ‘WP_ENVIRONMENT_TYPE’. When this constant is not defined, the default environment type is production. The allowed values are: local, development, staging, and production.
define( 'WP_ENVIRONMENT_TYPE', 'staging' );
Note: When ‘WP_ENVIRONMENT_TYPE’ is set to ‘development,’ WP_DEBUG will automatically be set to ‘true’ if it isn’t already defined in wp-config.php.
13. Debug scripts
If you’re troubleshooting issues with JavaScript and CSS, you can use the SCRIPT_DEBUG constant to force WordPress to use the development versions of scripts and stylesheets. The files in wp-includes/js, wp-includes/css, wp-admin/js, and wp-admin/css will be loaded instead of the minified versions. To view these development versions, set ‘SCRIPT_DEBUG’ to ‘true.’
define( 'SCRIPT_DEBUG', true );
14. Disable JavaScript concatenation
In WordPress, JavaScript files are sequenced to speed up the load time of admin screens. If you’re getting JavaScript errors in the WordPress admin area, you can disable script concatenation by setting ‘CONCATENATE_SCRIPTS’ to ‘false.’
define( 'CONCATENATE_SCRIPTS', false );
Is this the ultimate guide to wp-config.php?
While this article is quite extensive and covers everything from the basics of how to locate, access, and edit wp-config.php, it is by no means exhaustive. How you set up your wp-config.php file will be specific to your needs, your server environment, and personal preferences. If you have additional questions about ways that you can use the wp-config.php file, you can refer to WordPress.org’s support documentation. We’ve also included some answers to frequently asked questions below.
Frequently asked questions
What if I can’t find my wp-config.php location?
While your wp-config.php file is normally located in the root folder of your WordPress installation, it may be located somewhere else. You’re more likely to encounter this if you’re taking over a WordPress site from a previous developer or if your hosting company automatically installs WordPress for you. If you’re having trouble finding your wp-config.php file, you can do a search in your SFTP program or in cPanel.
Filezilla
If you’re using Filezilla to access your site via SFTP, you can click on the binoculars icon at the top to perform a file search. Search ‘wp-config.php’ in the top-most folder you have access to in case wp-config.php is located in a folder outside the root directory. It may take several minutes for results to appear, as you’ll be searching all the folders on your server.

cPanel
Searching for wp-config.php in cPanel is pretty straightforward. In your host’s cPanel, click File Manager under Files.
You’ll be taken to your file tree on your server and at the top right of the screen will be a search field. You can use the dropdown selector at the left to choose whether you want to search all files or just a specific directory. Since you don’t know where wp-config.php is, it’s probably best to search all directories.
Enter ‘wp-config.php’ in the search field and click Go.

If you still can’t find wp-config.php, it may be that its folder doesn’t have the correct permissions set for you to be able to access it. In this case, contact your hosting company for assistance.
What if my wp-config.php file is not writable?
If you see an error about missing write permissions for wp-config.php in your WordPress dashboard, it’s likely due to a plugin that needs write access to wp-config.php. Some plugins require this type of access to add code that’s required for the plugin to work. However, some hosts may implement strict permissions on wp-config.php for security reasons that also deny write access to these plugins.
If your host allows you to make changes to these settings, you should be able to change your file and folder permissions via SFTP or cPanel.
SFTP
For this example, we’re using Filezilla.
1. Connect to your server via SFTP.
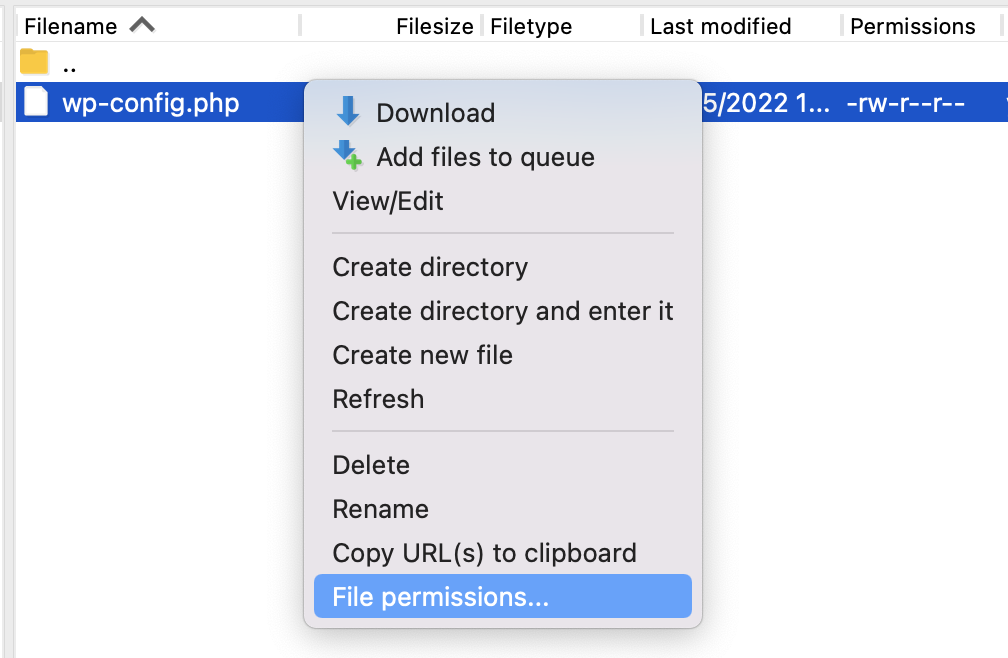
2. Find your wp-config.php file. It’s located in the root folder of your WordPress installation by default, but may be located somewhere else.
3. Right click on your wp-config.php file and click File Permissions.
Make sure the file permissions are set to 640 or 644.

If wp-config.php is in a folder outside the root folder, double-check that the folder permissions are set to 750 or 755.
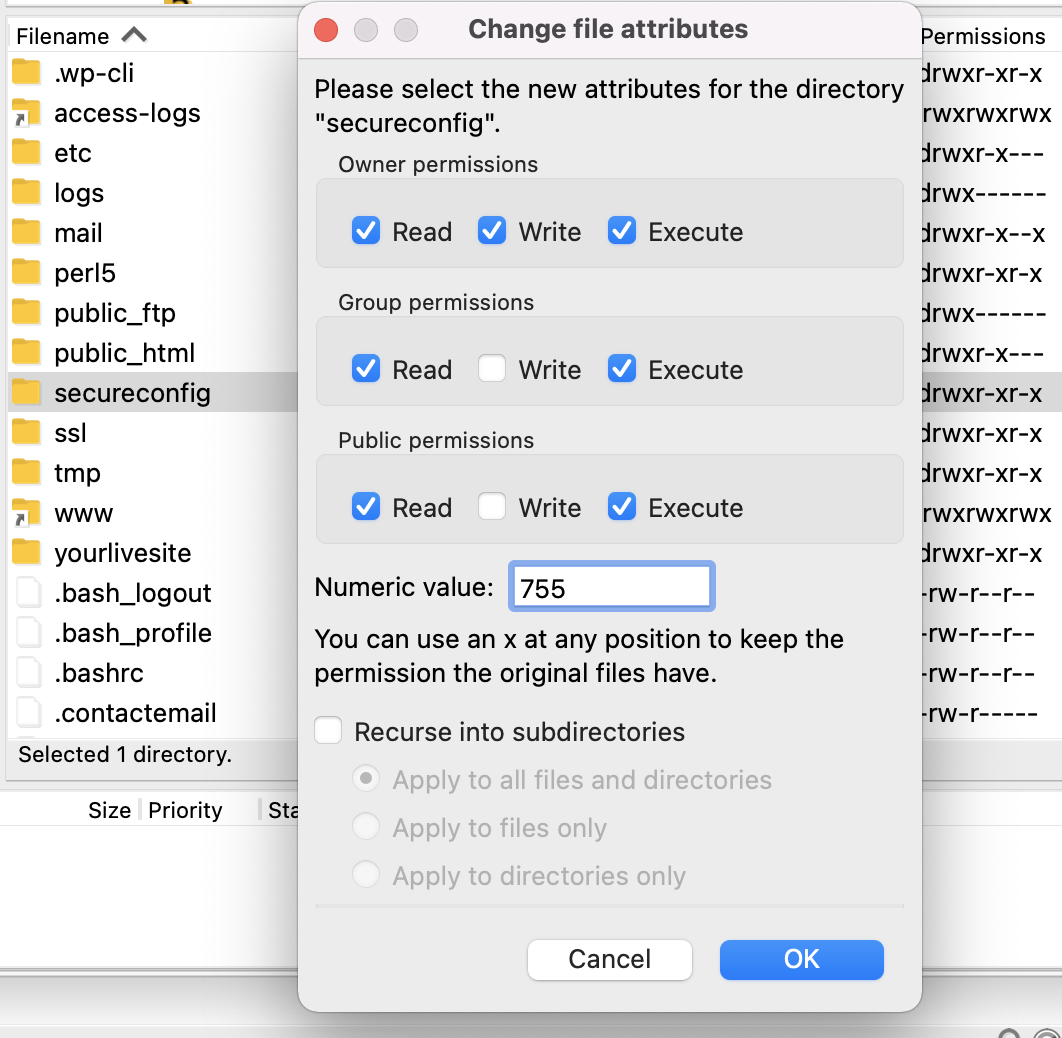
Note: Some hosting platforms may require you to use different permissions values. For files, you can try 664 and 666. For folders, try 775.
If changing the file permissions does not solve your issue of granting write access, it’s likely that the file ownership settings are to blame and you’ll need to contact your hosting provider in order to make any changes.
Read more about WordPress file permissions.
Can plugins edit my wp-config.php file?
If your folder and file permissions are set to allow write access (750, 755, or 775 for folders; 640, 644, 664, or 666 for files), then plugins should be able to write to wp-config.php. If you want to disable plugins from being able to write to your wp-config.php file, you can set stricter file permissions of 440 or 400. This will also prevent other users on your server from reading wp-config.php.
What is wp-config-sample.php?
When you initially download WordPress, there’s no wp-config.php file included. This file is usually set up during the install process or can be manually configured. The wp-config-sample.php file is included with WordPress so that users have a template to use when manually configuring wp-config.php as well as also having a backup “clean slate” template to work from if something should happen to your original wp-config.php file you created.
wp-config-sample.php includes all the basic constants and placeholder values required to set up WordPress as well as commented-out explanations of sections within the file that help users understand where to place certain information.
wp-config-sample.php content:
<?php/** * The base configuration for WordPress * * The wp-config.php creation script uses this file during the installation. * You don't have to use the web site, you can copy this file to "wp-config.php" * and fill in the values. * * This file contains the following configurations: * * * Database settings * * Secret keys * * Database table prefix * * ABSPATH * * @link https://wordpress.org/support/article/editing-wp-config-php/ * * @package WordPress */ // ** Database settings - You can get this info from your web host ** ///** The name of the database for WordPress */define( 'DB_NAME', 'database_name_here' ); /** Database username */define( 'DB_USER', 'username_here' ); /** Database password */define( 'DB_PASSWORD', 'password_here' ); /** Database hostname */define( 'DB_HOST', 'localhost' ); /** Database charset to use in creating database tables. */define( 'DB_CHARSET', 'utf8' ); /** The database collate type. Don't change this if in doubt. */define( 'DB_COLLATE', '' ); /**#@+ * Authentication unique keys and salts. * * Change these to different unique phrases! You can generate these using * the {@link https://api.wordpress.org/secret-key/1.1/salt/ WordPress.org secret-key service}. * * You can change these at any point in time to invalidate all existing cookies. * This will force all users to have to log in again. * * @since 2.6.0 */define( 'AUTH_KEY', 'put your unique phrase here' );define( 'SECURE_AUTH_KEY', 'put your unique phrase here' );define( 'LOGGED_IN_KEY', 'put your unique phrase here' );define( 'NONCE_KEY', 'put your unique phrase here' );define( 'AUTH_SALT', 'put your unique phrase here' );define( 'SECURE_AUTH_SALT', 'put your unique phrase here' );define( 'LOGGED_IN_SALT', 'put your unique phrase here' );define( 'NONCE_SALT', 'put your unique phrase here' ); /**#@-*/ /** * WordPress database table prefix. * * You can have multiple installations in one database if you give each * a unique prefix. Only numbers, letters, and underscores please! */$table_prefix = 'wp_'; /** * For developers: WordPress debugging mode. * * Change this to true to enable the display of notices during development. * It is strongly recommended that plugin and theme developers use WP_DEBUG * in their development environments. * * For information on other constants that can be used for debugging, * visit the documentation. * * @link https://wordpress.org/support/article/debugging-in-wordpress/ */define( 'WP_DEBUG', false ); /* Add any custom values between this line and the "stop editing" line. */ /* That's all, stop editing! Happy publishing. */ /** Absolute path to the WordPress directory. */if ( ! defined( 'ABSPATH' ) ) { define( 'ABSPATH', __DIR__ . '/' );} /** Sets up WordPress vars and included files. */require_once ABSPATH . 'wp-settings.php';
What is the fastest way to fix an “Error Establishing a Database Connection”?
The fastest fix is to check your database credentials inside the wp-config.php file. This error generally means the DB_NAME, DB_USER, DB_PASSWORD, or DB_HOST values are incorrect. First, download a copy of your wp-config.php file using FTP or your host’s file manager.
Then, open it and carefully compare these four lines with the exact credentials provided by your hosting provider. Even a small typo can cause this error. If you confirm the details are correct, the next step is to contact your host to ensure their database server is online and running correctly.
How do I know if I made a syntax error in wp-config.php?
A syntax error in wp-config.php usually results in a blank white screen, also known as the “WordPress White Screen of Death”. You might also see a “Parse error” message on the screen, which is a clear sign of a code mistake.
To find the exact mistake, you can temporarily enable debugging. Add the line define( ‘WP_DEBUG’, true ); to your wp-config.php file. This will display the specific PHP error on the screen, telling you the exact line number where the mistake occurred. The most common errors are missing semicolons, incorrect quotes, or extra spaces before the <?php tag.
Is it safe to leave debugging mode enabled on a live site?
No, it is never safe to leave debugging mode enabled on a live website. When WP_DEBUG is set to true, your site displays PHP errors and warnings on the public-facing pages. This not only looks unprofessional but also exposes sensitive information about your server’s file paths and your site’s code structure. Hackers can use this information to find vulnerabilities.
Always use debugging for troubleshooting on a staging site or for very brief periods on a live site. Once you have fixed the issue, make sure you change the line back to define( ‘WP_DEBUG’, false );.
What should the file permissions be for wp-config.php?
The file permissions for wp-config.php should be set to 600, 640, or 644. A setting of 600 is the most secure because it means only the file owner can read and write to it. A setting of 644 allows the owner to read and write, while the group and public can only read it.
You should never set the permissions to 777, as this allows anyone to read, write, and execute the file, creating a major security risk. You can change file permissions using an FTP client like FileZilla or through the file manager in your hosting control panel.
Can I recover my site if I delete my wp-config.php file?
Yes, you can recover your site, but you will need your database credentials. If you delete the file, your site will show the WordPress installation screen because it cannot find the database information. To fix this, you can get a copy of the wp-config-sample.php file from a fresh WordPress download.
Rename it to wp-config.php. Then, you must manually enter your correct DB_NAME, DB_USER, DB_PASSWORD, and DB_HOST information. If you do not have these details saved, you will need to find them in your hosting account’s control panel or contact your host’s support team for help.
How does moving wp-config.php one level up improve security?
Moving the wp-config.php file one directory above your public root folder makes it inaccessible from a web browser. The public root folder, often called public_html or www, is where files served to the internet live. By placing wp-config.php outside of this folder, no one can navigate to it directly using a URL.
WordPress is automatically designed to look for the file in the directory above if it cannot find it in the root. This is a simple but effective hardening technique that hides your most critical configuration file from direct web access, protecting your database credentials from certain types of server misconfigurations or attacks.
What does “memory exhausted error” mean and how can wp-config.php fix it?
A “memory exhausted error” means your WordPress site tried to use more memory (RAM) than your server has allocated for PHP processes. This often happens when you use a poorly coded plugin, a large theme, or try to upload a big image. You can fix this by increasing the memory limit directly in your wp-config.php file.
Add the following line: define( ‘WP_MEMORY_LIMIT’, ‘256M’ );. This tells WordPress it can use up to 256 megabytes of memory. You can adjust this number based on your hosting plan’s limits. It is a common and effective way to resolve resource-related fatal errors.
Will changes to wp-config.php be overwritten when I update WordPress?
No, changes made to your wp-config.php file will not be overwritten during a standard WordPress core update. The WordPress update process is designed to replace core files like those in the wp-admin and wp-includes folders, but it intentionally leaves the wp-config.php file and the wp-content folder untouched.
This is because wp-config.php contains your unique site settings that are necessary for the site to function. Your custom constants for memory, security, and debugging will remain safe across all core WordPress updates.
What is the difference between wp-config.php and functions.php?
The wp-config.php file handles your site’s core configuration and database connection. It operates before WordPress fully loads. Think of it as the foundational blueprint for your entire WordPress installation. In contrast, the functions.php file is part of your specific theme and is used to add features and functionality to that theme.
It loads after the core WordPress files, including wp-config.php. You use wp-config.php for site-wide settings like memory limits and database details, while you use functions.php for theme-specific code, such as creating new widget areas or changing how your posts look.
