
Although WordPress themes are typically well-coded, they need regular updates to patch security vulnerabilities and introduce new features. But if you’ve made a lot of customizations to your theme, you might worry that updating it will cause you to lose all of your hard work.
Fortunately, there are a few easy ways to update your WordPress theme without losing anything. Backing up your site, using a child theme, and testing any changes in a staging environment can help you preserve your settings. Then, you can easily update the theme from your WordPress dashboard, cPanel, or using File Transfer Protocol (FTP).
In today’s guide, we’ll explore the importance of updating your WordPress theme. Then, we’ll explain the best methods to do this while maintaining any theme customizations. Let’s get to work!
TL;DR – Safest ways to update a WordPress theme
- Back up first (files and database), ideally via your host or a backup plugin like VaultPress Backup.
- If you customized files, move edits to a child theme or a site-specific plugin.
- Update in this order: Staging → test → Live.
- Pick a method: Dashboard (fast), WP-CLI (developers), FTP/cPanel (manual).
- If something breaks: roll back (backup restore or WP Rollback), fix, retry.
Why you may need to update your WordPress theme
Updating your WordPress theme is an essential task. It can enhance your site’s security, introduce new features, and help things run more smoothly. Let’s start by discussing WordPress security.
Security
The most important reason to update your theme is for website safety. Updates may include security patches that reduce vulnerabilities on your site. If you stick with the older version, you could expose yourself to threats. Because WordPress themes are often open source, anyone could examine your theme’s code and search for possible weak points.
Any known security issues will generally be published in the theme’s support forums and changelogs. Therefore, hackers can use this information to identify problems and break into your site.
In 2021, critical security vulnerabilities were identified in more than 50 WordPress themes. These vulnerabilities exposed users to various attacks, including Cross-Site Scripting (XSS), Remote Code Execution (RCE), and SQL injections.
That’s not to say that WordPress themes are inherently unsafe. Developers continually work on the software to improve and protect it.
Keeping your theme up-to-date can go a long way towards securing your site. It’s also important that you download themes from reputable sources, and only choose ones that have a number of positive reviews and are compatible with the latest version of WordPress core. The WordPress.org theme repository, for example, is chock full of excellent, free options that are heavily reviewed against WordPress’ coding best practices.
New features
From a design perspective, updating your theme can unlock new settings and built-in configuration options. For example, an update might include new blocks or block patterns that you can use across your site.
Taking advantage of built-in features means you won’t need to rely as much on third-party plugins and custom CSS. So, you can design the site you want with less time and expense.
Compatibility
Finally, themes are often updated for compatibility with WordPress core. Since new versions of core are typically released two or three times a year, theme developers will test their themes against WordPress and update them accordingly.
This ensures that the software won’t cause bugs, slow down your site, or even break some features. As such, keeping your theme up to date is essential if you want your website to perform at its best.
What to do before updating your WordPress theme
If done incorrectly, updating your theme can mean losing hours of hard work and design customizations. Fortunately, there are some precautionary steps you can take to safeguard your edits.
Back up your site
Backing up your website is a general best practice. If something goes wrong during an update (or any other time), you can simply restore an older version of your site while you troubleshoot and resolve the issue.
Fortunately, it’s very easy to create copies of your site with Jetpack VaultPress Backup.
Jetpack VaultPress Backup works in real-time, saving every change you make as it happens. The backup is stored off-site, so even if your site goes completely down, you can access and restore it right away.
Plus, Jetpack has a WordPress activity log that tracks every action taken, so you can quickly identify the point to which you want to restore.
To restore your WordPress website to an earlier version, simply navigate to Jetpack → Backup in your WordPress.com account. Then, you can click through the different days and select Restore to this point for the backup you’d like to use.
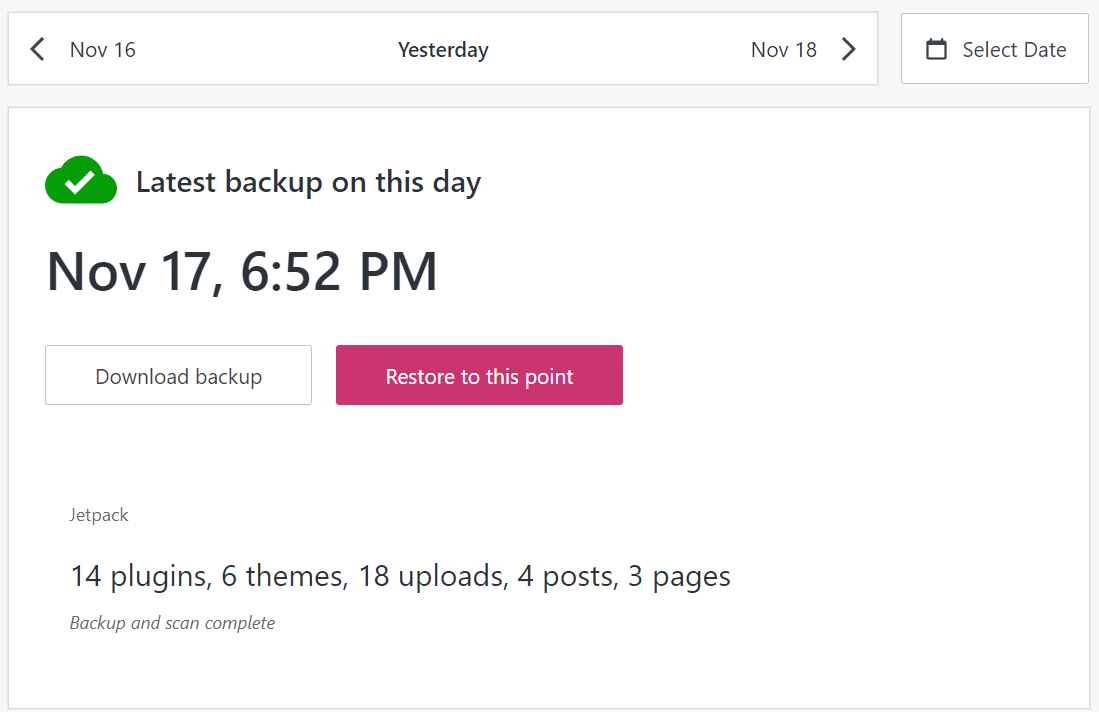
Or, you can choose an event in your activity log — like a theme update — and restore to just before that occurred.

Make sure theme customizations are in a child theme
If you want to edit and customize your WordPress theme, you’ll need to create a WordPress child theme first. The “child” inherits the configuration files, templates, and stylesheets of its “parent,” but WordPress will treat it as an independent theme.
Any changes you make to the child won’t affect the parent. Plus, updating the parent theme will apply security patches and other upgrades to the child without overriding any custom code you’ve added.
If you’re not already working with a child theme, it’s worth making one now. You’ll first want to create a complete backup of your WordPress site.
Then, access your website via File Transfer Protocol (FTP) and head to the root directory (typically called public_html, public, or www). Open wp-content/themes and create a new folder for your child theme. Consider naming it after the parent theme, with “-child” at the end.

Inside the folder, create a new text file and name it “style.css”. Next, add the following code to it, updating the information where relevant:
/*

Theme Name: The name of your theme goes here

Theme URI: http://example.com/twenty-twenty-two-child/

Description: The description of the child theme goes here

Author: John Doe

Author URI: http://example.com

Template: twentytwentytwo

Version: 1.0.0

*/
When you’re ready, save and close the file. Then, create a new file and name it “functions.php”. Add this enqueuing script to it so that WordPress knows how to load the stylesheets in your child theme:
<?php

add_action( 'wp_enqueue_scripts', 'enqueue_parent_styles' );

function enqueue_parent_styles() {

wp_enqueue_style( 'parent-style', get_template_directory_uri() . '/style.css' );

}

?>
Finally, head to Appearance → Themes in your WordPress dashboard. Find your child theme and click on Activate. It’s now ready for you to use and customize.
Consider testing theme changes on a staging site
A staging website is a copy of your site where you can safely test changes. Any edits you make to the staging environment won’t affect your live website. Then, once you’ve determined that it’s safe to proceed, you can ‘push’ any changes online, where they’ll be visible to anyone who visits your site.
Using a staging site is a practical choice from a User Experience (UX) point of view. Playing around with your website while it’s online can cause inconvenience and confuse visitors who may not be able to access particular features.
Additionally, utilizing a staging site can show you if a theme update will cause problems. Then, you can avoid pushing the changes live until you have a solution.
When running your tests in a staging environment, it’s worth following these steps:
- Check for theme compatibility. First, you’ll want to ensure that the theme update has been tested with the version of WordPress you’re running on your site. You may also need to update WordPress core first if you’re using an older version.
- Put Jetpack into “safe mode.” If you’re using the Jetpack plugin, this helps ensure that your connection isn’t broken when setting up a staging site.
- Update the theme. You can check out the methods outlined later in this guide to see how to do this.
- Test the site’s functionality. This is the most important part of the process. Consider testing your site’s menus, other navigational elements, forms, and online store. You can also scan your website for visual problems by viewing your posts, pages, and custom post types.
- Verify issues in support forums. If you run into any problems, head to the official WordPress support forums for the theme. There might be known issues that developers are working to resolve.
- Report problems to the theme developer. If no one else has the same issue, it’s a good idea to contact the theme developer. This way, they can fix it for you and all other users.
- Push your changes live. Finally, if everything is looking good, it’s time to push the update live.
Don’t worry if you don’t already have a staging environment in place. Let’s look at a few easy ways to create one:
Create a staging site with your web host
Depending on which WordPress hosting provider you choose, you may have access to a free or paid staging environment.
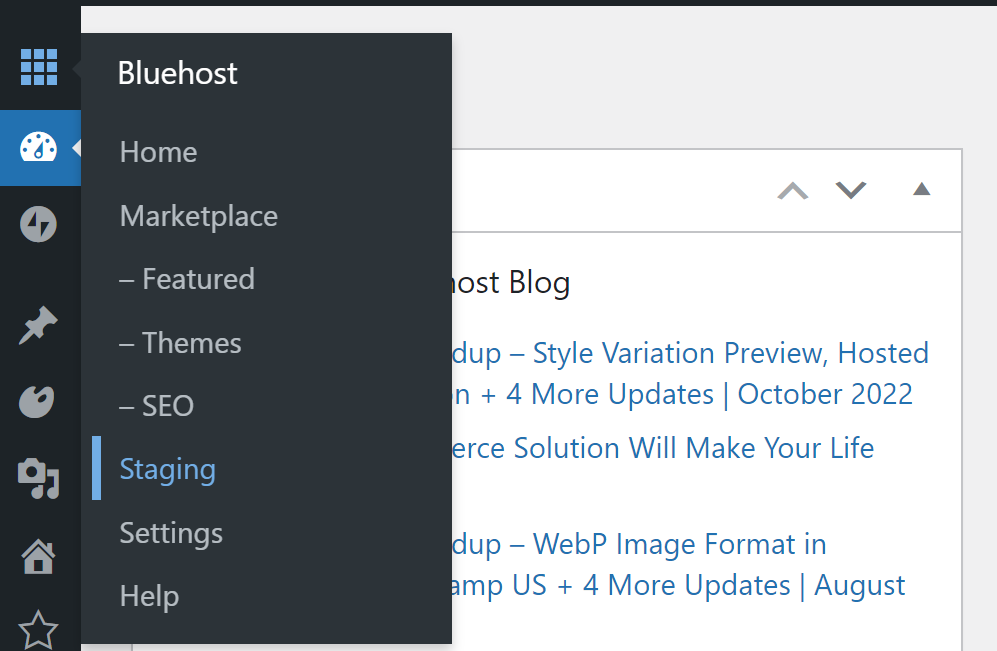
For instance, Bluehost offers staging functionality within your WordPress dashboard. If you have the host’s plugin enabled, head to Bluehost → Staging.
Now, select Create Staging Site.
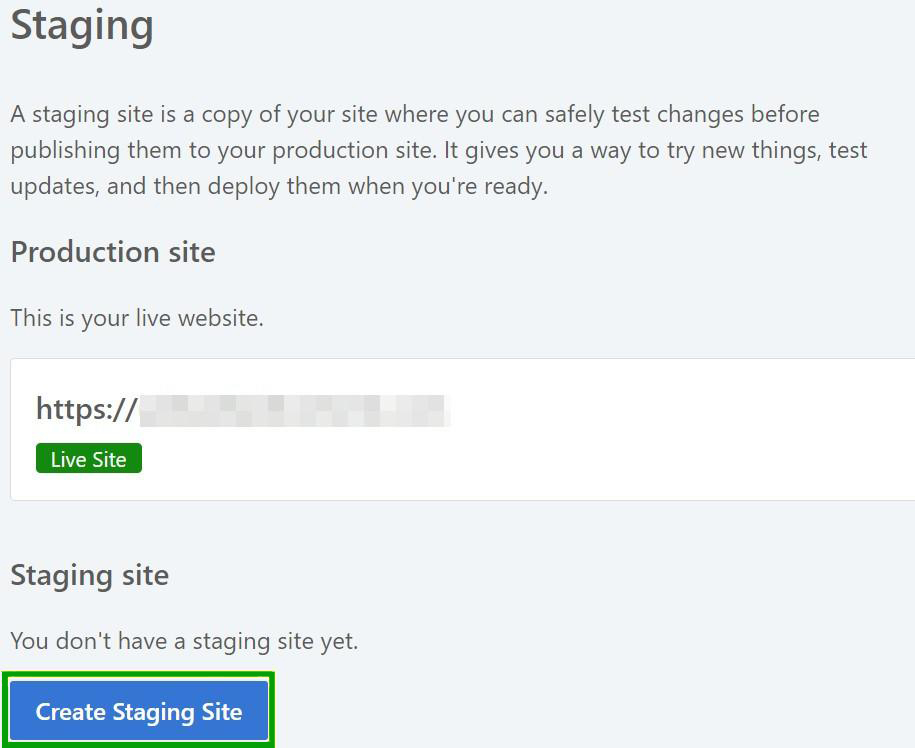
Bluehost will take a few minutes to create a staging website. It will be a complete copy of your existing site, but any changes you make won’t affect your live page.
You can access your staging site by clicking on the circle to the left of its name.

Then, you can apply any edits to your live site by hitting Deploy All Changes on the right-hand side.
Make a staging site with a plugin
The Jetpack plugin also enables you to make a staging environment. You’ll simply need to clone your site, import it into a local environment or subdomain, and then work on the website there. This documentation can walk you through the entire process.
Alternatively, you could opt for a staging plugin like WP Staging. This free plugin helps you clone your website and work on it safely.
Once you’ve installed and activated the plugin in your WordPress dashboard, head to WP Staging → Staging Sites → Create New Staging Site.

You can then select specific database tables and files or just click on Start Cloning to copy your entire site.
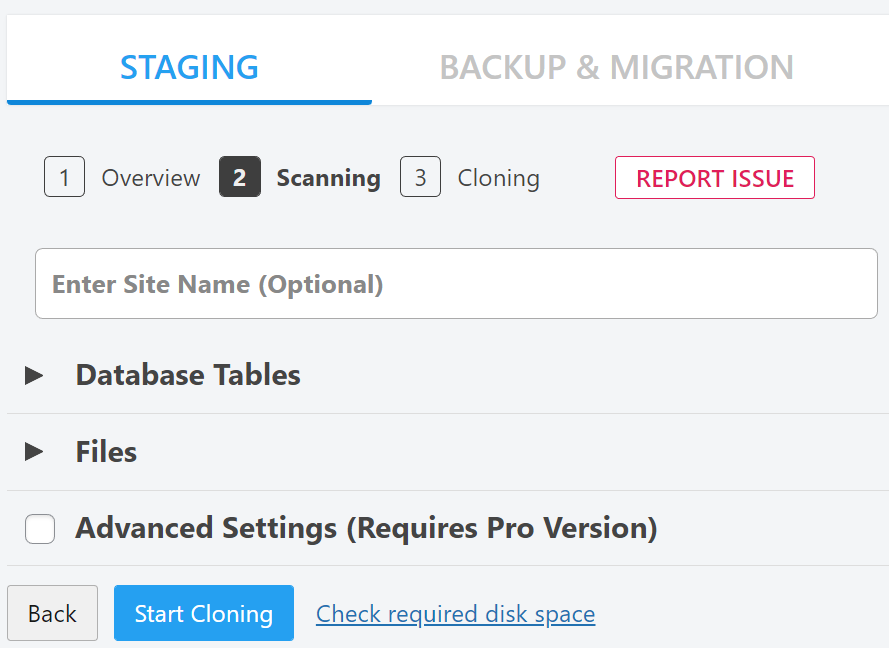
WP Staging will take a few minutes to clone your website and create a staging environment. Then, it’s ready to go!
How to update your theme in WordPress (4 methods)
| Method | Best For | Pros | Cons |
| WordPress Dashboard | Beginners, themes from WordPress.org | Easiest and fastest (1-click) | May not work for all premium themes; less control |
| FTP (File Transfer Protocol) | Intermediate Users, All Themes | Universal method, works for any theme | Slower, requires FTP credentials, risk of error if done incorrectly |
| cPanel File Manager | Intermediate Users, All Themes | No extra software needed | Clunky interface, similar risks to FTP |
| WP-CLI (Advanced) | Developers, System Admins | Extremely fast, scriptable, efficient | Requires command-line access and knowledge |
Now let’s get into the main part of this tutorial. Before running any updates, you should consider the best time of day for this process.
Although a theme update takes just a few moments, it could cause temporary glitches on your site that inconvenience visitors. Additionally, if a new software version causes major problems, you don’t want to be scrambling to fix them during an influx of traffic.
Your first instinct might be to run a theme update in the middle of the night. But, this may not be the best approach if most of your visitors come from a different time zone.
You may want to consider using Google Analytics to see when most users come to your site. Then, simply run your theme updates during a quiet period.
1. Update your theme using the admin dashboard
Updating a theme via the WordPress admin dashboard is a very straightforward process. Simply head to Dashboard → Updates and scroll down to the Themes section.
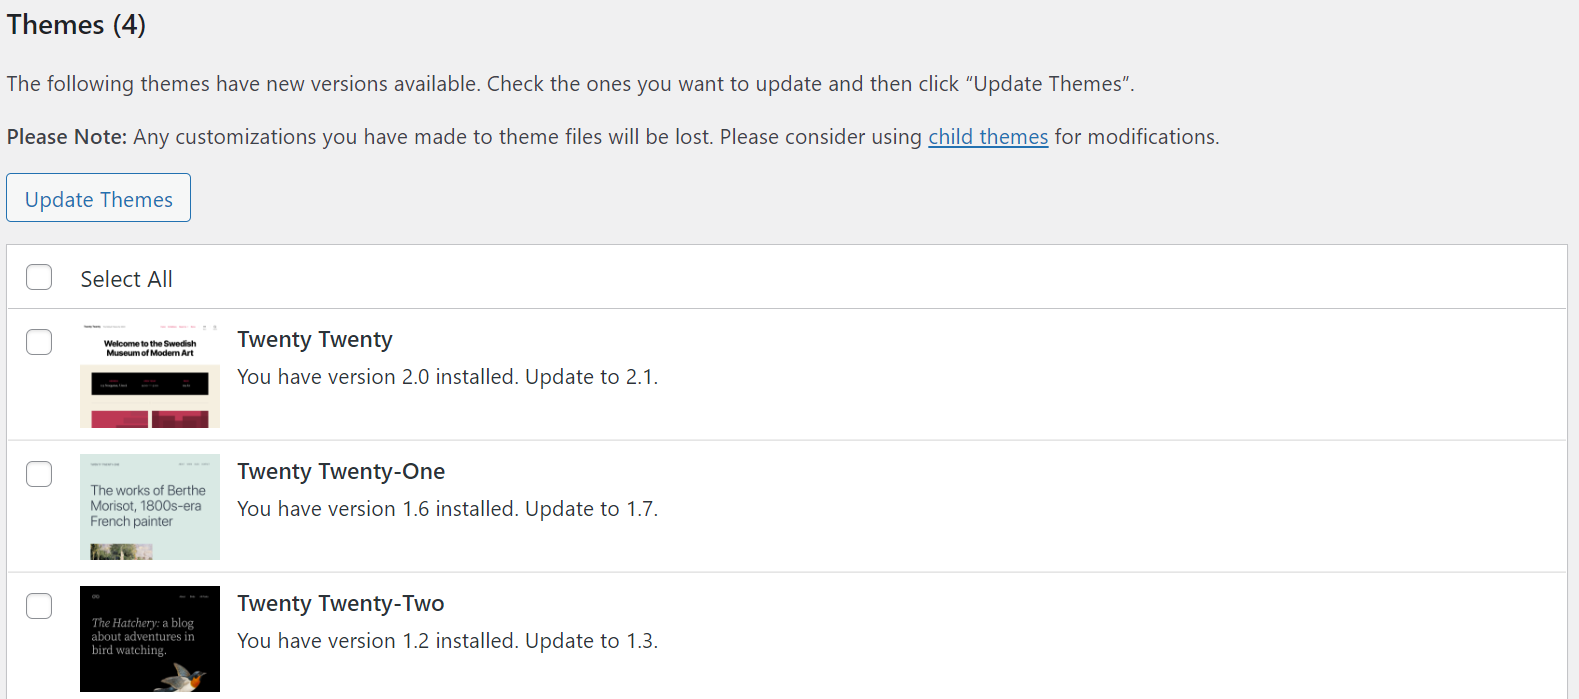
Here, tick the checkbox next to your theme and click on Update Themes. The process should complete in a couple of seconds.
Alternatively, you can find available theme updates under Appearance → Themes. Any outdated themes will have a banner message:
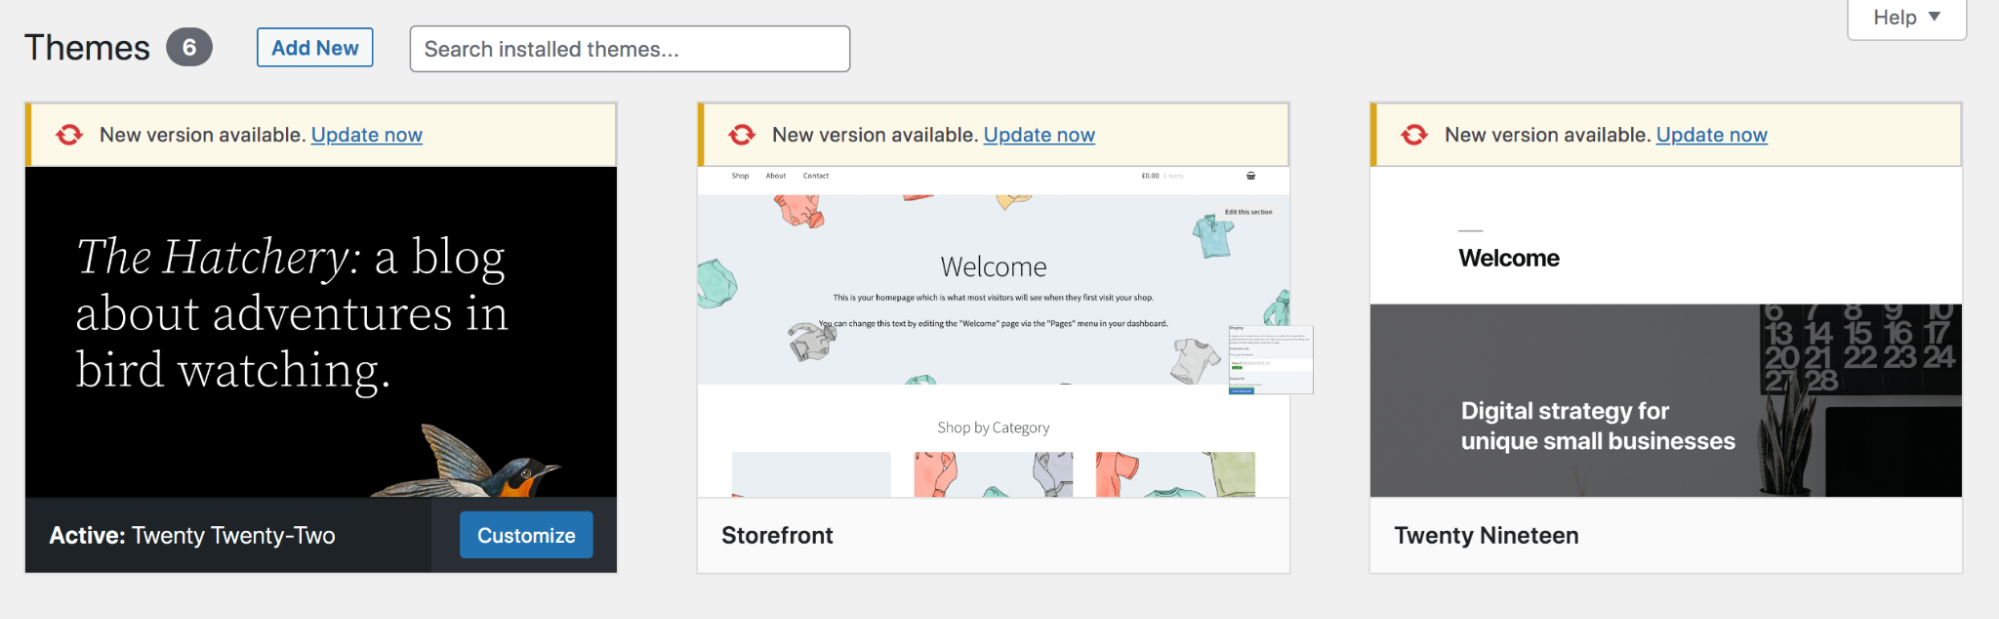
Simply click on Update now above the applicable theme, and wait a few moments for WordPress to run the update.
If, for any reason, this method doesn’t work, there is another option you can take from within the WordPress dashboard:
- Go to Appearance → Themes → Add New.
- Upload the zip file of the latest version of your current theme. For example, you can update the Twenty Twenty-Two theme by uploading a new copy downloaded from WordPress.org.
- Click Replace active with uploaded when prompted.
2. Update your theme manually via FTP
Sometimes, you may be unable to update your premium or custom theme from the WordPress dashboard. For instance, if you purchased a theme from outside the WordPress theme repository, it might not add its updates to your dashboard. Fortunately, you can use an FTP client to run the updates.
Firstly, you’ll need to download the latest version of the theme onto your computer. It should download as a .zip file, so you’ll also have to extract it.
Next, connect to your website using an FTP client. If you don’t have one installed, FileZilla is a free and user-friendly option. It will ask you for your FTP credentials, so make sure to have them handy, too.
Then, head to wp-content → themes.
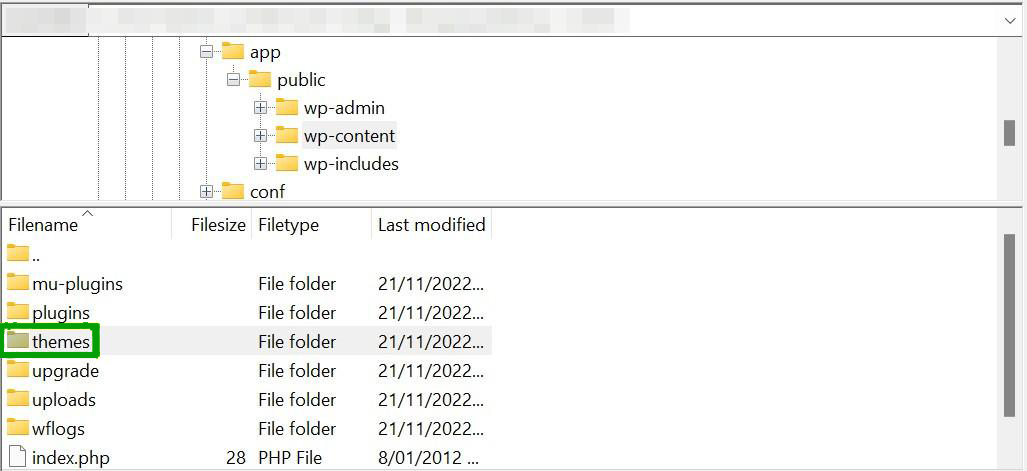
You may want to download a copy of the existing folder for your theme in case something goes wrong. Then, simply replace it with the unzipped folder you just downloaded. This will override the existing theme files, applying the updates to the theme.
3. Update your theme using cPanel
If your hosting provider uses cPanel, you can also use this application to change your WordPress theme or update it. Again, you may need to use this method if you’ve purchased a premium theme that doesn’t add its updates to the WordPress dashboard.
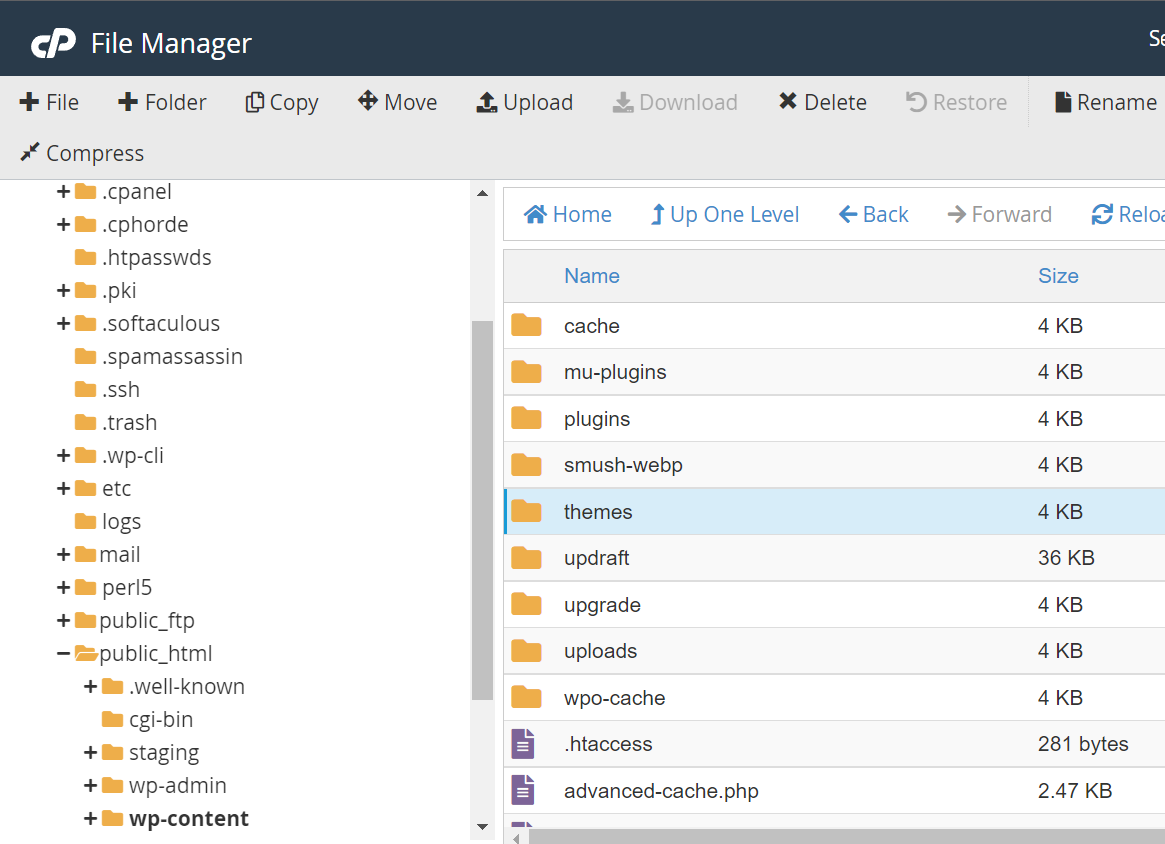
Like the previous method, you’ll need to download the latest theme version and unzip the files. Then, log into your hosting dashboard and locate cPanel. You’ll then need to open File Manager.

Now, go to public_html → wp_content → themes.
Inside, you should see a folder for the theme you want to update. Right-click on it and select Compress to download it as a .zip file to your computer. This way, you’ll have a functional version to restore if you make a mistake.
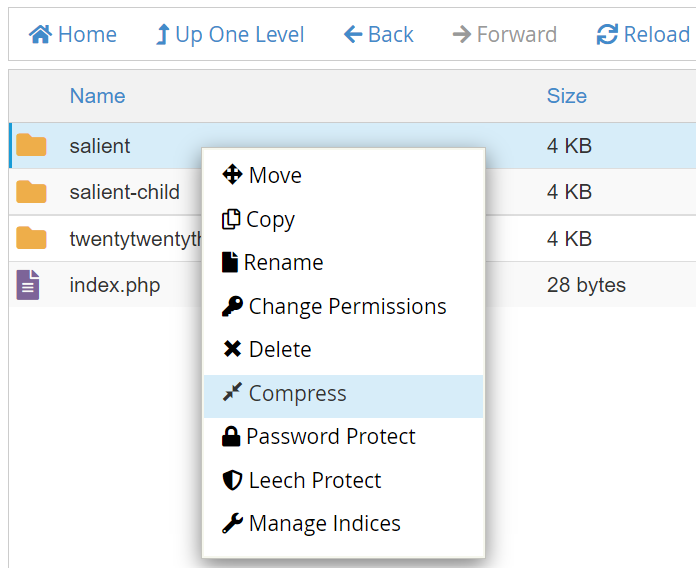
Delete the theme folder and upload the downloaded folder containing the updated theme. When you navigate back to your WordPress dashboard, your site should now be running the latest version of the theme.
4. Update a theme using WP-CLI (for developers)
For developers and system administrators who prefer using the command line, WP-CLI provides the fastest and most efficient way to manage WordPress themes. This method requires SSH access to your server and for WP-CLI to be installed in your hosting environment. It is a powerful tool for updating one or multiple themes with a single command.
Before you start, always make a backup of your site. To begin, connect to your server via SSH and navigate to your WordPress installation’s root directory.
You can check which themes have pending updates with this command:
wp theme list --update=available
This command shows you a list of only the themes that need to be updated, helping you see what work needs to be done.
To update a specific theme, you use its folder name, also known as its “slug.” For example, to update the “twentytwentyfour” theme, you would run the following command:
wp theme update twentytwentyfour
The tool will handle downloading and replacing the theme files for you, showing you the old and new version numbers upon completion.
If you need to update all themes on your site at once, the --all flag makes this very simple. Running the command below will update every theme that has a new version available:
wp theme update --all
This command is very useful for site maintenance because it saves you from updating each theme one by one. It is a good practice to run this regularly to keep all theme files secure and up to date.
How to undo a WordPress theme update
Rolling back or undoing a theme update will revert it to the previous software version. You might need to do this if the updated theme causes problems on your website.
If you have a working backup of your WordPress website, you can simply restore it to this version. With Jetpack VaultPress Backup, you’ll just have to open your site with WordPress.com and navigate to Jetpack → Backup.
Then, find a copy of your site that has the older version of the theme, and click on Restore to this point.
If you don’t have a website backup, a plugin like WP Rollback can help you out. Install and activate the plugin, then head to Appearance → Themes. Click on the theme to see its details, and select Rollback in the bottom-right corner.
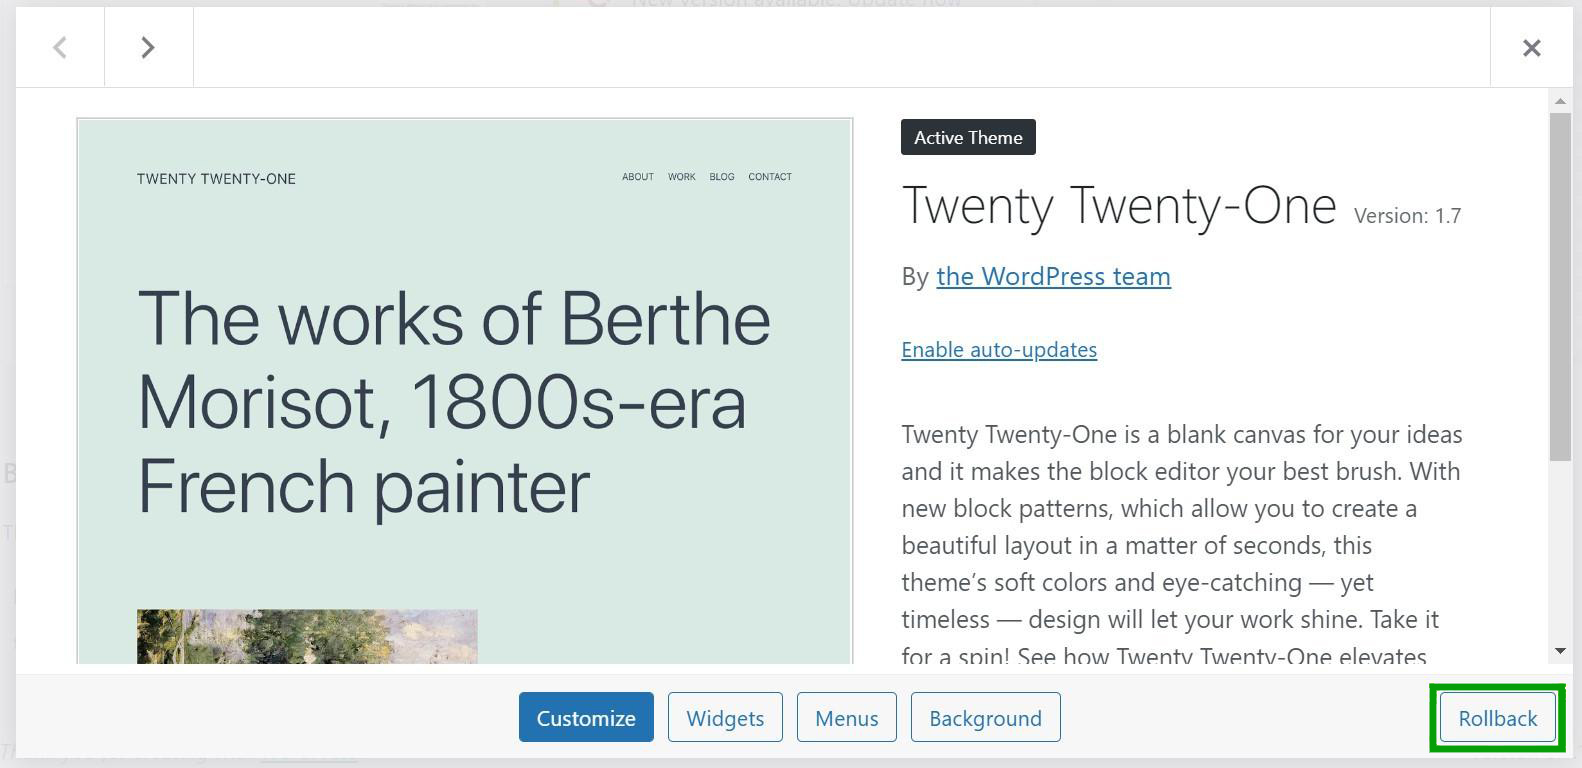
You can now choose which version of the theme you’d like to reinstate.

Click on the circle next to the software version, then select Rollback. The plugin will take care of the rest.
Keep in mind that this plugin only works for themes downloaded from the WordPress.org theme Repository. If you have a premium theme and didn’t back up your site, your only option is to manually roll back the update.
In this scenario, you’ll need to download the previous version of your theme as a .zip folder and unzip the files. Then, connect to your site via FTP or File Manager to replace the current theme folder with the older one. We covered this method in the previous section of the article.
Frequently asked questions about updating your WordPress theme
By now, you should have a good idea of how to update your WordPress theme. If you still have questions about the process, we’ll answer them in this section.
Why should you update a WordPress theme?
Updating a WordPress theme can secure your site by patching over security vulnerabilities within the code. Additionally, theme updates may contain new features or settings that give you more control over your theme’s appearance.
Finally, since WordPress core is also updated frequently, new theme versions ensure compatibility with the core software.
What happens when you update a WordPress theme?
Updating a theme involves installing the latest software version. The old theme files will be replaced with new ones during this process.
Any minor adjustments you’ve made within the theme’s built-in settings should carry over with the update, but custom code will be deleted and lost. For this reason, it’s advisable to back up your theme and make custom edits within a child theme before running any updates.
Can I set my WordPress theme to update automatically?
You can set up automatic updates for your WordPress theme. This setting will save you time since you won’t have to manually upgrade the software. Moreover, you’ll immediately have access to security patches and other benefits.
As always, you’ll want to make sure that you’re also backing up your site if you enable automatic updates. Then, you’ll have a functional version of your website on hand if the new software causes problems.
In your WordPress admin dashboard, navigate to Appearance → Themes and click on the theme you want to automatically update. Now, select Enable auto-updates from the side menu.

Depending on your host, you may also have theme updates enabled by default. Many hosting providers will automatically update software to save you time and energy. You can then manage these settings from your hosting dashboard.
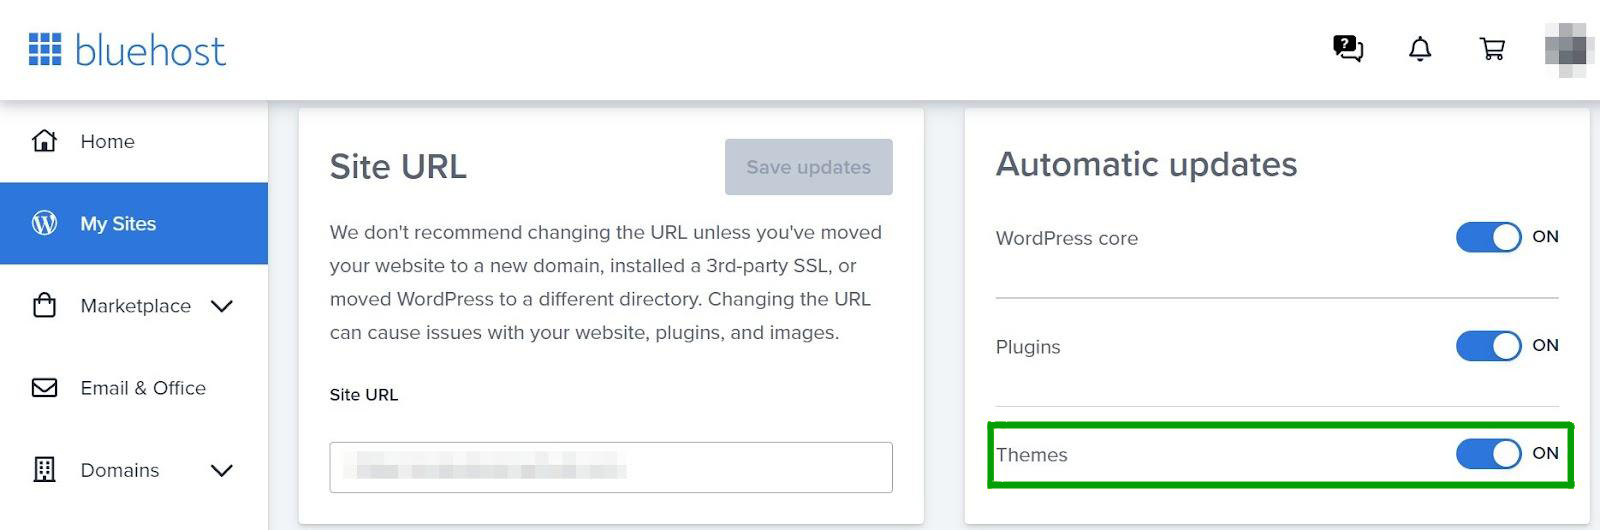
In many cases, you’ll just need to toggle a setting to enable and disable automatic theme updates.
What if a WordPress theme update gets stuck?
Occasionally, a WordPress theme update can get “stuck.” This means it will keep trying to update but times out before completing the process. It may even break your site during the process.
The easiest solution here is to restore a backup of your WordPress site and then run the update again. If the update continues to get stuck, there are a few simple fixes.
For starters, consider clearing your browser and server-side caches. There might be files interfering with the update process. Then, reload the page and try running the update again to see if it works.
The update could also be timing out due to a lack of resources. This is common if you’re using a shared hosting plan. In this scenario, make sure you’re only running one update at a time (rather than multiple themes and plugins simultaneously).
The update may also be stuck because it’s only partially complete. In this scenario, you can access your website via FTP, delete the theme folder to remove the theme from WordPress, and replace it with a downloaded folder from WordPress or the marketplace where you bought the theme. We explained this process in-depth earlier in the post.
What is the safest way to update a WordPress theme?
The safest way to update a WordPress theme is by first testing the update on a staging site. A staging site is a private copy of your live website where you can test changes without affecting your public visitors.
This lets you see if the new theme version causes any problems, such as layout breaks or plugin conflicts, before you apply the update to your main website. After you confirm the update works correctly on the staging site, you can then proceed to update the theme on your live site, ideally after taking a full backup.
Will I lose my content if I update my WordPress theme?
No, you will not lose your content when you update your WordPress theme. All of your pages, posts, images, and other media are stored separately in the WordPress database, not in the theme’s files. The theme controls the design and layout of your site, while your content remains untouched.
However, if you have made direct code changes to the theme’s files, like style.css or functions.php, those customizations will be lost. To avoid this, you should always use a child theme for any code modifications.
What is a child theme and why do I need one?
A child theme is a secondary theme that gets all its features and styling from a main theme, which is called the parent theme. You need a child theme if you plan to make any custom code changes to your site’s design or functions.
By putting your customizations in the child theme, you can safely update the parent theme whenever a new version is released. Your changes will remain safe because the update only affects the parent theme’s files, leaving your child theme’s files alone. Without a child theme, any updates would overwrite and erase your custom work.
How do I fix my site if a theme update breaks it?
The quickest way to fix your site after a theme update breaks it is to restore your website from a backup that was taken right before the update. If you do not have a backup, you can use an FTP client or your hosting provider’s file manager to access your website’s files.
From there, navigate to the wp-content/themes folder, delete the folder of the broken theme, and then upload the folder of the previous version that was working. This manual replacement will revert your site to its state before the update.
Can I go back to a previous version of a theme after updating?
Yes, you can go back to a previous version of a theme, but WordPress does not have a built-in “rollback” button for themes. The most reliable method is to restore a backup of your site from before the update.
If you do not have a backup, you will need to find the older version of the theme files. You can sometimes get these from the theme’s developer or a public repository. Once you have the old files, you must manually delete the current theme folder from your server via FTP and upload the old one.
Should I enable automatic updates for my WordPress theme?
Enabling automatic updates for your theme can be convenient for security, but it also carries risks. An automatic update could happen when you are not available to check your site, and if it causes an issue, your site could be broken without your knowledge.
It is generally recommended to disable automatic updates for themes unless you have a robust, automated backup system in place. Performing updates manually allows you to first create a backup and test the site immediately after the update to ensure everything is working as expected.
What is the difference between updating a theme via FTP and the WordPress dashboard?
Updating a theme through the WordPress dashboard is the simplest method. You click a button, and WordPress handles the rest by downloading and installing the new files for you. This works well for themes listed in the official WordPress repository.
Updating via FTP is a manual process where you download the new theme files to your computer and then use an FTP client to upload them to your server, overwriting the old files. FTP is necessary for some premium themes that do not offer one-click updates and is also a useful method for troubleshooting when the dashboard update fails.
How do I know when a theme update is available?
WordPress will notify you about available theme updates in several places within your dashboard. You will see a red circle with a number next to the “Dashboard” menu item and the “Updates” submenu.
A notification will also appear on the “Appearance” > “Themes” page, with a banner over the specific theme that has a new version. These notifications only appear for themes that are in the official WordPress.org theme directory or for premium themes that are properly configured to check for updates.
Do I need to update themes that I am not using?
Yes, you should always delete any themes that you are not actively using. Even inactive themes contain code that can become a security risk if it is not kept up to date. Hackers can target vulnerabilities in outdated theme files, even if the theme is not active on your site.
For better security and site performance, keep only your active theme and a default WordPress theme (like Twenty Twenty-Four) as a backup. Delete all others from the “Appearance” > “Themes” page.
Update your WordPress theme today
WordPress theme updates can introduce security fixes, new features, and advanced functionality to your website. Unfortunately, updates can also override custom edits you’ve made or cause problems on your site.
Therefore, you’ll want to save a backup and create a child theme before upgrading a theme. It’s also worth testing any changes in a staging environment before pushing them live. Then, updating your theme is simply a matter of clicking a few buttons in your WordPress admin area, accessing your website via FTP, or using cPanel in your hosting dashboard.
Before updating your WordPress theme, you’ll need to make sure that you have a functional backup in place. With Jetpack VaultPress Backup, you can save copies of your entire website and restore them in seconds. Learn more about Jetpack VaultPress Backup today!
