
Imagine you’ve worked hard to optimize your site for speed. It loads quickly, passes all performance tests, and the pages look sharp on every device. However, when a visitor clicks on an element like a button, there’s a lag in response. So, what’s going on?
The delay between interaction and a visible response is known as Interaction to Next Paint (INP). The faster your site responds, the more likely visitors are to engage with your content. This better user experience translates into more time spent on your website, and therefore higher conversions. So, improving your INP is a win for everyone.
In this guide, we’ll break down exactly how INP works, what causes poor scores, and how to fix them. We’ll also look at how to measure your site’s INP and discuss why it matters.
What is Interaction to Next Paint (INP)?
Interaction to Next Paint (INP) is one of Google’s Core Web Vitals: a set of metrics designed to gauge the user experience of a website.
INP measures the time between a visitor’s interaction (like clicking, tapping, pressing a key) and the time the page visually updates in response. For example, if a customer clicks on the Add to Cart button and the button responds after 300 milliseconds, that is the INP for that interaction.
Essentially, the INP indicates how responsive your site is. If you have a good INP, your website feels polished. But a poor INP means that the website feels sluggish, even if it technically loads quickly.
Why INP matters for your WordPress site
In March 2024, Google replaced the First Input Delay (FID) metric with INP. The new metric was introduced because FID only measured the delay before an event began processing. INP captures the full experience, from input to visual confirmation.
Even if your website passes the Core Web Vitals test and scores well in all other areas, it’s important to prioritize your INP. A good INP score indicates smoother interactivity, typically leading to enhanced engagement and increased visitor satisfaction.
The effect of a good INP ripples through the rest of your metrics. Enhanced engagement results in more time spent on your site. More time on your site usually improves your conversion rates. And all of this shows Google that you’re delivering value to site visitors — what they ultimately care about most when deciding where to rank sites in organic search results.
In other words, a better INP typically leads to more visitors and more of those visitors converting into customers, subscribers, etc.
What is a good INP score?
Let’s look at what makes a good INP score. Google categorizes this metric as follows:
- Good: under 200 milliseconds
- Needs improvement: 200 – 500 milliseconds
- Poor: more than 500 milliseconds
This means that a website with an INP of under 200 ms feels instant, while one between 200 – 500 ms feels a bit sluggish but acceptable. If your site’s INP is more than 500 ms, then it may feel laggy, and visitors might start noticing the delay.
To achieve a good score, Google recommends that at least 75 percent of user interactions occur within the 200 ms threshold.
Note that INP varies by device. Mobile INP scores tend to be worse due to slower CPUs and higher thread contention. So, always test both desktop and mobile performance.
What causes poor INP scores on WordPress sites?
If your INP score is high (more than 500 milliseconds), something is likely preventing your browser from responding quickly to interactions. In WordPress, this is usually a theme, plugin, or third-party script.
Let’s take a closer look at the most common culprits.
1. JavaScript-heavy themes or plugins
Many fancy WordPress themes rely on heavy JavaScript for sliders, animations, popups, or complex layouts. Likewise, plugins often enqueue scripts across your entire site — even on pages that don’t need them.
When there’s too much JavaScript to load, the browser’s main thread becomes overloaded. This means that every time a visitor interacts with your website, the browser must pause other tasks to execute those scripts.
For example, a multipurpose theme with sliders, parallax effects, and custom builders may enqueue ten different JavaScript files that total more than one MB. Clicking on a simple button could trigger a chain of animations that adds hundreds of milliseconds of delay.
It’s a good idea to audit your active theme and plugins, using tools like Chrome DevTools, to see which scripts run on each page. You’ll also want to replace heavy plugins with lightweight alternatives and disable unused modules in page builders.
2. Long tasks blocking the main thread
A long task refers to any JavaScript execution that runs for more than 50 milliseconds. During this time, the browser cannot respond to user input, which results in a lag.
Long tasks are often caused by:
- Large libraries like jQuery or front-end scripts by page builders
- Synchronous data fetching (e.g., using XMLHttpRequest instead of asynchronous APIs)
- Complex loops or DOM manipulations
If multiple long tasks run back to back, the browser queues interactions instead of processing them immediately. For example, a WooCommerce store might use multiple analytics scripts that parse cart data after every click. Each script executes sequentially, adding input lag.
When you run a test on PageSpeed Insights, Google will let you know if there are long main-thread tasks on your website.
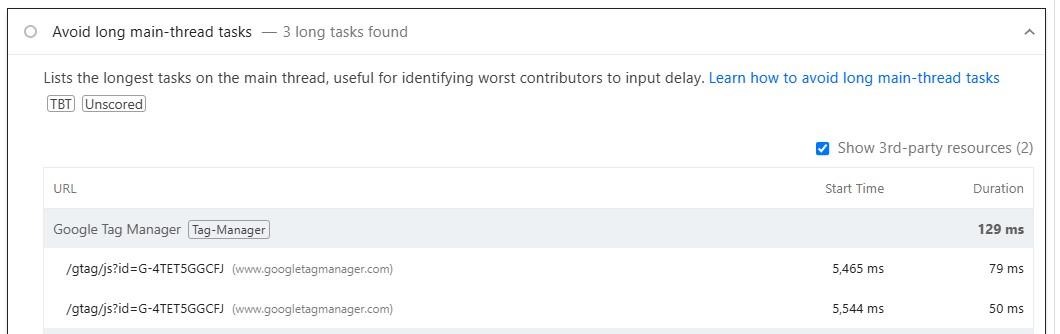
The main fix here would be to break long tasks into smaller, asynchronous chunks using requestIdleCallback(), setTimeout(), or requestAnimationFrame(). This may sound technical to non-developers, but don’t worry: we’ll be looking at more straightforward solutions later in the post.
3. Unoptimized assets (CSS, JS, and images)
Heavy or unminified assets add unnecessary processing time. CSS and JS files that block rendering keep the main thread busy, while large images delay the visual update.
For instance, a page with multiple 300 KB JS files and 2 MB of uncompressed images forces the browser to parse, compile, and render all that data before responding visually.
There are several ways to fix this issue. You can minify and compress JS/CSS using a performance plugin like Jetpack Boost, and defer non-critical scripts. You’ll also want to use modern and efficient image formats like WebP and AVIF.
4. Large DOM sizes
The DOM (Document Object Model) represents every element on your page. When it grows too large, like over 1,500 nodes, every layout recalculation takes longer to execute.
WordPress sites often bloat the DOM through page builders or shortcodes that wrap elements in multiple nested containers. A page may include five nested divs per content block, leading to thousands of nodes. A simple click on a dropdown menu can trigger recalculation across the entire layout.
Again, a test on PageSpeed Insights can reveal large DOMs on your website. As a solution, you should simplify templates, use fewer nested elements, and avoid duplicating hidden content.
5. Inefficient event handlers
Event handlers are JavaScript functions that execute when visitors interact with elements. Inefficient or heavy handlers, like running large loops on every scroll or click, delay processing.
For example, a custom script listening for the “mousemove” event might recalculate layout positions every time the cursor moves. On slower devices, this makes interactions more laggy.
If you’re working with a developer, you’ll want to ask them to debounce or throttle frequent events (like scroll or mousemove), and ensure click handlers perform minimal work (ideally, just DOM updates or API calls handled asynchronously).
6. Third-party scripts (ads, analytics, chat widgets)
Third-party scripts load external code from another server. While useful, they compete for bandwidth and main-thread resources on your website.
Your site may have third-party scripts from Google Analytics, chat widgets, ad networks, affiliate banners, and more. Since these scripts often run asynchronously, they’re unpredictable and sometimes block paints.
Try to limit the number of third-party scripts, or at least load them after page interaction (using the delay JavaScript options that we’ll be looking at soon). You can also host analytics locally where possible.
How to improve your INP score on WordPress
We’ve already covered some methods to improve your INP score, but so far, these fixes have been a little technical.
In this section, we’ll look at more beginner-friendly solutions, which include using tools that automate optimization for you.
1. Upgrade to high-performance hosting
Your choice of hosting plan directly impacts your site’s performance. If you opted for a discount solution, it may be time to upgrade to a more powerful one.
Ideally, choose plans that are specifically optimized for WordPress. Look for the following specifications:
- Support for PHP 8.1+
- HTTP/3 support
- SSD or NVMe storage
- Integrated caching and CDN options
Managed WordPress hosts automatically handle many optimizations for you, providing faster response times that benefit INP.
2. Choose a lightweight theme
A lightweight theme minimizes front-end code and avoids excessive JavaScript. Speed-optimized themes will help you improve your site’s performance, including the INP score.
It might be tempting to choose a theme that’s packed with elements, but you likely won’t need all of them. So, try to avoid multipurpose themes that include hundreds of features you’ll never use, as it will just harm your site’s performance.
The leaner your theme, the less work your browser must do after each interaction. Many themes claim to be lightweight, but the best way to confirm this is to run multiple speed tests with different themes installed and compare the results.
3. Keep all software updated
Software updates often contain performance enhancements and bug fixes that will help your website run faster. So, it’s essential to keep your WordPress core, theme, and plugins up to date.
Sometimes, a performance issue like poor INP will vanish simply by updating outdated components that were blocking scripts or generating inefficient queries.
4. Install a Core Web Vitals optimization plugin
Not everyone has the time to manually optimize their website. Also, some of these tasks require technical skill.
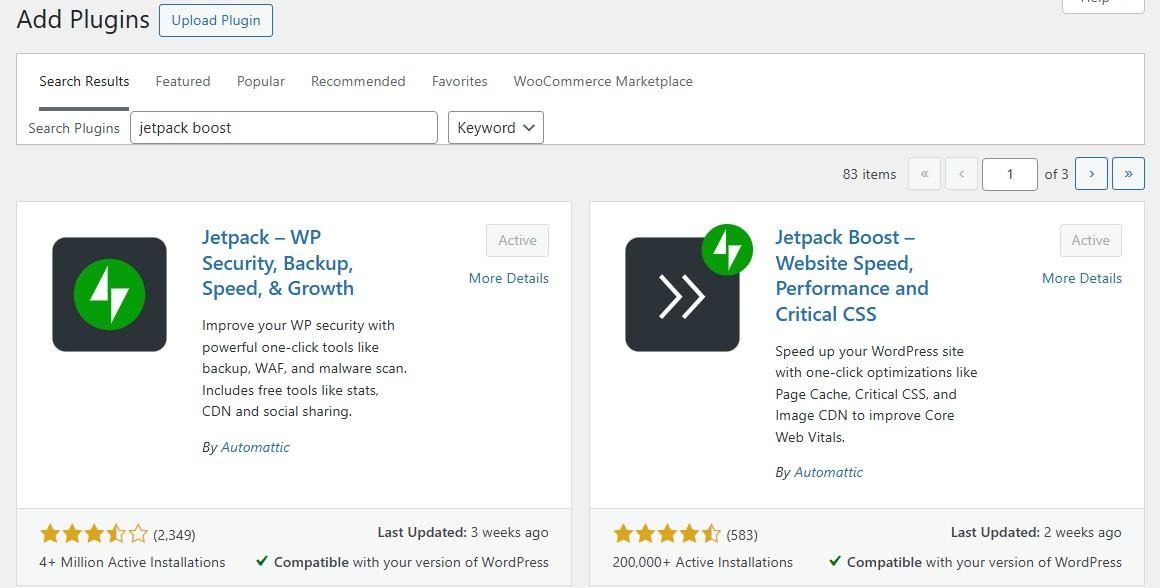
If you want quick results, install Jetpack Boost. Developed by Automattic, the people behind WordPress.com, Jetpack automates various optimization tasks.
These include non-essential JavaScript deferral, code minification, and more. Plus, Jetpack provides real-time performance scores for both the desktop and mobile versions of your website.
You can get started with Jetpack Boost for free. Simply look for the plugin through the WordPress dashboard, then install and activate it.
Note that you’ll need a WordPress.com account to use Jetpack. You can create one for free.
5. Defer or delay non-essential JavaScript
Scripts that aren’t immediately required (like analytics, chat widgets, etc.) should load later using defer or async commands. Alternatively, you can defer or delay non-essential JavaScript with Jetpack Boost.
All you have to do is toggle on the relevant setting.
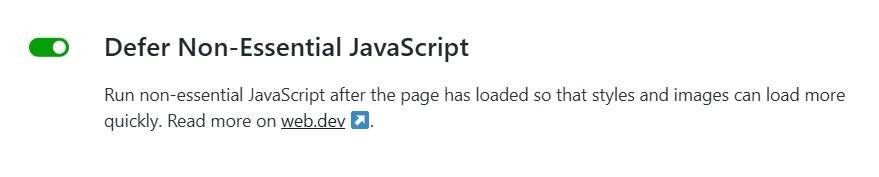
This significantly reduces input delay and keeps the main thread free for user actions like clicking on buttons.
6. Inline critical CSS
Critical CSS is the minimal styling needed to render the above-the-fold portion of your page. Above-the-fold content is that which is immediately visible to visitors when they land on a page, before they start scrolling down.
Inlining it ensures instant visual feedback while deferring the rest of your styles. Once again, Jetpack Boost can handle this automatically, improving your INP and overall Core Web Vitals score.
7. Concatenate JS and CSS
By merging smaller JavaScript and CSS files into larger bundles, you reduce requests to the server every time someone visits your website. Concatenation also improves caching efficiency and parsing speed on mobile devices.
Fortunately, this feature is also available with Jetpack Boost.

You can quickly enable it for both JavaScript and CSS.
8. Remove unused CSS
WordPress themes and page builders often load thousands of unused CSS scripts. The browser must still parse them, which increases render time.
You can start by deleting any plugins or themes you no longer need. If you run a test on PageSpeed Insights, the results will show any unused CSS on your website.
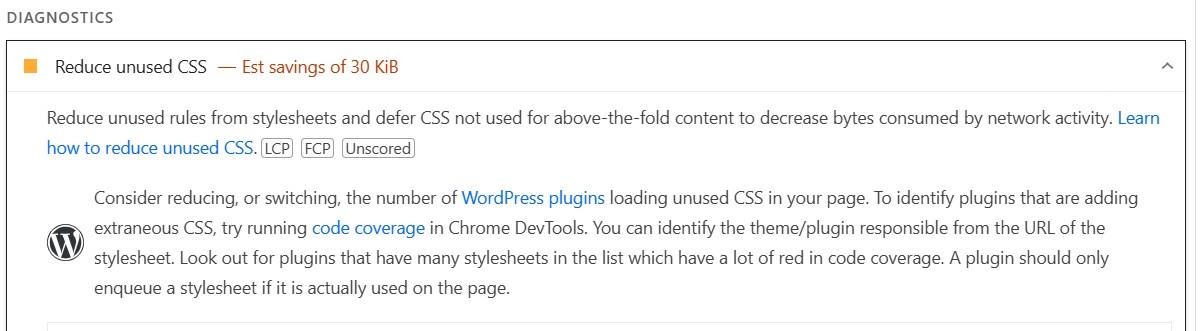
You can also enable the Optimize Critical CSS Loading in Jetpack.
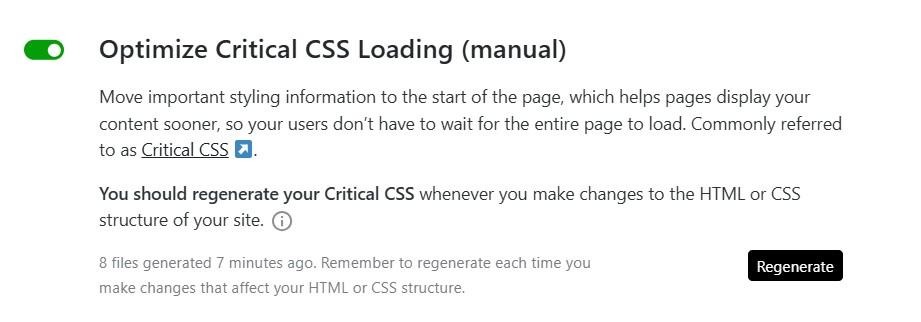
This displays the most important scripts sooner, so visitors won’t have to wait for all the scripts (including unused ones) to load before they can interact with your website.
9. Minimize third-party scripts
Another effective measure is to minimize the number of third-party scripts on your website. Remove anything that isn’t essential anymore. For example, you may have used a chat widget in the post or an email marketing integration that you no longer need.
Each third-party script that you remove can save tens or even hundreds of milliseconds from your INP.
10. Deactivate and delete unnecessary plugins
Every plugin you install on your website adds CSS and JavaScript files. Over time, these scripts accumulate and slow everything down.
So, delete any plugins you no longer use (disabling them won’t be enough). Then, run another Core Web Vitals test and you should notice a difference in your INP score.
11. Clean and optimize your database
A cluttered database can slow query execution and server responses. You can use a database optimization plugin to delete post revisions, drafts, spam comments, and other unwanted elements.
Regular database maintenance helps keep your site lean, reducing the time WordPress needs to deliver pages for interaction.
The easiest speed optimization plugin for WordPress
Jetpack Boost gives your site the same performance advantages as the world’s leading websites, no developer required.
Boost your site for free12. Optimize your images
Images are heavy files and add weight to loading times. So, you’ll want to compress images before you upload them, or use a plugin like Jetpack that will automatically resize photos for you and convert them to WebP.
All you need to do is enable the Image CDN in Jetpack.

This will also deliver your images from Jetpack’s content delivery network, putting less pressure on your server.
13. Leverage caching and a CDN
Caching is the process of storing versions of your pages in a visitor’s browser. This way, when they return to your website, your page is loaded from the browser, and the server will have less work to do. As a result, they are able to view and interact with the content more quickly.
Jetpack empowers you to enable caching on your website.
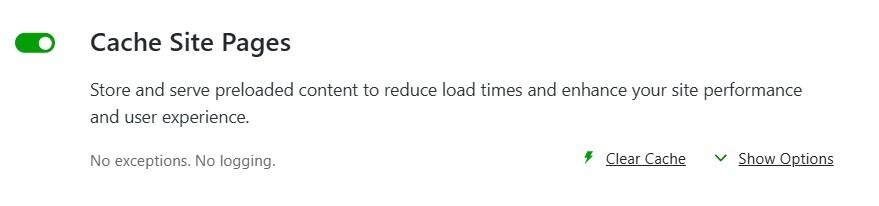
This gives you granular control over which pages or URLs to exempt from caching.
It’s also a good idea to use a content delivery network. This is a network of servers distributed across the globe that deliver your content from the server that’s closest to each visitor. As a result, your pages load more quickly, making every click feel faster.
Jetpack includes an image CDN by default.
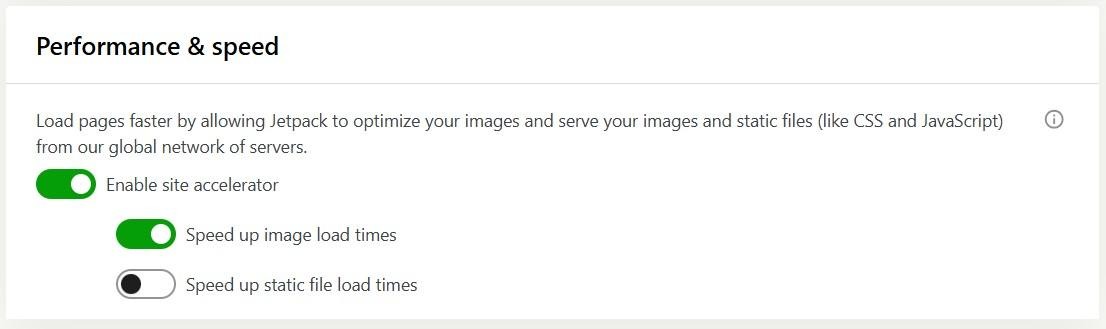
When you enable this feature, Jetpack serves your images and static CSS and JavaScript files from its secure global network of servers.
14. Avoid an excessive DOM size
You might also want to hire a developer to audit your pages for unnecessary HTML elements. Each new element increases recalculation time after an interaction.
Keep total nodes under 1,500 where possible. Simplify nested divs and avoid having multiple hidden sections loading simultaneously.
15. Break up long tasks
If you have technical knowledge, you could also break long-running scripts into smaller, asynchronous chunks, using modern APIs:
requestIdleCallback(() => { /* task */ });orsetTimeout(task, 0);
This gives the browser more space to process inputs and improves perceived responsiveness.
How to measure INP on your WordPress site
There are three main tools you can use to measure your WordPress site’s INP. Let’s take a close look at each method.
Google PageSpeed Insights
You may already be familiar with Google PageSpeed Insights. This testing tool checks your site’s Core Web Vitals, which include INP.
Enter your website’s URL. When the result is ready, look for the INP metric.

If the result is green, you’re good. If it’s yellow or red, you should work on improving the score. Fortunately, PageSpeed Insights gives you a list of recommended actions to boost your site’s performance.
Google Search Console
With Google Search Console, you can see which pages on your site need improvement. Log into your account and select your website, then go to Experience → Core Web Vitals.
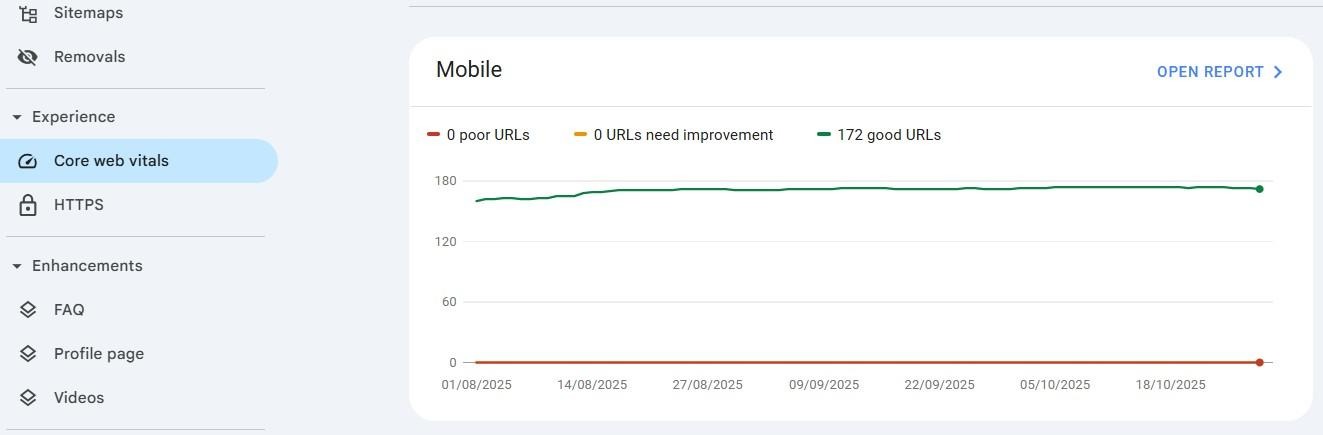
Now, open the report for the mobile or desktop version, as you wish. Your URLs are grouped into three categories: Poor, Need Improvement, and Good.
Select a group, then click to view the metrics.
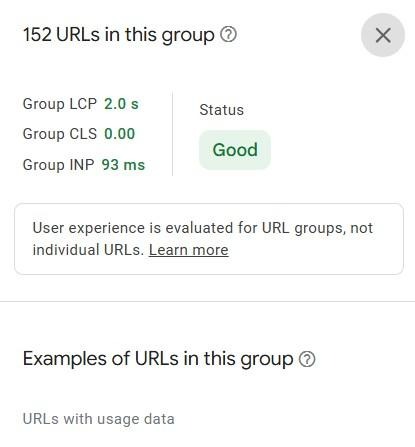
This shows the aggregated LCP, CLS, and INP data for the URLs in that group.
Chrome DevTools
Finally, you can use the Performance panel in Chrome DevTools to record real interactions.
Right-click on the page and select Inspect. This will open DevTools. Then, go to the Performance tab, and you’ll see local metrics, including INP.

DevTools also highlights long tasks, helping you isolate which scripts need to be split or deferred.
Gaining a deeper understanding of INP
Everything that we’ve discussed so far may be new to you. On the other hand, if you’re already familiar with INP, you might want to delve a little deeper to fully understand how it works.
What exactly does INP measure?
INP looks at all measurable interactions on a page and takes the longest (or 98th percentile) as the final score. That means even one sluggish button can pull down your overall metric.
So, you’ll want to be thorough when optimizing your website for INP. Besides removing unused components, it’s also important to look at existing files on your website and optimize them by using an image CDN, minimizing JavaScript and CSS, and implementing the other measures discussed above.
How is your INP score calculated?
INP = Input Delay + Processing Time + Presentation Delay
Here’s what each component measures:
- Input delay: How long before the browser starts processing a visitor’s action
- Processing time: How long to execute the relevant JavaScript
- Presentation delay: How long to update the UI after processing
Ideally, you’ll want to optimize each component to make sure that your INP remains under 200 ms.
Which user interactions count toward INP?
Any interactions that lead to visible change count toward your site’s INP. This includes clicking a menu, submitting a form, or toggling a modal.
Hover or scroll events generally don’t count unless they interfere with other clickable elements.
The three phases of INP
Let’s take a closer look at the three phases of INP.
Phase 1: Input delay
This occurs when the browser’s main thread is occupied with other work. Heavy JavaScript, layout recalculations, or synchronous data calls often lead to input delay.
Phase 2: Processing time
This is the duration required to execute event handlers. Clean, modular JavaScript helps reduce this processing time. You’ll also want to avoid inline scripts that manipulate multiple DOM nodes.
Phase 3: Presentation delay
Once processing is done, the browser must paint the change. Complex CSS animations or reflows extend this delay, so you should opt for simple GPU-accelerated features and simple transitions. A solid, lightweight theme will already have these elements in place to reduce delays.
Frequently asked questions
Finally, let’s answer some common questions about INP.
What is the difference between FID and INP?
When it was still in use, FID only measured the time until the browser started processing the first interaction. INP measures the complete response cycle for all interactions, providing a truer reflection of user experience.
Why is my INP worse on mobile than on desktop?
Mobile devices have slower CPUs and less memory, so each script takes longer to run. You can optimize for mobile by deferring JavaScript and minimizing DOM size.
Will improving my INP score help other Core Web Vitals?
Yes. Many INP optimizations, like reducing JavaScript execution time, optimizing CSS, and enabling caching, also enhance Largest Contentful Paint (LCP) and Cumulative Layout Shift (CLS).
Do I need to hire a developer to fix INP issues, or can I do it myself?
You can do most INP optimizations yourself with Jetpack Boost. This plugin automates core improvements such as critical CSS generation, JavaScript deferral, and image optimization.
For highly customized or script-heavy sites, a developer will help with event handling, code splitting, and other technical tasks.
What is the fastest way to start improving my INP score?
You can instantly improve your INP score by installing Jetpack Boost. Then, simply use the toggle buttons to enable essential features like image CDN, non-essential JavaScript deferral, CSS optimization, and more.
The easiest speed optimization plugin for WordPress
Jetpack Boost gives your site the same performance advantages as the world’s leading websites, no developer required.
Boost your site for free