
WordPress is a secure content management system (CMS), but the way you set up and configure your website can affect its level of security. If you don’t take steps to protect your site, you might end up facing a data breach or losing your content.
To help you out, we’ve created the ultimate WordPress security checklist. This will guide you through all the steps you need to protect your website against bots and attackers.
In this guide, we’ll take a look at the built-in security features of WordPress. Then, we’ll show you 30 things you can do to further protect your site.
Does WordPress offer built-in security?
Yes, WordPress offers some security measures. Your admin dashboard is protected by a login page that requires users to enter a valid username and password.

The CMS also gets regular patches and updates to eliminate known WordPress security issues and vulnerabilities. Generally speaking, if you keep WordPress and its components up to date, you’ll be spared from the most common vulnerabilities.
Having said that, there’s also the human element to consider. In many cases, WordPress sites are hacked because of human error, like sharing or reusing login credentials. If an attacker gains access to an account with a high level of privileges, they can wreak havoc on your website.
Since the CMS is such a popular platform, attackers scan the web trying to find WordPress sites with known vulnerabilities. The more your site grows, the bigger a target that it will become.
What is the easiest way to secure a WordPress site?
Securing a WordPress website requires you to change your site’s configuration and add several features that make it harder for attackers to break in. If you don’t have time to follow this entire WordPress security checklist, the best thing you can do is install a security plugin.
Jetpack Security provides you with access to several security features, like automatic malware scanning and removal, spam protection, and real-time backups.
It’s important to note that no single plugin can protect your website against all the potential threats it can face. Therefore, you’ll want to secure your site even further if you’re serious about protecting your data and hard work.
For example, you’ll want to enforce strong passwords and enable two-factor authentication (2FA). We’ll take a closer look at these security measures (and many others) in our checklist.
30-step WordPress security checklist
Remember that you don’t need to work on all of these security measures at once. Crossing off every item in the checklist may take a while, but most of them are fixes that you only need to implement once.
So, here are 30 ways you can boost your site’s security.
1. Keep WordPress updated
Outdated WordPress installations are perhaps the biggest cause of security breaches. A lot of users forget to update WordPress, along with the plugins and themes on their sites. This is a significant problem, as outdated software tends to be a primary target among attackers.
The older the software is, the more time attackers have had to analyze its code and find security loopholes. Developers monitor these threats and fix them as they appear. Therefore, you’ll want to run updates as soon as they’re released.
Fortunately, WordPress makes it easy to stay on top of updates. In your dashboard, go to the Updates tab, and you’ll see an overview of everything available.
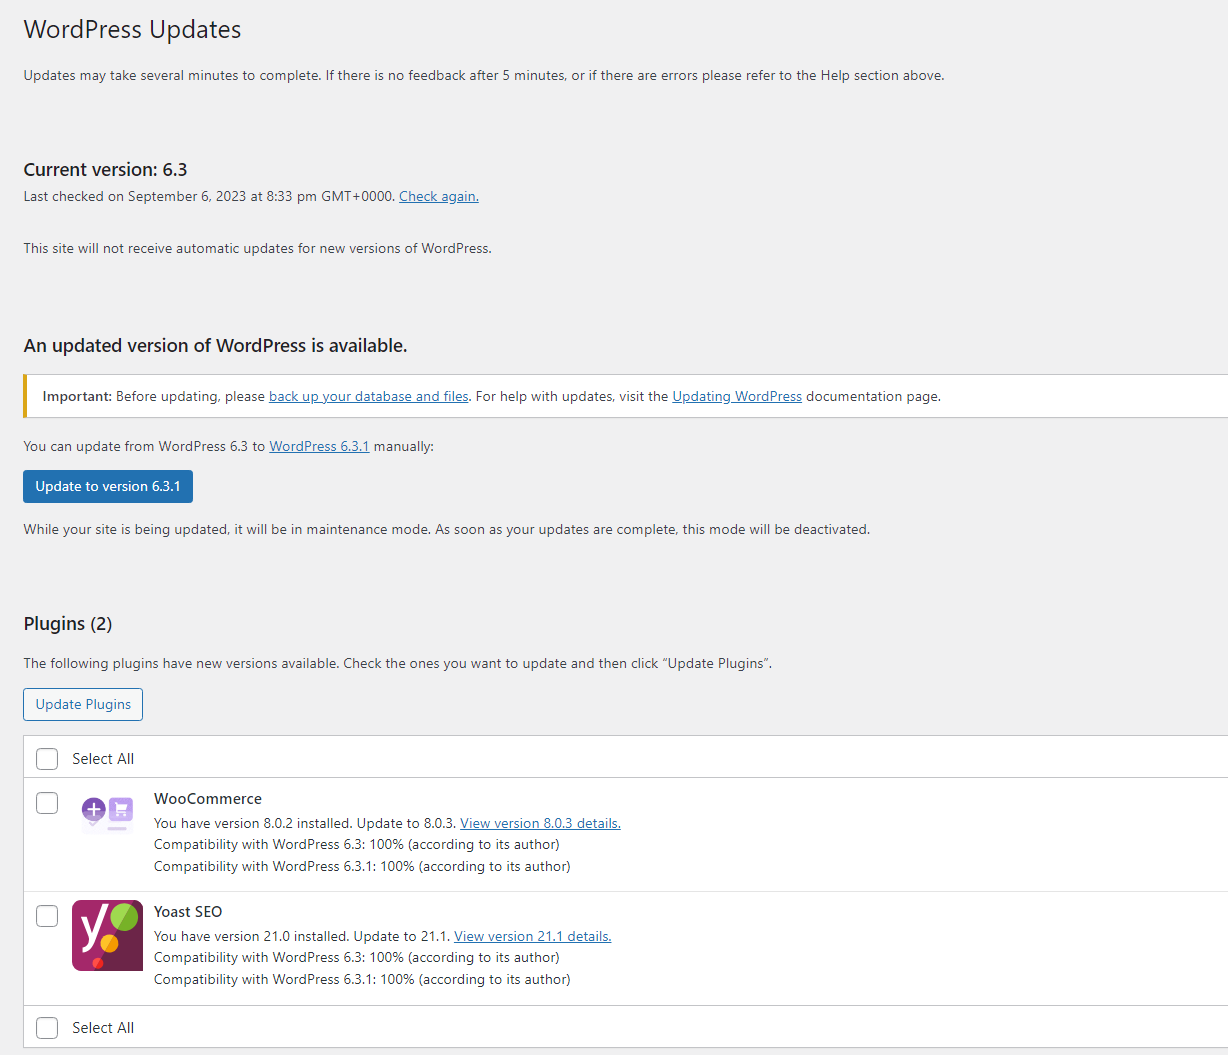
If you have a lot of updates to run, it’s important to back up your WordPress website before you proceed. This is especially important when updating to a newer WordPress version, as it can sometimes cause compatibility issues with plugins and themes.
You’ll want to check your updates page daily. Alternatively, you can enable auto-updates for your plugins and themes.

This way, if you forget to check your site for updates, these will be run automatically.
2. Create strong usernames and passwords
Your website is only as secure as the credentials you use to access it. WordPress itself will let you know if you’re setting a weak password when creating a new account.
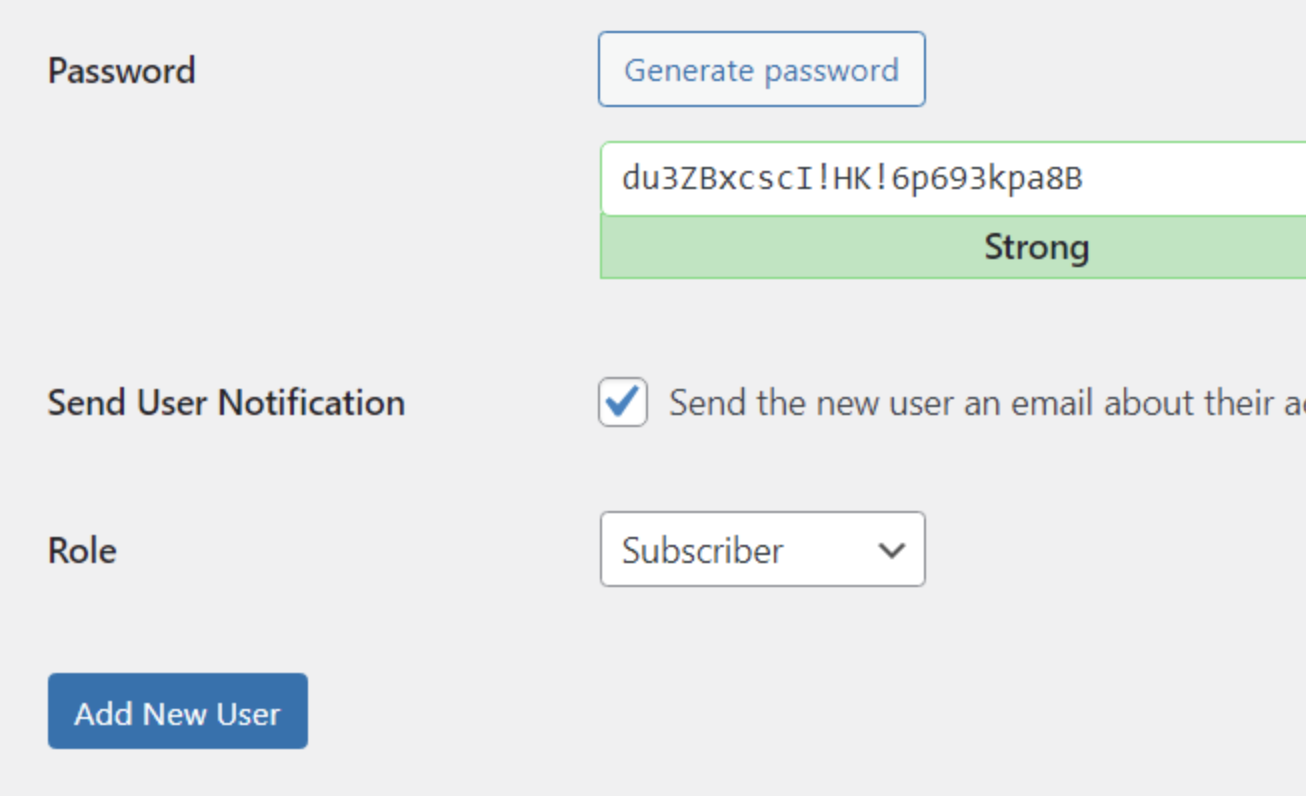
A “weak” password is anything that is easy to guess. If your credentials are something like “administrator” and “1234”, your site will likely fall victim to brute force attacks.
Ideally, your password should contain at least eight characters and a combination of letters, numbers, and special characters. If you have multiple users on your WordPress site, you may want to remind them to use strong credentials and change their passwords every few months.
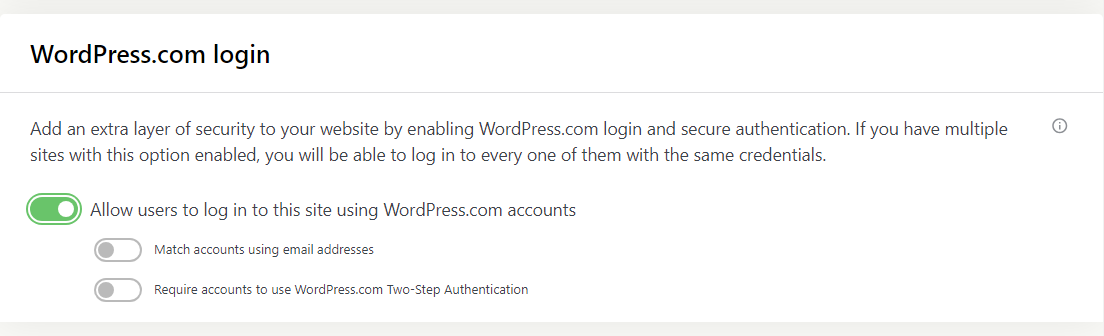
3. Add an extra layer of protection with 2FA
Two-factor authentication is a security measure that requires you to use a second layer of authentication when logging into a site. For instance, some websites may require you to enter a one-time code sent via email or SMS.
The goal of 2FA is to make it nearly impossible for attackers to guess your credentials. Without access to another device or account, they won’t be able to log into WordPress.
By default, WordPress doesn’t include 2FA functionality, so you’ll need to use a plugin like Jetpack to add this feature to your site. With Jetpack, you can add 2FA (called secure authentication) that works with your WordPress.com account.
4. Install a trusted security plugin
Powerful WordPress security plugins will help you cross off several items on this WordPress security checklist. Ideally, you’ll choose a single tool that offers the following features:
Malware scanning
If your website becomes infected, you’ll want to know as soon as possible. Regular malware scans will let you know if any part of your website is at risk.
Malware removal tools
If your security plugin identifies malware, you’ll want help to remove it. This may involve deleting the files or replacing them, depending on the part of your WordPress site that’s infected.
Backups
There are a lot of standalone backup solutions and plugins for WordPress. Some of the best WordPress security plugins include automatic backups, so you won’t need to install an additional plugin.
Security logs
Ideally, you’ll want to know everything that happens on your website. Security logs record events in WordPress and enable you to search them to find suspicious activity.
2FA implementation
As we discussed earlier, 2FA is a critical tool that can help you minimize the risk of security breaches due to stolen credentials.
Jetpack Security includes all of those features, so you can carry out several steps in this security checklist with one tool.
5. Use a web application firewall (WAF)
A WAF is a security solution that helps protect applications and websites — including WordPress sites — from attacks by filtering and monitoring traffic. Depending on the software, it should be able to identify malicious traffic using preset rules or databases of known attackers.
A lot of web hosts automatically set up firewalls for their customers. You can also use Jetpack Security to add a WAF for your WordPress website.
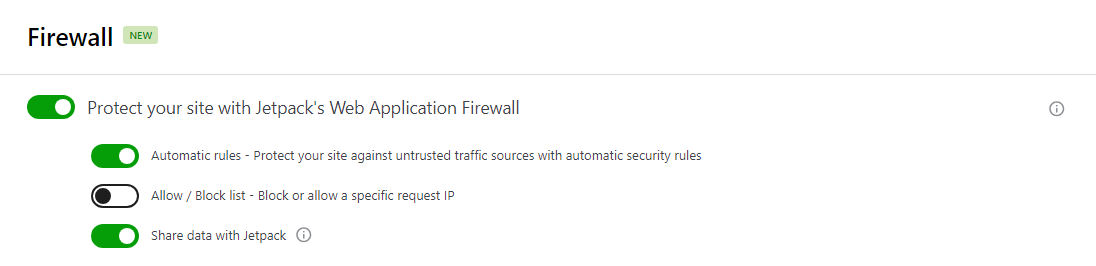
Jetpack Security enables you to configure the WAF to use its preset rules and block specific IP addresses. You can also share activity data with Jetpack, which helps make the WAF more effective by growing the database of known threats.
6. Regularly scan WordPress for malware and vulnerabilities
Scanning your WordPress website for malware and vulnerabilities involves reviewing all of its files to look for unauthorized modifications or malicious code. While the process may seem daunting, there are tools that can do it for you.
Jetpack Security uses WPScan (the largest database of known WordPress vulnerabilities) to scan your website.

If the WordPress plugin finds malware or vulnerabilities, it can immediately notify you and even help remove or repair the affected files. This is much simpler than the manual approach, which requires you to determine which files to delete and figure out how to repair them.
7. Back up your site regularly or in real-time
Backups are a critical component of website security. If anything ever happens to your site, they enable you to get up and running again quickly.
Relying on your hosting provider for backups isn’t a safe option, as a compromise of your server could render both your WordPress site and its backups useless.
Instead, you need a real-time, off-site backup solution to ensure that you’re protected 24/7 and can restore your site at a moment’s notice — even if it’s completely down.
Jetpack VaultPress Backup does just this, saving your site every time you make a change.
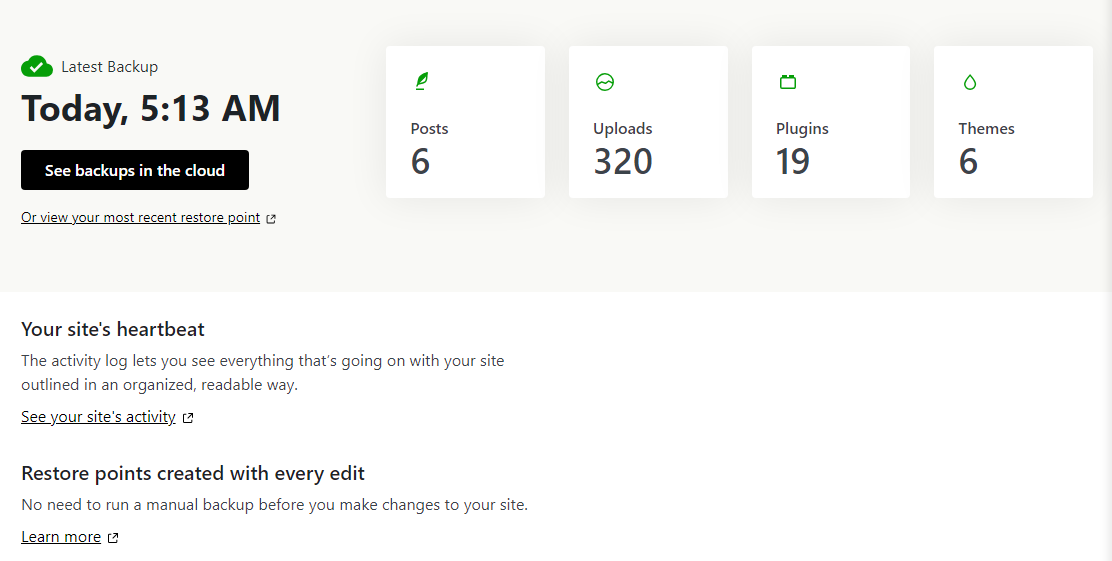
The plugin stores these backups in the cloud to avoid overcrowding the server. It uses a combination of incremental and differential backups, so it doesn’t need to copy your entire site and database each time you make a change, which makes the process much more efficient.
Beyond website changes, Jetpack VaultPress Backup saves new comments, orders, and other user actions. It’s the premier backup tool for WooCommerce stores, as it will save orders even if you have to revert your WordPress site to a previous version.
8. Store your backups on a separate server
As mentioned above, simply taking backups isn’t enough. You need to store them in multiple, secure, off-site locations so if there’s a digital security breach or physical disaster at one data center, you can still access and restore your site files. This is the same reason you can’t rely on backups from your host alone — your site and backups could both be compromised at once.

If you’re using VaultPress Backup, all of this is taken care of for you. Your backups are stored in multiple locations in the cloud and are always accessible, even if your site is down.
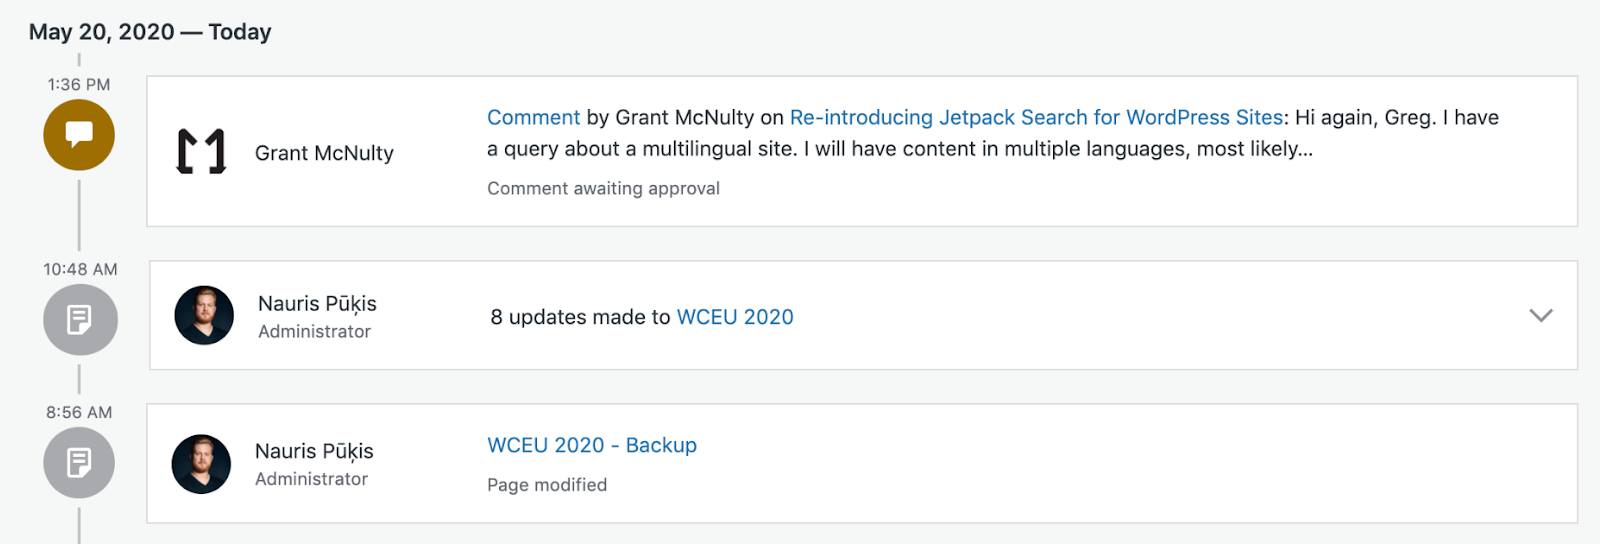
9. Keep track of user activity
If you have access to your site’s activity logs, you’ll be able to see when someone tries to log in multiple times and fails, if there’s a modification to a WordPress file, if someone installs a new plugin, and more.
Think about logs as the tech equivalent of security recordings. You hope you never have to use them, but they’re a widely-used security feature for a reason. WordPress doesn’t offer this functionality by default, so you’ll need to look for a plugin that does.
Jetpack Security enables you to monitor everything that happens on your website. It keeps an activity log that records who does what, with dates and times. If you run into a security issue, you can check this log to see what caused it.
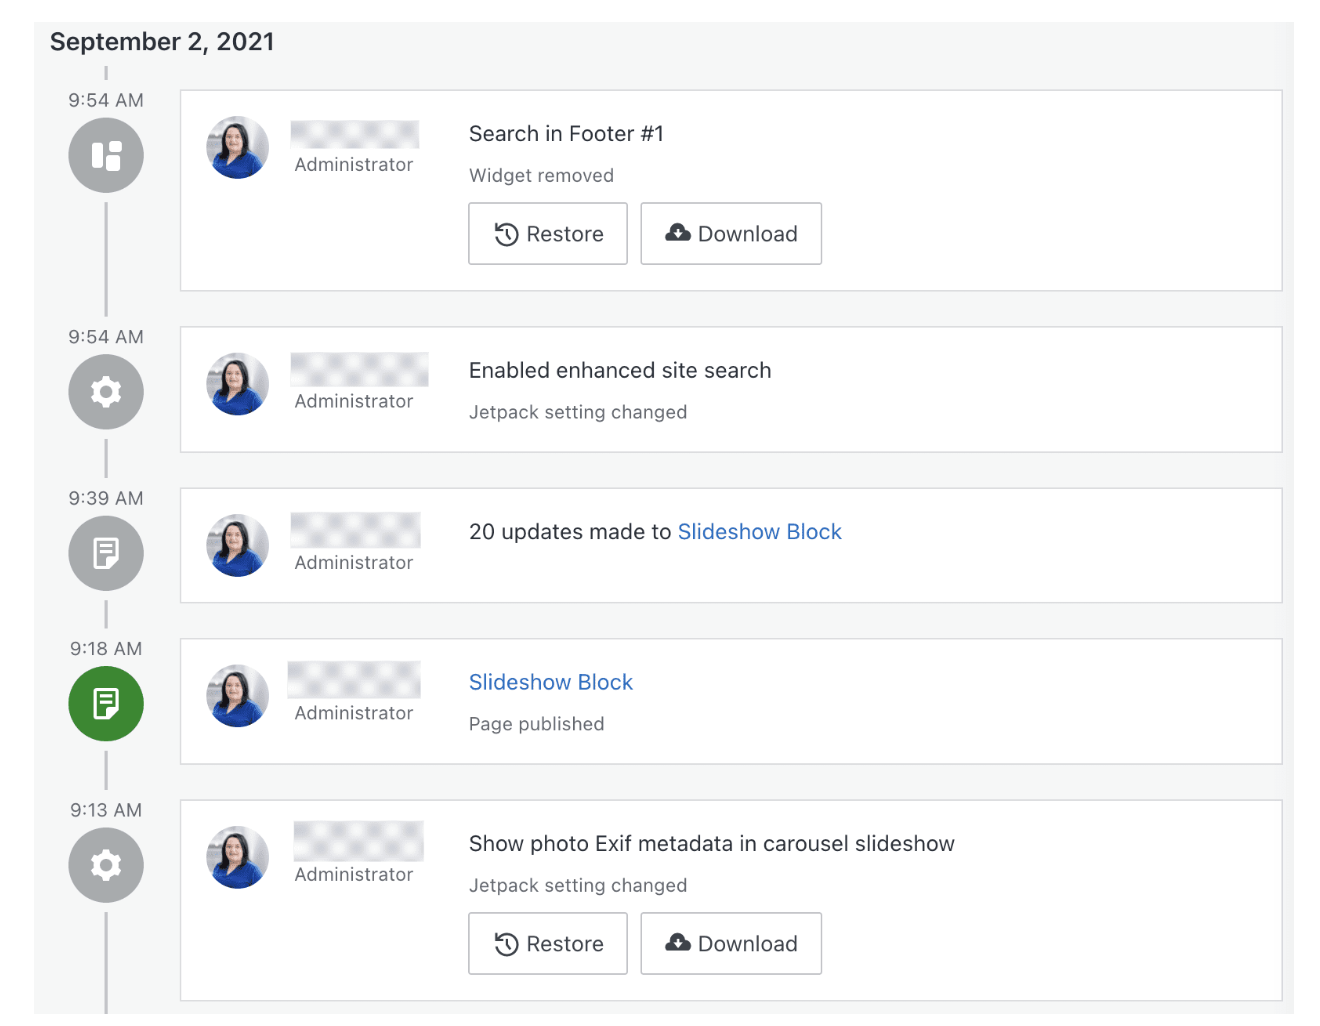
It also integrates with VaultPress Backup functionality, so you can restore your site to a specific moment based on what you find in the activity log.
10. Control user access and permissions
One of the simplest ways to keep any system safe is to limit who has access to it. If you’re the only person working on your site, no one else should know your WordPress login information.
When working with a team, it’s important that you make full use of the WordPress user role system. The CMS offers multiple roles you can assign to users, depending on what permissions you want them to have.
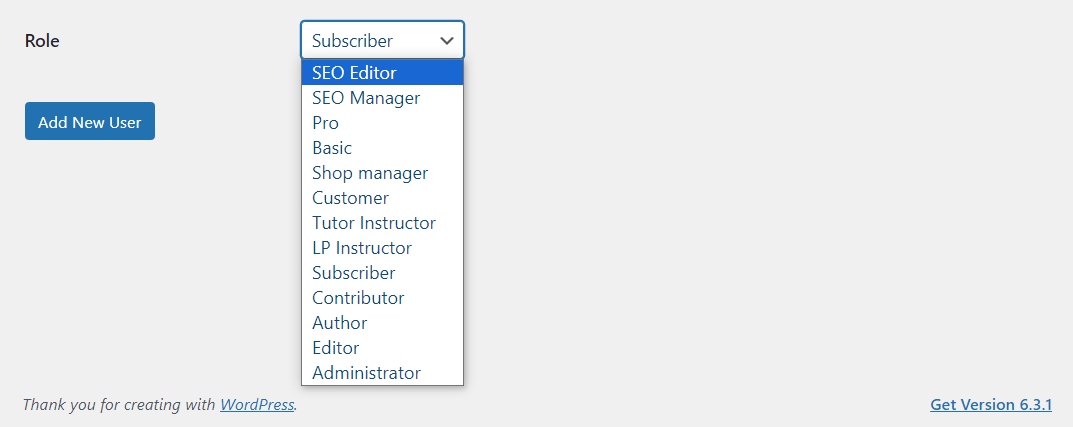
The highest role is that of administrator and that’s the only user with full access to all WordPress features and settings. Other WordPress users, like authors, can only publish their own content and won’t be able to change the site’s configuration or even access its settings.
When considering what role to assign to each user, think about the permissions they need to carry out their tasks. At no point should any user have more permissions than they need. These restrictions will keep your site safer.
11. Limit the number of login attempts allowed
Repeated login attempts can be a sign that someone forgot their credentials. But if the number of attempts is more than a handful, you’re probably dealing with someone who’s trying to break into your website.
You should limit login attempts allowed within a specific time period to stop automated brute force attacks. Once again, you can use Jetpack to implement this security measure.

The plugin can block attackers that try to use common credentials to get into your website. You can also configure it to allowlist specific IP addresses, so only their users can log into WordPress.
12. Use a CDN to help protect against DDoS attacks
A content delivery network (CDN) is a data system that stores copies of your website on servers in different locations around the world — reducing the latency that can result when someone tries to visit a site hosted in a country far away. When someone attempts to visit your WordPress site, the CDN will automatically respond to the request from a nearby server.
The CDN can lighten the load on your servers, help you handle more traffic, reduce loading times, and protect you against distributed denial-of-service (DDoS) attacks. Since the attacks won’t hit your server directly, it won’t be as heavily impacted if it’s flooded by bot traffic.
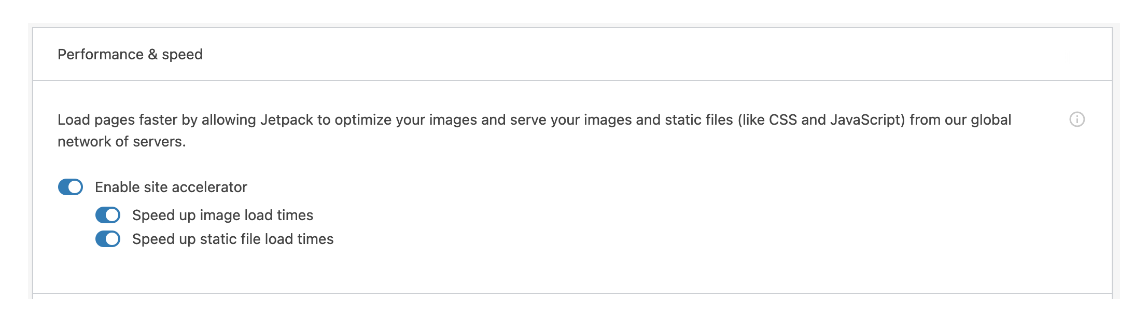
If you use Jetpack Security, you have access to an image CDN that can help you cache media files for faster loading times. Plus, it automatically resizes images and serves the best option based on each visitor’s individual device. You can also consider integrating other CDNs with WordPress to reduce loading times even further and protect your site from sudden increases in traffic.
13. Install an SSL certificate
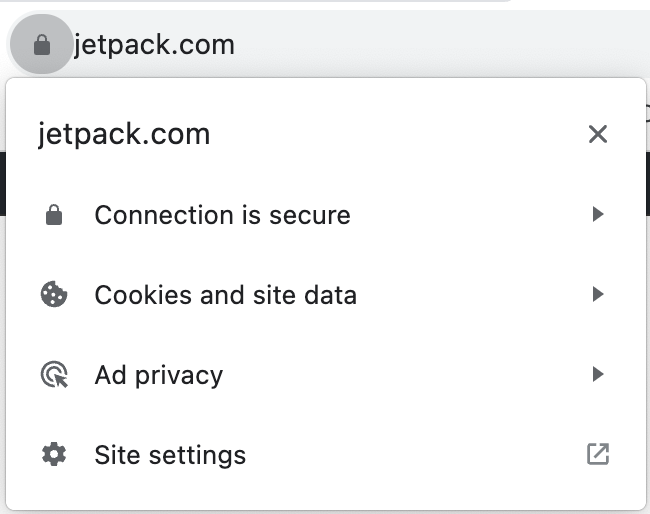
A secure sockets layer (SSL) certificate is a signal that your website can be trusted. It also enables you to load your site over HTTPS, which encrypts data that flows to and from your website.
Most browsers signal that websites have SSL certificates with a simple lock icon in the navigation bar.
These days, most reputable web hosts offer free SSL certificates and automatic setup for users. If your web host doesn’t do this, you can obtain a free certificate from a source like Let’s Encrypt.
Once the certificate is ready, you’ll need to install it and then enable HTTPS. There are several ways to force WordPress to load over HTTPS. Really Simple SSL lets you do this with a simple click.
14. Prefer SFTP to FTP when transferring files
File transfer protocol (FTP) enables you to connect to your website and upload, download, and modify files directly. The protocol uses a different set of credentials, which your web host should provide for you.
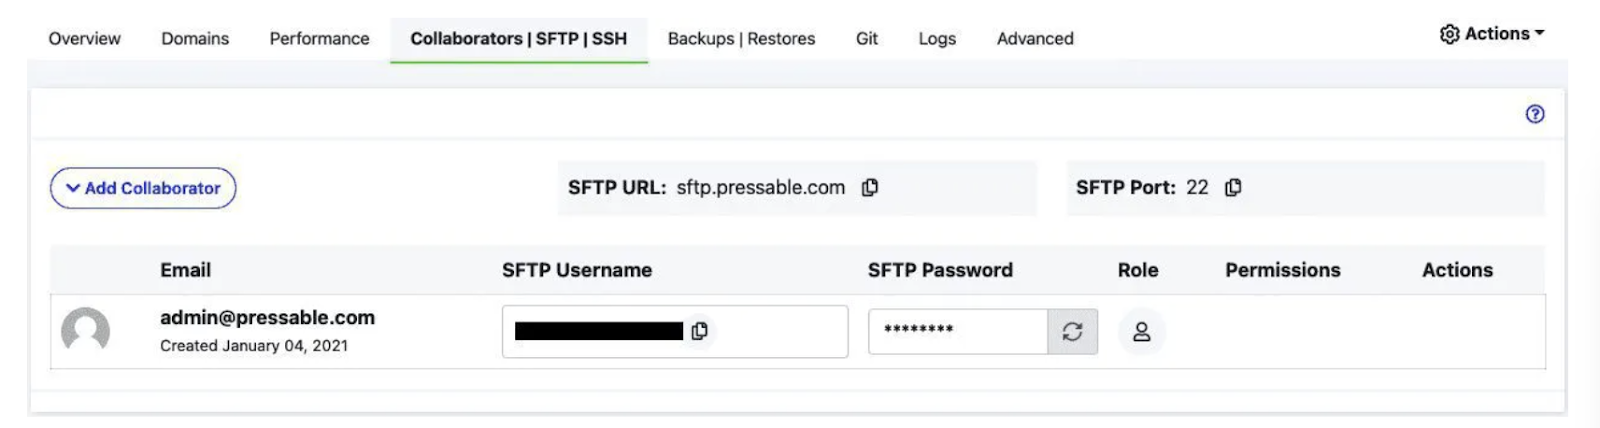
Some hosts use an updated and safer version of the protocol called SFTP. Modern FTP clients support both protocols and they work the same. The main difference is that SFTP encrypts the data you send and receive from the server (much like HTTPS).
If your web host enables you to use both FTP and SFTP, default to the latter. In case your web host only supports FTP, you might want to consider switching to a provider that offers better security features.
We guard your site. You run your business.
Jetpack Security provides easy‑to‑use, comprehensive WordPress site security, including real‑time backups, a web application firewall, malware scanning, and spam protection.
Secure your site15. Keep your PHP version updated
WordPress is built on PHP, and the version you use plays an important role in site speed. Newer versions of PHP include security fixes that can help your website run faster and prevent exploits.
You can see what version of PHP your server uses by navigating to Site Health → Info and opening the Server tab.
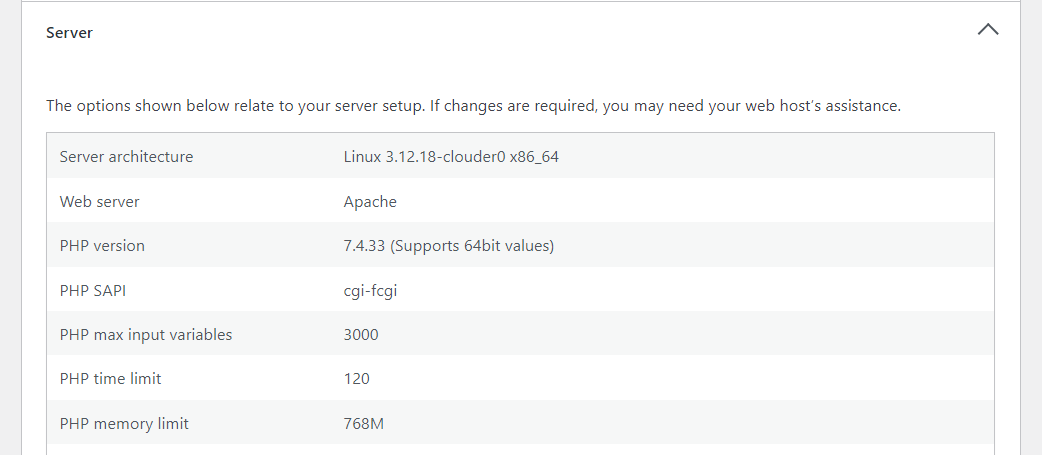
Compare that information to the latest PHP release and see if your web host is using the latest version. Some web hosts may enable you to switch between PHP versions. If yours doesn’t, it might be time to consider switching to a new WordPress host.
16. Delete inactive WordPress themes and plugins
It’s a good rule of thumb to deactivate and delete any plugins or WordPress themes you no longer use. This can decrease the chances of compatibility issues or vulnerabilities.
Deleting inactive themes and plugins will keep your website safer and more organized. You’ll want to review your active plugins periodically and make note of the ones you’re no longer using.
17. Carefully assess new plugins and themes
Before you install any plugin or theme on your website, it’s important to ensure that it comes from reputable developers and that it has a good track record. You can do this by checking its ratings and reviews.

The same goes for WordPress themes. Most plugin and theme repositories will show you an update history. A reputable plugin or theme will have regular updates, which means the developers are actively working on it.
You want to avoid WordPress plugins and themes that don’t receive updates anymore. No matter how useful they might be, they can lead to vulnerabilities on your website since the code is outdated.
18. Invest in a secure hosting provider
Not all hosting providers offer the same level of service, performance, and features. Some are better than others, and that doesn’t necessarily mean they’re more expensive.
Choosing a strong, secure WordPress hosting provider is a crucial decision as you’ll typically be bound to them for a long period of time. It’s important that you read as many reviews as possible and do your research before committing to any service.

If you need help, you can check out this list of Jetpack-recommended hosts, some of which include key Jetpack features as part of managed WordPress hosting services.
19. Change the default admin username
When you set up WordPress, it’ll create the admin username by default. This makes it easy to remember your credentials, but it also makes it easy for attackers to guess your details.
If your WordPress admin account is already set up, you have two options to change the default administrator username:
- Create a new administrator account. You can create a new administrator account with any username you want and then switch to it. Once you do, you can delete the old account and proceed with using the new one.
- Change the username using phpMyAdmin. If you want to keep the existing account, you can modify the username through the database.
No username should be easy to guess, especially when it comes to the administrator account. If someone gets access to it, they’ll be able to make any changes they want to your website.
20. Change the default database prefix
The default database prefix in WordPress is wp_. That means if an attacker knows the name of the database, they can also guess the prefix and use that information to try and query it.
You can minimize that risk by changing the default database prefix to anything besides wp_. This is a two-step process. The first step is changing the database prefix in the wp-config.php file, which should have a line that looks like this:
$table_prefix = 'wp_';After making the change in wp-config.php, you’ll need to update the tables in the database with the new prefix. You can do this using phpMyAdmin and running multiple queries similar to this one:
RENAME table `wp_options` TO `wp_a1b2c3d4_options`;You can use that query structure and change what comes after the “TO” to match the table name with the updated prefix. Keep in mind that you’ll need to run that query for each table in the database, and until you do, your site won’t function properly.
21. Change the default /wp-admin and /wp-login.php URLs
The /wp-admin and /wp-login.php URLs enable you to access the dashboard and the login page in WordPress. These URLs are easy to remember, but they make your site more vulnerable. If someone wants to break into your website, they’ll often start with the default WordPress login URL.
You can make life harder for attackers by changing those default URLs. There are plugins that enable you to do this, like WPS Hide Login. Alternatively, you can change the login URLs through the .htaccess file if you prefer a manual approach.
22. Limit wp-admin access to authorized IP addresses only
The /wp-admin URL opens the dashboard in WordPress. Technically, no one should have access to the dashboard without the right credentials. You can take security a step further by limiting access only to allowlisted IPs.
That is not a feature that WordPress offers. To implement it, you’ll need to add the following code to the .htaccess file:
<Directory /root/wp-admin/>

  Order Deny,Allow

  Deny from all

  Allow from xxx.xxx.xxx.xxx

</Directory>
The xxx.xxx.xxx.xxx stands for the IP address you want to allowlist. Note that you can add multiple IPs by copying that line and entering the different addresses.
You’ll also need to modify the directory path, so it matches the location of the root directory in the server. After saving the file, any IP address not on the list will see an error if they try to access the dashboard.
23. Limit FTP access to authorized IP addresses only
You can limit FTP/SFTP access to your website by restricting who has access to the corresponding credentials. Some hosting control panels also enable you to limit FTP access by IP address.
This is ideal if you have a static IP address, since it will prevent anyone else from connecting to the website and accessing its files via FTP, even with the right credentials. Without a static IP, this setting may limit even your own access to the site.
Keep in mind that only a select few people should be able to connect to the website using FTP. If you’re working with others, and they don’t have a reason to access or edit core files directly, they shouldn’t have access to your FTP credentials.
24. Secure your wp-config.php file
The wp-config.php file contains critical information about your website, including details about the database. By default, the file is located in the WordPress root directory.
The easiest way to secure the file is to move it directly outside the root directory. If WordPress can’t find wp-config.php where it usually is, it will look for it in one directory above its regular location.
Another option is to configure the file’s permissions to restrict access to anyone besides the administrator (that’s you). To do this, you’ll need to understand how file permissions work in UNIX-based systems and change the file’s configuration using SFTP.
25. Disable file editing to block malicious changes
Only the administrator should have permission to access and modify WordPress core files. Typically, you’ll be able to access file editing functionality from the dashboard. This means you can directly edit core, plugin, and theme files without leaving the WordPress admin.
Depending on the level of permissions users have, they might be able to access the file editor. The best way to prevent this is to disable file editing altogether.
To implement this safety measure, open the wp-config.php file and add the following line of code before the end:
define('DISALLOW_FILE_EDIT', true);Save the changes to the file and close it. Note that you’ll still be able to edit files, but you’ll need to use SFTP to do it, which is a better (and safer) option than using the WordPress file editor.
26. Disable PHP file execution
Disabling PHP file execution in specific directories of your WordPress website is a security measure that helps prevent malicious scripts from running. If an attacker manages to upload a PHP script to your website, they might be able to execute it to gain unauthorized access, manipulate data, or distribute malware.
You can disable PHP file execution in specific directories by connecting to WordPress via FTP and navigating to the root folder. Inside, you can select what directories you want to protect and create new .htaccess files inside each of them.
Here’s the code you need to add to those files:
<Files *.php>

  Order Allow,Deny

  Deny from all

</Files>
Note that disabling PHP execution at the root directory level might impact WordPress’ functionality. After all, the entire CMS is built on top of PHP. That means it’s better to disable it for individual folders like the media file directory.
27. Turn off PHP error reporting
Displaying errors publicly can expose potential vulnerabilities in your WordPress website to attackers. PHP error messages can include sensitive information like file paths, database structure details, or other data that can be used for exploiting your website.
WordPress enables you to disable PHP error reporting by changing the wp-config.php file. You can add the following code to the file to disable the WordPress debug mode and hide errors on the front end:
// Turn off all error reporting

error_reporting(0);

// Disable display of errors and warnings

define('WP_DEBUG', false);

define('WP_DEBUG_DISPLAY', false);

// Hide errors from being displayed in the browser

@ini_set('display_errors', 0);
Add that code before the end of the wp-config.php file and make sure you have a recent backup of your WordPress site before saving it. Keep in mind that error reporting can sometimes be useful for troubleshooting, so you may need to re-enable this feature at some point.
28. Disable directory browsing on your website
Directory browsing is a feature that enables visitors to access URLs like yourwebsite.com/wp-content and see the content of that directory. If directory browsing is enabled, users will be able to see lists of internal folders and files and even access them depending on their permissions.
From a security standpoint, it makes sense to disable directory browsing. A lot of WordPress web hosts do this by default. If yours doesn’t, you can disable directory browsing by adding the following code to your .htaccess file:
Options -IndexesThis is a simple change, so it shouldn’t take long to implement. Afterward, if users try to visit a directory, they’ll see a simple error message instead.
29. Hide your WordPress version
By default, the current version of WordPress you’re using is listed in your source code. If someone knows what version of WordPress you’re using (and it’s an outdated one), they can look into specific vulnerabilities for that version, making it easier to breach your website.
To hide your WordPress version, you can add this code to your functions.php file:
function remove_version_info() {

return '';

}

add_filter('the_generator', 'remove_version_info');
30. Avoid CAPTCHA for spam protection
CAPTCHA is a decent solution for protecting websites and forms against spam, but it’s not without problems.
Adding CAPTCHA to your WordPress website adds a layer of complication that can annoy and turn away legitimate visitors and even be impossible to solve — especially for those with impairments.
Recent developments in attack vectors have also made CAPTCHAs less effective. If you care about preventing spam (which can result in a security breach) but also want to maximize conversion rates through an optimal user experience, it’s time to consider alternatives.

Akismet is an all-in-one spam protection solution for WordPress that works completely in the background. The WordPress plugin helps you block spam by using its database of known malicious actors, and identifying and blocking specific words and URLs from comments on your site. It does all of that automatically, without visitors having to use CAPTCHAs to verify if they’re human.
Frequently asked questions about WordPress security
If you still have questions about how to protect your WordPress website, this section will answer them.
What are the benefits of having a WordPress security checklist?
Having access to a WordPress security checklist will help you determine what measures you’ve taken to protect your site and what is still left to do. The checklist is a simple resource you can refer to at any time to see what security measures you can implement in WordPress.
What is the fastest way to enhance my WordPress security?
The fastest way to protect your WordPress website is by using WordPress security plugins. Depending on the plugin you use, you’ll get access to features like 2FA, activity logs, backup tools, and malware scanning. Jetpack Security includes all of those features.
How can I scan my WordPress site for malware and vulnerabilities?
You can use a plugin like Jetpack Security to scan your WordPress site for malware. This tool will also highlight any potential vulnerabilities in your website. Then, you can take the necessary steps to eliminate these problems.
If you don’t need a comprehensive WordPress security plugin, you can also get malware scanning through a standalone WordPress plugin like Jetpack Protect.
What is the most reliable way to back up and restore my WordPress site?
Your best option is to use an automated solution, so you don’t need to create backups manually. The plugin should also save copies on an off-site storage solution to avoid issues if your server is compromised.
The Jetpack VaultPress Backup plugin offers real-time backups. It also makes safe copies of your WordPress site on the cloud. You can also access VaultPress Backup along with a host of other features as part of Jetpack Security.
Jetpack Security: The top security plugin for WordPress
Jetpack Security offers a collection of security features that will protect your WordPress website. With this plugin, you can cross off several items from the WordPress security checklist.
For instance, you get access to a backup solution, malware scanning and one-click removal, spam protection, activity logs, two-factor authentication and more. This makes Jetpack one of the most comprehensive security tools you can use for WordPress.
Are you ready to boost your site’s security? Get started with Jetpack security today!
We guard your site. You run your business.
Jetpack Security provides easy‑to‑use, comprehensive WordPress site security, including real‑time backups, a web application firewall, malware scanning, and spam protection.
Secure your site