
To grow your WordPress site, you need to understand what’s working — and what’s not. That starts with clear, reliable analytics.
Jetpack Stats and Google Analytics (GA4) both track how people find and interact with your site, but they approach it differently. Jetpack Stats keeps things simple, showing key metrics right in your WordPress dashboard. Meanwhile, Google Analytics delivers deeper data and custom reports, but requires more setup and experience to use.
This guide covers the key differences between Jetpack Stats and GA4, including installation, reporting, real-time traffic, customization, and privacy. You’ll also learn when to use each tool individually and when running them together works best. Let’s get started.
Installation and setup
With Jetpack Stats, setup is fast and frustration-free. You install it like any other plugin from your WordPress dashboard. Go to Plugins → Add New Plugin. Search for “Jetpack” and click Install now → Activate.
Once you connect to WordPress.com, Jetpack Stats starts recording data immediately. You don’t have to paste tracking codes, mess with your theme files, or configure complex settings.

Google Analytics takes a bit more work. You’ll need a Google account and a Google Analytics account within that. Then, you must create a GA4 property inside your Google Analytics account, generate a tracking ID, and add that code to your site. That usually means installing a plugin or editing your site’s header manually. If you want to track custom events or ecommerce behavior, the setup quickly becomes more technical.

Jetpack Stats delivers quick insights without technical overhead. Google Analytics works better for those who need detailed tracking and don’t mind spending time in configuration mode or hiring professional help.
User interface and accessibility
As for how these analytics tools function, Jetpack Stats keeps things simple. You’ll find your site’s data right inside the WordPress dashboard, no separate logins or new tabs are needed. The interface highlights core metrics like page views, top posts, and referrers, with clean visuals that don’t feel overwhelming.

Google Analytics offers more data but takes more effort to use. The GA4 interface is powerful, but complex. You’ll see everything from engagement rates to event parameters, but navigating all the available reports takes practice. It’s built for marketers and analysts, not casual users.

If you want quick takeaways at a glance, Jetpack Stats delivers. If you need more information and want to dig deeper into conversion optimization, user behavior, and attribution paths, Google Analytics gives you the tools you need.
Data metrics and reporting
Jetpack Stats gives you a focused look at how your content performs without overwhelming you with data you don’t need. Right from your WordPress dashboard, you can view daily traffic trends, top-performing posts and pages, referrers, outbound link clicks, and visitor locations by country. It also captures available search terms and highlights author performance, which is especially helpful for multi-author blogs.
Everything’s presented in a clean, readable format. You don’t need to configure reports, filter through settings, or connect to outside tools. Jetpack automatically displays useful insights like 7-day traffic highlights, historical trends, and top referrers. You can even download CSV files of your top content, countries, or referral sources if you want to archive or analyze the data elsewhere.
The focus is on clarity and speed, so you can make quick decisions about what to promote, when to post, and which topics are getting traction, without having to build custom dashboards or interpret complex metrics.
Google Analytics (GA4), in contrast, tracks a wider range of user behavior from engagement time and scroll depth to custom event tracking and ecommerce interactions. You can build funnels, compare audience segments, and set conversion goals, but that power comes with complexity. You’ll likely need to define the events you want to track, customize your reports, and learn how to navigate GA4’s layered interface before you can use the data effectively.
Real-time data tracking
Jetpack Stats delivers near-live snapshots of visitor activity. Track the number of visitors currently on your site, see which posts they’re reading, and identify referral sources in real time. It even captures engagement such as likes, comments, video plays, and downloads without extra configuration.
The dashboard refreshes as new data comes in, so you’ll notice traffic spikes instantly — whether from a promotional push or a surprise mention — which makes it possible to react in the moment.
Google Analytics 4 also provides a real-time report, but it’s not live in the same continuous way. It updates data every minute or so and only shows activity from the past 30 minutes. You’ll get metrics on active users, sources, pageviews, and events, but there can be a slight delay.
For everyday monitoring, Jetpack’s continuously updating view is more practical and user-friendly. GA4’s real-time report is useful for validating tracking, testing campaigns, or spotting short-term trends but it’s designed for brief windows and requires navigation through its interface to get to those insights.
Customization and advanced features
Jetpack Stats keeps analytics simple and maintenance-free. Once activated, as you know, it lives in your WordPress dashboard and automatically displays essential insights like traffic trends, top-performing posts, visitor locations, referrers, outbound clicks, and even author rankings without any setup work
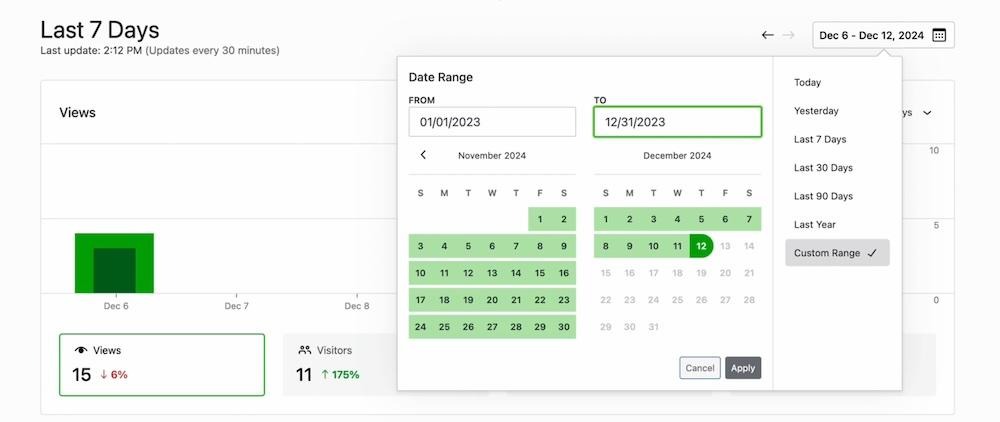
Recent updates added powerful enhancements. You can now select custom date ranges and see hourly breakdowns for a single day. Chart navigation improved too, so you can click a month’s bar to zoom into daily data, then dive further into hourly stats with just a few clicks.
You can also export CSV files of your top pages, referrers, or visitor locations, which comes in handy if you want to archive data or analyze trends externally.
GA4 offers a deeper level of customization, but for a price — time and effort. You can create detailed conversion paths, define custom events, compare audience segments, and even pipe your data into BigQuery for large-scale analysis. The interface supports custom dashboards, advanced filters, attribution models, and user-level tracking, too.
That said, this flexibility requires in-depth knowledge of the platform. Setting up GA4 to reflect your business needs often means writing event code, configuring tags, or even learning how to navigate its more technical interface.
If you prefer analytics that are simple, automatic, and content-focused, Jetpack Stats gets the job done. If you need to track complex user behavior across multiple channels or customize your data structure, GA4 gives you the control but expects you to do the work.
Privacy and compliance
If you’re collecting visitor data, you need to do it responsibly, and that starts with privacy. From GDPR to CCPA, more regulations now expect site owners to handle personal information responsibly and transparently.
Jetpack Stats is designed with privacy in mind. It doesn’t use tracking cookies unless absolutely necessary, and it avoids collecting personally identifiable information. You can also choose to honor Do Not Track browser settings, and Jetpack includes a built-in Cookies & Consent Banner that helps you meet legal requirements without installing third-party plugins. It’s displayed in WordPress using the Cookie Consent block.

Jetpack Stats processes data on Automattic’s infrastructure, which is regularly audited for security and compliance. It also offers built-in tools for GDPR compliance that help you update your privacy policy and respond to visitor data requests.
Because it focuses on aggregated, anonymous metrics, Jetpack Stats can often be used without requiring explicit consent, particularly in jurisdictions that distinguish between personal data and anonymous site usage data. For many WordPress site owners, this means staying compliant without adding complexity.
Google Analytics 4 collects much more detailed data, which can include user behavior across sessions, devices, and channels. While GA4 now anonymizes IP addresses by default (a move toward stronger compliance), it still sets cookies and processes user-level data. To use GA4 in line with GDPR or CCPA, you’ll likely need to add a cookie consent banner that blocks tracking until users opt-in and configure Google Consent Mode. You’ll also need to customize data retention and sharing settings and update your privacy policy to reflect what’s collected and how it’s used.
In regions like the European Union, some regulatory bodies have even questioned whether GA4 meets privacy standards without significant modification. That puts the burden of compliance squarely on you.
If you’re looking for a privacy-friendly analytics tool that works out of the box, Jetpack Stats is the simpler and safer option.
Which analytics tool (or both) fits your needs?
Both Jetpack Stats and Google Analytics offer value, but which one fits your situation best depends on how you use your site, how much data you want, and how much time you’re willing to spend managing it.
When to use Jetpack Stats
Use Jetpack Stats if you want fast, clear insights with zero hassle. It’s ideal for:
- Bloggers and content creators who want to track post performance
- Site owners who prefer everything inside the WordPress dashboard
- Small teams that don’t need complex reports or custom events
- Anyone prioritizing privacy without installing extra tools
Jetpack Stats gives you the essentials and covers page views, top content, and referral sources without overwhelming you. If you care more about publishing than reporting, this is a solid choice.
When to use Google Analytics (GA4)
Choose GA4 if you need comprehensive tracking across multiple platforms. It works best for:
- Ecommerce sites tracking conversions, revenue, and product performance
- SaaS businesses measuring onboarding, churn, and feature usage
- Marketing teams running multi-channel campaigns
- Anyone who needs custom events or narrower segmentation
GA4 is powerful, but only if you’re ready to invest the time to set it up and interpret the data. It’s not beginner-friendly, but it does provide deep visibility into user behavior, if that’s what you need.
When to run both side by side
Many WordPress site owners run Jetpack Stats and GA4 together. Jetpack handles quick daily checks for things like what content’s trending, where traffic’s coming from, and when readers show up. Then, you can lean on Google Analytics to explore bigger questions or build reports for clients.
They don’t conflict, they don’t double-count, and they serve different use cases. If you want simplicity and power without choosing one over the other, this hybrid setup gives you the best of both worlds.
How to install Jetpack Stats in under five minutes
You don’t need any coding skills or tracking IDs to get Jetpack Stats running. Just follow these quick steps and you’ll start seeing traffic data in your WordPress dashboard almost immediately.
Step 1: Install and activate Jetpack
Go to Plugins → Add New in your WordPress dashboard. Search for “Jetpack” then locate “Jetpack – WP Security, Backup, Speed, & Growth” and click Install Now then Activate.

Simple, yet powerful stats to grow your site
With Jetpack Stats, you don’t need to be a data scientist to see how your site is performing.
Get Jetpack StatsStep 2: Connect to WordPress.com
After activation, you’ll be prompted to connect your site to a WordPress.com account. If you don’t have one, you can create it in seconds. This connection enables stats tracking and other Jetpack features.
Step 3: Enable Site Stats (if needed)
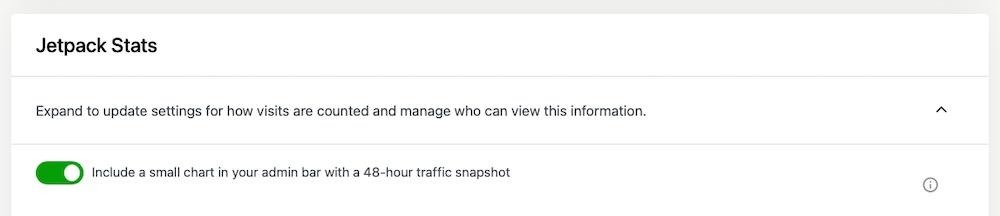
Jetpack Stats is automatically enabled for all sites. To double-check, go to Jetpack → Settings → Traffic and ensure Site Stats is toggled on.
Step 4: View your stats
Head over to Jetpack → Site Stats in your dashboard. You’ll see your traffic chart, top posts, referrers, and other useful data right away.

That’s all there is to it. No tags, no headers to edit, no third-party dashboards. You’re now tracking traffic directly from within WordPress.
How to make the most of Jetpack Stats — seven practical tips
Once Jetpack Stats is up and running, there’s a lot more you can do than just watch your traffic chart go up and down. These tips will help you get real value from your stats and make smarter content and marketing decisions.
1. Use 7‑Day Highlights to spot weekly growth spurts
Jetpack shows a handy summary of your past seven days, including your highest traffic day. Use this to figure out what’s working over time and repeat it. You can spot consistent patterns in post performance, referral sources, or audience behavior to guide your next content decisions.
2. Schedule content around your Peak Traffic Time insight
Jetpack tracks the time of day your site gets the most visitors. Use this data to time your posts, email campaigns, or social shares when your audience is most active. This insight helps you reach more people without increasing your publishing workload.
3. Explore the Author Leaderboard to motivate contributors
Running a multi-author blog? The Author Leaderboard lets you see which writers drive the most traffic. Celebrate high-performing posts or share performance data to encourage friendly competition.
4. Track campaign clicks by appending UTMs
Even though Jetpack Stats doesn’t offer full conversion tracking, you can still monitor link clicks using UTM parameters. Add them to social or email links, then check your Clicks and UTM data to see how they performed. You can also add UTM parameters after upgrading to a Commercial license for Jetpack Stats.
5. Monitor Referrers daily to catch unexpected press hits
If your site gets mentioned on a news outlet, blog, or high-traffic newsletter, Jetpack Stats will show it right away under Referrers. This helps you respond quickly, whether that’s sharing the mention or engaging with new visitors.
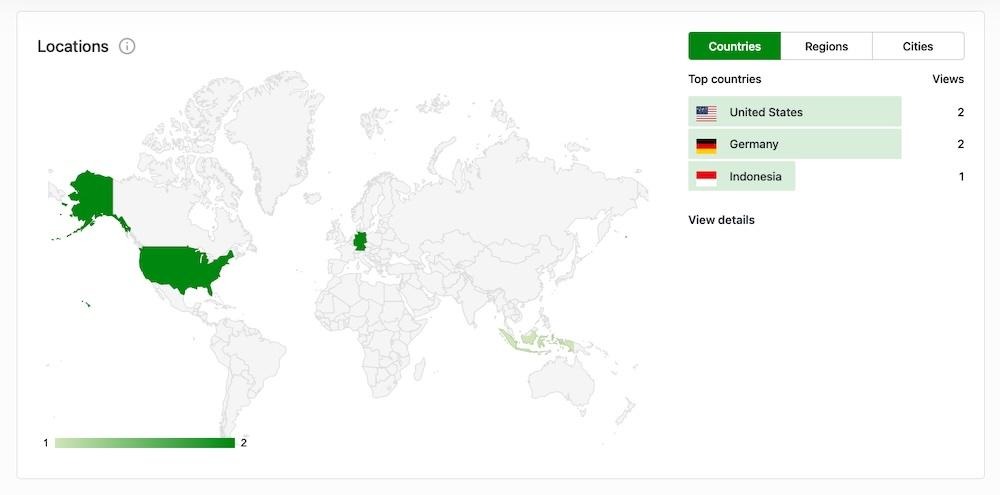
6. Monitor your Heatmap by Country before and during global launches
Jetpack shows where your readers are located. Use this to customize launch schedules, translations, or marketing pushes around regions where you’re gaining traction.
7. Sync with Jetpack Social to view follower growth alongside traffic
If you use Jetpack Social to auto-post to your social channels, you’ll see traffic data alongside follower counts. It’s a simple way to tie content output to audience growth without extra tools.
Jetpack Stats or Google Analytics? Here’s the bottom line
If you want simple and fast WordPress insights, go with Jetpack Stats. It gives you the key metrics that matter like page views, referrers, and popular content right inside your dashboard, with zero configuration and strong privacy defaults.
If you need to dive deeper into user behavior, conversions, and traffic segmentation, GA4 offers more flexibility. It’s built for teams that rely on custom data to shape their strategy.
If you don’t want to compromise, you can always use both. Jetpack Stats gives you a quick snapshot of your site’s traffic health at a glance, while GA4 is there when you need to get into the specifics.
Whatever you choose, having clear, reliable data helps you make better decisions. Try Jetpack Stats today.
Simple, yet powerful stats to grow your site
With Jetpack Stats, you don’t need to be a data scientist to see how your site is performing.
Get Jetpack Stats