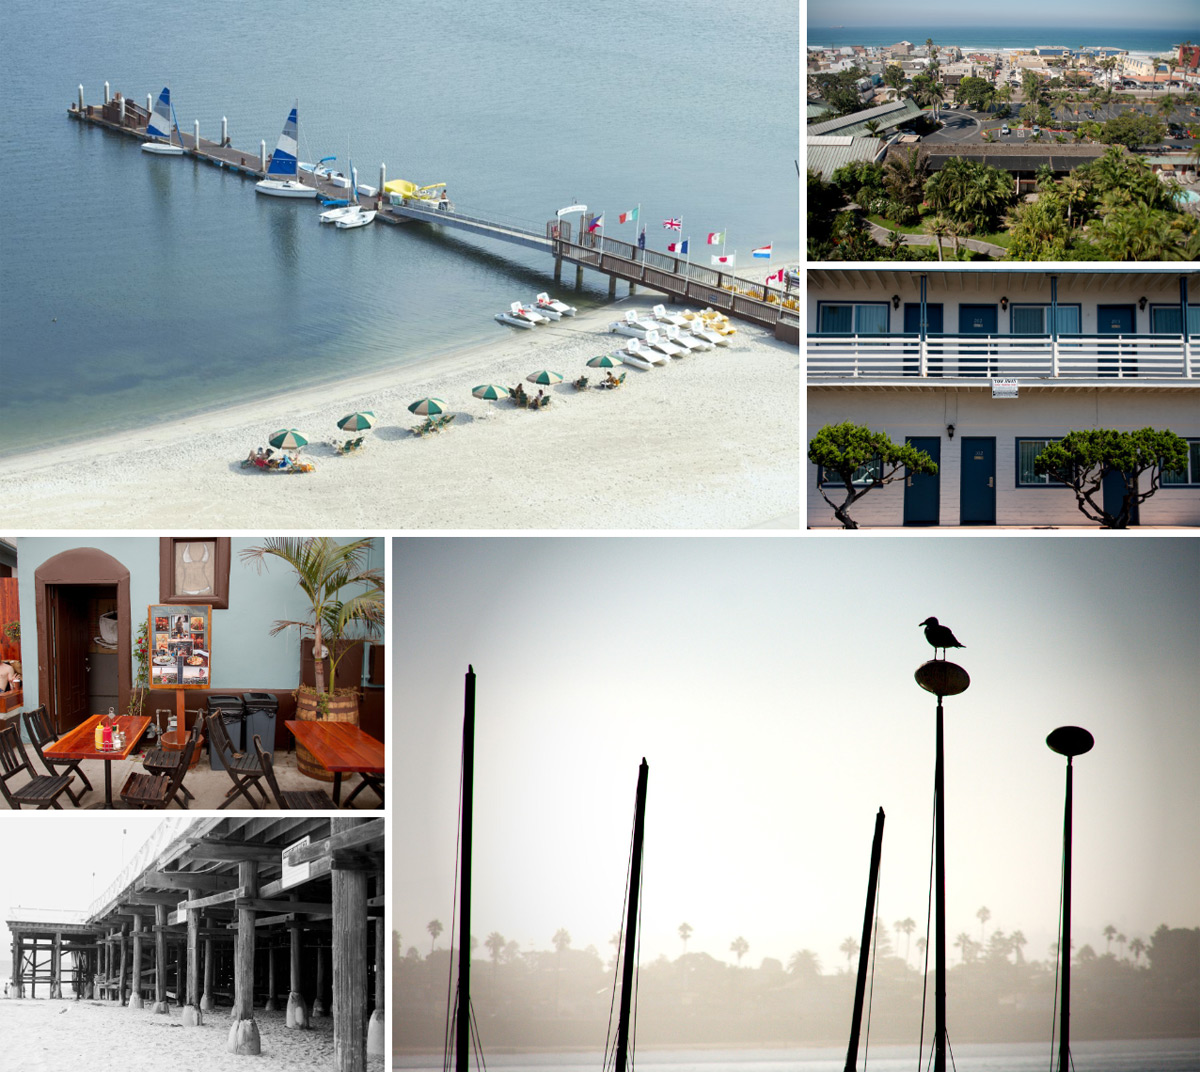
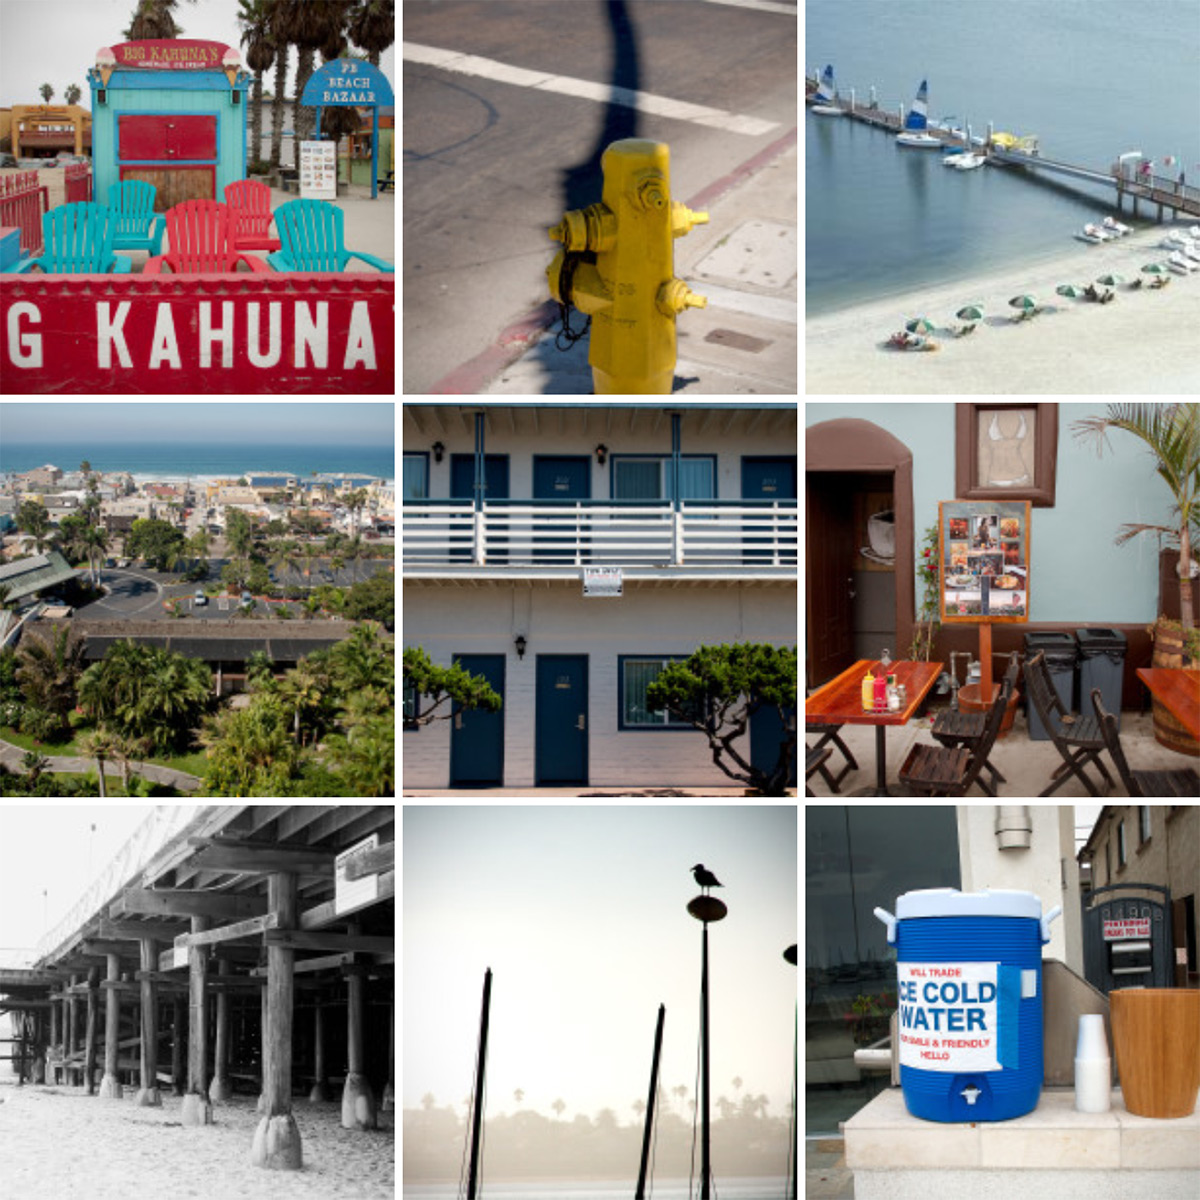
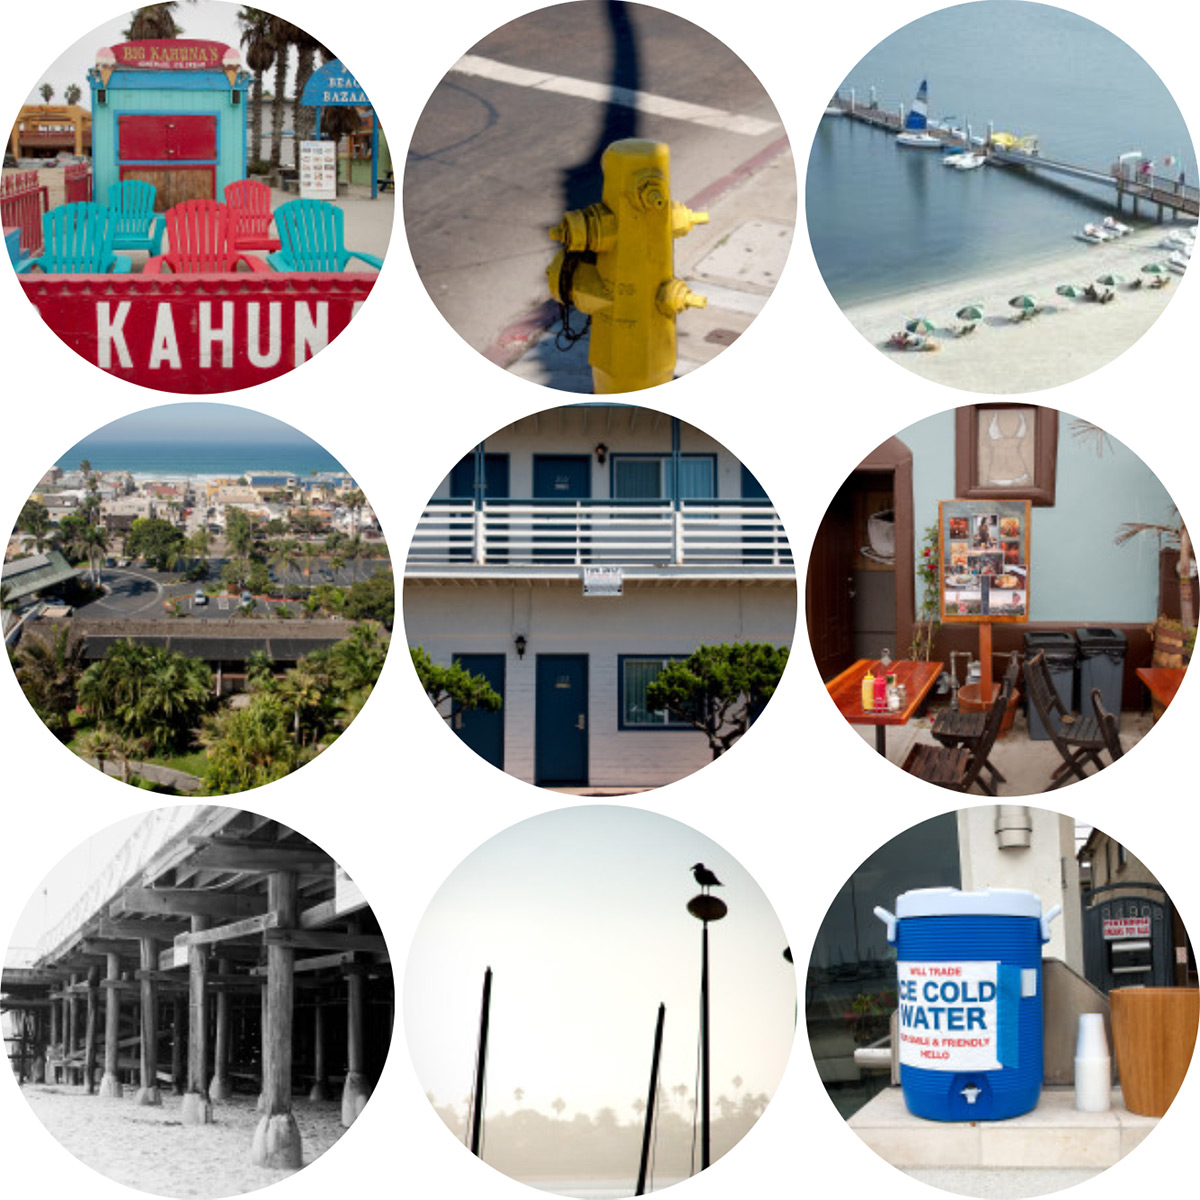
With Tiled Galleries, you can display your image galleries in a tiled mosaic, circular grid, square tiles, or tiled columns. There is also a slideshow option.
Important: Images added to a Tiled Gallery block are automatically served through Jetpack’s Image CDN, even if you have Jetpack’s Site Accelerator feature disabled.
Here are some examples:
Requirements
The Tiled gallery block is available on all Jetpack-connected sites. It is a part of the Jetpack Blocks suite and is activated by default. The block remains available even if you disable the Tiled Galleries feature on the Modules Page.
The Tiled Gallery block does not require a paid upgrade to use. See our Jetpack Blocks article to learn about the available blocks and how to activate them.
Jetpack Blocks require the Block Editor (also referred to as the Gutenberg editor). If you’ve installed the Classic Editor plugin, you have a few options:
- Deactivate the Classic Editor: Go to Plugins → Installed Plugins in your WP Admin and deactivate the Classic Editor plugin.
- Enable both editors: If you prefer flexibility, navigate to Settings → Writing in your WP Admin (not the menu under Jetpack settings). Set Allow users to switch editors to Yes. You will only see these options if you have the Classic Editor plugin installed and active.
Some custom themes or plugins may prevent you from using the Block Editor. In that case, please contact the support team for the plugin or theme for further assistance.
For more details, see Using Blocks and the Classic Editor.
Tiled Galleries in the Classic Editor
To use Tiled Galleries using the Classic Editor plugin or the Classic Block, please see the guide on Using Tiled Galleries with the Classic Editor.
Create a gallery
To create a gallery, please follow these steps:
- Add a new Tiled Gallery block with either the in-post block selector or the block selector in the post toolbar.
- Add images to your gallery by uploading them from your computer, selecting them from your Media Library, or selecting them from an external source.
- Once you’ve added images, use the block toolbar and the sidebar to add your customizations.
- The toolbar has a change block type button, which you can use to select the type of gallery you’d like to create.
- The other buttons on the toolbar allow you to set the alignment for the gallery by selecting the appropriate option. You can use Edit to add and remove images.
- Click on the X to deselect any images you don’t want included in the gallery. Then, drag and drop the images to reorder.
- Click Add to Gallery to add new images. When you’ve finished making changes to the images in the gallery, click Update gallery.
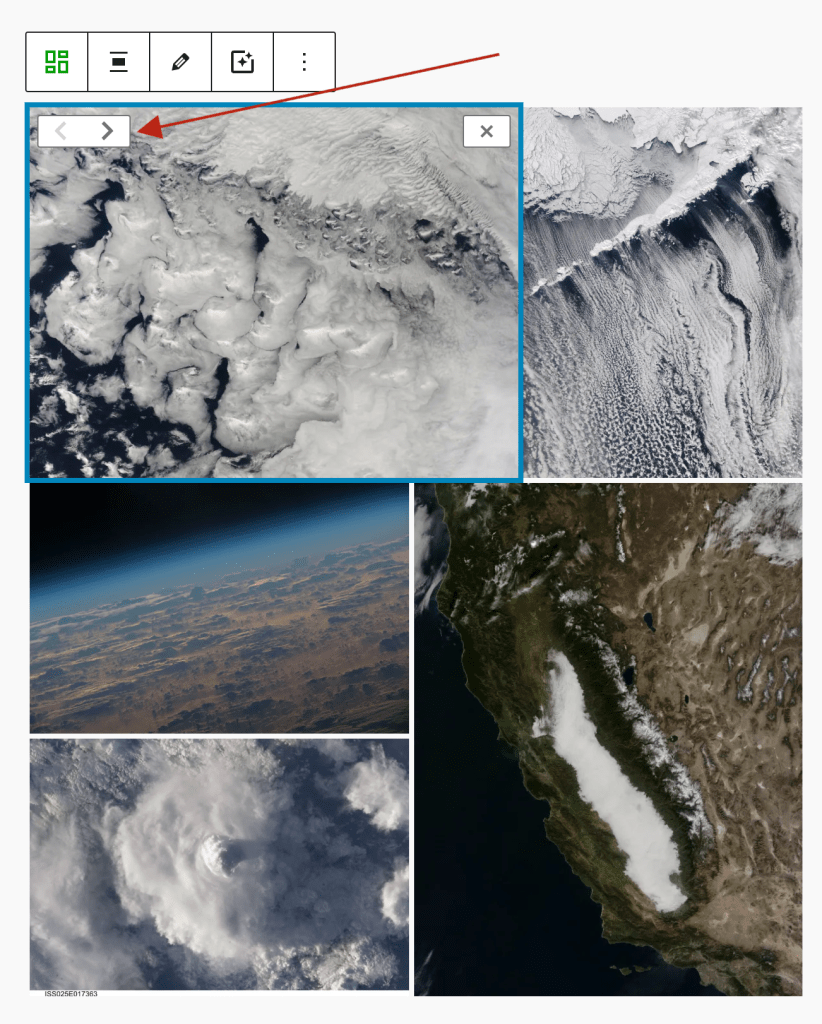
- To position images within your gallery, you can click on an image within the block and use the arrow buttons to move them:
Toolbar settings
The toolbar at the top of the block provides customization options for the Tiled Gallery block. Go to Toolbar → Block Icon → Transform To / Styles to access the options:
- Transform to: Convert the block into an Image, Slideshow, Columns, Details, Group, or Gallery.
- Styles: Choose from different layout options, including Tiled Mosaic, Circles, Square Tiles, and Tiled columns.
- Align: Set how the gallery is displayed on the page with options for None (default), Wide Width, Full Width, and Align center.
- Pick an image filter: Apply visual filters to images in the gallery, including Black and White, Sepia, etc.
- Edit gallery: Open the gallery settings to modify images.
Sidebar settings
The sidebar panel provides more detailed customization options:
- Tiled Gallery settings:
- Columns: Adjust the number of columns in the gallery using the slider or manual input field.
- Link to: Set how images behave when clicked. Options include None, Media File, Attachment Page, or Custom.
- Styles: Switch between different gallery layouts such as Tiled mosaic, Circles, Square tiles, or Tiled columns. These are the same style customization options you find in the block toolbar.
- Background color: Customize the background color of the gallery.
- Padding & margin: Adjust spacing around and inside the gallery block.
Adding custom links to Tiled Gallery images
Customize the destination of each image in the Tiled Gallery block by assigning custom links, including URLs, in-page anchors, or other supported formats. This feature gives you greater flexibility when creating navigational or interactive image layouts.
Before you begin:
Make sure Jetpack’s Carousel feature is disabled under Jetpack → Settings → Writing → Media. The Carousel feature overrides custom link behavior, preventing your links from working as expected.
How to Add Custom Links to Tiled Gallery Images
- Insert a Tiled Gallery block: Add a Tiled Gallery block to your post or page and upload or select your images.
- Select an image in the gallery: Click on any individual image within the Tiled Gallery.
- Set a custom link: In the block settings sidebar, locate the Link to option.
- Choose Custom from the dropdown.
- Enter your desired link. This can be:
• A full URL (e.g., https://example.com/page)
• An in-page anchor (e.g., #section)
• A simple keyword or fragment, depending on your site’s setup
- Repeat for other images: Apply custom links to other images as needed. You can mix different types of links within the same gallery.
- Save and publish your post.
Clicking a linked image opens the custom destination in the same tab by default. If you enter a non-standard value (e.g., a keyword or Javascript: snippet), Jetpack will not block it, though browser behavior may vary depending on configuration.
Furthermore, previously saved custom links will remain when toggling between different Link to options.
Troubleshooting the Tiled Gallery block
Tiled Gallery options do not appear, or do not display correctly
If your Tiled Gallery options aren’t showing, or if they’re showing incorrectly, follow these steps:
- First, check whether you have a working Jetpack connection. If your Jetpack connection is broken, use our troubleshooting tips to fix any connection errors.
- Next, from your WP Admin dashboard, go to Jetpack → Settings → Performance -> Performance & speed. Make sure that the Speed up image load times option is enabled.
- Try switching to a default theme like Twenty Twenty Four to check whether your theme is conflicting with Jetpack’s Tiled Galleries. If the Tiled Gallery options display properly when you’re using a default theme, contact your theme’s creator to resolve the conflict.
- Disable any other slideshow or gallery plugins that are activated on your site. Using two slideshow or gallery plugins at the same time can cause a conflict.
- Finally, if you use the Cleaner Gallery plugin or a theme that includes this functionality, you won’t be able to use the Tiled Gallery features on your site. To solve this conflict, you can install this small plugin to deactivate Cleaner Gallery.
Slideshow option is missing
If you don’t see the Slideshow option for your Tiled Gallery, follow these instructions:
- Navigate to your WP Admin dashboard.
- Go to Jetpack → Settings → Writing.
- Make sure the Compose using shortcodes to embed media from popular sites option is turned on.
How to display a single image in a gallery view
To make a single image on a post or page appear in a gallery view, follow these steps:
- Click on your Tiled Gallery and navigate to the Gallery Settings.
- Choose ‘Attachment Page’ from the Link To dropdown menu, and save your changes.
- Now, when your image is clicked, it will appear in the gallery overlay view.
Define a specific width for your gallery
Tiled Galleries are built to fill your theme’s content width. You can define a specific $content_width value by adding the following code to your theme’s functions.php file:
if ( ! isset( $content_width ) ) {
      $content_width = 800;
}
Please be aware that code snippets are provided as a courtesy and our support team is unable to offer assistance customizing them further.
If you do not feel comfortable editing theme files, you can also use this plugin: Custom Content Width.
If your theme doesn’t define a content width, Tiled Galleries will default to 500px wide. You can read more about the Content Width theme feature here.
If your theme already defines a $content_width value, but you would like to use a different value for Tiled Galleries only, you can use the tiled_gallery_content_width filter.
Captions do not appear
The Tiled Gallery block doesn’t support captions (either per image or for the whole block) yet. Another alternative is to use the Classic block to add a Tiled Gallery which will allow you to add captions. Learn more in our Using Tiled Galleries with the Classic Editor guide.
Still need help?
Please contact support. We’re happy to advise.
Privacy Information
The Tiled Gallery block is disabled by default. You can activate Tiled Galleries anytime by following these instructions and clicking “Activate” next to Tiled Galleries.
| Data Used | |
|---|---|
| Site Owners / Users
None. |
Site Visitors
None. |
| Activity Tracked | |
| Site Owners / Users
If disconnecting from Google Photos, we track that Google Photos is being disconnected. |
Site Visitors
None. |
| Data Synced (Read More) | |
| Site Owners / Users
We sync options that identify whether or not the feature is activated and how its available settings are configured. |
Site Visitors
None. |
