Restoring a Jetpack Backup

What to Do If Your Site is Down

Get your site back online as quickly as possible. Maximize your website’s uptime with Jetpack Monitor.

If you have received an email alert from Jetpack’s Downtime Monitor service, please go through the following steps to get things back up and running again.

If you would prefer to deactivate the Jetpack Monitor service completely, please check these instructions.

Retrace your steps

If your site has gone offline, consider trying to determine what might have caused it by following these steps:

  1. Review the status included in the downtime alert email. Jetpack Monitor will record the status of your site. This can provide clues to help determine why your site is down.
  2. Think about any recent changes you made on the site that might have caused the problem. For example, if you recently installed or activated a plugin, it may have had an error that caused the site to go down.
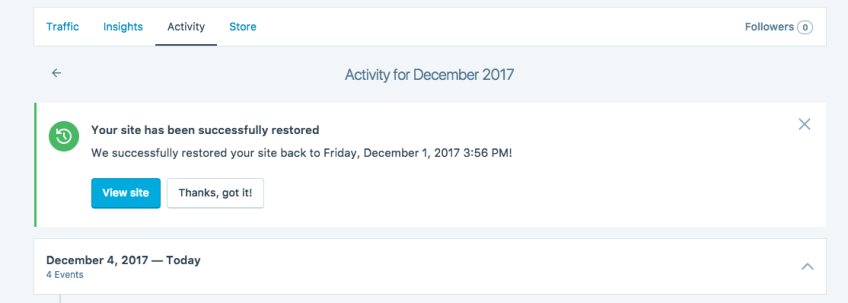
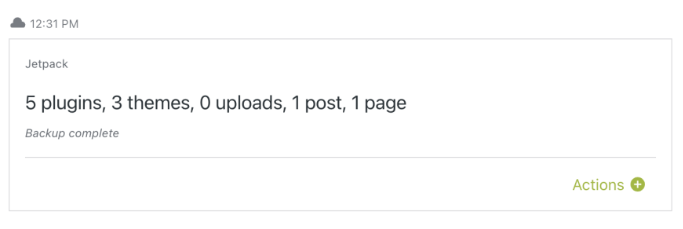
  3. Review the site’s Activity Log to check for any recent changes that may have created the issue.
  4. If you suspect that a plugin is the cause, deactivate that plugin via FTP access or your webhost’s file manager by changing the name of the plugin’s folder inside the /wp-content/plugins/ directory on your server. Your host can help you with that if necessary.
  5. If you’re not sure whether a plugin is actually to blame for your site going offline, try testing by deactivating all plugins. If that brings the site back online, then you can try activating each plugin one by one until the site goes down again to determine which one is making trouble.

Nervous about deactivating plugins on your live site when testing? Try out the Health Check & Troubleshooting plugin to create a special test version of your site (as a logged-in user) where it starts off with plugins disabled and a minimal theme applied.

Check for error messages

If you see an error message on the site, check if the error is mentioned on this list of common WordPress errors. If so, follow the guide to see if you can remove the error. If you can’t fix it, be sure to copy the error or take a screenshot to reference later.

If you see only a blank screen, that may be what’s known as the ‘White Screen of Death’ (WSOD). In this case, you can follow the step-by-step guide on How to Fix the WSOD.

Check for emails about security threats

If you received an email letting you know that Jetpack identified a potential threat on your site prior to your site going offline, or if you suspect your site has been hacked, you can follow this guide to secure your site, eliminating possible malware issues and strengthening your site for the future.

Access your host control panel

Look up who your hosting provider is (you can check one of the emails confirming your website, for example, or your password manager if you’re using one) and log in to their control panel. From there, you should be able to control the status of the website and see if there’s any problem with the website loading.

Contact your host

The last thing to try before to get your website back online is to contact your webhost for assistance. They have direct control over your site and server and can check their error logs to find the exact cause of the issue. They can most likely fix the problem for you or at least point you in the next best direction.

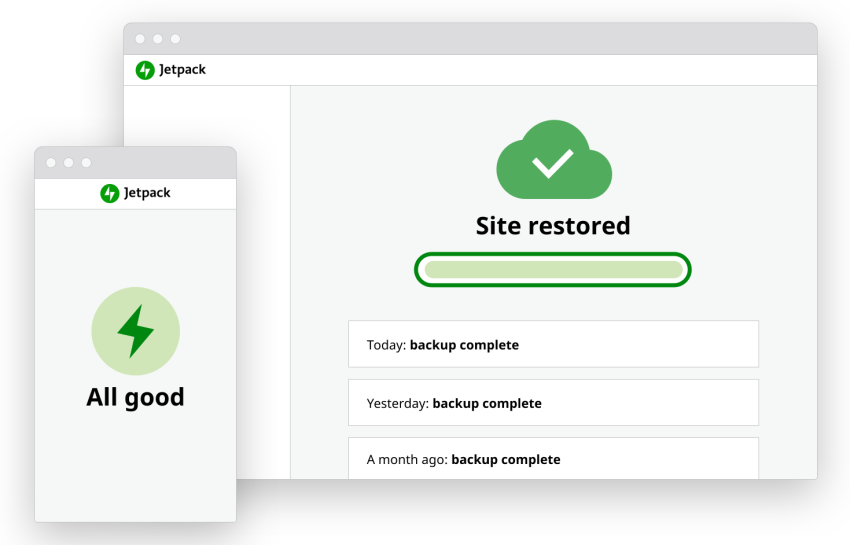
Restore with Jetpack

Jetpack may be able to restore your site, even if it’s down, as long as the site has a working WordPress installation, and you’ve added working server credentials. You have two options to restore:

  1. (Automatic) Perform a restore of one of your restore points.
  2. (Advanced) Download a backup and upload it manually.

Please note that restoring the website via Jetpack does not guarantee it will keep working, as the underlying problem may have been restored along with everything else.

Still need help?

Please contact support. We’re happy to advise.

Comments Off on What to Do If Your Site is Down

Restore a Website with Jetpack VaultPress Backup

Restore from a backup in just a few clicks.

With a paid Jetpack VaultPress Backup solution, you can use Jetpack VaultPress Backup to restore your site to a previous state. If you need to undo a change or go back to a certain point in time, Restore is for you.

We’ve developed Jetpack VaultPress Backup with WooCommerce in mind. You can safely restore your site to any past state — all orders and products will be kept current.

There are various ways to restore your site:

  1. Restore your website to a particular event;
  2. Restore your website to a particular day;
  3. Restore specific files or plugins;
  4. Download a backup and restore it manually.

You can restore your site either at Cloud.Jetpack.com or the WordPress.com dashboard, depending on which interface you typically use.

Before You Restore

To restore with Jetpack VaultPress Backup, you will need:

  1. A working WordPress site
  2. A healthy Jetpack connection.

If restoring your site initially fails over HTTP, try adding server credentials to your Jetpack Settings.

During restore, existing files with the same name will be overwritten, but files with unique names will not be removed. We do not delete anything but our helper files, which we must add to the site during the restore process.

However, it is important to note that your website’s database is completely replaced with the database from the backup you’re restoring from. So, any posts, pages, or other content you’ve added since the restore point date would be lost. You should make an export of this content before using our restore feature; then, you can import it back to your site after the restore.

It is not possible to interrupt or stop a restore once it starts. If you initiate a restore in error, please wait for it to complete, and then restore it again to the desired version.

The length of time for a restore to finish depends on many factors, such as the number of files in your site.

Restore via Cloud.Jetpack.com

To restore your website from the Cloud.Jetpack.com dashboard, please follow these steps:

  1. Go to Cloud.Jetpack.com and select the site you wish to restore.
  2. Open the site’s Activity Log if you are looking for a particular event and/or date range.
  3. Use the filters to search by Date Range and/or Activity Type (for example Plugins, Posts and Pages) you’d like to restore.
  4. Click Actions > Restore to this point, which will open the restore site dialog box.
  5. Alternatively, you can also navigate to VaultPress Backup. You’ll see the latest backup for your site or the scheduled time of your next one.
  6. From the restore dialog box, uncheck any boxes for items you don’t wish to restore. If you want to restore everything, leave all of the options checked and click Restore now.
Screenshot of the Restore site interface, with a checklist of types of items you wish to restore.

Your restore will begin, and a progress bar will appear on the page. You will also receive email updates on the progress of your restore. When the restore has been completed, you’ll see a confirmation message.

Restore specific files

Want to revert back to an older version of only specific files? Or roll back to a previous version of a plugin? Perform a granular restore in these cases.

A complete backup in the Jetpack Activity log. There is a button labeled "Actions +"
  1. Navigate to a daily Jetpack Backup in the Activity Log or in the Backup page.
  2. Click on the Actions(+) and then View files.
  3. Browse all the files and select which ones you want to download or restore by checking the corresponding boxes.
  4. Confirm.

Exclude specific files from a restore

As well as restoring specific individual files from a backup, you can also choose which files you don’t want to restore.

  1. Navigate to a daily Jetpack Backup in the Activity Log or in the Backup page.
  2. Click on the Actions (+) and then View files.
  3. Check the box at the top to select all files and folders.
A selective/granular restore in Jetpack VaultPress Backup. A list of files/folders which can be selected/deselected before restoring.
  1. Browse files and folders and deselect the ones you want to exclude from the restore by unchecking the corresponding boxes.
  2. Click Restore selected files.

Restore when your site is completely down

If the website you want to restore is down or showing a fatal error, you can try these steps:

  1. Revert to a fresh installation of WordPress. Your host may have this option in the cPanel, but you may need to ask your host the best way to do this.
  2. Connect Jetpack.
  3. Attempt a Jetpack Restore by following the above steps.
  4. If that still does not work, you can will most likely have to proceed with a manual restore.

Download a Backup for manual restore

In the event that a one-click restore is not possible, you can download a backup for a manual restore like this:

  1. Go to Cloud.Jetpack.com or WordPress.com, depending on your choice.
  2. Open the Activity Log for your desired site.
  3. Use the filters to search by Date Range and/or Activity Type you’d like to restore.
  4. Click Download to open the backup download box. 
  5. Uncheck any boxes for items you don’t want to include in your download. If you want to download everything, leave all of the boxes checked and click Create download.
  6. Jetpack will begin preparing your selected download. At the top of the Activity Log, you can follow the progress of your download.
  7. A message will appear at the top of the Activity Log when your backup download is ready. Click Download to download the backup. You will also receive an email with a link to the download when it’s complete.

Once you have downloaded the backup, you can use that to restore the site manually.

Still need help?

Please contact support. We’re happy to advise.

Comments Off on Restore a Website with Jetpack VaultPress Backup

Jetpack VaultPress Activity Log

Access the full list of management events that occurred on your site via the Activity Log.

From the Jetpack Activity Log, you can access a detailed record of site activities, including core WordPress and Jetpack events. Check this page’s general features for more information about the Activity Log.

View Activity Log

To see your site’s Jetpack Activity Log, please follow these steps:

  1. Start at https://cloud.jetpack.com.
  2. Select the site for which you’d like to see recent activity. Please note that you can view Activity for sites where you are an Administrator. Accounts with the Editor role and below cannot view any activities.
  3. Click on Activity Log.

Types of activities recorded

You can check the following events stored in your site’s Activity Log:

  • Published or updated posts and pages
  • Comment submission and management activity
  • Plugin installations, updates, and removals
  • Site performance score
  • Theme installations, updates, and deletions
  • Settings and options modifications
  • Brute Force Attack Protection
  • Login attempts by registered site users

Check this table to learn more about how long we store information about each type of activity.  

Customers on the Jetpack VaultPress Backup plan or Security plan will have access to events for the last 30 days, and customers on the Jetpack Complete plan will see events for one year. For Jetpack Complete, a maximum of 1,000 events will show on the feed. You can filter the events by date range and activity type, and the feed will also show up to 1,000 events from that filtered range. 

Filter Activity Log’s events

If you own a paid plan for your site, you can use the “Filter by” option at the top of your activity to customize your search results.

You can filter events by Date Range and Activity Type.

To filter events by date range, follow these steps:

  1. Select Date Range
  2. Select the start date.
  3. Select the end date.

To filter events by activity type, follow these steps:

  1. Select Activity Type.
  2. Select the checkbox next to each activity type you want to display.
  3. You can select as many as you want, so check also the handy nested activity types.

For greater customization, the Date Range and Activity Type filters can be combined.

To clear an individual filter, click the X next to it. Click the larger X icon on the right to clear all active filters.

Still need help?

Please contact support. We’re happy to advise.

Privacy Information

The Activity Log is activated by default. There is currently no way to deactivate this feature.

Data Used
Site Owners / Users

To deliver this functionality and record activities around site management, the following information is captured: user email address, user role, user login, user display name, WordPress.com and local user IDs, the activity to be recorded, the WordPress.com-connected site ID of the site on which the activity takes place, the site’s Jetpack version, and the timestamp of the activity. Some activities may also include the actor’s IP address (login attempts, for example) and user agent.

Site Visitors

None.

Activity Tracked
Site Owners / Users

Recorded site management activities include: login attempts/actions, post and page update and publish actions, comment/pingback submission and management actions, plugin and theme management actions, widget updates, user management actions, and the modification of other various site settings and options. See Complete List.

Site Visitors

None.

Data Synced (Read More)
Site Owners / Users

All core WordPress and Jetpack option/setting update actions are synced. This includes the current and previous state of a site’s options. Successful and failed login attempts (these include IP address and user agent) are synced.

Site Visitors

Successful and failed login attempts, which will include the actor’s IP address and user agent.

Comments Off on Jetpack VaultPress Activity Log
  • Enter your email address to receive news and updates from Jetpack

  • Join 99K other subscribers
  • Browse by Topic