
Normally, updates to WordPress, themes, and plugins are fast and easy — you click the update button and, a few seconds later, the process is over and you’re happily moving on with your day. But if you’re reading this, chances are things didn’t go as expected.
While updates usually don’t cause issues, things can sometimes go wrong during the update process, especially during a major upgrade. This may be something as minor as an update not completing fully or it may be something that breaks your site entirely, making it unreachable.
These issues can be pretty scary for a website owner. If you find yourself experiencing problems after an update — don’t panic. Fixing the most common update issues is often quick and painless.
Quick fix summary
If your site just broke after an update:
- Try Recovery Mode (check admin email for a special link).
- If stuck on “Briefly unavailable for scheduled maintenance…”, delete the
.maintenancefile in the webroot. - Can’t log in? Via SFTP/Panel, rename
/wp-content/plugins/toplugins-1orplugins-offand switch to a default theme. - Check
wp-content/debug.log(steps to enable are below) for the exact plugin/theme or PHP error. - Roll back the last change (plugin/theme/core) to a known-good version; then retest on a staging site.
How do I know if an update broke my WordPress site?
WordPress has a lot of moving parts. Any time WordPress core, a theme, a plugin, or even the PHP version that the software is operating on is updated, there’s a small chance for some conflict. If you find your site unresponsive, doing any kind of strange “looping” behavior, or with broken functionality, ask yourself if you’ve performed any updates recently.
Here are a few signs that your site may be broken because of an update:
1. A WordPress core, theme, or plugin update fails
You click on Update Plugins, but the update screen won’t go away. You might see a message saying “updating” which never resolves or you might click the Update button and nothing seems to happen.
If you visit your site from an incognito screen, you may be greeted by a “Briefly unavailable for scheduled maintenance. Check back in a minute” message. This indicates that an incomplete update has made your site unavailable — and it’ll stay that way until the issue is resolved.
2. There’s a white screen of death
Your update might complete as expected while you’re in the WordPress dashboard, but when you visit your site URL, all you get is a blank screen. This is known as the white screen of death. If you’re experiencing this, one of the updates you just applied may have crashed your WordPress site and made it unavailable.
3. The site doesn’t work as intended or has unavailable features
This bug is the hardest to notice and troubleshoot, as your site is operational but some of your website’s features aren’t working anymore.
Sometimes the fix is simple and straightforward. For example, if you just updated your contact form plugin and it doesn’t work anymore, the issue is self-explanatory. There’s some kind of conflict in the contact form update itself.
Other times, the issue may be something you aren’t aware of for a while — especially if it’s not an essential or frequently-used feature on your site. Several updates of WordPress core, your theme, and other plugins might go by before you’re alerted to the problem. At that point, detecting the cause of the issue can become complicated.
What do I do if an update breaks my site?
The easiest solution to fixing a site after an update causes a problem is to simply restore your WordPress site from your most recent backup. If you take frequent backups or run one before performing updates, then reverting to that backup will likely resolve your issue. From there, you can troubleshoot the specific error you encountered.
If you don’t have a backup to restore from, then you’ll need to start troubleshooting.
The rest of this article will walk you through solutions for the most common update-related problems. After you apply these fixes the first time, it will become much easier the next time you face a similar issue.
Use WordPress Recovery Mode (if you received an email)
When WordPress detects a fatal error, it emails the admin a special Recovery Mode link:https://yoursite.com/wp-login.php?action=enter_recovery_mode&rm_token=…
Open that link to access a safe dashboard session and deactivate the failing plugin/theme, then retest.
If Recovery Mode isn’t accessible, proceed with the steps below.
The next, most critical step: Check your error logs
Before you start deactivating plugins or themes, you must find out why the site broke. WordPress has a built-in debugging system that generates an error log.
- Connect to your site using SFTP or your host’s File Manager.
- Find the wp-config.php file in your site’s root directory.
- Add the following lines of code to this file, just above the line that says /* That’s all, stop editing! Happy publishing. */:
php
define( ‘WP_DEBUG’, true );
define( ‘WP_DEBUG_LOG’, true );
define( ‘WP_DEBUG_DISPLAY’, false );
@ini_set( ‘display_errors’, 0 );
Save the file. Now, try to load your broken website again.
A new file named debug.log will be created in your /wp-content/ directory. Open this file. The last few lines will contain a “Fatal error” message, which will tell you the exact file path and line number of the plugin or theme that caused the crash. This tells you exactly where to start.
Step-by-step solutions to common WordPress updating problems
This section covers the most common update issues and their solutions in detail. Since there’s a lot of ground to cover, let’s start with one of the most common and easiest problems to fix after an update — a website stuck in maintenance mode.
How do I fix my WordPress website when it’s stuck in maintenance mode?
If your site is stuck in maintenance mode after an update, you may see an error on the front end that says, “Briefly unavailable for scheduled maintenance. Check back in a minute.”

Sometimes this is due to an update getting stuck and not completing. Other times it’s just a caching error. First try clearing both your server-side and browser cache.
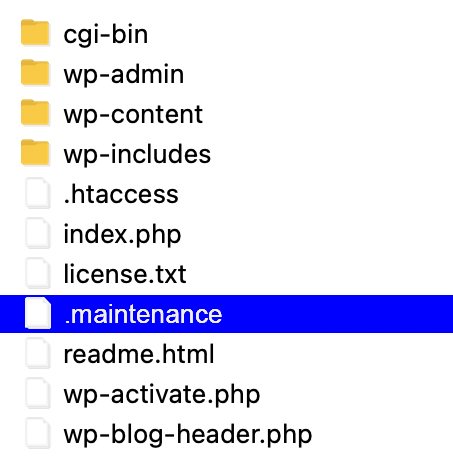
If you still get this error, or you see it in incognito mode, then the culprit is probably an incomplete update. In this case, you’ll need to remove the .maintenance file. You can do this by accessing your hosting provider’s cPanel, or using SFTP through a file transfer app like FileZilla.
Here are the steps for each method:
cPanel
- Access the File Manager from your cPanel.
- Next, you need to find the .maintenance file, which is in the root folder. This is usually called “public_html” but it may have another name like “www” or “yoursitename,” so check with your hosting provider if you’re unsure. If you can’t see the folder, enable hidden files by checking the box next to Show Hidden Files in Settings, which you can find in the upper right corner of the File Manager screen.

- Delete the .maintenance file.
- Visit your site from an incognito window. Testing the site availability from an incognito window will ensure that you see the latest change, as it takes cached data out of the picture. You should now be able to see your site.
SFTP
If you’re new to using SFTP, check your web host’s help center for documentation on using SFTP to connect to your WordPress site.
- Log in to your site securely using the SFTP option in your FTP client and click Connect.
- Click on your site’s root folder, usually “public_html” but it could be another name like “www,” or “yoursitename.” Check with your hosting provider if you’re unsure.
- If you don’t see the .maintenance file, confirm that Force showing hidden files is enabled in the Server menu.
- Find the .maintenance file in the root folder and delete it.
- If the file still appears to be there, click on the Refresh the file and folder list button.
- Access your site from an incognito window to ensure that the problem is fixed.
How do I fix my WordPress website if an update won’t finish?
WordPress updates that won’t finish are most common on inexpensive shared hosting plans. Shared hosting means that your site shares resources with other sites on the same server. Shared servers are often overcrowded and, as sites grow, they start pulling resources from each other. This can cause problems when you’re performing resource-intensive operations on your website like updating multiple plugins at once.
If your update won’t finish or your site has become unresponsive, you should ensure that your update is actually stuck by opening the Plugins panel in a new tab. Sometimes you’ll see that the update did complete, but the server hasn’t changed the information in the WordPress dashboard. If that isn’t the case, give it a little more time and repeat the process to see if the update is unstuck.
If that doesn’t work and you were attempting to update multiple plugins at once, try updating each plugin one-by-one. This way, you’ll put less strain on the overloaded server, making it more likely to complete the update without issues. You’ll also be able to identify if there’s a particular update causing problems so you can repair, disable, or replace it if it still doesn’t work.
What do I do when a theme or plugin update is incomplete?
Sometimes it seems as if the update is finished, but some files are missing. This issue can break your website and is usually caused by incorrect file permissions or an interrupted update process.
If this happens, the easiest thing to do is to replace the incomplete upload manually via SFTP.
This guide will walk you through replacing plugin files, but the process is exactly the same for themes, except you would upload your theme files to the /themes folder vs the /plugins folder.
- Download the plugin you want to fix from WordPress.org or the developer you purchased your plugin from.
- Log in to your SFTP client or cPanel, and locate the plugin folder in /wp-content/plugins.
- Find the plugin you want to reinstall, right-click on its folder, and rename it to something like “exampleplugin_v1.” Then, download that renamed folder to your computer. We’ll use this one as a backup if anything goes wrong later.
- Once you’ve downloaded the folder, right-click on it and delete it.
- Log back in to your WordPress dashboard and view the list of plugins. The one you just deleted should be marked in red as unavailable.
- Go back to your FTP client, access your local file list (your computer), and find the folder where you extracted the plugin that you want to install.
- Make sure the destination folder on the remote site (right side of the SFTP window) is /wp-content/plugins. Right-click that folder and select Upload. You can also drag the folder from your local file list to the destination folder to upload your plugin.
- Once the process finishes, go back to your WordPress dashboard, where you’ll find your new plugin.
- Click on the blue Activate button. The issues from the previous incomplete install should be fixed and your site should work again.
How do I fix the “white screen of death” on WordPress?
First, if you update a single plugin or theme and get a blank or white screen after trying to access your site, you should try the steps outlined in the previous section and make sure your plugin or theme is installed correctly.
If it’s installed correctly but still doesn’t work, disabling or deleting the plugin or theme should fix the issue. It’s important to note that when deleting a plugin via SFTP, the plugin’s data will not be removed from the database. If, however, you delete the plugin using the WordPress dashboard, you’ll very likely lose all data and settings associated with that plugin.
Of course, if you want to continue using this theme or plugin, you’ll want to troubleshoot where the exact issue lies. The plugin or theme update that prompted the fatal error could instead be a conflict with an older plugin on your site that hasn’t been well maintained. It could also be an issue with the updated WordPress plugin or theme itself. The only way to know for sure is to run the following tests:
If you can still access your WordPress Dashboard:
–
1. Disable all plugins and switch to a default WordPress theme like Twenty Twenty-One
If you can access your WordPress dashboard, deactivating all of your plugins is simple:
- Go to the Plugins tab
- Click on the Plugin checkbox in the upper left corner of the list. This will select all plugins.
- Click on the Bulk action menu button, select Deactivate and then Apply.
To switch to a default theme, go to Appearance → Themes. Activate one of the WordPress default themes like Twenty Twenty-One.
Once you’ve disabled all your plugins and reverted to a default theme, use an incognito window to try accessing your website. It should open normally now.
If that isn’t the case, you may need to reinstall WordPress or reach out to your hosting provider for help. If the site is working normally, then either the plugins or the theme are the issue.
2. Enable your theme and other plugins one-by-one until the white screen of death comes up again
Go back to the Plugins tab and start enabling them one-by-one. Make sure that you refresh your site several times from the incognito window each time you activate a plugin. The idea is to find the plugin that causes your site to break, showing the white screen of death. Then you’ll know which one caused the issue.
If activating a plugin with a default theme enabled causes the white screen of death, then you know the plugin you just activated is the culprit. You can now roll back to a previous version and wait for an update that fixes the issue or find a new plugin to replace it with.
If you’ve activated all plugins with no errors and your site is functioning normally, then the issue is probably the theme. Enable your theme and check in an incognito window to see if you get the white screen of death again. If you updated your theme and various plugins on your site simultaneously, you won’t be able to know for sure whether it’s an issue with the theme itself or an issue specific to the interaction of the theme and another plugin. The next thing to do is test whether the theme or a plugin is really to blame.
3. Test your theme with your plugins
With your theme active, go back to the Plugins tab and disable them all again, then enable them one-by-one. If the error only occurs when both a particular plugin and your theme are active, it means that one is causing a conflict with the other and they’re no longer compatible. Try rolling each back to their previous versions and then updating them one at a time. Whichever one causes the white screen of death is the problematic update.
Once you find the plugin or theme that isn’t working correctly, you can choose to roll back to a previous version, disable it until it gets another update, or replace it with an alternative that works.
If you can’t access your WordPress Dashboard:
–
1. Disable all plugins and switch to a default WordPress theme like Twenty Twenty-One using SFTP or cPanel
If you can’t access your WordPress dashboard after an update and all you see is the white screen of death, you’ll need to deactivate your plugins via SFTP or cPanel. Even if you can access your dashboard, some people may find the SFTP or cPanel method preferable.
- Log in to your cPanel or SFTP client.
- Locate the /plugins folder in /wp-content.
- Right-click and rename it to something like /plugins1, then save your changes if in cPanel.
- If you don’t see your changes, click on the Refresh the file and folder list button.
- Locate the /themes folder in /wp-content.
- If you have a default theme installed and available, you can activate it by deactivating your current theme. To deactivate your current theme, simply rename the folder to something like “yourtheme_v1.”
Visit your site from an incognito window — if it works, you know that either one of your plugins or the theme is the issue. If it doesn’t work and you’re still getting a blank screen or other errors, you may need to reinstall WordPress or reach out to your hosting provider for help.
2. Rename your plugins folder back to /plugins and rename your theme folder back to “yourtheme”
If your site is now accessible, it’s time to start testing your theme and plugins. Before you can do that, you’ll need to rename the folders back to their original names so that WordPress can display them in the dashboard.
In cPanel or your SFTP client, find the folder you just renamed to /plugins1, and change its name back to /plugins. Then find your theme folder and name it back to its original name. This will not activate the theme or plugins. They will be accessible in the WordPress dashboard, but inactive.
Now that you can access your WordPress dashboard, complete the steps outlined in the above section titled, If you can still access your WordPress Dashboard.
Note: Instead of disabling all plugins at once, you can also go through the /wp-content/plugins folder and manually rename each of the plugins folders one by one until you find the one that was the issue. This will take more time, but it might be the only available solution if you still can’t access the WordPress dashboard after deleting all plugins at once through SFTP/cPanel.
How do I fix error messages after WordPress updates?
Plugins and themes aren’t the only culprits that can cause errors and break your website — core updates can cause issues, too.
When a core WordPress update causes your site to break or have unacceptable errors, the best course of action you can take is to roll back your WordPress to a previous version.
How to downgrade to an older version of WordPress
- Deactivate all of your plugins through the WordPress dashboard or via SFTP or cPanel.
- Download the older version of WordPress you want to downgrade to and extract the files.
- Delete the /wp-content folder and wp-config.php files from the older version. You do not want to overwrite these on your site.
- Log in to your SFTP client or cPanel. In your root folder, usually named public_html, locate and delete the /wp-admin and /wp-includes directories.
- Find the folder where you extracted the files on your local machine (left side of your SFTP app), and double check that you’ve deleted the /wp-content folder and wp-config.php file from the older version of WordPress that you downloaded. This is very important. Drag the contents of the folder over to your root directory. Once you start the upload process, the client will ask you what to do with existing files. You should select the Overwrite option.
- Log back into your WordPress dashboard. There, you may see a message that asks you to update your WordPress database — do this.
- After that, you should be able to log into your site normally, but this time you’re using the older version of WordPress. If the issue was in the latest core update, your site should work normally now.
What to do when a PHP update breaks your website
Upgrading PHP to the latest version your host supports will improve site performance, but it can also cause incompatibility. While your host might allow for a higher version of PHP, your theme or plugins may not — and that’s a problem. If your site breaks down after upgrading your PHP version, you should roll it back and start troubleshooting your PHP update to see what caused the conflict.
These instructions are for cPanel-based hosts. If your host doesn’t offer cPanel, then your hosting provider should be able to help with downgrading your PHP version. Make sure to take a backup before making these changes.
- Log in to cPanel.
- Scroll down to Software and click MultiPHP Manager.
- Select your domain name and use the dropdown to select the new PHP version.
- Click Apply to save the changes.
- Open an incognito window and check your website for any errors.
If you’re unsure how to revert PHP back to a previous version, contact your host. They can usually do this for you or direct you to documentation specific to their platform.
How do I avoid site downtime caused by WordPress update errors?
Dealing with the most common WordPress errors caused by updates isn’t extremely difficult. But it sure is annoying. Even if you know what to do, pulling it off requires time and resources. And until you fix the issue, your site will either remain unavailable or be full of errors.
Fortunately, there are things you can do to avoid or minimize site downtime due to update errors.
1. Use a staging environment
Setting up a WordPress staging website is one of the best ways to ensure that everything works as intended when you plan to make an update.
A staging site is essentially a clone of your live website on a different URL. When a new WordPress core update, plugin, or theme is released, you can install and try it in your staging environment first, before you install the update in a live production environment.
If there are any errors or incompatibilities, your staging site will usually show them. It will also serve as a test site where you can apply solutions without worrying about disrupting your actual site’s functionality as you deactivate themes and plugins during the troubleshooting process. After you figure out what went wrong, you can move forward with pushing the updates to your live site.
Meanwhile, your user-facing site will remain fully operational throughout the entire process. Visitors, potential clients, and customers can access it as usual.
2. Update your site regularly
One of the reasons you might encounter an issue is because you’ve been skipping updates. Skipping WordPress core updates is a big problem, but issues can also arise when ignoring theme and plugin updates, too.
If you skip an update or two, the changes are going to be more drastic when you upgrade to the newest version. This can make incompatibility issues more likely, more widespread, and more difficult to troubleshoot.
Make sure to either enable automatic updates or visit your dashboard frequently to manually update everything whenever something new is available.
One more tip — if you perform manual updates, try to do them one by one and check how your site works between each update. That way, you will know which update caused issues, making it easier to find the solution and fix later.
Frequently asked questions
Why do WordPress updates break websites?
WordPress updates can break your site when its different parts stop working together correctly. Your website has three main parts: WordPress itself, your plugins, and your theme. An update to one part can create a problem with another if they are not built to work with the new changes.
This happens most often when a plugin is not ready for a new version of WordPress. Another common reason is a mismatch with the PHP version on your web server, which is the coding language that powers WordPress.
What is the fastest way to find which plugin broke my site?
The fastest way to find the problem plugin is to check your website’s error log. You can turn on this log by editing your wp-config.php file and adding a line of code: define( ‘WP_DEBUG_LOG’, true );.
After you do this, WordPress will create a debug.log file in your /wp-content/ folder. This file records all errors. The last few lines will almost always contain a “Fatal error” message that names the exact plugin folder and file that caused your website to crash.
Can I prevent my site from breaking during an update?
Yes, you can greatly lower the risk of an update breaking your site. The best method is to test updates on a staging site first. A staging site is a private copy of your website where you can safely test changes without affecting your live site.
Additionally, having an automatic, real-time backup plugin like VaultPress Backup is critical. If an update does cause a problem on your live site, a backup allows you to restore the previous working version in just a few minutes, giving you time to fix the issue properly.
What is the ‘white screen of death’ and what usually causes it?
The ‘white screen of death’ is a blank white screen that appears where your website should be. It happens when a critical PHP error prevents WordPress from loading any content at all.
The most frequent causes are plugin conflicts and theme conflicts. This happens when code in one plugin is incompatible with another plugin or with the WordPress core files. It can also be caused by running out of memory on your server. Enabling the debug log is the best way to see the specific error causing the white screen.
Is it safe to edit the wp-config.php file?
Yes, it is safe to edit the wp-config.php file if you are careful. This file contains your website’s base configuration details. You should always make a backup of the file before making any changes.
The safest way to edit it is by using an FTP client or the File Manager in your hosting control panel. When adding debug code, copy and paste the exact lines provided in guides to avoid syntax errors. Make sure you place the code above the /* That’s all, stop editing! */ line.
How do I fix my site if I am locked out of the wp-admin area?
If you are locked out of your admin dashboard, you must use SFTP or your host’s File Manager to fix the site. The most common solution is to disable your plugins.
To do this, log in to your server and navigate to the wp-content folder. Find the folder named plugins and rename it to something like plugins_old. This deactivates all plugins, which should allow you to log in to wp-admin. Once you are in, rename the folder back to plugins and reactivate your plugins one by one until you find the one causing the lockout.
Can I undo or roll back a WordPress update?
Yes, you can roll back a WordPress update, but the best way to do it is by restoring a backup. A full website backup includes your files and your database, allowing you to return the site to the exact state it was in before the update.
While there are plugins that can help you downgrade a WordPress core, plugin, or theme version, this can sometimes cause new issues. Restoring from a known good backup is the safest and most reliable method for reversing an update that has broken your site.
What should I do with the information in the debug.log file?
The debug.log file gives you the direct answer to what broke your site. Open the file and look at the last few lines for a “Fatal error” message. This message will contain a file path, for example: /public_html/wp-content/plugins/some-plugin/some-file.php. This path tells you that the plugin named “some-plugin” is the source of the problem.
With this information, you can go directly to that plugin’s folder via SFTP and delete it or rename it to fix the crash. You no longer have to guess which plugin is the problem.
How do I safely get out of ‘stuck in maintenance mode’?
If your site is stuck on the “Briefly unavailable for scheduled maintenance” screen, it means a file was not removed correctly after an update. To fix this, connect to your website’s server using SFTP or a File Manager.
Look in the main root folder of your WordPress installation. You will find a file named .maintenance. To get your site back online, you simply need to delete this file. Your site will immediately become available again. This issue happens when an update process is interrupted and fails to clean up after itself.
How does using a staging site help prevent these problems?
A staging site provides a safe, private environment to test all updates. It is an exact clone of your live website. Before you update plugins, themes, or WordPress on your public site, you perform the updates on the staging site first.
If an update breaks the staging site, you can investigate and fix the problem there without any of your visitors knowing. Once you confirm that all updates work correctly on the staging site, you can then perform the same updates on your live site with confidence, knowing they will not cause a crash.
What is the best way to protect my WordPress website from update errors?
While using staging sites and updating everything regularly is great, you can still face issues and headaches. Keeping regular backups of your site allows you to quickly restore it to its previously functioning state. Backups also protect your site in case of other issues like hacks and errors.
While you can make backups manually, this process is tedious and time-consuming. Your hosting provider may offer backups, but they may not be as frequent or stretch as far back as you need. Fortunately, there’s one super simple solution that offers you complete, granular control — Jetpack Backup.
When you implement real-time backups with Jetpack, you don’t need to worry about update conflicts keeping your website offline. If an update breaks your site, you can revert all the changes through Jetpack in a couple of clicks, without needing to call your hosting provider.
Restoring a site backup through Jetpack will quickly get your site back online. And you’ll have plenty of time to figure out what’s causing the problems on your site without any stress or pressure.
