Does your agency handle multiple clients, and as a result, multiple websites? Managing plenty of sites can be time-consuming. For example, setting up Jetpack alone — an essential step in making a website more functional and secure — isn’t exactly simple.
Thankfully, there’s now a way to streamline the process of configuring a site for each client you serve. You can just do the initial setup for one website and just deploy the same configuration across all the other sites you will make, thanks to InstaWP. This not only makes the repetitive task faster but also ensures consistency in all your projects.
In this post, we’ll show you how to do exactly just that.
Why install Jetpack?

You might be wondering why you should install Jetpack in the first place when setting up a site. Well, Jetpack provides a variety of features for WordPress sites, such as better site security and site performance, as well as backups. You don’t have to turn on everything — Jetpack offers plugins that allow you to install only what you want and need.
Ultimately, it really depends on you and/or your client. But it is highly recommended if you want to improve your site’s security, performance, and speed. Jetpack can help you attract more traffic.
The question is, how do you make sure that you only set up Jetpack once and just copy your settings to every website you make? This is where InstaWP comes in with its test site/sandbox feature.
What is InstaWP, and why use it?

InstaWP is a tool to create a WordPress Sandbox Environment. It lets you spin a test environment for your website in a few seconds. You can use it to make a completely new test website or a clone of your current website and test out plugins and configurations. You’ll get to do this all without affecting your original website’s settings and without fear of breaking your site!
Plus, you don’t have to worry about things like your local storage, setting up DB, or even using a third party paid cloud hosting service. InstaWP handles all that, even with their free plan. And you can also use InstaWP in various ways, like building sites for your clients or developing and testing WordPress sites and products.
But one of the best features of InstaWP is the ability to create a website template with your preferred themes, plugins, and settings. That means you no longer have to do time-consuming setups for each new website you make. Instead, you can make one website as a base and start from there.
How do you use InstaWP to generate a test WordPress site?
Go to InstaWP and sign up for an account. Alternatively, use this link for quick onboarding.
Once you sign in, you will see this screen:

Click Add New + or + New Site to make this pop-up menu appear:

You can customize your WP version, PHP version, and site configuration, whether you want your website to be a default WordPress site, a WooCommerce site, or a multisite. When you’re done, press the Create Site button.
This screen will appear:

Click on the Magic Login button. It will take you to your WordPress test site instantly.
How do you install the Jetpack Plugin on your InstaWP test site?
When you have a test site ready, install the Jetpack plugin by following any of these procedures.
Via the test website dashboard
From your Dashboard, hove over Plugins and click Add New. On the next screen, type Jetpack in the search bar.

When you see Jetpack, press Install Now.

After installation, don’t forget to press the Activate button.

Once you activate the plugin, the Jetpack button will appear on your dashboard menu. Set it up according to your preferences.

Via InstaWP’s Chrome Extension
If you have the InstaWP Chrome Extension, an InstaWP account, and a ready test site, follow these steps.
On WordPress, hover your cursor over the Download & Extend section then click Plugins.

Input Jetpack in the white section next to the magnifying glass, then click on it when it appears.

You’ll see this appear on the next screen:

Click Launch to install it on your current test website on InstaWP.
If you have two or more test websites on your InstaWP account, click the arrow on the right of the button. That will make a dropdown menu appear. You can then choose the site for plugin installation.

A check will appear if you have installed Jetpack successfully.

And when you go to your test site, the Jetpack button will be on the left-hand menu:

What features of Jetpack should you activate?
As mentioned earlier, Jetpack has plenty of features that will benefit your website and keep it safe, but you don’t have to turn them all on. If you feel confused about what to activate, here are some of our recommendations:
- Brute Force Attack Protection – This feature will protect your site from brute force attacks when a hacker tries to guess your login credentials by repeatedly using diverse username-password pairs until they succeed. If a hacker ever attacks your site, Brute Force Attack Protection will limit the number of login attempts from the hacker’s IP address. And if the hacker keeps trying, the feature will temporarily block that IP address so that no new attempts can be made.
- Downtime Monitoring – With this feature, Jetpack will continuously monitor your site and let you know if any downtime is detected. You’ll get notified via email.
- Jetpack Scan – Anything that involves security, you can now view it in one location. You can also fix problems and restore backups. You’ll be notified via email.
- VaultPress Backup – Whatever changes you make on your website, you can save them. And if your site gets broken for whatever reason, you can restore the original site in one click, even if you’re offline.
- Activity Log – Get a complete record of everything that happens on your website. This is especially important if you have a team with multiple people working on it. This is a clear way to monitor changes and remove the guesswork from the equation.
What if you prefer using Jetpack CLI?
Jetpack CLI is a command-line interface (CLI) tool for managing and deploying WordPress sites when you use Jetpack. It is used to make WP-CLI feature-rich and powerful.
You can configure Jetpack offline to your preference from the command line, making it easier to automate tasks and streamline your workflow.
The question is, what if you want to edit Jetpack using this option? Is it possible with InstaWP? Yes – you can access InstaWP using SSH, and from there, access Jetpack CLI.
You first need to go to the rightmost part of your test website and press the three-dot menu.

A drop-down menu will appear. Scroll down and click on the SFTP/SSH option.

On the next screen, make sure to enable SSH and follow the instructions.

Once this is set up, you can run Jetpack CLI commands like the example below.

Whatever changes you make here will be carried out on the InstaWP test site, such as:
- wp jetpack disconnect – Disconnect Jetpack from WordPress.com, or unlink any user’s account from their WordPress.com connection.
- Use wp jetpack disconnect blog to disconnect Jetpack from WordPress
- Use wp jetpack disconnect user <id|email|username> to unlink a user account from WordPress
- wp jetpack reset – This command resets the Jetpack environment and brings it back to the starting default states. You can either reset all current options or simply revert to default active module settings.
- Use wp jetpack reset modules to return modules to their default active state
- Use wp jetpack reset options to go to the very initial Jetpack settings that you find upon getting started with it. This also resets all modules to default.
- wp jetpack options – This command is for you to manage various available options. List them, their values, fetch separate option values, and update or delete them.
- Use wp jetpack options list to get all your options and their values related to the Jetpack configuration
- Use wp jetpack options get <option_name> to fetch a specific option’s value.
- Use wp jetpack options update <option_name> <option_value> to update an option’s current value to a new value. Take note that it only works for strings.
- Use wp jetpack options delete <option_name> to delete any option – but only ones that are not important for keeping you connected with WordPress.com.
Template Creation With Pre-Configured Jetpack Settings
When you’re done setting up your Jetpack on the test site, here’s what you do next. At InstaWP, click on Templates.

Click Add New + or the + Add Template.

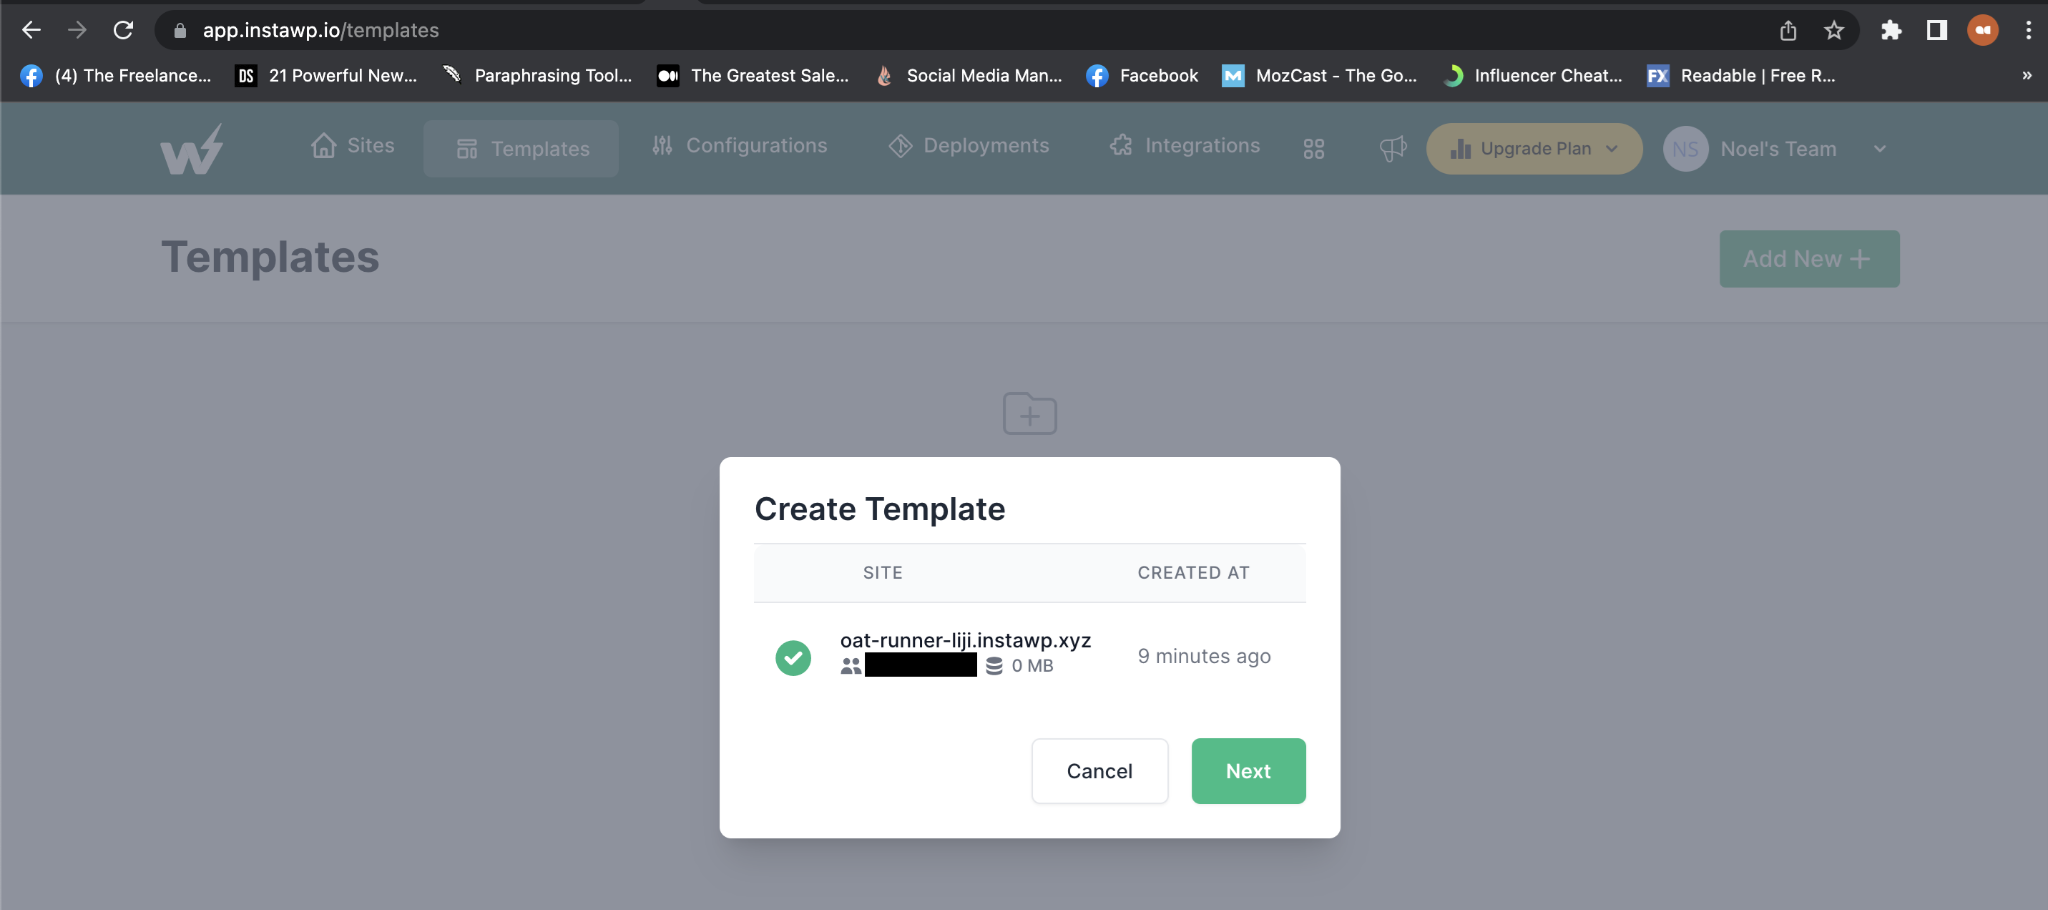
When this popup appears, click on your created site, then Next.

You’ll see this next:

Name your template, describe it, and set it as a shared or private template. Since you’ll be doing this template for your agency, making it a shared one might be better.
Using this template to make an entirely new site
Return to the Sites page and hit the Add New + button.

Instead of making a blank website and starting over, click From Template. You’ll see your freshly-made template.

Select it, then press Create Site. InstaWP will make a site based on the template. The settings you configured on Jetpack earlier will be there. Do this whenever you need to create different websites with the same settings for your convenience.
Take The Website Live
The great thing about InstaWP is that you can make many different websites from a template and take all those websites live if you want to. Go to your Sites page, look for the site you want to make live, click the three vertical dots adjacent to this site’s name. Select Migrate:

Choose the hosting server you prefer. InstaWP can migrate to the following hosts:

Enter the important details and sit back, as InstaWP will handle the entire process. Read this comprehensive checklist before you go live, though, to have a launch, as smooth as possible.
Conclusion
To sum things up, installing Jetpack on any WordPress site you plan to make is recommended because of its many benefits. And by using InstaWP, you only need to configure Jetpack once and deploy it across all your sites, and you’ll save valuable time and resources.
By doing so, you’ll not only have more protected and more efficient websites, you’ll have a better workflow and get to focus on delivering top-quality sites for your clients.
Sign up at InstaWP today to get started.
