
Updating a WordPress website can be more complicated than you’d think. Usually, publishing a new page or post isn’t a problem. But if you’re updating WordPress components or making major design or functionality changes, you run the risk of breaking your website. The best way to avoid this problem is by using a staging site.
With a WordPress staging site, you get a safe environment where you can test any changes you want to make. Once you’re satisfied that everything is working correctly, you can then move (or ‘push’) those changes from the staging website to a live environment.
In this guide, we’re going to break down what staging sites are and how they work. We’ll then discuss the pros and cons of using a staging environment, and show you how to create your own.
What is a WordPress staging site?
The concept of a WordPress staging website is simple: you make a copy of your site and use that to test any changes you want to make. Fortunately, your staging website isn’t accessible to the public. This means that any updates won’t be reflected on the original website until you decide to ‘push’ those changes.
‘Pushing to production’ is a software development term that means moving a project from its testing environment to a public one. After you push your staging site to production, visitors will be able to see the updates you made.
Sometimes, updating plugins, themes, or WordPress itself can lead to issues throughout your website. The goal of using a staging website is to help you prevent those situations — you get the chance to make changes in a risk-free environment.
Additionally, if an update causes an error, you can troubleshoot and then push the corrected site to production. Your visitors will be none the wiser. While not every WordPress website uses staging environments, we highly recommend taking advantage of this tool.
How to set up a WordPress staging site
There are several ways to create a WordPress staging website. In this section, we’re going to walk you through each of them, starting with the most straightforward options and then moving to the more involved, manual approaches.
| Method | Ease of Use | Cost | Best For |
| Hosting Provider | Easy | Usually included with managed hosting | Beginners and those who want a seamless workflow with their host. |
| Plugin | Easy | Free to premium | Users on shared hosting or those who want more control and convenience. |
| Local Environment | Moderate | Free | Developers who want an offline testing environment. |
| Manual Setup | Difficult | Free | Experienced users on a tight budget. |
1. Create a staging website with your hosting provider
Some hosting providers offer built-in staging functionalities. It’s a common feature, and a major selling point for managed WordPress web hosts, in particular. Here are some WordPress-friendly web hosts that offer staging functionality:
- Pressable: WordPress hosting from WordPress experts at Automattic, the creators of WordPress.com. All plans come with staging functionality.
- Bluehost: Bluehost’s staging tools are available with their managed WordPress hosting plans.
- InstaWP Live: A WordPress-optimized hosting service provided by the InstaWP platform, which is specifically designed for WordPress staging and has various advanced development tools to speed up your workflows.
- SiteGround: This web host offers budget-friendly managed WordPress hosting plans on the market, all of which include staging tools.
- Kinsta: This is a WordPress web hosting service geared towards sites that require high performance. All of its plans include staging tools.
- Flywheel: This WordPress web host is a great option for agencies and it enables you to create staging sites with ease.
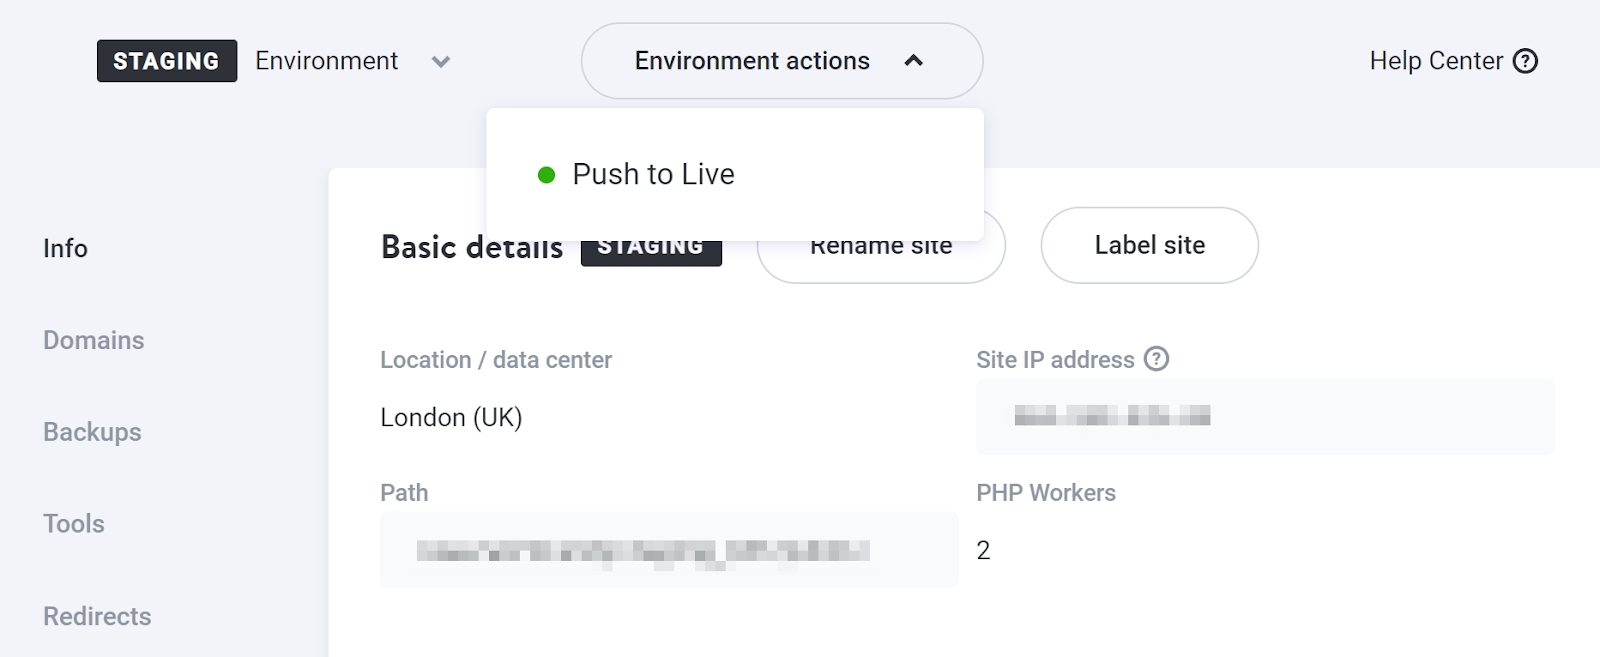
It’s also important to note that each web host implements staging tools differently. To give you an example, Kinsta enables you to select any website and switch between live and staging environments.
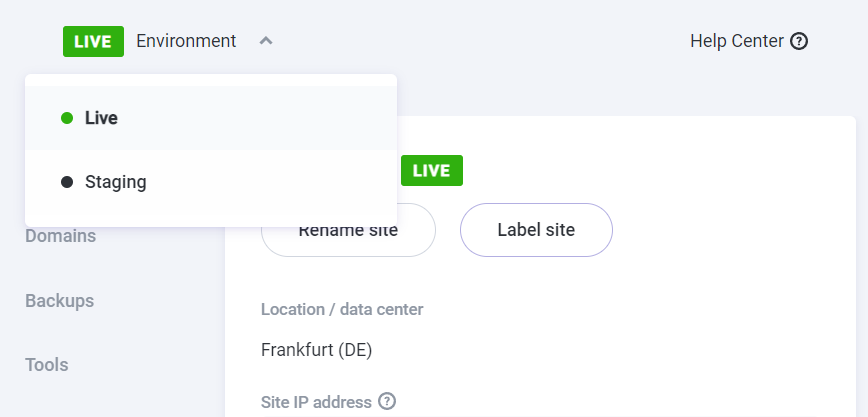
When you switch to staging, Kinsta will automatically set up a new environment for you. In other words, it’ll create a full copy of your website for you to make changes to.
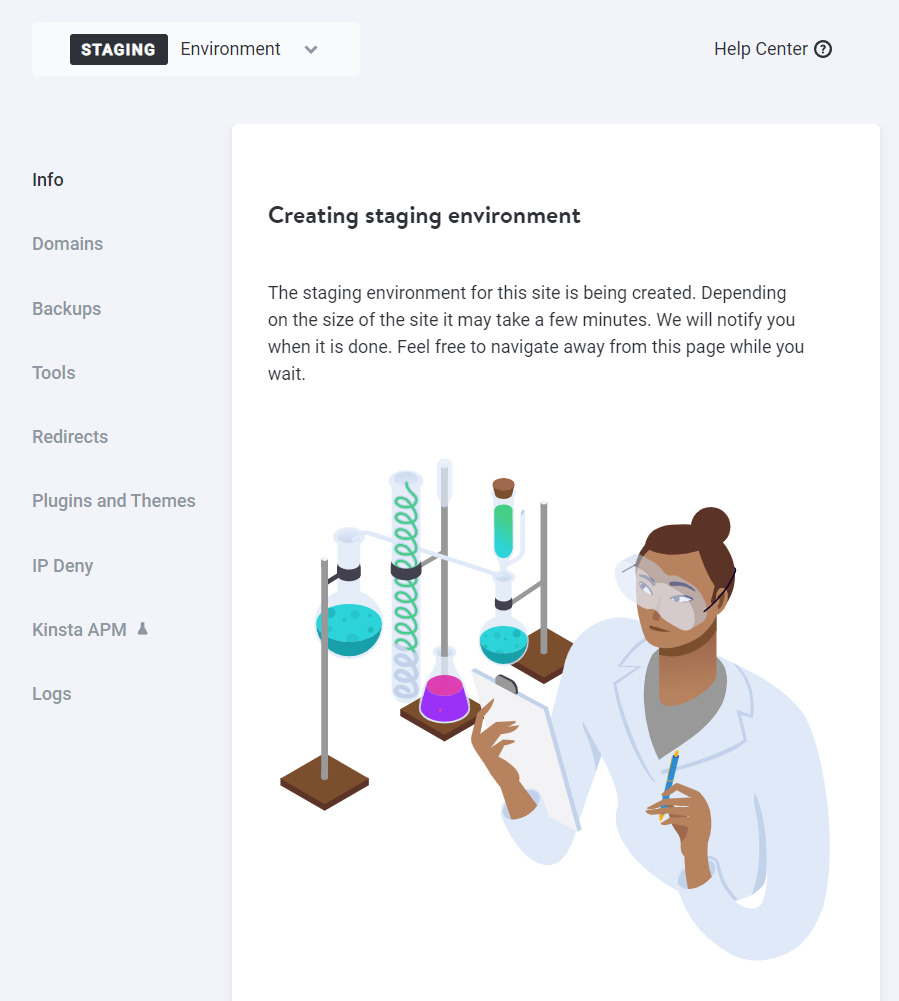
Once the staging environment is set up, you can access it just as you would your regular website. When you’re ready to push updates to production, you can do so from your hosting control panel.
Overall, if you choose any of the web hosts that we mentioned above, you should have an easy time creating staging websites. The best web host for you will depend on the type of plan you need, the price, and the user interface.
2. Use a WordPress staging plugin (or a backup plugin)
A lot of popular WordPress backup plugins also enable you to create staging copies of your website. To show you how these plugins typically work, we’re going to walk you through the process of creating a staging site and pushing it to production using WP Staging.
Since you can create multiple staging copies of your site using subdirectories, this plugin can work with any host. First you’ll need to install and activate the plugin. Then, you can jump right in and create a staging copy of your site.
To do so, simply navigate to your WordPress dashboard, then go to WP Staging → Staging Sites. Next, click on Create New Staging Site.
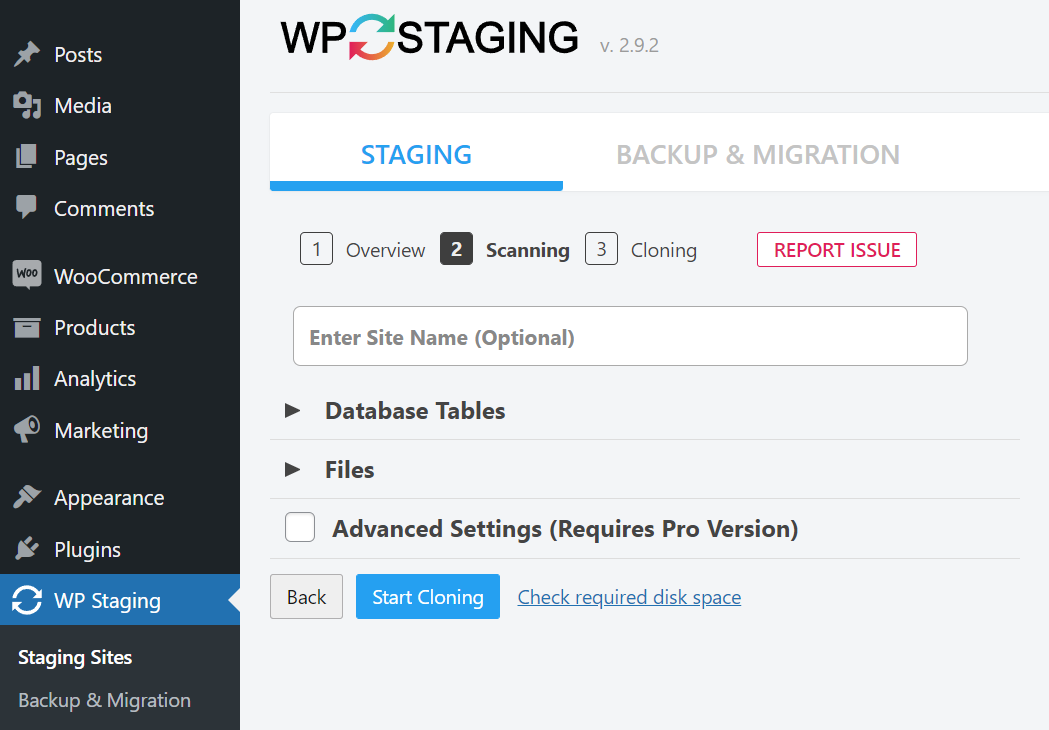
The plugin will ask you what parts of the database to clone, as well as which files the staging website should include. By default, the plugin will select everything. That way, you get a carbon copy of the website for staging purposes — we recommend that you keep these default selections.
Then click on Start Cloning, and WP Staging will show a command line interface where it’ll display progress as it creates the staging website.
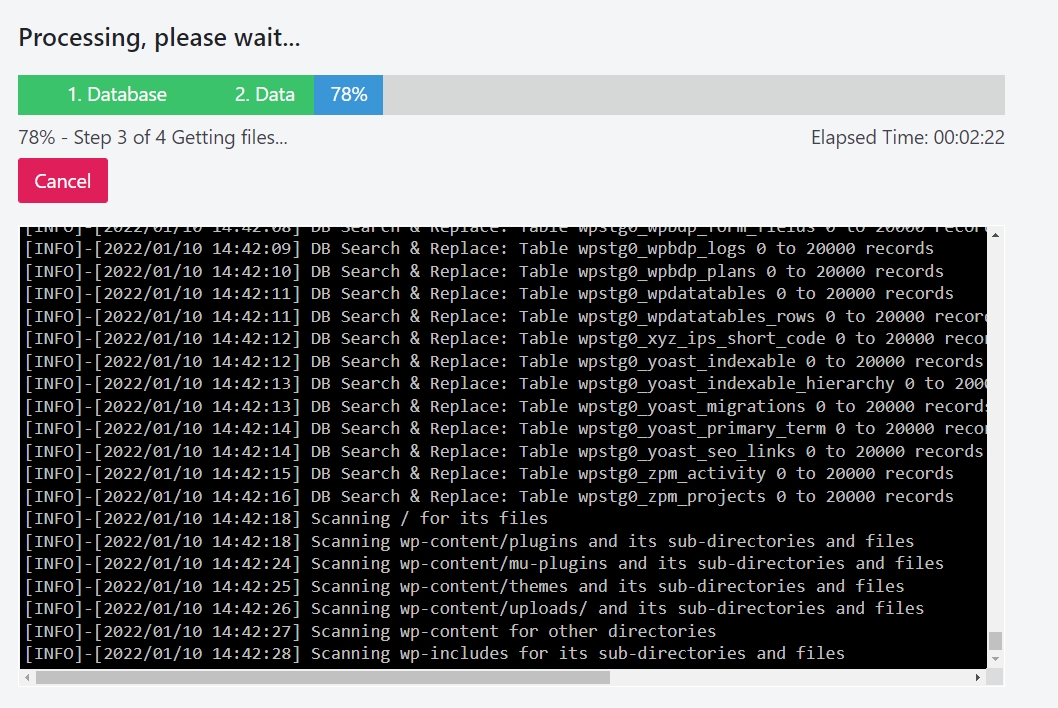
When the process is complete, the plugin will display instructions on how to access the staging site. Follow those steps.
Once you log in, you’ll see a branded WP Staging page instead of the regular WordPress login form. Note that any administrator account can access the staging copy of the website using their credentials.

When you’re ready to push the changes that you’ve made, you can return to the original website and go to WP Staging → Staging Sites. You’ll see a list of any staging websites that you’ve created, each with a drop-down menu including options for deleting it, copying it, or pushing it to production.
If you’re not using a dedicated staging solution, you can still create a staging site using a backup plugin like Jetpack Backup.
To do this, you’ll need to create a full backup of your website and import it to a local environment or a subdirectory/subdomain with your web host. Once you import the backup, you’ll have a fully working copy of your original site in an environment where you can run tests.
You can then make any changes that you need and create a copy. This will be a new backup with those updates included.
At this stage, you can use your backup plugin to import the new copy to the original website. This will override all of your existing content, which works out the same as pushing a staging site to production.
While this process may get the job done, it requires lots of extra work. So if you know you want to use staging functionality on a regular basis, it might be worth your time to choose a staging-specific plugin or a web host that offers built-in tools.
3. Use a local WordPress staging environment
There are a lot of ways to set up local WordPress websites. Some managed web hosts go as far as to offer dedicated tools for creating local WordPress environments. Two great options are DevKinsta and Studio by WordPress.com.
These tools are perfect for staging websites if you have access to full backups. That means you may still need a WordPress backup plugin in conjunction with them.
While the process will vary somewhat depending on your chosen tool, you’ll start by creating a backup of your live site and importing it into a local environment. Note that you’ll also need to install the same backup plugin on both sites.
After importing a backup to your local website, you can use it as a staging environment. Then, when you’re ready to push the changes to production, you usually have two options.
The first is to create a full backup of the local website and import it to your live site (as we did in Method Two). Alternatively, you may be able to push the site directly to production through your local WordPress development tool, depending on which web host you use.
If you’re a paying user of Kinsta, these local development tools become full-blown staging tools. Therefore, they’ll likely give you the option to push your site live, allowing you to skip the manual backup.
4. Create a WordPress staging site manually
If you don’t want to pay for staging functionality, you can always create an environment manually. To do so, you’ll need to set up a subdomain or a subdirectory through your web host, install WordPress on it, and import a full copy of your website. Once the copy is up and running, you can use it as a staging environment.
The process of creating a subdomain or a subdirectory will vary depending on your web host. If you use shared hosting, you probably have access to a cPanel account. In that case, you can go to Domains → Subdomains and create a new directory.

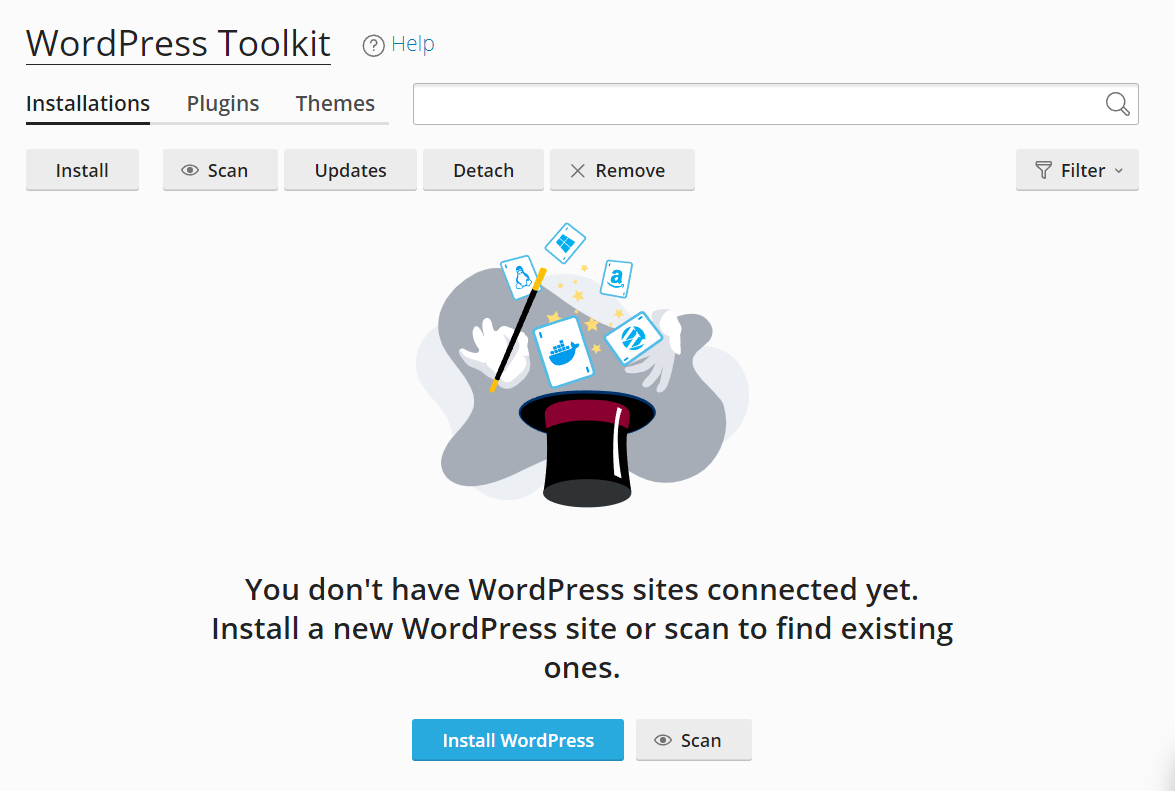
Next, check cPanel to see what options it offers for installing WordPress. Typically, you’ll have access to Softaculous or the WordPress Toolkit. Both options enable you to install WordPress using an intuitive setup wizard.
After installation, you can import a full backup of your live website. The subdomain or subdirectory may be accessible by the public, but that shouldn’t be a problem unless you share the address.
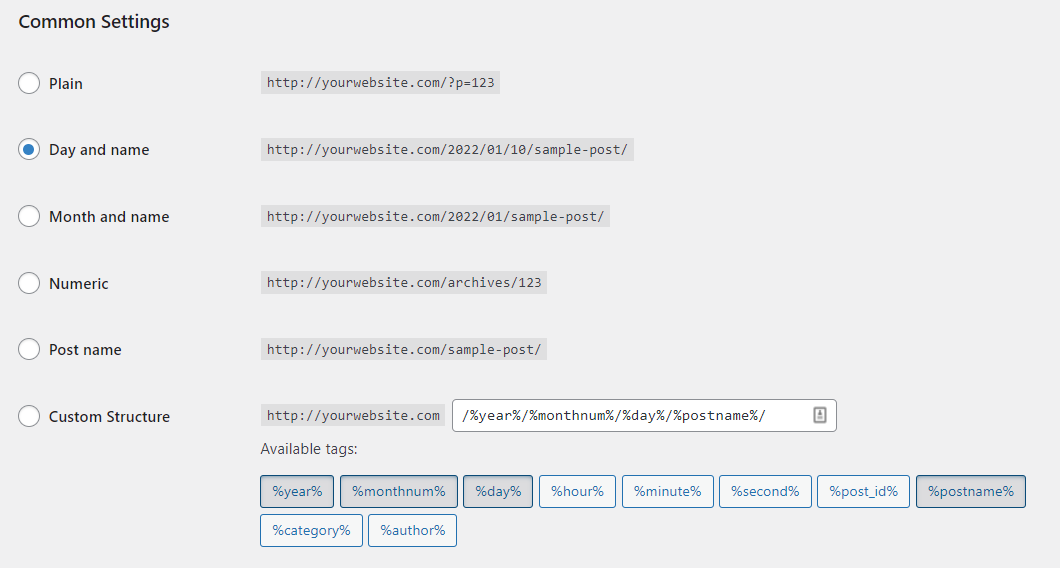
Additionally, you’ll need to remember to update your staging site’s permalink structure so it matches that of your live site. To do so, go to Settings → Permalinks and select the structure that matches your original site’s.
To make your life easier, we also recommend that you discourage search engines from crawling the staging website. That way, you’ll avoid potential penalties for duplicate content, and having users find the staging website through results pages.
You can do this by going to Settings → Reading and clicking on the option that says Discourage search engines from indexing this site.

Once you’re done using the staging environment, you’ll need to create a backup and import it to your live website. Then you can go ahead and either delete the staging subdirectory/domain or leave it for the next time you need it.
What to do after you push from staging to a live environment
You may run into the following issues when pushing from a staging to a live or production environment:
- Not all content transitioned over
- Specific parts of your website are not working
- The website is inaccessible
In most cases, any errors you encounter after pushing from staging to production are caused by the failure to do a complete overwrite. If you’re importing a backup, it needs to include both your WordPress site’s database and all WordPress files so that it completely replaces your existing installation.
Unfortunately, some web hosts struggle when it comes to importing large files, which can cause problems if you set up staging websites manually. So if you run into an error while importing a backup, you’ll need to start again from scratch to ensure that you’re not missing any key files.
Even if you don’t encounter any issues while pushing from staging to production, it’s still a good idea to give your website a full checkup when the process is finished. You’ll want to make sure links are working, every page loads correctly, and key features still function properly. If everything looks good, you can put away the staging website until the next time you need it.
What are the differences between a WordPress staging site and a test site?
Typically, all new software goes through multiple stages before you see a finished product. These stages include:
- Development
- Quality assessment
- Staging
- Production
In web development, this means that staging websites are almost ready for publishing. If you’re using a staging environment, you likely already have a live site, and you’re using that environment to test minor changes.
A test website, on the other hand, is a blank canvas that you use to test completely new designs or functionality to see how they operate. Typically, when developers are working on a website, they use a staging environment to test small pre-approved changes or updates to ensure they work before pushing them to the live world.
This might sound like a complicated process. Still, if you’re running a WordPress website for your business, it’s essential that you try and minimize any errors that can affect the user experience.
The bottom line is that any time you make significant changes to your website, you run the risk of coming across errors. If you have a dedicated testing and staging process in place, you can greatly reduce those risks.
The pros of creating a staging site for WordPress
You might assume that there are very few downsides to using a WordPress staging website. But if you’ve never used one before, you should know that it can be a bit complicated. So before we talk about how to create a staging environment, let’s go over the pros and cons of using one. Here are the pros of a staging site:
1. You can update WordPress safely
If you’ve been using a Content Management System (CMS) for a while, you might have encountered situations where running updates caused errors on your website. Those errors usually show up due to compatibility issues, and can be a big source of headaches. This is especially true if your website relies on a specific plugin or theme for key functionality.
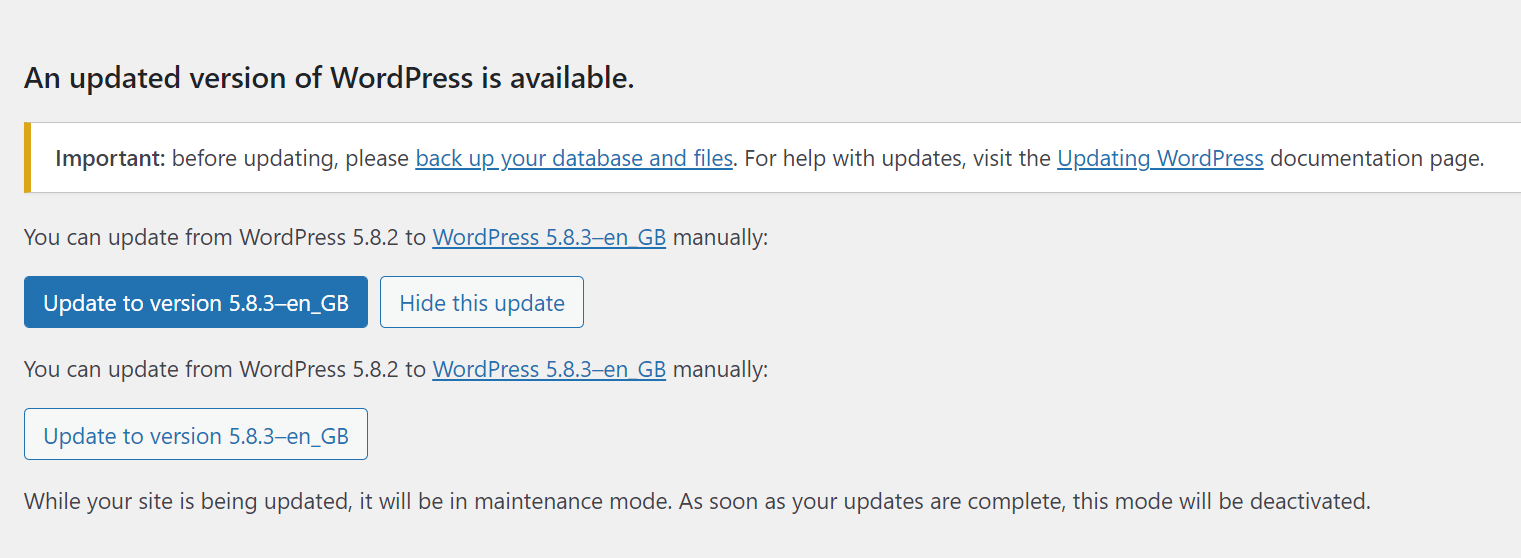
Ultimately, minor issues can have a severe impact on your site. Therefore, WordPress itself warns that you should fully back up your website before updating.
If you run a website for a business, any downtime from errors can scare away visitors and negatively affect your revenue. By using a staging website, you can ensure that the updates you make won’t break anything. That way you won’t be showcasing your mistakes to your audience.
2. You have more freedom when making changes to WordPress
You might sometimes be hesitant to make design or functionality changes to your website. If your site works well and looks good, redesigning layouts, adding new features, or changing themes can be scary.
Of course, sometimes these changes are necessary. You’ll need to be careful, though, because even the smallest tweak can cause problems.
Additionally, if you’re planning to update your entire site, you don’t want people browsing through a mix of updated and old designs — this can be a jarring experience! With a staging website, you can make all your changes upfront. That way, you don’t have to worry about visitors seeing half-finished designs or pages.
Once you’re ready to publish the complete new version of your website, you might be able to push it to production with only a few clicks. But it’s important to note that this will depend on the type of staging environment you’re using.
3. Creating WordPress staging websites is simple
There are several ways to create a WordPress staging website. The approach you use will depend on your web host and the method you feel most comfortable with. Here are four common ways to create a staging environment:
- Create one through your web host. Some web hosts enable you to create staging websites using their control panel.
- Make one manually. Depending on your web host, you should be able to set up subdomains to which you can copy your site. Then, use those copies as staging websites.
- Use a plugin. Some plugins enable you to set up copies of your site on a subdomain or with backups that you can import to other sites.
- Use a local WordPress development tool. Local WordPress development tools let you create websites that you can only access from your computer. These ‘local’ environments are perfect for staging purposes.
If you have access to staging functionality through your web host, it’s definitely the easiest approach that you can take. That’s because web hosts typically also include features that enable you to push staging sites to production in a simple step or two.
WordPress staging plugins are another great way to set up this type of environment. On the other hand, most ‘staging plugins’ are primarily backup tools that offer staging functionality as an extra. This means there are few (if any) plugins with staging functionality that you can use for free.
One example that we found is InstaWP Connect, which is a staging and migration tool by InstaWP. This plugin creates a quick, full, or custom staging of your live site in your InstaWP dashboard.
After making changes to your site in staging, you can push changes to your live site irrespective of your hosting provider. Syncing changes between staging and live environments is also possible through this plugin. And if you want to host your site right there, you can use their amazing hosting service, InstaWP Live.
The cons of using a staging site for WordPress
The best real‑time WordPress backup plugin
Save every change and get back online quickly with one‑click restores from VaultPress Backup.
Get VaultPress Backup1. Staging functionality usually isn’t free
A lot of web hosts don’t offer staging functionality, particularly if you’re using a budget hosting plan. Usually, staging tools are reserved for managed WordPress hosting, which means you might need to extend your budget a bit if you want this feature.
The good news? Sometimes you can find managed WordPress web hosts that cost less than $10 per month for a basic plan. If your current host doesn’t offer staging, you might want to reassess your budget and consider switching to a host that does.
As far as plugins go, there are a lot of WordPress backup tools that offer staging functionality. The problem is that the vast majority of those plugins only offer staging tools with their premium licenses.
You can use backup plugins to create copies of your site and upload them manually to a subdirectory. That process works perfectly, but it also requires you to do everything manually.
Overall, if you plan to use a staging website, your best bet is to sign up for a WordPress web host that offers that functionality. In most cases, managed WordPress web hosts also offer a broad range of additional perks that are well worth the money.
2. Updating your website takes longer
Updating a WordPress website can be very straightforward. Depending on what changes you want to make, it can be a simple matter of opening the Block Editor, making a few updates, and publishing them. On that same note, it usually only takes a few minutes to update a full roster of plugins and themes.

When you add a staging website into the mix, updates take longer overall. Testing every change you want to make before publishing it means you’ll need to plan updates well in advance.
Furthermore, if you want an update to go live on a specific date, you’ll want to set aside at least a few hours or days for testing. The bigger the update, the longer the testing period should be.
The solution to that problem is to know when to use staging websites and when not to. Here are some scenarios when it makes sense to use a WordPress staging site:
- You’re planning a major redesign of your website
- You want to test a new feature before it goes live
- You’re switching from one theme to another
- You’re replacing a plugin with an alternative
- You’re updating multiple plugins and themes at once
You don’t need to use a staging website for minor changes like publishing posts or updating your site’s content. But any time you’re planning to make a change that can impact your site’s functionality, that’s when using a staging environment can pay off.
When NOT to use a WordPresss staging site
While staging sites are invaluable, they are not always necessary. For minor changes, such as publishing a new blog post, fixing a typo, or updating a single image, using a staging site is overkill.
A good rule of thumb is: if the change can be easily reversed and is unlikely to cause a conflict, you can make it on the live site. However, for anything involving code changes, plugin/theme updates, or design overhauls, a staging site is non-negotiable.
Frequently asked questions
How do I push changes from my WordPress staging site to the live production site?
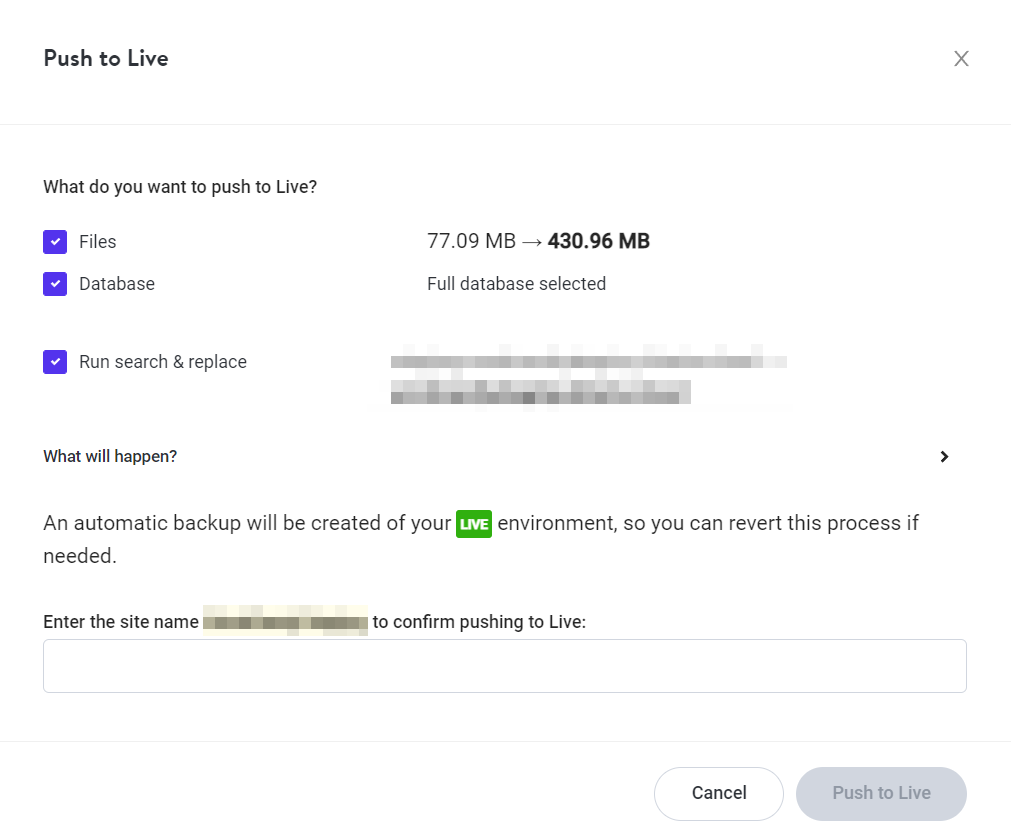
You can push changes from a staging site to your live production site using a feature provided by your hosting company or a staging plugin. First, you select which changes you want to move. You can typically choose to move files only, the database only, or both. After you have made your selection, you start the process.
It is important to back up your live site before you begin. This ensures you can restore your site if anything goes wrong during the transfer. Always double-check your live site after the process is complete to make sure everything works correctly.
Will using a WordPress staging site affect my live website’s SEO?
A staging site will not affect your live website’s SEO if it is configured correctly. Staging sites should be hidden from search engines to prevent them from indexing duplicate content. You can do this by using a robots.txt file to block crawlers or by password-protecting the staging environment.
Most hosting providers and staging plugins automatically handle this for you. This configuration ensures that only your live site is visible to Google, so your rankings remain safe while you work on your staging copy.
How should I manage a staging site for a WooCommerce store that receives live orders?
Managing a staging site for an active WooCommerce store requires a careful process to avoid losing customer and order data. You should not simply overwrite your live site’s database with the staging database, as this would erase any orders placed while you were working.
Instead, you should push only file changes, such as theme or plugin updates, from staging to live. For database changes, you must selectively merge them. Specialized plugins or a developer can help with this process to make sure that new orders are preserved while your site updates are applied successfully.
What is the difference between a WordPress staging site and a local development environment?
A staging site is an online copy of your live website hosted on a server, making it a true mirror of your production environment. This allows you to test changes in conditions that are nearly identical to your live site, and it is accessible through a private URL.
A local development environment runs on your own computer, not on the internet. It is completely private and useful for building a site from the beginning or for making large changes offline. A local site is faster for development, but a staging site is better for final testing before going live.
How do I keep my live site’s content synchronized with the staging site?
To keep your live and staging sites synchronized, you should regularly copy changes from your live site to your staging site. This action ensures your staging environment has the latest content and data before you begin testing new updates.
Many hosting providers and staging plugins offer a “pull” or “sync” feature that lets you update your staging site with one click. Doing this prevents you from working on an outdated version of your site. This is very important for sites where content is added frequently, such as blogs or news sites.
Should I always update WordPress core, themes, and plugins on the staging site first?
Yes, you should always perform all updates on your staging site before applying them to your live site. This includes updates to WordPress core files, your active theme, and all installed plugins.
Updating on a staging site first lets you safely check for any conflicts or bugs that the updates might cause. If an update breaks your site, it happens in a private environment where you can fix it without affecting your visitors. Once you confirm that everything works perfectly, you can then perform the same updates on your live site with confidence.
Is it safe to delete my WordPress staging site after I am finished with it?
Yes, it is completely safe to delete your WordPress staging site after you have successfully pushed your changes to your live site. Deleting the staging copy can help free up server resources and reduce hosting costs if you are charged for the extra site.
Most staging tools provided by hosts or plugins have a simple one-click deletion option. Before deleting it, make sure you have a complete backup of your live site. This gives you a safety net in case you need to restore anything later. Keeping the staging site is also an option if you plan to make more updates soon.
How does creating a staging site affect my website’s database?
When you create a staging site, the process makes a complete copy of your live website’s database. This means all your posts, pages, user information, and settings are duplicated into a separate, independent database for the staging environment.
Any changes you make to the staging database will not impact your live site’s database. When you push changes from staging to live, you will have the option to overwrite the live database with the staging copy. It is very important to be careful during this step to avoid losing any new data from your live site.
Can I give my client access to the staging site for review and feedback?
Yes, you can and should give your clients access to the staging site. A staging site provides a perfect platform for clients to review changes and provide feedback before those changes go live.
Since the staging site is a private copy, clients can test new features and designs without any risk to the public-facing website. Most staging setups are password-protected, so you can securely share the login details with your client. This collaborative process ensures that everyone is happy with the updates before they are published for all visitors to see.
Using a WordPress staging website to test updates
Staging functionality is a game changer when it comes to updating your website. With a staging site, you can avoid making changes that end up causing minor or even serious site errors. Depending on your web host, you might already have access to the tools you’ll need.
Let’s recap the four ways you can quickly create a staging website on WordPress:
- Create a staging site through your hosting provider.
- Use a WordPress staging (or backup) plugin.
- Use a local staging environment.
- Create a staging website manually.
Backups play a crucial role in creating most WordPress staging websites. If you’re looking for a tool to help you do this, check out Jetpack Backup, which offers automatic backups in real-time!
The best real‑time WordPress backup plugin
Save every change and get back online quickly with one‑click restores from VaultPress Backup.
Get VaultPress Backup