
If your store processes orders daily, your backup strategy should be designed around one question: how many orders can you afford to lose?
In this guide, you’ll learn exactly what to back up in WooCommerce, how often to back up, and how to restore safely.
Quick recommendation:
- High-volume / revenue-critical stores: use real-time, off-site backups (so every order is captured).
- Lower-volume stores: daily backups may be acceptable, but you should still prioritze real-time backups.
- Avoid relying on host backups alone unless you’ve verified retention, off-site storage, and restore success.
Why back up your WooCommerce store?
There are a number of reasons why you should regularly back up your WooCommerce store. For starters, it will help you protect your data in case of a technical issue or human error.
If you’re updating your site, installing a new plugin, or making any other changes to your content, there’s a chance that something will go wrong. If it does, it’s important that you have a current version to restore.
The same is true for cyber attacks. You’ll want to have a safe copy of your website to roll back to in the event that a hacker infiltrates and infects your site with malicious code or malware.
Another reason to back up your store is to keep a record of your data. This can be useful for auditing purposes, or if you need to reference past orders when dealing with queries and complaints.
In summary, backups help ensure that you can always access your data, even if your WooCommerce site goes down and you’re unable to log in. Hosting issues, cyberattacks, and unexpected outages are all things that can cause downtime.
How often should I back up WooCommerce?
How frequently you back up a WordPress site depends on how often you add or change data. Static or small websites may only require backups periodically — daily is a good option.
But WooCommerce sites are a different story. Not only is there usually a lot more activity, it’s all the more important to protect data like orders and customer submissions. You don’t want to lose a single one.
For this reason, WooCommerce stores shouldn’t really settle for anything less than real-time backups, which save a new copy every single time an order is placed, a product is updated, or anything else happens on the site.
You can manually back up a WordPress site at regular intervals. It’s not the most efficient process, but does allow you to avoid using a plugin. But for real-time backups, you’ll want to use a tool like Jetpack Backup.

Jetpack continuously monitors your WooCommerce store for changes. Whenever you update your content, a snapshot of this change will be safely stored. These happen automatically, so you never have to remember to take a backup. And if you ever need to restore a copy, you can do so in just a few clicks — no code or server edits required!
What should I include in a WooCommerce backup?
When it comes to creating a WooCommerce backup, there are two main areas you’ll need to consider: your database and your files. The database contains all of your critical data — if you lose this, you’ll lose your entire store.
Your WooCommerce database contains:
- Products
- Customers
- Orders
- Tax information
Meanwhile, your files contain all of your media. If you lose these files, you’ll lose all of your product images and videos.
Another important area is your settings, which include your shipping methods and payment gateways. Your store’s settings will typically be included in your database and files, so you won’t need to create a separate backup for them.
How to back up your WooCommerce database
There are several methods that you can use to back up your WooCommerce database. The best solution will depend on a handful of factors, like your experience level and the type of hosting plan you use. Let’s take a close look at each option.
1. Back up WooCommerce in real-time with a plugin
The quickest and easiest method for backing up your WooCommerce database is to use a plugin like Jetpack Backup, which includes:
- Automated real-time backups
- 10GB of storage space (1TB option also available)
- One-click restores
- A 30-day backup archive
- Easy setup
- Off-site storage
Once installed and activated on your website, you can access the tool by navigating to Jetpack → Backup from your WordPress admin area.
Here, you can manage all of your backups. You can also restore your site to any past state while keeping your customer data and orders current.
2. Back up WooCommerce using your web host
If you don’t want to install a plugin on your website, you can back up WooCommerce through your web host. The options that are available to you will depend on your hosting plan.
Many providers offer backups as part of their packages, while others make them available as a premium add-on. It’s best to check with your web host to see which options are included with your plan and upgrade your service if necessary.
The actual steps involved in backing up your WooCommerce store will depend on your host, but the process will be similar. You can start by logging into your hosting control panel.
If your web host uses cPanel, navigate to the Files section and select the Backup application.

On the next screen, you’ll see some backup options:

If you want to back up your entire site, select the Download a Full Account Backup button. Note that you might want to save it to your local device, as some providers will automatically delete backups after 48 hours.
Alternatively, you can scroll down to the Download a MySQL Database Backup section.
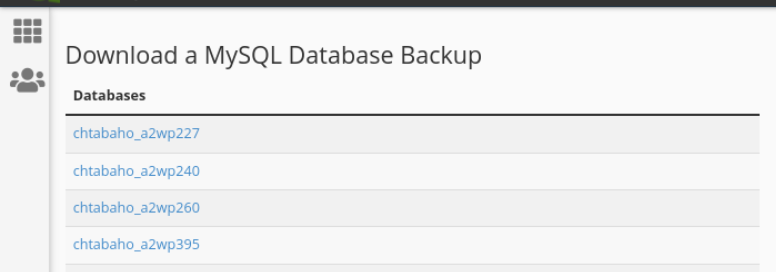
Here, you can locate your WooCommerce database from the list. Then, select the link to begin the download process. The backup will be stored as an .sql file on your computer.
If your hosting provider doesn’t use cPanel, you may still have options for backing up your WooCommerce database. Let’s use SiteGround as an example.
To get started, log into your account and navigate to Websites. Next to your domain name, select Site Tools. Then, go to Security → Backups.
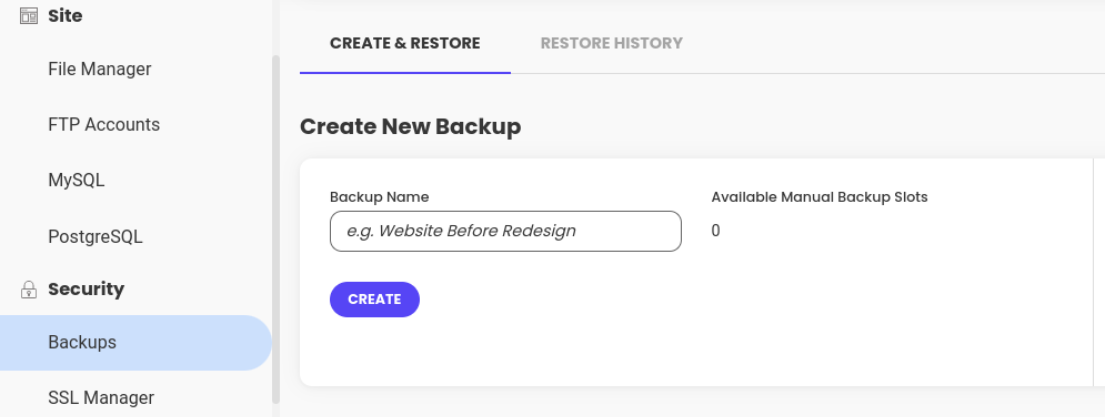
After naming your backup, click on the Create button. Once your backup is complete, you can view it from the Manage Backups log located on the same page.
Keep in mind that, by choosing this option, you’re relying completely on your host. It’s very possible that something goes wrong and your backups aren’t stored or completed correctly. Hosting providers typically only back up your site on a daily or weekly basis, and only store backups for a certain period of time. If something goes wrong, this could mean that you don’t have what you need to get back up and running.
And, if your store goes down because of a hosting issue, you don’t have an alternative option for accessing and restoring your backups.
3. Back up WooCommerce manually
A third option for creating a WooCommerce backup is to use the manual approach. This method can be a little tedious and time-consuming. As such, we only recommend it as a last resort.
You’ll need to back up your WooCommerce files and database separately. You can do this using a cPanel File Manager or File Transfer Protocol (FTP) client, and phpMyAdmin.
In the following tutorial, we’ll cover FTP and phpMyAdmin, since we’ve already discussed how to back up your site via cPanel.
Backing up WooCommerce files via FTP
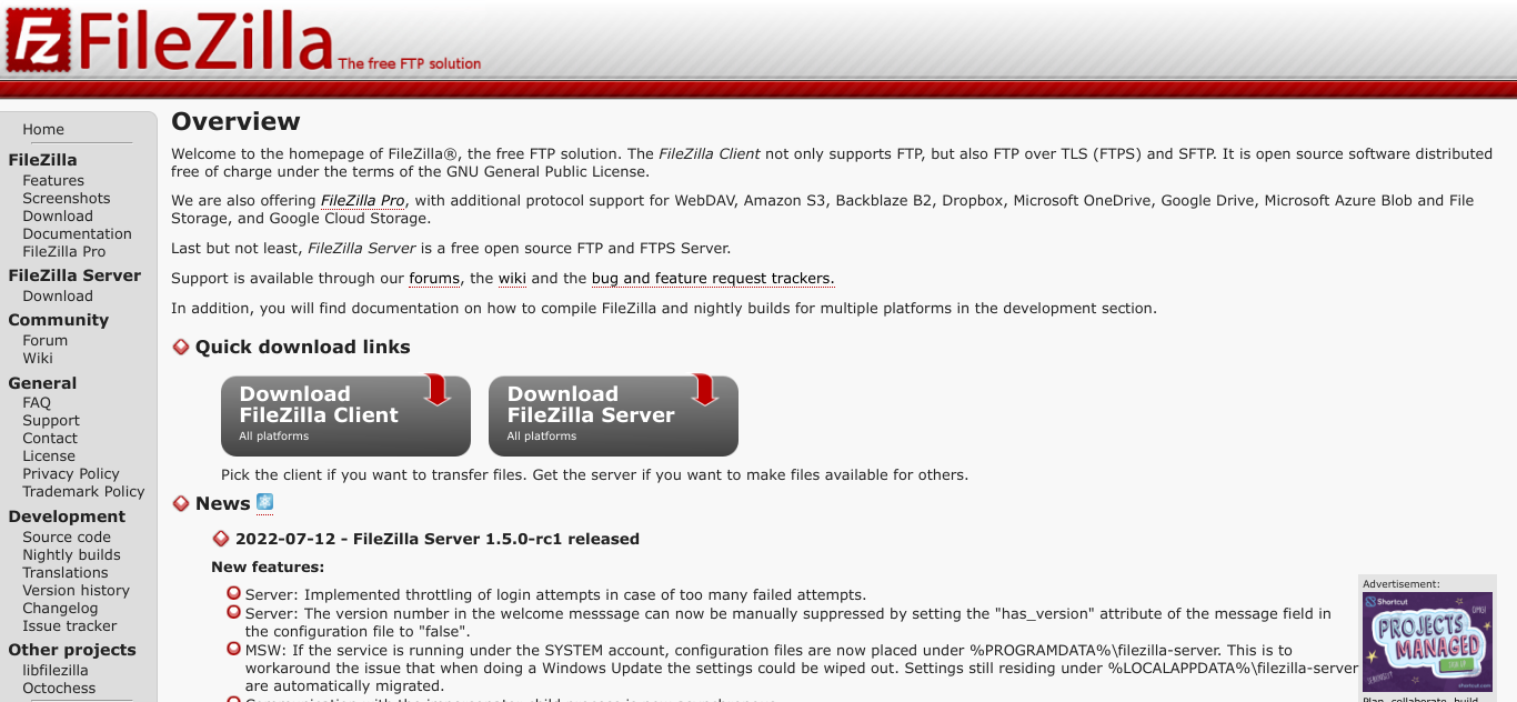
To get started, you’ll need to download an FTP client like FileZilla.
Once you launch the FTP client, log in to connect to your site. You can find your FTP credentials in your web hosting account. You’ll need your hostname, username, password, and port number.
After you successfully connect to your site, navigate to the public_html folder, right-click on it, and select Download.
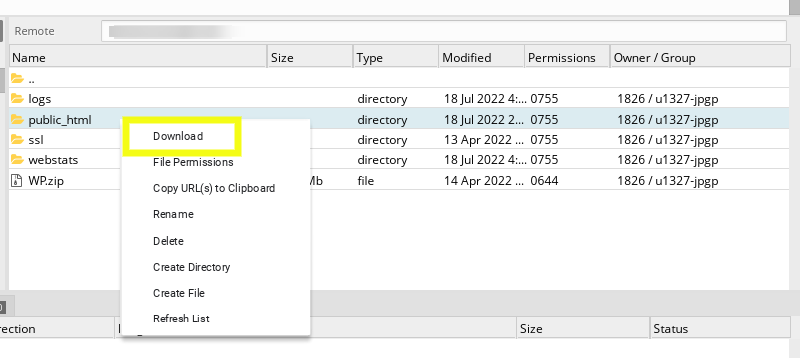
You can store and save your files as a ZIP folder on your device. The next step is to back up your database.
Backing up your WooCommerce database
You can use phpMyAdmin to manually back up your WooCommerce database. To get started, log into your hosting account and navigate to phpMyAdmin under Databases.

On the next page, you can find a list of databases. Choose your database, then select all of the tables and click on the Export tab.

Next, you’ll need to choose a backup format. You can keep it as the default SQL.
When you’re done, click on the Go button to download the database. Then, you can move the database backup to the folder that contains the site files you downloaded earlier.
Beyond the time required, manual backups run the risk of human error. If you find yourself needing to restore a backup, the last thing you want is to realize that your backup is faulty. Plus, manual backups mean you may not have a copy of the most recent site changes or store orders. It’s for these reasons that we generally don’t recommend relying on manual backups.
How to restore your WooCommerce backup
Regardless of the method that you used to create your WooCommerce backup, you should be able to restore it in a few simple steps. The best option will depend on the solution you used to back it up.
Let’s take a look at how to restore your WooCommerce backup based on the three main methods we’ve discussed in the last section.
1. Restore a backup with one click using Jetpack
If you have Jetpack Backup installed and activated on your site, you can restore your WooCommerce backup in just one click. The great thing about using Jetpack Backup is that all of your orders will be saved — regardless of the point you restore to. There are two main options to choose from.
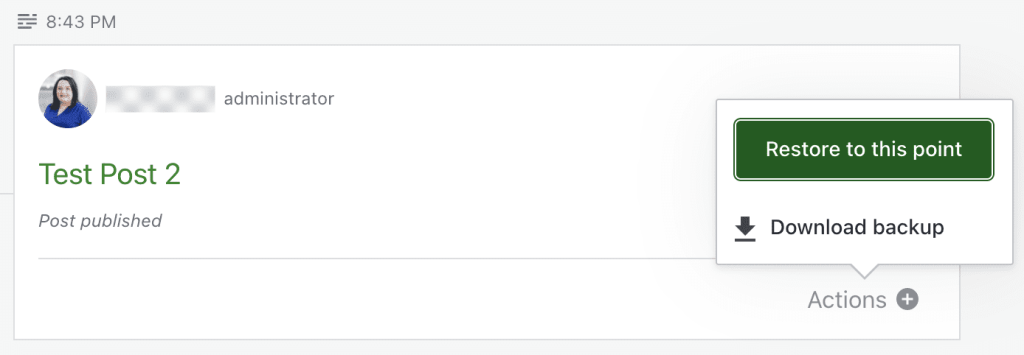
The first is to restore it to a particular event. To do this, navigate to your WordPress.com account (which you can do even if your site is down!) and go to your Activity Log. On this screen, you can use the filters to search by date or activity type.
Once you find the event you’re looking for, you can select the Actions button next to it, followed by Restore to this point.
This will open the Restore Site panel. Here, you can select any items you don’t want to restore. If you want to retrieve all of the content, you can simply click on Confirm Restore.
A progress bar will appear, showing you the current status of the process. Once the restoration is complete, you’ll receive a notification via email.
The second option is to restore your site to a specific day. In the WordPress dashboard navigate to Jetpack → Backup.
Here, you’ll see the latest backup of your site. To choose a particular day, you’ll need to click on Select Date from the calendar at the top of the page.
Once you find your preferred date, you can select Restore to this point.

On the next screen, leave the selected options as-is. If you want to exclude certain items, you can uncheck the accompanying boxes. When you’re done, click on the Confirm restore button.

Once again, a progress bar will appear. When the process is complete, you’ll see a confirmation message.
2. Restore a backup from your web host
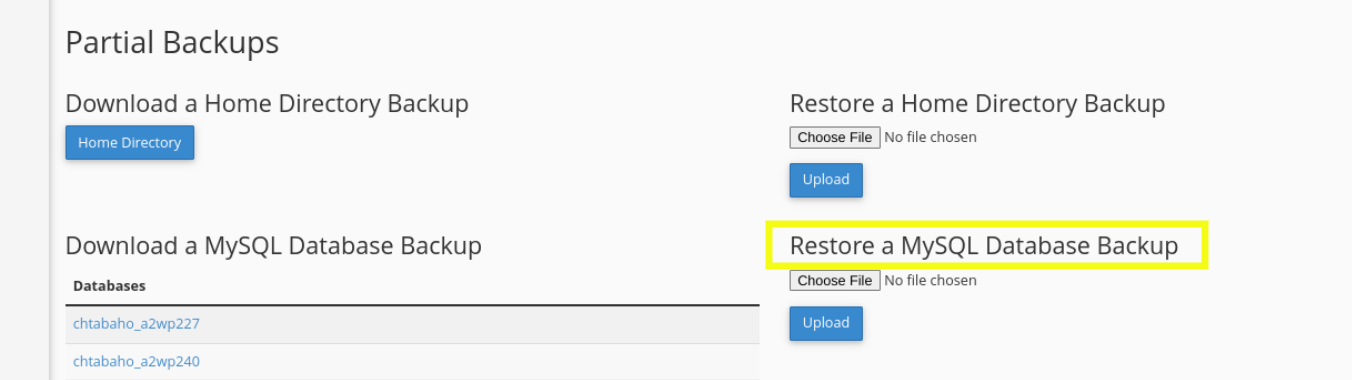
If you backed up your site via your web host, you can usually restore it in the same way. If your provider uses cPanel, log into your site and navigate to Files → Backup.
This is the same page you used to back up your site, but this time you’ll need to click on the Choose File button under Restore a MySQL Database Backup.
Select the .sql file that you downloaded as your backup, and click on the Upload button to restore it.
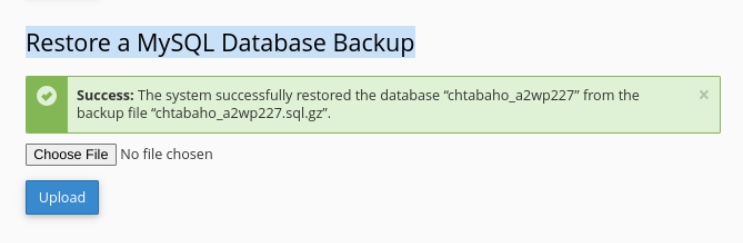
Once the process is complete, you should see a message informing you that the database was successfully restored.
3. Restore a manual backup of your store
As we mentioned earlier, you can use the Backup application in cPanel (if your hosting provider offers it) to restore your content. Since this is not always an option, we’ll show you how to manually restore your store using FTP and phpMyAdmin.
Let’s start by restoring your WooCommerce files. Connect to your server via FTP, using the credentials offered by your hosting provider.
Once you’re connected to your server, the remote site panel will display your site directory. Navigate to your public_html folder, then drag and drop the files from the local site panel to your remote site panel.

If you stored your files in a ZIP folder when backing them up, you’ll need to extract them before restoring them. This can take some time, depending on the size of your WooCommerce store.
Next, you can manually restore your database using phpMyAdmin. To get started, log into your hosting cPanel account, then navigate to phpMyAdmin from the Database section.
From the list on the left, select your database, then the Import tab.

On the next screen, you’ll need to click on the Choose File button and select the file that you backed up from your local device or server. Next, make sure that the format is the same as the backup you downloaded (SQL by default).
When you’re done, click on the Go button. As with the files, this restoration process can take some time.
Tips and best practices for creating WooCommerce backups
Creating backups in WooCommerce is fairly straightforward. To ensure that the process goes as smoothly as possible, there are some tips and best practices that you can use.
The first is to create a backup schedule that suits your needs. Ideally, you’ll want to choose real-time backups so that you have a stored version every time you make changes to your site.
Another tip is to create offsite backups. Why? Because keeping your backups on the same server as your store can create a singular point of failure. If something happens to your store or server, you may also lose your backups.
To prevent this, we recommend keeping copies of your site on a third-party platform. Some popular options include Google Cloud Storage, Amazon S3, and Dropbox. Keep in mind that if you use Jetpack, the plugin will automatically store your backups in a separate, secure location.
If you have to retrieve a backup of your WooCommerce site, you might also want to restore it to a staging environment before moving it to your live site. This way, you can test the restored version to make sure that everything looks and functions as it should.
Finally, you might want to periodically test your backup solution to verify that it’s working properly. If you’re using a plugin, you’ll want to make sure that you’re keeping it up to date. Not only can this help strengthen your security, but it minimizes the chances of compatibility issues.
Frequently asked questions about WooCommerce backups
So far, we’ve looked at how to create and restore WooCommerce backups, but you might still have some questions about the process. Let’s answer some of them.
Where are WooCommerce backups stored?
The location of your WooCommerce backups will depend on the method you used to save them. If your hosting plan includes backups, you can access them via cPanel (or a control panel equivalent). These backups are stored on your server.
If you manually back up your WooCommerce store or use a plugin, you can usually access your backups from your local device and/or off-site locations of your choice. For instance, if you use an FTP client, you can store backups on your computer, and then upload them to a third-party platform like Google Drive or Dropbox.
Backups from Jetpack are stored on dedicated servers — the same world-renowned infrastructure used for WordPress.com — so you never have to worry about their security.
You can also use the plugin to create manual backup so that you always have a safe and updated copy in an additional location.
What is the best WooCommerce backup solution?
If you’re looking for the best backup solution, you might want to consider using Jetpack Backup. This premium tool automatically backs up your WooCommerce site so you don’t have to worry about handling it yourself. It also performs real-time backups every time you make changes to your store.
Can I only back up products in WooCommerce?
There may be times when you just want to back up a certain section of your store. Perhaps you don’t want to take up more storage space than necessary or you don’t have enough time to do a complete backup.
Fortunately, you can just back up your WooCommerce products. You can do this manually or by using a plugin.
To do it manually, navigate to the Products tab of your admin dashboard. Next, select all of the products and click on the Export button located at the top of the screen:

This will take you to the Export Products screen. Here, you can select the columns, product types, and product categories that you want to export. If you want to include all of the data, you can leave it as-is.
When you’re done, click on the Generate CSV button.

The CSV file will be downloaded to your computer. You can then move this file to an off-site storage location.
Another option is to use a plugin like Product Import Export for WooCommerce. With the free version, you can export products based on simple, grouped, or external/affiliate types.
Can I back up orders in WooCommerce?
By default, WooCommerce does not let you export orders. Fortunately, you can use a plugin like Advanced Order Export for WooCommerce to do this.
This plugin lets you export any custom field that’s assigned to your WooCommerce orders and products. You can also choose from multiple data export format options, including CSV, XML, and JSON.
Additionally, you can rename labels, reorder columns, and apply filters. The tool lets you export order data, a summary of order details, and customer information, which you can then save to the location of your choice.
After you install and activate the plugin, you can navigate to WooCommerce→ Export Orders. Then, click on the Export now tab to configure your settings.

You can filter orders by data type and enter certain date ranges. You can also name your export file and select a format. On the right-hand side, you can choose to apply a wide variety of filters for your products. For instance, you can base it on order statuses, custom fields, and more.
When you’re happy with your changes, you can select the Save settings button at the bottom, followed by Export. This will download a file in the format that you selected.
Start backing up your WooCommerce store
Your WooCommerce store is packed with data, including orders, customer information, and product details. With so many potential threats putting your WordPress site at risk, it’s important to know how to perform a WooCommerce backup.
As we discussed in this post, there are several ways to back up and restore your WooCommerce store. The easiest option is to use a plugin like Jetpack Backup. You can also perform manual backups, though this can be very time-consuming and therefore is not ideal.
Are you looking to create regular WooCommerce backups without much effort? Download Jetpack Backup today!
