
People who visit your website don’t want to wait a long time to see your content. If you don’t optimize your code, render-blocking resources like CSS can contribute to visitors’ perception of slower load times.
Fortunately, you can easily generate critical CSS for your website. By installing a plugin like Jetpack Boost, you’ll be able to extract all the necessary CSS for displaying above-the-fold content. This can be key to making your website appear faster and more user-friendly.
In this guide, we’ll explain critical CSS and why you should consider generating it for your website. Then, we’ll show you two different ways to do this in WordPress.
What is critical CSS in WordPress?
Once a visitor clicks on a link to your website, their browser has to process a series of tasks to render the content fully. All the steps involved in downloading, processing, and converting the code into pixels make up the Critical Rendering Path.
The browser reads the site’s HTML, CSS, and JavaScript code from top to bottom during this loading process. Since it won’t automatically know which resources are most important in rendering the page, the browser could get stuck processing unnecessary code.
If a certain CSS file stops your website from rendering, it becomes a render-blocking resource. Even if it isn’t necessary for displaying the page, visitors won’t see the content until this render-blocking CSS is fully processed.
Critical CSS refers to the required CSS code for the above-the-fold web content. Essentially, it’s the bare minimum code the browser needs to display the first section of content to visitors.
The benefits of generating critical CSS
Generating critical CSS for your web pages involves eliminating any render-blocking CSS and enabling the browser to only process what’s necessary.
1. Optimize content delivery
When you optimize CSS delivery for your WordPress website, it can improve the rendering process. To a front-end visitor, it might even seem like your pages are loading more quickly.
When someone lands on your website, the first thing they’ll see is the above-the-fold content. This is everything displayed on the front page without needing to scroll.

By extracting critical CSS, you’re optimizing the CSS files needed to display this initial section. Without it, users may see partial elements that haven’t been fully rendered.
A common misconception is that critical CSS decreases your loading time. Although this isn’t true, the optimization technique can improve perceived performance.
Essentially, users will think your pages are loading faster because the browser can simply display above-the-fold elements more efficiently.
By generating WordPress critical CSS, visitors will have a better User Experience (UX) on your site. As a result, you can reduce bounce rates and encourage return visits.
2. Improve Core Web Vitals
Although WordPress critical CSS doesn’t increase or decrease page loading time, it can improve your Core Web Vitals. These metrics analyze a website’s user experience.
Here are the Core Web Vitals:
- Largest Contentful Paint (LCP): A website’s loading performance
- First Input Delay (FID): A website’s interactivity
- Cumulative Layout Shift (CLS): A website’s visual stability
After you scan your website for a Core Web Vitals report, you may see additional metrics like First Contentful Paint (FCP) or Time to First Byte (TTFB). These impact LCP and play an important role in the loading process.
Critical CSS directly impacts FCP. Put simply, FCP measures the time it takes to render the first element on a web page after it starts loading. If your site has a poor FCP score, visitors will often see a blank page for a while.
As a WordPress website owner, you should aim to get FCP under 1.8 seconds, but many elements can negatively impact this score, including:
- Render-blocking JavaScript and CSS
- A slow server
- Bulky font files
- Large Document Object Model (DOM) size
Since render-blocking CSS contributes to FCP, generating critical CSS can improve this score. During this process, you’ll inline all the CSS needed to render above-the-fold content.
How to test your website for render-blocking CSS
Before generating WordPress critical CSS, you’ll need to know whether it’s necessary for your website. Since large CSS files are considered render-blocking resources, you can scan for them with a speed optimization tool.
To get started, enter your website’s URL into PageSpeed Insights. This Google software will analyze your site’s performance with various speed audits.

At the top of the page, you’ll see your Core Web Vitals assessment. It includes metrics for Largest Contentful Paint, First Input Delay, Cumulative Layout Shift, First Contentful Paint, Interaction to Next Paint, and Time to First Byte.

As you learned earlier, render-blocking CSS is closely tied to the FCP score. Make sure both your mobile and desktop assessment results are 1.8 seconds or less.
If you receive a poor score, you may have bulky, unoptimized CSS files on your website. To verify if this is true, scroll down to Opportunities. This section provides specific suggestions to improve your website’s loading time.

Here, you may notice an alert telling you to Eliminate render-blocking resources. Although this message could refer to a JavaScript file, it might also signal that you need to generate critical CSS.
How to generate critical CSS in WordPress
Now that you understand more about WordPress critical CSS and why it’s important, it’s time to generate it! Regardless of your skill level, you can easily learn how to optimize CSS delivery in WordPress by following our beginner-friendly tutorial.
Method 1: Generate critical CSS with a plugin
Although you could generate it yourself, optimizing CSS delivery with a WordPress plugin is often easier. The right tool can automatically defer less important CSS. Plus, you won’t have to edit any code manually.
Jetpack Boost can quickly improve your site’s loading performance. After a simple setup process, you can use this plugin to generate critical CSS, defer non-essential JavaScript, and more.

To start using Jetpack Boost, install and activate it in WordPress. Then, you’ll receive a score based on your website’s current performance.

With the free plugin, you’ll see an option to Optimize CSS loading. Alternatively, you can upgrade to a paid subscription to generate critical CSS automatically. This will help avoid having to regenerate CSS every time you make a change.

To enable critical CSS, simply use the switch on the left-hand side. Similarly, you can defer non-essential JavaScript and turn on lazy loading for images. Combined, these settings can significantly reduce page loading time and allow visitors to see your content earlier.
Method 2: Manually generate critical CSS
If you don’t want to use a plugin, you can also manually generate critical CSS. It’s important to remember that this method involves editing your site’s code, so it can be a more complicated process for beginners.
Step 1: Back up your website
To get started, you’ll want to create a backup of your WordPress site. If you make a mistake in your site files, you can easily revert to this saved version. This way, you won’t lose any important data.
If you need to manage your backups easily, you can install the Jetpack VaultPress Backup plugin. This tool stores backups off-site and provides one-click restorations, even if your site is completely down.
Here’s how to get started:
Go to Plugins → Add new in your WordPress dashboard. Search for “Jetpack VaultPress Backup” and click Install now → Activate.
Then, you’ll see a new window that will allow you to set up the plugin. Click Set up Jetpack.

Then, connect your site to your WordPress.com account. Once you’re redirected back to your site, click Upgrade now to view several options for Jetpack VaultPress Backup plans.
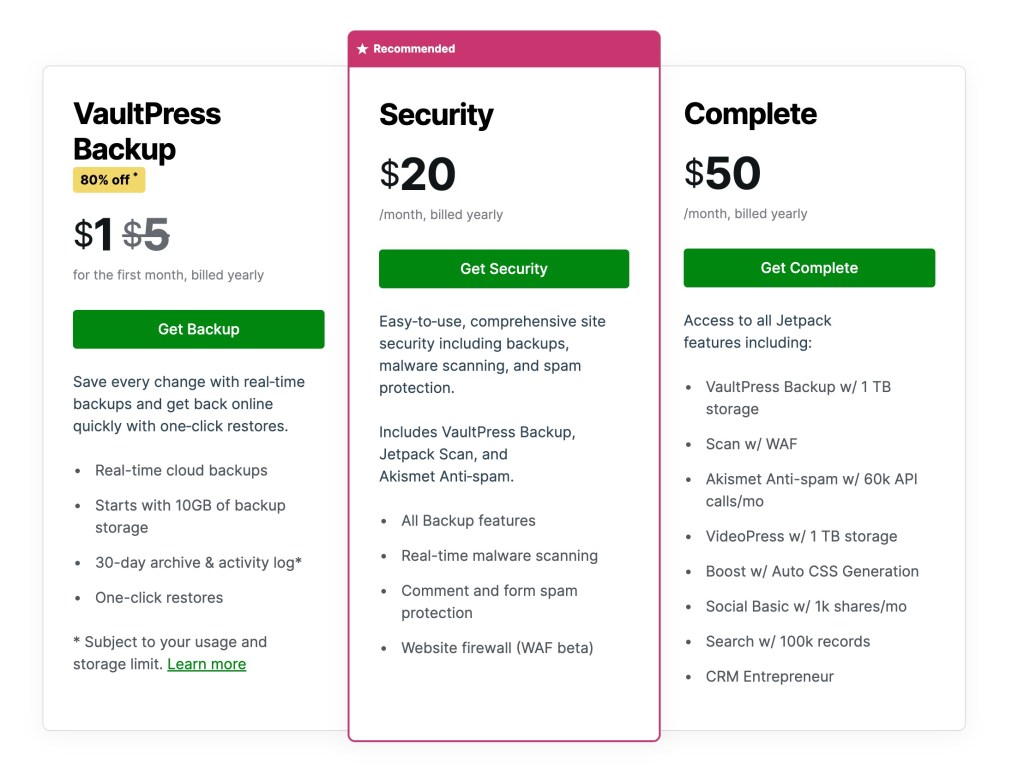
At a minimum, you’ll need the Backup plan, but Security and Complete provide additional tools for protecting, growing, and speeding up your site.
Your first backup will start automatically, and you can check its progress by going to Jetpack → Backup in your WordPress dashboard.
If any mistakes happen during the next few steps, simply come back to this page and hit Restore to this point. This will revert your site to the older version, eliminating any errors that occurred.
Step 2: Use a critical CSS generator
Once you know that your website is backed up, you can start generating your critical CSS. One of the easiest ways to do this is with a critical CSS generator. This tool will automatically produce your critical CSS, preventing you from having to manually create code.
First, open the CoreWebVitals Critical CSS Generator. Enter the URL for your website or a specific page you want to optimize. Then, hit Generate critical CSS.

Once it’s finished loading, you’ll see the CSS code generated in the text box. Copy this code.

After you save this code, you can inline it on your website!
Step 3: Inline critical CSS
When someone visits your website, their browser will retrieve your site’s files from the server. It will first check the <head> section for necessary content during the parsing process. Then, it’ll continue rendering the <body> content.
To prioritize critical CSS, place it in your files’ <head> section. This is called inlining. When you inline CSS, the browser requests that this stylesheet is retrieved before rendering the rest of the page.
Essentially, inlining CSS will place the code where it needs to be used. So, a visitor’s browser won’t have to parse render-blocking files before displaying the target content.
Once you’ve copied the generated critical CSS, you can inline it in your files. Navigate to your public_html folder via FTP. Then, go to wp-content → themes → your active theme and open the header.php file.
In this header file, locate the <title> tag. Beneath it, add the critical CSS using <style> tags. Finally, select Update File.
How to verify your critical CSS is working correctly
After generating and inlining critical CSS, here are three methods to verify it’s working:
- Google PageSpeed Insights re-test. Re-run your URL and check whether the “Eliminate render-blocking resources” opportunity has disappeared or reduced in weight. Also check your FCP score — aim for under 2 seconds on mobile.
- Chrome DevTools Coverage tab. Open Chrome DevTools → three-dot menu → More Tools → Coverage. Reload the page and check what percentage of your CSS is being used on initial load. A high “unused bytes” percentage on the initial load suggests your critical CSS extraction was incomplete.
- View Page Source. Right-click your page and “View Page Source.” Search for
Frequently asked questions
So far, we’ve discussed critical CSS and how to generate it. If you still have questions about inlining CSS on your website, we’ll answer them here!
Can generating critical CSS break your site’s appearance?
If done incorrectly, generating critical CSS could negatively impact your site’s appearance and layout. Fortunately, you can reverse any changes by simply restoring a saved backup of your WordPress site. Using Jetpack VaultPress Backup, you can view an activity log and restore old versions of your site with one click.
Plus, you can use a plugin like Jetpack Boost to turn critical CSS on and off whenever necessary. These simple settings were built according to WordPress best practices, so they’re less likely to affect your site on the front end.
What else can I do to optimize my CSS code?
If you want to further optimize CSS on your site, consider minifying it. You’ll remove unnecessary code during CSS minification to reduce the CSS file sizes.
Your CSS code likely has spaces and line breaks to make it easier to read. Since a browser can process code without these extra elements, you can delete them. This reduces the resources and time needed to run the files.
You can also remove unused CSS altogether. By reducing your files to only the necessary code, your website will start loading faster.
What else can I do to improve my page speed?
One of the best ways to speed up your site is by improving your Core Web Vitals. Using a tool like PageSpeed Insights, you can identify unoptimized elements like render-blocking resources.
Since browsers load your site’s code from top to bottom, the loading process can easily be interrupted by JavaScript. By deferring JavaScript parsing, visitors won’t have to wait for scripts to load before they see your content.
Additionally, consider implementing lazy loading for images. With this setting in Jetpack Boost, pictures below the fold won’t load until visitors scroll down. This can prevent your website from loading every image simultaneously, delaying the rendering process.
Lastly, a Content Delivery Network (CDN) can significantly speed up your website. Instead of relying on one server, a CDN uses a system of data centers worldwide. An option like Jetpack’s CDN can improve content delivery for images and static files.
How often should I regenerate critical CSS?
Regenerate any time you change your theme, update a plugin that affects your layout, or make significant above-the-fold design changes. Jetpack Boost’s paid plan handles this automatically, which is one of its most practical advantages over the manual method.
Does critical CSS work with Elementor or other page builders?
Yes, but page builders generate more complex CSS than hand-coded themes, which can make critical CSS extraction incomplete. Jetpack Boost is compatible with major page builders. If you’re generating manually, run the generator on multiple page templates (homepage, post, product, archive) separately, as each may have unique above-the-fold CSS.
What’s the difference between critical CSS and deferred CSS?
They’re two sides of the same optimization. Critical CSS is what you inline — the minimum styles needed to render visible content. Deferred CSS refers to the rest of your stylesheet, which you load asynchronously after the initial render using rel=”preload” or JavaScript. Both work together: inlining critical CSS and deferring the rest is the complete optimization strategy.
Optimize CSS delivery in WordPress
If you’re trying to improve your website’s content delivery, it’s important to eliminate any render-blocking resources. Since unoptimized CSS can delay the rendering process, it’s worth generating critical CSS. Although doing this won’t directly improve loading time, it will enable visitors to see above-the-fold content much faster.
To review, here’s how to generate critical CSS in WordPress:
- Generate critical CSS with a plugin like Jetpack Boost.
- Use a Critical CSS Generator.
With Jetpack Boost, you can optimize CSS without editing any code. After downloading and activating the plugin, you’ll be able to generate critical CSS with just one click!
The easiest speed optimization plugin for WordPress
Jetpack Boost gives your site the same performance advantages as the world’s leading websites, no developer required.
Boost your site for free