
If you run a large or complex website, you likely have lots of pages for visitors to sort through. At times, it may be frustrating and time-consuming for them to find what they’re looking for.
A search bar is a great way to combat this problem, and adding one to WordPress is simple. If you’re a beginner, you can use the Search Block feature or install a plugin. If you’re looking for something a little more advanced, you can add a search icon to your navigation menu, or edit your theme files to include whatever customizations you’d like.
In this guide, we’ll take a closer look at the role a search bar plays on your website. Then, we’ll show you five methods to add one in WordPress.
Why it’s important to include a search bar on your WordPress site
If your website only has a few pages, it’s probably easy for visitors to find the content or information they’re looking for. On the other hand, for growing business sites, complex ecommerce stores, or popular blogs, it can take a long time for visitors to navigate your pages using the menu alone.

The three-click rule is a principle used by most web designers. This rule suggests that a user should be able to find any desired information on your site using three (or fewer) clicks of the mouse. Otherwise, they can become frustrated and abandon your site.
This means that a search bar is a great way to improve the User Experience (UX).
With this feature, you can serve your audience the content they desire much faster, reducing bounce rates and increasing the amount of time they spend on your website.
Better yet, you can monitor your site’s search data to keep track of the terms and phrases that visitors use most often. This is a great way to discover gaps between what your guests are looking for and what you’re offering to them. With this knowledge, you can confidently plan new initiatives to serve your visitors and grow your efforts.
Where to place your search bar
It’s important to make sure your search bar is easily accessible. Therefore, you’ll want it to occupy a prime position. But you also don’t want this feature to distract from your main content, like blog posts and product pages.
With that in mind, it’s usually a good idea to place a search bar in your website’s header. This way, it will be one of the first elements your visitors see.

Additionally, this enables you to place your search bar beside your navigation menu. This is effective because it allows you to keep the user’s experience consistent. When they arrive on your site, they’ll know to automatically head to the top of the page.
On the other hand, you might prefer to use your footer or sidebar to accommodate search functionality. These positions are also widely used to support navigation menus, since they don’t interfere too much with the page’s content. If you opt for this approach, it’s best to make sure the search feature is particularly prominent, so it won’t be missed.
How to add a search bar to WordPress (5 ways)
Now, let’s take a look at five ways to add a search bar in WordPress. We’ll start with the simplest approach, and work our way down to more customizable options. It’s a good idea to familiarize yourself with all of these approaches, so you can select the one that best fits your needs and experience.
1. Add a search bar using the Search block
The first way to add a search bar to WordPress is to use the Search block. Since any WordPress user will be familiar with blocks already, this is one of the quickest and simplest options.
There are two ways you can add a Search block to your website. First, you can add the block to a specific page or post. Second, you can add the Search block to a template part (like your header) using the Site Editor. Let’s explore how both of these techniques work.
Add a Search block to a post or page
One way to use the Search block feature is to add it to a specific post or page (like your homepage). To do this, you’ll need to open the relevant post or page for editing, or create a new one.
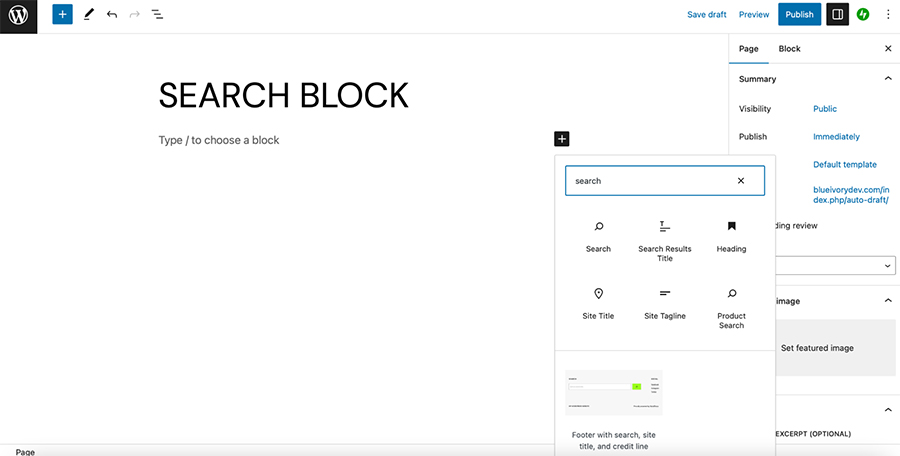
Then click on the plus (+) icon to add a new block. Enter “search” and select the Search option.
This will place a search bar directly on your page. Then you can use the toolbar to change the button position, add a button icon, and adjust the alignment.
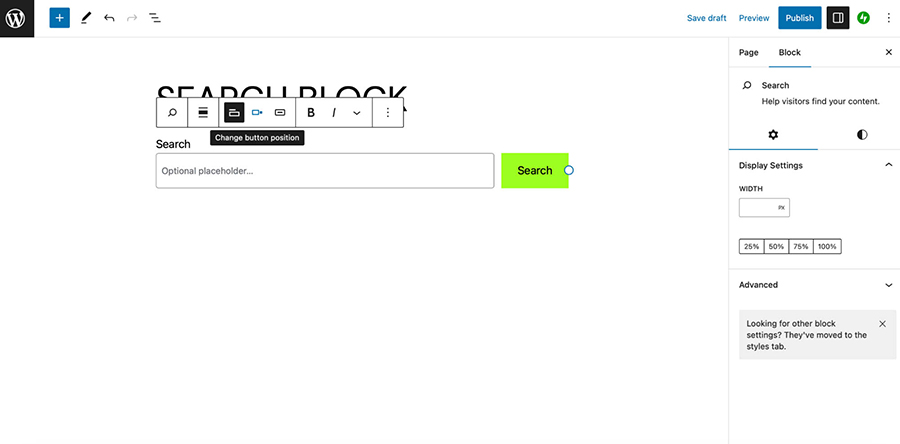
Plus, you can use the Block Settings at the left of the screen to alter the width of your search bar, change its colors, and even swap out the font selection.
Add a Search block using the Site Editor
If you’re using a block theme, you can also add the Search block to a template part like your header. This way, you can display the search bar across all pages of your site.
First, you’ll need to make sure you have a block theme activated. Otherwise, you won’t be able to access the Site Editor.
Then, navigate to Appearance → Editor in your WordPress dashboard. Click on Template Parts → Header, and select the pencil icon to edit your current website header.
This will open your header inside the Block Editor, where you can make lots of customizations to your template part.

Choose the plus (+) icon to browse your WordPress blocks for the Search option.
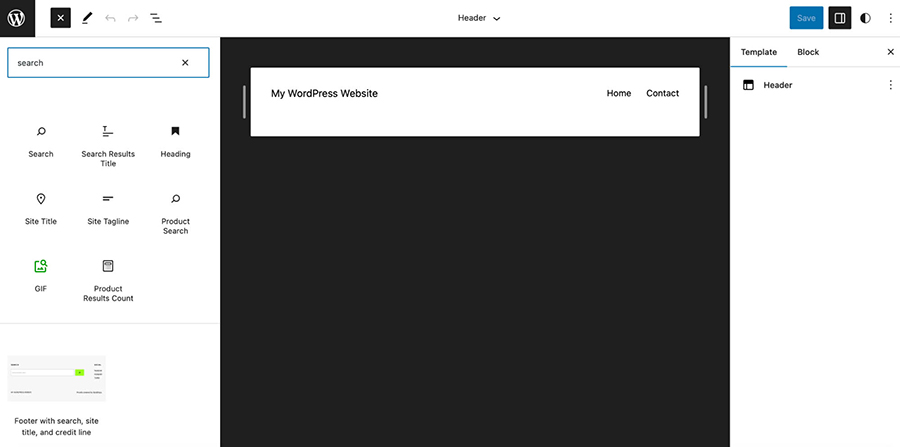
Now, all you need to do is drag the Search block into your header area.
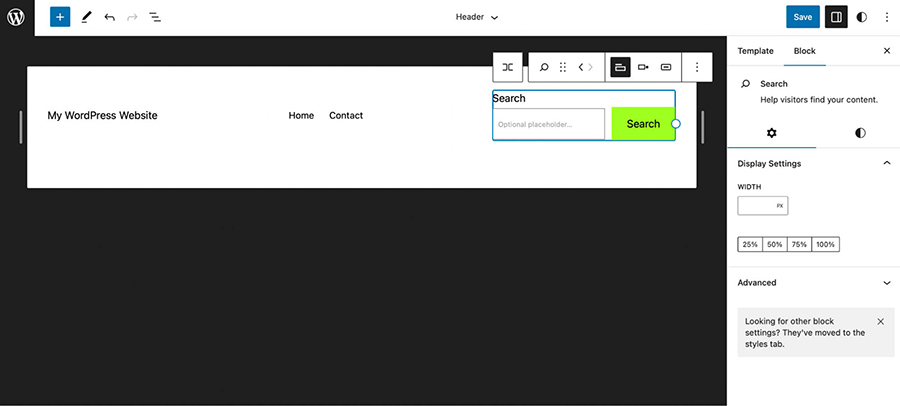
You can use the arrows in the toolbar to move your search bar to the edge of your menu. Then you can access all the same settings as when you add the Search block to a page or post.
So, you’re able to change the button icon, adjust the position, and toggle the search label from the toolbar. Plus, in the Block Settings, you can alter the width of the block and change the colors and fonts.
Once you’re happy with your search bar, click on Save. Then visit your website in a browser to view the search bar on the front end.
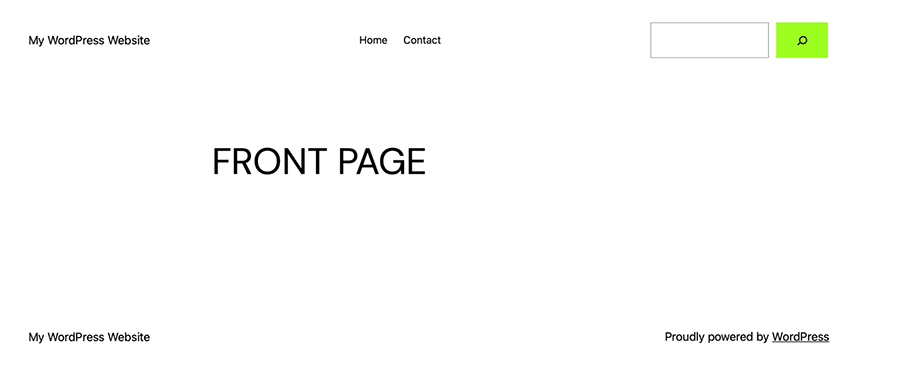
If you want to make any more changes, you can revisit the Site Editor at any time. You can also use this method to place your search bar elsewhere, such as in your footer.
2. Add a search bar using the widget panel
Another way to add a search bar to WordPress is to use the widget panel. This is a beginner-friendly option that’s best suited to those using classic WordPress themes.
To add a search bar using the widget panel, you’ll start in your WordPress dashboard. Then head to Appearance → Widgets.
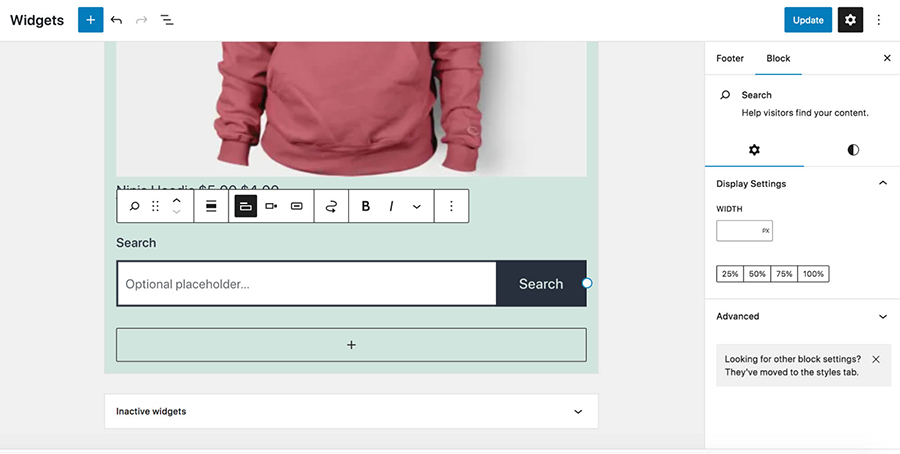
Here, expand the section where you want to add a search widget. And click the + icon at the bottom. This will open up a list of blocks for your site. Search for, “Search.” Select the search block.

Now, you can style and customize the search block however you’d like and save to add it to that section of your site.
If you want to change the button, position, or style of your search widget, head back to the Widgets screen and use the toolbar to customize your search bar.
3. Add a search bar using a plugin
If you’re looking for an option that’s more flexible but still simple, you might prefer to use a plugin to add a search bar to WordPress. Using a plugin is quick and requires no special know-how, but gives you more control over your search bar than you’ll get from the default WordPress settings.
Add a search bar with Jetpack Search
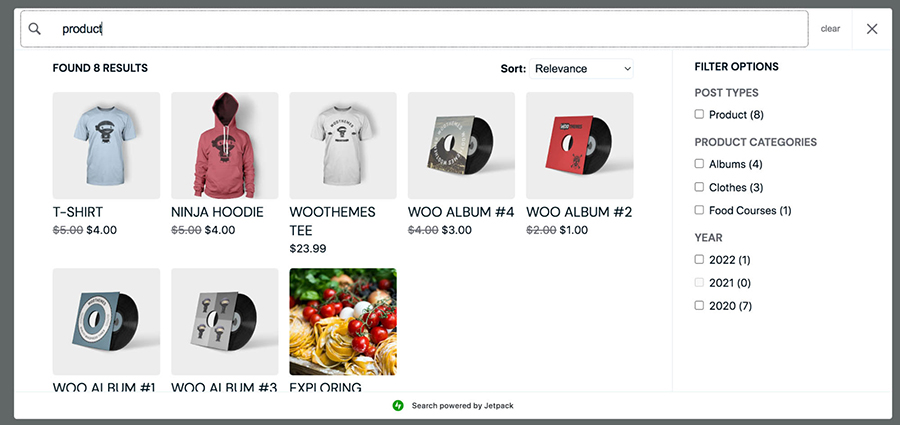
Jetpack Search, for example, lets site owners nudge visitors in the right direction by customizing results and providing easy-to-use filtering options that are intuitive to use. It’s also smart enough to understand what visitors are looking for, even if they misspell a word or type in a complex, multi-faceted search like, “Bulk jars of tangy poultry seasoning for under $50.”
Leading interior designer, Kylie. M. Interiors, uses Jetpack Search to more efficiently navigate visitors to one of more than 3,000 articles and reduce the workload for her and her team.
Jetpack Search also supports dozens of languages and works lightning fast, providing logical results that update as visitors type. So people can find the right answers before they’re even finished submitting their search.
It also integrates seamlessly with your WordPress site for brand consistency and provides insights to site owners about what visitors are searching for.
Perhaps most impressively, all of this power comes with minimal performance impact to your site because it operates on the cloud. So, even if thousands of new visitors are searching for content each day, your server resources won’t suffer.
You’ll need to start by installing Jetpack Search on your site, and you have two options here:
- Add the Jetpack Search plugin. This adds just the search functionality to your site, and has both free and premium plans available depending on your usage.
- Purchase the Jetpack Complete plan. Jetpack Search is bundled in this plan, alongside additional site features for security, growth, and more.
In the following steps, let’s say that you choose the Jetpack Search plugin. In the WordPress dashboard, go to Plugins → Add New and search for “Jetpack Search.” Then, click Install now → Activate.
You’ll be prompted to connect to a WordPress.com account, and can purchase a premium plan if you choose to do so. Once the plugin is set up, go to Jetpack → Search in your dashboard. Here, you can enable the feature, turn on instant search, view data about the searches placed on your site, and more.
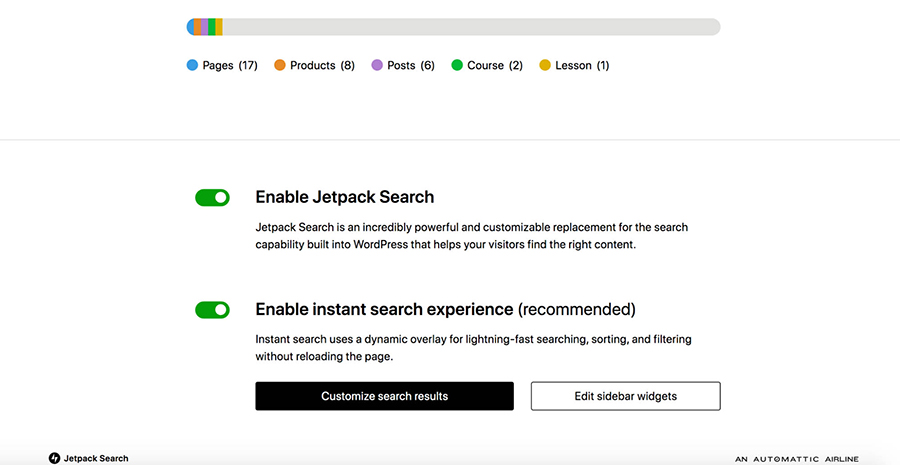
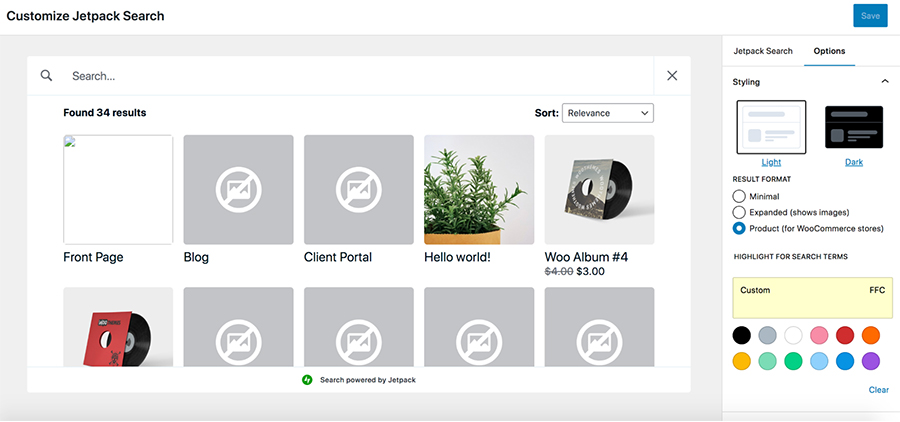
If you’d like to customize the search experience, click the Customize search results button. This will open a new screen with lots of additional options for styling, included post types, and more. For example, you might choose to highlight search terms in your brand color, show additional information for product results, and exclude media files from results.
Add your search bar to your site
Now, you can add the new Jetpack Search experience anywhere you’d like on your site, just as we did earlier in this article. You’ll simply add a Search block using the Block Editor, Site Editor, or Widget panel depending on your specific situation. Jetpack Search will automatically replace the default WordPress setup with the new, instant search experience.
4. Add a search icon to your header or menu without a block theme
A header or navigation menu is an ideal place for a search icon, since it’s instantly visible to everyone who lands on your website.
If you’re using a block theme, you can add a search bar to your header using the steps detailed above. If you’re using a classic theme, you’ll need to install a plugin like Ivory Search.
To get started, you’ll need to install and activate Ivory Search in WordPress. Then, go to Ivory Search → Menu Search, and choose the menu where you want to display your search bar.
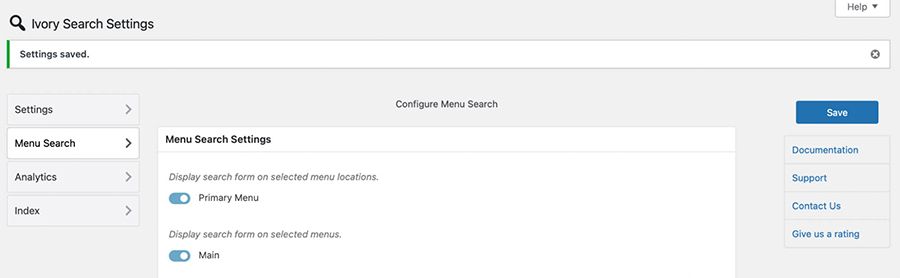
Click on Save to view all the available settings. For instance, you can select search form styles such as drop-down and full-width.
Further down, use the toggle to display a search form close icon. Then click on Select Color to apply a menu magnifier icon color.
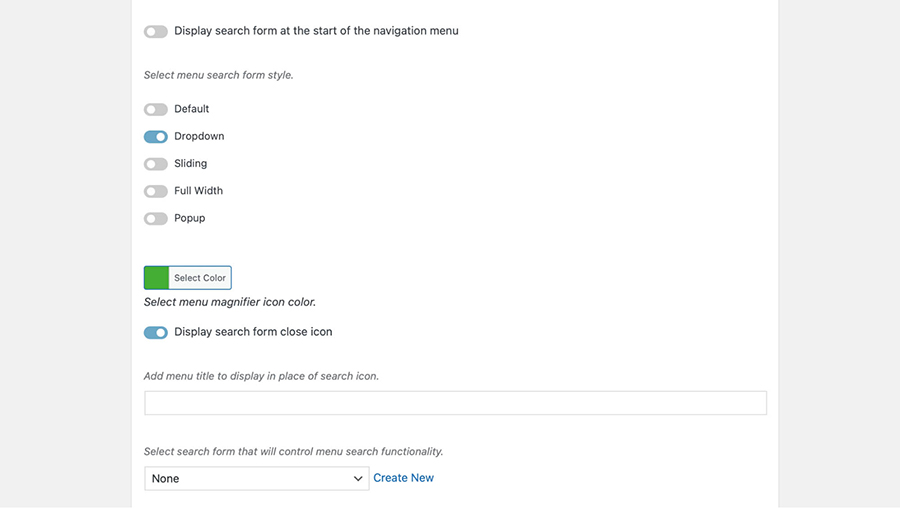
You can also add a menu title to display instead of the search icon.
Finally, select the search form that will control the menu search functionality. Use the drop-down menu to make your selection.
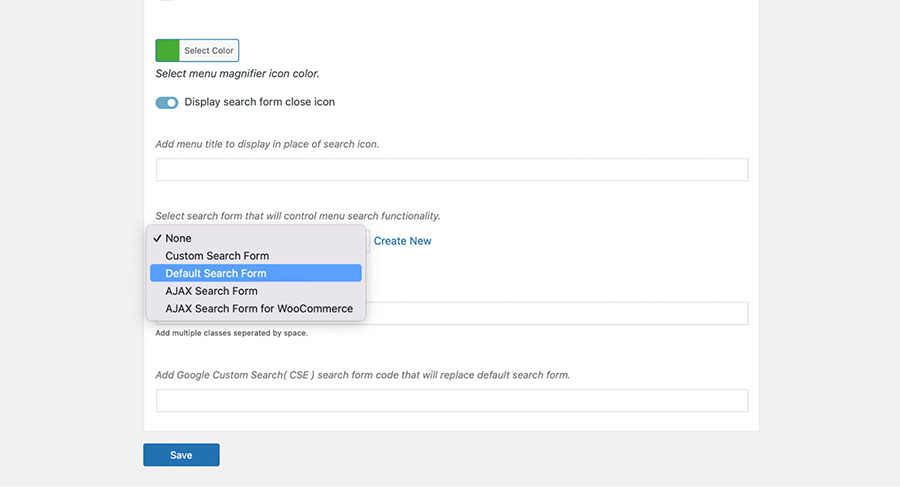
Then, click on Create New. This will take you to a new screen where you can give your search form a name and configure your searchable content.

Choose Save Form to generate your search form shortcode. Then you can add it to a widget area, like your header.
You can view your site on the front end to see the results:

You should see the search icon in your preferred color. When you click on that icon, a full search bar will appear.
5. Add a search bar manually using custom code
All the methods we’ve looked at so far have been suitable for beginners. However, this next option requires some technical knowledge, since you’ll need to add and edit code in your theme files. You’ll want to make all changes using a child theme, so that when you update your theme down the road, your code won’t be lost.
Before you get started, it’s important to make a backup of your WordPress site. That way, if you enter a wrong line of code, you can easily restore your site to a previous version.
To add a search bar manually, connect to your site via FTP or your hosting provider’s cPanel. Navigate to your website files (typically the public_html folder), then choose /wp-content → /themes → /your-theme. Browse through the files, and find the header.php or footer.php file (depending on where you want to add your search bar).
Once you’ve found the file you want to use, open it and add this function:
<?php get_search_form(); ?>
This will call the search form from your searchform.php template. If you don’t have this template yet, the function will create one.
Your search bar should now be visible on the front end.

From here, you can continue to tweak your search form via custom code to look and function exactly how you prefer.
How to create a custom search form template (optional)
If you want full control over markup, create searchform.php in your child theme and add accessible labels + custom classes:
<pre><code class="language-php"><?php
/**
* Custom search form template.
*/
?>
<form role="search" method="get" class="site-search" action="<?php echo esc_url( home_url( '/' ) ); ?>">
<label class="screen-reader-text" for="site-search-input">Search this site</label>
<input id="site-search-input" type="search" class="site-search__input"
placeholder="Search…" value="<?php echo get_search_query(); ?>" name="s" />
<button type="submit" class="site-search__button">Search</button>
</form></code></pre>Help your visitors find what they need
Instantly deliver the most relevant results to your visitors with Jetpack Search. No coding required, no ads, and no tracking.
Get Jetpack Search for freeHow to offer the best search experience to your visitors
The search experience is a crucial part of your website, since it affects the way customers find and engage with your content. One of the easiest ways to take your search experience to the next level is to use a handy tool like Jetpack Search.
Jetpack Search is a superb solution for large and complex websites. Once installed, you can present instant search results with advanced filtering to help visitors find exactly what they’re looking for.
There’s a free version that can handle 5,000 records and 500 requests per month.
The premium version can handle larger sites and a greater search volume, plus you can display an unbranded search bar, so the experience fits in seamlessly with the rest of your site.
To get started with Jetpack Search, all you need to do is install and activate it. Then go to Jetpack → Search and scroll down to the settings.

Here, you can use the toggle to Enable Jetpack Search. You can also toggle on the instant search experience. This will enable dynamic overlay for searching, sorting, and filtering, without forcing visitors to reload the page. Your changes will update automatically, providing visitors with an advanced search experience right away.
Frequently asked questions (FAQs) about WordPress search
In case you still have a few questions, let’s look at a few common reader queries regarding search functionality.
Why should I add a search bar in WordPress?
A search bar is an easy way to improve your user experience. Small websites might be able to match visitors with the content they’re looking for pretty quickly.
However, large and complex sites like ecommerce stores can have hundreds or even thousands of pages. Therefore, visitors might get frustrated trying to find content using the navigation menu alone.
A search bar can deliver instant results, and point visitors to where they want to be on your site. This way, you can reduce bounce rates and increase time spent on site.
What is the difference between a search bar and a search box?
‘Search bar’ and ‘search box’ are interchangeable terms. Both describe a field that is placed on your website (usually in your menu or header). Visitors can enter search terms and keywords into this field to discover content on your site.
It’s important to note that a search bar is different from an address bar. An address bar is the field near the top of your browser where you can either type in a specific URL or enter search terms. Then a search engine (like Google) matches you with content in its index. The address bar searches the entire web, while the search bar (or box) is tied to a single website.
How can I improve the WordPress search experience for my visitors?
A search bar is a great way to provide a stellar user experience, but there are also ways to optimize the search experience.
For instance, you can place your search bar somewhere that’s easily accessible, like your header, footer, or sidebar. Additionally, you can improve the WordPress search experience by providing live search suggestions.
Spelling correction is another great tool to make the search experience more accurate. Plus, you might support filtered searches, so customers can find content by searching for specific tags, categories, dates, and more.
What is the difference between default WordPress search and a plugin like Jetpack Search?
The default WordPress search function is basic. It performs a simple keyword match against your post titles and content, often returning results that are not sorted by relevance.
A dedicated plugin like Jetpack Search offers a more advanced experience. It provides features such as instant search results that appear as the user types, typo correction, and intelligent relevance ranking based on content, tags, and categories. Advanced plugins also use cloud-based servers, which means the search process does not slow down your website, even with many users searching at once.
Will adding a custom search bar slow down my website?
It depends on the method you use. Adding a search bar using a block, widget, or a well-coded plugin has a minimal impact on site speed. Advanced plugins like Jetpack Search are designed for performance. They process search queries on their own servers, so they do not use your website’s resources.
The method that could potentially slow down your site is a poorly implemented custom code solution or a heavy plugin that runs complex database queries on your server for every search. Always choose optimized tools to maintain good site performance.
How do I customize the “No Results Found” page in WordPress?
You can customize the “No Results Found” message by creating or editing the search.php file in your child theme. Within this file, you can write a conditional statement that checks if any posts were returned by the search query. If no posts are found, you can display a custom message.
Good practice is to offer helpful next steps on this page. You could suggest alternative search terms, provide a link back to your homepage, or display a list of your most popular articles. This improves the user experience by helping visitors who did not find what they wanted.
Can I add a search bar to my WordPress menu without a plugin?
Yes, you can add a search bar to your menu without a plugin if you are using a block-based theme or are comfortable with code. With a block theme, you can use the Site Editor under “Appearance” to edit your header template part and simply drag a Search block into your navigation area.
For classic themes, you would need to add a specific function to your theme’s functions.php file that hooks into the navigation menu filter and injects the search form HTML. This method requires technical knowledge and is best handled within a child theme.
Is it better to use a plugin or custom code to add a search bar?
For most users, using a high-quality plugin is the better option. Plugins are easier to install, configure, and maintain without needing any coding skills. They often come with advanced features like live search, analytics, and customization options that would be complex to build from scratch.
Custom code is best reserved for developers who need complete control over the search form’s HTML structure and functionality, or who have unique design requirements that a plugin cannot meet. For a balance of ease and power, a plugin is almost always the recommended path.
How do I make my search bar search for more than just posts and pages?
By default, WordPress search is limited to posts and pages. To expand its scope, you can use a plugin or add a code snippet to your theme’s functions.php file.
A search plugin will typically provide a settings panel where you can check boxes to include custom post types, such as products in an ecommerce store, media files, or documents. If you are using code, you will need to modify the main search query to include additional post types in its parameters. This makes your site search much more comprehensive and useful for visitors.
What makes a good search experience on a website?
A good search experience is fast, relevant, and easy to use. The search bar should be prominently placed, usually in the header, so it is always accessible. The results should load quickly and be sorted by relevance, not just date.
Advanced features such as spelling correction for typos and live search suggestions greatly enhance the experience. Finally, the search results page itself should be clearly designed, highlighting the search term within the results and providing clear titles and excerpts so users can easily identify the best match for their query.
Can a search bar improve my website’s SEO?
A search bar can indirectly improve SEO by enhancing user experience signals. When visitors can easily find what they are looking for, they tend to stay on the site longer, view more pages, and have a lower bounce rate. These are all positive user engagement metrics that Google considers when evaluating a site’s quality.
Furthermore, by tracking what users search for, you can discover new keyword opportunities and create content that directly meets your audience’s needs. This can lead to higher rankings for those terms over time.
Jetpack Search: A powerful and customizable WordPress search plugin
One of the easiest ways to keep visitors on your site is to streamline navigation. A search bar enables you to do this because it quickly connects visitors with the content they seek. Better yet, there are lots of easy ways to add a search bar to your website.
For instance, you can add a search bar to WordPress using the Search block or use custom code and tweak it to meet your needs.
Alternatively, you might prefer to create this feature with a plugin, which can be one of the best ways to implement a powerful search function on your site. With a solution like Jetpack Search, you can implement quick results and powerful filtering to keep visitors on your site.
What’s more, you can enable an instant search experience with a dynamic overlay, to generate results even faster. Check out the plans today to get started!
Help your visitors find what they need
Instantly deliver the most relevant results to your visitors with Jetpack Search. No coding required, no ads, and no tracking.
Get Jetpack Search for free