Learn how to view referral traffic from social networks directly in the Jetpack Social Overview tab.
You can check on the traffic generated from social media networks as referrals, by accessing the Jetpack Social Overview tab when you’re on a paid plan. This feature, in fact, requires a paid Jetpack Social plan to see real data. Free-plan sites see a preview with an upgrade prompt.
Where to find the chart
1. Go to Jetpack → Social in WP Admin.
2. Select the Overview tab.
3. The Traffic from social media card appears above the Connected accounts card.
What the chart shows
The chart is a line chart of referral visits to your site, broken down by social network. The data comes from the same referrers source as Jetpack Stats.
Networks shown with real referral data:
- X (Twitter)
- Threads
- Mastodon
- Bluesky
- Tumblr
- Nextdoor
Note: X appears in the chart because traffic arriving at your site from x.com, twitter.com, and t.co is counted as referral data. This is separate from Social connections – X is not currently available as an auto-sharing destination in Jetpack Social.
Networks shown as discovery cues (visible in the legend even if you have not connected them through Jetpack Social):
- YouTube
- TikTok
- Discord
The chart does not include traffic from search engines, direct visits, or referrers outside the social network list above.
For a full referrers breakdown, use the Traffic view in Jetpack Stats.
Change the date range
A date range selector at the top of the card lets you choose:
- Last 7 days.
- Last 30 days.
- Last 90 days.
Each interval is cached independently, so switching between them is fast after the first load.
Free plan vs. paid plan
This is what you can see and act upon if you’re on the free plan:
- The chart shows a blurred placeholder curve, not your real traffic.
- An Unlock traffic insights overlay appears with an “Upgrade now” button.
- The date range selector is disabled. Hovering it shows the tooltip “Available with a paid plan.”
On a paid Jetpack Social plan, instead:
- The chart shows your real referral data.
- The date range selector is enabled.
When the chart is hidden or empty
The chart hides entirely if your site has zero connected accounts in Jetpack Social. In that state, the Overview tab focuses on the “Add account” call to action.
If you have at least one connected account but no matching referrer visits in the selected window, the chart shows the message “No traffic from social media yet” instead of a line graph.
Privacy information
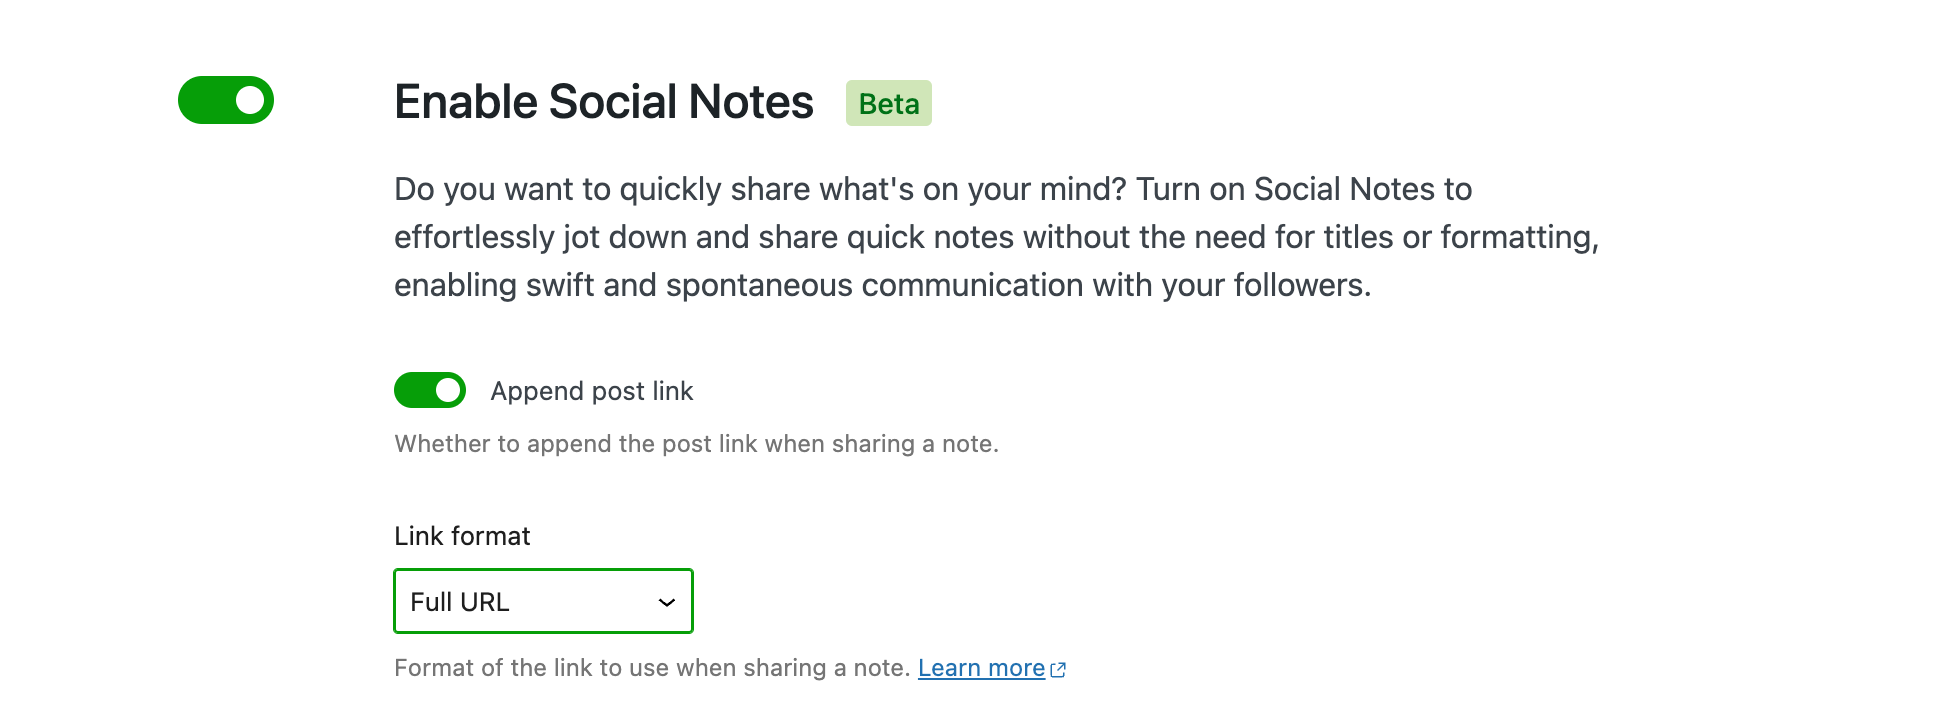
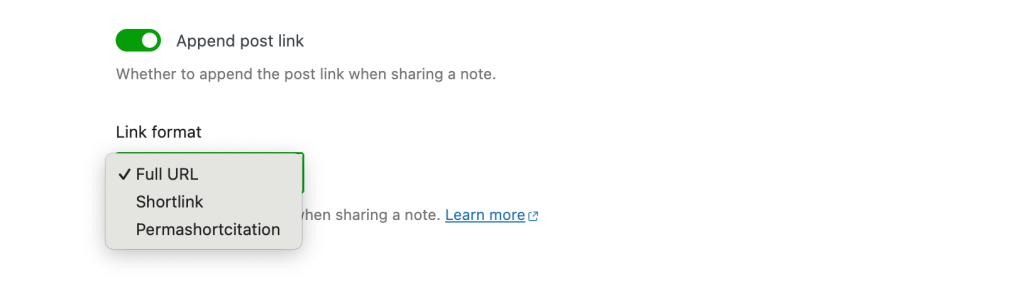
Jetpack Social is deactivated by default. It can be activated at any time. To activate it:
- Go to Jetpack → Settings in your WP Admin.
- Click the Sharing tab.
- Toggle the Automatically share your posts to social networks setting in the Jetpack Social connections section.
Still need help?
Please contact support. We’re happy to advise.