
WordPress is a powerful content management system (CMS), but its popularity means equal attention as a target among hackers. Without the necessary security measures, your site can be vulnerable to attacks.
Fortunately, there are several things you can do to keep your site safe. This ranges from simple tasks like updating plugins and performing backups to more involved strategies, like migrating to a hosting provider with stronger security measures.
In this guide, we’ll walk you through 28 WordPress security best practices to help you ensure that your site is protected.
1. Keep WordPress, plugins, and themes updated
Outdated software poses a huge threat to websites. When a plugin or theme hasn’t been updated in months or years, hackers will have had more time to look for vulnerabilities in the software and find a way into sites that use it.
Simply put: If you’re using an older version of WordPress, your site is vulnerable to attacks. This also applies to any plugins or themes on your website.
It’s important to keep in mind that WordPress is staggeringly popular. It powers around 43 percent of all known websites. That means that a single plugin with a security issue can lead to hundreds or thousands of sites with an open door for cybercriminals.
The easiest way to protect yourself against these vulnerabilities is to keep WordPress and all its components up to date. This can be as simple as checking the dashboard every day to see what updates are available and executing them.

In the case of plugins, you can configure them to update automatically on a one-by-one basis. To do this, go to Plugins → Installed Plugins and click on Enable auto-updates for the plugins you want to update automatically.

2. Change the default “admin” username
One of the biggest security mistakes that WordPress users can make is choosing a username like “admin” or “administrator”. Those are the default usernames that WordPress sets for you, and keeping them in place makes it easier for attackers to force their way in.
Many hackers try to break into a website by trying as many combinations of usernames and passwords as possible. This is called a brute force attack. If someone already knows your username, it means they only have to guess one login factor.
WordPress doesn’t let you change the username for the administrator account once you set it. To make a change, you’ll need to create a new account, give it the Administrator user role, and delete the old one.
You can do this by going to Users → Add New. Then, enter the details for the account, including a username that’s hard to guess, and choose Administrator from the Role menu.
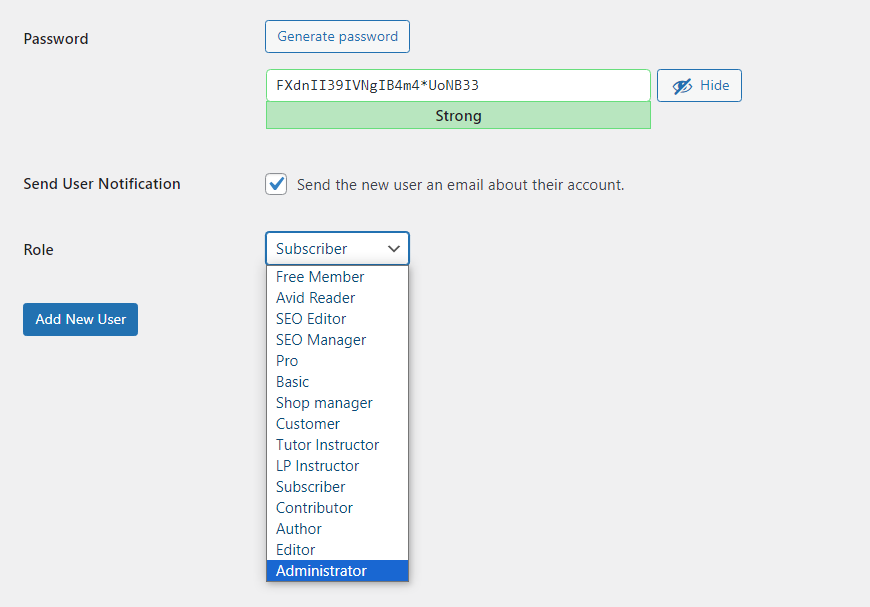
The next time you create a WordPress website, you’ll need to set the administrator username to something different. This simple change will make it much harder for attackers to access the account.
3. Use strong passwords and change them regularly
If you use an easy password like “1234” or have the same one for every account, it’s just a matter of time until someone gains access to your site.
While there are ways to regain access to stolen accounts, the process can be arduous. Plus, a hacker might do irreparable damage to your content and reputation.
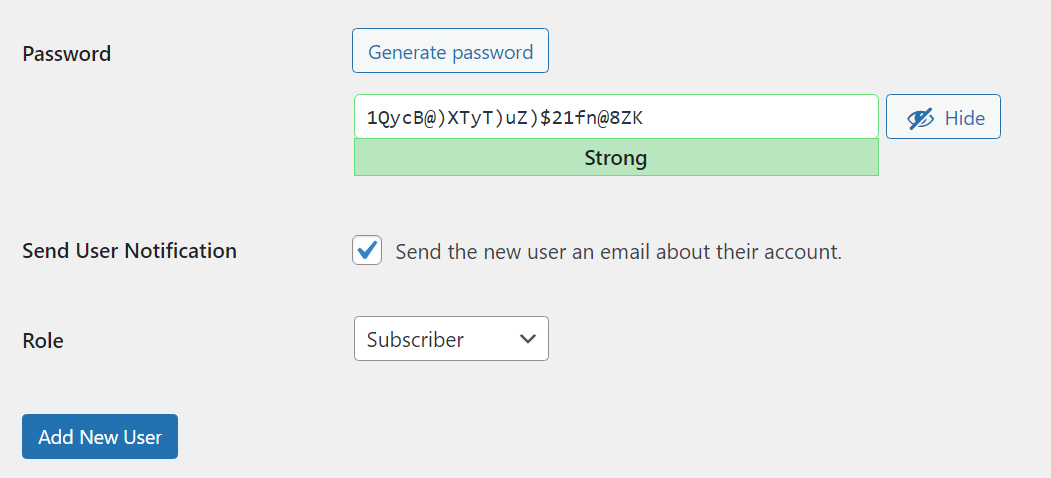
When you create a new account in WordPress, the CMS will generate a strong password for you. This is typically a combination of letters, numbers, and special characters.
You can use this password or change it to something more memorable (while retaining a mixture of letters and numbers).
You could even use a credentials manager if you have trouble remembering it. Password managers can help you generate secure passwords for all your accounts and keep them safe.
For added security, you’ll want to change your passwords periodically. This way, if there’s a leak of credentials, your account will be safe.
4. Implement two-factor authentication (2FA)
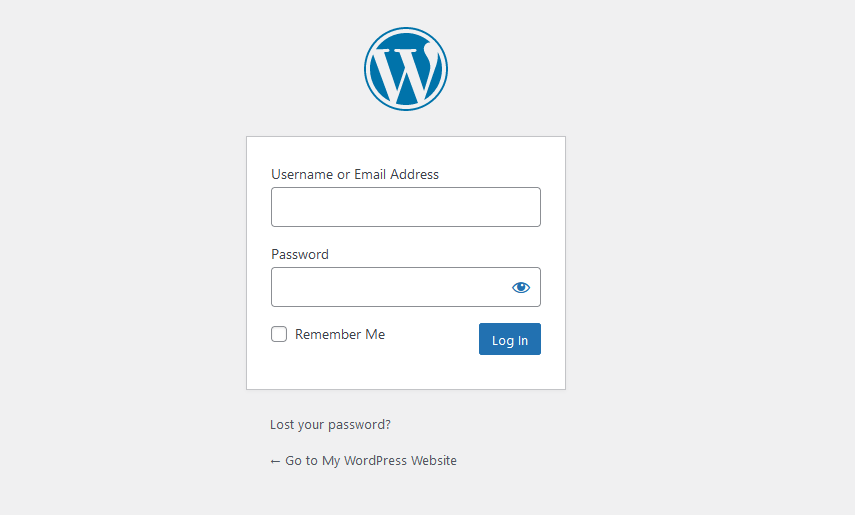
Like many other websites, WordPress requires a username and a password to log in. This means login security largely depends on how strong your credentials are.
Even with the strongest password, there’s a chance someone might gain access to your account or others on your site. An effective way to avoid this breach is to use two-factor authentication (2FA).
When you enable 2FA, your site will require an additional method of verification for users to log in. Typically, this is a one-time code sent via SMS, email, or an authentication app.
Since hackers don’t have access to your mobile device or emails, they won’t be able to log into your account. Some websites offer the option of using 2FA, whereas others enforce it.
If you use Jetpack, you can enable users to log in with their WordPress.com accounts. There’s also an option for using WordPress.com’s 2FA functionality.
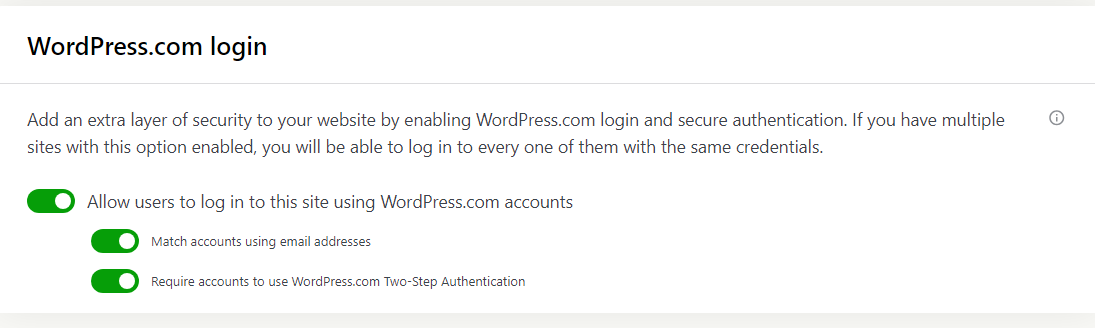
You can find these settings by navigating to Jetpack → Settings and locating the WordPress.com login section. Then, simply toggle the corresponding switch.
5. Use HTTPS encryption through an SSL certificate
A secure sockets layer (SSL) certificate enables your website to load over HTTPS, which is the secure version of HTTP. The certificate verifies that your website is genuine and that communication between the browser and the server is encrypted.
You can get an SSL certificate for free from several authorities, like Let’s Encrypt. Many WordPress web hosts will automatically set up an SSL certificate for your website. Other web hosts will enable you to set up a certificate manually via cPanel.
6. Install a reputable security plugin
WordPress security plugins often come with a collection of features and tools that help you protect your website. These typically include:
- Spam protection
- Denial of service (DDoS) attack protection
- A web application firewall (WAF)
- Malware scanning and cleanup
- Automatic backups
You can find individual WordPress plugins that do each of those tasks separately. But if you opt for a comprehensive security tool, you’ll be able to manage multiple features from the same place, which can make your work easier.
In fact, using the right plugin can help you check off several items in this list of the best WordPress security practices. Jetpack Security includes all the features just mentioned, and many others.
7. Regularly back up your website
Backing up your data regularly is arguably the most important thing you can do to keep it safe. When it comes to websites, a full backup can be a lifesaver in the case of a security breach or malfunction.
If your site gets hacked or ceases to function properly, the easiest way to solve the problem might be to restore a recent backup. The more recent the backup is, the less likely it becomes that you’ll lose any critical information.
Once the site is functioning properly again, you can take the necessary steps to secure it from further attacks.
There are a lot of backup options for WordPress. Some web hosts offer automatic backups as part of your hosting plan (typically if it’s a managed service). However, it’s best not to rely solely on these backups. If your server is compromised — by a coding mistake, host error, or hack — the backups can be, too.
A better option is to use a plugin that stores backups off-site. Jetpack VaultPress Backup is one such option. The tool is available as an individual plugin and as part of the Jetpack Security bundle mentioned before. It backs up your site automatically whenever you make a change.
These real-time backups are ideal if you’re constantly adding new content to your website. It means you’ll always have a copy of the latest version. Plus, the backups are stored off-site, so you’ll always have access to them, even if your site is completely down.
8. Use a web application firewall (WAF)
A WAF is a type of firewall that’s designed to filter traffic to and from a website. It uses rules to filter specific types of traffic and it can blocklist known malicious IPs.
WAFs are designed to help you stop common types of cyberattacks, including SQL injections, cross-site scripting (XSS), and cross-site request forgeries (CSRF). They’re capable of doing this thanks to their complex systems of rules.
The more comprehensive the rules of the firewall, the more effective it is. A lot of security plugins (including Jetpack Security) boast sophisticated WAFs with rulesets designed from years of experience dealing with WordPress attacks.
Although you can set up and configure a WAF manually, your best bet is to use either a web host or a security plugin that sets one up for you. This way, you can leverage their existing database of threats and simply toggle the firewall on.
9. Regularly scan for malware
Scanning your website for malware involves using a third-party tool or a security plugin. This software goes through your site’s files, plugins, and themes to look for malware infections. If it detects anything amiss, it will let you know where the problem is.
Remember when you used to run antivirus scans on your computer and it would take forever? Now, most antivirus software just runs in the background and only bothers you if there’s an issue. Malware scans with Jetpack Security work just as seamlessly.
And, unlike with other tools that only tell you there’s a problem, if Jetpack finds something, it will usually provide solutions to fix the problem — often with a single click.
If you take steps to secure your site, malware infections should be exceedingly rare. Even so, it never hurts to have automatic malware scans set up in case you get hit by a zero-day exploit or some other type of attack that’s difficult to stop.
10. Block form and comment spam
Any WordPress site with open comment sections or forms may encounter spam. This can range from competitors posting links to their sites to attackers sharing malicious URLs or trying to use scripts to gain unauthorized access.
The simple solution to this problem is to moderate comments on your site. But as your site grows, filtering spam comments can become a full-time job. It’s not uncommon to have thousands of messages waiting for moderation.
You could try to use a CAPTCHA to stop robot spam submissions, but you’ll inevitably annoy some users and diminish the legitimate engagement and conversions your site needs to thrive.
The best option is to use Akismet. This tool works completely in the background to stop spam submissions on comments and forms, so you don’t even notice it’s happening. Legitimate users are allowed to continue without the need to solve a puzzle, answer a riddle, or even click a box.
All of this happens with 98% accuracy.
Akismet is also customizable, to immediately delete certain comments and retain others for you to manually review and approve or deny.
You can get Akismet as its own plugin, but if you’re committed to improving your overall security and user experience with the least amount of effort (and expense) you can also get it as part of the Jetpack Security plan.
11. Implement secure file permissions using FTP
Every file and folder in a UNIX-based system has a set of permissions. These permissions are represented by sets of three numbers. For example, “777” means that every user has full write, read, and execution permissions for a file or directory.
The first of the three numbers represents who owns the file or directory. The second number stands for accounts in an owner group, and the third for every other user.
In the example above, each seven means that each of those types of users has read (four), write (2), and execution (1) permissions. If you add up those values you get a seven.
The file permissions you assign to WordPress files and directories will govern who can access, read, and edit them. The recommended file permissions for WordPress are 755 for directories and 644 for files.
To set these permissions, you’ll need to connect to your website via a file transfer protocol (FTP) tool like FileZilla. You can get your FTP credentials from your hosting account.
Once you connect to your site, navigate to the root directory (this is usually labeled public_html). Inside this folder, you can select any subdirectory or file you want, right-click on it, and choose the option that says File permissions.
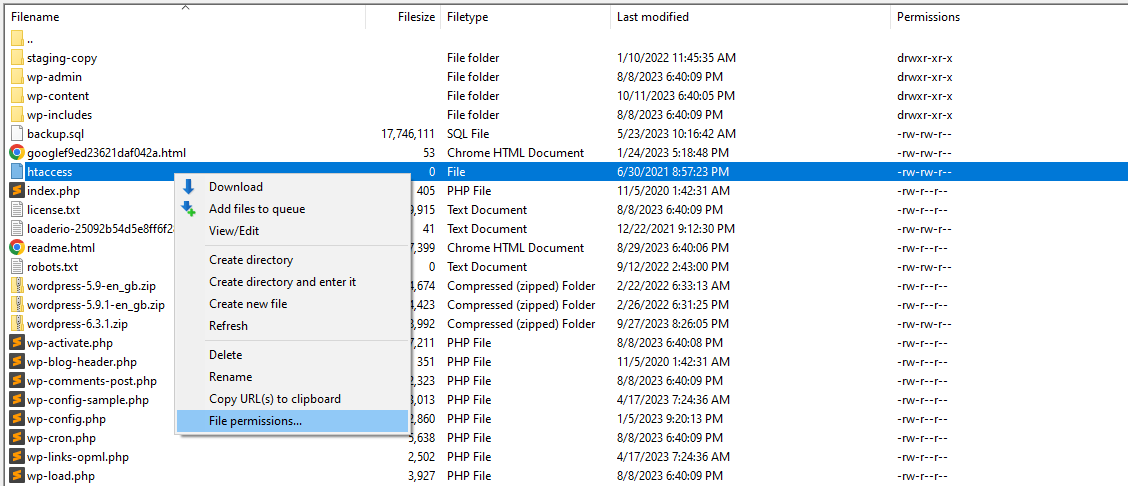
A new window will pop up where you can set the permission for the file or directory you selected through the Numeric value field.
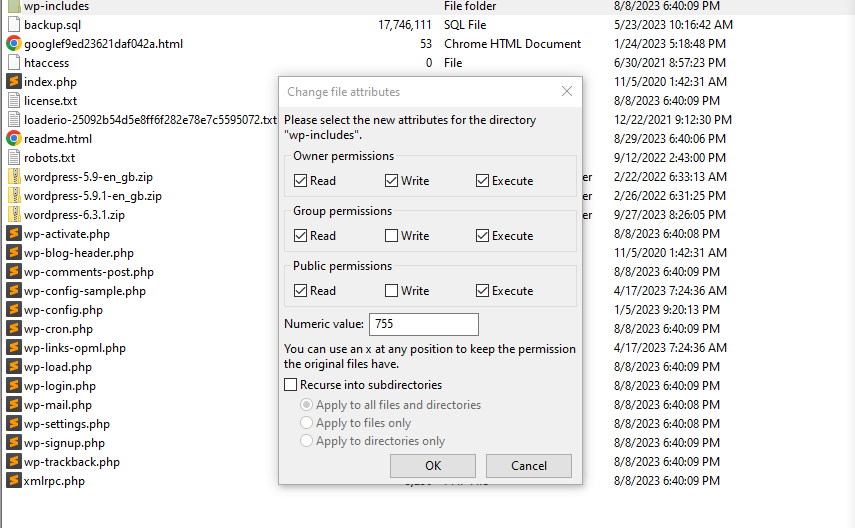
If you change permissions for directories, you’ll also see an option that says Recurse into subdirectories. This will enable you to set the same permissions for all subdirectories or files.
Note that there are some exceptions to the rule when it comes to the optimal permissions for WordPress files. One of them is the wp-config.php file, which we’ll discuss in the next section.
12. Secure your wp-config.php file
The wp-config.php file includes critical information about your website and its database. It’s one of the most important WordPress core files, which means you should take additional steps to secure it.
In terms of permissions, it’s best to set wp-config.php to either 400 or 440. If you remember the breakdown from the previous section, you’ll know those permission values translate to:
- 400: Only the owner can read the file.
- 440: Only the owner and users in the owner’s group can read the file.
This removes writing permissions from wp-config.php altogether. This is usually a safe choice, since it prevents anyone from being able to modify the file’s settings.
Another way you can secure wp-config.php is to move one level above the root directory. WordPress will look for the file one directory up if it can’t find it in the default location.
That means WordPress will still function as normal, but attackers might be fooled by the fact they can’t find the file.
13. Disable file editing in your wp-config.php file
WordPress offers several options for editing files. One of them is using the plugin and theme file editors, which are available from the dashboard.
These file editors enable you to make changes to your site’s code without having to connect to it via FTP. The downside of this approach is that if a hacker gains access to an account that has permission to use these editors, they can wreak havoc on your website.
Therefore, you might want to consider disabling file editing in WordPress. You can do this by opening the wp-config.php file and adding the following line of code to it:
define('DISALLOW_FILE_EDIT', true);
Note that some themes and plugins will automatically disable file editing. If you don’t see the file or theme editors in the dashboard, it’s likely that you’re using one of these tools.
14. Restrict directory browsing in your .htaccess file
If directory browsing is enabled, you can visit yourwebsite.com/content/. Instead of getting a 403 forbidden error, you’ll see a list of the subdirectories and files inside that folder.
Disabling directory browsing is a must if you want to protect your site. If anyone can see the contents of your site’s folders, they can get a lot of information, like what theme and plugins you use. They’ll also be able to navigate media files unrestricted, which is terrible from a privacy standpoint.
Most WordPress web hosts disable directory browsing by default. If yours doesn’t offer this feature, you can enable it yourself by editing the .htaccess file in the root directory.
To do this, open the file and add the following line of code:
Options -Indexes
Save the changes and close the file. Now, if you try navigating to a directory through a browser, you’ll get an error saying you don’t have access to it.
15. Restrict access to the wp-admin directory
wp-admin is the default location for the WordPress directory. If you visit your website’s homepage and add /wp-admin to the end of the URL, you’ll get to the WordPress dashboard (after going through the login page).
This structure is standard for WordPress websites. This makes it easy to find and access the dashboard, both for you and for attackers.
One way to protect the WordPress admin is to secure it with a password. This way, users will need to enter a different password after making it through the login page.
If your web host uses cPanel, you can add a password to the wp-admin directory by using the Directory Privacy tool.
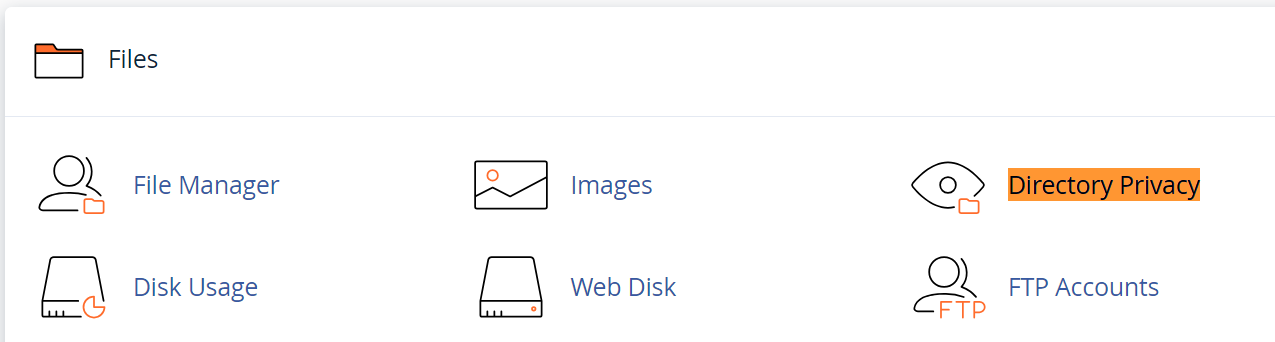
Once you’re inside this tool, browse through the folders until you find the wp-admin directory. Click on the EDIT button next to it, and on the following page, tick the option that says Password protect this directory.
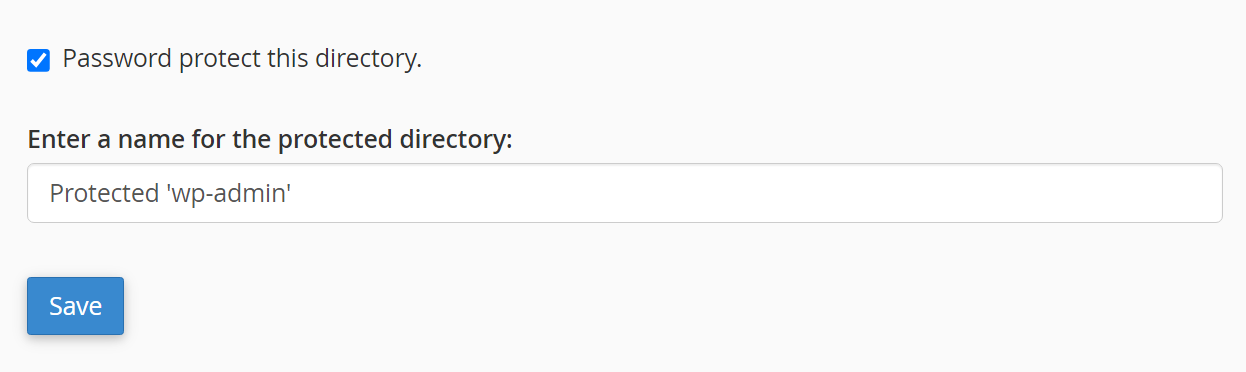
Now the directory privacy tool will ask you to set a password for wp-admin. After you save the password, try accessing the WordPress dashboard. A password pop-up should appear directly within the browser.
16. Hide your wp-admin login URL
Another way to protect the WordPress admin is to change the URL that leads to the login page. If you combine this strategy with the additional password protection covered in the section above, no attacker should be able to get into your site’s dashboard.
You can change the wp-login URL manually, but using a plugin can simplify the process. WPS Hide Login is a simple tool that enables you to set a new login URL without needing to edit any of your site’s code.

Once you install the plugin, go to Settings → WPS Hide Login and look for the section that says Login url. Use the field next to that option and replace the default login URL with a custom one.
You might want to use a random mix of letters and numbers. This will make it more difficult for attackers to guess. Just make sure to either bookmark the new login page, or set a URL that you can remember.
17. Limit login attempts
As mentioned earlier, attackers can gain access to your site by trying out multiple combinations of usernames and passwords. Setting strong passwords can be an effective way to block their attempts, but there’s another thing you can do to stop brute force attacks.
This involves limiting the number of login attempts that users can make in a specific period of time. This limitation won’t affect regular users, but it should be enough to foil brute force attacks that use bots. By limiting the rate at which they can try new credentials, you can minimize the chances they’ll succeed.
There are a lot of tools you can use to limit login attempts in WordPress. If you use Jetpack, you have access to its brute force protection feature. This automatically limits login attempts that Jetpack identifies as malicious.

Jetpack can also help you allowlist IP addresses, so they’re not blocked by the brute force protection tool. You can use this for your IP address and those of your coworkers to prevent false flags.
18. Log idle users out automatically
A lot of websites will log you out of your account after a set period of time. This is a security measure designed to prevent other people from hijacking your session if they get access to your computer.
This might not be an issue depending on where you log in from, but it’s still a security measure worth implementing. That applies particularly if there are other people who have access to your site’s dashboard.
WordPress doesn’t log out users automatically. To add this functionality, you’ll need to use a plugin like Inactive Logout.
Once you install the plugin, go to Settings → Inactive Logout → General Settings. Look for the Idle Timeout option and set the value to whatever timer you want, in minutes.
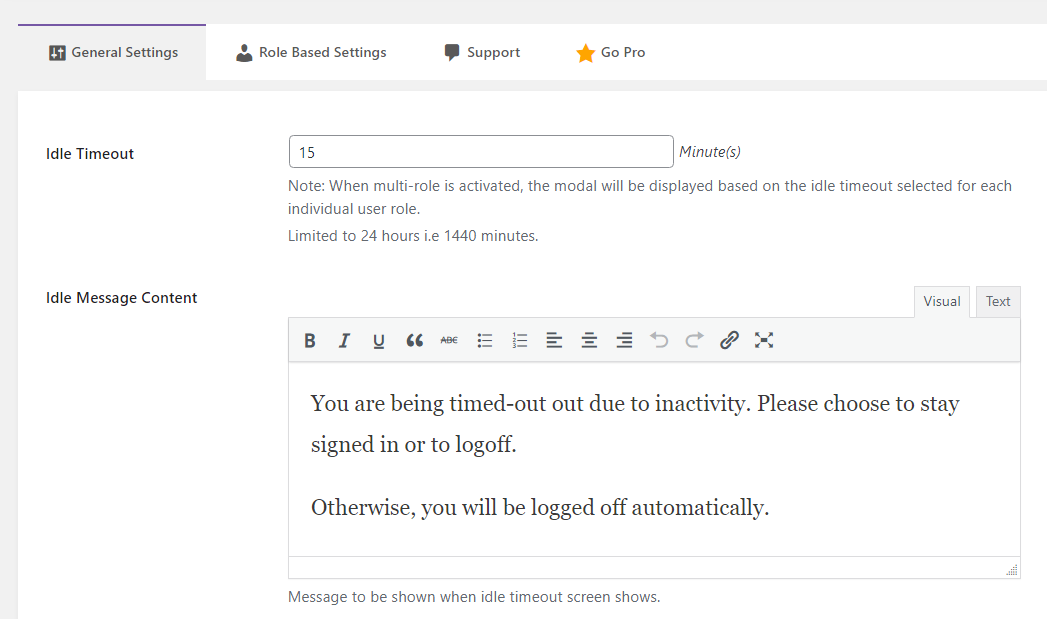
Now, users will be automatically logged out if they’re idle for that amount of time. The plugin also enables you to configure a message that informs them why their session is closed, so they’re not confused when they return.
We guard your site. You run your business.
Jetpack Security provides easy‑to‑use, comprehensive WordPress site security, including real‑time backups, a web application firewall, malware scanning, and spam protection.
Secure your site19. Change the default WordPress database prefix
Every WordPress database has a name. By default, that name is wp_something, with the “something” standing in for the actual name of the database.
What’s really important here is the prefix. By default, WordPress uses the wp_ prefix, which means that attackers can easily guess the full name of the database.
Simply changing the prefix can make that task much more difficult for attackers. Unfortunately, it’s not that simple to change the WordPress database prefix.
This process requires you to edit both core files and make changes to the database itself. So before you do anything else, you’ll need to perform a full website backup, which includes all files and the database. That way, if anything goes wrong, you can restore the backup.
To get started, access the website via FTP and go to the wp-config.php file. Open the file and look for this line inside:
$table_prefix = ‘wp_’;
You can go ahead and replace the “wp_” prefix with something else, like “newprefix_”. That’s just an example, though. You’ll want to choose something that’s difficult to guess.
Now, save the file and access the database using phpMyAdmin. Select the WordPress database from the list to the left and click on SQL in the menu at the top of the screen above the list of tables.
This will open a page where you can execute SQL commands that affect the database. What you need to do now is replace the existing table prefixes for all tables in the database. By default, that means the following tables:
- wp_options
- wp_postmeta
- wp_posts
- wp_term_relationships
- wp_term_taxonomy
- wp_terms
- wp_commentmeta
- wp_comments
- wp_links
Keep in mind that some plugins may also add new tables to the database. You’ll need to update the prefixes of these tables, too.
For each table, you’ll need to run the following SQL command:
RENAME table wp_xxxx TO newname_xxxx;
The “xxxx” placeholders stand for the name of each table after the underscore. Likewise, you’ll need to change the newname_ prefix to the one you set earlier when modifying wp-config.php.
Repeat this process as needed for each table in the database. When you’re ready, you can return to the dashboard.
Changing the database prefix can break any active plugins and themes on your site. These tools won’t recognize the updated database until you deactivate and reactivate them.
Therefore, you’ll need to go through each plugin and theme on your site and follow that process. When you’re done, check your site to make sure that everything is working as it should.
20. Hide your WordPress version
In the past, WordPress used to display the version of the software that a site was using in the footer. The idea was that this information could be useful for troubleshooting purposes, and it would be much easier to find if it were readily available to front-end visitors.
The problem with that approach is that displaying the version number means attackers can look up vulnerabilities specific to that release. This gives malicious actors a lot of information that they can use to carry out an attack on your website.
Plus, this feature has no practical benefit for you. After all, you can always check your site’s WordPress version from the dashboard.
Newer versions of WordPress no longer display that information on the front end. If you can see the version number in the footer, it means your website is overdue for a WordPress update.
21. Keep your PHP version up-to-date
As you probably know, WordPress is built largely on PHP. It relies on this programming language to perform most of the admin tasks.
PHP is also a software. This means it gets regular updates with new features and functions, and improved performance.
WordPress has a minimum supported PHP version (which can change by release) and a recommended PHP version for best security/performance. As of today, WordPress recommends PHP 8.3+ when possible. Check the official Requirements page and your host’s supported versions before upgrading.
Most reputable web hosts update PHP on their servers as new versions come out. Some providers even enable you to switch between versions manually (which can be necessary for troubleshooting errors on your WordPress site).
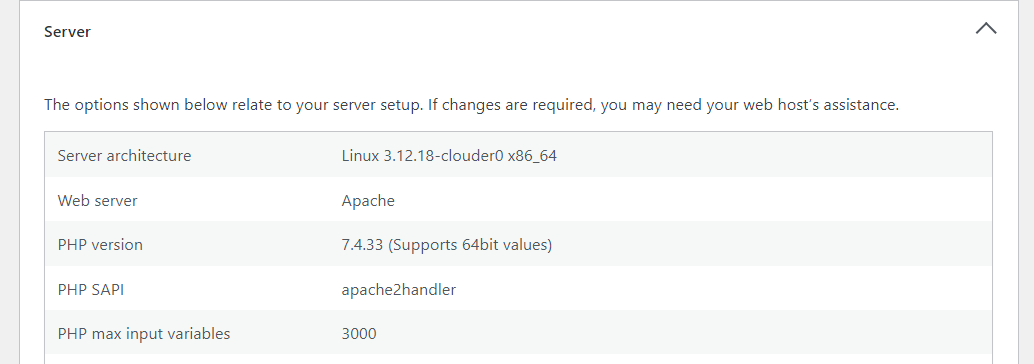
You can check what version of PHP your site is running by navigating to Settings → Site Health → Info → Server in your WordPress dashboard. Here you’ll see an overview of your server’s configuration, including the version of PHP that it uses.
If that version is outdated, you may want to contact your web host. They might be able to update PHP for you. Even so, this is something you shouldn’t need to do if you’re using a reputable hosting provider, as they’ll take care of it for you.
22. Turn off PHP error reporting
WordPress comes with a debugging tool that enables the CMS to log PHP errors. You can use these error reports to troubleshoot technical issues on your website.
Unfortunately, these reports can also lead to security issues. If attackers gain access to PHP error logs, they can get a lot of information about how your site works. They might be able to see what plugins are active on your site (if they display errors), as well as important files on your site with PHP issues.
Unless you’re actively troubleshooting an error in WordPress, you don’t need to enable PHP error reporting. If you’re using it to diagnose a problem, you’ll want to disable the WordPress debug mode as soon as you get the information you need.
Disabling PHP error reporting requires you to modify the wp-config.php file, which is located in the WordPress root directory. You can access the directory via FTP, as shown earlier.
Then, open the wp-config.php file and add the following line of code:
define ( ‘WP_DEBUG’, true );
Change the true value to false and save the file. This will disable error logs in WordPress.
You can turn them back on at any time as needed. You’ll just need to change the value back to true.
23. Remove unnecessary plugins and themes
Plugins and themes are what make WordPress such a versatile platform. They add new features to your site and enable you to customize its design.
The problem is that some people install dozens of plugins and themes, but only use a few of them. For example, you might try many different themes before settling on your favorite, but never uninstall the rest.
Every active plugin on your website presents a security risk. Typically, this risk is minimal for plugins that get regular updates and have a reputable development team behind them. For outdated plugins or those that no longer receive updates, that risk increases drastically.
The same applies to themes. Having themes you don’t use on your site can lead to vulnerabilities.
If you’re not actively using a specific theme or plugin, the safest bet is to uninstall it (not just deactivate it). This only takes a few minutes, but it can make a huge difference to your site’s security. Plus, if you change your mind, you can always reinstall a deleted plugin or theme.
However, there is an exception here. You may want to keep a default theme like Twenty Twenty-Three installed, but inactive, for the purposes of troubleshooting.
24. Remove unnecessary user accounts
As a rule of thumb, no one should have access to your website unless it’s absolutely necessary. If you do need to give someone access (to publish content, perform maintenance, or update the site), you’ll want to make sure that you don’t assign them a user role with more permissions than they need.
Once a person no longer needs access to the website, you can go ahead and delete their account. This will prevent them from altering the website without your approval.
These user accounts pose another risk. Some people might reuse credentials from their personal accounts to log into your website. If these credentials are leaked in a security breach, attackers will be able to use them to gain access to your website.
Deleting user accounts in WordPress is simple. To do this, go to Users → All Users and select an account. Once you identify the account you want to remove, hover over it and click on Delete.
Note that this option will only appear if you’re the administrator. As long as no one else has access to the admin account, you should be the only person with the ability to delete user accounts.
25. Monitor user activity
If you run a WordPress website where other people have access to the dashboard to publish content, make changes to the site, and update it, you’ll likely encounter security issues sooner or later. For instance, someone might get their credentials stolen or install a plugin that introduces a security risk to the site.
For this reason, it’s a good idea for the administrator to keep an eye on what others do when they’re using the site.
Activity logs are tools that monitor specific events and take note of when they happen. You can access that log and see who did what and when. This enables you to spot events and actions that can negatively impact your site’s security.
This feature isn’t available in WordPress by default, but you can add it with a plugin. Jetpack Security includes an activity log that stores data from the past 30 days.
The log is hosted offsite. Therefore, if you lose access to the site, you can check the log to see what happened, before restoring a recent backup.
26. Use a CDN to reduce the risk of a DDoS attack
Content delivery networks (CDNs) can help you drastically reduce load times. They do this by caching your website using a network of data centers distributed around the world. When someone visits the site, the CDN intercepts the request and loads a copy from the closest server.
Using a CDN offers a host of benefits beyond reducing load times. For example, there’s less strain on your server, which means your website will be better positioned to handle large spikes in traffic. Moreover, a CDN can act as a barrier in case of an attack.
If your website is the target of a DDoS attack, the CDN can shut it down quickly. A lot of CDNs may ask visitors to verify if they’re human if the network detects something strange with the connection. Since DDoS attacks rely on bots, they often can’t bypass these types of security checks.
Even if the DDoS attack manages to reach the CDN, its data centers are built to manage massive influxes of traffic. In the meantime, your website itself will be protected by the CDN.
You can integrate any CDN you want with WordPress. Jetpack CDN is very easy to set up. You can enable it for free in the Jetpack plugin, and the CDN will start caching media files from your website.
27. Migrate to a security-focused hosting provider
Every web host has its own selling point. For instance, some hosting providers are more focused on security and performance, while others prioritize affordable pricing.
Ideally, you’ll pick a web host that promises top-notch performance and security (and doesn’t charge an unfair rate for it). There are a lot of web hosts that fit these criteria and handle essential security tasks for you. Those tasks may include:
- Backups
- Setting up a WAF
- Protecting you from DDoS attacks
- Malware scanning and cleanup
If you want to spend more time and energy on running your website and less on protecting it against attacks, you’ll want to pick a host that values security. To get started, you might want to take a list of recommended WordPress hosts.
Web hosts that provide managed hosting plans tend to offer more in terms of security. Of course, these services will be a bit pricier than unmanaged plans, but they can help put your mind at ease.
28. Consider an enterprise security solution for WordPress
If you run an enterprise-level website, your security measures should go beyond updating plugins and making backups. You’ll need a security solution that provides end-to-end protection for your website.
WPScan has the largest database of WordPress security vulnerabilities on the market.
WPScan offers an enterprise-focused security solution. This can be tailored to your company’s needs and the kind of website you have. You can reach out to WPScan directly to get an assessment of your site’s security and request a quote.
Frequently asked questions
This list of WordPress security tips has covered the most important measures for protecting your site. If you still have any questions about how to improve your website’s security, this section will aim to answer them.
What common threats can be mitigated by these WordPress security best practices?
This guide covers everything from basic protective measures to more advanced security practices. If you take the time to implement every measure outlined in this article, your website should be protected against the most common threats. These include brute force attacks, data theft, and malware.
The ultimate goal of these measures is to ensure that no malicious actor can access your site and cause damage. They can also prevent mistakes by inexperienced users, like installing a bad plugin.
What is the easiest way to improve WordPress security?
If you don’t have time to implement every measure in this guide, the best thing you can do is set up a WordPress security plugin. These tools will automatically enable a myriad features that help protect your website.
Jetpack Security is an all-in-one solution that automates many essential tasks. It performs real-time backups, sets up a firewall, scans and provides quick fixes for malware, protects your site against spam, and more. It also provides you with access to activity logs, so you can identify any actions on your site that may have caused a security problem (and who performed them).
What is the best security plugin for WordPress?
There are many WordPress security plugins to choose from, but Jetpack Security is one of the most comprehensive solutions on the market. It handles most of the security practices discussed in this post, including backups, malware scanning and removal, and spam protection.
How do I back up my WordPress site, and where should I store the backups?
There are multiple ways to back up a WordPress website. You can back up all files and the database manually, use a plugin that does it for you, or sign up for a hosting plan that includes some limited backups.
In most cases, you don’t want to store backups locally or in just one location. This is why it’s not typically recommended to rely on hosting backups alone. Cloud backups tend to be more secure, since most providers store multiple copies for the sake of redundancy.
Jetpack Security includes real-time cloud backups. Everything is stored offsite, and a new backup is made every time you make a change to your website.
How often should I update my WordPress site?
Ideally, you should update WordPress and its components as soon as there are updates available. Using the latest version of any software will boost your site’s security and performance. Plus, it provides you with access to the latest features.
A lot of updates are focused on patching security vulnerabilities. Ideally, you’ll want to check your site for updates daily. You could even enable auto-updates for plugins. All of this and more is possible with Jetpack Security, the top real-time security and backup plugin.
How often should I scan my WordPress site for malware?
If you can, you should scan your website for malware daily. Since this is such a critical task, it makes sense to automate it. That way, your security plugin or malware scanner will still be on the lookout for vulnerabilities even if you’re not available.
Jetpack Security includes automated malware scanning. The plugin scans your site periodically and notifies you if it finds anything suspicious.
Jetpack Security: Round-the-clock WordPress protection and backups
Protecting a WordPress website can be a lot of work. You’ll need to perform regular backups, carry out updates, scan your site for malware, and more. Additionally, you’ll want to ensure that anyone with access to your site is using strong usernames and passwords.
An all-in-one solution like Jetpack Security can handle most of these tasks for you. You’ll get automated backups and scans, spam protection, a powerful firewall, and more. All you need to do is install the plugin and enable these features.
Are you ready to boost your site’s security? Get started with Jetpack Security today!
We guard your site. You run your business.
Jetpack Security provides easy‑to‑use, comprehensive WordPress site security, including real‑time backups, a web application firewall, malware scanning, and spam protection.
Secure your site