Donations Form Block

Accept credit and debit card payments for donations, tips, and other forms of contribution, with the Donations Form block.

This block uses Stripe as the payment gateway, ensuring secure and encrypted transactions.

Requirements

To use the Donations Form block, you will need the following:

The Donations Form Block is a part of the Jetpack Blocks suite and is activated by default on connected sites. It does not require a paid upgrade to use. See our Jetpack Blocks article to learn about the available blocks and how to activate them.

Jetpack Blocks require the Block Editor (also referred to as the Gutenberg editor). If you’ve installed the Classic Editor plugin, you have a few options:

  • Deactivate the Classic Editor: Go to PluginsInstalled Plugins in your WP Admin and deactivate the Classic Editor plugin.
  • Enable both editors: If you prefer flexibility, navigate to Settings → Writing in your WP Admin (not the menu under Jetpack settings). Set Allow users to switch editors to Yes. You will only see these options if you have the Classic Editor plugin installed and active.

Some custom themes or plugins may prevent you from using the Block Editor. In that case, please contact the support team for the plugin or theme for further assistance.

For more details, see Using Blocks and the Classic Editor.

Please be aware of the following:

  • If the person making a donation doesn’t have a WordPress.com account, they will be required to create one before proceeding.
  • The Stripe account processes the payments and sends receipts to supporters automatically.
  • For monthly and yearly recurring payments, the system bills subscribers at the end of their renewal period and transfers the funds to your Stripe account.
  • As a site owner, you can cancel the subscription at any time.
  • You can create multiple Donations Form blocks across your website.

Add the Block

You can add the Donations Form block by searching and/or selecting it from the Jetpack section of the block selector. Here are the steps you can follow:

  1. Navigate to your site’s Pages or Posts from the WP Admin.
  2. Edit the page or post where you want to add the Donations Form block. Or create a new post or page.
  3. Add a new block by clicking the (+) icon or type / to search for blocks.
  4. Type “donations” in the search box and select the Donations Form block.
  5. After adding the Donations Form block, you can set it to a One-Time donation, Recurring Monthly, or Yearly donation.

See Jetpack Blocks for more detailed instructions on adding blocks.

You will be prompted to connect your WordPress.com account to Stripe after adding the Donations Form block for the first time. Click Connect to proceed.

Manage Stripe

  • All the earnings through the Donations Form block will directly go into your Stripe account.
  • Stripe requires citizenship or company ownership in specific countries to accept payments (a list of countries is available in Stripe’s support center).
  • Supporters can pay with a credit card issued anywhere in the world.

Configure the Donations block

Once you have connected your Stripe account successfully, you can insert a pre-populated Donations Form block on your page or post. If you already added the block, you should see the pre-populated form on your page or post. This block is fully customizable, including:

  • Renewal interval: Set the frequency your supporters are billed (options for one-time, monthly, or yearly donations).
  • Price: Set suggested amounts, with defaults at $5.00, $15.00, and $100.00.
  • Currency: Select the payment currency.
  • Custom text: Provide additional information for your donors about the cause they are supporting. The title is set to “Make a one-time donation” by default. You can change that and also add more information to the default “Choose an amount” instruction.

Make sure to click “Publish” once you have finalized your customizations on the block to go live.

Accept custom donation amounts

By default, allowing supporters to specify their own donation amounts is activated for one-time, monthly, and yearly donations. If you prefer, you can turn off this feature from the Block Settings in the right sidebar.

Other block settings

In the block settings on the right sidebar, you can:

  • Choose the intervals for which you would like to accept donations.
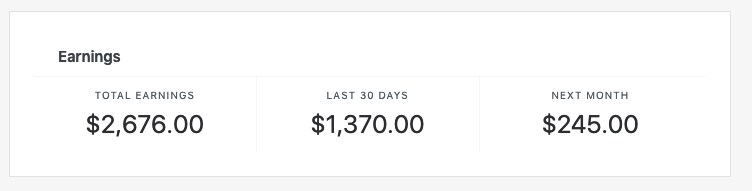
  • View earnings via a “View donation earnings” link to your donor dashboard.
  • Add CSS classes for custom button styling.

Related fees

Please see our support article for information about associated transaction fees.

Post-donation management

Consider maintaining a strong relationship with your supporters by sending personal thank you emails, putting them on a mailing list, or sharing thank you videos. This practice aids in building your community and brand, while encouraging continuous support.

Sharing the URL of your Donations Form on various channels such as social media, email lists, friends, and family also helps to boost visibility, traffic, and potential donations.

Still need help?

Please contact support. We’re happy to advise.

Privacy Information

The Donations Form block is activated by default. You can deactivate it by turning off Jetpack Blocks.

Please note that payments are processed via Stripe, so we recommend reviewing its privacy policy and documentation.

Data Used
Site Owners / Users

To process a payment, the Stripe account ID, Amount being charged ( from product information ), and Currency ( from product information ) is sent to Stripe.
Site Visitors

To facilitate new signup and renewals, the following is sent to Stripe (governed by Stripe TOS): Name, Credit Card number, CVV, and Expiry date.

Note – the credit card details are not stored by us – this data is collected and stored by Stripe. WordPress.com systems are fully PCI compliant.
Activity Tracked
Site Owners / Users

Email-related events (you will receive an email from Jetpack when a payment has been completed) are tracked – sends, opens, and clicks.
Site Visitors

We plan to store anonymized analytics about which step in the purchase process was reached to improve the user experience.

Cookies may be stored to implement content blocking in the future.
Data Synced (Read More)
Site Owners / Users

We sync the following meta around payments/products: all information regarding new products being created/edited.

We also sync the following meta from Stripe with Oauth connection: Account ID, secret and public keys necessary to facilitate the payment, country, timezone, default currency, and the account name.
Site Visitors

We create a new WordPress.com account for the user or use the account associated with the email customer gives us. An explanation of WordPress.com data used can be found here.

History of signups and billing facilitated via this feature is stored on WordPress.com servers for accounting and subsequent renewal purposes.
To renew the subscription, on our servers, we store the Safely encrypted Stripe ID of the credit card connected to the subscription, the User id that initiated the purchase, Details about the product, Payment history for the subscription, Last 4 digits of the credit card and the brand – what is known in the industry as “safe details.”

Also, we connect the credit card ID to the WordPress.com user id, allowing for one-click payments on other subscription products sold on the WordPress.com network.
Comments Off on Donations Form Block

Pay with PayPal

Use the PayPal Payment Buttons block to securely collect payments or donations on your Jetpack site via PayPal.

This block replaces the older Pay with PayPal block, which is now deprecated. See the Legacy “Pay with PayPal” Block paragraph at the bottom of this page.

Requirements to use the PayPal payment button block

To use the PayPal Payment Buttons block, you’ll need the following:

  • A PayPal Business account connected to your bank account to receive payments.
  • A WordPress site with the Jetpack plugin installed and connected.
  • The Jetpack Blocks feature enabled in your WordPress editor.

Jetpack Blocks require the Block Editor (also referred to as the Gutenberg editor). If you’ve installed the Classic Editor plugin, you have a few options:

  • Deactivate the Classic Editor: Go to PluginsInstalled Plugins in your WP Admin and deactivate the Classic Editor plugin.
  • Enable both editors: If you prefer flexibility, navigate to Settings → Writing in your WP Admin (not the menu under Jetpack settings). Set Allow users to switch editors to Yes. You will only see these options if you have the Classic Editor plugin installed and active.

Some custom themes or plugins may prevent you from using the Block Editor. In that case, please contact the support team for the plugin or theme for further assistance.

For more details, see Using Blocks and the Classic Editor.

Add a Pay with PayPal block

You can add the PayPal Payment Buttons block directly to your post or page in the WordPress block editor, and then configure the button through your PayPal account.

Step 1: add the PayPal Payment Buttons block

  1. Go to your site’s Dashboard.
  2. Open the page or post where you’d like to add the payment button.
  3. Click the + Block Inserter icon and search for “PayPal.”
  4. Select PayPal Payment Buttons from the list.

You’ll see a placeholder block where you can later paste the button code generated by PayPal.

Step 2: create the PayPal button code

Next, you’ll create your PayPal button from your PayPal account:

  1. In the block, click “Sign up” or “Log in” to open PayPal’s Build your Payment Links and Buttons page.
    • Alternatively, go to your PayPal account → Pay & Get Paid → Create Payment Links and Buttons.
  2. Select Payment Buttons.
  3. Fill in your product or donation details (name, description, price, etc.).
  4. Click Build it to generate your button code.
  5. On the “Your buttons are ready” screen:
    • Choose Stacked Buttons or Single Button at the top.
    • Copy the HTML button code displayed on the right.
  6. Paste the copied code into the PayPal Payment Buttons block on your site.
    • For Stacked Buttons, paste both code sections into the two fields provided.
    • For Single Button, switch the block to “Single Button” mode and paste the single code section.

Taking payments with PayPal

When a visitor clicks your PayPal payment button, a new PayPal window opens to complete the checkout securely.

Visitors can pay using:

  • Their PayPal account (balance, linked credit card, or bank).
  • PayPal Credit, if available.
  • A credit or debit card, even without a PayPal account.

All payments are sent directly to the PayPal account used to create the button code.

Test a payment (optional)

If you want to test the checkout flow, you can use a PayPal Developer (Sandbox) account.

  1. Log in to your PayPal Developer Dashboard.
  2. Create sandbox business and personal accounts.
  3. Use the sandbox business account to create a test button and add its code to your site.
  4. Publish the post or page.
  5. Complete the checkout using your sandbox personal account.

Successful test payments appear in your sandbox business account.

Selling products and shipping

If you’re selling physical products, keep in mind:

  • The PayPal button does not automatically calculate tax or shipping costs. You should include these in your listed price.
  • PayPal will collect the shipping address and send it to you along with the payment confirmation.

If you need advanced e-commerce features such as shopping carts, tax calculation, or product management, consider using WooCommerce instead.

Collecting your funds

To ensure payments reach you correctly, please check the following are in place:

  • Your site’s Privacy settings must be set to Public.
  • Verify that PayPal supports online payments in your country.
  • Payments are deposited into the PayPal account linked to the email address you used in the button setup.

For each purchase:

  • PayPal sends a confirmation email to you and to the purchaser.
  • Jetpack will also send a purchase confirmation email and a monthly transaction report to the site owner’s account email.

If your PayPal email isn’t linked to an existing PayPal account, PayPal will email you instructions to claim your funds.

Understanding fees

PayPal applies a transaction fee to each payment.
Fees vary by payment type and location. See PayPal’s fee documentation for current rates.

Jetpack does not charge additional fees or take a percentage of your payments.

Legacy “Pay with PayPal” block

The older Pay with PayPal block is now deprecated and replaced by the PayPal Payment Buttons block.
Existing instances of the legacy block will continue to work, but we recommend switching to the new block for improved reliability, security, and compatibility.

Still need help?

Please contact support. We’re happy to advise.

Privacy Information

The Pay with PayPal block is deactivated by default, and unlocking it requires an upgrade to the Growth, Security or Complete plan. If you have access to this feature, there is no way to deactivate it entirely — but if you are not using the feature, its code will not run on your site.

To make the block work, we need to integrate with third-party cloud services (such as the PayPal API), send notification emails and summaries, and store tokens and API keys in a PCI-compliant manner.

Please note that payments are processed via PayPal, so we also recommend reviewing its privacy policy and documentation.

Data Used
Site Owners / Authors

To process a payment via PayPal, the following site/seller-related information is utilized: seller’s email address, site URL, WordPress.com-connected site ID, PayPal button ID, button configuration (style, locale, color, etc.), and whether a purchase quantity of greater than 1 is permitted.Additionally, for activity tracking (detailed below): IP address, WordPress.com user ID, WordPress.com username, WordPress.com-connected site ID and URL, Jetpack version, user agent, visiting URL, referring URL, timestamp of event, browser language, country code.

Site Visitors / Purchasers

To process a payment via PayPal, the following customer/purchase-related information is utilized: transaction amount, transaction currency code, product title, product price, product ID, order quantity, PayPal payer ID, and PayPal transaction ID.

Activity Tracked
Site Owners / Users

Payment completions, which include the following additional information: WordPress.com-connected site ID, product ID, order ID, PayPal payer ID, PayPal transaction ID, PayPal transaction status, and HTTP referrer.All email-related events (you will receive an email from Jetpack when a payment has been completed) are also tracked – sends, opens, and clicks.
Site Visitors / Users

The PayPal payer ID, transaction ID, and HTTP referrer are sent with a payment completion tracking event (see Data Used section for Site Owners / Users for more information on that event) to our servers.

Data Synced (Read More)
Site Owners / Users

We sync the following meta around payments/products: PayPal transaction ID, PayPal transaction status, PayPal product ID, quantity, price, seller email address, currency, payment button CTA text, and whether or not multiple items are allowed.

Site Visitors / Purchasers

We sync the following meta around payments/products: PayPal transaction ID, PayPal transaction status, PayPal product ID, quantity, price, customer email address, currency, and payment button CTA text.

Comments Off on Pay with PayPal

Payments Block

Add a payment button, collect donations, or add paid content to any post or page using the Jetpack Payments Block.

Sell physical and digital products online with the Payments Block, taking both one-time payments and recurring income from subscriptions or membership websites.

Set the “Enable customers to pick their own amount” option to accept donations. Or use the Donations Block with advanced features for donations.

Requirements

The Payments Block is available on all Jetpack-connected sites. It is a part of the Jetpack Blocks suite and is activated by default. The Payments Block does not require a paid upgrade to use. See our Jetpack Blocks article to learn about the available blocks and how to activate them.

Jetpack Blocks require the Block Editor (also referred to as the Gutenberg editor). If you’ve installed the Classic Editor plugin, you have a few options:

  • Deactivate the Classic Editor: Go to PluginsInstalled Plugins in your WP Admin and deactivate the Classic Editor plugin.
  • Enable both editors: If you prefer flexibility, navigate to Settings → Writing in your WP Admin (not the menu under Jetpack settings). Set Allow users to switch editors to Yes. You will only see these options if you have the Classic Editor plugin installed and active.

Some custom themes or plugins may prevent you from using the Block Editor. In that case, please contact the support team for the plugin or theme for further assistance.

For more details, see Using Blocks and the Classic Editor.

Stripe supported countries and currencies.

The Payments block requires you to connect a Stripe account. To start accepting payments using a Stripe account, you must be a citizen or own a company in a country where Stripe payments are supported. Your customers can pay using a credit card issued anywhere in the world.

Set up a Payments block

Jetpack offers several different options for accepting payments via the Payments block. Get started collecting payments by following these steps:

  1. Add the Payments block by searching and/or selecting it from the Jetpack section of the block selector. (See Jetpack Blocks for detailed instructions on adding blocks.)
  2. Choose which type of payment you want to add: Donations Form, Payment Buttons, or Paid Content.
  3. Connect your Stripe account when prompted. Create a Stripe account if necessary.
  4. Once you fill out the Stripe form and connect it to your WordPress.com account, you’ll be taken back to the post/page you were editing, and you’ll see “Congrats! Your site is now connected to Stripe. You can now start accepting funds!”

For full instructions on connecting your Stripe account, adding new buttons, viewing related fees, and managing your buttons, visit our WordPress.com support article on this topic.

Any money you earn will go into your Stripe account using the Payments block. From there, you can move it to the personal account of your choice. WordPress.com never has any access to the money you earn.

Related Fees

Please see our support article for information about associated Jetpack Monetize transaction fees.

Payments Management

Monitor and grow your subscription base with Payments block’s suite of tools.

Earnings breakdown

You can view a detailed breakdown of your revenue in your WordPress.com dashboard by visiting My Site(s) → Tools → Monetize → Monetization Options.

Earnings summary, including Total earnings, Last 30 days, and Next Month
  • Total earnings – shows all charges collected by any revenue-earning options on your site.
  • Last 30 days – shows the revenue you’ve earned over the last 30 days.
  • Next month – shows predicted earnings for the next 30 days. This assumes that nobody unsubscribes and does not include any new subscribers.

Subscribers list

Check the list of your paying subscribers at My Site(s) → Tools → Monetize → Supporters, where you can:

  1. Download a CSV file containing a list of your subscribers with their email addresses, subscription data, and other information. You can use that file to connect payments to any accounting or fulfillment systems you use.
  2. View or cancel a user’s subscription by clicking on the three dots menu next to their name.

Issue refunds

You can manage refunds yourself through your Stripe Dashboard.

Disconnect the Stripe account

You can disconnect Stripe from your WordPress.com dashboard by following these steps:

  1. Start at WordPress.com
  2. Navigate to My Site(s) → Tools → Monetize → Payment Settings section.
  3. Click “Disconnect Stripe Account”.

Disconnecting Stripe Account here will:

  • remove Stripe from all your WordPress.com and Jetpack sites
  • prevent visitors from purchasing a subscription
  • block renewals of any existing payments subscribers

Still need help?

Please contact support. We’re happy to advise.

Privacy Information

The Payments Block is activated by default. You can deactivate it by turning off Jetpack Blocks.

Please note that payments are processed via Stripe, so we also recommend reviewing its privacy policy and documentation.

Data Used
Site Owners / Authors

In order to process a payment, the Stripe account ID, Amount being charged ( from product information ), Currency ( from product information ) is sent to Stripe.

Site Visitors / Purchasers

To facilitate new signup and renewals, the following is sent to Stripe (governed by Stripe TOS):

  • Name
  • Credit card number
  • CVV
  • Expiry date

Note: the credit card details are not stored by us. This data is collected and stored by Stripe. WordPress.com systems are fully PCI compliant.

Activity Tracked
Site Owners / Users

Email-related events (you will receive an email from Jetpack when a payment has been completed) are tracked – sends, opens, and clicks.

Site Visitors / Users

We will store anonymized analytics about which step in the purchase process was reached for the purpose of improving the user experience.

Cookies may be stored to implement content blocking in the future.

Data Synced (Read More)
Site Owners / Users

We sync the following meta around payments/products: all information regarding new products being created / edited.

We also sync the following meta from Stripe with Oauth connection: Account ID, secret and public keys necessary to facilitate the payment, country, timezone, default currency, and the account name.

Site Visitors / Users

We create a new WordPress.com account for the user, or use the account associated with the email customer gives us. An explanation of WordPress.com data used can be found here.

History of signups and billing facilitated via this feature is stored on WordPress.com servers for accounting and subsequent renewal purposes.

For the purpose of renewing subscriptions, on our servers we store:

  • Safely encrypted Stripe ID of the credit card connected to subscription
  • User ID that initiated the purchase
  • Details about the product
  • Payment history for the subscription
  • Last 4 digits of the credit card and the brand – what is known in the industry as “safe details”

Also, we connect the ID of the credit card to the WordPress.com user ID, which allows for one-click payments on other subscription products sold on the WordPress.com network.

Tagged , | Comments Off on Payments Block

Jetpack Blocks

Jetpack blocks offer solutions to help create content, integrate content from third-party services, monetize your site, and make your site more interactive and engaging.

About Jetpack Blocks

In 2018, WordPress 5.0 officially introduced the default block-based editor, also referred to as the Gutenberg editor. Blocks are the elements that make up a page or post: paragraphs, headings, quotes, images, videos, buttons, and more. Each item on a page is its own block, you can edit and move each one independently to create custom layouts.

Jetpack extends the default functionality of the WordPress block editor by giving you access to an array of additional blocks to build engaging pages and posts.

Blocks are incompatible with the WordPress Classic Editor, but if you’d like to explore the blocks option and maintain the familiarity of the Classic Editor, please refer to our suggestions in the section Using Blocks and the Classic Editor.

How to activate Jetpack Blocks on your site

Jetpack Blocks are activated by default. To activate or deactivate them, navigate to Jetpack → Settings → Writing in WP Admin, then scroll down to the Composing section and click on the toggle next to “Jetpack Blocks…”

How to add Jetpack Blocks to your site’s posts and pages

You can add a block by clicking on the + button, also called the Block Inserter, as explained in this guide. You’ll then recognize all the Jetpack blocks from the Jetpack green color, or you can locate them all under the Jetpack block category,

You can also search for a block by name using the search box or by typing a forward slash followed by the block name, e.g., /payments.

Some Jetpack blocks require certain Jetpack features to be enabled, and some require a Jetpack plan. See the list below for further details.

If Jetpack Blocks or a specific feature is not active, the associated block placeholder will be hidden from users without admin permissions. This includes blocks like Related Posts, Blog Stats, Top Posts, Ad, Contact Form, and VideoPress.

To use these blocks, an admin must first enable the related Jetpack feature. Once enabled, the blocks become available to other user roles like Authors and Editors.

If you don’t see a Jetpack block available in the block inserter, try logging in as an admin to check if the feature needs activation.

If you have trouble using Jetpack Blocks on your site, it may also be that your custom theme or another plugin’s editor is preventing you from doing so. In that case, please contact the respective plugin or theme author for further assistance.

An overview of Jetpack Blocks and their capabilities

For more information on blocks, you can refer to the WordPress Block Editor guide on WordPress.com.

Below is a list of all Jetpack Blocks.

Text

Blocks to help with writing and editing content.

  • Blog Stats allows users to showcase site statistics on the site’s front-end. Users can display views and visitor statistics for individual posts and/or the whole site.
  • Jetpack AI Assistant – leverage AI to draft, transform, and translate both new and existing content.
  • Jetpack AI Search – allows visitors to ask questions and get replies powered by AI and your site content.
  • LaTeX – create and display LaTeX with live preview
  • Markdowncreate formatted content using only regular characters and some punctuation marks.
  • Top Posts & Pages Block allows users to showcase popular content on their site.
  • Writing Promptget a prompt to start your writing, and include a link to other people’s writing on the same topic in the WordPress.com Reader.

Media

Blocks to add variety in displaying media on your site.

  • Image Compare  – display and compare the differences between two images side by side.
  • Tiled Gallerydisplay image galleries as a tiled mosaic, circular grid, square tiles, or tiled columns.
  • Slideshowinsert an image slideshow into a post or page.
  • StoryCombine photos and videos to create an engaging, tappable, full-screen slideshow.
  • VideoPress – Embed a video from your media library or upload a new one with VideoPress.

Widgets

Blocks to add original functionalities to the site.

  • Star Ratingallows site authors to add a visual review rating to the site.
  • Repeat Visitorcontrol the visibility of its nested block(s) depending on how many times a visitor has visited the page.
  • Cookie Consent Block – display a cookie consent banner on your website, letting visitors know the site uses cookies.

Embeds

Blocks to easily integrate third-party services.

  • Facebook – embed content from Facebook using Jetpack’s API.
  • Instagram – embed content from Instagram using Jetpack’s API.
  • Latest Instagram Posts display your most recent images from Instagram.
  • Loom embed a Loom video.
  • Descript – embed a Descript audio or video link.
  • Eventbrite Checkout embed Eventbrite events.
  • GIF search for an animated GIF image from Giphy and embed it directly on your site.
  • Google Calendar embed a Google Calendar on a post or page.
  • Google Docs – embed a Google Document
  • Goodreads integrates your Goodreads profile into your site.
  • Map add a map to any post or page on your site.
  • Pinterest – embed a Pinterest pin, board, or user.
  • Podcast Player display a list of recent episodes from a podcast and play them right from your site.
  • Related Posts suggest additional posts related to the one the visitor reads.

Forms

Easily set up forms for various purposes.

When adding the Form block, it offers you the option to add one of these readily available templates:

  • Contact Form – a simple contact form for your post or page.
  • RSVP Form – a form allowing your visitors to confirm their presence at an upcoming event.
  • Registration Form – allow visitors to register for a membership, club, group, etc.
  • Appointment Form – add a form to select a preferred appointment time and date.
  • Feedback Form is a form for your site to collect visitors’ feedback.
  • Salesforce Lead Form – a form that’ll send submissions directly to Salesforce.

You can also customize the form templates or create your own form by using these form field blocks:

  • Text Input Field
  • Name Field
  • Email Field
  • URL Field
  • Date Picker
  • Phone Number Field
  • Hidden Field
  • Slider Field
  • Multi-line Text Field
  • Checkbox
  • Terms Consent
  • Multiple Choice (Checkbox)
  • Single Choice (Radio)
  • Dropdown Field
  • Rating Field (starts and heart)
  • Slider Field

Monetize

Blocks to help generate revenue.

  • Donations Form accept credit and debit card payments for donations powered by Stripe.
  • OpenTable add reservations via OpenTable.
  • Pay with PayPal add a payment button to accept payments for physical/digital products or donations.
  • Tock add a reservation form via Tock on your restaurant’s website.
  • Ad insert an Ad unit anywhere within the content of any post, page, or widget area.
  • Payments add a payment button to process credit or debit card payments powered by Stripe.
  • Payment Buttons add different payment buttons for various payment plans within a single block powered by Stripe.
  • Paywall display a portion of the post and restrict the remaining content to all subscribers or paying subscribers only.

Grow

Blocks to help expand your site growth.

  • Blogroll display sites that you recommend to people visiting your website. 
  • Business Hours display your business’s opening hours on your site.
  • Calendlyallows visitors to schedule one-on-one appointments, group events, and team meetings directly from your website.
  • Contact Info add your contact information (email address, physical address, phone number) to any post or page.
  • Like Insert the Like Block in any of your page templates so your readers can show their appreciation for your posts and pages.
  • Mailchimpallows visitors to join your Mailchimp list.
  • Nextdoorembed posts from the Nextdoor social platform to your website.
  • Paid Content monetize your site by accepting various payment plans for exclusive access to content you create, powered by Stripe.
  • Recipe – add structured recipe content (images, ingredients, steps)
  • Sharing Buttons add sharing buttons so visitors can share your posts and pages on social media with a couple of quick clicks.
  • Subscribe insert a subscription form to enable your readers to get notifications when you publish new posts.
  • Subscriber Login allows members and subscribers to log in and access their account and subscription details.
  • Voice to content – transform spoken words into a post using AI
  • WhatsApp Button allow site visitors to send you a message to inquire about your product or services or to ask for support.

How to disable individual Jetpack Blocks

You may want to have Jetpack Blocks on your site, but not want individual ones active. To disable individual Jetpack Blocks, you will need to do so via custom code, as we do not have a user interface for doing so. You can find guidance for disabling individual Jetpack Blocks in our developer documentation, and here as well.

Per our Scope of Support, we are not able to assist with custom code implementations beyond what is provided in our developer documentation.

Using Blocks and the Classic Editor

The WordPress Classic Editor does not support blocks. However, there are workarounds to be able to leverage both the familiarity of the Classic Editor and the power of WordPress blocks:

Use the Classic block. If you have the Classic Editor plugin installed, you will first need to deactivate it, under Plugins → Installed Plugins in your WP Admin. With the Classic Editor disabled, you’ll have access to the default WordPress Block editor which includes the Classic block. The Classic block looks the Classic Editor, with the Custom TinyMCE buttons toolbar in the block.

Enable the Block Editor in the Classic Editor plugin. The Classic Editor plugin gives you the option to enable the Block editor, therefore giving you access to both editors, you can turn it on under Settings → Writing in your WP Admin dashboard. You can select the Block editor as the Default editor for all users, then for the option Allow users to switch editors, select Yes.

Still need help?

Please contact support. We’re happy to advise.

Tagged , , , | Comments Off on Jetpack Blocks
  • Enter your email address to receive news and updates from Jetpack

  • Join 99K other subscribers
  • Browse by Topic